Table of Contents
- Introduction
- Why the Volcano Project is a STEM Essential
- The Science of the "Sizzle": How It Works
- Option 1: The Quick and Easy 3-Minute Volcano
- Option 2: The Multi-Day Paper Mache Masterpiece
- Option 3: The Color-Changing "Magic" Volcano
- Understanding the Earth: Real Volcano Facts for Kids
- Integrating STEM: From the Lab to the Kitchen
- Troubleshooting Your Volcano Eruption
- Beyond the Volcano: Extension Activities
- Case Study: A Weekend of Discovery
- The Importance of Screen-Free Learning
- Frequently Asked Questions (FAQ)
- Conclusion: Ignite a Love for Learning
Introduction
Have you ever seen a child’s eyes light up the moment a fizzy, red "lava" flow spills over the side of a homemade mountain? There is something truly primal and exhilarating about a volcano eruption. It is the quintessential science experiment, a rite of passage for every young explorer, and quite possibly the most famous kids volcano project in history. But why does this specific activity capture our imaginations so thoroughly? At I'm the Chef Too!, we believe it’s because it perfectly blends the thrill of a "kaboom" with the tangible, hands-on learning that sticks for a lifetime.
Whether you are a parent looking to fill a rainy Saturday afternoon or an educator seeking to bring plate tectonics to life, this blog post is designed to be your go-to resource. We are going to cover everything from the lightning-fast three-minute eruption to the multi-day paper mache masterpiece. We will dive deep into the chemistry of the "fizz," the geology of our planet’s crust, and even how to turn these scientific concepts into delicious, edible adventures. Our mission is to blend food, STEM, and the arts into one-of-a-kind "edutainment" experiences, and the volcano project is the perfect place to start.
By the end of this post, you will have a complete roadmap for creating various types of volcanoes, troubleshooting common eruption issues, and expanding the lesson into a full-scale Earth Science unit. We want to help you spark curiosity and creativity in your children, facilitating family bonding through screen-free educational alternatives that are as fun as they are informative.
If you’re ready to bring the heat (safely!) and turn your kitchen or backyard into a geological wonder, let’s get started. And if you find your little ones are hungry for more adventures after the lava clears, you can always Ready for a new adventure every month? Join The Chef's Club and enjoy free shipping on every box.
Why the Volcano Project is a STEM Essential
Before we get our hands messy with flour paste or vinegar, it is worth asking: what makes a volcano project so effective? From a developmental standpoint, this activity hits several key marks. It involves fine motor skills (building the structure), following multi-step directions (the recipe for the eruption), and the scientific method (predicting what happens when we add the "secret ingredient").
At I'm the Chef Too!, we focus on the benefits of the process. We aren't just making a mess; we are fostering a love for learning and building confidence. When a child measures out the baking soda and pours the vinegar, they are acting as the lead scientist in their own laboratory. This sense of agency is vital for cognitive development.
Furthermore, volcanoes allow us to discuss complex Earth Science in a way that is visible. We can talk about pressure, gas, and chemical reactions. Instead of just looking at a diagram in a textbook, children can see the "magma" (magma when it's underground, lava when it's above!) flow in real-time. This hands-on approach is exactly how we develop our cooking adventures—by making the abstract tangible.
If you're looking for even more ways to explore the wonders of the world, you can Find the perfect theme for your little learner by browsing our complete collection of one-time kits.
The Science of the "Sizzle": How It Works
So, what exactly is happening inside that plastic bottle or paper mache cone? The classic kids volcano project relies on a simple yet dramatic chemical reaction between an acid and a base.
The Acid-Base Reaction
In this case, the white vinegar acts as the acid (acetic acid), and the baking soda acts as the base (sodium bicarbonate). When these two substances meet, they react to form carbonic acid. However, carbonic acid is very unstable and immediately breaks down into two things: water and carbon dioxide gas (CO2).
The Role of Carbon Dioxide
Carbon dioxide is the same gas that creates the "fizz" in your favorite soda. Because gas takes up much more space than solids or liquids, it desperately tries to expand. Inside the narrow neck of a bottle or a cup, there isn't enough room for all that newly created CO2. The pressure builds rapidly until the gas pushes the liquid mixture up and out of the opening.
Adding the Secret Ingredient: Dish Soap
If you have ever tried a volcano with just vinegar and soda, you might have noticed it’s a bit "thin" and quick. To make the eruption look like real, viscous lava, we always recommend adding a squeeze of dish soap. The soap lowers the surface tension of the liquid, allowing the CO2 to create thousands of tiny, stable bubbles. This results in a thick, foamy eruption that flows slowly down the sides of your volcano, much like the lava from a shield volcano.
For a truly immersive experience that connects these chemical reactions to the world of baking, you might want to try a chemical reaction that makes our Erupting Volcano Cakes Kit bubble over with deliciousness.
Option 1: The Quick and Easy 3-Minute Volcano
Sometimes, you don’t have a week to wait for paper mache to dry. Maybe it’s a sunny afternoon and the kids have high energy, or maybe you need a quick demonstration for a school project. This method is fast, effective, and uses materials you likely already have in your pantry.
Materials Needed:
- A 2-liter soda bottle (empty)
- 10 ml of dish soap
- 100 ml of warm water
- 400 ml of white vinegar
- Food coloring (red or orange is best!)
- Baking soda slurry (Fill a cup halfway with baking soda, then add water until it’s a pourable liquid)
Step-by-Step Instructions:
- Find the Perfect Spot: This experiment is messy! We highly recommend doing this outside on the grass, in a sandbox, or inside a large plastic bin.
- Mix the Base: Pour the warm water, vinegar, dish soap, and a few drops of food coloring into the empty 2-liter bottle. Give it a gentle swirl to mix, but don’t shake it too hard—you don’t want it to foam up yet.
- Prepare the Catalyst: Stir your baking soda slurry until it is smooth. This slurry is the secret to a fast reaction because it prevents the baking soda from clumping at the bottom.
- Eruption Time: Using a funnel (or a very steady hand), pour the baking soda slurry into the bottle quickly and step back!
- Observe: Watch as the foamy "lava" pours out. Notice how the dish soap creates that thick, bubbly texture.
Scientific Observation:
Ask your kids: "Does the amount of vinegar change how high the lava goes?" or "What happens if we use cold water instead of warm water?" This turns a fun trick into a true kids volcano project where they are testing variables and recording results.
Option 2: The Multi-Day Paper Mache Masterpiece
If you have a bit more time and want to create a keepsake that can be erupted over and over again, the paper mache method is the way to go. This project is a fantastic "edutainment" experience because it involves sculpture, painting, and chemistry all in one.
Materials Needed:
- A sturdy cardboard base (an old pizza box is perfect)
- An empty soda bottle (20 oz or 2-liter)
- Duct tape or masking tape
- Newspaper (lots of it!)
- Flour and water (for the paste)
- Acrylic paint and brushes
- Optional: Red food coloring and vinegar/soda for the final act
Step 1: Building the Skeleton
Start by taping your bottle to the center of the cardboard base. To create the "slope" of the volcano, you can crumple up balls of newspaper and tape them around the base of the bottle. Alternatively, cut strips of cardboard and tape them from the neck of the bottle down to the edges of the pizza box to create "ribs."
Step 2: Making the Paste
At I'm the Chef Too!, we love using kitchen staples for our crafts. You can make a simple, non-toxic paper mache paste by mixing one part flour with one part water. Stir it until it’s the consistency of thick pancake batter. If you want it to be extra smooth, you can boil 5 parts water and whisk in 1 part flour, but the cold method works just fine for a home project.
Step 3: Layering the Paper
Tear the newspaper into strips (about 1-2 inches wide). This is a great task for younger kids! Dip a strip into the paste, use your fingers to "squeegee" off the extra liquid, and lay it onto your volcano frame. Smooth it out with your hands. You’ll want to do at least 2 or 3 layers to make it sturdy. Important: Do not cover the opening of the bottle!
Step 4: The Drying Phase
This is the hardest part: waiting. Depending on the humidity, your volcano might take 24 to 48 hours to dry completely. We recommend placing it near a fan or a sunny window. This waiting period is a great time to talk about real volcanoes—how they take years to form through repeated eruptions and cooling lava.
Step 5: Painting and Decorating
Once the structure is rock-hard, it’s time to get creative. Use browns and grays for the mountain, green at the base for "vegetation," and maybe some streaks of red or orange near the top to show where past lava flows have cooled.
As you wait for the paint to dry, you might want to consider making the learning last all year. Give the gift of learning that lasts all year with a 12-month subscription to our STEM cooking adventures.
Option 3: The Color-Changing "Magic" Volcano
Want to take your kids volcano project to the next level? Why settle for one color of lava when you can have a rainbow? This variation introduces the concept of color theory and keeps the excitement going for much longer.
The Setup:
Instead of mixing the food coloring into the vinegar inside the bottle, you will place "hidden" drops of different colors of washable tempera paint or food coloring at the bottom of a few different cups.
- The Base Mixture: Fill a large pitcher with vinegar and a good squeeze of dish soap.
- The Volcano Cup: Place a small plastic cup inside a mound of dirt, sand, or even your paper mache volcano. Fill the cup 1/3 with baking soda.
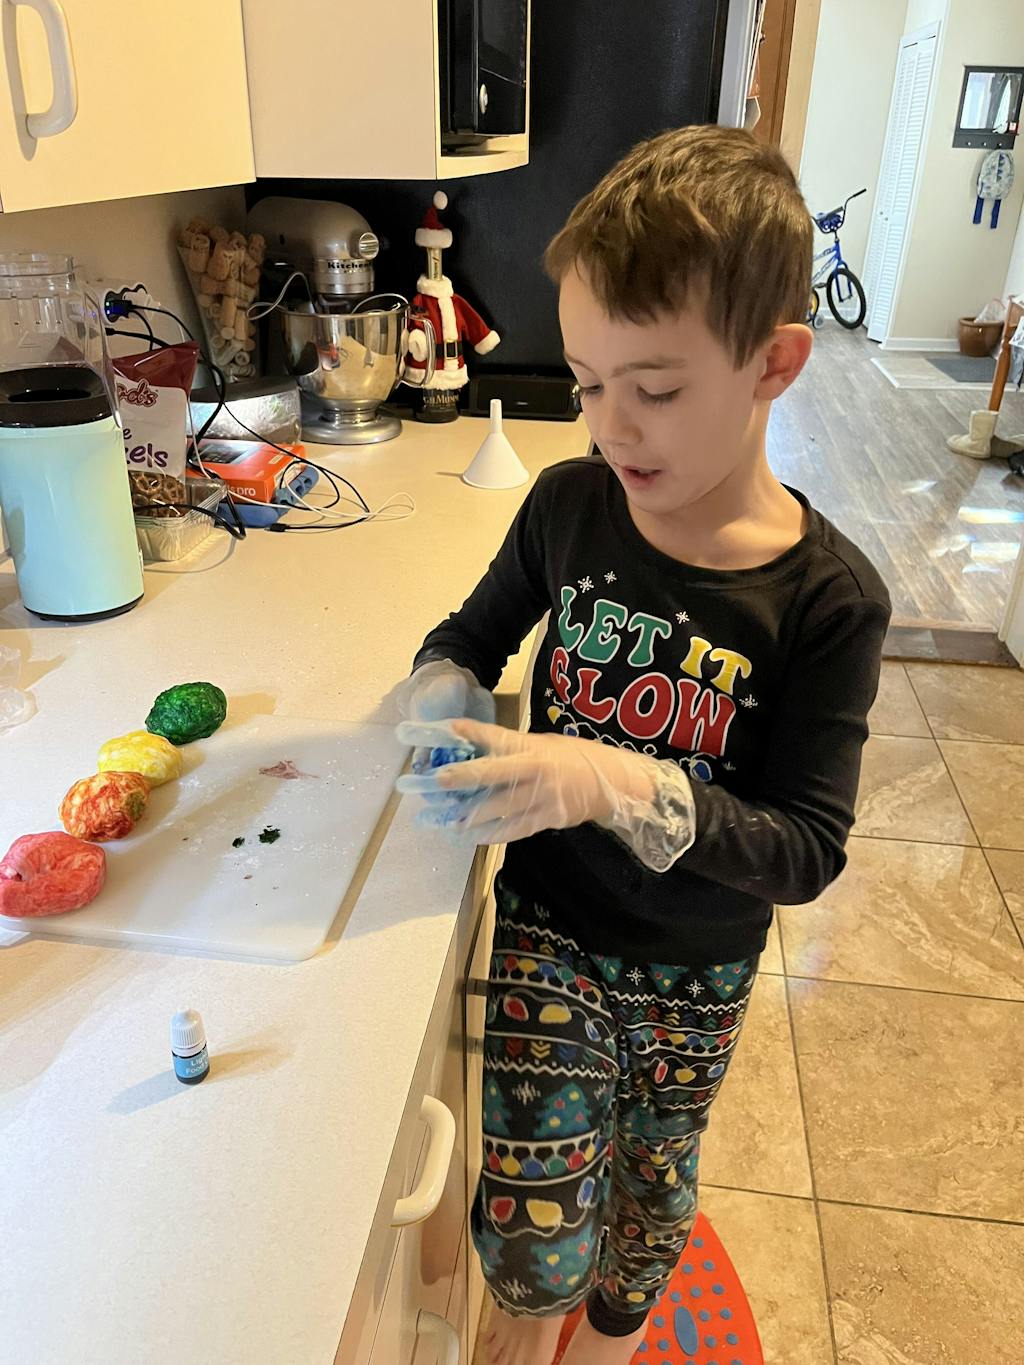
- The Primary Colors: Add a dollop of blue paint to one side of the cup and yellow to the other.
- The Eruption: Pour in the vinegar. As the bubbles rise, they will mix the two colors. Your kids will be amazed to see green lava pouring out!
- Repeat: You can "reset" the experiment by adding more baking soda and different color combinations (Red + Blue = Purple lava!).
This is a wonderful way to demonstrate that science isn't just about explosions; it’s about transformation. It’s the same curiosity we bring to our kitchen labs, where mixing yellow butter and white sugar creates something entirely new.
Understanding the Earth: Real Volcano Facts for Kids
A kids volcano project is only half the fun without the "why" behind it. While the vinegar and soda are reacting in your kitchen, what is happening under our feet?
What is a Volcano?
Think of a volcano as a chimney for the Earth. Deep inside our planet, it is so hot that rocks melt into a thick liquid called magma. Because magma is lighter than the solid rock around it, it rises. When it finds a weak spot or a crack in the Earth’s crust, it pushes through. Once it hits the surface, we call it lava.
Tectonic Plates: The Giant Puzzle
The surface of the Earth isn't one solid piece; it’s made of giant puzzle pieces called tectonic plates. These plates are always moving, though very slowly.
- Divergent Boundaries: When plates pull apart, magma rises to fill the gap (this happens a lot on the ocean floor).
- Convergent Boundaries: When plates crash into each other, one might slide under the other, melting and creating a path for volcanoes (like the "Ring of Fire" around the Pacific Ocean).
- Hot Spots: Sometimes, a volcano forms right in the middle of a plate because there is a particularly hot spot in the mantle below (this is how the Hawaiian Islands were formed!).
Types of Volcanoes
Not all volcanoes look like the steep cones we see in movies.
- Shield Volcanoes: These are broad and flat, like a warrior’s shield. Their lava is very "runny" and travels a long way. Mauna Loa in Hawaii is a great example.
- Stratovolcanoes (Composite): These are the tall, picturesque mountains like Mt. Fuji or Mt. St. Helens. They have "sticky" lava that doesn't flow far, so it builds up into steep peaks. These are known for big, explosive eruptions.
- Cinder Cones: These are smaller and made of "cinders" (blobs of lava that cooled in the air). They usually only erupt once and aren't very big.
Learning about these different types can help your child decide what shape to make their kids volcano project. If they want a shield volcano, they can make their cardboard base very wide!
Explore astronomy by creating your own edible solar system with our Galaxy Donut Kit, which is another fantastic way to see how the shapes of our universe are formed by physics and chemistry.
Integrating STEM: From the Lab to the Kitchen
At I'm the Chef Too!, our mission is to show that the skills used in a science experiment are the same skills used in cooking. When you create a kids volcano project, you are practicing:
- Measurement: Precision is key. Too much water and your eruption is weak; too much soda and it’s a dry clump.
- Observation: Encouraging kids to describe what they see, smell, and hear builds their vocabulary and descriptive powers.
- Safety First: Just as we emphasize adult supervision in the kitchen, we teach that science requires a safe environment (and maybe some safety goggles for extra fun!).
- Trial and Error: If the first eruption doesn't go well, we don't give up. We adjust our "recipe" and try again. This builds the resilience that every great scientist and chef needs.
Imagine the excitement of a 7-year-old who has just finished building a paper mache volcano and then gets to create an edible version. A child who loves geology would be thrilled to try our Erupting Volcano Cakes Kit. It’s a way to bridge the gap between "science time" and "snack time," making learning a seamless part of their day.
Troubleshooting Your Volcano Eruption
Sometimes, despite our best efforts, the "lava" just sits there. Here are some common issues and how to fix them:
- The "Slow Ooze": If the lava is barely moving, you might have too much water in your slurry. Try adding a higher concentration of baking soda directly into the bottle next time.
- The "Clear Fizz": If it looks more like sparkling water than lava, you forgot the dish soap! The soap is essential for creating those big, colorful bubbles.
- The "Bottom Clog": If you pour the soda in as a powder, it often gets stuck at the bottom and doesn't react with the vinegar. Always use a "slurry" (soda mixed with a little water) to ensure it reaches the acid quickly.
- The "Messy Explosion": If the lava goes everywhere but down the sides, your bottle neck might be too narrow. You can try cutting the top off the bottle slightly to create a wider "crater."
Remember, the goal isn't a "perfect" eruption; it's the joy of discovery. Even a failed experiment is a chance to ask, "Why did that happen?" and "How can we change it?"
Beyond the Volcano: Extension Activities
Once your kids volcano project is complete, you don't have to stop there. There are dozens of ways to extend the learning and keep the curiosity alive.
1. Geological Rock Hunt
Go into your backyard or a local park and look for different types of rocks. Can you find any that look like they might be volcanic (igneous)? Look for rocks with tiny holes (like pumice) or shiny, glass-like surfaces (like obsidian).
2. The "Viscosity" Race
Volcanoes erupt differently based on how "thick" or "runny" their magma is. You can test this in the kitchen! Take three liquids: water, maple syrup, and honey. Have a "race" to see which one flows down a tilted plate the fastest. This is exactly how scientists study lava flow!
3. Mapping the Ring of Fire
Print out a map of the world and have your child mark where the most famous volcanoes are located (Mt. Vesuvius in Italy, Mt. St. Helens in the USA, Krakatoa in Indonesia). They will quickly see a pattern—most are located near the edges of continents!
4. Edible Geology
Kitchen science is at the heart of what we do. You can talk about the Earth's layers by making a "Layer Cake" or a "Parfait." The bottom layer is the core, the middle is the mantle, and the thin top layer of frosting is the crust we live on.
If your child enjoys these types of hands-on activities, they would love to Find the perfect theme for your little learner by browsing our complete collection of one-time kits.
Case Study: A Weekend of Discovery
Imagine a parent, Sarah, and her 8-year-old son, Leo. Leo is obsessed with dinosaurs and the prehistoric world. Sarah wants to do something special on a Saturday that doesn't involve a TV screen.
They start by building a paper mache volcano together. As they rip the newspaper strips, Sarah tells Leo about the tectonic plates and how the world looked during the time of the T-Rex. They spend the afternoon painting the volcano a deep, "earthy" brown.
The next day, they set the volcano in the middle of a sandbox. Leo adds his toy dinosaurs around the base. They prepare the baking soda slurry and the red vinegar. When the eruption happens, Leo is ecstatic! He watches how the "lava" flows around his dinosaurs, learning about the power of nature.
To cap off the weekend, they head to the kitchen. Sarah has a Chef's Club Subscription, and that month's kit happens to be focused on Earth Science. They spend the evening "baking their way through the Earth's layers," solidifying everything Leo learned in the sandbox. This is the power of "edutainment"—it’s a memory-making experience that teaches without ever feeling like a chore.
The Importance of Screen-Free Learning
In today's world, it is easier than ever to hand a child a tablet and let them watch a video of a volcano. While those videos are informative, they don't engage the senses in the same way. When a child smells the sharp tang of vinegar, feels the slimy texture of paper mache paste, and hears the hiss of the bubbles, they are creating strong neural connections.
At I'm the Chef Too!, we are committed to providing these screen-free alternatives. We believe that family bonding happens in the kitchen and at the craft table. By participating in a kids volcano project, you aren't just a spectator; you are an active participant in your child's education.
Whether you are building a mountain out of flour and water or baking a cake that "erupts" with flavor, you are showing your child that the world is a place worth exploring. You are building their confidence to ask questions and their creativity to find the answers.
Frequently Asked Questions (FAQ)
1. Is the volcano project safe to do indoors?
Yes, it is safe, but it is very messy! If you do it indoors, we highly recommend placing the volcano inside a deep plastic bin, a bathtub, or on a large tray covered with a plastic tablecloth. The eruption is non-toxic, but the food coloring can stain carpets or wood.
2. Can I use lemon juice instead of vinegar?
Absolutely! Lemon juice contains citric acid, which will react with the baking soda just like the acetic acid in vinegar. It actually smells a bit better, too! You might need a little more lemon juice to get a strong reaction.
3. How do I make the eruption last longer?
The key to a longer eruption is the amount of dish soap and the concentration of the baking soda. If you use more soap, the bubbles will be more stable and stick around longer. You can also try adding the vinegar slowly rather than all at once.
4. What is the best paint to use for a paper mache volcano?
Acrylic paint is best because it is water-resistant once it dries. This is important because the vinegar and water from the eruption will likely get on the paint. Washable tempera paint works too, but it might run or smear when it gets wet.
5. Can I make a volcano without paper mache?
Yes! You can use play dough, clay, or even just a mound of dirt or sand in your backyard. Simply place a cup or bottle in the center and build your "mountain" around it.
6. Why did my volcano not erupt?
Most likely, the baking soda and vinegar didn't mix well. If you used dry baking soda, it might have clumped at the bottom. Next time, try the "slurry" method (mixing soda with a little water first) and make sure your vinegar is fresh.
7. How many times can I erupt my paper mache volcano?
If you used acrylic paint and a good sealer (like Mod Podge), you can erupt it many times! Just make sure to wipe it down and let it dry completely between uses so the cardboard doesn't get soggy and moldy.
Conclusion: Ignite a Love for Learning
The kids volcano project is more than just a classic science experiment; it is a doorway into the incredible, moving, changing world we live on. From the chemical reaction that creates the bubbles to the geological forces that shape our continents, there is so much to discover. We’ve explored the quick 3-minute method for busy afternoons, the multi-day paper mache craft for deep engagement, and even the color-changing variations that bring a touch of magic to STEM.
At I'm the Chef Too!, we are passionate about making these moments happen for your family. Our mission is to blend food, STEM, and the arts to create joyful memories and foster a lifelong love for learning. We want to see your children become the curious scientists and creative chefs of tomorrow, one "edutainment" adventure at a time.
Remember, every eruption is a success if it sparks a question. "Why did it do that?" is the most important sentence a child can say. By providing them with the tools and the time to explore, you are giving them a gift that lasts far longer than the bubbles from a vinegar reaction.
Are you ready to make every month an adventure? Whether you’re exploring the depths of the Earth or the far reaches of the galaxy, we have something special waiting for you. Ready for a new adventure every month? Join The Chef's Club and enjoy free shipping on every box. Let's get cooking, building, and erupting together!


")