Table of Contents
- Introduction
- The STEM Behind the Stitch
- Setting Up Your Sewing Kit: The Essentials
- Teaching the Basics: Three Simple Stitches
- Project 1: The Classic Felt Heart Softie
- Project 2: Button Trees in Embroidery Hoops
- Project 3: Lavender Scented Sachets
- Project 4: Monster Backpack Charms
- Hypothetical Case Study: The Rainy Saturday Solution
- Project 5: Simple Fabric Bookmarks
- Project 6: Hand-Sewn Scrunchies
- Project 7: Felt Finger Puppets
- Why Sewing is Essential for Early Development
- Safety First: Guidelines for Parents and Educators
- Taking it Further: Sewing and Group Learning
- Integrating Cooking and Sewing: A Day of Making
- FAQ: Common Questions About Kids' Sewing
- Conclusion
Introduction
Have you ever noticed the intense look of concentration on a child’s face when they are trying to thread a bead or connect two building blocks? That focused energy is the spark of curiosity we love to see at I’m the Chef Too!. But what if you could take that natural drive for making and turn it into a lifelong skill that blends art, engineering, and patience? Hand sewing is one of the most rewarding ways to introduce children to the world of tactile learning. While many people think of sewing as a complex craft reserved for adults with sewing machines, simple hand sewing projects for kids are actually the perfect entry point for little makers to develop fine motor skills and creative confidence.
In this post, we are going to dive deep into the wonderful world of needle and thread. We’ll explore why sewing is a hidden gem of STEM education, the best supplies to get started without a fuss, and a wide variety of projects ranging from felt softies to practical household items. Whether you are a parent looking for a screen-free weekend activity or an educator wanting to add a new dimension to your classroom, this guide will provide you with everything you need to get those little hands stitching.
Our mission at I’m the Chef Too! is to blend food, STEM, and the arts into one-of-a-kind "edutainment" experiences. We believe that when children work with their hands—whether they are kneading dough or pulling a needle through felt—they are building a foundation for complex problem-solving. By the end of this article, you will see how sewing is more than just a hobby; it is a gateway to a love for learning that lasts a lifetime.
The STEM Behind the Stitch
At first glance, sewing might look like a purely artistic endeavor. However, when we look closer, we see that simple hand sewing projects for kids are packed with mathematical and scientific concepts. At I’m the Chef Too!, our unique approach involves teaching complex subjects through tangible, hands-on adventures, and sewing fits perfectly into this educational philosophy.
When a child sews, they are engaging in spatial reasoning. They have to understand how a flat, two-dimensional piece of fabric can be transformed into a three-dimensional object like a stuffed animal or a pillow. This is the same type of thinking used by architects and engineers. Furthermore, sewing requires measurement and estimation. How much thread is needed for this seam? How far apart should the stitches be to keep the stuffing from falling out? These are all practical applications of geometry and physics.
We are committed to sparking curiosity and creativity, and sewing provides a fantastic screen-free educational alternative that keeps children engaged for hours. Just like our Chef's Club Subscription, which delivers a new adventure to your door every month, sewing offers a consistent way to build skills over time. Each project becomes a building block for the next, fostering a sense of accomplishment and persistence.
Setting Up Your Sewing Kit: The Essentials
Before you start your first project, you’ll need a few basic supplies. You don’t need a fancy sewing box; in fact, simple is often better for children. Here is what we recommend for a beginner-friendly sewing kit:
- Tapestry or Embroidery Needles: For younger children (ages 4–6), look for blunt-tipped tapestry needles. These are safer and work beautifully with plastic canvas or loose-weave fabrics like burlap. For older kids, standard embroidery needles with a large eye are perfect because they make threading much easier.
- Embroidery Floss: This is thicker and more colorful than standard sewing thread, making it easier for kids to see their progress and handle the material.
- Felt: If there is one "magic" fabric for kids, it’s felt. Because it is non-woven, it doesn’t fray at the edges. This means kids can focus on their stitches rather than worrying about the fabric falling apart. Wool felt or a high-quality wool-blend felt is sturdier and feels better than the cheap polyester versions.
- Buttons and Beads: These are great for adding "eyes" to monsters or "flowers" to a garden scene.
- Fabric Scissors: A sharp pair of scissors makes a huge difference. Ensure there is adult supervision when these are in use, but teaching a child how to cut fabric properly is a skill in itself.
- Stuffing: To turn flat projects into "softies," you’ll need some polyester fiberfill or even old fabric scraps cut into tiny pieces.
Ready for a new adventure every month? Join The Chef's Club and enjoy free shipping on every box to keep the hands-on learning going even after the sewing is done!
Teaching the Basics: Three Simple Stitches
Before jumping into a project, it helps to practice the fundamental motions. We recommend sitting side-by-side with your child, rather than across from them, so they can see the needle movement from your perspective.
1. The Running Stitch
This is the "up and down" stitch. It’s the most basic way to join two pieces of fabric. Imagine a little dolphin jumping in and out of the water—that’s exactly how the needle moves through the cloth.
2. The Whip Stitch
The whip stitch is great for closing the edges of a stuffed animal. Instead of going up and down, the needle "wraps" around the edge of the fabric. This creates a very secure seam and is often easier for children who struggle with the "poke from behind" aspect of the running stitch.
3. Tying the Knot
This is often the hardest part for little fingers! A simple way to teach this is the "finger wrap" method. Wrap the thread around your index finger once, roll it off with your thumb, and pull. Don’t worry if it takes a few tries; even adult sewers find knots tricky sometimes!
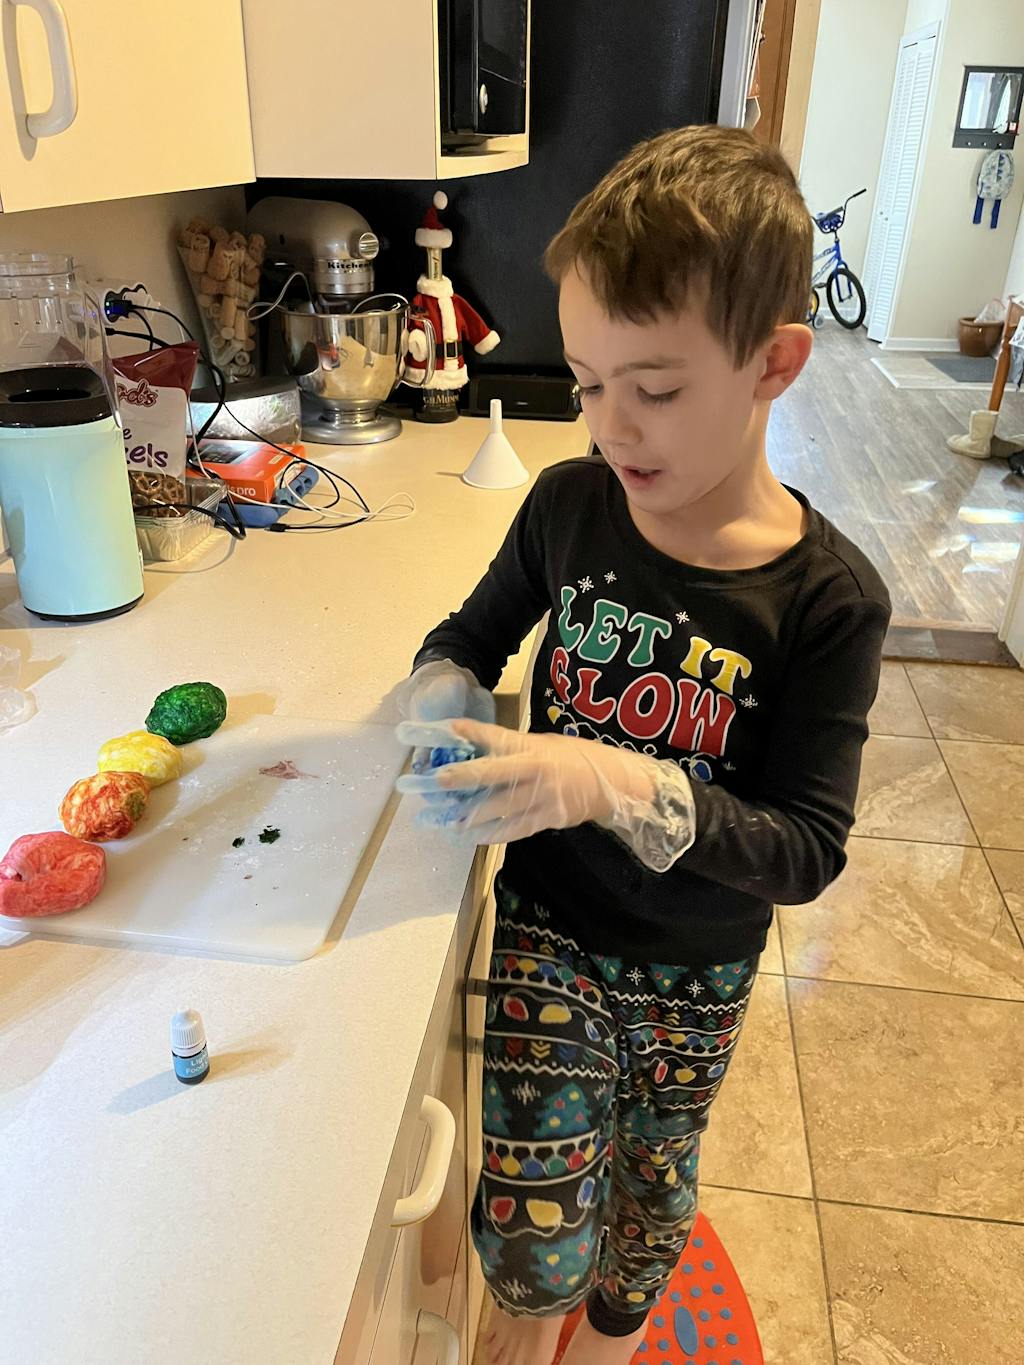
Project 1: The Classic Felt Heart Softie
This is the quintessential first sewing project. It’s simple, quick, and the results are instantly gratifying.
Steps:
- Cut out two identical heart shapes from felt.
- Have your child pick a bright color of embroidery floss.
- Start sewing around the edge using a running stitch or whip stitch.
- Stop about two inches before you reach the starting point.
- Stuff the heart with fiberfill or cotton balls.
- Sew the remaining gap closed and tie a knot.
This project is a great way to build confidence. A child who completes a heart feels like a "real sewer." If they love the process of creating something from scratch, they might also enjoy exploring our full library of adventure kits available for a single purchase in our shop.
Project 2: Button Trees in Embroidery Hoops
This project combines sewing with a bit of "nature" art. It’s fantastic for developing manual dexterity because it involves sewing through both fabric and button holes.
Steps:
- Place a piece of muslin or light-colored felt into a 6-inch embroidery hoop.
- Cut a small rectangle of brown felt to act as the tree trunk and sew it onto the bottom of the hoop.
- Provide a bowl of colorful buttons (the "leaves").
- Let your child sew the buttons onto the fabric above the trunk.
- Each button requires several passes of the needle, which is excellent practice for precision.
Pro-Tip: For younger children, you can pre-mark the spots for the buttons with a disappearing fabric marker. This helps them plan their design and reduces frustration.
Project 3: Lavender Scented Sachets
This project introduces the concept of functional art. Not only does the child create something beautiful, but it also serves a purpose in the home.
Steps:
- Cut two squares of fabric (about 4x4 inches).
- Sew three sides together firmly using a small running stitch.
- Fill the pouch with dried lavender flowers.
- Sew the final side shut.
These make wonderful gifts for grandparents or teachers. It’s a great way to show children that the things they make have value in the "real world." If you're looking to bring these types of hands-on STEM adventures to your classroom, camp, or homeschool co-op, we encourage you to learn more about our versatile programs for schools and groups.
Project 4: Monster Backpack Charms
Let’s get creative! Monsters are the perfect subject for sewing because they don’t have to be perfect. If one eye is higher than the other, or the shape is a bit wonky, it just adds "character."
Steps:
- Cut two "blob" shapes out of felt.
- Sew on mismatched buttons for eyes and use a few stitches of red thread for a mouth.
- Sew the two blobs together, leaving a space for stuffing.
- Before sewing it completely shut, insert a loop of ribbon at the top.
- Once finished, the child can clip their monster to their school backpack.
This kind of open-ended creativity is exactly what we strive for at I’m the Chef Too!. We want to facilitate family bonding through projects that allow every child’s unique personality to shine.
Hypothetical Case Study: The Rainy Saturday Solution
Imagine a parent, Sarah, looking for a screen-free weekend activity for her 7-year-old son, Leo, who loves gadgets and building things. Leo usually reaches for his tablet when it rains, but Sarah wants something more engaging. She pulls out a small bag of felt, some neon green thread, and a handful of buttons.
Instead of a "craft," she frames it as an engineering challenge: "Can you build a soft-shell case for your favorite action figure using only this needle and thread?" Leo is intrigued. He spends the next two hours measuring the figure, cutting the "armor" (felt), and figuring out how to sew the sides so the figure fits snugly inside.
By the end of the afternoon, Leo hasn't just "sewn"; he has prototyped, measured, and solved a physical problem. This is the heart of STEM education. While we can’t guarantee every child will become a top scientist, we can guarantee that activities like these foster a love for learning and build confidence. For parents like Sarah, giving the gift of learning that lasts all year with a 12-month subscription to our STEM cooking adventures is the perfect way to keep that momentum going.
Project 5: Simple Fabric Bookmarks
For children who are just starting to read, making their own bookmark is a special milestone.
Steps:
- Cut a long rectangle of felt.
- Use a contrasting thread to sew a decorative border around the edge. This is a great time to introduce a "blanket stitch" or just stick with a clean running stitch.
- At the top, sew on a small felt star or a tassel made of embroidery floss.
- Encourage your child to use their new bookmark in their favorite bedtime storybook.
Project 6: Hand-Sewn Scrunchies
This project is a bit more advanced but very popular with older children (ages 8 and up). It teaches the concept of a "tube" and working with elastic.
Steps:
- Cut a strip of fabric about 3 inches wide and 18 inches long.
- Fold it in half lengthwise (pretty sides touching) and sew a long straight line down the side. This is best done with a backstitch for extra strength.
- Turn the tube right-side out (this is the fun, "magic" part!).
- Thread a piece of elastic through the tube using a safety pin.
- Tie the elastic in a knot and sew the two ends of the fabric tube together.
This project bridges the gap between simple hand sewing and functional fashion. It’s a great way to find the perfect theme for your little learner by browsing our complete collection of one-time kits for more inspiration on how to combine textiles and STEM.
Project 7: Felt Finger Puppets
Finger puppets are a fantastic way to encourage imaginative play after the sewing is finished.
Steps:
- Trace your child’s finger on a piece of felt, adding about half an inch of "wiggle room" all the way around.
- Cut two of these shapes.
- Before sewing them together, decorate the front piece. Will it be a rabbit? An alien? A tiny chef?
- Sew the two sides together, leaving the bottom open.
A child could sew an entire cast of characters and then put on a play for the family. This combines the "Art" and "Engineering" parts of STEAM in a very joyful way.
Why Sewing is Essential for Early Development
As an educational expert, I see hand sewing as a "powerhouse" activity. It touches on several key developmental areas:
Fine Motor Skill Development
Threaded a needle and making small, rhythmic movements with a needle helps strengthen the small muscles in the hands and fingers. These are the same muscles needed for neat handwriting and using tools in a science lab.
Patience and Perseverance
In a world of instant gratification, sewing takes time. If a thread tangles, the child must stop and untangle it. If a stitch is too loose, they might choose to pull it out and try again. This builds "grit"—the ability to stick with a task even when it gets a little bit difficult.
Confidence and Agency
There is a unique sense of pride that comes from saying, "I made this." When a child sees a finished project that they created from a pile of scraps, they realize they have the power to change their environment and create something of value.
At I’m the Chef Too!, we see this same confidence grow in the kitchen. Whether a child is seeing a chemical reaction that makes our Erupting Volcano Cakes bubble over with deliciousness or finishing their first felt heart, the psychological benefit is the same: they are learning to trust their own abilities.
Safety First: Guidelines for Parents and Educators
While we want to encourage independence, hand sewing does involve sharp objects. Here are our top tips for keeping the experience safe and joyful:
- Adult Supervision is Mandatory: Always stay nearby while your child is sewing.
- The "Needle Home": Teach your child that the needle always has a "home" (like a pincushion or a specific spot in the kit). It should never be left on the floor or the sofa.
- Thimble Fun: For older kids, using a thimble can prevent sore fingers and adds an extra layer of "professionalism" to their kit.
- Lighting Matters: Ensure the workspace is well-lit to prevent eye strain and accidental pokes.
Taking it Further: Sewing and Group Learning
If you are an educator or a homeschool lead, consider incorporating simple hand sewing projects for kids into your curriculum. It’s an excellent way to teach historical lessons (how did people make clothes before machines?) or biological lessons (studying the textures of different animal fibers like wool and silk).
Our school and group programs are designed to be flexible, offering options with and without food to suit various classroom needs. Adding a sewing component to a history or science lesson can make the information much more "sticky" for students who learn best by doing.
Integrating Cooking and Sewing: A Day of Making
Why stop at sewing? At I’m the Chef Too!, we believe the best days are filled with multi-sensory learning. Imagine a "Maker Day" at your house. In the morning, you might sit down to create some felt "food" softies—felt strawberries, cookies, and slices of pizza. In the afternoon, you could head to the kitchen to make the real thing!
You could explore astronomy by creating your own edible solar system with our Galaxy Donut Kit and then sew a felt "moon" to hang in the bedroom. This holistic approach to education ensures that children see the connections between different subjects. Cooking is chemistry; sewing is geometry; both are delicious and fun!
FAQ: Common Questions About Kids' Sewing
Q: What is the best age for a child to start sewing? A: Most children have the coordination to start with a blunt needle and plastic canvas around age 4. By age 6 or 7, they are usually ready for felt and embroidery needles.
Q: My child gets frustrated when the thread comes out of the needle. What should I do? A: This is the most common hurdle! You can try "threading" the needle and then tying the thread to the needle with a small knot. This keeps it from slipping out while they sew. As they get more confident, you can move back to the standard way.
Q: Is sewing just for girls? A: Absolutely not! Sewing is a vital life skill for everyone. From surgeons to tailors to astronauts (who have to repair their own gear!), many professions require hand-sewing skills. Boys often love the "engineering" side of sewing, like making pouches for their treasures or repairing their own stuffed animals. Even beloved animals can make learning fun, like when kids make Wild Turtle Whoopie Pies and then sew a felt turtle to match!
Q: What fabric is best for beginners? A: Felt is the absolute best. It doesn't slip, it doesn't fray, and it comes in every color imaginable. Once they master felt, they can move on to cotton or fleece.
Q: How do I keep the thread from tangling? A: The secret is not to use a piece of thread that is too long. A piece about the length of your child's arm (from fingertip to shoulder) is usually just right.
Conclusion
Teaching a child to sew is like giving them a superpower. It’s the ability to take a vision in their head and turn it into something they can hold in their hands. Simple hand sewing projects for kids are about so much more than just stitches; they are about building patience, improving motor skills, and creating joyful family memories that will be cherished for years to come.
At I’m the Chef Too!, we are proud to be your partners in this journey of "edutainment." Whether you are stitching a felt monster or baking a tray of science-themed treats, you are helping your child develop the tools they need to explore the world with curiosity and confidence. We invite you to continue this journey of discovery with us.
Each of our kits is a complete experience, containing pre-measured dry ingredients and specialty supplies, making it easier than ever for you to provide high-quality educational activities at home. A new adventure is delivered to your door every month with free shipping in the US when you join our community.
Ready for a new adventure every month? Join The Chef's Club and enjoy free shipping on every box. We can't wait to see what you and your little chef—and now, your little tailor—create next!


")