Table of Contents
- Introduction
- Why a Balloon Car STEM Project? The Power of Hands-On Discovery
- The Science Behind the Zoom: Unpacking the Physics of a Balloon Car
- The Engineer's Blueprint: Understanding the Design Process
- Gathering Your Toolkit: Everyday Materials for Big Discoveries
- Building Your Dream Machine: A Step-by-Step Construction Guide
- Testing and Troubleshooting: The Art of Iteration
- Beyond the Finish Line: Extending the Learning and Fun
- Making it a Family Affair: Bonding Through STEM
- The I'm the Chef Too! Connection: Where Learning is Delicious
- Conclusion
- FAQ: Your Balloon Car STEM Activity Questions Answered
Ever watched a child’s eyes light up as they send a toy car hurtling across the room, propelled by a burst of imagination and perhaps a gentle push? Or perhaps you've seen a deflating balloon zip erratically through the air, sparking a moment of pure wonder. These everyday occurrences aren't just playful incidents; they're tiny, powerful windows into the world of physics and engineering, often igniting a spark of curiosity without us even realizing it. But what if we could take that natural sense of awe and transform it into a thrilling, hands-on learning adventure right in your living room or classroom?
That's precisely what we at I'm the Chef Too! love to do, and it’s perfectly embodied in one of the most classic, yet endlessly engaging, STEM challenges: the balloon car STEM project. More than just a simple craft, building a balloon-powered car is an incredible journey into the principles of motion, design, and problem-solving. While our mission often blends food, STEM, and the arts into one-of-a-kind "edutainment" experiences, the core philosophy extends beautifully beyond the kitchen. We are committed to sparking curiosity and creativity in children, facilitating family bonding, and providing screen-free educational alternatives that are tangible, hands-on, and genuinely fun. The balloon car embodies this spirit, offering a dynamic project that promises not just educational growth but also joyful shared memories.
In this comprehensive guide, we'll dive deep into everything you need to know about setting up your very own balloon car STEM project. We'll explore the fascinating science behind how these simple contraptions zoom, walk you through the empowering engineering design process, provide practical tips for construction, and even offer creative ways to extend the learning. Get ready to transform everyday materials into a vehicle of discovery, sparking curiosity and creativity in your children in a truly unique and memorable way.
Introduction
Imagine a quiet Saturday afternoon. Your child, perhaps seven years old, is fiddling with a cardboard box, some bottle caps, and a deflated balloon. Suddenly, an idea sparks: "Can we make this move... without touching it?" This isn't just a child playing; it's a budding engineer at work, driven by innate curiosity and a desire to understand. This very moment is the perfect springboard for a balloon car STEM project – an activity that transforms common household items into a powerful, interactive learning tool.
We understand that capturing and sustaining a child's attention in educational pursuits can be a delightful, yet often challenging, endeavor. Traditional textbooks and lectures, while foundational, often don't ignite that spark of genuine interest and hands-on engagement that truly impactful experiences do. This is precisely why we champion activities like building a balloon car. It's a perfect example of how complex scientific and engineering principles can be explored through tangible, accessible, and exciting play. By actively designing, building, and testing their own balloon cars, children aren't just memorizing facts; they are actively discovering how the world works. They're experimenting with cause and effect, learning to adapt, and honing their problem-solving skills in a deeply satisfying way. It’s an adventure of the mind, disguised as play.
This blog post is your ultimate resource for orchestrating a successful and enriching balloon car STEM challenge. We'll demystify the science that makes these little vehicles fly, break down the engineering design process into easy-to-follow steps, offer practical advice for construction and refinement, and provide creative extensions to keep the learning momentum going long after the first race. Our aim at I'm the Chef Too! is to empower you, whether you're a parent seeking engaging home activities or an educator looking for a dynamic classroom project, to facilitate an experience that fosters a love for learning, builds confidence, and creates lasting, happy memories. So, gather your materials, prepare for some exhilarating trial and error, and let's embark on this exciting journey of discovery with the humble, yet mighty, balloon car!
Why a Balloon Car STEM Project? The Power of Hands-On Discovery
In an age dominated by screens and passive entertainment, finding activities that truly engage a child's mind and body can feel like a quest. This is where the magic of a balloon car STEM project shines. It’s more than just a craft; it's a gateway to understanding the world around us, offering a multitude of benefits that align perfectly with our educational philosophy at I'm the Chef Too!.
First and foremost, a balloon car STEM project offers a fantastic screen-free educational alternative. Instead of staring at a tablet, children are actively manipulating materials, thinking critically, and seeing immediate, tangible results of their efforts. This kind of active engagement stimulates different parts of the brain, encouraging deeper learning and longer-lasting retention. It’s about doing, not just observing.
Beyond the immediate engagement, this project fosters crucial developmental skills. Children learn about:
- Problem-Solving: What happens if the car doesn't go straight? How can we make it faster? These questions lead to hands-on solutions.
- Critical Thinking: Analyzing why a design worked or failed and adjusting accordingly.
- Fine Motor Skills: Cutting, taping, measuring, and assembling all contribute to developing dexterity and coordination.
- Creativity and Innovation: There's no single "right" way to build a balloon car. Children are encouraged to experiment with different materials and designs, leading to truly unique creations.
- Patience and Resilience: Things might not work perfectly the first time. Learning to troubleshoot and try again is a powerful lesson in perseverance.
- Collaboration and Communication: Especially when working with a parent, sibling, or classmate, children learn to share ideas, divide tasks, and communicate their observations.
At I'm the Chef Too!, we believe in "edutainment"—making learning so enjoyable that children don't even realize they're absorbing complex concepts. Just as our edible creations teach about chemical reactions, fractions, and biology through delicious fun, the balloon car STEM project demystifies fundamental physics and engineering principles in an exciting, accessible way. It sparks that initial curiosity, laying a foundation for a lifelong love of STEM.
Moreover, this activity is a wonderful opportunity for family bonding. Working together on a shared project, celebrating successes, and learning from challenges creates cherished memories and strengthens relationships. It’s about the shared experience, the laughter, and the "aha!" moments that come from collective discovery. You're not just building a car; you're building connections.
Ready to bring more hands-on, educational adventures into your home? We make it easy! Join The Chef's Club today and a new STEM cooking adventure will be delivered to your door every month with free shipping in the US! It's the perfect way to keep that spark of curiosity burning bright, month after month.
The Science Behind the Zoom: Unpacking the Physics of a Balloon Car
Before we gather our materials and start taping pieces together, let's take a moment to appreciate the incredible science that makes a balloon car zoom across the floor. This isn't just playtime; it's a fantastic, tangible introduction to fundamental physics concepts that children might otherwise only encounter in a textbook. Watching these principles come alive is truly "edutainment" at its best!
At its core, the balloon car operates on one of Isaac Newton's most famous and powerful principles: his Third Law of Motion.
Newton's Third Law of Motion: Action and Reaction
Newton's Third Law states that "for every action, there is an equal and opposite reaction." This principle is everywhere, from walking (your foot pushes on the ground, the ground pushes back) to rockets launching into space.
In the context of our balloon car:
- The Action: When you inflate a balloon and then release its opening, the compressed air inside rapidly pushes out of the straw or nozzle at the back of the car.
- The Reaction: In response to this air being expelled backward, an equal and opposite force pushes the balloon (and thus the car) forward.
Imagine a rocket blasting off. It expels hot gases downwards (action), and in response, the rocket is propelled upwards (reaction). Your balloon car is simply a miniature, ground-based rocket! The more forcefully and rapidly the air is expelled, the greater the reaction force, and the faster and further your balloon-powered car will travel. This simple, observable principle makes the abstract concept of action-reaction immediately understandable and exciting for children.
Other Key Physics Concepts at Play:
While Newton's Third Law is the star of the show, a successful balloon car STEM project also brilliantly demonstrates several other vital physics concepts:
-
Newton's First Law of Motion (Inertia): This law states that an object at rest will stay at rest, and an object in motion will stay in motion with the same speed and in the same direction unless acted upon by an unbalanced force.
- In your balloon car: When your car is sitting still, it won't move until the balloon's thrust acts on it. Once it's moving, even after the balloon completely deflates, the car will continue to roll for a bit. Why? Because of inertia! It wants to keep moving until an external force (like friction or air resistance) brings it to a halt. This helps children understand why things don't just stop instantly when the initial push is gone.
-
Newton's Second Law of Motion (Force, Mass, and Acceleration - F=ma): This law explains the relationship between force, mass, and acceleration. A larger force is needed to move a more massive object or to accelerate an object more quickly.
- In your balloon car: If you use a larger balloon or inflate it more (creating more force), your car will accelerate faster and potentially achieve a higher speed. Conversely, if you build a very heavy car (increasing its mass), it will accelerate more slowly or won't travel as far, even with the same balloon force. This is a fantastic opportunity for experimentation: what happens if you add a small toy figure to your car? Does it still go as fast? Does a larger balloon make a bigger difference?
-
Potential and Kinetic Energy:
- Potential Energy: This is stored energy. When you inflate the balloon, you're storing potential energy in two ways: in the stretched rubber of the balloon itself and in the compressed air trapped inside. It's energy "waiting" to do something.
- Kinetic Energy: This is the energy of motion. When you release the balloon, the stored potential energy is converted into kinetic energy as the air rushes out and propels the car forward. Eventually, the car stops, but the energy isn't lost; it's converted into other forms like sound (whoosh!), heat (from friction), and even slight vibrations. This illustrates the principle of energy transformation and conservation.
-
Friction: This is the resistance that occurs when two surfaces rub against each other. Friction always opposes motion.
- In your balloon car: Friction occurs in several places: between the wheels and the floor, and crucially, between the axles and the car's body. Too much friction can significantly slow down or completely stop your car. Engineers designing real cars go to great lengths to minimize friction to improve efficiency, and your child will quickly discover the importance of smooth-spinning wheels and axles. They might try adding a little oil or making sure their straw "bearings" are wide enough.
-
Aerodynamics (Air Resistance): This refers to how air moves around an object. The shape of your car can affect how much it's slowed down by the air pushing against it.
- In your balloon car: A sleek, low-profile car will typically experience less air resistance than a tall, boxy one. Experimenting with different car body shapes can show children how air resistance affects speed and distance. It’s an easy way to introduce principles of design efficiency.
Understanding these concepts isn't about rote memorization; it's about seeing them in action. When a child adjusts their balloon car – perhaps making the wheels spin more smoothly, or adding a sleeker body – they are intuitively experimenting with force, friction, mass, and aerodynamics. This hands-on discovery is precisely the kind of learning we champion at I'm the Chef Too!, where complex scientific ideas become tangible, exciting, and, most importantly, memorable. Just as we turn baking into a delicious lesson on chemical reactions and measurement, the balloon car transforms simple play into an engaging lesson on fundamental physics.
Ready to put these scientific principles to the test with your own budding engineer? We encourage continuous, hands-on learning. Join The Chef's Club and receive new, exciting STEM adventures delivered right to your door every month! It’s the easiest way to ensure a steady stream of "edutainment" that sparks curiosity and builds confidence.
The Engineer's Blueprint: Understanding the Design Process
Building a successful balloon car isn't just about sticking parts together haphazardly; it's a fantastic real-world application of the engineering design process (EDP). This systematic, iterative approach is what engineers worldwide use to solve problems, innovate, and create new things, from bridges to smartphones. It’s an incredibly valuable skill for children to learn, as it encourages critical thinking, structured problem-solving, resilience, and adaptability – qualities that extend far beyond the workshop or classroom.
The beauty of the EDP is that it's not always a perfectly linear path; engineers often go back and forth between steps, refining their ideas and testing their solutions until they achieve the desired outcome. Here's how this powerful process applies directly to our balloon car STEM project:
1. Ask: What is the Problem or Challenge?
Every engineering project begins with a clear understanding of the goal. Without a defined objective, it's hard to know where to start or if you've succeeded. For a balloon car, the "ask" could be articulated in various ways, depending on the learning goals:
- "How can we make a car move using only the air from an inflated balloon?" (A basic introductory challenge)
- "Can we design a balloon car that travels at least 5 feet in a straight line?" (Introducing specific performance criteria)
- "What design elements will make our balloon car go the fastest, or the farthest?" (Encouraging optimization)
Encourage your child to articulate the challenge in their own words. This helps them internalize the objective and develop a sense of purpose before jumping into solutions. This "ask" stage helps frame their thinking and provides a target for their efforts.
2. Imagine: Brainstorm Solutions & Ideas
This is the creative, "anything goes" phase! It's about generating as many potential solutions and design concepts as possible, no matter how wild or unconventional they might seem at first. The goal here is quantity over quality, to open up possibilities.
Gather your available materials and prompt questions:
- "What could we use for the main body of our car? (Think cardboard, plastic bottles, paper plates, milk cartons, lightweight wood scraps, foam trays)."
- "How will we attach the wheels securely? And what could we use for wheels themselves? (Consider plastic bottle caps, old CDs, sturdy cardboard circles, toy wheels, empty tape rolls)."
- "What materials would make good axles that allow the wheels to spin freely? (Straws, wooden skewers, pencils, chopsticks)."
- "How will the balloon be attached to effectively push the car? Where should the air escape from? Should it be a straw? A direct opening?"
- "What will hold everything together? (Tape, hot glue, rubber bands, paper clips, string)."
Don't judge ideas at this stage; instead, foster an environment where all suggestions are welcome. Sketching ideas can be incredibly helpful. Even a simple doodle can clarify a concept, help visualize how parts might fit together, or reveal potential issues before construction begins. Encourage drawing multiple perspectives of the car, including how the balloon and straw will be integrated.
3. Plan: Choose the Best Solution & Develop a Design
Now it's time to refine those imaginative ideas into a workable, detailed plan. This stage moves from "what if?" to "how will we do it?"
- Evaluate Ideas: Look at the brainstormed ideas and discuss the pros and cons of each. Which materials seem most practical, readily available, and effective for the chosen challenge? Consider factors like weight, stability, and ease of assembly.
- Select a Design: Guide your child in choosing the design they think has the best chance of meeting the challenge. This decision-making process is crucial for developing critical thinking.
- Detailed Diagram: Draw a more detailed diagram of the chosen design. This isn't just a casual sketch anymore; it’s a blueprint. Label the parts, indicate approximate measurements (e.g., how long should the car body be? How far apart should the wheels be for stability?).
- Material List: Create a final list of the specific materials needed for this chosen design. This helps organize the building phase.
- Anticipate Challenges: Encourage thinking ahead. "How will we make sure the axles spin smoothly?" "What if the balloon falls off?" "Will this design be stable when it moves?"
This planning stage is essential for translating abstract ideas into concrete steps, setting the stage for a more successful build.
4. Create: Build Your Balloon Car
With a solid plan in hand, it’s time for the exciting hands-on construction! This is where the ideas leap off the paper and become a physical reality.
- Follow the Plan (Mostly!): Encourage your child to follow their detailed design plan, but also emphasize that it's okay to make small adjustments if something isn't working as expected. Real-world engineering often involves on-the-fly modifications.
- Assembly: Carefully cut, tape, glue, and assemble the components. This is where fine motor skills are put to the test. Ensure adult supervision, especially when using sharp tools like scissors or hobby knives.
- Balloon Integration: Pay special attention to how the balloon and straw (or air nozzle) are attached. A secure, airtight connection is paramount for effective propulsion.
- Testing as You Go: Encourage mini-tests throughout the building process. Do the wheels spin freely before the car is fully assembled? Is the balloon connection secure? This iterative testing helps catch problems early.
The "Create" stage is where the magic of transforming simple materials into a functional machine happens, offering immediate gratification and a sense of accomplishment.
5. Improve: Test, Evaluate, and Redesign
This is arguably the most critical and educational part of the engineering design process, often leading to the deepest learning. Few designs work perfectly on the first try, and that's precisely the point!
-
Test: Take your completed balloon car to an open, flat space. Inflate the balloon fully, hold the air in, place the car down, and release! Observe its performance:
- Does it move?
- How far does it go?
- Does it go in a straight line, or wobble?
- How fast is it?
-
Evaluate: Discuss the results with your child. "What worked well? What didn't go as planned?"
- If it didn't move: Is the balloon leaking? Is there too much friction? Is the car too heavy?
- If it wobbled: Are the wheels secure? Are the axles parallel?
- If it didn't go far: Is the balloon big enough? Is the air escaping efficiently?
-
Redesign/Iterate: Based on the evaluation, brainstorm modifications to improve the car's performance. This might mean:
- Using lighter materials.
- Making the body more aerodynamic.
- Securing axles more tightly or loosely.
- Adjusting the angle of the straw.
- Trying different wheel sizes.
The cycle of "Test, Evaluate, Redesign" is the heart of engineering. It teaches children that failure isn't an end; it's an opportunity to learn and improve. This resilience and adaptability are invaluable life skills. Each iteration makes the child a better problem-solver and a more thoughtful designer.
The engineering design process, especially through a fun, hands-on activity like the balloon car STEM project, truly encapsulates our mission at I'm the Chef Too! We believe in fostering a love for learning by making complex subjects tangible and engaging. It’s about building confidence, developing key skills, and creating joyful family memories, all without overpromising specific outcomes, but rather celebrating the process of discovery.
Ready for more adventures that spark curiosity and creativity? Explore our full library of adventure kits available for a single purchase in our shop! You're sure to find a perfect theme to continue your child's journey of hands-on discovery.
Gathering Your Toolkit: Everyday Materials for Big Discoveries
One of the most appealing aspects of a balloon car STEM project is that it typically requires materials you might already have lying around your home or classroom. This accessibility makes it a low-barrier, high-impact activity, proving that you don't need fancy equipment to explore complex scientific and engineering principles. The beauty lies in repurposing and innovation!
Here's a comprehensive list of common materials, along with tips and alternative suggestions, to help you gather your toolkit. Remember, part of the fun (and the engineering design process!) is improvising with what you have.
The Essentials:
-
For the Car Body:
- Plastic Bottle (e.g., water bottle, soda bottle): Lightweight and sturdy.
- Small Cardboard Box (e.g., tissue box, cereal box, shoe box): Easy to cut and customize.
- Sturdy Cardboard Piece: A flat piece of corrugated cardboard works wonderfully as a base.
- Plastic Container (e.g., yogurt container, butter tub): Can be used for a more compact design.
- Tip: Consider weight and rigidity. Lighter bodies generally allow for faster travel, but a sturdy base is crucial for stability.
-
For the Wheels (4 needed):
- Plastic Bottle Caps: Easy to attach and readily available.
- Old CDs/DVDs: Great for larger, smoother wheels.
- Sturdy Cardboard Circles: Cut from thick cardboard; can be customized in size.
- Empty Tape Rolls: Offer a good diameter.
- Tip: Uniformity in size and shape of the wheels is important for the car to travel straight and smoothly. Experiment with different sizes – larger wheels cover more distance per rotation.
-
For the Axles (2 needed):
- Wooden Skewers: Strong and straight, but require care when cutting.
- Unsharpened Pencils: Readily available and sturdy.
- Chopsticks: Another good option for straightness.
- Tip: The axles need to be strong enough to support the car's weight without bending and smooth enough to spin freely.
-
For Axle Holders/Bearings (3-4 straws):
- Plastic Drinking Straws: Crucial for holding the axles in place and allowing them to spin with minimal friction. "Jumbo" or "milkshake" straws often work best as they provide more space for axles to spin.
- Flexible Straws (1): One bendy straw is often used for the balloon's exhaust, allowing for aiming the thrust.
- Tip: Cut straws slightly wider than the car body to ensure the wheels don't rub.
-
For Propulsion:
- Balloons (various sizes): The heart of the propulsion system! Having a few different sizes allows for experimentation. Standard 9-inch latex balloons are a good starting point.
- Tip: Larger balloons hold more air, potentially providing more thrust and distance.
-
Adhesives & Fasteners:
- Strong Tape (e.g., duct tape, packing tape, masking tape): Essential for securing parts. Scotch® tape can work for lighter attachments.
- Rubber Bands: Great for securing the balloon to the straw tightly.
- Hot Glue Gun (with adult supervision): Provides a very strong and quick bond, ideal for axles and body parts.
- Scissors: For cutting cardboard, straws, and tape.
- Hobby Knife/Box Cutter (for adult use only): Useful for making precise holes or cuts in plastic bottles/cardboard.
- Tip: Test different adhesives for different materials. Tape is good for temporary fixes and flexibility, while glue offers more permanence.
Optional, But Recommended:
- Modeling Clay or Dry Sponge: Can be used to secure wheels to axles if the holes are too big, or to add weight strategically.
- Ruler or Tape Measure: For accurate cutting and placement, crucial for keeping the car straight.
- Marker: For drawing designs and marking cut lines.
- Push Pin or Small Drill Bit: For making initial holes in bottle caps (adult supervision required).
- Open Area to Test: A smooth, flat floor (hardwood, tile, linoleum) works best for consistent results.
- Lab Notebook/Paper & Pen: To sketch designs, record observations, and track improvements (a simple form of engineering documentation!).
- Smartphone with a timer or sensor app: For more advanced challenges like measuring speed or distance accurately.
Safety First!
- Always ensure adult supervision when children are using scissors, hobby knives, hot glue guns, or other sharp/hot tools.
- Be mindful of small parts that could be a choking hazard for very young children.
- Work in a well-ventilated area if using strong glues.
By gathering these simple materials, you're not just preparing for a craft session; you're setting the stage for a rich, hands-on scientific investigation. The process of scrounging for and selecting materials is an integral part of the engineering design process, teaching resourcefulness and creative problem-solving from the very beginning.
Remember, at I'm the Chef Too!, our goal is to blend learning with fun. Whether it's through a delicious baking experiment or an exciting engineering challenge like the balloon car STEM project, we believe in making education an engaging adventure. If you're looking for more exciting ways to spark curiosity, browse our complete collection of one-time kits! There's a whole world of discovery waiting for your child.
Building Your Dream Machine: A Step-by-Step Construction Guide
With your materials gathered and your design plan sketched out, it's time for the most exciting part: bringing your balloon car to life! This step-by-step guide will walk you through the general process, but remember, the beauty of a balloon car STEM project is the flexibility and creativity it encourages. Don't be afraid to deviate or experiment with your own brilliant ideas!
Pre-Work and Safety Reminders:
- Adult Supervision: As mentioned, an adult should always be present, especially when using sharp objects like scissors, hobby knives, or hot glue guns.
- Clear Workspace: Set up a clean, open area to work, protecting surfaces if using glue.
- Review Your Plan: Take a moment to look at your chosen design sketch. This will help guide your construction.
Step 1: Prepare the Car Body
Your car body needs to be sturdy enough to hold everything and provide a good base.
- Choose Your Body Material: Select your cardboard box, plastic bottle, or flat cardboard piece.
-
Cut (if necessary): If using a plastic bottle, you might want to cut off the top or bottom for a more open structure, or leave it intact for a contained design. For a cardboard box, you might cut it down to a desired size. For flat cardboard, decide on the shape and size of your chassis.
- Example: If using a plastic bottle, an adult can carefully use a hobby knife to cut a small, rectangular opening on the top for easier access later, or just use the bottle as-is.
- Consider Shape: Think about aerodynamics. A lower, sleeker body might reduce air resistance.
Step 2: Prepare and Attach the Axle Holders (Straws)
These straws will hold your axles and allow your wheels to spin. They act as simple bearings, reducing friction.
- Cut Axle Holders: Take two regular drinking straws. Cut them so they are slightly longer than the width of your car body. This ensures the wheels won't rub against the body.
-
Attach to Body: Using strong tape (like duct tape or packing tape), securely tape these two straws to the underside or sides of your car body.
- Crucial Tip: Ensure the straws are perfectly parallel to each other and perpendicular to the length of the car. If they are not parallel, your car will steer sideways! Imagine a simple rectangular body; tape one straw near the front and one near the back.
- Alternative: For a plastic bottle, you can poke small holes with a push pin or drill bit on opposite sides and thread the straws through, then tape them for extra security.
Step 3: Create the Axles and Wheels
This is where your car gets its ability to move!
- Cut Axles: Take your wooden skewers, pencils, or chopsticks. Cut two pieces that are slightly longer than your axle-holder straws. They need to extend out enough on each side to attach the wheels.
-
Prepare Wheels: If using bottle caps, an adult can carefully make a small hole in the exact center of each of the four caps using a push pin, small drill bit, or hobby knife. The hole should be snug for your chosen axle material (skewer, pencil). If using CDs or cardboard circles, ensure the center hole is appropriate for your axle.
- Tip: Centering the hole perfectly is critical for smooth, wobble-free wheel rotation.
-
Attach Wheels to Axles:
- Push one wheel (bottle cap, CD, etc.) onto one end of an axle (skewer/pencil).
- Thread the axle through one of the prepared straw axle holders on your car body.
- Push another wheel onto the other end of the axle.
- Repeat for the second axle and pair of wheels.
- Secure Wheels: The wheels need to be securely attached to the axle but loose enough that they don't rub against the car body. You can use a dab of hot glue (adult supervision!), a small piece of modeling clay, or even tightly rolled paper to create a "stopper" on the inside and outside of the wheel, preventing it from sliding off the axle while allowing it to spin freely. Make sure the wheels are spaced evenly and don't rub against the straws or the car body.
Step 4: Integrate the Balloon and Propulsion System
This is the power source for your balloon car!
-
Prepare the Balloon Straw: Take your flexible straw (or a regular straw if you don't have a bendy one).
- Crucial Connection: Insert the short end of the straw securely into the neck of your balloon.
- Seal it Tight: Tightly wrap a rubber band around the balloon's neck and the straw to create an airtight seal. You can also use strong tape for this, ensuring no air leaks. This seal is absolutely vital for efficient propulsion!
- Test for Leaks: Blow into the straw to inflate the balloon. If you feel air escaping anywhere other than the straw's open end, re-secure the connection.
-
Attach to Car Body:
- Option A (Through Body): If using a plastic bottle, an adult can cut a small hole in the top of the bottle, large enough for the straw. Press the free end of the straw through this hole and out the mouth of the bottle.
- Option B (Taped to Top/Side): For cardboard bodies or simpler designs, simply tape the balloon (with the attached straw) to the top or side of the car body.
- Straw Direction: Ensure the straw points directly backward, not downwards or sideways. The air escaping backward generates the forward thrust. Angle it slightly upward if needed to clear the ground. Use plenty of tape to secure the balloon and straw firmly to the car body. The balloon shouldn't wobble or sag.
Step 5: Final Adjustments and Initial Test
Almost ready for launch!
- Spin Test: Gently push your car. Do the wheels spin freely without wobbling? Does it roll smoothly? If not, adjust the axles, wheels, or axle holders. Make sure nothing is rubbing excessively.
- Inflation Test: Inflate the balloon fully through the straw. Cover the tip of the straw with your finger to hold the air in.
- The Moment of Truth: Place your balloon car on a smooth, flat surface. Release your finger from the straw and watch it go!
Don't be discouraged if your car doesn't perform perfectly on the first try! This is where the "Improve" stage of the engineering design process comes in. Every "failure" is a learning opportunity.
We at I'm the Chef Too! believe that learning from experience, making adjustments, and celebrating small victories are crucial. This hands-on process of building and refining is exactly what sparks curiosity and builds confidence. If your child loves hands-on challenges, they'll adore our themed kits. For instance, exploring chemical reactions has never been more fun than making our Erupting Volcano Cakes! It’s a delicious way to learn about states of matter and gases.
Testing and Troubleshooting: The Art of Iteration
The first launch of your balloon car is always exciting! But often, it's also just the beginning of the real learning. Few engineering designs work perfectly on the very first attempt, and that's not just okay – it's an essential part of the process. This phase, where you test, observe, and troubleshoot, is a powerful demonstration of the "Improve" stage of the engineering design process and truly exemplifies the resilience and critical thinking we aim to foster at I'm the Chef Too!.
The Initial Test Run:
Find a smooth, flat surface. Inflate your balloon fully by blowing through the straw, keeping your finger over the end of the straw to trap the air. Place the car gently on the ground, then remove your finger and observe!
- What happened? Did it move? How far? Did it go straight? Did it wobble? Did it just sit there?
- Encourage Observation: Ask your child what they saw. What did they notice? What did they expect to happen?
Common Challenges and Solutions (Troubleshooting Guide):
Here are some common problems you might encounter with your balloon car STEM project and practical ways to solve them, turning "failures" into learning moments:
-
The Car Doesn't Move at All (or Moves Very Slowly):
-
Possible Causes:
- Not Enough Air: The balloon wasn't fully inflated, or it's too small for the car's weight.
- Air Leak: The balloon-to-straw connection isn't airtight, so the air escapes before it can create thrust.
- Too Much Friction: Wheels are rubbing against the car body or axles, or axles aren't spinning freely within the straws. The car is simply "stuck."
- Car is Too Heavy: The body and components are too massive for the balloon's thrust to overcome.
-
Solutions:
- Inflate More/Larger Balloon: Try inflating the balloon completely. If still slow, try a larger balloon that can hold more air and generate more thrust.
- Check for Leaks: Re-secure the balloon-to-straw connection with more tape or a tighter rubber band. Ensure the straw is sealed into the balloon.
-
Reduce Friction:
- Make sure the axle-holder straws are wider than the axles and that the axles aren't bent.
- Ensure wheels aren't rubbing against the car body; you might need to adjust their spacing or trim the body slightly.
- A tiny drop of cooking oil or lip balm on the axles where they meet the straws can sometimes help.
- Lighten the Car: If your car is very heavy, consider swapping out some materials for lighter alternatives (e.g., a cardboard box instead of a plastic container).
-
Possible Causes:
-
The Car Moves, But Only in Circles or Doesn't Go Straight:
-
Possible Causes:
- Uneven Wheels/Axles: Wheels are not all the same size, or they are not attached perfectly centered on the axles, causing a wobble. Axles might not be parallel to each other.
- Thrust Not Straight: The straw expelling air isn't pointing directly backward; it's angled slightly to one side, pushing the car off course.
- Uneven Weight Distribution: The car's weight might be distributed unevenly, making one side heavier and causing it to pull in that direction.
-
Solutions:
- Check Wheel Alignment: Ensure all wheels are the same size and attached straight. Roll the car manually to see if any wheels wobble excessively.
- Parallel Axles: Double-check that your two axle-holder straws are perfectly parallel to each other. Use a ruler to measure the distance between them at the front and back.
- Align Thrust: Re-tape or adjust the balloon straw to ensure it points perfectly straight out the back. Use the flexible part of a bendy straw to adjust the angle precisely.
- Balance Weight: Add a small piece of clay or tape a coin to the lighter side of the car to balance its weight.
-
Possible Causes:
-
The Car Starts Strong, Then Stops Abruptly:
-
Possible Causes:
- Limited Air Supply: The balloon simply runs out of air quickly, and the car doesn't have enough momentum to keep going against friction.
- High Friction: The initial thrust overcomes the friction, but as the force diminishes, friction quickly brings the car to a stop.
- Obstacles: Something on the floor or a loose part is snagging the car.
-
Solutions:
- Optimize Friction: Review solutions for "Too Much Friction" above.
- Larger Balloon: Use a bigger balloon for a longer burst of air.
- Sleeker Design: Consider modifying the car body to be more aerodynamic, reducing air resistance.
- Check Clearance: Ensure no parts of the car (like the balloon itself or the straw) are dragging on the ground.
-
Possible Causes:
-
The Balloon Detaches or the Straw Pops Out:
-
Possible Causes:
- Weak Connection: The rubber band or tape wasn't strong enough to withstand the pressure of the inflated balloon.
-
Solutions:
- Stronger Seal: Use multiple rubber bands, or wrap tape more securely around the balloon's neck and straw. Consider adding a small dab of hot glue (adult supervision!) for a more permanent seal.
-
Possible Causes:
The Iterative Process:
The troubleshooting phase is not about perfection, but about learning and improvement. Each adjustment, each re-test, teaches your child valuable lessons about cause and effect, problem-solving, and the realities of engineering. It fosters a growth mindset, showing them that challenges are opportunities for learning, not reasons to give up. This iterative process is what real engineers do every day!
Just as we encourage experimentation in our cooking kits to understand ratios and textures, this balloon car STEM project emphasizes hands-on adjustments to optimize performance. It’s a fun, low-stress way to introduce complex scientific principles.
Ready to explore even more scientific wonders? Join The Chef's Club for a continuous stream of hands-on learning delivered right to your door! Our convenient monthly subscription with free shipping in the US ensures that the educational adventure never stops.
Beyond the Finish Line: Extending the Learning and Fun
Once your balloon car is zipping across the floor, the learning doesn't have to stop! The balloon car STEM project is incredibly versatile, offering numerous ways to extend the challenge and deepen the educational experience. These extensions turn a successful build into a full-fledged scientific investigation, reinforcing key concepts and encouraging further exploration, much like the diverse learning opportunities found in our I'm the Chef Too! kits.
1. The Great Race & Competition:
- Design a Race Course: Use masking tape to create a track on the floor. Add obstacles, ramps (explore potential and kinetic energy!), or target zones.
- Timed Trials: Use a stopwatch to time how fast the car travels a set distance (e.g., 5 feet). This introduces quantitative measurement.
- Distance Challenge: See whose car can travel the farthest. This often leads to optimizing for lower friction and greater thrust.
- Fair Play: To ensure a fair competition, standardize one variable, such as the size of the balloon, or the amount of tape allowed. This teaches about controlling variables in an experiment.
2. Experiment with Variables:
This is where the scientific method truly comes into play! Encourage your child to change just one thing at a time and observe the results.
- Balloon Size: Does a larger balloon (more air) make the car go farther or faster?
- Number of Balloons: What happens if you attach two or even three balloons? (Be careful not to add too much weight!)
- Straw Angle/Length: Does changing the angle or length of the exhaust straw impact performance?
- Wheel Size/Material: Do larger wheels make it faster? Do bottle caps perform better than CDs?
- Car Body Shape/Weight: How does adding weight affect distance or speed? Does a more aerodynamic shape reduce drag?
- Surface Type: Does the car perform differently on carpet versus a smooth floor? This demonstrates different levels of friction.
For each experiment, encourage recording observations (even simple drawings or notes) and discussing what they learned.
3. Quantitative Measurement and Data Collection:
Elevate the project by introducing more precise measurements:
- Measure Distance: Use a tape measure to accurately record how far each car travels.
-
Measure Speed:
- Mark a start and finish line. Use a stopwatch to time how long it takes the car to travel that distance. Speed = Distance / Time.
- For a more advanced challenge, some smartphone sensor apps can measure acceleration or even provide basic speed data.
- Graphing Results: Create simple bar graphs to compare results from different designs or experimental runs (e.g., "Distance Traveled with Small Balloon vs. Large Balloon"). This introduces data visualization.
4. Alternative Power Sources & Advanced Engineering:
- Rubber Band Cars: Challenge children to design a car powered by a wound-up rubber band. This introduces concepts of elastic potential energy.
- Sail Cars: Can they design a car powered by wind? This explores aerodynamics and wind energy.
- Gear Systems: For older children, introduce simple gears to connect a motor or hand crank to the wheels.
- Steering Mechanisms: Can they add a simple steering system to their car?
5. Connecting to Real-World Applications:
- Rockets and Jet Engines: Discuss how Newton's Third Law powers rockets into space and jet engines propel airplanes. Your balloon car is a miniature version!
- Hydraulics/Pneumatics: Talk about how compressed air (pneumatics) or compressed liquid (hydraulics) are used in real-world machinery like construction equipment or robotic arms.
- Automotive Engineering: Discuss how engineers design real cars for fuel efficiency (aerodynamics, lightweight materials) and smooth driving (suspension, low-friction parts).
These extensions turn the balloon car STEM project into a long-term learning experience, adapting to your child's growing curiosity and abilities. It's about empowering them to become independent thinkers and discoverers.
At I'm the Chef Too!, we craft experiences that blend academic concepts with hands-on fun. Just as the balloon car introduces physics, our kits explore other amazing STEM topics. For instance, kids can explore astronomy by creating their own edible solar system with our Galaxy Donut Kit, making learning about space truly out-of-this-world! And for a continuous supply of such engaging learning experiences, remember that convenience is key for busy families. Join The Chef's Club today for a new adventure delivered to your door every month with free shipping in the US! Our 3, 6, and 12-month pre-paid plans are perfect for gifting or long-term enrichment, ensuring a steady flow of "edutainment" that sparks creativity and fosters a love for learning.
Making it a Family Affair: Bonding Through STEM
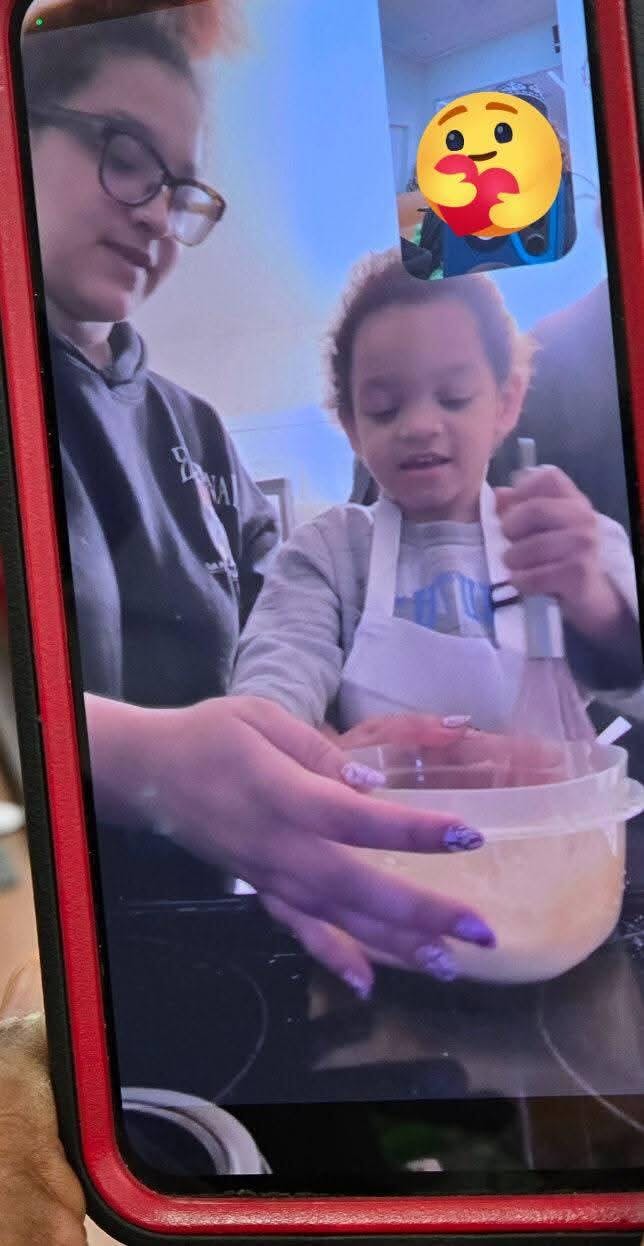
While the primary focus of the balloon car STEM project is undoubtedly educational, one of its most beautiful side effects is the incredible opportunity it provides for family bonding. In our increasingly busy lives, finding dedicated time for shared, screen-free activities can be a challenge. The balloon car activity offers a perfect solution, transforming learning into a collaborative adventure that strengthens relationships and creates lasting memories.
At I'm the Chef Too!, our mission extends beyond just teaching STEM concepts; we are deeply committed to facilitating family bonding. We believe that some of the most profound learning happens when parents and children work side-by-side, sharing laughter, overcoming challenges, and celebrating successes together. The balloon car STEM project exemplifies this philosophy beautifully.
Here's how to make it a truly enriching family affair:
- Collaborative Design: Instead of just giving instructions, involve your child in every step of the engineering design process. Sit together and brainstorm ideas (the "Imagine" phase). Let them lead the sketching (the "Plan" phase). Ask open-ended questions like, "What do you think will happen if...?" or "How can we make this part stronger?" This empowers them and values their input.
- Shared Roles: Delegate tasks appropriate for their age. A younger child might be responsible for gathering materials or decorating the car body, while an older child can handle more complex cutting (with supervision) or assembly. Working together on different parts fosters teamwork and a sense of shared ownership.
- Embrace the Mess (and the Learning!): There might be tape mishaps, glue spills, and designs that don't quite work. Instead of frustration, approach these moments with humor and a problem-solving mindset. "Oops, that wheel wobbled! What do you think we can do differently next time?" These shared challenges become opportunities for resilience and creative thinking.
- Celebrate Small Victories: Did the wheels spin smoothly? Did the car move even an inch? Celebrate every step of progress, not just the final outcome. High-fives, cheers, and genuine praise reinforce effort and encourage continued engagement.
- Storytelling and Reflection: After the building and testing, take time to talk about the experience. "What was your favorite part?" "What was the hardest part?" "What did you learn about how cars move?" This helps children articulate their discoveries and internalize the lessons.
- Document the Journey: Take photos or videos of the different stages of your build and the test runs. These visual memories become cherished mementos of your shared adventure in STEM.
The beauty of a family-led balloon car STEM project is that it's not about achieving a perfectly engineered vehicle; it's about the journey of discovery itself. It’s about the conversations, the shared giggles, the moments of mutual learning, and the unique memories you create together. It's about fostering a love for learning, building confidence in their abilities, and strengthening the bonds that truly matter.
At I'm the Chef Too!, we constantly strive to create experiences that deliver this blend of education and connection. We develop our unique cooking adventures with both mothers and educators, ensuring they are not only educational but also truly foster family togetherness. Whether it’s baking cookies or building a car, the goal is always to create a space for joyful, screen-free exploration.
If you're looking for ongoing inspiration to keep these invaluable moments flowing, we've got you covered. Join The Chef's Club today for a new adventure delivered to your door every month with free shipping in the US! Give the gift of learning that lasts all year with our 3, 6, and 12-month pre-paid subscriptions, and continue building those precious family memories, one exciting STEM project at a time.
The I'm the Chef Too! Connection: Where Learning is Delicious
At I'm the Chef Too!, our heart and soul are dedicated to creating "edutainment" experiences that blend the magic of food, the wonders of STEM, and the creativity of the arts. While a balloon car STEM project might not involve edible ingredients, it perfectly encapsulates our core mission and values. It’s about igniting curiosity, fostering creativity, and making complex subjects tangible and exciting for children.
Our unique approach, developed by mothers and educators, is rooted in the belief that children learn best when they are actively engaged, using their hands, and seeing immediate results. This is precisely why the balloon car STEM project resonates so deeply with our philosophy:
- Hands-On Discovery: Just as kneading dough teaches about gluten development, or measuring ingredients teaches fractions, building a balloon car teaches physics and engineering through direct, tactile experience. It's about doing, testing, and observing, rather than just reading.
- Sparking Curiosity: A child who understands why their balloon car moves (Newton's laws!) is more likely to ask "why" about other phenomena. This project cultivates that invaluable scientific mindset.
- Screen-Free Engagement: In a world saturated with digital distractions, we champion activities that pull children away from screens and into a world of physical creation and exploration. The balloon car is a fantastic example of high-quality, engaging screen-free fun.
- Problem-Solving & Resilience: When a recipe doesn't turn out perfectly, or a balloon car doesn't zoom as expected, children learn to troubleshoot, adjust, and try again. This iterative process builds resilience and critical thinking skills that are applicable in every aspect of life.
- Facilitating Family Bonding: Our kits are designed to bring families together in the kitchen, creating shared experiences and memories. Similarly, a balloon car project becomes a wonderful collaborative endeavor, fostering communication, teamwork, and laughter between parents and children.
We pride ourselves on offering unique educational adventures that are not only fun but also thoughtfully designed to teach core STEM concepts. Whether it's exploring states of matter with our Erupting Volcano Cakes or delving into astronomy with our Galaxy Donut Kit, we consistently aim to make learning an unforgettable and delicious journey.
The balloon car STEM project is a testament to the power of simple materials and big ideas. It’s a joyful reminder that some of the most profound learning experiences come from humble beginnings and a willingness to explore. It's a perfect complement to the kind of "edutainment" we provide.
Conclusion
We've journeyed through the exciting world of the balloon car STEM project, uncovering its scientific underpinnings, navigating the iterative engineering design process, and exploring creative ways to extend the learning. What started as a simple idea – making a car move with air – has blossomed into a rich tapestry of physics, problem-solving, creativity, and invaluable family bonding.
The balloon car STEM activity stands as a powerful testament to the idea that complex scientific and engineering principles are not confined to textbooks or laboratories. They are woven into the fabric of our everyday lives, waiting to be discovered through tangible, hands-on play. This project empowers children to become active participants in their learning, fostering critical thinking, resilience, and a deep, intrinsic curiosity about how the world works. It offers a wonderful, screen-free alternative that promises not just educational growth, but also joyful shared memories that will last a lifetime.
At I'm the Chef Too!, our mission is to continue bringing these kinds of inspiring "edutainment" experiences to families everywhere. We believe in sparking that natural wonder in children, transforming learning into an adventure that blends food, STEM, and the arts into unforgettable moments. We are committed to nurturing the next generation of curious minds, confident problem-solvers, and creative innovators, one delicious (or delightfully zippy!) project at a time.
Don't let the learning stop here! Keep the spark of curiosity and creativity alive in your home. Join The Chef's Club today for a new, exciting STEM cooking adventure delivered directly to your door every month with free shipping in the US! Choose from our flexible 3, 6, or 12-month pre-paid plans – perfect for ongoing enrichment or as a truly unique gift. Let's continue to build, learn, and create wonderful memories together!
FAQ: Your Balloon Car STEM Activity Questions Answered
We know you might have a few more questions as you embark on your balloon car STEM project journey. Here are some frequently asked questions to help you ensure a smooth and educational experience!
Q1: What is the best age range for a balloon car STEM project?
A1: This project is incredibly versatile and can be adapted for a wide range of ages, generally from 5 years old up to teenagers.
- Ages 5-7: Focus on the basic construction, the "action-reaction" principle, and the joy of seeing their creation move. Adult help will be significant for cutting and securing parts.
- Ages 8-12: Children can take on more of the design and construction independently, engage in troubleshooting, and begin experimenting with variables like balloon size or wheel types.
- Ages 13+: Teenagers can delve deeper into the physics (calculating speed, friction, aerodynamics), undertake more complex designs, and conduct rigorous experiments with data collection and analysis. For younger children, emphasizing safety and providing ample supervision for sharp tools is paramount.
Q2: What's the most common reason a balloon car doesn't move?
A2: The most common reasons a balloon car fails to move are usually related to excessive friction or air leaks.
- Friction: The wheels might be rubbing against the car body, or the axles might not be spinning freely within their straw holders. Make sure the axles are straight, the straws are wide enough, and nothing is binding.
- Air Leaks: The connection between the balloon and the straw is often the culprit. Ensure it's perfectly airtight with plenty of tape or a tight rubber band, so all the air is forced out the intended exhaust. A heavy car or an under-inflated balloon can also be factors, so ensure your car is as lightweight as possible and the balloon is fully inflated.
Q3: How can I make my balloon car go straighter?
A3: Getting a balloon car to travel in a straight line is a classic engineering challenge! The key is symmetry and alignment.
- Parallel Axles: Ensure your two axle-holder straws are perfectly parallel to each other. Use a ruler to measure the distance between them at both ends.
- Even Wheels: All four wheels should be the same size, securely attached, and spinning without wobbling. The holes for the axles in the wheels should be perfectly centered.
- Straight Thrust: The straw expelling air from the balloon must point directly backward, perfectly aligned with the car's direction of travel. Any slight angle will cause the car to veer off course. Use a flexible straw to fine-tune the angle.
- Balanced Weight: Ensure the car's weight is evenly distributed from side to side.
Q4: Can I use different materials for the car body, axles, or wheels?
A4: Absolutely! Experimenting with different materials is highly encouraged and is a fantastic way to engage with the engineering design process.
- Body: Try plastic containers, foam trays, paper plates, or even recycled food cartons. Each material has different weight and structural properties.
- Wheels: CDs, sturdy cardboard cut-outs, empty tape rolls, or even old toy wheels can work. Consider their diameter and weight.
- Axles: Pencils, chopsticks, or even metal wire (with adult supervision) are alternatives to wooden skewers. Just remember to consider how each material affects the car's weight, friction, and overall stability, and to adjust your design accordingly. This process of iteration is at the heart of what we teach at I'm the Chef Too!
Q5: How can I make the balloon car go farther?
A5: To maximize distance, focus on two main areas: increasing propulsion force and reducing resistance.
- Increase Propulsion: Use a larger balloon that can hold more air, providing more thrust for a longer duration. Ensure an airtight seal between the balloon and straw for efficient air expulsion.
- Reduce Friction: This is crucial. Make sure wheels spin freely on smooth axles, and that axles move smoothly within their straw holders. Minimize any rubbing between wheels and the car body. Consider a lighter car body and components (Newton's Second Law: less mass, greater acceleration for the same force).
- Reduce Air Resistance: Design a car body that is sleek and aerodynamic, reducing the drag from the air as it moves. A lower profile and smoother surfaces help.
Q6: Why is this considered a STEM project?
A6: It's a quintessential STEM project because it integrates all four components:
- Science: Explores Newton's Laws of Motion (action-reaction, inertia, F=ma), potential and kinetic energy, friction, and aerodynamics.
- Technology: While simple, the car is a basic technological device designed to perform a function.
- Engineering: Involves the full engineering design process (Ask, Imagine, Plan, Create, Improve) – from problem definition and brainstorming to building, testing, and redesigning.
- Math: Involves measurement (length, distance), potentially timing for speed calculations (speed = distance/time), and understanding concepts like proportionality (e.g., how wheel size affects distance per rotation). This holistic approach aligns perfectly with our "edutainment" mission at I'm the Chef Too!, where learning is always integrated and hands-on!
Q7: Where can I find more STEM activities for my child?
A7: We're thrilled you're eager for more STEM adventures!
- I'm the Chef Too! Website: Browse our extensive collection of one-time kits that blend cooking, science, and art into delicious educational experiences.
- The Chef's Club Subscription: For ongoing inspiration, convenience, and a fresh adventure delivered to your door every month with free shipping in the US, our subscription plans are the perfect solution for continuous learning and family fun!


")