Table of Contents
- Introduction
- The Unsung Hero of the Craft Box: Why Q-Tips?
- Beyond the Swab: The Educational Power of Q-Tip Crafts
- A Gallery of Q-Tip Craft Ideas for Every Little Learner
- Making it a Family Affair: Tips for Parents and Educators
- The I'm the Chef Too! Difference: Blending Fun, STEM, and Food
- Ready to Stir Up More Learning Fun?
- Frequently Asked Questions About Q-Tip Crafts for Kids
Introduction
Picture this: A quiet afternoon, a sprinkle of curiosity, and a humble cotton swab – an item often relegated to bathroom cabinets, suddenly transformed into a mighty tool for boundless creativity and learning. Who knew that these small, unassuming sticks could unlock a world of imagination for our children? Far from being just for cleaning, Q-tips are an unsung hero in the realm of kids' crafts, offering a fantastic pathway to developing crucial skills while having an absolute blast.
At I'm the Chef Too!, we believe that learning should always be an adventure, blending the magic of food, the wonders of STEM, and the joy of the arts into unforgettable "edutainment" experiences. Just as our unique cooking kits turn complex subjects into tangible, delicious discoveries, Q-tip crafts offer a similar hands-on approach to fostering curiosity and building foundational abilities. This post will delve deep into the incredibly diverse and educationally rich world of Q-tip crafts for kids. We'll explore how these simple tools can ignite fine motor skills, spark creativity, introduce early STEM concepts, and provide cherished moments of family bonding, all without the glare of a screen. Get ready to discover why Q-tip crafts are an indispensable addition to any child’s creative toolkit, transforming everyday items into extraordinary learning opportunities.
The Unsung Hero of the Craft Box: Why Q-Tips?
Before we dive into a sea of creative projects, let's take a moment to appreciate the humble Q-tip itself. Often overlooked, this common household item boasts a surprising array of qualities that make it an ideal crafting companion for children of all ages.
Accessibility and Affordability: Always On Hand
One of the greatest advantages of Q-tip crafts is their incredible accessibility. Most households already have a box (or several!) of cotton swabs tucked away. This means that when inspiration strikes, or when you need a quick, engaging activity to divert a restless child, your primary supply is likely just an arm's reach away. There's no need for a special trip to the craft store, no waiting for deliveries, just instant access to a world of creative potential.
Furthermore, Q-tips are remarkably affordable. Compared to specialized art supplies, a large box of cotton swabs represents a minimal investment, making them a budget-friendly option for ongoing creative exploration. This economic benefit allows for experimentation without worrying about wasted resources, encouraging children to freely explore ideas without pressure. Imagine being able to provide a fresh, engaging activity anytime, anywhere, simply by grabbing a handful of Q-tips and a few other common household items. This immediate gratification helps maintain a child's interest and prevents creative blocks often caused by waiting for supplies. It also removes a significant barrier for parents and educators who might be working with limited budgets, proving that enriching educational experiences don't always require expensive gadgets or elaborate setups. The sheer ubiquity of Q-tips means that spontaneous bursts of creativity are always possible, turning unexpected moments into valuable learning opportunities.
Safety and Size: Perfect for Little Hands
The design of a Q-tip is inherently child-friendly. Its slender stick and soft, cotton ends are perfectly sized for small hands to grasp, promoting a comfortable and natural hold. This ergonomic advantage is crucial for developing fine motor control without causing strain or frustration. Unlike larger paintbrushes or chunky markers that can sometimes feel unwieldy for preschoolers, Q-tips offer a delicate precision that empowers children to make controlled marks and manipulations. The thin handle encourages a developing tripod or pincer grasp, which are essential for pre-writing skills.
The soft cotton tips also make them inherently safer than many other craft tools. There are no sharp edges, and the risk of significant mess is often lower than with wide brushes or direct finger painting. While supervision is always key, particularly with younger children who might be inclined to put things in their mouths, the overall safety profile of Q-tips means less worry for parents and more freedom for children to explore. This safety aspect allows parents and educators to feel more at ease, letting children engage more independently in their creative pursuits. Moreover, the small size of the cotton tip means less paint or glue is picked up at once, reducing spills and making cleanup considerably easier – a bonus for any adult!
Versatility: Beyond the Ear Canal
While originally designed for hygiene, the craft potential of Q-tips is vast and exciting. They act as tiny paintbrushes, precise glue applicators, building blocks, threading tools, and even sensory objects. Their simple form belies their incredible capacity for transformation. This versatility makes them a fantastic open-ended material, encouraging children to think outside the box and discover new ways to use an everyday object.
For instance, a Q-tip can be dipped in paint to create intricate dot patterns, much like pointillism, or used for controlled lines and strokes. It can be snipped and inserted into clay to form a fuzzy sheep, or used as a delicate tool to pick up small embellishments like glitter or sequins. The rigid stick and soft ends also allow them to be used as miniature construction elements, providing a unique challenge for spatial reasoning. This adaptability is key to sparking creative problem-solving and allowing children to direct their own artistic journey, fostering innovation from a young age. They're not just for painting; they can be poked, threaded, built with, and even used for delicate glue application, opening up an entire world of tactile and visual exploration. This diverse functionality makes Q-tips an invaluable resource for countless craft projects, proving that sometimes, the simplest tools yield the most creative outcomes.
Beyond the Swab: The Educational Power of Q-Tip Crafts
At I'm the Chef Too!, we're passionate about making learning an exciting, hands-on adventure. Our cooking STEM kits are carefully designed by mothers and educators to spark curiosity and creativity, teaching complex subjects through tangible, delicious experiences. In much the same way, Q-tip crafts, though simple, are packed with profound educational benefits that align perfectly with our mission to provide screen-free educational alternatives and facilitate family bonding. Let's explore the diverse skills these tiny tools help nurture.
Fine Motor Skill Fiesta: Precision in Every Dot
One of the most celebrated educational benefits of Q-tip crafts is their exceptional ability to develop fine motor skills. These are the small muscle movements that rely on coordination between the brain and hands, crucial for tasks like writing, buttoning clothes, and using utensils. The precise control required for Q-tip activities directly translates to greater dexterity and independence in daily life.
- Pincer Grasp Development: Holding a slender Q-tip naturally encourages the development of a pincer grasp – the precise grip between the thumb and forefinger. This foundational skill is vital for future handwriting, cutting with scissors, and manipulating small objects with control. As children practice dipping the Q-tip into paint or glue and then applying it, their finger muscles strengthen and gain greater control. This repetitive, focused movement helps solidify the neural pathways necessary for intricate hand movements.
- Hand-Eye Coordination: Whether a child is carefully placing a dot within a specific area, connecting Q-tips to build a structure, or threading beads onto a Q-tip stem, these activities demand acute hand-eye coordination. They learn to visually guide their hand movements, improving precision and accuracy. This skill is critical for everything from catching a ball to reading and writing, as it helps the brain integrate visual information with motor responses.
- Pre-Writing Skills: The controlled movements involved in Q-tip painting, especially when tracing lines, letters, or shapes, are fantastic precursors to formal writing. Children learn about pressure control, directionality (left-to-right, top-to-bottom), and forming enclosed spaces, all without the initial frustration often associated with holding a pencil. The repetitive motion can also help build muscle memory in their hands, preparing them for the rigors of formal schooling. It's a playful introduction to the fundamentals of penmanship.
- Bilateral Coordination: Many Q-tip crafts require the use of both hands simultaneously – one hand holding the paper steady, the other manipulating the Q-tip. This bilateral coordination is essential for a myriad of daily tasks, such as tying shoes, cutting with scissors, or even using a knife and fork. It helps integrate the left and right sides of the brain, improving overall motor planning and efficiency.
- Developing an Open Webspace: Occupational therapists often advocate for Q-tip activities because they naturally encourage an open webspace (the curve between the thumb and index finger), which is a key indicator of an efficient pencil grasp. The length of a Q-tip (or even a half Q-tip) helps children maintain this optimal hand posture, preventing cramping and promoting endurance when writing or drawing.
Just as our I'm the Chef Too! kits guide children through the precise measurements, stirring, and decorating needed to create delicious masterpieces, Q-tip crafts offer a complementary avenue for honing these vital fine motor skills. Whether they're carefully piping frosting onto a cupcake or meticulously dabbing paint with a Q-tip, the underlying skill development is remarkably similar, laying a strong foundation for future academic and life success.
Sensory Exploration: A Tactile Journey
Beyond fine motor refinement, Q-tip crafts offer a delightful sensory experience. For many children, engaging multiple senses enhances learning and helps them feel more connected to the activity, especially those who learn best through tactile exploration.
- Texture: The soft, slightly fuzzy cotton tip against various surfaces (paper, clay, fabric) provides unique tactile input. When dipped in paint, it creates a unique dabbing sensation and visual texture that differs significantly from a brush stroke or finger painting. This varied sensory input is crucial for developing sensory discrimination and can be very grounding for some children.
- Process Art: Q-tip painting, in particular, lends itself beautifully to process art, where the emphasis is on the journey of creation rather than solely on the final product. This focus on the sensory experience of making art—the feel of the Q-tip, the vibrant colors, the repetitive motion—can be incredibly calming and satisfying. It removes the pressure of producing a "perfect" outcome, allowing children to freely explore and enjoy the act of creation itself.
- Calming Activity: The repetitive motion of dot painting or carefully placing Q-tips can be surprisingly meditative. This focused attention can help a child regulate their emotions, reduce anxiety, and develop concentration skills, making it an ideal screen-free alternative for a moment of quiet engagement. For children who are easily overstimulated, the controlled and repetitive nature of Q-tip crafts can be a wonderful way to find a sense of calm and focus. It provides a structured yet creative outlet for their energy.
Igniting Creativity and Imagination: From Blanks to Brilliance
Q-tip crafts are a powerful catalyst for imagination, offering a blank canvas for children to express their unique ideas and tell their own stories. This encouragement of creative thought is vital for problem-solving and innovation in all areas of life.
- Open-Ended Play: Many Q-tip activities are inherently open-ended, meaning there's no single "right" way to do them. This freedom encourages children to experiment, make choices, and develop their own artistic style. Instead of merely copying, they're inventing, leading to a deeper sense of ownership and accomplishment. This type of play is crucial for developing divergent thinking and self-expression.
- Storytelling: A simple Q-tip painting can become a scene from a favorite book, a representation of a fantastical creature, or a map to an imaginary land. As children create, they often narrate, weaving stories around their artwork, further developing language and cognitive skills. This blend of visual art and narrative enriches their imaginative world and strengthens communication abilities.
- Color Mixing and Composition: Using Q-tips with different colors of paint provides a hands-on introduction to color theory. Children can experiment with blending dots, creating new hues directly on the paper, and understanding how colors interact. They also learn about composition, deciding where to place elements to create a balanced or dynamic image, understanding how different arrangements evoke different feelings or tell different parts of a story. This foundational artistic knowledge can inspire a lifelong appreciation for visual arts.
Early STEM Connections: Learning Through Play (The I'm the Chef Too! Way!)
At I'm the Chef Too!, our core mission is to blend food, STEM, and the arts. While Q-tip crafts might not involve edible creations, they are surprisingly rich in opportunities to introduce early STEM concepts in an accessible and engaging way. They lay foundational knowledge, much like how our Erupting Volcano Cakes Kit introduces chemistry through a delicious, bubbling reaction, or how our Galaxy Donut Kit explores astronomy through edible celestial bodies.
-
Science Explorations:
- Absorption: Children observe firsthand how the cotton tip absorbs paint or water, a simple yet powerful demonstration of capillary action and material properties. They can experiment with different amounts of liquid to see how it affects the Q-tip's capacity.
- Texture and Properties: Exploring how different materials (paper, felt, clay) interact with Q-tips and various paints or glues. They might notice that paint absorbs differently on rough paper versus smooth, or how Q-tips can create unique textures on clay.
- Cause and Effect: Understanding that applying different amounts of pressure or using varying quantities of paint creates different visual effects, teaching basic physics in action. What happens if I use more paint? Less pressure? These simple experiments build scientific observation skills.
-
Engineering Principles:
- Construction: When using Q-tips as building blocks (e.g., for skeletons, snowflakes, or small structures), children engage in basic engineering. They consider balance, stability, and how to connect parts to form a cohesive, standing whole. This involves trial and error, a cornerstone of engineering design.
- Problem-Solving: Figuring out how to make a Q-tip stand up in clay without falling over, or how to create a sturdy frame for a 3D object. These challenges develop critical thinking and spatial reasoning.
-
Artistic Design: (Often integrated into STEM as STEAM)
- Color Theory: Mixing primary colors to create secondary ones with Q-tip dots on paper. Children see color transformations happen right before their eyes.
- Composition: Arranging elements on a page to create a pleasing image, understanding visual balance and focal points.
- Form and Texture: Using dots to create the illusion of texture, like the fuzzy wool on a Q-tip sheep, or depicting movement and depth.
-
Mathematical Concepts:
- Patterns: Creating repetitive designs with Q-tip dots, introducing concepts of sequences, repetition, and symmetry. This lays the groundwork for understanding algebraic thinking.
- Shapes: Forming letters, numbers, and geometric shapes by connecting dots or arranging Q-tips. This reinforces shape recognition and understanding of geometric properties.
- Counting: Counting the number of dots used, grouping them, or comparing quantities, building fundamental numeracy skills.
- Spatial Reasoning: Arranging Q-tips to build 2D or 3D objects helps children understand spatial relationships, how objects fit together, and concepts like "above," "below," "next to," which are crucial for geometry and problem-solving.
These early exposures to STEM concepts through playful, hands-on activities are incredibly valuable. They foster a love for discovery and critical thinking, mirroring the approach we champion at I'm the Chef Too! When your child is ready to explore even more intricate STEM concepts with a delicious twist, remember that The Chef's Club delivers a new adventure directly to your door every month, packed with pre-measured ingredients and specialty supplies for hassle-free learning!
A Gallery of Q-Tip Craft Ideas for Every Little Learner
The versatility of Q-tips means there's a craft for every interest and skill level. From simple dot painting to intricate constructions, these tiny tools can lead to truly wonderful creations. Let's explore some fantastic Q-tip craft ideas that promise hours of engaging, screen-free fun.
The Art of the Dot: Q-Tip Painting Extravaganza
Q-tip painting is perhaps the most popular and accessible Q-tip craft, and for good reason! It’s an excellent way to practice fine motor skills and offers a unique aesthetic, often compared to pointillism. The controlled dabbing motion is both satisfying and skill-building.
-
Basic Dot Painting Techniques:
- Materials: Q-tips, washable tempera or acrylic paint (small amounts in a palette, old egg carton, or shallow dishes), heavy paper or cardstock to prevent buckling.
- Method: Dip one end of a Q-tip into a color of paint and press it onto the paper to create a dot. Experiment with different pressures for varying dot sizes and intensities. Encourage children to use one Q-tip per color to keep paints vibrant, or embrace color mixing by gently dabbing different colors on the same tip or on the paper. This allows for experimentation with hues.
- Skill Focus: Pincer grasp, hand-eye coordination, concentration, color recognition and discrimination, understanding cause and effect.
- Tips: Use thick paper (like watercolor paper or cardstock) to prevent the paint from soaking through or making the paper ripple. Start with large areas to fill before moving to more detailed work, allowing for gradual skill progression. Keep a damp cloth nearby for quick cleanup.
-
Templated Art: Bringing Pictures to Life with Dots:
- Materials: Printable templates (letters, numbers, shapes, animals, seasonal images), Q-tips, various paint colors.
- Method: Print out a template with outlines or pre-drawn dots that children can fill in. Children use their Q-tip and paint to meticulously fill in the designated spaces. This is particularly effective for teaching letter formation, number recognition, or identifying shapes. For example, a child could use vibrant green dots to fill in a shamrock template for St. Patrick's Day, or red and blue dots for a firework celebration scene.
- Skill Focus: Following instructions, pattern recognition, spatial awareness (understanding boundaries), fine motor control, early literacy and numeracy.
- Examples: Alphabet dot pictures (A-Z, both uppercase and lowercase), 2D shape formation mats (rectangle, circle, star, octagon), seasonal themes (fall leaves, winter snowflakes, summer ice creams, spooky Halloween scenes, festive Christmas ornaments). These templates also make learning name recognition a joyful experience, with editable name mats where kids can build the letters of their own name using Q-tip dots!
- Extension: After filling in a template, encourage children to add their own freehand dots around the main image, creating a personalized background, additional details, or even an abstract border.
-
Story-Based Painting: Illustrating Adventures:
- Materials: Q-tips, paint, paper, a favorite storybook or a creative prompt (e.g., "Imagine a forest at night," or "What would a friendly dragon look like?").
- Method: Read a story aloud, then ask children to choose a scene, character, or emotion from the story to illustrate using Q-tip dots. This encourages comprehension, visual storytelling, and imaginative interpretation. For instance, after reading about a starry night, they could create a galaxy of swirling Q-tip dots, depicting the constellations or individual stars.
- Skill Focus: Imagination, narrative skills, visual interpretation, fine motor control, emotional expression through art.
-
Abstract Art: Freeform Expression:
- Materials: Q-tips, various paint colors, a large piece of paper.
- Method: Simply let children experiment with dots, lines (by dragging the Q-tip), and patterns without any specific subject in mind. Encourage them to explore how colors blend when dotted side-by-side, how different pressures create different effects, and the sheer joy of spontaneous creation. This process-focused art can be incredibly liberating and fosters pure self-expression.
- Skill Focus: Creativity, self-expression, understanding cause and effect, sensory exploration, artistic composition, emotional release.
Looking for more ways to spark creativity and develop these same essential skills in a culinary context? Our one-time kits offer a fantastic range of themed culinary adventures, from building edible structures to crafting delicious art, all available for a single purchase in our shop! They provide the perfect next step for curious hands and minds.
Building with Buds: Constructive Q-Tip Crafts
Beyond painting, Q-tips can be excellent building materials, challenging children to think in three dimensions and apply basic engineering principles. These crafts help develop spatial reasoning and problem-solving abilities.
-
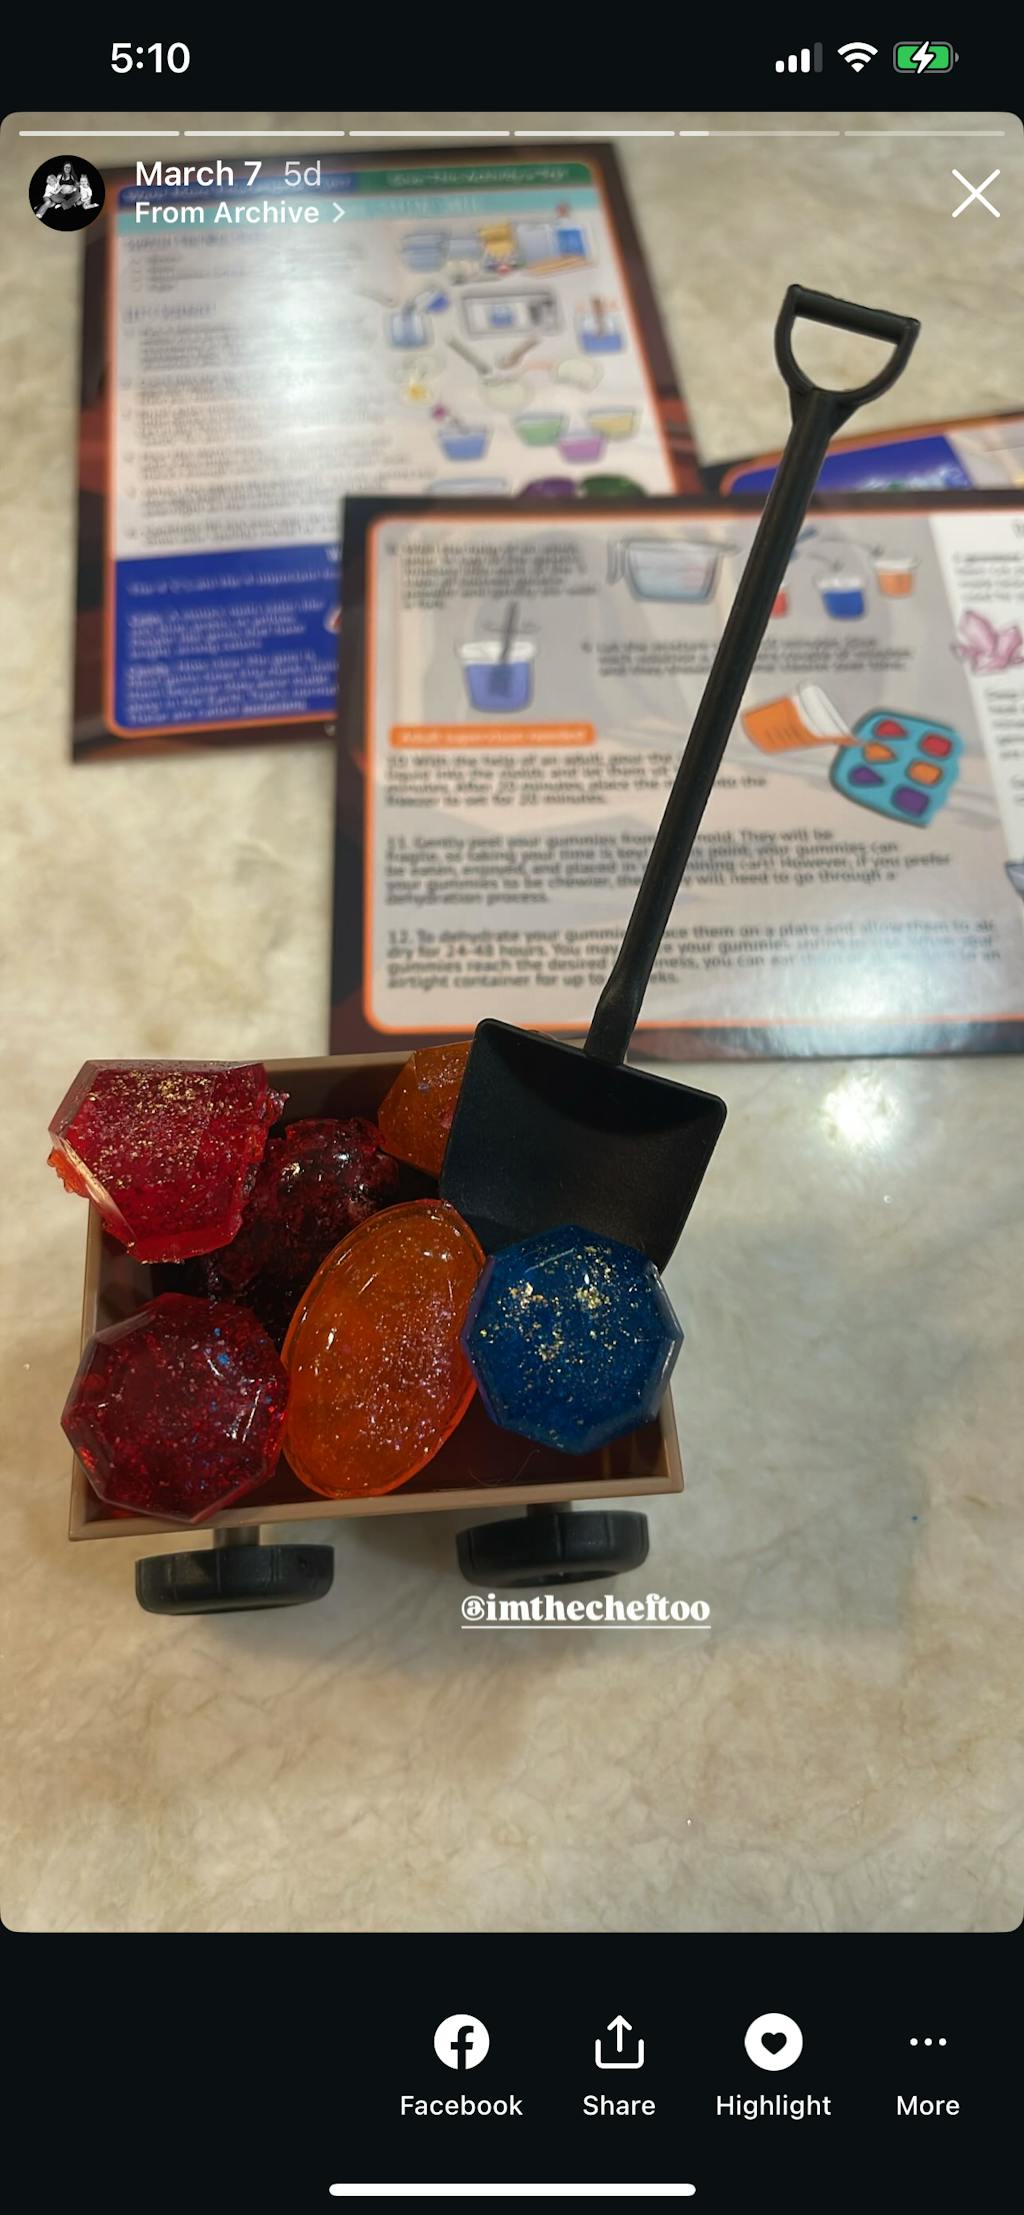
Fuzzy Sheep Craft: This is a classic, irresistibly cute Q-tip creation that combines several fine motor skills.
- Materials: A generous supply of Q-tips, a small ball of air-dry clay (or homemade playdough), felt or foam paper in black or brown for the head and ears, googly eyes, craft glue (a low-temp hot glue gun can be used by an adult for faster setting), scissors.
-
Method:
- Prepare Q-tips: Cut several Q-tip ends, leaving about a ¼ inch of the stem still attached to the cotton tip. These will be the "wool." Cut four full Q-tips in half, these will serve as the sheep's wobbly legs.
- Form the Body: Roll the clay into a compact, approximately 1-2 inch ball. This will be the sheep's body.
- Create Wool: Begin inserting the short Q-tip pieces (cotton-end first) into the clay ball until the entire surface is covered, creating a fluffy, "woolly" texture. Ensure they are inserted securely.
- Make the Head: Cut an oval shape from the felt or foam paper for the head. Add some "fuzzy hair" by layering and gluing a few small, cloud-shaped felt pieces to the top of the head. Cut two small Q-tip ends (the cotton parts) and glue them to the sides of the head for ears.
- Add Face and Legs: Attach googly eyes to the head. Carefully insert the four Q-tip half-pieces into the bottom of the clay body for legs, ensuring the sheep can stand stably.
- Assemble: Once the clay body is filled and the head details are complete, use craft glue to attach the head onto the body. Let dry completely before playing.
- Skill Focus: Fine motor cutting, sculpting with clay, spatial reasoning, following multi-step instructions, creativity, understanding balance and stability.
- Extension: Experiment with different animal shapes. For instance, a porcupine could be made by poking Q-tip quills into a playdough body, or a spider by adding eight Q-tip legs to a round playdough body.
-
Skeleton Art: Perfect for learning about the human body, exploring anatomy, or for a spooky Halloween craft!
- Materials: Black construction paper (or any dark color for contrast), white Q-tips (whole or cut to size), craft glue, a white crayon or chalk for drawing outlines.
- Method: Lightly draw a simple human skeleton outline (or specific bones like a rib cage or a hand) on the black paper. Children then use Q-tips to mimic bones, cutting them to fit the approximate lengths of limbs, ribs, and other skeletal structures. They glue the Q-tips onto the outline, creating a fascinating 2D representation.
- Skill Focus: Basic anatomy, cutting, spatial arrangement, fine motor precision, problem-solving (fitting pieces together), understanding structure.
-
Snowflake Structures: These crafts beautifully introduce concepts of geometry and symmetry.
- Materials: White Q-tips, craft glue, construction paper (blue or black works well for contrast), glitter (optional) for an extra sparkly effect.
- Method: Children arrange whole or cut Q-tips into intricate snowflake patterns, gluing them down onto paper. They can create symmetrical designs by mirroring Q-tip placement, layer Q-tips for 3D effects, or even cut Q-tips into smaller pieces for more detailed "ice crystals" at the ends of branches.
- Skill Focus: Geometry, symmetry, pattern recognition, fine motor control, creativity, understanding radial design.
-
Houses and Buildings:
- Materials: Q-tips, craft glue, cardboard squares (for bases), small pom-poms or beads (for decorations or connecting points), scissors.
- Method: Using glue, children can construct simple 2D or 3D structures by carefully joining Q-tips. They can create fences, walls, or even rudimentary houses, practicing balance, structural integrity, and architectural design principles on a miniature scale. They might need to hold pieces in place until the glue dries, or use clips.
- Skill Focus: Engineering concepts (structure, stability), spatial reasoning, problem-solving, fine motor dexterity, patience, planning.
For kids who love to build and explore scientific reactions, our Erupting Volcano Cakes Kit provides a thrilling edible engineering experience, where they construct a delicious volcano and then witness a chemical reaction that makes it bubble over! It’s the perfect blend of building and science, much like these Q-tip construction challenges.
Sensory & Exploratory Q-Tip Activities
Some Q-tip activities focus less on creating a specific outcome and more on the process of manipulation and sensory input, which is incredibly beneficial for development, particularly for strengthening hand muscles and improving precision.
-
Threading and Lacing:
- Materials: Q-tips, various items with holes like pony beads, pasta (e.g., ditalini or penne), cheerios, or even bread bag ties.
- Method: Children carefully thread beads or other items onto the stem of a Q-tip. This activity is excellent for developing concentration, very precise fine motor skills, and hand-eye coordination. It requires a gentle touch and careful manipulation.
- Skill Focus: Fine motor control, bilateral coordination, concentration, visual perception, sorting (if using different colored beads).
-
Q-Tip Poking and Posting: This activity is a favorite among occupational therapists for developing hand strength and precision.
- Materials: Q-tips (cut in half can be easier to stabilize for younger children), an upturned kitchen colander, an old spice jar with holes, a styrofoam block, a plastic container with holes poked in the lid, or an egg carton.
- Method: Children poke or "post" the Q-tips into the holes of the chosen item. This simple action significantly strengthens the small muscles in their hands and reinforces the pincer grasp. It can be a very calming, repetitive activity.
- Skill Focus: Hand strength, pincer grasp, precision, focus, dexterity.
-
Playdough Creations with Q-Tips:
- Materials: Playdough (homemade or store-bought), Q-tips.
- Method: Use Q-tips to add intricate details to playdough creations. For example, add realistic spikes to a playdough porcupine, create delicate spider legs, or make "feathers" for a playdough turkey. The act of inserting the Q-tips into the dough requires control and varying pressure, adding another layer to sensory play.
- Skill Focus: Creativity, fine motor control, imaginative play, sensory exploration, understanding texture and form.
-
Marble or Pom-Pom Mazes: This combines engineering, problem-solving, and fine motor skills.
- Materials: Q-tips, contact paper (sticky side up) or heavy cardboard, marbles or pom-poms, craft glue (if using cardboard), scissors.
- Method: Children arrange Q-tips on a sticky surface (like contact paper) or glue them to cardboard to create walls for a maze. They then navigate a marble or pom-pom through their self-designed path, testing their engineering.
- Skill Focus: Problem-solving, spatial reasoning, planning, fine motor manipulation, understanding physics (gravity, friction).
- Extension: Make the maze on a larger scale and challenge kids to design increasingly complex routes with dead ends and multiple paths. Time them to see how fast they can complete it.
-
Water Painting on Chalkboards: A simple, mess-free way to explore temporary art.
- Materials: Q-tips, a chalkboard or dark slate, a small cup of water.
- Method: If there's some chalk dust residue on the board, Q-tips dipped in water can create temporary "paintings" by reactivating the chalk. Alternatively, simply "draw" with water on a clean chalkboard to see the temporary dark marks appear and then disappear as the water evaporates.
- Skill Focus: Sensory exploration, temporary art, understanding evaporation (basic science), fine motor control, observation.
Themed Adventures with Q-Tips: Sparking Imagination for Every Occasion
Q-tip crafts are incredibly adaptable to various themes, making them perfect for reinforcing learning about seasons, holidays, or specific subjects. These activities provide a wonderful opportunity to tie creative play into what your child is learning or experiencing in their world.
-
Seasonal Celebrations:
- Fall: Create vibrant fall trees by dotting red, orange, and yellow paint onto brown tree outlines. Make Q-tip corn on the cob by filling in an ear of corn template, or depict a sprawling pumpkin patch.
- Winter: Design intricate Q-tip snowflakes on dark paper, dot white paint on blue paper for a beautiful snowy scene, or create Q-tip "snowmen" by gluing cotton swabs onto stacked paper circles.
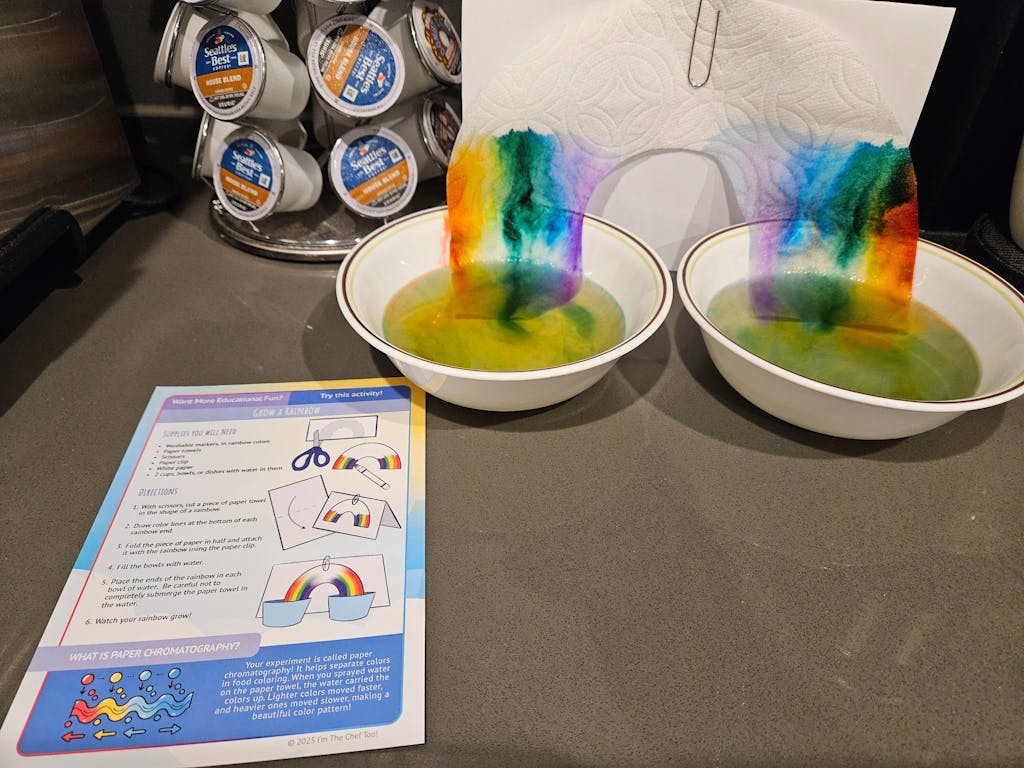
- Spring: Dot paint beautiful Q-tip flowers with multicolored petals, buzzing bees with striped bodies, or even a vibrant rainbow after a spring shower, exploring color order.
- Summer: Create colorful firework displays by splaying Q-tip ends and dipping them in multiple colors, or dot paint lively beach scenes with bright suns, ocean waves, and tiny beach balls.
-
Animal Kingdom Fun:
- Farm Animals: Beyond the fuzzy sheep, use Q-tips to create spotted cows, textured feathers on chickens, or even the distinct snouts of pigs by dotting pink paint.
- Ocean Creatures: Dot paint vibrant scales on fish, create the textured surface of a starfish, or make the intricate, flowing patterns on a jellyfish. You can even dot paint a whole coral reef scene!
- Bugs: Use Q-tip dots to make the characteristic spots on a ladybug, the segmented body of a caterpillar, or the intricate, veined wings of a butterfly.
-
Holiday Cheer:
- Valentine's Day: Dot paint hearts in various shades of red and pink, make personalized cards with Q-tip messages, or create adorable "love bug" characters.
- St. Patrick's Day: Paint lucky shamrocks, shimmering pots of gold at the end of a rainbow, or cheerful leprechaun hats with green Q-tip dots.
- Halloween: Craft spooky spider webs with fine Q-tip lines, dot paint jack-o'-lantern faces, or create ghostly figures that seem to float across the page.
- Christmas: Decorate paper ornaments with intricate Q-tip dots, create festive scenes like Santa's workshop, or make Q-tip "snow" falling gently on a winter drawing.
These themed Q-tip adventures can tie into broader educational themes. For example, if your child is learning about the solar system, they could dot paint planets or create their own starry night sky, reinforcing astronomical concepts. This seamlessly connects play with learning, a principle we cherish at I'm the Chef Too! If your little astronomer or character-loving chef is ready for more, explore our Galaxy Donut Kit for an edible journey through space, or dive into playful baking with our Peppa Pig Muddy Puddle Cookie Pies! These kits offer a similar blend of creative play and educational engagement, but with the added delicious reward!
Making it a Family Affair: Tips for Parents and Educators
Engaging in Q-tip crafts with children is more than just an activity; it's an opportunity for connection, shared laughter, and meaningful learning. It's about building memories and fostering a love for discovery in a supportive environment. Here are some tips to make the experience enjoyable and enriching for everyone involved, whether you're a parent at home or an educator in a classroom setting.
Setting Up a Stress-Free Craft Zone
- Gather Your Supplies in Advance: Before you begin, have all your materials readily accessible: Q-tips (plenty!), paints, glue, paper, any chosen templates, and other embellishments like googly eyes or small beads. Small dishes, an old muffin tin, or a paint palette are perfect for dispensing small, manageable amounts of paint for easy dipping. This minimizes interruptions and keeps the creative flow going.
- Protect Your Surfaces: Lay down newspaper, an old tablecloth, a dedicated craft mat, or even a cut-open paper bag to protect your table and surrounding area from accidental spills or splatters. Even washable paints can sometimes leave a trace, and a little preparation goes a long way in reducing cleanup stress.
- Dress for Mess: Encourage children to wear old clothes or a smock, apron, or an oversized old T-shirt. Part of the fun of crafting is not worrying about getting a little paint or glue on oneself. Setting this expectation beforehand allows children to relax and fully immerse themselves in the creative process without fear of ruining their clothing.
Encouraging Exploration, Not Perfection
- Focus on the Process, Not Just the Product: Remember, the primary goal of these activities is not to create a museum-worthy masterpiece, but to foster curiosity, develop skills, and enjoy the creative process itself. Praise effort, experimentation, and unique ideas rather than just the final outcome. The journey of creation holds more value than the end result.
- Open-Ended Invitations: Instead of giving rigid instructions like, "Draw a house with dots," try phrasing it as an open-ended invitation: "What kind of house could you build with these Q-tips?" or "What story does your Q-tip painting tell?" This encourages imaginative thinking, self-direction, and allows children to make their own artistic choices, fostering their unique voice.
- Embrace the "Mistakes": If a child perceives they've made a "mistake," encourage them to see it as an opportunity to change direction, add a new element, or learn something new. Reframe it by saying, "That's an interesting turn! What could we do with that?" There are no true mistakes in creative expression, just unexpected outcomes that can lead to even more exciting discoveries.
Adapting for Age and Skill Level
Q-tip crafts are wonderfully adaptable for various age groups, allowing for differentiated learning and engagement:
- Toddlers (1-3 years): For the youngest crafters, focus on large movements and sensory exploration. Offer large paper and a few primary colors of washable paint. Let them dab freely, exploring the texture and color. Supervise closely to ensure Q-tips aren't ingested. The goal here is exposure and sensory input.
- Preschoolers (3-5 years): Introduce simple templates (large shapes, big letters), encourage basic pattern-making (e.g., alternating colors), and try basic constructive crafts like the fuzzy sheep. They can start experimenting with more colors and discussing their creations, beginning to link their art to ideas.
- School-Aged Kids (6+ years): Challenge them with more intricate templates, complex patterns (like mandalas or mosaics), or multi-step constructive projects. Encourage them to design their own templates or create detailed scenes with narratives. Introduce more refined skills like threading beads onto Q-tips or designing small Q-tip mazes.
Safety First: Supervision and Non-Toxic Materials
- Always Supervise: While Q-tips are relatively safe, adult supervision is always essential, especially with younger children who might put things in their mouths. Always remain present and attentive during craft time.
- Non-Toxic Materials: Ensure all paints, glues, and other craft supplies are clearly labeled as non-toxic and child-safe. This is a non-negotiable safety measure for any children's activity.
Cleaning Up: Part of the Learning Process
- Involve Children: Make clean-up an integral part of the activity. Teach them to wipe down surfaces, put lids back on paints, dispose of used Q-tips, and organize supplies. This fosters responsibility, develops life skills, and reinforces the idea that every activity has a beginning and an end.
- Positive Reinforcement: Thank them for helping and acknowledge their contribution, reinforcing that cleaning up is just as important as the creating. This builds good habits for the future.
Just like in our I'm the Chef Too! kitchen, where every step from measuring to mixing to cleaning up is part of the learning adventure, these Q-tip crafts provide a holistic experience. We champion moments of screen-free family fun and educational discovery, and these simple crafts are a perfect fit. And when you're ready for more guided, delicious STEM adventures that arrive conveniently at your door, our monthly Chef's Club Subscription offers endless opportunities for family bonding and joyful learning!
The I'm the Chef Too! Difference: Blending Fun, STEM, and Food
You've seen how a simple Q-tip can open doors to incredible learning and creativity, fostering essential skills and sparking joy. At I'm the Chef Too!, our mission is to take this spirit of hands-on discovery and elevate it into a truly unique "edutainment" experience, blending food, STEM, and the arts in a way that truly captivates children.
Our founder mothers and educators recognized the immense power of tangible, multi-sensory learning. They saw that when children engage with their hands, minds, and even their taste buds, complex subjects become approachable, memorable, and incredibly fun. That's why we meticulously design each of our cooking STEM kits to spark curiosity and creativity, much like the imaginative Q-tip crafts we've explored today. We are committed to fostering a love for learning that extends beyond a single activity, integrating academic concepts into real-world, delicious projects.
Think about it:
- The fine motor skills a child develops while carefully dot painting with a Q-tip are precisely the same muscles they’ll strengthen when measuring flour, stirring batter, piping frosting, or decorating a cupcake in one of our kits. These foundational dexterous movements are transferable and invaluable.
- The early STEM connections made by building a Q-tip skeleton, creating intricate patterns, or experimenting with textures translate directly to the scientific reactions (like our Erupting Volcano Cakes Kit, where children learn about acid-base reactions through delicious bubbling lava) or mathematical measurements involved in baking a delicious treat. Our kits make these concepts tangible and exciting.
- The creativity and problem-solving encouraged by open-ended Q-tip art find a new, delicious medium in designing an edible landscape, crafting a galaxy of donuts with our Galaxy Donut Kit, or decorating a themed cookie with our unique specialty supplies. We provide the tools and inspiration, allowing children to personalize their edible creations.
We believe in providing screen-free educational alternatives that truly engage the whole family. Our kits aren't just about making food; they're about fostering a love for learning, building confidence through successful creations, developing key life skills, and creating those precious moments of family bonding around a shared activity. Each box is a complete adventure, designed for convenience with pre-measured dry ingredients and specialty supplies, taking the stress out of planning and prep. This means more quality time focusing on the fun and learning, rather than scrambling for ingredients.
Just as a Q-tip invites open-ended exploration, our kits invite children to embark on culinary journeys, transforming them into "chefs" and "scientists" simultaneously. We don't suggest guaranteed educational outcomes like "your child will become a top scientist," but we do guarantee they'll develop critical thinking, expand their vocabulary, build practical skills, and, most importantly, have an absolute blast. The goal is to nurture a lifelong love of discovery and empower them with confidence through these joyful, hands-on experiences, proving that learning can indeed be delicious!
Ready to Stir Up More Learning Fun?
From the delicate dabs of Q-tip painting to the inventive constructions built with cotton swabs, it's clear that these simple tools offer an extraordinary playground for childhood development. They teach precision, ignite imagination, and subtly introduce the foundational principles of STEM and art, all within a framework of joyful, hands-on exploration. We’ve seen how accessible, affordable, and incredibly versatile Q-tip crafts are, making them a fantastic addition to any family's routine for screen-free engagement and skill-building.
Just as we celebrate the power of everyday items to spark discovery, at I'm the Chef Too!, we champion the blend of education and entertainment through our unique cooking STEM adventures. We believe every child deserves the opportunity to explore, create, and learn in a way that's both meaningful and delicious. The skills honed through Q-tip crafts—fine motor control, creative thinking, problem-solving—are beautifully complemented and expanded upon in our carefully crafted kits, designed by mothers and educators to be both fun and incredibly educational.
Imagine receiving a new, exciting themed adventure delivered right to your door every month, complete with pre-measured dry ingredients and specialty supplies, ready for a hands-on culinary STEM journey! No more last-minute trips to the grocery store, no more searching for complex recipes, and no more screen time guilt—just pure, unadulterated learning and family fun that sparks genuine curiosity.
Ready to take the next step in fostering your child's curiosity and creativity with convenient, delicious learning? Join our community of little chefs and scientists today! Discover the convenience, flexibility, and immense value of ongoing educational enrichment that truly sparks a love for learning.
Join The Chef's Club today and enjoy free shipping on every box, bringing new adventures to your door every month! Choose from our flexible 3, 6, or 12-month pre-paid plans, perfect for gifting a year of learning or ensuring long-term enrichment for your own family. Let the delicious learning begin, and watch your child's confidence and skills grow with every new adventure!
Frequently Asked Questions About Q-Tip Crafts for Kids
Q1: What age group are Q-tip crafts suitable for?
Q-tip crafts are incredibly versatile and can be adapted for a wide range of ages, from toddlers (with close supervision) to elementary school children and even older kids. For toddlers (1-3 years), focus on large-scale dot painting with washable paint and thick paper, emphasizing sensory exploration and large motor movements. For preschoolers (3-5 years), introduce simple templates, pattern-making, and basic constructive crafts like the fuzzy sheep. School-aged children (6+) can tackle more intricate designs, complex patterns, and multi-step projects, and even develop their own unique Q-tip creations, focusing on fine detail and problem-solving. Always ensure materials are non-toxic and supervise younger children closely to prevent ingestion.
Q2: What kind of paint works best for Q-tip painting?
Washable tempera paint or acrylic paint are generally the best choices for Q-tip painting due to their vibrant colors, good coverage, and ease of cleanup from surfaces and skin. Watercolor paints can also be used for a lighter, more translucent effect, especially for activities like water painting on chalkboards or creating subtle layers of color. Always ensure the paints you use are clearly labeled as non-toxic and child-safe. Using small amounts of paint in shallow dishes, an old muffin tin, or a dedicated paint palette helps control mess and encourages children to dip carefully and precisely.
Q3: How do Q-tip crafts help with fine motor skills?
Q-tip crafts are exceptionally beneficial for developing fine motor skills because they encourage several key actions fundamental to hand dexterity:
- Pincer Grasp: Holding the slender Q-tip naturally promotes the precise grip between the thumb and forefinger, which is essential for tasks like handwriting, buttoning, and zipping.
- Hand-Eye Coordination: Children must visually guide their hand to place dots accurately, connect lines, or insert Q-tips into small openings, thereby improving accuracy and control.
- Hand Strength: The repetitive motion of dipping, dabbing, and applying slight pressure, or poking Q-tips into materials like clay, strengthens the small muscles in the hand and fingers.
- Bilateral Coordination: Many crafts require using one hand to hold the paper steady and the other to manipulate the Q-tip, fostering coordination and integration between both sides of the body. These skills are fundamental for countless daily tasks, from self-care to academic performance.
Q4: Can Q-tip crafts be adapted for STEM learning?
Absolutely! Q-tip crafts offer numerous accessible opportunities for early STEM (Science, Technology, Engineering, Math) exploration in a playful, hands-on manner.
- Science: Children can explore concepts like absorption (observing how the Q-tip soaks up liquid), material properties (how paint looks different on various surfaces), and cause-and-effect (how varying pressure changes the dot size).
- Engineering: By building 2D or 3D structures like skeletons, snowflakes, or small houses, children learn about balance, stability, design, and spatial reasoning. Creating a Q-tip maze also introduces basic engineering challenges.
- Art: (often integrated into STEM as STEAM) Experimenting with color mixing, creating symmetrical patterns, and understanding composition are key artistic skills.
- Math: Activities can involve creating symmetrical patterns, forming letters and numbers, counting dots, grouping objects, and exploring geometric shapes. This hands-on approach to STEM aligns perfectly with our mission at I'm the Chef Too!, where we bring these concepts to life through delicious cooking adventures that are both educational and fun.
Q5: What are some good non-painting Q-tip craft ideas?
Beyond painting, Q-tips are fantastic for a variety of other crafts that build different skills:
- Fuzzy Animals: Create charming animals like fuzzy sheep or porcupines by inserting Q-tips into a base of clay or playdough.
- Building Structures: Use Q-tips and craft glue to construct intricate skeletons, delicate snowflakes, or even miniature houses, practicing balance and architectural design.
- Threading/Lacing: Thread beads, small pasta shapes, or even cereal with holes onto Q-tip stems to enhance fine motor control and concentration.
- Poking Activities: For hand strengthening and precision, children can poke Q-tips into holes in an upturned colander, a styrofoam block, or an egg carton.
- Playdough Embellishments: Use Q-tips to add fine details, spikes, or legs to playdough creations, encouraging imaginative play and tactile exploration. These activities provide diverse ways to engage children, promoting fine motor skills, creativity, and problem-solving without needing paint.
Q6: How can I make Q-tip crafts a family bonding experience?
Q-tip crafts are wonderful for fostering family bonding and creating cherished memories:
- Participate Together: Instead of just supervising, join in the activity yourself! Create your own Q-tip art or build alongside your child. Shared creativity is a powerful bonding tool.
- Engage in Conversation: Ask open-ended questions about their choices: "What colors are you using and why?", "What story is your picture telling?", "How did you decide to build that structure?" This encourages communication and shows genuine interest in their work.
- Celebrate Efforts: Display their creations prominently and acknowledge their hard work, unique ideas, and creativity, regardless of the outcome. This builds self-esteem and pride.
- Keep it Screen-Free: Designate craft time as a dedicated screen-free zone to encourage focused interaction, conversation, and connection without digital distractions. These shared moments of hands-on creativity are invaluable for strengthening family ties and creating lasting, positive memories, much like the joyful, educational experiences our I'm the Chef Too! cooking kits provide.
Q7: What if my child doesn't want to follow a specific craft idea?
That's perfectly fine, and often encouraged! Foster open-ended exploration and child-led play. The goal of crafting is often the process, not just strictly adhering to a specific product. If your child prefers to just dab paint freely, experiment with mixing colors, or use Q-tips in an unconventional way (e.g., sticking them into playdough instead of gluing them), allow that freedom. This fosters independent thinking, creativity, and problem-solving skills, as they learn to follow their own curiosity. You can offer a few suggestions, but ultimately, let their imagination guide them. Sometimes the most innovative and personally meaningful ideas come from breaking the "rules" and exploring new possibilities.