Table of Contents
- Why Clear Ornaments Are a Crafting Treasure for Kids
- Getting Started: Essential Supplies for Your Clear Ornament Craft Station
- A World of Fillers: Imaginative Ideas for Inside Your Ornaments
- Beyond Filling: Creative Ways to Decorate the Outside
- Themed Ornament Ideas: Bringing Stories to Life
- Educational Benefits: More Than Just a Craft
- Tips for a Smooth & Joyful Crafting Experience
- Beyond the Holidays: Year-Round Ornament Fun
- Conclusion
- FAQ Section
Do you remember that magical feeling of creating something unique, something that sparkled just so, and knowing it would hang proudly on the Christmas tree or brighten a window? For many of us, crafting clear ornaments during childhood was a gateway to boundless imagination and the simple joy of making. But these versatile little spheres are far more than just holiday decorations; they're tiny canvases for colossal learning, offering a perfect blend of artistic expression and skill development for children of all ages.
At I'm the Chef Too!, we believe in fostering curiosity and creativity through hands-on experiences, blending the fun of food with the fascinating worlds of STEM and the arts. Clear ornament crafts align perfectly with our mission to provide "edutainment" that facilitates family bonding and offers a refreshing, screen-free educational alternative. This comprehensive guide is designed to ignite that same spark of wonder in your children, transforming simple clear ornaments into enchanting projects that teach, delight, and create lasting memories. We’ll explore an incredible array of filling and decorating techniques, delve into the unexpected educational benefits, and provide practical tips for a smooth, joyful crafting experience that you can enjoy together, far beyond the festive season. Get ready to embark on a creative journey that promises to be as enriching as it is fun!
Why Clear Ornaments Are a Crafting Treasure for Kids
Clear ornaments, whether made of glass or shatterproof plastic, are surprisingly versatile craft supplies that open up a world of possibilities for young imaginations. Their transparency acts like a blank canvas, ready to be filled, painted, or embellished, making them an ideal medium for children to explore creativity.
One of the primary reasons we adore clear ornaments for kids' crafts is their inherent versatility. You can literally put almost anything inside them, or decorate them in countless ways on the outside. This open-ended nature encourages children to think creatively, experiment with different materials, and develop their own unique artistic vision. It’s not just about following a set of instructions; it’s about discovery and personal expression, which are core tenets of our educational philosophy at I'm the Chef Too!. Just as we use unexpected ingredients and cooking methods to teach complex subjects, clear ornaments invite children to use everyday items in imaginative new ways.
Beyond versatility, these crafts are fantastic for skill development. From strengthening fine motor skills as little fingers pick up tiny beads or thread pipe cleaners, to fostering sensory exploration through various textures and weights, clear ornament projects are mini-workshops for growing minds and hands. Children practice color recognition, sorting, and even basic concepts of volume and space as they choose what to put inside. The process of planning an ornament, selecting materials, and executing the design engages their cognitive abilities in a fun, tangible way.
Affordability and safety are also key advantages. Clear plastic ornaments are widely available and often quite inexpensive, making them an accessible craft supply for families and educators alike. Their shatterproof nature means less worry about breakage, allowing even the youngest crafters to participate with confidence (though adult supervision is always recommended, especially with small pieces). This makes them a stress-free option for busy parents and a fantastic activity for groups in a classroom or camp setting.
Finally, clear ornaments allow for profound personalization, creating unique gifts and cherished keepsakes. Imagine a grandparent receiving an ornament filled with items hand-picked by their grandchild, or a teacher decorating their classroom with student-made creations. These aren't just crafts; they're tangible memories, celebrating milestones, relationships, and the joy of creation. In a world increasingly dominated by screens, these hands-on activities offer a much-needed alternative, fostering connection and creativity—a value we deeply uphold at I'm the Chef Too!.
Getting Started: Essential Supplies for Your Clear Ornament Craft Station
Before diving into the wonderful world of clear ornament crafts, a little preparation goes a long way in ensuring a smooth and enjoyable experience for everyone. Setting up a dedicated craft station can help keep materials organized and minimize mess, making the process more relaxing and fun. Think of it as preparing your kitchen for a culinary adventure with one of our kits – having everything in place makes the creative journey much more delightful!
Here's a list of essential supplies you'll want to gather:
-
Clear Ornaments (Plastic or Glass):
- Plastic: Ideal for younger children, group activities, or if you want to hang them where they might get bumped. They come in various shapes and sizes, from classic spheres to flat discs, and even heart or star shapes.
- Glass: Offer a slightly more refined look, but require closer adult supervision due to their fragility. Best for older children or projects that will be displayed in a protected spot.
- Having an assortment of sizes can add variety to your projects and cater to different filler types.
-
Tools for Manipulation:
- Small Funnels: Absolutely indispensable for pouring tiny items like glitter, sand, or small beads into the narrow opening of the ornaments without creating a huge mess. You can even make a simple paper funnel in a pinch.
- Tweezers or Tongs: Perfect for carefully placing small objects, like mini trees or specific beads, into the ornament. They help with precision and fine motor skill development.
- Craft Sticks, Pencils, or Chopsticks: Useful for nudging items into place once they're inside the ornament, especially for standing up miniature figurines or pushing cotton balls to the sides.
- Small Scoops or Spoons: For transferring larger fillers like pom-poms or Epsom salt.
-
Adhesives and Sealants (Adult Supervision Required):
- Mod Podge: A crafter's best friend! It acts as a glue, a sealer, and a finish. Great for adhering glitter to the inside or outside of ornaments, or for fabric decoupage.
- Polycrylic: A popular choice for sealing glitter inside ornaments, providing a durable, clear, and shiny finish. Many crafters find it superior for glitter adhesion compared to other options.
- Hairspray (aerosol): A quick and easy alternative for adhering glitter to the inside of an ornament if you're in a pinch.
- Hot Glue Gun: For attaching external embellishments like ribbons, bows, or securing the ornament cap (always with adult supervision for safety).
- Craft Glue: A more general-purpose glue for attaching lighter items or for younger children to use on the outside of ornaments.
-
Decorating Mediums:
- Glitter: Fine, chunky, iridescent, metallic—the possibilities are endless! Glitter instantly adds sparkle and magic.
- Acrylic Paints: For pour painting techniques, brushwork, or creating patterns on the outside. Make sure they are non-toxic and washable if working with younger children.
- Puffy Paint: Adds a fun 3D texture and vibrant color to the outside of ornaments.
- Permanent Markers or Paint Pens: Great for drawing faces, patterns, or writing messages on the outside of plastic ornaments.
-
Embellishments and Finishing Touches:
- Ribbons, Twine, Yarn: For hanging the ornaments, tying bows, or creating decorative loops.
- Pipe Cleaners (Chenille Stems): Highly versatile for creating hooks, spirals, mini-wreaths, or small characters to hang with or on the ornament.
- Fabric Scraps, Lace, Felt: For decoupage, wrapping, or cutting into shapes.
- Buttons, Beads, Sequins: For adding external decoration and texture.
-
Protective Gear:
- Tablecloths or Newspaper: To protect your work surface from spills and glitter.
- Disposable Gloves: If working with paints or adhesives that can be messy.
Once you have your materials organized, you're ready to unleash the creativity! Remember, much like our I'm the Chef Too! kits where all the dry ingredients and specialty supplies are pre-measured and ready, a well-stocked and organized craft station makes the entire experience more enjoyable and less stressful, allowing for more focus on the imaginative process. If you’re looking for continuous, hassle-free ways to engage your children in creative learning, consider our Chef's Club subscription – a new adventure delivered to your door every month!
A World of Fillers: Imaginative Ideas for Inside Your Ornaments
The magic of clear ornament crafts truly shines when you start to explore the incredible variety of items that can be carefully placed inside. This is where children's imaginations run wild, turning everyday objects into treasures. The act of selecting, sorting, and carefully maneuvering these fillers is not just fun; it's a fantastic exercise in fine motor skills, spatial reasoning, and creative decision-making.
Here are some imaginative filler ideas, categorized for inspiration:
Nature's Bounty: Bringing the Outdoors In
Connecting with nature is a wonderful way to foster appreciation for the environment and spark scientific curiosity. Collecting these items can be an adventure in itself!
- Dried Flowers & Petals: Press small flowers or dry petals to create a delicate, colorful display. Think lavender, rose petals, or tiny wildflowers. This can lead to discussions about botany and plant life cycles.
- Small Leaves & Ferns: Tiny, pressed leaves (especially autumn colors) or delicate fern fronds can create a beautiful, seasonal look.
- Sand & Tiny Pebbles: Gathered from a memorable beach trip or a local park, these can evoke memories of adventures. Layering different colors of sand can create stunning patterns, akin to sedimentary rock formations.
- Mini Pinecones & Acorns: Small, cleaned pinecones or tiny acorns add a rustic, woodland charm.
- Tiny Seashells: Perfect for a "beach memory" ornament, especially if collected by your child.
- Spices or Potpourri: For a sensory experience, fill an ornament with aromatic spices like whole cloves, cinnamon sticks (broken into small pieces), or a fragrant potpourri mix. While not sealed for scent, it adds a unique visual.
Sparkle & Shine: Glittering Wonders
Glitter is a timeless favorite for a reason – it instantly adds a touch of magic and excitement to any craft!
- Glitter (Fine, Chunky, Iridescent): The classic choice! To make glitter stick permanently inside plastic or glass ornaments, remove the cap and pour about a tablespoon of clear liquid adhesive (like Polycrylic or Mod Podge) inside. Swirl it around until the entire interior is coated, then pour out any excess. Immediately pour glitter inside, cover the opening with your thumb or a piece of paper towel, and shake vigorously until the inside is fully coated. Let it dry upside down on a paper towel. For an instant sparkle, you can also use aerosol hairspray (spray inside, then add glitter, shake, and dry).
- Sequins & Confetti: Small, shiny sequins or various shapes of paper confetti add texture and sparkle without the potential mess of loose glitter once sealed.
- Beads (Pony, Seed, Clear): A colorful array of beads can be poured in to create layers, or individual clear beads can mimic bubbles or ice. This is excellent for color sorting and pattern creation.
- Rhinestones & Jewels: Self-adhesive or small loose rhinestones can be carefully placed inside or glued onto the exterior for extra bling.
Sensory Play & Textural Delights: More Than Meets the Eye
These fillers engage multiple senses, offering a rich tactile experience.
- Cotton Balls or Artificial Snow: Perfect for creating a cozy "winter wonderland" or "snowman belly" effect. Children love pushing them in and watching them expand.
- Small Pom-Poms: Available in a rainbow of colors and various sizes, pom-poms are easy for little hands to handle and create a soft, fluffy texture. They're great for color-themed ornaments.
- Feathers: Soft, wispy feathers (craft store variety) add a light, airy, and whimsical touch.
- Rice (Colored) or Small Pasta Shapes: You can dye rice with food coloring and rubbing alcohol for a vibrant, layered effect. Small pasta like orzo or tiny stars can also be used. This connects to our I'm the Chef Too! mission, showing how everyday food items can be transformed into art and learning tools, much like how we use ingredients for delicious experiments!
- Mini Marshmallows or Sprinkles: While we usually keep food for eating at I'm the Chef Too!, the visual appeal of mini marshmallows or festive sprinkles can be delightful inside an ornament (ensure they are completely dry and sealed to prevent spoilage).
Personal Touches: Making Memories Tangible
These fillers transform an ornament into a truly meaningful keepsake.
- Alphabet Beads & Message Scrolls: Spell out names, initials, "LOVE," "JOY," or a special year using alphabet beads. You can also roll up tiny handwritten notes or wishes and tuck them inside.
- Tiny Photos: Roll up miniature printed photos of family, pets, or special moments and carefully insert them.
- Small Trinkets & Charms: From tiny toy figures to meaningful charms, these add a personal narrative to the ornament. Imagine a miniature dinosaur for a budding paleontologist or a tiny chef's hat for a culinary enthusiast!
- Lego Bricks or Mini Building Blocks: Small, loose pieces can be dropped in for a toy-themed ornament.
- Perler Beads: These small, colorful plastic beads can be used loose or even fused into tiny shapes beforehand to be placed inside.
Whether your child is meticulously layering colored sand or gleefully shaking glitter into every crevice, each choice and action is a step in their creative and developmental journey. Not ready to subscribe to continuous fun? No problem! You can always explore our full library of adventure kits available for a single purchase. Find the perfect theme to spark joy and learning any time you wish!
Beyond Filling: Creative Ways to Decorate the Outside
While filling clear ornaments offers a delightful world of possibilities, the exterior of these versatile spheres also presents a fantastic canvas for creativity. Decorating the outside often involves different skill sets, such as brush control, pattern recognition, and textural exploration, adding another dimension to the crafting experience.
Here are some engaging ideas for decorating the exterior of clear ornaments:
Painting Techniques: Strokes of Genius
Painting is a classic art form that children of all ages can enjoy, allowing for vibrant expression and exploration of color.
- Pour Painting (Inside or Outside): This technique yields stunning, marbled effects. For inside pour painting, carefully drip several different colors of acrylic paint into the ornament's opening. Swirl the ornament gently, allowing the colors to coat the interior walls in beautiful, abstract patterns. Pour out any excess paint and let it dry thoroughly, upside down, for several days. For outside pour painting, you can carefully drizzle paint over the exterior, allowing it to drip and blend.
- Finger Painting: For younger children, applying non-toxic, washable paint directly with their fingers onto the outside of a plastic ornament is a wonderful sensory experience. They can create swirls, dots, or even tiny handprints (on larger, flatter ornaments).
- Puffy Paint Designs: Puffy paint creates a raised, dimensional effect that adds a fun texture. Kids can draw lines, dots, swirls, or even create small characters or messages on the ornament's surface. Once dry, it retains its 3D form.
- Dot Painting: Using cotton swabs or the back of a paintbrush, children can create intricate dot patterns in various colors, inspired by aboriginal art or pointillism. This helps develop precision and focus.
- Brushwork & Stencils: Older children might enjoy using fine brushes to paint detailed designs, stripes, or freehand illustrations. Stencils can also be used to apply paint in specific shapes or letters, making it easier to achieve a clean look.
Textural Wraps: Adding Depth and Dimension
Incorporating different materials to wrap or cover the ornament adds interesting tactile elements and a rustic or cozy aesthetic.
- Twine, Yarn, or String Wrapping: Starting from the top, apply a thin line of craft glue (like Mod Podge) and begin wrapping twine, yarn, or colorful string tightly around the ornament, overlapping slightly. Continue adding glue and wrapping until the entire ornament is covered. This creates a beautifully textured, rustic look. Different colors of yarn can be blended for a striped effect.
- Fabric Strips or Lace Decoupage: Cut thin strips of fabric (e.g., plaid, floral, festive patterns) or pieces of lace. Apply Mod Podge to a section of the ornament, then carefully press the fabric strip onto it, smoothing out any bubbles. Overlap strips to cover the entire surface, then apply a final layer of Mod Podge to seal and protect.
- Felt Cutouts: Cut felt into small shapes (stars, hearts, snowflakes) and glue them onto the outside of the ornament for a soft, tactile embellishment.
Stickers & Decals: Easy Embellishments
For quick and easy decoration, stickers are always a hit with kids!
- Window Clings & Vinyl Stickers: These are fantastic for plastic ornaments. Window clings can be easily applied and removed, allowing for changing designs. Vinyl stickers (often found in craft stores) adhere well and come in endless themes—from letters to animals to holiday motifs.
- Glitter Stickers or Foam Stickers: Add instant sparkle and dimension without the need for glue or loose glitter.
Handprints & Fingerprints: Personalized Keepsakes
Capturing a child's handprint or fingerprint is a timeless way to create a precious memory.
- Handprints on Flat Ornaments: For larger, flatter clear ornaments, children can press their hand (coated in non-toxic acrylic paint) directly onto the surface. This makes a wonderful keepsake, especially for younger kids.
- Fingerprint Characters: Using a thumb or finger dipped in paint, kids can create "fingerprint people," "fingerprint animals," or festive designs (e.g., reindeer, snowmen) on the ornament, adding small details with a marker once the paint is dry.
Decorating the outside of clear ornaments allows children to express themselves through different artistic mediums and to develop their fine motor control and aesthetic sense. It's a wonderful way to extend the creative possibilities of these simple craft supplies. Ready to transform learning into an exciting monthly journey? Join The Chef's Club today! We deliver a complete "edutainment" experience right to your doorstep, making it easy to create cherished memories and build essential skills.
Themed Ornament Ideas: Bringing Stories to Life
One of the most exciting aspects of clear ornament crafts is their ability to tell a story or capture a theme. By combining different fillers, decorating techniques, and external embellishments, children can bring their favorite worlds, characters, or subjects to life within these transparent spheres. This kind of imaginative play is central to how we approach learning at I'm the Chef Too!, transforming abstract concepts into tangible, engaging experiences.
Here are some captivating themed ornament ideas to spark your child's imagination:
Winter Wonderland & Festive Fun
Beyond traditional Christmas themes, these ideas celebrate the magic of winter.
- Adorable Snowmen: Fill an ornament with cotton balls or artificial snow. Use permanent markers or small craft vinyl cutouts to draw a snowman's face (eyes, carrot nose, rosy cheeks) on the outside. Add a tiny ribbon scarf around the cap.
- "I Spy" Ornaments: A fantastic interactive craft! Fill an ornament with a variety of small, recognizable items (e.g., a tiny button, a bead, a mini pom-pom, a small charm, a sequin, a piece of small pasta, a safety pin). Write a corresponding list of items on a small card attached to the ornament. Kids shake the ornament to find the hidden treasures – great for observation skills and patience!
- Sparkling Icicles: Use clear or iridescent glitter inside, perhaps a touch of blue paint swirled, and attach silver twine or clear fishing line for hanging. For a science twist, you can even grow borax crystals on pipe cleaners shaped like icicles, then carefully place them inside a larger ornament (requires adult supervision for borax).
- Candy Cane Swirls: For plastic ornaments, drip red and white acrylic paint inside and swirl to create a candy cane effect. Or, fill with tiny red and white striped beads or sprinkles.
Cosmic & Earthy Adventures
Connect crafts to science and exploration, much like our STEM-focused cooking kits.
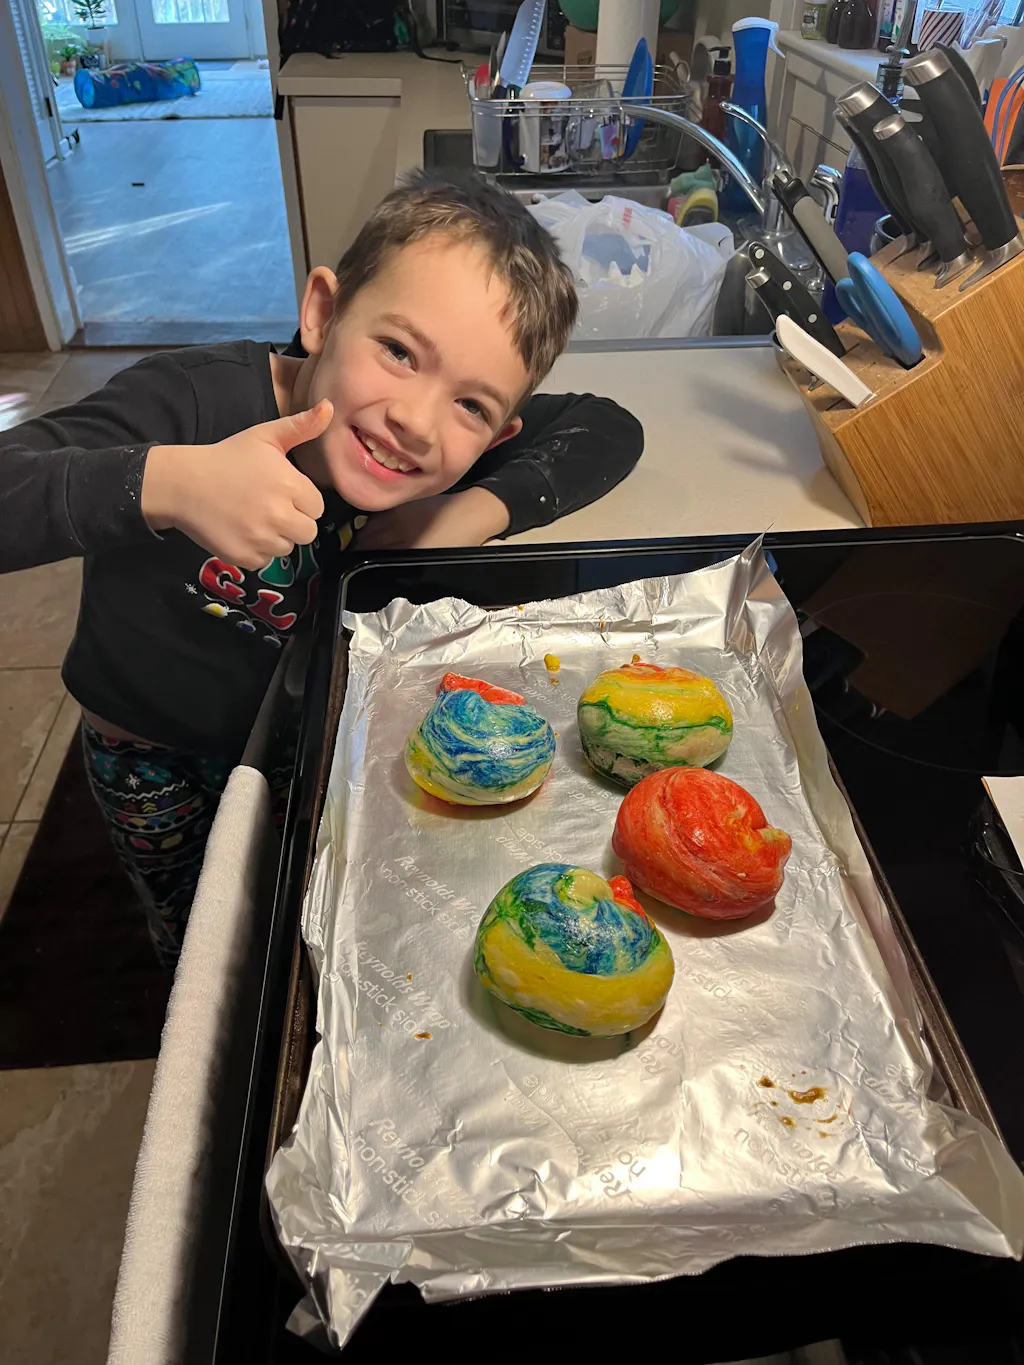
- Galaxy Wonders: Fill an ornament with fine blue, purple, and black glitter, along with star-shaped confetti. A tiny drop of glow-in-the-dark paint (swirled carefully) can add an extra celestial touch. For those aspiring astronomers, crafting a Galaxy Donut Kit isn't just about making treats; it's an edible exploration of the cosmos. Similarly, a clear ornament can become a mini galaxy, filled with iridescent glitter and tiny stars, prompting conversations about space and imagination.
- Mini Volcanoes/Dinosaur Digs: For a playful nod to earth science, fill an ornament with layers of sand, small brown pebbles, and perhaps a tiny plastic dinosaur. Imagine creating a sparkling, edible 'galaxy' with glitter and star confetti, or even making an ornament that mimics a volcanic eruption! Just like the thrilling chemical reaction that makes our Erupting Volcano Cakes bubble over with deliciousness, clear ornaments can be a canvas for scientific wonder.
- Under the Sea: Fill with blue and green glitter, small seashells, tiny plastic fish or mermaid figures, and maybe some iridescent cellophane cut into "seaweed" strips.
Character & Storybook Worlds
Bring favorite characters and stories to life in miniature form.
- Beloved Character Homes: Use colors and small items reminiscent of a favorite character. For instance, tiny red and white polka dots painted on the outside, with miniature ladybugs or flowers inside for a certain spotted insect friend. Even beloved characters can make learning fun, like when kids make Peppa Pig Muddy Puddle Cookie Pies, transforming a simple treat into a playful adventure. Similarly, a clear ornament can become a tiny "muddy puddle" with brown filler and tiny toy pigs inside!
- Fairy Gardens: Fill with dried moss, tiny silk flowers, a miniature fairy figurine, and a sprinkle of iridescent glitter.
- Pirate's Treasure: Gold glitter, small plastic coins, tiny beads, and a rolled-up "treasure map" (small paper scroll) can create a pirate-worthy gem.
Family Keepsakes & Memories
These themes focus on personal connections and celebrating loved ones.
- Memory Capsules: Fill with small items that represent a memorable year, a family vacation, or a child's interests (e.g., a tiny ticket stub, a piece of craft foam shaped like a favorite animal, a charm from a trip).
- Photo Collage Ornaments: Print several tiny photos and carefully glue them to the inside walls of a clear ornament, creating a mini photo album effect.
- "Love Notes" Ornament: Write small messages of love, gratitude, or wishes on tiny strips of paper, roll them up, and fill the ornament. A wonderful gift for family members.
Encouraging children to craft themed ornaments not only sparks their creativity but also enhances their storytelling abilities and allows them to express what's important to them. It’s a wonderful way to connect learning with personal interests, a philosophy we deeply embrace at I'm the Chef Too!. If you're looking for consistent, high-quality, and fun learning experiences, consider our Chef's Club subscription. With options for 3, 6, or 12-month pre-paid plans and free shipping in the US, it’s an ideal gift that keeps on giving, fostering a love for STEM through culinary arts.
Educational Benefits: More Than Just a Craft
At I'm the Chef Too!, our core mission is to show children that learning can be an exciting, hands-on adventure. We seamlessly blend food, STEM, and the arts into unique "edutainment" experiences, proving that complex subjects can be taught through tangible, delicious cooking escapades. What many might see as a simple craft, like decorating a clear ornament, actually embodies many of these same profound educational principles. These projects are far more than just pretty decorations; they are powerful tools for holistic child development.
Let's explore the rich tapestry of educational benefits woven into every clear ornament craft:
STEM Connections (Science, Technology, Engineering, Math)
Believe it or not, these crafts are packed with STEM learning!
-
Science:
- Chemistry: Experimenting with glitter adhesion (understanding how Mod Podge or Polycrylic creates a bond), observing how paint colors mix and separate during pour painting, or even exploring crystal growth with borax (with careful adult supervision) are all mini chemistry lessons.
- Physics: Understanding concepts of volume and density when choosing fillers, observing how different materials fall and settle inside the ornament, or learning about gravity as paint drips.
- Nature Study: Collecting natural elements like sand, pebbles, or dried flowers can lead to discussions about botany, geology, and ecology.
- Technology: While not overtly digital, using tools like funnels, tweezers, or even a hot glue gun (under strict adult supervision) introduces children to the appropriate use of various instruments and techniques, building comfort with tools.
-
Engineering:
- Design & Planning: Children decide on a theme, select materials, and plan how to arrange them inside or outside the ornament. This involves forethought and problem-solving.
- Structural Integrity: For outside decorations, they learn about adhesion, layering, and how different materials can be combined to create a stable, aesthetically pleasing design.
-
Math:
- Counting & Sorting: Picking up individual beads, pom-poms, or sequins is a natural way to practice counting. Sorting by color, size, or type introduces early classification skills.
- Measurement & Estimation: Estimating how much glitter or how many pom-poms will fit inside, or measuring ribbons for bows, subtly introduces mathematical concepts.
- Geometry: Exploring spherical shapes, understanding concepts of inside/outside, and creating patterns with shapes.
Art & Creativity
The artistic opportunities are boundless, fostering imagination and self-expression.
- Color Theory: Choosing harmonious color palettes, experimenting with color mixing (e.g., in pour painting), and observing how light interacts with transparent and colored materials.
- Composition & Design: Arranging fillers or external decorations to create visually appealing patterns, scenes, or abstract art.
- Texture & Sensory Exploration: Working with diverse materials like fluffy cotton, smooth beads, rough twine, or delicate feathers engages the sense of touch and teaches about different textures.
- Self-Expression: Every ornament becomes a unique reflection of the child's personality, interests, and current creative impulses. There's no right or wrong way, fostering confidence and individuality.
Fine Motor Skills & Hand-Eye Coordination
These activities are a workout for small muscles!
- Pincer Grasp: Picking up tiny beads, sequins, or pieces of glitter with the thumb and forefinger strengthens this essential grasp, crucial for writing and other detailed tasks.
- Tool Manipulation: Using tweezers, funnels, or paintbrushes refines hand movements and develops precision.
- Hand-Eye Coordination: The delicate work of inserting items into a small opening, painting specific lines, or wrapping string requires careful coordination between what the eyes see and what the hands do.
Cognitive Development & Problem-Solving
Beyond the hands-on aspect, these crafts stimulate critical thinking.
- Planning & Decision-Making: Children make choices about materials, colors, and arrangements. "What should I put in next? How will this look if I layer it?"
- Problem-Solving: Encountering challenges like "How do I get this small object to stand up inside?" or "How can I make the glitter stick?" encourages children to experiment and find solutions.
- Focus & Concentration: Engaging in a detailed craft project helps children develop their ability to concentrate for extended periods, a valuable skill for academic success.
- Cause & Effect: Observing how different actions lead to different artistic outcomes.
Language & Social-Emotional Development
Crafting is also a wonderful opportunity for connection and communication.
- Vocabulary Expansion: Discussing colors, textures, shapes, and techniques introduces new words.
- Storytelling: Creating themed ornaments can inspire children to tell stories about their creations.
- Family Bonding: Crafting together provides quality, screen-free time for conversation, collaboration, and shared enjoyment, strengthening family ties. This aligns perfectly with our I'm the Chef Too! mission, providing shared experiences that are both educational and fun.
- Confidence & Pride: Successfully completing an ornament, especially one they can give as a gift, instills a strong sense of accomplishment and boosts self-esteem.
When children engage in clear ornament crafts, they aren't just making a pretty object; they are actively learning, developing crucial skills, and building confidence in a joyful, memorable way. It's truly "edutainment" in action, echoing our belief that learning should be an adventure for every child. For parents and educators seeking continuous inspiration and hassle-free, educational adventures, our Chef's Club subscription is the answer. Every month brings a new, unique blend of food, STEM, and art, designed by mothers and educators to delight and educate. Bring our hands-on STEM adventures to your classroom, camp, or homeschool co-op. Learn more about our versatile programs for schools and groups, available with or without food components.
Tips for a Smooth & Joyful Crafting Experience
Embarking on a clear ornament crafting session with kids should be a source of joy and creative exploration, not stress. Just as we ensure our I'm the Chef Too! kits come with pre-measured ingredients and clear instructions to make cooking stress-free, a little preparation and a relaxed mindset can make all the difference when crafting.
Here are some practical tips to ensure your crafting experience is smooth, safe, and truly enjoyable for everyone:
-
Preparation is Key: Set the Stage for Success
- Gather All Supplies First: Before inviting the children to the craft area, make sure every single item you plan to use is laid out, opened, and within easy reach. This prevents interruptions and keeps the creative flow going.
- Cover Your Work Surface: Glitter, glue, and paint have a magical way of getting everywhere. Protect your table with a disposable plastic tablecloth, old newspaper, or a dedicated craft mat.
- Set Up Individual Bowls/Containers: For small fillers like beads, sequins, or pom-poms, put them in separate shallow bowls or muffin tins. This makes it easier for children to select items and reduces spills.
- Pre-open Glues and Paints: Squeeze a small amount of glue or paint onto a palette or paper plate for easy access, rather than having kids struggle with caps.
-
Embrace the Mess (and Plan for Cleanup)
- Accept It Will Get Messy: Seriously, half the fun for kids is often the tactile experience, which can involve some mess. If you go into it expecting perfection, you'll likely be disappointed.
- Have Wipes/Paper Towels Handy: Keep a roll of paper towels or a pack of wet wipes nearby for quick cleanups of sticky fingers and small spills.
- Consider "Glitter Zones": If glitter is involved, designate a specific area (perhaps even a large cardboard box or tray) to contain the sparkle. Using a funnel for glitter insertion is a game-changer!
- Easy Disposal: Have a trash can or bag nearby for immediate disposal of wrappers, excess materials, and used paper towels.
-
Focus on the Process, Not Perfection: Encourage Exploration
- Let Them Experiment: Resist the urge to "fix" your child's ornament or dictate exactly what it should look like. The true value is in their exploration, decision-making, and imaginative process.
- Offer Choices, Not Commands: Instead of saying, "Put the blue glitter in," try, "What colors of glitter do you think would look pretty in there?" This empowers them.
- Celebrate Uniqueness: Praise their efforts and the individuality of their creation. "Wow, look at all the different textures you used!" or "I love the way you combined those colors!"
- Understand Developmental Stages: A toddler's "craft" might just be dumping everything into a ball, while an older child might create something more intricate. Adjust your expectations accordingly.
-
Safety First: Adult Supervision is Essential
- Small Parts Hazard: Many ornament fillers are small and can be a choking hazard for young children. Always supervise closely.
- Glass Ornaments: If using glass, reserve these for older children or projects where an adult will do most of the delicate handling. Plastic is generally safer for active little hands.
- Adhesives & Tools: Hot glue guns, strong adhesives, and sharp tools (like scissors for cutting fabric) should always be used with direct adult supervision, or adults should perform those steps.
- Ventilation: If using strong-smelling paints or adhesives, ensure good ventilation in your crafting area.
-
Displaying & Gifting: Cherish the Creations
- Allow Ample Drying Time: Especially for painted or heavily glued ornaments, ensure they are completely dry before handling or packaging. Drying them upside down (for filled or pour-painted interiors) can help prevent puddling.
- Create a Special Display: Find a prominent spot to hang their finished ornaments, whether it's on a holiday tree, a window, or a special "art display" branch.
- Thoughtful Gifting: If making gifts, help children package their ornaments carefully. A simple clear bag with a tag that says "Handmade by [Child's Name]" adds a special touch.
By following these tips, you can create an environment where creativity flourishes, learning happens organically, and precious family memories are made. These hands-on activities provide a wonderful screen-free alternative, promoting connection and joyful discovery—values we champion at I'm the Chef Too!. For parents and educators seeking continuous inspiration and hassle-free, educational adventures, our Chef's Club subscription is the answer. Every month brings a new, unique blend of food, STEM, and art, designed by mothers and educators to delight and educate.
Beyond the Holidays: Year-Round Ornament Fun
While clear ornament crafts are often synonymous with the festive season, limiting their use to just a few weeks a year would be missing out on their incredible potential for year-round fun and learning. At I'm the Chef Too!, we believe in continuous engagement that sparks curiosity, and these versatile clear spheres can certainly play a role in seasonal celebrations, educational projects, and thoughtful gestures throughout the year.
Here are some ideas for incorporating clear ornament crafts into your family's routine beyond the holidays:
Seasonal Decorations
- Spring Blooms: Fill ornaments with dried spring flowers, pastel-colored beads, or small paper butterflies for a touch of springtime cheer. Hang them on an indoor "spring tree" or by a sunny window.
- Summer Beach Vibes: After a summer vacation, fill an ornament with sand, tiny seashells, and a small rolled-up photo from the trip. It becomes a perfect keepsake to remember sunny days.
- Autumn Harvest: Collect small, colorful dried leaves, tiny acorns, or miniature pinecones to create charming fall-themed ornaments. These can adorn a Thanksgiving table centerpiece or a "gratitude tree."
Classroom & Homeschool Projects
- "All About Me" Ornaments: At the beginning of the school year, have each child fill an ornament with items that represent their personality, hobbies, or family. This is a wonderful "getting to know you" activity.
- Science Fair Displays: Ornaments can beautifully display small scientific specimens, layered soil samples, or even encapsulated data in a visually engaging way.
- History Timelines: Each ornament could represent a different historical period, filled with symbolic items or labeled with key dates.
- Literacy Link-ups: After reading a book, children could create an ornament representing a character, setting, or important theme from the story.
Thoughtful Gifts & Party Favors
- Birthday Party Favors: Instead of traditional goody bags, children can craft an ornament as part of the party activity, filling it with small toys or candies to take home. It's an activity and a favor in one!
- Teacher Appreciation Gifts: A handmade ornament filled with meaningful messages or small tokens of appreciation makes a heartfelt gift for educators.
- Thank You Gifts: A personalized ornament is a unique way to express gratitude to friends, coaches, or neighbors.
- Baby Shower Keepsakes: Small clear ornaments filled with baby socks, tiny pacifiers, or blue/pink ribbons make adorable favors or decorations.
Everyday Creative Play
- Sensory Bottles (Large Ornaments): For younger children, larger clear plastic ornaments can become mini sensory bottles. Fill them with water, glitter, sequins, and a drop of glycerin for slow-moving wonder. Ensure the cap is securely glued on.
- Nature Observation Jars: Take an empty ornament on a nature walk. Collect small, non-living treasures found along the way (a pretty feather, a unique pebble, a tiny seed pod) to observe later.
- Story Starters: Fill an ornament with random small objects. Shake it up, and then use the visible items to spark imaginative storytelling.
By expanding your view of clear ornament crafts beyond just the holiday season, you unlock a continuous stream of creative, educational, and bonding opportunities. These simple spheres truly are versatile tools for encouraging imagination and learning throughout the year, aligning perfectly with our mission to spark curiosity in children every single day. Whether you're celebrating a birthday, a special occasion, or just a Tuesday, our complete collection of one-time kits offers endless possibilities for discovery and deliciousness.
Conclusion
From sparkling glitter bombs to miniature encapsulated worlds, clear ornament crafts for kids offer a treasure trove of creative possibilities, far exceeding their simple appearance. As we've explored, these versatile spheres are not just charming decorations; they are dynamic canvases for learning, fostering a remarkable array of skills from fine motor dexterity and cognitive problem-solving to artistic expression and scientific curiosity. They provide precious screen-free moments for family bonding, allowing children to develop confidence and pride in their unique creations.
At I'm the Chef Too!, we wholeheartedly champion hands-on, engaging "edutainment" that blends STEM, food, and the arts into unforgettable experiences. Clear ornament crafts beautifully embody this philosophy, proving that learning can be an adventure, a delightful process of discovery that yields tangible, meaningful results. Whether you're planning a festive holiday activity, a seasonal decoration, an educational project, or a heartfelt gift, these crafts are a testament to the power of imagination and the joy of making.
So, gather your supplies, open your minds to the endless possibilities, and embark on a crafting journey that promises smiles, learning, and cherished memories. Ready to infuse your home with continuous creativity and educational fun? Don't let the adventure stop here! Join The Chef's Club today and receive a new, unique STEM cooking kit delivered right to your door every month. Spark curiosity, foster creativity, and create delicious family memories with I'm the Chef Too! – where learning is always an adventure.
FAQ Section
Q1: What kind of clear ornaments should I use for kids?
A1: For younger children or any situation where breakage is a concern, clear plastic ornaments are highly recommended. They are shatterproof, durable, and readily available. For older children or projects that will be displayed in a protected area, clear glass ornaments can offer a beautiful, high-quality finish, but they require closer adult supervision due to their fragility. Both come in various shapes and sizes.
Q2: How do I get glitter to stick inside an ornament permanently?
A2: The most effective method is to use a clear liquid adhesive like Polycrylic or Mod Podge. Remove the ornament cap, pour about 1 tablespoon of the adhesive inside, and swirl it around until the entire interior is coated. Pour out any excess. Immediately pour your chosen glitter inside, cover the opening, and shake vigorously until the glitter adheres evenly. Let the ornament dry upside down for several days to ensure complete drying and prevent glitter from flaking. An aerosol hairspray can also work as a quicker, though sometimes less durable, alternative.
Q3: What are some easy fillers for toddlers?
A3: Toddlers love to drop things into containers, making clear ornaments perfect for fine motor development. Great toddler-friendly fillers include:
- Large pom-poms
- Cotton balls
- Large beads (ensure they are too big to be a choking hazard if you have very young children present)
- Small jingle bells
- Colorful pipe cleaner pieces (pre-cut)
- Larger sequins These items are easy for small hands to grasp and manipulate. Always supervise toddlers closely to prevent choking hazards.
Q4: Can these ornaments be used for anything other than Christmas?
A4: Absolutely! Clear ornament crafts are incredibly versatile for year-round fun.
- Seasonal Decorations: Fill with dried flowers for spring, sand and seashells for summer, or colorful leaves for autumn.
- Party Favors: Guests can make their own themed ornaments as a party activity and take them home.
- Educational Tools: Use for "All About Me" projects, science fair displays, or visual aids in classrooms.
- Thoughtful Gifts: Personalize with photos or messages for birthdays, teacher appreciation, or thank yous.
- Sensory Bottles: Larger plastic ornaments can be filled with water, glitter, and small objects to create calming sensory bottles for young children (ensure cap is securely sealed).
Q5: How can I make the ornaments last longer?
A5: To ensure your clear ornaments stand the test of time:
- Secure Caps: For filled ornaments, apply a small dab of hot glue (adult supervision!) around the rim of the cap before reattaching it, to prevent it from coming off and spilling the contents.
- Seal Exterior Decorations: If you've painted or applied fabric to the outside, apply a thin coat of Mod Podge or a clear sealant spray over the top once dry.
- Store Carefully: When not on display, store ornaments in individual compartments or wrap them gently in tissue paper or bubble wrap to prevent scratching or damage.
Q6: What if my child just wants to dump everything in?
A6: That's perfectly normal, especially for younger children! Embrace it as part of their creative process and sensory exploration.
- Encourage, Don't Dictate: Instead of correcting them, ask open-ended questions like, "What do you think will happen if we add this next?" or "Tell me about your design!"
- Provide Limited Choices: To manage overwhelming dumping, offer a smaller selection of materials at a time.
- Focus on the Process: Reiterate that there's no "right" way to make an ornament; it's about having fun and being creative. The learning happens in the exploration and decision-making, even if the final product looks like a chaotic mix!
Q7: How do I clean up glitter effectively?
A7: Glitter can be notoriously tricky!
- Use a Lint Roller: This is your best friend for picking up scattered glitter from surfaces, clothes, and even skin.
- Damp Cloth or Sponge: For glitter mixed with glue or paint, a damp cloth works well. Rinse frequently.
- Vacuum with a Hose Attachment: For larger areas on floors or carpets, a vacuum with good suction can help.
- Work on a Tray or Box: Containing the glitter activity within a tray or large cardboard box can significantly reduce spread.