Table of Contents
- Why Chemistry for Kids? The Magic of Everyday Reactions
- Safety First! Essential Tips for Young Chemists
- Kitchen Chemistry: Deliciously Edible Experiments
- Fantastic Fizz & Foaming Fun: Exploring Chemical Reactions
- Acids, Bases, and pH: The Colorful World of Indicators
- States of Matter & Beyond: Physical Changes in Action
- The Art of Separation: Chromatography & Mixtures
- Growing Wonders: Crystals and Polymers
- Bringing STEM to Life with I'm the Chef Too!
- FAQ: Your Chemistry Questions Answered
Imagine your child's eyes widening as a colorful liquid fizzes and overflows, or a simple mixture transforms into something entirely new before their very eyes. This isn't magic; it's the captivating world of chemistry! Far from being a daunting subject reserved for high school labs, chemistry can be a thrilling adventure for kids of all ages, right in the comfort of your own home. It’s about more than just mixing ingredients; it’s about discovering how the world works, fostering a love for learning, and creating unforgettable family memories.
At I'm the Chef Too!, we believe that the best learning happens when it's hands-on, engaging, and delightfully delicious. Our mission is to blend food, STEM, and the arts into one-of-a-kind "edutainment" experiences that ignite curiosity and creativity in children. We understand the power of tangible, real-world applications in teaching complex subjects, which is why our kits, developed by mothers and educators, turn abstract scientific principles into exciting cooking adventures. This post will delve into a wide array of easy, safe, and incredibly fun kids chemistry experiments you can do, highlighting how these activities spark critical thinking, observation skills, and a genuine passion for science. Get ready to transform your kitchen into a bustling laboratory and embark on a journey of discovery that will entertain, educate, and inspire your budding scientists.
Why Chemistry for Kids? The Magic of Everyday Reactions
Have you ever wondered why bread rises, or how soap cleans? The answers lie in chemistry, the fascinating study of matter and its transformations. For children, engaging with chemistry isn't just about memorizing facts; it’s about actively exploring the world around them. It taps into their innate curiosity, encouraging them to ask "why" and "how" things happen. When children observe, predict, and experiment, they develop a robust set of skills that extend far beyond the science lab.
Developing Essential Life Skills
Chemistry experiments are powerful tools for developing crucial cognitive and practical skills. When kids conduct experiments, they naturally learn:
- Observation: Noticing subtle changes in color, texture, and state is fundamental to scientific inquiry. "What's happening to the milk when we add soap?"
- Critical Thinking & Problem-Solving: "Why didn't the volcano erupt as much this time? What could we change?" These questions lead to analytical thinking and hypothesis testing.
- Following Instructions: Carefully measuring ingredients and performing steps in order teaches precision and patience.
- Fine Motor Skills: Pouring, stirring, dropping, and mixing all enhance dexterity and coordination.
- Math Concepts: Measuring liquids and solids, understanding ratios, and even basic timing introduces practical mathematical applications.
- Cause and Effect: Directly witnessing a chemical reaction demonstrates how one action leads to a specific outcome.
Beyond these tangible skills, chemistry experiments foster a sense of wonder and accomplishment. When a child successfully creates a bubbling potion or grows a crystal, their confidence soars. This positive reinforcement encourages further exploration and a lifelong love of learning. Moreover, these screen-free activities provide a fantastic alternative to digital entertainment, promoting active engagement and family bonding. Imagine the joy of working together on a colorful experiment, sharing laughter, and discovering new things side by side. It's these shared experiences that build strong connections and cherished memories.
Ready to bring more of these incredible learning experiences into your home regularly? Our carefully curated I'm the Chef Too! Chef's Club subscription delivers a new, exciting blend of food, STEM, and arts right to your door every month. Each box comes with pre-measured dry ingredients and specialty supplies, making it incredibly convenient for busy families to dive into "edutainment" adventures together.
Safety First! Essential Tips for Young Chemists
Before donning lab coats (or aprons, in our case!), safety must always be the top priority. While many kids chemistry experiments use common household ingredients, adult supervision is absolutely non-negotiable. Instilling good safety habits early on teaches children responsibility and respect for scientific processes.
Here are some crucial safety guidelines to follow for every experiment:
- Adult Supervision: Never leave children unattended during an experiment, even with seemingly harmless ingredients. An adult should always be present to guide, assist, and ensure safety.
- Read Instructions Thoroughly: Before starting, read all steps and gather all materials. Understand the "why" behind each action.
- Eye Protection: For experiments involving splashes, powders, or reactions that might produce gas, safety goggles are a must. Simple swimming goggles can often suffice for kids.
- No Tasting (Unless Edible!): Unless an experiment is specifically designed as an edible one (like many of our I'm the Chef Too! kits!), assume all ingredients are not for consumption. Clearly communicate this rule to children.
- Proper Ventilation: Some reactions might produce odors or fumes. Conduct these experiments in a well-ventilated area, such as near an open window or outdoors.
- Handwashing: Always wash hands thoroughly with soap and water before and after handling any chemicals or ingredients.
- Clean Workspace: Protect your surfaces with old newspapers, tablecloths, or baking sheets to contain spills and make cleanup easier.
- Allergy Awareness: Be mindful of any food allergies or sensitivities when choosing ingredients, especially for edible experiments.
- Respect for Heat Sources: If an experiment involves heat (like a stovetop, oven, or even a microwave), adults should handle all heating elements. Teach children about burn safety.
- Safe Disposal: Follow instructions for disposing of experiment waste properly. Most household experiment waste can go down the drain or in the regular trash, but always double-check.
By establishing these safety protocols, you create a secure and respectful environment for learning and discovery, allowing your children to explore the wonders of chemistry with confidence.
Kitchen Chemistry: Deliciously Edible Experiments
At I'm the Chef Too!, we firmly believe that some of the best learning happens when it's delicious! Our unique approach blends culinary arts with STEM principles, creating edible adventures that are as educational as they are fun. Kitchen chemistry is a fantastic way to introduce children to scientific concepts using familiar, safe, and often tasty ingredients. These experiments transform your kitchen into a vibrant lab where curiosity is sparked, and creativity is savored.
Fizzing & Frothing Fun: Edible Acid-Base Reactions
Many delightful edible experiments revolve around the classic acid-base reaction, often producing exciting fizz and foam.
-
Fizzy Lemonade (or Limeade!): A simple and refreshing way to demonstrate gas production.
- Materials: Lemon juice (an acid), baking soda (a base), sugar, water, and ice.
- Procedure: Mix sugar and lemon juice. In a separate cup, add a tiny bit of baking soda to some water. When you combine the baking soda solution with the lemon juice mixture, watch it fizz! The carbon dioxide gas created makes a delicious, bubbly drink. Experiment with how much baking soda creates the perfect fizz without affecting the taste too much.
- Science: This is a classic acid-base reaction producing carbon dioxide gas, which gives the lemonade its fizz.
- "Erupting" Lava Cakes: While not a true volcano in the traditional sense, you can create delicious cupcakes or muffins that "erupt" with a gooey center using similar principles. Our very own Erupting Volcano Cakes Kit takes this concept to a whole new level, blending geology with baking! Children learn about chemical reactions while making and decorating incredible cakes that bubble over with deliciousness. It's a fantastic way to see science in action and then enjoy the tasty results.
The Magic of Mixtures: Edible States of Matter & Solutions
Exploring how ingredients mix and change states is fundamental to chemistry, and it's particularly engaging when the end product is a treat.
-
Ice Cream in a Bag: This experiment is a fantastic way to explore states of matter, heat transfer, and endothermic reactions – all while making fresh ice cream!
- Materials: Half-and-half or whole milk, sugar, vanilla extract, ice, rock salt, two resealable plastic bags (one quart-size, one gallon-size).
- Procedure: In the quart bag, mix milk, sugar, and vanilla. Seal it tightly, removing as much air as possible. In the gallon bag, combine ice and rock salt. Place the sealed quart bag inside the gallon bag, ensuring it's completely surrounded by the ice-salt mixture. Shake vigorously for 5-10 minutes until the liquid hardens into ice cream.
- Science: The salt lowers the freezing point of the ice, creating a super-cold brine (an endothermic reaction) that draws heat away from the milk mixture, freezing it into ice cream.
-
Rock Candy Crystals: Growing your own edible crystals is a mesmerizing process that teaches about supersaturation and crystallization over several days.
- Materials: Sugar, water, a pot, heat, wooden skewers, clothespins, clear glasses or jars.
- Procedure: Heat water in a pot and add sugar, stirring constantly until no more sugar dissolves (this creates a supersaturated solution). Let it cool slightly. Pour into jars. Suspend a skewer in each jar using a clothespin, ensuring it doesn't touch the bottom or sides. Wait patiently for days or even a week as crystals form.
- Science: As the supersaturated sugar solution cools and water slowly evaporates, the sugar molecules come out of the solution and begin to attach to the skewer, forming beautiful crystals.
The Science of Baking: Beyond Simple Mixing
Baking itself is a complex series of chemical reactions, and delving into it can be incredibly educational.
-
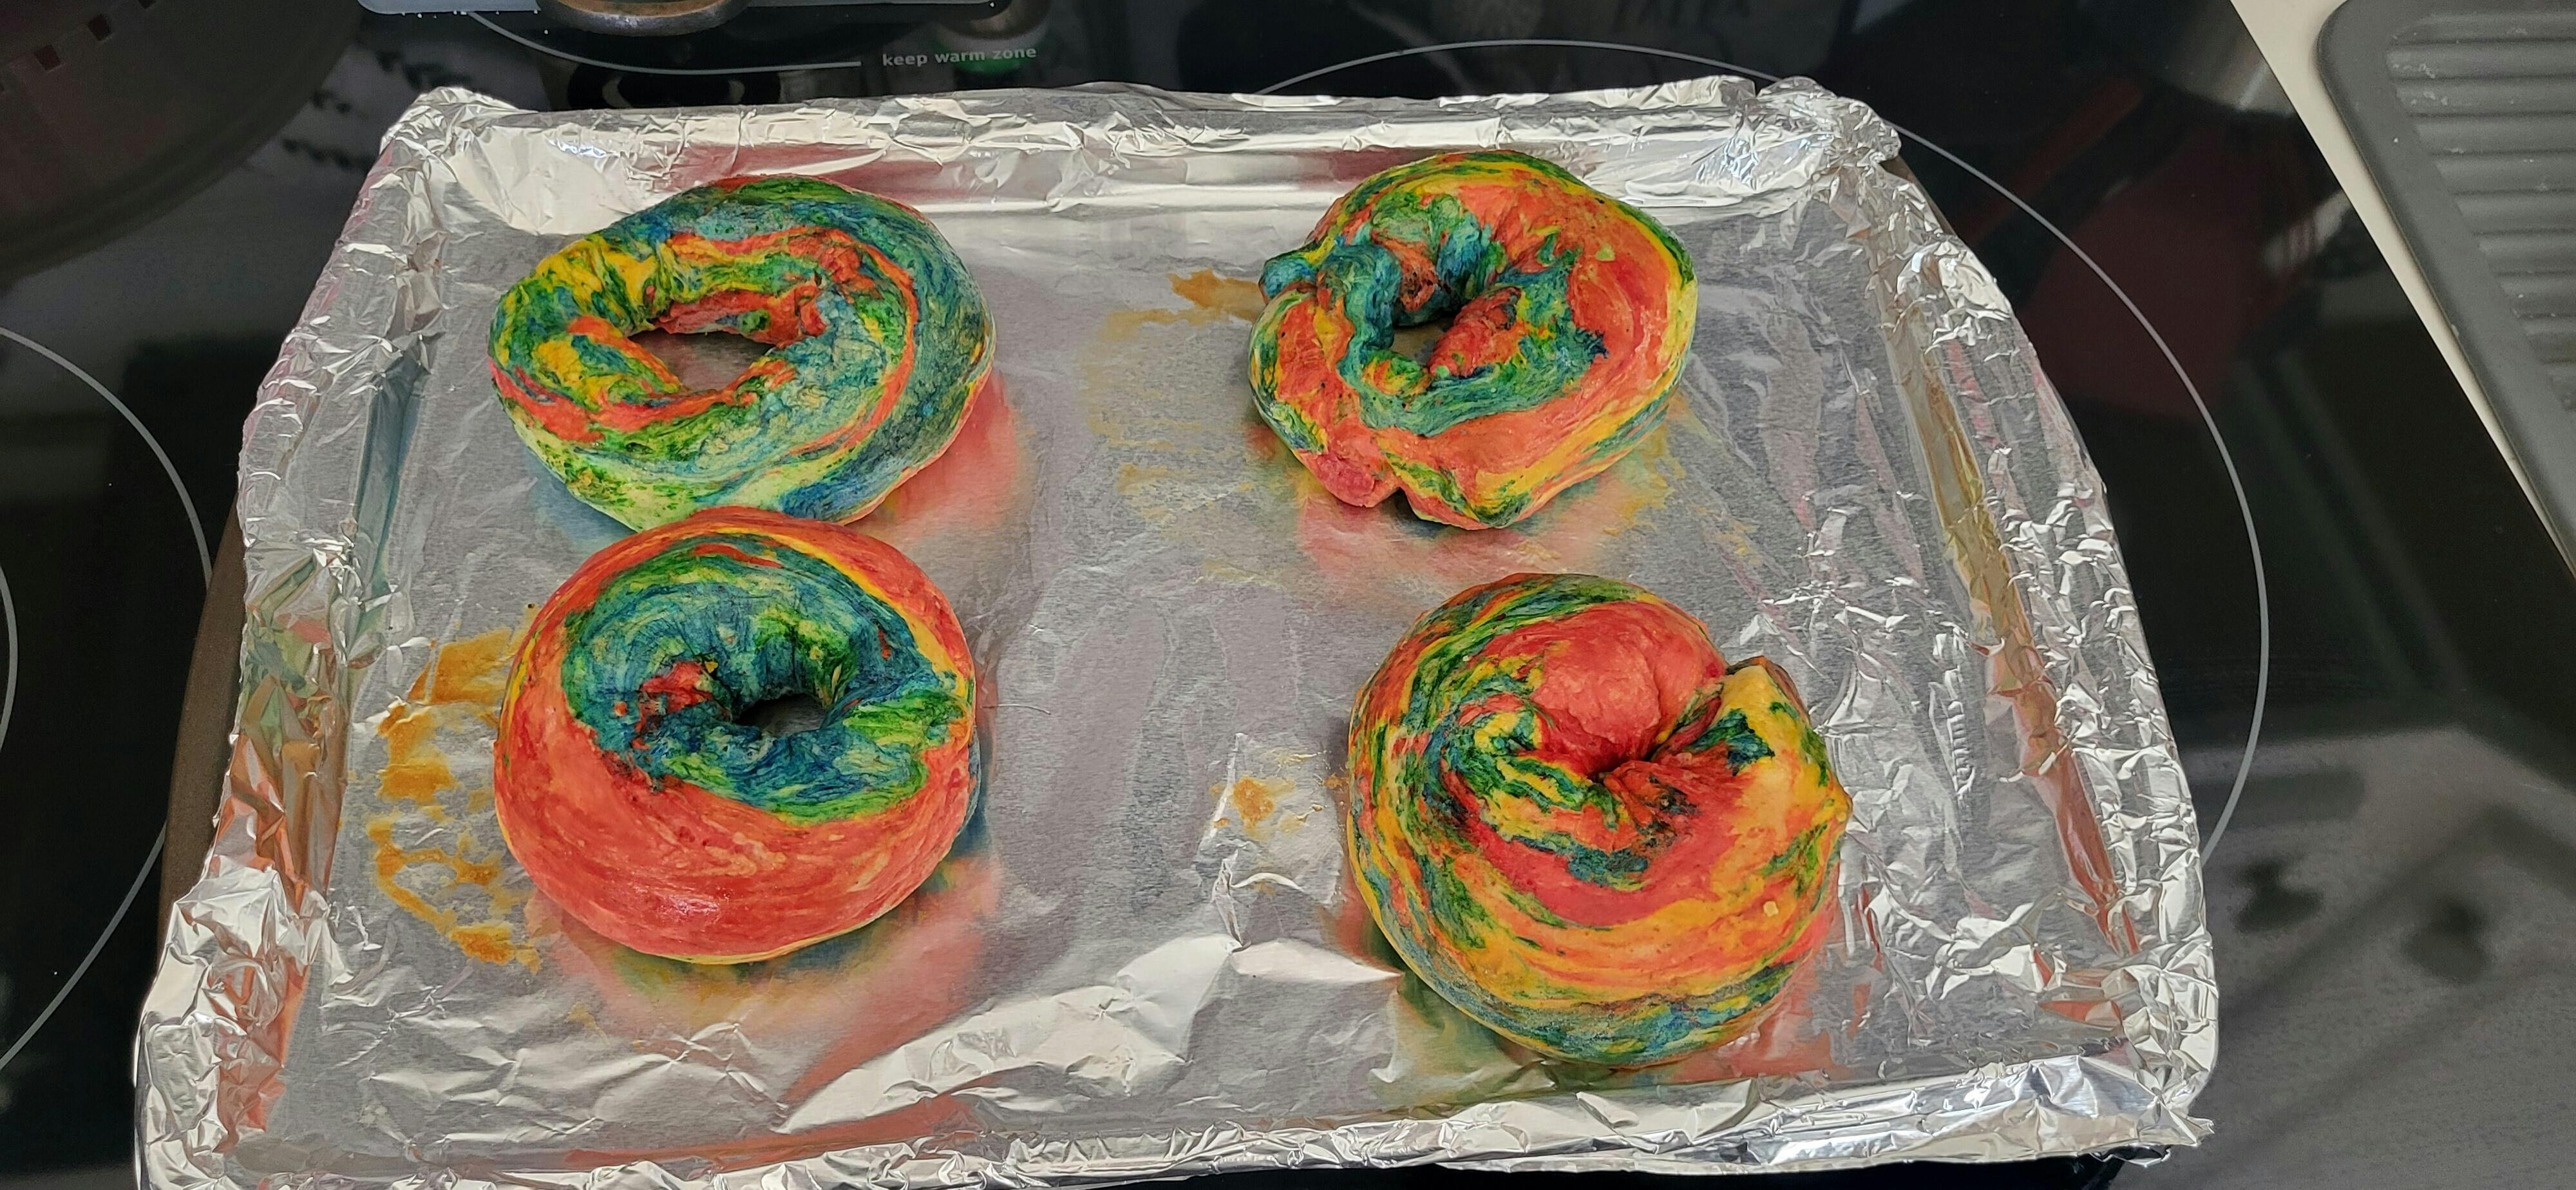
Bread in a Bag: A simple way to explore the role of yeast, a living organism, in fermentation and gas production.
- Materials: Flour, yeast, warm water, sugar, salt, oil, resealable plastic bag.
- Procedure: Mix warm water, sugar, and yeast in the bag and let it activate. Add flour, salt, and oil, then knead right in the bag. Let it rise, then shape and bake.
- Science: Yeast feeds on sugar and produces carbon dioxide gas, which gets trapped in the dough, causing it to rise. This is a classic example of fermentation.
- Themed Culinary Adventures: Our kits make learning edible and incredibly engaging. For instance, children can explore the science of mud and gravity by creating Peppa Pig Muddy Puddle Cookie Pies. It’s a delightful way to connect beloved characters with real-world scientific concepts in a fun, delicious, and screen-free manner.
These edible chemistry experiments are not just fun; they bridge the gap between abstract scientific concepts and concrete, delicious results. They demonstrate that science is all around us, even in our favorite foods. If you're looking for more exciting culinary STEM adventures that take the guesswork out of gathering ingredients and planning, explore our full library of one-time kits in our shop. Each kit offers a complete "edutainment" experience designed to spark curiosity and creativity!
Fantastic Fizz & Foaming Fun: Exploring Chemical Reactions
Chemical reactions are at the heart of chemistry, and they are incredibly exciting to witness, especially when they involve fizz, foam, and dramatic transformations. These experiments beautifully illustrate how substances can combine to create entirely new materials, often accompanied by visible changes like gas production or color shifts.
The Classic Volcano: Baking Soda and Vinegar
Perhaps the most iconic kids' chemistry experiment, the baking soda and vinegar volcano is a spectacular demonstration of an acid-base reaction producing gas.
- Materials: Baking soda, white vinegar, dish soap (optional, for more foam), food coloring (optional), a bottle or container (e.g., a plastic bottle, small jar), and a tray or baking pan to catch the "lava."
- Procedure: Place the bottle in the center of your tray. Add 1-2 tablespoons of baking soda to the bottle. If desired, add a few drops of food coloring and a squirt of dish soap for a more dramatic, foamy eruption. Slowly pour in the vinegar and watch the magnificent eruption!
- Science: Baking soda (sodium bicarbonate) is a base, and vinegar (acetic acid) is an acid. When they mix, they react to produce carbon dioxide gas. The gas bubbles rapidly escape, creating the "erupting" effect. Dish soap traps the gas, making the foam last longer.
- Extension: Experiment with different amounts of baking soda and vinegar to see how it affects the size and duration of the eruption. Try using warm versus cold vinegar.
- For an even more immersive experience that links chemistry to geology and culinary arts, our Erupting Volcano Cakes Kit provides all you need to bake and decorate amazing volcano cakes that really bubble! It’s an example of how we blend edible fun with core STEM concepts.
Gas Production in Action: Alka-Seltzer Adventures
Alka-Seltzer tablets are another fantastic source of fizz, perfect for demonstrating gas production in a variety of creative ways.
-
Alka-Seltzer Rockets: Build and launch a mini rocket powered by chemistry!
- Materials: Empty film canister (or a small container with a tight-fitting lid), Alka-Seltzer tablet, water.
- Procedure: Fill the film canister about one-quarter full with water. Break an Alka-Seltzer tablet in half and quickly drop it into the water. Snap the lid on tightly and immediately place the canister upside down on a flat surface (ideally outdoors or in a clear, open space). Stand back and watch it launch!
- Science: Alka-Seltzer contains citric acid and baking soda. When it dissolves in water, these ingredients react to produce carbon dioxide gas. The gas builds pressure inside the sealed canister until it forces the lid off, propelling the canister upward.
-
Lava Lamps: Create a mesmerizing, reusable lava lamp using simple household items.
- Materials: Tall, clear glass or plastic bottle, vegetable oil, water, food coloring, Alka-Seltzer tablets.
- Procedure: Fill the bottle about two-thirds full with vegetable oil, then fill the rest with water, leaving a small gap at the top. The oil and water will separate. Add several drops of food coloring. Drop in a piece of an Alka-Seltzer tablet and watch the colored "lava" blobs rise and fall. Add more tablet pieces as needed to keep the reaction going.
- Science: Oil and water don't mix (they are immiscible) due to differences in polarity and density. The colored water sinks through the oil. When Alka-Seltzer reacts with the water, carbon dioxide gas bubbles are produced. These bubbles attach to the colored water droplets, making them less dense and causing them to rise through the oil. When the bubbles pop at the surface, the water droplets become denser again and sink, creating the "lava lamp" effect.
Foaming Wonders: Elephant Toothpaste
This impressive experiment produces a large, warm column of foam, showcasing catalysis and exothermic reactions. Due to the ingredients, this requires strict adult supervision and careful handling.
- Materials: Empty plastic bottle (e.g., a soda bottle), 6% hydrogen peroxide (available at beauty supply stores, not the 3% common household variety – higher concentrations create a better reaction but require more caution), active dry yeast, warm water, dish soap, food coloring, a large tray or basin.
- Procedure: Place the bottle in the tray. Pour about ½ cup of hydrogen peroxide into the bottle. Add a good squirt of dish soap and a few drops of food coloring. Swirl gently. In a separate small bowl, mix 1 tablespoon of active dry yeast with 3 tablespoons of warm water and stir for 30 seconds to activate the yeast. Pour the yeast mixture into the bottle and quickly step back. A large column of foam will rapidly erupt!
- Science: Hydrogen peroxide naturally breaks down into water and oxygen, but very slowly. Yeast contains an enzyme called catalase, which acts as a catalyst, significantly speeding up this decomposition reaction. The rapid release of oxygen gas gets trapped by the dish soap, creating the enormous foam, which is warm to the touch because the reaction releases heat (exothermic).
- Safety Note: Wear gloves and eye protection. Do not touch the foam immediately as it can be warm. Dispose of responsibly.
These bubbling, fizzing, and foaming experiments provide thrilling visual demonstrations of chemical changes, making abstract concepts concrete and exciting for young scientists. For an ongoing source of such captivating "edutainment," consider our flexible Chef's Club subscription options. We offer 3, 6, and 12-month pre-paid plans, perfect for gifting or ensuring a continuous stream of hands-on, delicious STEM learning.
Acids, Bases, and pH: The Colorful World of Indicators
The concepts of acids and bases might sound advanced, but they are all around us, from the lemons we squeeze to the baking soda we use. Introducing children to pH – a measure of how acidic or basic a substance is – can be incredibly visual and engaging, thanks to the magic of natural indicators.
The Amazing Red Cabbage Indicator
Red cabbage juice is a wonder of nature, acting as a natural pH indicator that changes color dramatically depending on the acidity or alkalinity of a substance.
- Materials: Red cabbage, hot water, blender or grater, strainer, various household substances (lemon juice, vinegar, baking soda dissolved in water, dish soap dissolved in water, plain water, milk, antacid dissolved in water), clear cups or containers.
-
Procedure:
- Make the Indicator: Chop about a quarter of a red cabbage. Blend it with enough hot water to cover the cabbage, or grate it finely and steep in hot water for about 10-15 minutes. Strain the liquid to get your purple red cabbage juice indicator.
- Test Substances: Pour a small amount of each household substance into separate clear cups. Add a tablespoon or two of the red cabbage indicator to each cup and observe the color change.
- Science: Red cabbage contains a pigment called anthocyanin. This pigment reacts with acids and bases, causing it to change color. In acidic solutions (like lemon juice or vinegar), it turns red or pink. In neutral solutions (like plain water), it remains purple. In basic or alkaline solutions (like baking soda or dish soap), it turns blue, green, or even yellow!
- Extension: Create a pH scale using paper and label where each substance falls. Discuss why some cleaners are basic and some foods are acidic.
Lemon Volcanoes: A Zesty Twist
Building on the acid-base reaction, lemon volcanoes provide a delightful, fragrant, and slightly contained eruption.
- Materials: Fresh lemons, baking soda, dish soap, food coloring (optional), craft stick or spoon, tray.
- Procedure: Cut the bottom off a lemon so it sits flat (don't cut too much or juice will leak). With a knife or spoon, gently poke and loosen the pulp inside the lemon to release some juice, but keep the rind intact as a "crater." Add a few drops of food coloring into the lemon. Sprinkle a generous amount of baking soda into the lemon. Use a craft stick to stir the baking soda and lemon juice together. As the reaction starts, add a squirt of dish soap for more foam, and continue stirring. You can even squeeze the lemon gently to get more juice flowing.
- Science: Lemons are naturally acidic (citric acid). When baking soda (a base) is added, the acid-base reaction produces carbon dioxide gas, causing the foamy eruption. The dish soap enhances the foam.
- Extension: Compare the eruption using different citrus fruits like limes or oranges. Do they produce more or less fizz?
Rubber Egg Experiment: Dissolving Shells
This patience-testing experiment beautifully illustrates how acids can react with certain materials over time.
- Materials: Raw egg, white vinegar, clear glass or jar.
- Procedure: Carefully place a raw egg into a clear glass. Pour enough white vinegar over the egg to completely submerge it. Observe it over several days, changing the vinegar every day or two. After about 2-3 days, the shell will have mostly dissolved, leaving a "naked" egg with a rubbery texture. You can even bounce it (gently!) from a low height.
- Science: Eggshells are primarily made of calcium carbonate. Vinegar, being an acid, reacts with the calcium carbonate in the shell, dissolving it and producing carbon dioxide gas (which you'll see as tiny bubbles initially forming on the shell). What's left is the semi-permeable membrane that holds the egg together, giving it a rubbery, bouncy texture.
- Safety Note: This is a raw egg, so handle with care and wash hands thoroughly. Do not eat the egg.
These vibrant and hands-on experiments make the abstract concepts of acids, bases, and pH accessible and exciting for young learners. They show how chemistry influences everything from our food to the natural world. To keep the scientific adventures coming, remember that our Chef's Club subscription offers a convenient, all-in-one solution for engaging "edutainment" delivered right to your door, complete with pre-measured ingredients and specialty supplies.
States of Matter & Beyond: Physical Changes in Action
Chemistry isn't just about things reacting to form new substances; it also involves understanding the physical changes matter undergoes. Exploring states of matter (solid, liquid, gas), density, and osmosis provides a fundamental understanding of how substances behave. These experiments are often simpler to set up and offer clear, observable results.
Observing Changes of State: Melting, Freezing, and Evaporation
-
Melting & Freezing Ice: The simplest way to demonstrate reversible physical changes.
- Materials: Ice cubes, two plates or bowls.
- Procedure: Place an ice cube on one plate in a warm spot and another on a second plate in a cooler spot. Observe which one melts faster. Then, put the melted water into a freezer-safe container and freeze it back into ice.
- Science: Melting is a physical change where a solid (ice) absorbs heat energy and transforms into a liquid (water). Freezing is the reverse, where a liquid loses heat energy and turns into a solid. The chemical composition (H2O) remains the same throughout.
-
Evaporation Experiment: Illustrating how liquids can turn into invisible gas.
- Materials: Two shallow dishes or bowls, water, sunny spot, shaded spot.
- Procedure: Pour the same amount of water into two dishes. Place one in a sunny, warm spot and the other in a shaded, cooler spot. Mark the water level with a marker. Check back over a day or two and observe which dish loses water faster.
- Science: Water molecules gain enough energy from heat to escape the liquid surface and turn into water vapor (a gas), which mixes with the air. This process is called evaporation. Warmer temperatures speed up evaporation.
Layers of Learning: Density Rainbow Jar
Density is a fascinating property of matter that determines how much "stuff" is packed into a given volume. This experiment creates a beautiful, layered visual.
- Materials: Tall, clear glass or jar, various liquids with different densities (e.g., honey, corn syrup, dish soap, water, vegetable oil, rubbing alcohol), food coloring, dropper or spoon.
-
Procedure: Carefully layer each liquid into the jar, starting with the densest at the bottom and ending with the least dense at the top. For best results, pour slowly down the side of the glass. You can color the water and rubbing alcohol for more contrast.
- Typical density order (densest to least dense): Honey, corn syrup, dish soap, water, vegetable oil, rubbing alcohol.
- Science: Different liquids have different densities. Denser liquids sink below less dense liquids, creating distinct layers. This shows that even if liquids appear similar, they have different physical properties that affect how they interact.
- Extension: Try dropping small objects into the jar (e.g., a grape, a plastic bead, a paperclip) and observe where they float or sink, further exploring density.
Water's Journey: Osmosis with Gummy Bears
Osmosis is a vital biological process where water moves across a semi-permeable membrane. Gummy bears make this concept surprisingly tangible and fun!
- Materials: Gummy bears, plain water, saltwater (dissolve a lot of salt in water), clear cups.
- Procedure: Place one gummy bear in a cup of plain water and another in a cup of saltwater. Leave a "control" gummy bear out on a plate. Observe the changes in size and texture of the gummy bears after a few hours, then again after 24 hours.
- Science: Gummy bears are made of gelatin and sugar. The gelatin acts as a semi-permeable membrane. In plain water, water molecules move from the higher concentration outside the gummy bear into the lower concentration inside the gummy bear, causing it to swell (osmosis). In saltwater, if the salt concentration is higher outside, water will move out of the gummy bear, causing it to shrink or remain unchanged, depending on the exact concentrations.
- Extension: Try different solutions like sugar water or vinegar to see varying effects.
Dissolving Colors: Skittles and Water
A quick and vibrant experiment to explore dissolving, diffusion, and even a touch of chromatography.
- Materials: Skittles (or other candy with colored shells), warm water, white plate or shallow dish.
- Procedure: Arrange the Skittles in a circle or pattern on the white plate. Carefully pour warm water into the center of the plate, just enough to cover the bottom of the candies. Watch as the colors dissolve and spread, creating a beautiful rainbow pattern.
- Science: The colorful outer layer of the Skittles dissolves in the water. As the sugar and dyes dissolve, they diffuse (spread out) from an area of higher concentration (around the candy) to an area of lower concentration (the plain water), creating the stunning visual effect. The different dyes might also travel at slightly different rates, hinting at chromatography.
These experiments highlight fundamental physical properties and changes in matter, offering clear observations and encouraging children to think about how substances interact. Each activity, whether it's layering liquids or watching candies dissolve, provides a window into the wonders of scientific principles at play in our everyday lives.
Looking for even more engaging ways to explore science with your kids without the hassle of gathering materials? Our full collection of one-time kits offers unique, self-contained adventures blending food, STEM, and arts, perfect for a rainy day or a special learning project.
The Art of Separation: Chromatography & Mixtures
Sometimes, chemistry isn't about combining things, but about taking them apart! Chromatography is a brilliant technique that shows how mixtures can be separated based on different properties. It's like being a detective, revealing hidden components within what seems like a single substance.
Hidden Colors: Coffee Filter Chromatography
This classic experiment is visually striking and easy to set up, making it perfect for demonstrating how pigments can be separated.
- Materials: Coffee filters (or paper towels), washable markers (especially black, brown, and green), clear plastic cups, water, pencils or craft sticks.
-
Procedure:
- Cut strips of coffee filter paper.
- Draw a thick line about an inch from one end of each strip using a different colored marker.
- Pour a small amount of water into each cup, just enough to cover the bottom but not touch the marker line when the paper strip is placed in.
- Hang each coffee filter strip over a pencil or craft stick placed across the top of the cup, so the bottom end of the paper just barely dips into the water, and the marker line is above the water.
- Observe as the water travels up the paper, carrying the different pigments in the marker ink with it, separating them into distinct colors.
- Science: Chromatography works because different components of the ink have different solubilities in the water (the "solvent") and different affinities for the paper (the "stationary phase"). As the water moves up the paper, it dissolves the ink. The components that are more soluble in water and less attracted to the paper will travel further up, separating from those that are less soluble or more attracted to the paper. This is why black ink often reveals a rainbow of colors!
- Extension: Experiment with different brands of markers, or try different solvents like rubbing alcohol (with adult supervision) to see if you get different separations.
Nature's Palette: Leaf Chromatography
This seasonal experiment is a wonderful way to explore plant science and the hidden colors of autumn leaves.
- Materials: Fresh green leaves (from the same tree type work best), rubbing alcohol (with adult supervision), small clear jars or tall glasses, plastic wrap, shallow pan of hot water, spoon.
-
Procedure:
- Tear the leaves into very small pieces and place them in the jars.
- Pour just enough rubbing alcohol into each jar to cover the leaves.
- Mash the leaves gently with the spoon to help extract the pigments.
- Cover the jars loosely with plastic wrap.
- Place the jars in a shallow pan filled with hot tap water (like a warm bath, not boiling) for about 30-60 minutes. The warmth helps the alcohol extract the colors.
- After the time, remove the jars and observe the colored alcohol. You should see different bands of color (green, yellow, orange, brown) as the pigments separate.
- Science: Leaves contain several pigments, including chlorophyll (green), carotenoids (yellow/orange), and anthocyanins (red/purple, often produced in autumn). During most of the year, chlorophyll is so abundant that it masks the other colors. This experiment uses rubbing alcohol to extract and separate these pigments, revealing the underlying yellows and oranges that are always present in the leaf, even when they're hidden by the green.
These chromatography experiments offer a unique glimpse into the composition of everyday items, transforming seemingly simple substances into a canvas of scientific discovery. They teach patience, observation, and the surprising complexity found in the most common materials.
Growing Wonders: Crystals and Polymers
Some of the most enchanting chemistry experiments are those that unfold over time, revealing intricate structures or creating new, unusual materials. Crystal growth and polymer formation are perfect examples, encouraging patience, careful observation, and a sense of awe at the natural world.
Sparkling Creations: How to Grow Borax Crystals
Growing crystals is a magical experience that teaches about supersaturated solutions and crystallization. Borax crystals are relatively fast-growing and create beautiful formations.
- Materials: Borax (laundry booster, adult supervision essential), boiling water, pipe cleaners, string, pencils or craft sticks, clear jars or containers, optional: food coloring.
-
Procedure:
- Shape pipe cleaners into desired forms (e.g., snowflakes, stars, geometric shapes). Tie a piece of string to each pipe cleaner shape and attach the other end to a pencil, ensuring the shape can hang freely without touching the bottom or sides of the jar.
- In a jar, mix boiling water with borax. Use about 3 tablespoons of borax per cup of boiling water, stirring until no more borax dissolves (this creates a supersaturated solution).
- (Optional) Add a few drops of food coloring to tint your crystals.
- Carefully lower the pipe cleaner shape into the borax solution, suspending it from the pencil across the top of the jar.
- Leave undisturbed overnight (6-12 hours). By morning, beautiful crystals will have formed!
- Carefully remove the crystal-covered shapes and let them dry.
- Science: As the supersaturated borax solution cools, the water can no longer hold all the dissolved borax. The excess borax molecules begin to precipitate out of the solution and attach to the pipe cleaner (the "seed" for crystal growth), forming an ordered, repeating structure – a crystal.
- Safety Note: Borax is a cleaning agent and should not be ingested. Handle with gloves, and ensure children wash hands thoroughly after handling.
Simple Slime: Exploring Polymers
Slime is a beloved classic that introduces the concept of polymers and non-Newtonian fluids in a wonderfully tactile way. There are many slime recipes; we'll focus on a safe, common household version using contact lens solution.
- Materials: White school glue (PVA glue), baking soda, contact lens solution (containing borate or boric acid), mixing bowl, spoon, optional: food coloring, glitter.
-
Procedure:
- Pour ½ cup of white school glue into a bowl.
- Stir in ½ teaspoon of baking soda until fully dissolved.
- Add a few drops of food coloring or glitter if desired.
- Slowly add contact lens solution, about 1 tablespoon at a time, stirring constantly. You'll notice the mixture start to pull away from the sides of the bowl and become thicker.
- Once it's too thick to stir, knead the slime with your hands for a few minutes. If it's too sticky, add a tiny bit more contact lens solution, being careful not to add too much, or the slime will become stiff.
- Science: White school glue contains a polymer called polyvinyl acetate. The borate ions in the contact lens solution act as a "cross-linker." They connect the long polymer chains of the glue, forming new, larger, and more entangled chains. This changes the liquid glue into a stretchy, bouncy, non-Newtonian fluid – slime!
- Safety Note: Ensure contact lens solution contains borate or boric acid. Always supervise children, and wash hands thoroughly after playing with slime. Do not ingest.
These experiments provide children with a tangible understanding of how matter can be structured and transformed over time, from tiny molecules forming crystals to long chains creating a playful polymer. They nurture patience and a deep appreciation for the hidden chemistry that shapes our world.
To effortlessly bring more unique STEM-based learning activities into your home, we encourage you to explore the variety of options offered by I'm the Chef Too! Our convenient Chef's Club subscription delivers a new, exciting kit to your door every month with free shipping in the US. Each box is a complete "edutainment" experience, containing pre-measured dry ingredients and specialty supplies, making it easy to create delicious learning adventures and lasting family memories.
Bringing STEM to Life with I'm the Chef Too!
The world of chemistry is vast, wondrous, and full of opportunities for discovery. From the explosive fizz of a baking soda volcano to the slow, mesmerizing growth of crystals, these hands-on kids chemistry experiments offer invaluable lessons in observation, critical thinking, and the sheer joy of scientific exploration. Our goal at I'm the Chef Too! is to make these incredible learning experiences accessible, engaging, and delightfully fun for every child.
We are passionate about sparking curiosity and creativity by blending food, STEM, and the arts into unique "edutainment" experiences. Our kits, developed by mothers and educators, go beyond simple recipes, transforming each culinary adventure into a comprehensive lesson in chemistry, physics, biology, and more. Imagine exploring astronomy by creating your own edible solar system with our Galaxy Donut Kit, or understanding chemical reactions by baking an erupting cake. These tangible, delicious projects provide a screen-free alternative that fosters not only academic skills but also crucial life skills like following instructions, problem-solving, and building confidence in the kitchen.
We strive to make family bonding through education as simple and enjoyable as possible. That's why each I'm the Chef Too! box comes with pre-measured dry ingredients and specialty supplies, delivered conveniently to your door. You don't need to hunt for obscure chemicals or spend hours planning; just open the box and embark on a new adventure. We focus on the process – the laughter, the learning, the shared moments – because we know that fostering a love for learning and creating joyful family memories are the most valuable outcomes.
Whether your child is a budding scientist, an aspiring chef, or simply loves hands-on activities, our kits offer something truly special. We believe every child deserves the chance to explore, create, and discover the magic of STEM in a way that resonates with their natural curiosity.
Are you ready to bring more hands-on, delicious STEM adventures into your home every month? Join our family of curious learners and explore the exciting world of "edutainment" with us. Join The Chef's Club today and enjoy free shipping on every box, bringing a new blend of food, STEM, and arts right to your doorstep!
FAQ: Your Chemistry Questions Answered
Q1: What are easy chemistry experiments for kids?
A: Easy chemistry experiments often involve everyday household items and produce visible reactions. Some great starting points include baking soda and vinegar reactions (like volcanoes), dissolving experiments (Skittles and water), basic density layering (oil and water), and simple color mixing with milk and soap. Many of these require minimal setup and offer immediate, engaging results.
Q2: Can kids do chemistry experiments at home?
A: Absolutely! Many chemistry experiments for kids are perfectly suited for home environments using common kitchen ingredients. The key is always to have active adult supervision, follow safety guidelines (like eye protection and no tasting unless edible), and ensure the workspace is protected. Our I'm the Chef Too! kits are specifically designed for home use, providing all the necessary, safe ingredients and clear instructions for a fantastic at-home learning experience.
Q3: What age is appropriate for chemistry experiments?
A: Chemistry experiments can be adapted for children across a wide age range, from preschoolers to upper elementary students and beyond.
- Preschoolers (3-5 years): Focus on sensory experiences, simple observations, and cause-and-effect (e.g., color mixing, simple dissolving, safe bubbling reactions). Emphasis on adult-led participation.
- Early Elementary (6-8 years): Introduce basic terminology, encourage predictions, and involve them more in the setup and cleanup. They can handle slightly more complex multi-step experiments.
- Upper Elementary (9-11+ years): Encourage independent hypothesis formation, detailed observation, data recording, and deeper discussions about the "why" behind the reactions. They can often follow more intricate instructions with supervision. Our kits are generally designed for ages 4 and up, with activities that scale in engagement and learning depth for various age groups within that range.
Q4: Are chemistry experiments safe for elementary students?
A: Yes, chemistry experiments are generally safe for elementary students when age-appropriate materials are used and, most importantly, when conducted under direct adult supervision. Avoiding harsh chemicals, using proper protective gear, and emphasizing rules like "no tasting" and "wash hands" are crucial. We carefully select and pre-measure ingredients in our I'm the Chef Too! kits to ensure they are safe and suitable for children to handle with supervision, focusing on food-safe and non-toxic components whenever possible.
Q5: What if I don't have all the ingredients or don't know where to start?
A: That's a common concern! Gathering specific ingredients or knowing which ones are safe can be a challenge. That's precisely why I'm the Chef Too! exists. Our monthly Chef's Club subscription and individual one-time kits solve this problem. Each box is a complete experience, arriving with pre-measured dry ingredients and specialty supplies, along with easy-to-follow instructions. We remove the hassle, so you can jump straight into the fun and learning, confident that you have everything you need.
Q6: How can I make learning even more engaging and educational beyond just doing the experiment?
A: To maximize the educational value, encourage children to:
- Predict: Ask "What do you think will happen?" before starting.
- Observe: Guide them to describe what they see, hear, and feel (if safe).
- Explain: Ask "Why do you think that happened?" or "What did you learn?"
- Extend: Suggest variations or related questions to explore next.
- Record: Encourage drawing or writing down observations in a "science journal." I'm the Chef Too! kits are designed with this in mind, providing comprehensive learning guides that link the culinary fun to specific STEM and art concepts, fostering deeper understanding and discussion.


")