Table of Contents
- Why Fairy Crafts? More Than Just Glitter and Pixie Dust
- Essential Supplies for Your Fairy Crafting Adventure
- Magical Fairy Houses: A Home for Tiny Friends
- Wand-erful Creations: Crafting Fairy Wands
- Fairy Gardens: Miniature Worlds of Wonder
- Edible Enchantment: Fairy-Themed Treats
- Fairy Wearables: Crowns, Wings, and Tiaras
- Storytelling & Imaginative Play: The Heart of Fairy Crafts
- Tips for a Magical Crafting Session
- Beyond the Craft: Extending the Fairy Fun
- Conclusion
- Frequently Asked Questions
Remember that spark in your child's eyes when they stumble upon something truly magical? It's that feeling of wonder, of a world just beyond the ordinary, that fuels their imagination and shapes their understanding of the world. In an age filled with screens and structured activities, finding ways to tap into this innate sense of magic can be a wonderful challenge for parents and educators alike. But what if we told you that the key to unlocking boundless creativity, developing crucial skills, and fostering a deep love for both art and nature lies in the enchanting world of fairy crafts?
At I'm the Chef Too!, we believe that learning should be an adventure, a delightful journey where curiosity is sparked and creativity knows no bounds. Our mission is to seamlessly blend food, STEM, and the arts into one-of-a-kind "edutainment" experiences that get kids excited about discovery. Fairy crafts for kids embody this philosophy perfectly, offering a unique blend of imaginative play, hands-on skill development, and tangible results that bring joy to the whole family. This post will delve into the magical realm of fairy crafts, exploring why they are so beneficial for young minds, what essential supplies you’ll need, and a variety of captivating projects your children will adore. Get ready to embark on a crafting journey that promises not just beautiful creations, but also cherished memories and invaluable learning opportunities.
Why Fairy Crafts? More Than Just Glitter and Pixie Dust
Fairy crafts are far more than just a pretty pastime. They serve as a powerful catalyst for a child's holistic development, touching upon various educational domains that we deeply value at I'm the Chef Too!. These whimsical projects inherently encourage children to engage their senses, think creatively, and interact with the world around them in meaningful ways.
Fostering Imagination and Creativity
One of the most immediate benefits of engaging in fairy crafts is the boundless space they provide for imagination. When a child crafts a tiny chair for a fairy, designs a magical wand, or builds a miniature fairy house, they are not just manipulating materials; they are weaving narratives, creating characters, and constructing entire worlds within their minds. This imaginative play is crucial for cognitive development, helping children to think abstractly, visualize concepts, and develop problem-solving strategies in a low-stakes, fun environment. It's a screen-free educational alternative that transports them to realms of their own making, where anything is possible.
Developing Fine Motor Skills
The intricate nature of many fairy crafts demands precision and control, which are excellent for refining fine motor skills. Activities like cutting small shapes, gluing delicate items, tying ribbons, painting details, or arranging tiny natural elements all contribute to strengthening the small muscles in a child’s hands and fingers. These skills are fundamental for tasks such as writing, drawing, and even self-care activities like buttoning clothes. Our hands-on cooking adventures at I'm the Chef Too! similarly emphasize these skills, showing how tangible activities can build practical abilities while having fun.
Nurturing a Love for Nature
Many fairy crafts naturally incorporate elements from the outdoors. Gathering twigs, leaves, pebbles, flowers, and moss not only provides free and abundant crafting materials but also encourages children to observe and appreciate the natural world. This interaction fosters a sense of environmental awareness and curiosity about botany, geology, and ecology. It turns a simple walk in the park into a treasure hunt for inspiration, connecting children with the beauty and wonder of nature, much like our kits connect kids with the science behind everyday ingredients.
Building Problem-Solving Skills
Crafting often involves miniature construction and design challenges. How do you make a tiny door swing open? How can you create a sturdy roof for a fairy house? What materials will best represent tiny furniture? These questions prompt children to experiment, adapt, and innovate. They learn to identify problems, brainstorm solutions, and test their ideas, developing critical thinking and resilience. This trial-and-error process is a cornerstone of STEM education, proving that learning can be as delicious as it is challenging.
Encouraging Emotional Expression
Creating something magical can be a deeply personal and emotionally fulfilling experience. Children can imbue their fairy creations with their own feelings, stories, and dreams. The process allows them to express themselves non-verbally, to bring their inner worlds to life, and to share their creations with pride. This boosts self-esteem and provides a healthy outlet for creativity and self-discovery.
At I'm the Chef Too!, our unique approach to teaching complex subjects through tangible, hands-on, and delicious cooking adventures is developed by mothers and educators who understand these benefits firsthand. We are committed to sparking curiosity and creativity, facilitating family bonding, and providing enriching experiences that go beyond the ordinary. Fairy crafts are a perfect example of how simple, accessible activities can yield profound developmental benefits, preparing children for a lifetime of learning and discovery.
Essential Supplies for Your Fairy Crafting Adventure
Before you dive into the whimsical world of fairy crafts, it's helpful to gather some basic supplies. The good news is that many of these items are either inexpensive, readily available, or can be found right in your own backyard!
The Basic Craft Kit: Your Foundation
Every good crafting session starts with a solid foundation. These are the tools and materials you'll reach for again and again:
- Scissors: Child-safe scissors are a must for little hands.
- Glue: A variety of glues can be useful – liquid school glue for paper, glue sticks for lighter materials, and a low-temperature hot glue gun (for adult use with supervision) for more sturdy constructions.
- Construction Paper/Cardstock: A rainbow of colors provides endless possibilities for cutting, folding, and decorating.
- Pipe Cleaners: Flexible and fuzzy, perfect for shaping into tiny furniture, figures, or decorative accents.
- Pompoms: Soft and colorful, ideal for adding texture and whimsical touches.
- Craft Sticks: Popsicle sticks can become tiny fences, furniture frames, or structural supports.
- Markers, Crayons, Paint: For adding color and detail to your creations.
Nature's Bounty: Free and Earthy Treasures
One of the most charming aspects of fairy crafts is how beautifully they integrate natural elements. A simple walk outdoors can become a treasure hunt for your crafting supplies.
- Twigs and Small Branches: Perfect for building miniature structures, fences, or tiny log cabins.
- Leaves: Of all shapes, sizes, and colors can be used for roofs, carpets, blankets, or decorative accents.
- Flowers and Petals: Fresh or dried, they add delicate beauty and vibrant hues.
- Pebbles and Small Stones: Great for pathways, stepping stones, or building tiny walls.
- Moss: The ultimate fairy carpet or roof covering, adding an authentic, soft touch.
- Acorns, Pinecones, Seed Pods: Offer unique textures and shapes for miniature decor.
Recycled Materials: Sustainability Meets Creativity
Give new life to everyday items by transforming them into magical fairy elements. This teaches children about recycling and imaginative reuse.
- Toilet Paper/Paper Towel Rolls: Can be painted and decorated to become tree trunks, tiny houses, or even fairy periscopes.
- Egg Cartons: Each cup can be a tiny flower pot, a chair, or part of a miniature village.
- Cardboard Boxes: Cereal boxes, tissue boxes, or shipping boxes are ideal for constructing fairy houses, furniture, or backdrops.
- Old Fabric Scraps: Transform into fairy blankets, curtains, flags, or miniature clothing.
- Plastic Bottles/Containers: Can be cut, painted, and decorated to form structures, ponds, or lanterns.
Sparkle & Shine: The Magical Touch
No fairy craft is complete without a touch of magic!
- Glitter: Biodegradable glitter is a more eco-friendly option for adding sparkle to wands, wings, and fairy houses.
- Sequins and Beads: For adding delicate embellishments and shimmering details.
- Rhinestones: Tiny jewels that bring a touch of regal elegance to any fairy creation.
- Ribbons and Yarn: For tying, hanging, decorating wands, or creating miniature swings.
Having a dedicated "fairy craft box" or shelf where you keep these supplies organized makes spontaneous crafting sessions much easier and encourages children to explore their creativity whenever inspiration strikes. And for parents looking for a more streamlined, convenient approach to crafting and cooking, remember that our monthly Chef's Club subscription delivers all the pre-measured dry ingredients and specialty supplies right to your door, making educational fun effortless!
Magical Fairy Houses: A Home for Tiny Friends
What better way to welcome miniature magical beings than by crafting them a cozy home? Fairy houses are perhaps the quintessential fairy craft, allowing for incredible creativity and ingenuity. They combine architectural design with artistic flair, providing a fantastic opportunity to blend STEM principles with imaginative play.
Nature-Inspired Fairy Houses
Building a fairy house from natural materials is a wonderful way to connect children with the outdoors and show them how to create beauty from what's readily available.
How-to:
- Foundation: Start with a sturdy base like a piece of cardboard, a flat stone, or a slice of wood.
- Walls: Collect small twigs and branches. Children can break them into shorter pieces (adult supervision may be needed for sharper breaks). Use a low-temperature hot glue gun (adult operation is key!) or strong craft glue to attach the twigs upright around the base, forming walls. You can also use bark segments or larger flat stones for a different look.
- Roof: Get creative with roofing! Overlapping leaves (fresh ones will dry, changing the look), moss, or even small pieces of bark can create a charming, natural roof. A small pinecone can make a great conical roof.
- Details: Add tiny windows and doors by gluing on smaller pieces of bark, leaves, or thin slices of wood. Decorate with pebbles for pathways, small flowers for gardens, or moss for soft landscaping.
Benefits: This project encourages children to observe textures and shapes in nature, understand basic structural concepts (like stability and shelter), and use their fine motor skills to manipulate diverse materials. It’s a wonderful example of how engineering and design can be explored through play.
Recycled Material Fairy Dwellings
Transforming everyday waste into whimsical homes is a fantastic lesson in upcycling and creative reuse, perfectly aligning with a sustainable mindset.
How-to:
- Structure: Use an empty cereal box, milk carton, plastic bottle, or even a toilet paper roll as the main structure. Cereal boxes are great for cutting out doors and windows.
- Decorate: Cover the chosen structure with construction paper, fabric scraps, or simply paint it. Encourage children to choose colors and patterns that feel magical to them.
- Details: Cut out tiny doors and windows from contrasting paper or felt. Draw on details like window panes, doorknobs, or climbing vines. Attach small beads, sequins, or buttons as decorative elements.
- Landscaping: Create a small garden around the house using green paper or fabric for grass, small pompoms for flowers, and pipe cleaners for fences.
Benefits: This activity boosts creativity by challenging children to see potential in discarded items. It enhances scissor skills, gluing techniques, and artistic expression through painting and drawing. It’s a hands-on way to teach about environmental responsibility while crafting something truly unique.
Building fairy houses is a truly immersive experience that can take hours of focused, joyful play. And just like crafting a fairy house offers endless design possibilities, our I'm the Chef Too! experiences offer endless opportunities for learning. Ready to bring new adventures to your home every month? Join The Chef's Club and enjoy free shipping on every box, packed with "edutainment" and delicious discoveries!
Wand-erful Creations: Crafting Fairy Wands
No fairy is complete without a magical wand! Crafting a fairy wand is a simple yet incredibly satisfying project that allows children to personalize their instrument of enchantment. It’s fantastic for developing hand-eye coordination and encouraging creative embellishment.
Nature's Wand
Using a stick as the base connects this craft directly to the natural world, giving it an earthy, authentic feel.
How-to:
- Find a Base: Head outdoors to find a sturdy stick, roughly pencil-thickness and hand-length. Encourage children to choose one that feels "right" for a fairy.
- Clean & Decorate: Wipe the stick clean. Children can paint the stick, wrap it with colorful yarn or ribbons, or simply leave it natural for a rustic look.
- Embellishments: At the top, glue on a small pinecone, a cluster of dried flowers, a shiny pebble, or even a sparkly pompom. Streamers of ribbons, lace, or strips of fabric can be tied to the handle for a magical flourish as they wave it.
Benefits: This project encourages appreciation for natural materials and offers opportunities to practice winding, tying, and gluing. It’s a great way to develop dexterity and create patterns with different textures.
Star-Topped Wands
For a more classic, sparkling fairy wand, a star-topped design is always a hit.
How-to:
- Star Cut-outs: Cut two identical star shapes from cardstock, felt, or craft foam. Make them roughly 3-4 inches across.
- Wand Stick: Use a craft stick, a thin dowel, or even a sturdy paper straw as the wand handle.
- Assembly: Decorate one side of each star with glitter, sequins, beads, or paint. Glue the top of the wand stick between the two stars, then glue the stars together, ensuring the stick is firmly sandwiched inside.
- Finishing Touches: Add more glitter, glue on ribbons or tinsel beneath the star, or tie bells to the handle for a melodic touch.
Benefits: This craft refines scissor skills (especially for cutting star shapes), improves gluing precision, and encourages children to think about design and symmetry. The tactile experience of decorating with various materials enhances sensory development. Just as these crafts inspire imaginative magic, our I'm the Chef Too! kits inspire a world of delicious possibilities. For instance, exploring astronomy by creating your own edible solar system with our Galaxy Donut Kit can feel just as magical as waving a wand!
Fairy Gardens: Miniature Worlds of Wonder
Creating a fairy garden is like stepping into a storybook, allowing children to design an entire miniature ecosystem. These gardens are living, growing crafts that teach patience, responsibility, and the basics of plant care alongside artistic arrangement.
Potted Fairy Gardens
These are perfect for a tabletop or windowsill, bringing a touch of nature indoors.
How-to:
- Choose a Container: Select a wide, shallow pot, a terra cotta planter, or even an old bowl. Ensure it has drainage holes.
- Soil and Plants: Fill the container with potting soil. Choose small, slow-growing plants like mosses, succulents, miniature ferns, or small herbs (thyme, oregano). These require less maintenance and fit the miniature scale.
- Landscaping: Arrange the plants, leaving space for pathways and accessories. Use pebbles for pathways, small flat stones for patios, and collected twigs to create tiny benches or trellises.
- Accessories: This is where the magic truly comes alive! Add tiny fairy figurines (store-bought or handmade from clay), small mushroom caps made from painted acorns, miniature bird baths from bottle caps, or even a tiny swing made from a twig and string.
Benefits: Children learn about basic botany – what plants need to grow, how to arrange them aesthetically, and the responsibility of caring for living things. It's a wonderful exercise in miniature landscaping and creating a balanced, harmonious scene.
Terrarium Fairy Gardens
For a self-contained magical world, a terrarium fairy garden is an excellent choice, demonstrating simple ecological principles.
How-to:
- Container: Use a clear glass jar with a lid, an old fishbowl, or a cloche.
- Layers: Start with a layer of small pebbles (for drainage), followed by a thin layer of activated charcoal (to keep things fresh), and then a layer of potting soil.
- Plants: Choose plants that thrive in humidity, like mosses, small ferns, or air plants. Arrange them artfully.
- Decorate: Add tiny pebbles, polished stones, small sticks, and miniature fairy figurines. You can also create tiny paper or clay mushrooms to complete the scene. A spritz of water will help keep the plants happy.
Benefits: This project introduces children to the concept of an enclosed ecosystem, showing how plants cycle water and thrive in certain conditions. It fosters an understanding of miniature environments and the delicate balance of nature.
Fairy gardens are ongoing projects that can evolve over time, encouraging children to revisit and enhance their magical worlds. They're a beautiful way to combine natural science with imaginative play. Not quite ready to commit to a monthly subscription? Explore our full library of adventure kits available for a single purchase! You might just find the perfect blend of science, art, and deliciousness to spark your child's next passion. Browse our complete collection of one-time kits today!
Edible Enchantment: Fairy-Themed Treats
At I'm the Chef Too!, we believe some of the most magical learning happens in the kitchen. Creating edible fairy treats is a delightful way to combine the whimsy of fairies with the delicious fun of baking and decorating. It teaches practical kitchen skills, encourages following instructions, and results in a tasty reward!
Fairy Bread and Toast: Simple, Colorful, Delightful
This Australian classic is incredibly simple and endlessly appealing to children.
How-to:
- Ingredients: Soft white bread, butter or cream cheese, and colorful sprinkles (hundreds and thousands).
- Preparation: Spread a thin layer of butter or cream cheese on slices of bread.
- Sprinkle Magic: Have children generously sprinkle the colorful sprinkles over the buttered bread.
- Cut and Serve: Cut the bread into triangles or fun shapes with cookie cutters.
Benefits: This activity is excellent for very young children, practicing spreading and sprinkling, and reinforcing basic kitchen safety (no sharp tools needed). It's a fun way to introduce following a simple "recipe."
Cookie Decorating: Fairy Wings, Flowers, and More
Transforming plain cookies into magical masterpieces with icing and edible glitter is always a hit.
How-to:
- Bake or Buy Cookies: Use pre-baked sugar cookies or bake a batch using a simple recipe. Cookie cutters in shapes like stars, flowers, or butterflies (which can become fairy wings) are perfect.
- Icing Prep: Prepare royal icing or use store-bought cookie icing in various colors.
- Decorate: Children can use small spatulas or piping bags (with adult guidance) to spread icing. Edible glitter, small candies, and sprinkles can add dazzling details. Encourage them to draw intricate patterns, create delicate wings, or design vibrant flower petals.
Benefits: This fosters artistic expression, develops fine motor control for intricate decorating, and teaches patience. It's also a fantastic way to learn about color mixing and design principles in a delicious context.
Creative Baking with a Whimsical Twist
This is where I'm the Chef Too! truly shines, offering curated experiences that turn baking into a learning adventure. Imagine the magic of creating a treat that's not just delicious but also a gateway to understanding scientific concepts.
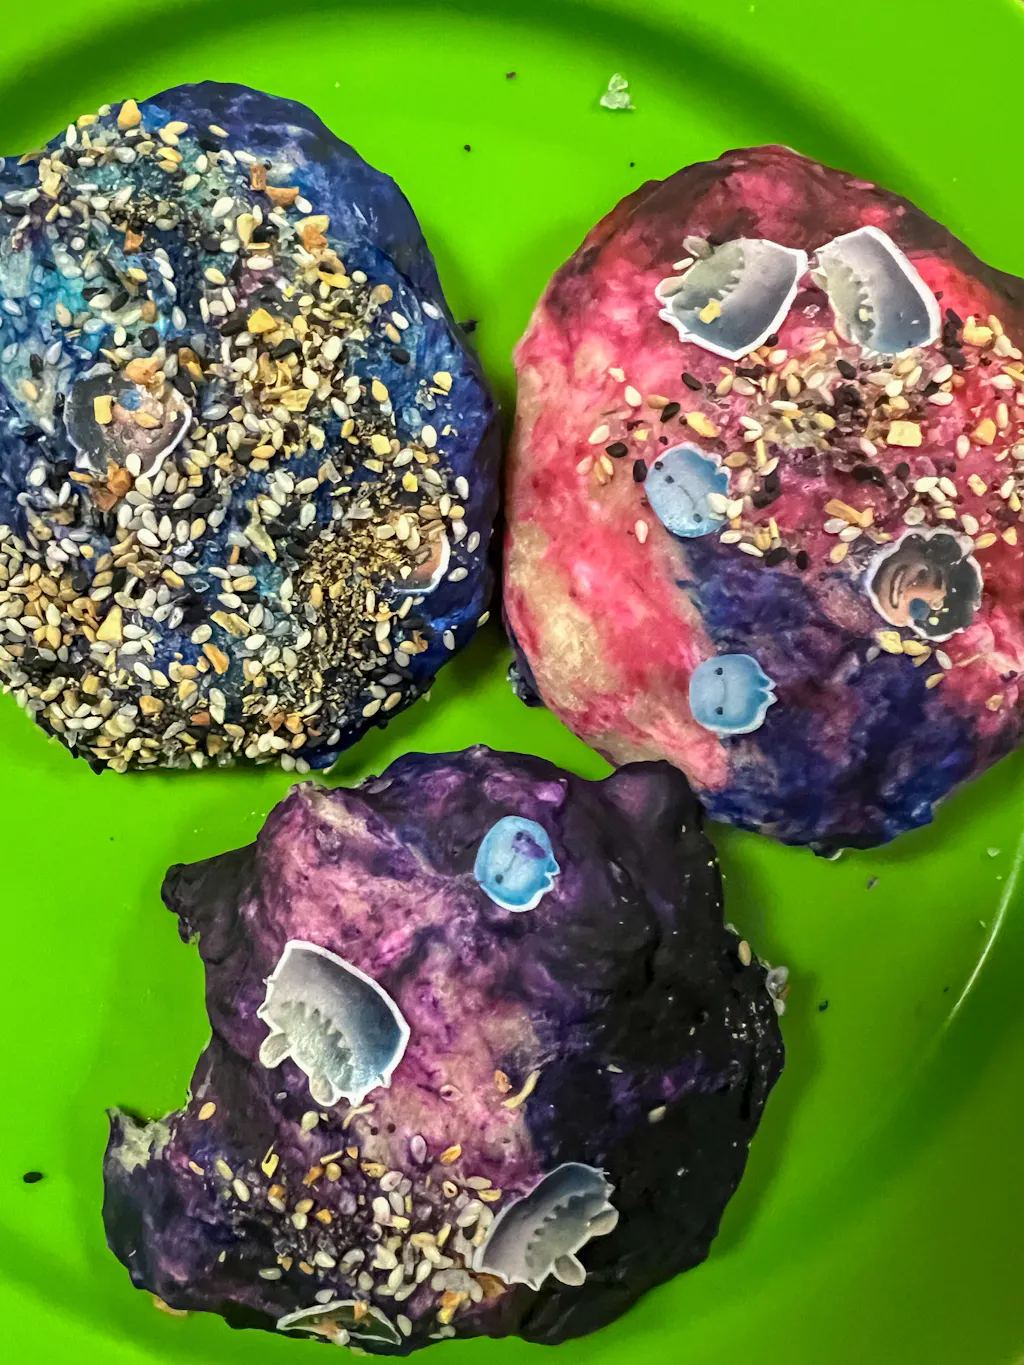
For example, exploring astronomy by creating your own edible solar system with our Galaxy Donut Kit can feel just as magical as waving a fairy wand. Kids can decorate delicious donuts to represent planets, complete with edible glitter "stars" and colorful "galaxies," all while learning about the wonders of space. Or perhaps creating a whimsical outdoor scene with Peppa Pig Muddy Puddle Cookie Pies will spark joy and imagination, allowing children to create edible "muddy puddles" with rich chocolate and playful toppings, perfect for a fairy-tale picnic.
These kits are developed by mothers and educators to make learning accessible and fun. They combine the joy of baking with concepts from STEM and the arts, proving that the kitchen is a fantastic classroom. Ready for a new adventure every month? Join The Chef's Club and enjoy free shipping on every box, making it easy to bring delicious learning experiences right to your home.
Fairy Wearables: Crowns, Wings, and Tiaras
Once your child has created a magical world for fairies, they’ll want to become a part of it! Crafting fairy wearables like crowns, wings, and tiaras allows for imaginative dress-up and provides a tangible link between their craft and their play. These projects are excellent for encouraging creativity, developing design skills, and fostering a sense of self-expression.
Flower Crowns: Nature's Headwear
Beautiful and fragrant, flower crowns are a classic fairy accessory that connect children directly with the beauty of nature.
How-to:
- Gather Materials: Collect fresh flowers with sturdy stems (daisies, dandelions, clover, small wildflowers work well), some flexible wire (florist wire is ideal), and floral tape (optional, but helpful).
- Measure: Measure the child's head circumference with a piece of string or flexible tape.
- Create the Base: Form a circle with the wire to fit the child's head, leaving a small overlap. Twist the ends together to secure.
- Attach Flowers: Have children carefully weave the flower stems around the wire base. For more secure attachment, an adult can use floral tape to wrap the stems onto the wire. Overlap flowers to create a full, lush crown.
- Enjoy: Once the crown is complete, gently fit it onto your child's head for instant fairy transformation!
Benefits: This craft develops fine motor skills through weaving and wrapping, teaches patience, and enhances appreciation for the delicate beauty of flowers. It also subtly introduces concepts of measurement and design.
Paper/Fabric Wings: Soaring into Imagination
Every fairy needs a pair of wings! Crafting wings can be a larger project that encourages construction and design thinking.
How-to:
- Design and Cut: On a large piece of sturdy cardboard (like from a delivery box) or heavy poster board, draw a pair of fairy wings. They can be classic butterfly shapes, pointed dragonfly wings, or whimsical fantasy designs. Cut them out carefully (adult assistance often needed).
- Decorate: This is where the magic happens! Children can paint the wings with bright colors, glue on tissue paper for a stained-glass effect, cover them with glitter, attach sequins, or even glue on fabric scraps for texture. Encourage them to think about patterns and symmetry.
- Add Straps: Attach elastic loops or sturdy ribbons to the center of the wings, creating armholes so the child can wear them like a backpack. Use strong glue or staple them securely (cover staples with tape for comfort).
- Wear and Play: Once dry, the wings are ready for imaginative flight!
Benefits: This project is fantastic for developing cutting skills, enhancing artistic expression through a wide range of decorating techniques, and introducing basic construction and attachment methods. It allows for a grander scale of creativity and play.
Making fairy wearables adds another dimension to fairy play, allowing children to fully immerse themselves in their magical world. These crafts foster self-expression and provide tangible props for imaginative storytelling. And just as these crafts invite children into a world of active play and learning, our I'm the Chef Too! experiences are designed to spark curiosity and creativity, facilitating family bonding away from screens. We believe in providing unique, hands-on, and delicious cooking adventures that make learning unforgettable. Why not give the gift of learning that lasts all year with a 12-month subscription to our STEM cooking adventures? Join The Chef's Club today!
Storytelling & Imaginative Play: The Heart of Fairy Crafts
The true magic of fairy crafts unfolds once the glue is dry and the glitter is settled. These creations are not just objects; they are props, characters, and settings for rich, imaginative play. This is where children integrate their crafts into narratives, building critical cognitive and social-emotional skills.
Once a fairy house is complete, who lives inside? What adventures do they have? A handmade wand begs to be waved with accompanying spells. A flower crown transforms a child into a woodland sprite, ready for a forest quest. This kind of open-ended, child-led play is incredibly valuable for several reasons:
- Language Development: As children narrate their fairy adventures, they expand their vocabulary, practice sentence structure, and develop storytelling skills. They might invent new words or sounds for their magical world.
- Social-Emotional Growth: When playing with others, children learn negotiation, sharing, and cooperation. They can take on different roles, developing empathy and understanding various perspectives. Even in solitary play, they work through emotions and ideas in a safe, imaginative space.
- Problem-Solving in Action: "Oh no, the fairy's house is flooded! How can we build a tiny bridge?" Imaginative play often presents mini-challenges that children solve using their creativity and critical thinking.
- Screen-Free Engagement: Fairy crafts naturally lead to hours of screen-free engagement. Instead of passively consuming media, children actively create, direct, and participate in their own narratives. This active engagement is at the core of I'm the Chef Too!'s philosophy, providing enriching alternatives that stimulate the mind and body.
Encourage your child to use their crafts to put on a puppet show, create a "fairy school" for their tiny creations, or embark on a backyard "fairy hunt" where they leave notes or gifts for their invisible friends. These activities extend the life of the craft and deepen the imaginative experience, truly making learning a delightful journey.
Tips for a Magical Crafting Session
To ensure your fairy crafting sessions are filled with joy and minimal stress, keep these practical tips in mind. As mothers and educators ourselves at I'm the Chef Too!, we understand the importance of creating supportive and engaging environments for children to learn and grow.
- Safety First, Always: Adult supervision is paramount, especially when using scissors, hot glue guns (always low-temp for crafts, and adult-operated), or any sharp tools. Teach children how to use tools safely and emphasize caution. Our kits are designed with age-appropriateness in mind, ensuring a safe and fun experience.
- Embrace the Mess (Within Reason): Creativity often comes with a bit of chaos! Lay down newspapers, old towels, or a craft mat to protect your surfaces. Dress children in old clothes or provide aprons. A little glitter on the floor is a small price to pay for a child's radiant smile.
- Focus on the Process, Not Perfection: The goal is not to create a flawless, Pinterest-worthy masterpiece. It's about the child's engagement, experimentation, and joy in the act of creation. Praise their effort, their unique ideas, and the imagination behind their work, rather than just the final product. This builds confidence and encourages continued exploration.
- Let Them Lead: While you can offer guidance and suggestions, allow your child to take the reins. Let them choose colors, materials, and design elements. Their ideas might be different from yours, and that's wonderful! Fostering independence and allowing them to express their unique vision is crucial for nurturing creativity.
- Prepare Ahead: Gather all your materials before you start. Having everything within reach minimizes interruptions and keeps the creative flow going. Pre-cutting some trickier shapes for younger children can also help prevent frustration.
- Set Realistic Expectations: Not every craft will turn out exactly as envisioned, and that's okay. Sometimes, the most valuable learning comes from mistakes or unexpected outcomes. Frame challenges as opportunities for innovation and problem-solving.
- Connect with Learning: As you craft, talk about the materials. "Look at this beautiful leaf! Do you know why it's changing color?" "How do you think we can make this house strong enough to stand up?" These questions naturally weave STEM concepts into the artistic process, mirroring our approach at I'm the Chef Too!
- Clean Up Together: Make tidying up part of the crafting process. This teaches responsibility and reinforces that every activity has a beginning, middle, and end.
By following these tips, you can create a magical crafting environment that fosters imagination, builds skills, and strengthens family bonds. Looking for more engaging and educational activities? Not ready to subscribe? Explore our full library of adventure kits available for a single purchase in our shop. Browse our complete collection of one-time kits and find the perfect theme for your little learner!
Beyond the Craft: Extending the Fairy Fun
The completion of a fairy craft doesn't have to be the end of the magic! In fact, it can be just the beginning of extended imaginative play and learning opportunities.
- Fairy Hunts: Once you've crafted several fairy houses or accessories, create a "fairy village" in your backyard or a designated spot indoors. Then, organize a "fairy hunt" where children search for hidden fairies or their tiny belongings. You can even leave tiny notes or "fairy dust" (glitter) to make it even more enchanting.
- Reading Fairy Tales: Pair your crafting sessions with reading classic fairy tales or new, whimsical stories. This strengthens literacy skills, exposes children to different narrative structures, and inspires new ideas for their own fairy worlds. Discuss the characters, settings, and magical elements, encouraging them to imagine their own versions.
- Outdoor Adventures Inspired by Fairies: Take your child on a "fairy-spotting" walk in a local park or nature trail. Encourage them to look for signs of fairies – a particularly gnarled tree that might house a fairy home, a patch of wildflowers that could be a fairy garden, or tiny mossy nooks where a fairy might rest. This reinforces their connection with nature and encourages observation skills.
- Miniature Tea Parties: Host a fairy tea party using their handmade dishes, tiny food made from clay or play-doh, and their crafted fairy friends as guests. This is wonderful for social play and role-playing.
- Story Jar/Box: Use an old jar or shoebox and decorate it as a "fairy story holder." Each day, or whenever inspiration strikes, children can add a small drawing, a written sentence, or a tiny crafted item that represents a new part of their fairy story. Over time, they'll have a collection of narratives from their magical world.
These extensions deepen the imaginative experience, reinforce learning, and create lasting family memories. At I'm the Chef Too!, our goal is to blend learning with joy, sparking curiosity and creativity through engaging, hands-on experiences. Every box we deliver is designed to be a complete adventure, fostering family bonding and providing a screen-free alternative that ignites the imagination. Ready to embark on delicious, educational adventures every month? Join The Chef's Club and let the "edutainment" begin!
Conclusion
The enchanting world of fairy crafts for kids offers a treasure trove of benefits, far beyond just artistic creation. From fostering boundless imagination and sharpening fine motor skills to nurturing a deep appreciation for nature and building crucial problem-solving abilities, these whimsical projects provide a holistic approach to child development. They are a beautiful testament to the power of hands-on learning, encouraging children to explore, experiment, and express themselves in a truly magical way.
At I'm the Chef Too!, we believe that every child deserves the opportunity to discover the joy of learning through tangible, engaging experiences. Our mission is to transform complex subjects into delightful "edutainment" by blending food, STEM, and the arts, all developed by mothers and educators who understand what truly sparks a child's curiosity. Fairy crafts perfectly encapsulate this philosophy, providing a wonderful screen-free alternative that strengthens family bonds and creates cherished memories.
So, gather your supplies, step into the enchanting realm of fairies, and watch as your child's creativity takes flight. The journey of discovery is just beginning, and we're here to make it delicious and unforgettable.
Ready to bring consistent, creative, and educational fun to your home? Let us deliver a new adventure to your door every month. Join The Chef's Club today and unlock a world of delicious learning with free shipping on every box!
Frequently Asked Questions
What age group are fairy crafts suitable for?
Fairy crafts are incredibly versatile and can be adapted for a wide range of ages. Toddlers and preschoolers (2-5 years old) can enjoy simpler tasks like gathering natural materials, spreading glue, or sprinkling glitter (with supervision). Elementary school-aged children (6-10 years old) can engage in more complex tasks like cutting, detailed painting, and constructing intricate fairy houses or gardens. Older children and pre-teens (11+) can explore advanced techniques, creating more elaborate and detailed projects, and even experimenting with different mediums like clay or sewing. The key is to choose projects that match their developmental stage and provide appropriate adult guidance.
What are the educational benefits of fairy crafts?
Fairy crafts offer a rich array of educational benefits, impacting multiple areas of a child's development. They significantly boost creativity and imagination, allowing children to invent entire magical worlds and narratives. Fine motor skills are refined through cutting, gluing, painting, and manipulating small objects. When incorporating natural elements, children learn about nature and environmental awareness. Problem-solving skills are developed as they figure out how to construct structures or overcome crafting challenges. Furthermore, these activities enhance language development through storytelling, foster social-emotional growth in collaborative play, and provide a valuable screen-free educational alternative that promotes active engagement.
How can I make fairy crafts eco-friendly?
Making fairy crafts eco-friendly is easy and often adds to their charm! Prioritize using natural materials found outdoors like twigs, leaves, moss, pebbles, and pinecones. Embrace recycled materials such as cardboard boxes, toilet paper rolls, egg cartons, and fabric scraps. When purchasing supplies, look for biodegradable glitter, non-toxic paints, and sustainable craft items. By reusing and repurposing, you teach children valuable lessons about sustainability and conservation.
Do I need special tools for fairy crafts?
Not at all! Many fairy crafts can be made with basic household items and natural materials. Essential tools include child-safe scissors, various types of glue (school glue, glue sticks), and perhaps some markers or crayons. A low-temperature hot glue gun can be useful for more sturdy constructions but should always be operated by an adult. The beauty of fairy crafts lies in their accessibility and the ability to improvise with what you have on hand.
How can I encourage my child if they get frustrated during crafting?
Frustration is a normal part of the creative process. If your child gets frustrated, offer encouragement and support rather than taking over. Acknowledge their feelings ("I see that's tricky right now"). Suggest taking a break, simplifying the task, or breaking it down into smaller steps. Offer a helping hand, but let them lead the way if possible. Remind them that the goal is to have fun and that it's okay for things not to be "perfect." Focus on the effort and the joy of creating, not just the end result.
What if I'm not "crafty" myself?
You don't need to be an experienced crafter to enjoy fairy crafts with your child! The emphasis is on the shared experience and the child's creativity. Follow simple instructions, let your child guide the process, and embrace imperfection. Your enthusiasm and willingness to try are more important than your crafting prowess. Remember, at I'm the Chef Too!, we make it easy with our thoughtfully designed kits that provide everything you need for a fun and educational experience, whether it’s baking, crafting, or a blend of both!
How can I extend the play after the craft is done?
Extending the play after a craft is key to maximizing its value. Encourage your child to use their creations for imaginative play – building stories, putting on puppet shows, or engaging in role-playing. You can set up a "fairy village" for ongoing play, go on a "fairy hunt" for hidden items, or read fairy tales that align with their creations. Creating new accessories for their fairy world is another great way to keep the magic alive. The possibilities for imaginative fun are truly endless!