Table of Contents
- Why Understanding the Water Cycle Matters (and Why Kids Love It!)
- The Four Stages of the Water Cycle Explained for Kids (and Parents!)
- Setting Up for Success: Essential Tips for Your Water Cycle Experiments
- Experiment 1: The Classic "Water Cycle in a Bowl" (Miniature Earth)
- Experiment 2: The "Water Cycle in a Bag" (Window Wonder)
- Experiment 3: "Cloud in a Jar" (Precipitation in Action)
- Beyond the Experiments: Deepening Water Cycle Learning
- Why Hands-On STEM with I'm the Chef Too! is the Perfect Complement
- Frequently Asked Questions (FAQ)
- Conclusion
Have you ever stopped to wonder why the sky sometimes fills with puffy white clouds, or why a gentle drizzle can turn into a downpour? Children are natural scientists, full of boundless curiosity, and few things capture their imagination quite like the weather and the mysteries of our planet. They marvel at puddles after a rain shower and gaze up at the vast blue expanse, often asking the most profound questions about how it all works. These questions about rain, clouds, and the very water we drink lead us directly to one of Earth's most fundamental and awe-inspiring processes: the water cycle.
At I'm the Chef Too!, we believe that learning should be an adventure—a delicious journey where questions lead to discoveries and curiosity sparks creativity. Our mission is to seamlessly blend food, STEM, and the arts into one-of-a-kind "edutainment" experiences that are not only profoundly educational but also incredibly fun. Just as we use baking to explore chemistry or engineering, understanding the water cycle becomes an exciting, tangible experience when approached with hands-on activities. In this comprehensive guide, we'll dive deep into the fascinating world of the water cycle, breaking down its essential stages into easy-to-understand concepts. More importantly, we'll equip you with simple, engaging, and highly effective water cycle experiments for kids that you can conduct right in your kitchen or classroom, transforming abstract scientific principles into visible, interactive lessons. Get ready to foster a love for learning, build confidence, develop key scientific skills, and create truly joyful family memories, all while discovering the magic of water!
Why Understanding the Water Cycle Matters (and Why Kids Love It!)
The water cycle, often called the hydrologic cycle, is more than just a scientific concept; it's the lifeline of our planet. It dictates weather patterns, sustains ecosystems, and ensures the availability of fresh water—a resource we often take for granted. For children, understanding this continuous journey of water opens up a world of wonder and critical thinking.
Sparking Curiosity and Scientific Inquiry: Kids are inherently curious. They see rain, feel the warmth of the sun, and play in puddles. The water cycle provides a perfect framework for answering their "how" and "why" questions. By engaging in hands-on experiments, children aren't just memorizing facts; they're actively observing, predicting, and drawing conclusions. This process mirrors the scientific method, encouraging them to think like real scientists from an early age. They learn to question phenomena, hypothesize about outcomes, and interpret their observations, skills that are invaluable in all areas of life.
Building Environmental Awareness: Introducing the water cycle early on fosters a deeper appreciation for our environment. When children understand that the water they drink today might have been part of an ocean or a cloud last week, it cultivates a sense of connection and responsibility towards water conservation. They begin to grasp the interconnectedness of nature and the importance of protecting our planet's most vital resource. This foundational knowledge empowers them to become conscientious global citizens who understand their role in sustaining a healthy Earth.
Developing Key STEM Skills: Engaging with the water cycle naturally integrates various STEM (Science, Technology, Engineering, and Math) skills. Children practice:
- Observation: Noticing changes in water, mist, and droplets.
- Prediction: Guessing what might happen next in an experiment.
- Measurement: Quantifying water or time in some variations.
- Cause and Effect: Understanding how heat causes evaporation, or cold causes condensation.
- Problem-Solving: Adjusting conditions to see different results.
- Data Recording: Drawing or describing what they see.
At I'm the Chef Too!, we wholeheartedly embrace this interdisciplinary approach. Our unique kits are designed by mothers and educators to teach complex subjects through tangible, hands-on, and delicious cooking adventures. Just as a child might learn about states of matter by making ice cream, they can learn about the water cycle by observing these simple experiments. These experiences facilitate family bonding, offering a cherished screen-free educational alternative that makes learning feel less like a chore and more like a shared discovery.
Relating to Everyday Life: The water cycle isn't some abstract concept confined to textbooks; it's happening all around us, all the time.
- The steam rising from a hot bath or a kettle? That's evaporation.
- The fogging of a bathroom mirror after a hot shower? Condensation.
- The morning dew on grass or condensation on a cold drink? More condensation.
- Rain, snow, sleet, hail? Precipitation.
- Lakes, rivers, oceans, and even underground aquifers? Collection.
By pointing out these everyday examples, we make the water cycle relatable and exciting, reinforcing the idea that science is woven into the fabric of our daily lives.
Ready to embark on a journey of continuous learning and discovery with your family? Imagine a new adventure delivered right to your door every month, sparking curiosity and creativity with every box. Join The Chef's Club today and enjoy free shipping on every exciting STEM cooking kit!
The Four Stages of the Water Cycle Explained for Kids (and Parents!)
Before we jump into the fun experiments, let's establish a clear understanding of the four main stages that water continuously moves through. Explaining these concepts in simple, everyday language will give your children the vocabulary and context they need to truly grasp what they're observing in their experiments.
1. Evaporation: The Great Escape
Imagine the sun as a giant hairdryer for the Earth! When the sun's warm rays hit water in lakes, rivers, oceans, or even a puddle, something amazing happens. The water gets warm, so warm that it turns from a liquid into an invisible gas called water vapor. Think of steam rising from a boiling pot—that's water turning into vapor and floating up into the air! This process is called evaporation. Plants also release water vapor into the air through their leaves, a process called transpiration, which is like plants "sweating" water. It's how water gets from the Earth's surface up into the sky to begin its big journey.
2. Condensation: Cloud Formation!
Once water vapor rises high up into the atmosphere, it starts to get very, very cold. Imagine blowing warm breath onto a cold window—you see little foggy droplets form, right? That's condensation! As the water vapor cools, it changes back from an invisible gas into tiny, visible liquid water droplets or even ice crystals. These tiny droplets cling together around microscopic dust particles in the air, forming clouds. So, a cloud isn't just a big puffball; it's a huge collection of millions of tiny water droplets! This process of gas turning back into liquid (or ice) is called condensation.
3. Precipitation: When Clouds Get Heavy
As more and more water vapor condenses, the tiny water droplets in the clouds grow bigger and bigger. They bump into each other, join together, and get heavier and heavier. Eventually, the cloud can't hold all that water anymore! When the droplets become too heavy to stay suspended in the air, gravity pulls them down to Earth. This is when we experience precipitation, which can come in many forms:
- Rain: Liquid water falling.
- Snow: Water frozen into beautiful ice crystals.
- Sleet: Frozen raindrops.
- Hail: Lumps of ice that fall from severe thunderstorms. Precipitation is how water returns from the sky back to the Earth's surface.
4. Collection: Where Water Calls Home (Again!)
Once precipitation falls back to Earth, it needs a place to go. This is the collection stage. The water might fall directly into oceans, lakes, rivers, and streams, replenishing these bodies of water. Some of it might fall on land, soaking into the ground to become groundwater, which plants drink up or flows slowly through the soil back into rivers and eventually the ocean. The collected water then gets ready for its next journey, waiting for the sun to warm it up again, starting the cycle all over! It's a never-ending loop, ensuring that our planet always has water.
Understanding these four stages is the foundation for appreciating the water cycle. By using simple analogies and relating them to everyday observations, you're not just teaching science; you're nurturing a curious mind ready to explore the world.
For parents and educators looking for even more ways to bring science to life, our versatile programs for schools and groups offer hands-on STEM adventures, available with or without food components, perfect for classrooms, camps, or homeschool co-ops. Learn more about our School & Group Programs here!
Setting Up for Success: Essential Tips for Your Water Cycle Experiments
Embarking on scientific exploration with children is incredibly rewarding, but a little preparation can make all the difference between a chaotic mess and a smoothly running, educational adventure. Here are some invaluable tips to ensure your water cycle experiments are not only successful but also safe, engaging, and genuinely enriching for your young learners.
- Prioritize Adult Supervision: This is paramount for all activities, especially those involving water, heat, or small parts. An adult should always be present to guide, assist, and ensure safety. For experiments using hot water or sharp objects, the adult should handle those steps entirely.
- Gather Materials Ahead of Time: Nothing derails a fun activity faster than realizing you're missing a key ingredient or tool halfway through. Before you start, lay out all the necessary items for your chosen experiment. This also gives children a visual preview of what's to come, building excitement.
- Prepare Your Workspace: Choose a suitable area that can tolerate a little splash or mess. A kitchen counter, a table covered with a plastic tablecloth, or an outdoor patio works well. Have paper towels or a rag handy for quick clean-ups.
- Introduce Vocabulary First: Briefly explain the terms "evaporation," "condensation," "precipitation," and "collection" before you begin. Use simple analogies and encourage questions. This pre-exposure primes their minds for what they're about to see.
- Encourage Observation and Questioning: The real learning happens when children are actively observing and thinking. Ask open-ended questions like: "What do you see happening?" "Why do you think that's occurring?" "What do you predict will happen next?" Avoid giving all the answers; instead, guide them to discover the answers themselves.
- Emphasize the Process, Not Just the Outcome: It's important to set realistic expectations. Not every experiment will yield dramatic, instantaneous results. Some water cycle experiments take hours, or even a full day, to show significant changes. Teach patience and the value of sustained observation. The goal isn't just to see water drip, but to understand why it's dripping. Focus on the learning journey, the skills built, and the shared family time, rather than a perfect scientific display. At I'm the Chef Too!, we emphasize fostering a love for learning and building confidence through exploration, rather than guaranteeing specific educational outcomes.
- Document the Learning: Encourage children to draw what they see, describe their observations, or even take photos at different stages of the experiment. This reinforces their understanding and allows them to reflect on the process later. Simple drawing sheets or a science journal can be great tools.
- Connect to the Real World: After the experiment, talk about how what they observed applies to the actual water cycle on Earth. Point out real-world examples in your environment. This helps bridge the gap between a small-scale experiment and the vast natural phenomena.
By following these simple guidelines, you'll create an environment where children feel empowered to explore, discover, and learn effectively, turning a simple water cycle experiment into a memorable educational experience. For families who love to dive into new topics regularly, consider a subscription to our "Chef's Club." It's the ultimate convenience, bringing a new blend of food, STEM, and art directly to your door with free shipping in the US every month! Explore our subscription options here.
Experiment 1: The Classic "Water Cycle in a Bowl" (Miniature Earth)
This beloved experiment is a fantastic way to demonstrate all four stages of the water cycle in a single, self-contained system. It essentially creates a miniature version of Earth's atmosphere right on your countertop or patio!
Concept: To visually represent evaporation, condensation, precipitation, and collection within a closed environment, mimicking the Earth's natural water cycle.
Materials You'll Need:
- A large, clear bowl (preferably glass, as it allows for better observation)
- A smaller, empty mug or cup (must be shorter than the large bowl's sides but taller than the water level in the large bowl)
- Water (tap water is fine)
- Plastic wrap (cling film)
- A large rubber band or string to secure the plastic wrap
-
Optional Enhancements:
- Blue food coloring (to make the "ocean" water more visible)
- A few teaspoons of salt (to demonstrate freshwater creation from saltwater)
- Ice cubes (to accelerate condensation if doing the experiment indoors or on a cooler day)
Step-by-Step Instructions:
- Set the Scene: Place the small empty mug or cup directly in the center of the large bowl. This cup will "collect" your fresh "rainwater."
-
Create the "Ocean": Carefully pour water into the large bowl, around the small cup. Ensure the water level is high enough to create a substantial "ocean" but not so high that it spills into the small collecting cup. About 2-3 inches of water is usually sufficient.
- Optional: If using, add a few drops of blue food coloring to the water and stir gently to create a vibrant "ocean." If you're demonstrating how the water cycle purifies water, add 2 teaspoons of salt and stir until dissolved.
- Seal the "Atmosphere": Tightly cover the entire large bowl with plastic wrap. Use the rubber band or string to create a secure seal around the rim of the bowl. This is crucial for creating a closed system where water vapor can't escape.
-
Introduce the "Sun" (or "Cold Air"):
- Outdoor Method (Best Results): Place your setup outside in a sunny spot. The sun's warmth will be your natural "evaporator." This method works wonderfully on a warm, clear day.
- Indoor Method (Quicker, but less dramatic evaporation): If you're doing this indoors, you can place the bowl in a sunny window. To enhance condensation, place a handful of ice cubes on top of the plastic wrap, directly above the small collecting cup. The cold ice will create a cooler surface, encouraging water vapor to condense rapidly.
- Observe and Wait: Now, the most important part: patience! Check on your experiment every hour or so, or after several hours. You'll start to see changes.
What's Happening in Your Miniature Water Cycle:
- Evaporation: The sun's heat (or the warmth of your indoor environment) causes the water in the large bowl to warm up. As it warms, it transforms into invisible water vapor, which rises. If you added food coloring, notice that the vapor rising is clear, leaving the blue color behind in the bowl—demonstrating how evaporation naturally distills water!
- Condensation: The rising water vapor hits the cooler plastic wrap (especially if you've added ice cubes on top). As the warm vapor touches the cold surface, it cools down and changes back into tiny liquid water droplets. You'll see these droplets forming and clinging to the underside of the plastic wrap, much like clouds form in the sky.
- Precipitation: As more and more water vapor condenses, these tiny droplets grow larger and heavier. When they become too heavy to cling to the plastic wrap, gravity takes over, and they drip or "rain" down. The clever design of the experiment, with the plastic wrap slightly depressed in the center (due to the ice or just gravity), guides these drips to fall directly into your small collecting cup.
- Collection: The water that drips into the small cup represents the collection phase. This water is now fresh and pure! If you added salt to the initial water, you can taste the water in the small cup (once it's cooled, of course, and always under supervision) to discover that it's no longer salty. The water remaining in the large bowl also represents collection, as it will continue to cycle.
Learning Extensions for This Experiment:
- Taste Test: If you used salt, let children taste the original salty water (a tiny bit!) and then the fresh water collected in the cup. This is a powerful demonstration of water purification.
- Observation Journal: Provide a simple sheet for children to draw what they see at different stages (beginning, after 2 hours, after 4 hours, etc.). They can label evaporation, condensation, and precipitation.
- Discuss Variables: What if we put the bowl in the shade? What if we used hot water to start? How would more or less ice affect it? This encourages critical thinking about how different factors influence the water cycle.
This experiment is a fantastic example of how hands-on learning makes complex scientific ideas tangible and understandable. It embodies the very spirit of I'm the Chef Too!, where we believe in sparking curiosity through direct engagement and transforming abstract concepts into exciting, observable realities. Not ready to subscribe? Explore our full library of adventure kits available for a single purchase in our shop to find more engaging activities for your curious learner!
Experiment 2: The "Water Cycle in a Bag" (Window Wonder)
For a simpler, more portable, and equally effective demonstration of the water cycle, the "Water Cycle in a Bag" experiment is a fantastic choice. It's particularly great for individual observation, classroom settings (imagine a window full of these!), or for kids who love to see things evolve over time.
Concept: To observe the continuous movement of water through evaporation, condensation, and precipitation within a transparent, sealed bag, using the sun's energy.
Materials You'll Need:
- A clear, gallon-sized Ziploc-style bag (freezer bags are often more durable)
- Water (tap water)
- Blue food coloring (optional, but makes the water more visible)
- Permanent markers (red, blue, green, yellow)
- Clear strong tape (packing tape works well)
- A sunny window
Step-by-Step Instructions:
- Decorate Your "World": Before adding any water, use your permanent markers to draw elements of the water cycle on the bag. Draw a sun at the top corner (representing the heat source), some clouds across the top, and waves or a body of water at the bottom. You can even draw arrows to indicate the direction of movement. Pro-tip: Permanent markers prevent the drawings from washing off with condensation.
-
Add Your "Ocean": Carefully pour about half a cup to a full cup of water into the bottom of the bag. Try to avoid getting the sides of the bag wet above the "water line."
- Optional: Add a few drops of blue food coloring to the water and gently swish it to mix. This makes the "ocean" visually distinct.
- Seal It Tight: Zip the bag closed, making sure it's completely sealed. You don't want any water vapor to escape.
- Hang Your Experiment: Choose a window that receives a good amount of direct sunlight throughout the day. Using two long pieces of strong clear tape, securely tape the top corners of the bag to the windowpane. Ensure it's flat against the glass.
- Observe the Magic: Now, wait and watch! Over the next few hours, or even a full day, you'll start to see the water cycle in action.
What's Happening in Your Bag:
- Evaporation: The sun's rays warming the bag cause the water at the bottom to heat up. As it warms, it transforms into invisible water vapor, which rises within the sealed bag. You might see the blue color of the water remain at the bottom, indicating that the food coloring (like salt) doesn't evaporate with the pure water.
- Condensation: As the water vapor rises, it eventually reaches the cooler upper parts of the bag, especially where the windowpane might be slightly cooler. When the warm vapor touches this cooler surface, it cools down and changes back into tiny liquid water droplets. You'll see these droplets forming and clinging to the inside of the bag, often congregating near your drawn clouds.
- Precipitation: As more and more water condenses, the droplets on the sides of the bag will grow larger. Eventually, they become too heavy to stick to the plastic and begin to run down the inside of the bag, forming little "rain" streaks.
- Collection: This "rain" collects back into the pool of water at the bottom of the bag, replenishing your "ocean" and getting ready to evaporate and start the cycle all over again!
Learning Extensions for This Experiment:
- Time Lapse: If you have a phone with a time-lapse feature, you can set it up to record the bag over several hours to capture the entire process dynamically.
- Temperature Comparison: Try setting up two bags – one in a sunny window and one in a shadier spot. Compare the rate of evaporation and condensation between the two. This helps illustrate the role of temperature.
- Draw & Label: Have kids draw their bag and label the different stages as they observe them. They can even track the progress by drawing how many droplets they see at different times.
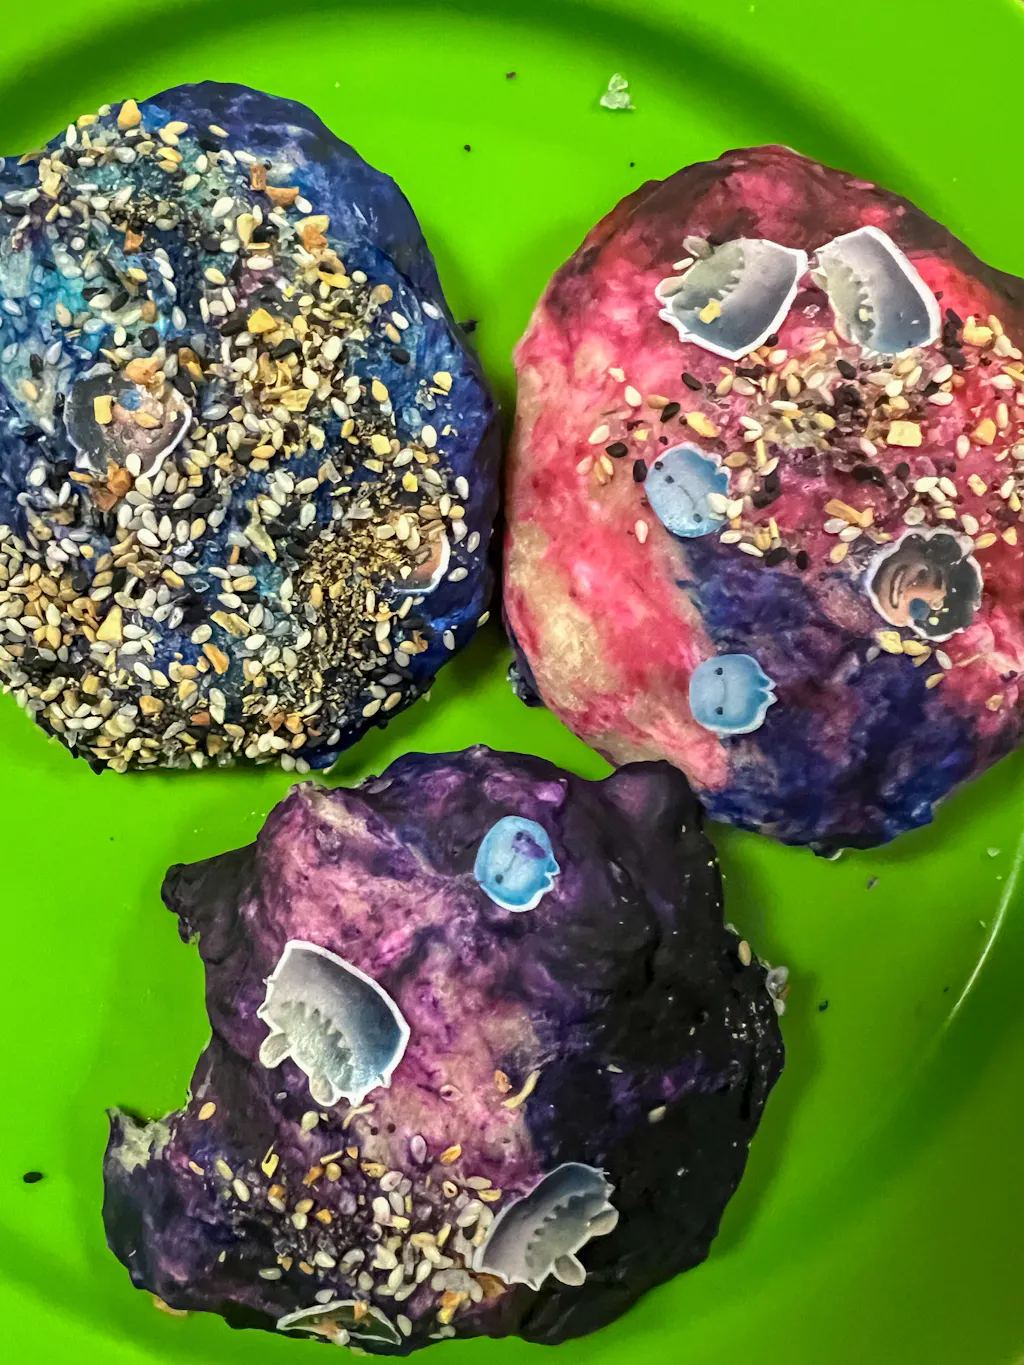
This simple yet powerful experiment provides a clear, visual representation of the water cycle, perfect for hands-on learning that's both educational and endlessly fascinating. It’s a wonderful example of screen-free educational fun that sparks curiosity. If your child enjoys experiments like this, they would love our Galaxy Donut Kit, where they can explore astronomy by creating their own edible solar system!
Experiment 3: "Cloud in a Jar" (Precipitation in Action)
While the previous two experiments show the full cycle, this "Cloud in a Jar" activity focuses specifically on the mesmerizing process of condensation and how clouds get heavy enough to release precipitation. It's a striking visual that really helps solidify the concept of a cloud forming and then raining.
Concept: To demonstrate how a cloud forms through condensation and how it becomes saturated, leading to "rain."
Materials You'll Need:
- A tall, clear glass or jar (e.g., a mason jar or a drinking glass)
- Shaving cream (not gel, the foamy kind works best)
- Water (tap water)
- Blue food coloring
- A small separate glass or bowl for mixing the colored water
- An eyedropper or a straw (to transfer colored water)
Step-by-Step Instructions:
- Prepare Your "Sky": Fill the large clear glass about two-thirds full with tap water. This water represents the atmosphere beneath your cloud.
- Create Your "Cloud": Spray a layer of shaving cream on top of the water in the glass. You want a thick, fluffy layer—about 1 to 3 inches—to form your "cloud." The thicker the cloud, the longer the experiment will take, allowing for more sustained observation.
- Mix the "Rain": In the small separate glass or bowl, mix about 3 tablespoons of water with approximately 10-15 drops of blue food coloring. This highly pigmented water will represent the accumulating moisture within your cloud.
-
Make it "Rain": Using an eyedropper, carefully draw up some of the blue-colored water. Gently drip the colored water onto the shaving cream cloud, directly above the center of the "cloud."
- If using a straw: Dip one end of the straw into the blue water, place your finger over the top end to create a vacuum, lift the straw over the shaving cream, and then slightly lift your finger to release drops.
- Observe Precipitation: Continue to drip the blue water onto the shaving cream. At first, the shaving cream will absorb the drops. But eventually, as the "cloud" becomes saturated and too heavy, you will see streaks of blue "rain" begin to fall through the shaving cream and into the clear water below.
What's Happening in Your Jar:
- Cloud Formation (Shaving Cream): The shaving cream acts as your cloud, a light, airy mass that can hold a certain amount of moisture.
- Water Accumulation (Blue Drops): The blue water drops represent the water vapor condensing and accumulating within a real cloud. The shaving cream initially absorbs these drops, showing how clouds build up moisture.
- Precipitation (Blue Streaks): Just like real clouds, there's a limit to how much moisture your shaving cream cloud can hold. Once it becomes saturated and too heavy, the blue water can no longer be contained. Gravity pulls it down, and you see it "rain" through the shaving cream and into the "atmosphere" (the clear water) below. This powerfully illustrates the moment precipitation occurs.
Learning Extensions for This Experiment:
- Prediction Challenge: Before starting, have children predict how many drops of blue water they think the cloud will hold before it starts to rain. Count the drops together and compare to their predictions.
- Cloud Comparison: Discuss different types of clouds. Are some clouds "heavier" than others? What makes a cloud rain more?
- Real Clouds: Talk about how real clouds are made of tiny water droplets or ice crystals, not shaving cream, but the principle of accumulating moisture until it falls is the same.
- Artistic Interpretation: After the experiment, have children draw a picture of a cloud raining, explaining the process they just observed.
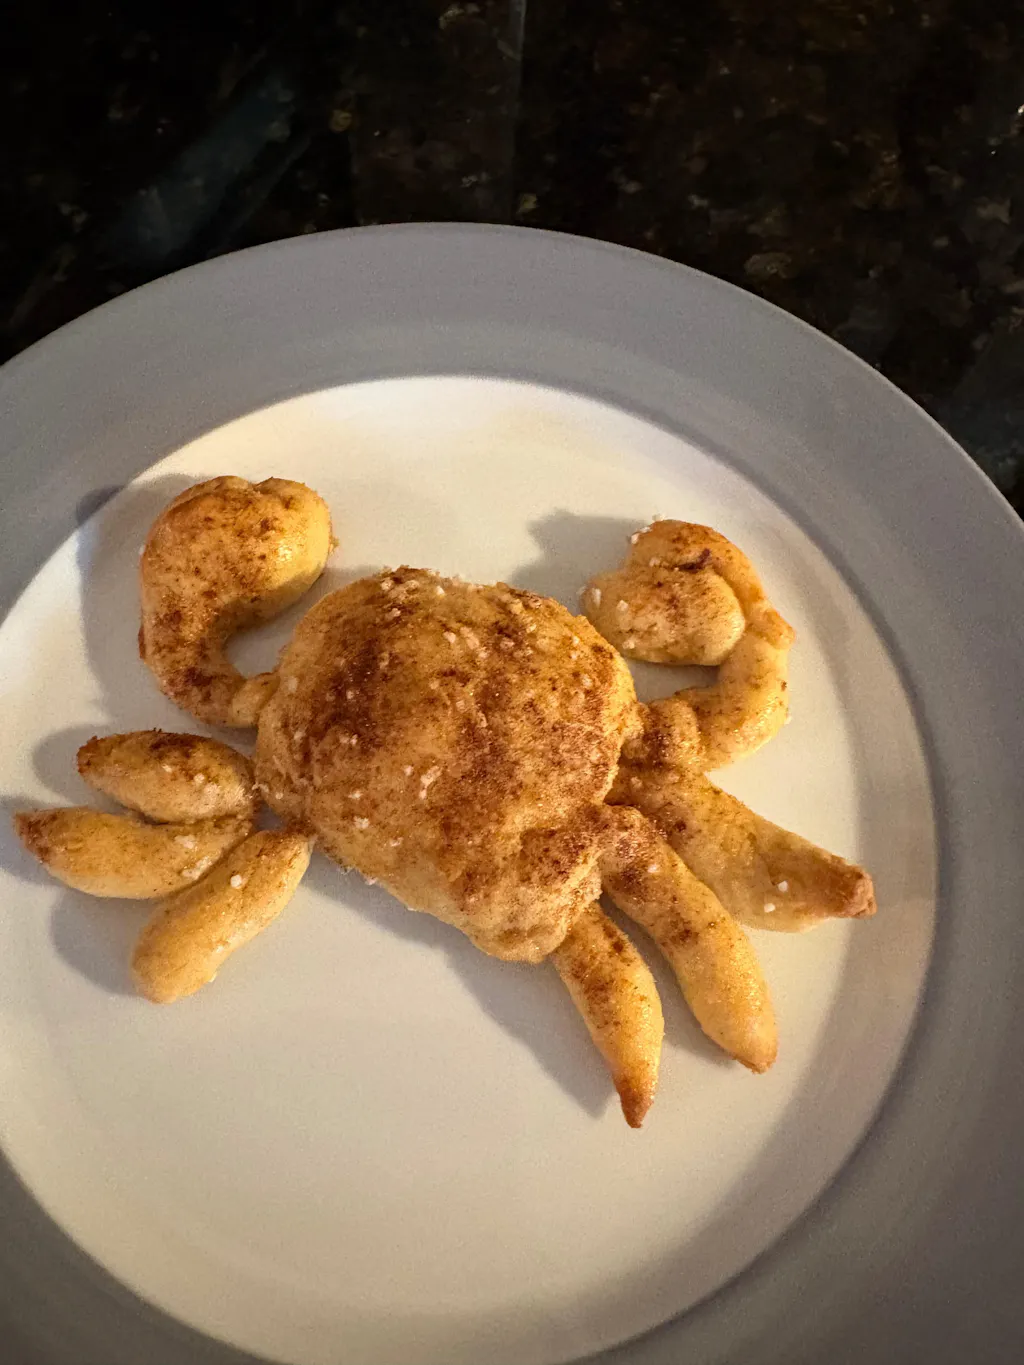
This experiment is a fantastic way to visually isolate and understand the precipitation stage of the water cycle. It's engaging, provides immediate results, and sparks conversation about weather phenomena. If you're looking for more ways to make learning feel like play, remember that even beloved characters can make learning fun, like when kids make Peppa Pig Muddy Puddle Cookie Pies with our kits!
Beyond the Experiments: Deepening Water Cycle Learning
While hands-on experiments are incredibly effective, integrating other learning methods can significantly deepen a child's understanding and appreciation for the water cycle. At I'm the Chef Too!, we believe in a holistic approach to education, blending STEM, food, and the arts to create comprehensive "edutainment" experiences. Here's how you can extend the learning beyond your kitchen lab:
Reading & Storytelling
- Picture Books: Many wonderful children's books tell the story of a raindrop's journey through the water cycle, making the concept relatable and imaginative. Visit your local library or bookstore for titles appropriate for your child's age.
- Age-Appropriate Documentaries: Short, engaging videos or documentaries can visually reinforce the concepts, showing real clouds, oceans, and rivers in action. Many educational platforms offer kid-friendly content.
Art & Craft
- Water Cycle Diagrams: After completing the experiments, have children draw their own water cycle diagrams, labeling the stages of evaporation, condensation, precipitation, and collection. This active recall strengthens their memory and understanding.
- Cloud Art: Encourage them to paint or draw different types of clouds (cumulus, stratus, cirrus) and discuss what kind of weather each might bring.
- Water Cycle Wheel Craftivity: Similar to ideas shared by other educators, you can create a movable wheel where a raindrop "arm" spins through different stages, providing a kinetic visual aid that children can interact with.
Outdoor Exploration
- Puddle Observations: After a rain shower, go outside and observe puddles. Talk about how the sun will eventually make the water "disappear" (evaporate). You can even mark the edge of a puddle and check back later to see it shrink.
- Tracking Rain: If it's raining, talk about where the water is coming from (the clouds) and where it's going (collection in gutters, grass, or streams).
- Observing Dew: On a cool morning, point out the dew on grass or spiderwebs. Explain how water vapor in the air cooled overnight and condensed into tiny droplets.
Connecting to Real-World Issues
- Water Conservation: Once children understand the cycle, it's a natural segue to discuss the importance of conserving water. Simple actions like turning off the faucet while brushing teeth, taking shorter showers, or watering plants efficiently make sense when they know water is a precious, recycled resource.
- Clean Water Importance: Briefly explain how the water cycle helps purify water (as seen in your bowl experiment!), but also how pollution can impact water quality. This plants the seeds for future environmental stewardship.
I'm the Chef Too! Connection
Just like understanding the water cycle is about observing transformations, our I'm the Chef Too! kits turn cooking into a laboratory of delicious discovery. Baking a cake involves chemical reactions, measuring ingredients is applied math, and decorating is art! For instance, making our Erupting Volcano Cakes teaches children about chemical reactions that make things bubble and "erupt," much like they observe changes in the water experiments. Every kit is designed to provide a tangible, multi-sensory learning experience that reinforces scientific principles, encourages creativity, and provides quality family time away from screens. We believe these culinary adventures complement scientific learning beautifully, showing children that STEM is everywhere—even in their snacks!
Why Hands-On STEM with I'm the Chef Too! is the Perfect Complement
At I'm the Chef Too!, we are passionate about transforming learning into an extraordinary adventure. Our core mission is to blend the joy of food, the rigor of STEM (Science, Technology, Engineering, and Math), and the creativity of the arts into unique "edutainment" experiences. When children engage in hands-on activities like our water cycle experiments or our specialized cooking kits, they're not just passively absorbing information; they're actively participating in their education, building skills, and fostering a lifelong love for discovery.
Think about the water cycle experiments we've explored: they teach complex ideas like states of matter, heat transfer, and gravity through direct observation. This tangible, experiential learning is at the heart of everything we do. Our kits are developed by a team of dedicated mothers and experienced educators who understand how children learn best. We know that the most profound lessons often happen when children can touch, taste, smell, and see scientific principles in action.
Here's why I'm the Chef Too! is the ideal partner for your child's educational journey:
- Holistic Learning: We go beyond traditional STEM. By incorporating the arts (like decorating baked goods) and the sensory experience of food, we engage multiple parts of a child's brain, making learning more memorable and enjoyable. This multi-faceted approach helps children understand the interconnectedness of different disciplines.
- Screen-Free Educational Alternative: In an increasingly digital world, we provide a much-needed antidote: engaging, hands-on activities that encourage interaction with real-world materials and foster face-to-face family bonding. Our kits offer a refreshing break from screens, promoting imaginative play and practical skill development.
- Convenience Delivered: We understand the demands on busy parents and educators. That's why our kits are designed for maximum convenience. Each box is a complete experience, containing pre-measured dry ingredients and specialty supplies, saving you countless trips to the grocery store and endless searching for obscure craft items. Everything you need for a fantastic educational adventure is delivered right to your door.
- Sparking Curiosity and Creativity: Our adventures are crafted to ignite a child's natural curiosity. Whether they're exploring geology by baking a "volcano" or learning about constellations through "galaxy donuts," our kits encourage children to ask questions, experiment, and express their creativity in delicious ways. We aim to nurture their inner scientist and artist simultaneously.
- Facilitating Family Bonding: Our kits are more than just activities; they are invitations for families to create together, learn together, and laugh together. These shared experiences build stronger family connections and create cherished memories around the kitchen table.
- Flexible and Value-Packed: Whether you're looking for an ongoing source of educational fun or a special gift, we have options to suit your needs. Our monthly "Chef's Club" subscription delivers a new adventure directly to your door with free shipping in the US on every box. You can choose from flexible 3, 6, and 12-month pre-paid plans, perfect for sustained enrichment or thoughtful gifting.
We believe that every child deserves the opportunity to learn in a way that excites and inspires them. Our approach doesn't promise guaranteed educational outcomes like "your child will become a top scientist." Instead, we focus on the incredible benefits of the process: fostering a love for learning, building confidence in their abilities, developing critical thinking and motor skills, and creating joyful, lasting family memories. We set realistic expectations, emphasizing the journey of discovery and the invaluable moments of connection.
Ready to infuse your home with delightful learning experiences and delicious discoveries every month? Join The Chef's Club today and enjoy free shipping on every box! Or perhaps you'd like to explore a specific theme first? Browse our complete collection of one-time kits to find the perfect adventure for your little learner! And for those looking to expand the learning beyond the home, don't forget our specialized School & Group Programs, designed to bring hands-on STEM and culinary arts to classrooms, camps, and homeschool co-ops.
Frequently Asked Questions (FAQ)
What is the water cycle for kids?
The water cycle is Earth's way of continuously moving water around our planet. It's like a never-ending journey where water evaporates from the Earth's surface, rises into the sky to form clouds, falls back to Earth as rain or snow, and then collects in rivers, lakes, and oceans, ready to start its journey all over again!
What are the 4 stages of the water cycle?
The four main stages of the water cycle are:
- Evaporation: When liquid water turns into an invisible gas (water vapor) and rises into the air.
- Condensation: When water vapor cools down and turns back into tiny liquid droplets, forming clouds.
- Precipitation: When those water droplets in clouds get heavy and fall back to Earth as rain, snow, sleet, or hail.
- Collection: When the water that falls back to Earth gathers in oceans, lakes, rivers, or soaks into the ground.
How long do these water cycle experiments take to show results?
The time it takes to see results can vary. The "Cloud in a Jar" experiment shows results almost immediately. The "Water Cycle in a Bowl" and "Water Cycle in a Bag" experiments typically need a few hours in a sunny spot to show significant evaporation and condensation, with precipitation collecting over several hours or even a full day. Patience is key!
Are water cycle experiments messy?
These experiments are generally low-mess, especially if you follow our tips for preparing your workspace and supervising children. The "Water Cycle in a Bag" is virtually mess-free, while the "Water Cycle in a Bowl" might involve a few drips. The "Cloud in a Jar" with shaving cream can be a bit messier, but it's contained within the jar.
Can I use tap water for these experiments?
Absolutely! Regular tap water is perfectly suitable for all these water cycle experiments.
What age are these water cycle experiments suitable for?
These experiments are fantastic for a wide range of ages, typically from preschool (with more adult guidance) through elementary school (ages 4-10). Younger children will enjoy the visual aspects and basic concepts, while older children can delve deeper into the scientific explanations, make predictions, and record observations.
Do I need special equipment for water cycle experiments?
No special equipment is needed! All the materials for these experiments are common household items that you likely already have in your kitchen or craft cabinet, making them easy and accessible for anyone.
How does I'm the Chef Too! relate to science concepts like the water cycle?
At I'm the Chef Too!, we believe in teaching complex STEM subjects through tangible, hands-on experiences. Just as water cycle experiments demonstrate concepts like states of matter, evaporation, and condensation, our cooking and baking kits use food to explore other scientific principles. For example, baking involves chemical reactions (like yeast making bread rise or baking soda creating fizz), measuring teaches math, and decorating encourages artistic expression. We make science delicious, fun, and accessible!
Conclusion
The water cycle is a testament to the incredible systems at play on our planet, a continuous dance of water that sustains all life. By engaging your children in these simple yet profound water cycle experiments, you're not just teaching them about science; you're igniting their natural curiosity, fostering critical thinking, and creating cherished moments of discovery. These hands-on activities transform abstract concepts into tangible, observable realities, making learning an unforgettable adventure.
At I'm the Chef Too!, we wholeheartedly champion this approach to education. Our mission is to blend food, STEM, and the arts into one-of-a-kind "edutainment" experiences, designed by mothers and educators to spark curiosity, facilitate family bonding, and provide a delightful screen-free educational alternative. We believe that true learning happens through doing, touching, and tasting, much like observing the fascinating journey of a water droplet.
Don't let the wonders of science remain confined to textbooks. Embrace the joy of hands-on exploration and watch your child's confidence and love for learning blossom. Ready to bring more delicious, educational adventures into your home every month?
Make learning an ongoing celebration! Join The Chef's Club today and enjoy the convenience of a new, exciting STEM cooking kit delivered with free shipping in the US on every box. Give the gift of discovery that lasts all year!