Table of Contents
- Introduction
- What is the Bone Bridge STEM Project?
- Why STEM with Bones and Bridges?
- Getting Started: Materials You'll Need
- Designing Your Bone Bridge: A Step-by-Step Guide
- Variations and Extensions: Scaling for All Ages
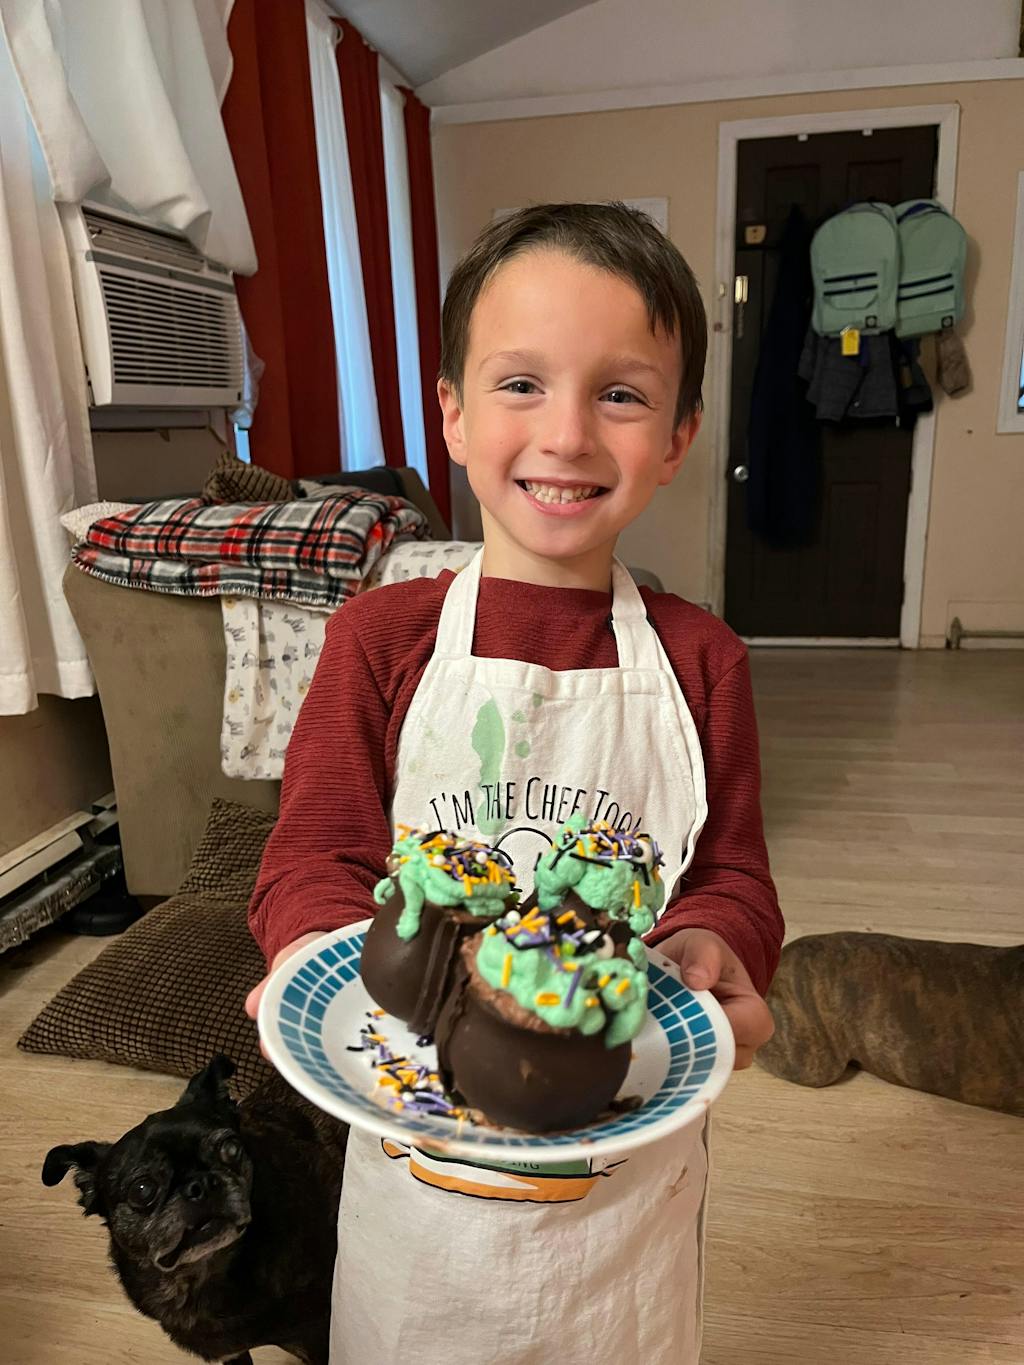
- I'm the Chef Too!'s Approach to Hands-On Learning
- Tips for Parents and Educators: Maximizing the Learning Experience
- Bringing STEM Home: More Engaging Activities
- Conclusion
- FAQ
Have you ever watched a child intently stack blocks, marveling at how they balance, or seen their eyes light up when they connect two seemingly disparate ideas? That innate curiosity, that drive to build and understand, is the heartbeat of STEM (Science, Technology, Engineering, and Mathematics). In a world increasingly saturated with screens, finding engaging, tangible activities that spark this natural inquisitiveness can feel like a challenge. But what if we told you there’s a captivating project that combines the thrill of engineering with a dash of anatomical wonder, all using simple materials found right in your home?
Welcome to the exciting world of the bone bridge STEM project! This activity is far more than just constructing a miniature bridge; it's a dynamic journey into the fundamental principles of engineering, structural design, and even a peek into biology. It encourages critical thinking, fosters creativity, and provides a fantastic opportunity for hands-on learning that transcends age. We believe that learning should be an adventure, a joyous exploration that leaves a lasting impression, and the bone bridge project perfectly embodies this philosophy. Here at I'm the Chef Too!, our mission is to blend food, STEM, and the arts into one-of-a-kind "edutainment" experiences, designed to spark curiosity and creativity in children, facilitate family bonding, and provide a screen-free educational alternative. This project aligns beautifully with our unique approach of teaching complex subjects through tangible, hands-on activities, even before we add the delicious twist! In this comprehensive guide, we'll dive deep into the bone bridge STEM project, covering everything from its educational benefits to detailed building instructions, variations for different age groups, and how you can seamlessly integrate it into your child's learning journey. Get ready to build, learn, and create unforgettable memories together!
Introduction
Imagine the challenge: constructing a sturdy bridge, not from steel or concrete, but from small, seemingly fragile "bones" – like cotton swabs or craft sticks. How do you make it strong enough to span a gap, perhaps even hold a small weight? This isn't just a fun craft; it's an immersive bone bridge STEM project that invites young minds to think like engineers, architects, and even scientists. It offers a tangible way to explore abstract concepts like force, stability, and design.
The purpose of this blog post is to equip parents, educators, and curious minds with everything needed to undertake this exciting bone bridge STEM project. We'll explore the foundational STEM principles at play, provide practical step-by-step instructions, suggest creative variations, and offer tips to maximize the educational impact while keeping the fun factor high. Our main message is clear: hands-on, exploratory learning activities like the bone bridge project are invaluable for developing essential 21st-century skills and fostering a lifelong love for discovery, all within a supportive and encouraging environment.
What is the Bone Bridge STEM Project?
At its core, the bone bridge STEM project is an engineering challenge where participants construct a bridge using materials that metaphorically represent "bones." The most common and accessible materials for this are cotton swabs, often chosen for their resemblance to small bones, combined with other simple craft supplies like pipe cleaners, popsicle sticks, and tape. The objective typically involves building a bridge that can span a certain distance, support a specific weight, or achieve maximum length while remaining stable.
This project is fantastic because it's scalable. For younger children, the goal might be simply to connect two points and see if their bridge holds together. For older kids, it can involve intricate design constraints, weight-bearing tests, and even research into different bridge types. It's a marvelous way to introduce structural engineering concepts without needing specialized tools or expensive kits. The "bone" aspect adds a playful, often thematic, layer, making the science feel more relatable and engaging, whether you connect it to human anatomy, prehistoric creatures, or purely as a fun, imaginative construction. It's a classic STEM challenge that thrives on creativity and problem-solving, making every attempt a unique learning opportunity.
Why STEM with Bones and Bridges?
The bone bridge STEM project is a treasure trove of educational opportunities, blending multiple disciplines into a cohesive, engaging activity. It's not just about building; it's about understanding why things work the way they do, fostering curiosity, and developing crucial skills.
Engineering Marvels: The Science of Bridges
Bridges are incredible feats of engineering, designed to withstand immense forces and connect landscapes. When children build a bone bridge, they become junior civil engineers. They'll grapple with concepts like:
- Load Bearing: How much weight can their structure hold?
- Tension and Compression: What happens when forces pull apart (tension) or push together (compression) on their "bones"? They'll instinctively learn that different shapes and joint designs handle these forces differently.
- Stability: What makes a bridge wobble or stand firm? They'll experiment with wider bases, triangular supports, and balanced designs.
- Structural Integrity: How do all the individual components work together to form a strong, unified structure? They'll see that a chain is only as strong as its weakest link – or, in this case, a bridge is only as strong as its weakest joint.
- Design Process: From initial sketches to trial-and-error construction, they'll experience the iterative nature of design, where mistakes are simply opportunities for improvement.
This hands-on exploration provides a much deeper understanding than simply reading about bridge types in a textbook. They're actively discovering the principles that engineers use every day to build real bridges around the world.
Anatomy Adventures: Understanding Bones
While the "bones" in this project are metaphorical, the activity offers a fantastic springboard into discussions about the human skeletal system or even animal skeletons. You can explore questions like:
- Why are our bones strong but also somewhat flexible?
- How do different bones connect at joints to allow movement while providing support?
- What role do bones play in supporting our body weight?
- How do engineers take inspiration from natural structures, like skeletons, when designing buildings and bridges?
This cross-curricular connection enriches the project, showing children how scientific principles are interconnected across various fields of study. It turns a simple building activity into a miniature biology lesson, sparking interest in how our own bodies are incredible machines.
The Power of Play: Developing Core STEM Skills
Beyond the specific scientific and engineering concepts, the bone bridge STEM project is a powerful vehicle for developing a wide range of essential skills:
- Critical Thinking: Children must analyze the problem (how to span the gap?), evaluate different solutions, and adjust their strategy based on what they observe.
- Problem-Solving: When a design fails, they don't just give up. They identify the problem, brainstorm fixes, and try again – a fundamental skill for any innovator.
- Creativity and Innovation: There's no single "right" way to build a bone bridge. Kids are encouraged to experiment with different designs, materials, and techniques, letting their imaginations lead the way.
- Collaboration: When working in teams, children learn to communicate ideas, negotiate roles, and support each other's efforts, mimicking real-world engineering teams.
- Fine Motor Skills: Manipulating small materials like cotton swabs and tape helps refine dexterity and hand-eye coordination.
- Patience and Persistence: Engineering challenges rarely succeed on the first try. This project teaches the value of perseverance and resilience in the face of setbacks.
At I'm the Chef Too!, we wholeheartedly believe in the power of these types of hands-on, exploratory activities. They are at the heart of our mission to provide screen-free educational alternatives that spark curiosity and creativity. We develop our unique experiences, blending food, STEM, and the arts, with these foundational skills in mind, knowing that through tangible engagement, children truly learn and grow. If you're looking for more ways to cultivate these skills and foster a love for learning that lasts, we invite you to explore our full library of adventure kits available for a single purchase in our shop.
Getting Started: Materials You'll Need
One of the beautiful aspects of the bone bridge STEM project is its accessibility. You don't need fancy equipment or specialized components. Most of what you need can be found in a typical home or easily sourced from a craft store.
Essential Supplies
- Cotton Swabs (Q-tips): These are your primary "bones." Aim for a box of 100-200. The more you have, the more elaborate or experimental designs children can create without fear of running out.
-
Joining Material (Tape is best):
- Masking Tape or Painter's Tape: These are excellent choices. They provide good adhesion, are easy for small hands to tear or cut, and allow for adjustments without leaving sticky residue.
- Scotch Tape: Also works, but can be a bit trickier for very young children to handle without it tangling.
- Avoid: Glue (too slow to dry), hot glue (requires adult supervision and doesn't allow for quick adjustments).
- Scissors: For cutting tape or other optional materials.
- Ruler or Measuring Tape: Essential for defining the span of the bridge and measuring its length. Paper measuring tapes (sometimes available for free from furniture stores) are great for kids.
- Two Support Blocks/Books/Containers: These will serve as the "banks" or "cliffs" that your bridge needs to span. Ensure they are stable and relatively uniform in height.
- Pennies or Small Weights: For testing the strength and capacity of the bridge. Base-ten blocks, small toy figures, or even candy corn (if a themed activity) work well too.
Optional Enhancements
- Popsicle Sticks / Craft Sticks: Can act as larger, stronger "bones" or structural supports, adding another layer of engineering complexity.
- Pipe Cleaners: Flexible and strong, they can be used for joints, reinforcement, or even decorative elements.
- Straws: Offer a different kind of structural element, lightweight but capable of forming strong trusses when taped together.
- Cardboard: Small pieces can be used as a bridge deck or as stronger foundational elements.
- String/Yarn: Can be introduced for suspension bridge concepts or for tying elements together (though tape is generally easier for this project).
- Paper and Pencil: For the planning and sketching phase, encouraging design thinking before building.
Having these materials readily available transforms a simple idea into an engaging challenge. It empowers children to experiment and innovate, knowing they have the tools to bring their structural visions to life.
Designing Your Bone Bridge: A Step-by-Step Guide
The beauty of the bone bridge STEM project lies in its hands-on, iterative nature. It's less about following a rigid template and more about embracing the engineering design process: Ask, Imagine, Plan, Create, Improve.
Planning Phase: The Blueprint for Success
Before any "bones" are laid, encourage a planning session. This doesn't have to be formal; it can be a quick discussion or a simple sketch.
-
Define the Challenge: Start by setting clear criteria.
- "We need to build a bridge that spans a gap of [e.g., 6 inches, 1 foot] between these two books."
- "The bridge must be at least [e.g., 1 inch] off the table."
- "Our goal is for the bridge to hold at least [e.g., 10 pennies] without collapsing."
-
Brainstorm Ideas: Ask open-ended questions:
- "How do real bridges look? What shapes do you see in them?" (Show pictures of different bridge types if possible: beam, arch, truss, suspension.)
- "Which materials do you think will be strongest? How can we connect them?"
- "What shapes make things strong?" (Hint: triangles are often key in engineering for stability!)
- Sketch a Design (Optional but Recommended): On a piece of paper, encourage children to draw their initial bridge idea. This helps them visualize the structure and think through connections. It's okay if the final bridge looks different; the act of planning is valuable.
Building Phase: Hands-On Construction
Now, the fun begins! Set up your two support blocks with the defined gap between them.
- Start with the Base: Begin by creating a sturdy base or deck for the bridge. This could involve taping several cotton swabs side-by-side to form a flat surface, or using popsicle sticks for a stronger foundation.
-
Build Your Supports: Think about how to support that deck.
- Beam Bridges: Simply span the gap with a long beam of connected "bones." This is often the first attempt and quickly reveals limitations.
- Truss Bridges: Introduce triangular shapes. Taping cotton swabs into triangles creates incredibly strong, lightweight structures that can be used as the sides or underneath the bridge deck.
- Arch Bridges: Try to bend and reinforce a curved shape.
- Connect the "Bones": Use tape liberally but strategically. Overlapping ends and wrapping tape firmly will create strong joints. Encourage kids to try different ways of joining to see what works best.
- Work Together (if in a group): If multiple children are participating, encourage them to divide tasks – one cutting tape, another assembling components, another holding parts in place. This fosters teamwork and communication, crucial skills highlighted by I'm the Chef Too!'s collaborative "edutainment" experiences.
Testing Phase: Putting Your Bridge to the Test
This is where the excitement peaks! Once the bridge is built, it's time to see if it meets the challenge criteria.
- Check the Span and Height: First, confirm the bridge correctly spans the gap and is at the required height.
-
Add Weights Gradually: Slowly and carefully place pennies or other small weights onto the center of the bridge.
- Count each weight as it's added.
- Observe where the bridge starts to sag or buckle.
- If it collapses, that's okay! It's valuable data for the next phase.
Reflecting Phase: Learning from Experience
This is perhaps the most important part of the STEM process, where true learning happens.
-
Discuss What Happened:
- "What worked well with your design?"
- "What was the most challenging part?"
- "Where did the bridge break or bend first?" (This helps identify weak points.)
- "Why do you think it broke there?"
- "What would you do differently if you built it again?"
- Record Findings (Optional): For older children, you might keep a simple record of the number of pennies held, or sketch the failure point.
- Iterate and Improve: Encourage them to take what they learned and try to improve their design. This iterative process is fundamental to engineering and innovation. This is where the real growth happens, transforming a "failure" into a stepping stone for success.
Just like in real engineering, every attempt, successful or not, provides valuable insights. This teaches children resilience and the scientific method in a very tangible way. Ready to build something new every month? Our Chef's Club subscription brings fresh, exciting challenges right to your doorstep, sparking continuous learning and family fun.
Variations and Extensions: Scaling for All Ages
The bone bridge STEM project is incredibly versatile, adaptable to various age groups and learning objectives. Its flexible nature ensures that everyone, from a curious kindergartener to a budding middle school engineer, can find a rewarding challenge.
For Younger Engineers (Ages 4-7)
For our youngest learners, the focus should be on exploration, basic construction, and developing fine motor skills, rather than complex structural analysis.
- Simple Span: The primary goal might just be to get any structure to connect two points (e.g., two small blocks) without immediate collapse.
- Material Exploration: Let them explore how cotton swabs feel, how tape sticks, and how different shapes connect.
- Sensory Engagement: Connect it to a story about a bridge a toy car needs to cross, or a river a teddy bear wants to get over.
- Focus on Fun: Celebrate every connection they make, every attempt, and their developing dexterity. The educational outcome is fostering a positive association with building and problem-solving.
- Guided Discovery: Offer more guidance and hands-on help, demonstrating how to tape two "bones" together or create a simple frame.
For Older Innovators (Ages 8-12+)
As children grow, their capacity for abstract thought and complex problem-solving expands, allowing for more intricate and challenging variations.
- Research Different Bridge Types: Before building, have them research beam, truss, arch, suspension, or cable-stayed bridges. Then, challenge them to build a specific type of bone bridge.
- Material Constraints: Limit the number of cotton swabs or the amount of tape they can use, forcing them to optimize their design for efficiency.
-
Specific Design Criteria:
- Longest Bridge: Build the longest bridge possible that can still hold a minimum weight.
- Strongest Bridge: Build a bridge of a specific length that can hold the maximum weight.
- Aesthetic Challenge: Incorporate an artistic element, making the bridge both functional and visually appealing.
- Blueprint Challenge: Require a detailed blueprint or scaled drawing before building.
- Cost Analysis (Advanced): Assign "costs" to each cotton swab or length of tape and challenge them to build the most cost-effective bridge that meets the criteria.
- Failure Analysis: When a bridge breaks, have them document exactly where and why it failed, proposing specific design changes for improvement. This mirrors real-world engineering practices.
Adding Weight & Capacity Challenges
This is a classic way to extend the bone bridge project and truly test the structural integrity.
- Progressive Loading: Start with lightweight objects (e.g., paperclips, pennies, marbles) and gradually increase the weight. This provides a clear metric for success and allows for comparison between different designs.
- Capacity Test: Instead of just weight, challenge them to see how many small objects (like mini erasers or candy) their bridge can hold on its deck before failing.
- Distributed Load vs. Point Load: Discuss how weight spread across the bridge (distributed load) is often easier to support than a single heavy object in one spot (point load). Experiment with both.
Connecting to Cross-Curricular Themes
The bone bridge STEM project isn't just about STEM; it can be a gateway to other subjects:
- History: Research famous bridges around the world and the engineers who designed them.
- Art: Encourage decorating the bridge or designing it with aesthetic appeal in mind, tying into the "A" in STEAM (Science, Technology, Engineering, Arts, Mathematics).
- Language Arts: Have children write a short story about their bridge, create a persuasive argument for why their design is best, or explain the engineering principles they used.
- Math: Calculate ratios, measure angles, compare weights, or even graph results.
By offering these variations, the bone bridge STEM project remains fresh and challenging, growing with your child's abilities and interests. It's this kind of adaptability and engagement that we prioritize at I'm the Chef Too! Our kits are designed to offer multi-faceted learning experiences, making complex subjects exciting and approachable. For example, just like a bone bridge teaches structural integrity, kits like our Erupting Volcano Cakes delve into exciting chemical reactions, blending science with a delicious outcome.
I'm the Chef Too!'s Approach to Hands-On Learning
At I'm the Chef Too!, the bone bridge STEM project perfectly encapsulates the spirit of what we do. While our primary focus is on edible science adventures, the underlying philosophy is identical: learning through direct experience, guided discovery, and playful engagement. We know that children thrive when they can touch, taste, smell, and manipulate materials to understand how the world works.
Beyond the Bridge: Our STEM Cooking Adventures
Just as building a bone bridge allows children to grasp engineering concepts by physically constructing them, our cooking STEM kits bring scientific principles to life in the kitchen. Imagine learning about:
- Chemical Reactions: The leavening agents that make cakes rise (like in our Erupting Volcano Cakes with their bubbling eruption!) are perfect examples of chemistry in action.
- States of Matter: Observing ingredients transform from liquids to solids, or how heat changes food, offers concrete lessons in physics.
- Measurement and Ratios: Precision in baking reinforces crucial mathematical skills, teaching children the importance of accurate measurements for a successful (and tasty!) outcome.
- Biology (with a twist): Understanding how yeast works, or the structure of a cell, can be explored through edible models.
We believe these hands-on, food-based explorations make abstract STEM concepts palatable and memorable. Developed by mothers and educators, our kits ensure that every activity is not only educational but also incredibly fun and safe.
Screen-Free Family Fun
One of our core values is providing meaningful, screen-free alternatives for family bonding. The bone bridge STEM project, like all our kits, encourages interaction, communication, and shared moments of discovery. Instead of staring at individual devices, families gather around a table, collaborating on a common goal. These are the moments that build strong family connections and create cherished memories. We offer a wonderful way to bring everyone together for a shared experience.
The Convenience of Discovery
We understand that parents and educators are busy. That's why we've designed our "edutainment" experiences to be as convenient as possible. Just as gathering materials for a bone bridge is simple, our kits arrive at your door with pre-measured dry ingredients and specialty supplies, ready for adventure. This eliminates the hassle of grocery shopping for obscure ingredients or searching for craft supplies, allowing you to jump straight into the fun.
For those who love continuous discovery, our monthly Chef's Club subscription delivers unique edutainment experiences right to your door with free shipping in the US. It's the ultimate way to ensure a steady stream of engaging, educational activities, perfect for sparking curiosity and creativity month after month.
Tips for Parents and Educators: Maximizing the Learning Experience
Engaging children in a bone bridge STEM project, or any hands-on activity, can be incredibly rewarding. To truly maximize the learning and enjoyment, a supportive and flexible approach is key.
Embrace the Process, Not Just the Product
It’s easy to get caught up in whether the bridge looks perfect or holds the most weight. However, the real learning happens in the journey.
- Focus on the Effort: Praise their thinking, their attempts, and their perseverance more than just the final outcome.
- Value "Failure": Frame collapsed bridges or designs that don't work as opportunities for learning. "That's interesting! Why do you think that happened? What can we learn from it?" This teaches resilience and problem-solving.
- Encourage Experimentation: Let them try out unusual ideas, even if you suspect they won't work. Sometimes the most unexpected approaches yield the best insights.
Encourage Open-Ended Exploration
Resist the urge to provide all the answers or show them the "best" way to build the bridge.
- Ask Guiding Questions: Instead of "You should put a triangle here," try "What shapes do you see that might make this stronger?" or "Where does your bridge feel weakest?"
- Step Back: Allow children to take ownership of the project. Your role is often best as a facilitator, offering encouragement and materials when needed, but letting them lead the design and construction.
- Allow for Differences: Every child's bone bridge will be unique, reflecting their individual thought process and creativity. Celebrate these differences!
Safety First!
While the bone bridge project uses simple materials, a few safety considerations are always prudent.
- Supervision: Always provide appropriate adult supervision, especially with younger children.
- Scissors: Teach proper scissor safety and supervise their use.
- Small Parts: Be mindful of very small parts (like individual cotton swab tips) if you have toddlers or infants nearby who might put them in their mouths.
- Clean Workspace: Ensure the work area is clear of clutter and easy to clean up afterward.
Celebrating Success and Learning from "Failures"
Every step of the process, from initial planning to the final test, is a chance to learn and celebrate.
- Document Progress: Take photos or videos of their bridges, both successful and those that offer lessons. This visual record can be a powerful tool for reflection.
- Share Discoveries: Encourage children to explain their design choices, what they learned, and what they would do differently. This strengthens communication skills.
- Display Their Work: Even if it's a small bone bridge, displaying it proudly validates their efforts and achievements.
Remember, fostering a love for learning and building confidence are paramount. Our goal at I'm the Chef Too! is to provide joyful, educational experiences that support this growth, ensuring that children develop key skills and create happy family memories without the pressure of guaranteed academic outcomes. The process of discovery, the joy of creation, and the bond formed through shared learning are the true rewards. Why stop at one bone bridge? Expand your child's world of discovery with a monthly Chef's Club subscription and continue the adventure!
Bringing STEM Home: More Engaging Activities
The bone bridge STEM project is just one example of how simple materials can unlock complex scientific and engineering principles. The world is full of opportunities for hands-on discovery, and we are passionate about making these experiences accessible and exciting for families.
Think about the everyday activities that can be transformed into STEM lessons:
- Kitchen Chemistry: Every time you bake or cook, you're engaging in chemistry! Observing dough rise, caramelizing sugar, or making homemade butter are all fantastic science experiments. This is precisely what we tap into at I'm the Chef Too! Our Galaxy Donut Kit, for example, allows kids to explore astronomy by creating their own edible solar system, combining art, science, and culinary fun.
- Backyard Biology: Observe insects, plant seeds, or create a mini-ecosystem in a jar.
- Physics of Play: Build paper airplanes and experiment with different wing designs, or construct ramps for toy cars to explore gravity and friction.
- Home Engineering: Design and build a fort, create a pulley system to lift toys, or even just organize a bookshelf efficiently – all involve engineering principles.
The key is to encourage curiosity and ask "why?" and "how?" questions. When children engage with these types of activities, they aren't just memorizing facts; they're developing a deeper understanding of the world around them. They're building confidence in their ability to solve problems and innovate.
At I'm the Chef Too!, we craft each of our kits to be a complete, immersive "edutainment" experience. We carefully select themes that resonate with children's interests – from dinosaurs to outer space, mythical creatures to beloved characters – and weave in core STEM and art concepts through delicious cooking adventures. Each box comes with pre-measured dry ingredients, specialty supplies, and easy-to-follow instructions, removing the planning burden from parents and making family learning time stress-free and joyful.
Not ready to subscribe? You can always explore our full library of adventure kits available for a single purchase in our shop. Whether you're interested in one-time fun or a continuous stream of discovery, we have something to spark every child's imagination. We believe that by making learning tangible and fun, we empower the next generation of thinkers, creators, and innovators, one delicious (or structurally sound!) project at a time.
Conclusion
The bone bridge STEM project is a testament to the power of hands-on, inquiry-based learning. It’s a simple yet profound activity that allows children to step into the shoes of engineers, grappling with real-world challenges like stability, strength, and design, all with readily available materials. More than just building a bridge, it’s about constructing critical thinking skills, fostering creativity, and cultivating a resilient problem-solving mindset. It teaches invaluable lessons about iteration – that "failures" are merely steps toward innovation – and encourages a deep understanding of how science and mathematics underpin the structures we see every day.
At I'm the Chef Too!, these foundational principles are at the heart of everything we do. We are dedicated to creating unique "edutainment" experiences that blend food, STEM, and the arts, inspiring curiosity and imagination in children while providing valuable screen-free family time. Just as a bone bridge challenges young builders to connect and support, our kits connect academic concepts with tangible, delicious outcomes, making learning an unforgettable adventure.
So, gather your "bones," clear your workspace, and embark on this incredible engineering journey. Watch as your child’s eyes light up with understanding and accomplishment. And when you’re ready to expand their world of discovery with even more engaging, educational fun delivered right to your door, remember us.
Ready for a new adventure every month? Join The Chef's Club and enjoy free shipping on every box. Give the gift of learning that lasts all year with a 12-month subscription to our STEM cooking adventures, and continue to spark curiosity and creativity with every delicious, educational kit!
FAQ
Q1: What age group is the bone bridge STEM project best suited for? A1: The bone bridge STEM project is incredibly versatile and can be adapted for a wide range of ages, generally from 4 to 12+. For younger children (4-7), focus on basic building, material exploration, and simple spans. For older children (8-12+), introduce more complex challenges like weight-bearing tests, specific bridge designs (truss, arch), material constraints, and detailed planning phases.
Q2: What are the main STEM concepts children learn from building a bone bridge? A2: Children learn about engineering design principles such as structural integrity, load bearing, tension, compression, and stability. They also engage in critical thinking, problem-solving, creativity, and the iterative design process. Depending on how you frame it, they can also learn basic anatomy connections related to bones and support.
Q3: What if our bone bridge collapses immediately? Is that a failure? A3: Absolutely not! A collapsed bridge is a crucial part of the learning process. It provides immediate feedback on what didn't work and offers an opportunity to ask "why?" and "how can we make it better?" Encourage children to analyze the weak points, brainstorm solutions, and try again. This teaches resilience and the iterative nature of engineering.
Q4: How can I make the bone bridge project more challenging for older kids? A4: For older children, you can introduce constraints like a limited number of "bones" or tape, specific weight-bearing requirements, or a challenge to build a particular type of bridge (e.g., a truss bridge). Encourage them to research real-world bridge designs, draw detailed blueprints, and meticulously document their testing results.
Q5: What materials do I absolutely need for this project? A5: The core materials are cotton swabs (your "bones"), a good quality tape (masking or painter's tape works best), scissors, a ruler or measuring tape, two stable supports (like books or blocks), and pennies or small weights for testing. Optional materials like popsicle sticks, pipe cleaners, or straws can add variety.
Q6: How does the bone bridge project connect to I'm the Chef Too!'s mission? A6: The bone bridge STEM project aligns perfectly with our mission to provide hands-on, screen-free "edutainment" that sparks curiosity and creativity. Like our cooking STEM kits, it teaches complex subjects (engineering, in this case) through tangible, engaging activities. It fosters critical thinking, problem-solving, and family bonding, all values we champion at I'm the Chef Too!.
Q7: Can I purchase kits from I'm the Chef Too! without a subscription? A7: Yes, absolutely! While we offer convenient monthly Chef's Club subscriptions for continuous learning, you can also browse our complete collection of one-time kits in our shop to find the perfect adventure for your child.