Table of Contents
- Introduction
- Understanding DIY STEM: More Than Just Play
- The Foundation of Discovery: Simple Materials, Big Impact
- Integrating Math & Technology Naturally
- The Educator's Toolkit: Tips for Successful DIY STEM
- Beyond the Moment: Sustaining the Spark of Curiosity
- Conclusion
Have you ever watched a child’s eyes light up, totally engrossed in a messy experiment or a challenging building project? That spark of curiosity, that deep concentration, that triumphant shout of "I did it!" – that's the magic of STEM in action. In a world brimming with screens and passive entertainment, finding genuinely engaging and educational experiences for our elementary-aged learners can feel like a quest. But what if we told you the most incredible learning adventures are often hiding in plain sight, right in your own home?
This comprehensive guide is dedicated to unlocking the power of DIY STEM activities for elementary students. We’ll explore how everyday materials can transform into captivating tools for scientific discovery, engineering ingenuity, technological understanding, and mathematical exploration. Our purpose is to provide you, parents and educators, with a treasure trove of practical, hands-on activities that foster critical thinking, problem-solving, and a lifelong love for learning. You’ll discover not only what to do, but why these activities are so beneficial, and how they seamlessly align with the core mission of I'm the Chef Too! – blending food, STEM, and the arts into one-of-a-kind "edutainment" experiences that facilitate family bonding and provide a vibrant, screen-free educational alternative. Get ready to turn your kitchen into a laboratory and your living room into an innovation hub, because the journey of discovery is about to begin!
Introduction
Imagine a quiet afternoon that suddenly bursts into laughter and excited chatter as your child discovers why a round column is stronger than a square one, or how to make a paper helicopter twirl through the air. These aren't just moments of fun; they are profound learning experiences, building blocks for future innovators, thinkers, and creators. In elementary school, children are at a pivotal stage of development, eager to explore and understand the world around them. This is the perfect time to introduce them to the wonders of Science, Technology, Engineering, and Math (STEM) through activities that are not only educational but also incredibly fun and accessible.
This blog post will delve deep into the world of DIY STEM, offering a wealth of practical, hands-on activities that you can do with elementary students using materials you likely already have at home. We’ll explore the underlying scientific principles, highlight the skills each activity develops, and provide tips to maximize the learning potential. From simple paper challenges that defy expectations to exciting kitchen chemistry that creates delicious results, we're here to guide you every step of the way. Our goal is to empower you to spark genuine curiosity and creativity in your children, demonstrating that learning is an exhilarating adventure that can happen anywhere, anytime.
Understanding DIY STEM: More Than Just Play
Before we dive into the activities, let's take a moment to understand what DIY STEM truly means and why it's so incredibly valuable for elementary-aged children.
What is STEM for Kids?
STEM stands for Science, Technology, Engineering, and Mathematics. These four fields are deeply interconnected and foundational to understanding our modern world. For kids, STEM isn't about memorizing formulas or complex theories; it's about developing a mindset:
- Science: Asking questions, observing, experimenting, and understanding how the world works. It’s about curiosity and discovery.
- Technology: Using tools and developing solutions to problems. This isn't just about computers; it's about any innovation that helps us.
- Engineering: Designing, building, and creating things to solve problems or meet needs. It’s about applying scientific principles to practical challenges.
- Mathematics: Using numbers, patterns, and logic to analyze, measure, and understand the world. It’s the language of STEM.
When we talk about STEM for elementary students, we’re talking about igniting these innate curiosities and fostering these critical ways of thinking through engaging, age-appropriate experiences.
Why DIY? The Power of Hands-On Learning
DIY STEM takes these powerful concepts and brings them right into your home, making them accessible and exciting. The "Do-It-Yourself" aspect is crucial because it:
- Promotes Accessibility: You don't need fancy equipment or expensive kits. Many activities use common household items, making STEM learning achievable for everyone.
- Encourages Creativity & Innovation: When children are given simple materials and a challenge, they are forced to think outside the box, come up with their own solutions, and iterate on their designs. This fosters genuine innovation.
- Builds Confidence: Successfully completing a DIY STEM project, even a small one, gives children a profound sense of accomplishment. They learn that they are capable of understanding complex ideas and solving problems.
- Fosters Problem-Solving Skills: DIY activities are often open-ended, meaning there isn't just one "right" answer. Children learn to identify problems, brainstorm solutions, test theories, and learn from "failures" – which are really just steps on the path to success!
- Enhances Family Bonding: These activities are perfect for doing together. Parents and children can collaborate, learn from each other, and create lasting memories. It’s a fantastic screen-free alternative that brings everyone together.
The I'm the Chef Too! Philosophy: Edutainment in Action
At I'm the Chef Too!, our mission perfectly aligns with the DIY STEM movement. We believe that the most effective learning happens when children are actively engaged and having fun. That's why we blend food, STEM, and the arts into one-of-a-kind "edutainment" experiences. Our unique approach teaches complex subjects through tangible, hands-on, and delicious cooking adventures developed by mothers and educators.
We understand the value of a comprehensive, hands-on experience, which is why our Chef's Club subscription boxes deliver a new adventure right to your door every month with free shipping in the US. Each box is a complete experience, containing pre-measured dry ingredients and specialty supplies, taking the prep work out of your hands so you can focus on the fun and learning. Ready for a new adventure every month? Join The Chef's Club and enjoy free shipping on every box.
While our kits offer incredible convenience and a structured learning experience, the spirit of DIY STEM – using everyday items to spark discovery – is at the heart of our philosophy. We champion curiosity and creativity, whether it's through our specially curated kits or through the simple experiments you can whip up at home.
The Foundation of Discovery: Simple Materials, Big Impact
You might be surprised at how much STEM learning can be extracted from the most humble of household items. Let's explore some fantastic DIY STEM activities for elementary students, categorized by the primary materials or concepts they utilize.
Paper Power: Engineering with Everyday Sheets
Paper is an incredibly versatile and affordable material for countless STEM activities. It teaches concepts of structure, strength, aerodynamics, and even abstract mathematical ideas.
The Mighty Paper Column Challenge: Strength of Shapes
- Concept: Structural engineering, load bearing, geometry, distribution of weight.
- Materials: 3 sheets of paper (copy paper works well), tape, a stack of books (or other uniform weights).
- The Challenge: Which shape of paper column – a circle, a square, or a triangle – can hold the most books without collapsing?
-
How to Do It:
- Have your child hypothesize: Which shape do they think will be the strongest and why? Encourage them to play with the paper, try folding different shapes, and feel their rigidity before taping. Record their predictions.
- Construct the columns:
- Circle: Roll one sheet of paper into a cylinder and tape the seam.
- Square: Fold one sheet of paper into a square prism and tape the seam.
- Triangle: Fold one sheet of paper into a triangular prism and tape the seam.
- Encourage different approaches for construction – some might overlap more, some less. This is part of the engineering design process!
- Test them out: Place each column upright and carefully stack books (or other weights) on top, one by one, until the column collapses. Make sure to use the same type of books for consistent weight.
- Observe and discuss: Which column held the most? Most often, the circular column will prove to be the strongest. Why? The weight on a circular column is distributed evenly around its entire surface, whereas square and triangular columns have edges and corners where stress concentrates, making them prone to buckling.
- Skills Developed: Hypothesis formation, observation, measurement, data collection, understanding structural integrity, geometric properties, critical thinking.
- Extension: Try building a paper bridge using similar principles. Can they design a bridge that spans a gap (e.g., between two chairs) and holds a toy car or a small weight? This introduces concepts of tension and compression.
The Endless Paper Chain: Problem-Solving & Measurement
- Concept: Optimization, measurement, critical thinking, practical geometry.
- Materials: One sheet of paper, scissors, glue stick or tape.
- The Challenge: Make the longest possible paper chain from just one sheet of paper within a set time (e.g., 20-30 minutes).
-
How to Do It:
- Introduce the challenge: Emphasize that careful planning will lead to a longer chain. Give them 5 minutes to think and plan their strategy before cutting.
- Execute: Let them cut strips and create loops, connecting them.
- Measure and compare: Once the time is up, carefully lay out the chains and measure them. Discuss:
- What strategies worked best for making longer strips? (e.g., cutting thinner strips along the longest side of the paper).
- How did the size of the strips affect the strength and length of the chain? (Thinner strips make a longer chain but can be more fragile).
- Did they encounter any problems during transport or laying out?
- Skills Developed: Strategic planning, fine motor skills, measurement, problem-solving, understanding trade-offs in design, data comparison.
- Extension: For older elementary students, introduce mathematical concepts: If their chain is X inches long, how many pieces of paper would they need to make a chain that stretches across the room? Or even further?
Fit Through an Index Card? Topology & Perimeter
- Concept: Geometry, perimeter, spatial reasoning, surprising mathematical properties.
- Materials: An index card (or any small rectangle of paper), scissors.
- The Challenge: Can you cut an index card in such a way that you can fit your head (or even your whole body!) through the resulting hole?
-
How to Do It:
- Ask the question: "Do you think you can fit through an index card?" Most kids will immediately say no. Then, "What if I give you scissors?" This usually gets them thinking.
- Allow experimentation: Let them try to figure it out on their own first. They might just cut a big hole in the middle, which won't work.
- Guide the process (if needed):
- Fold the card in half lengthwise.
- Make cuts from the folded edge, almost all the way to the open edge, leaving a small margin at both ends. Space these cuts about a quarter inch apart.
- Then, from the open edge, make cuts between the previous cuts, again almost to the folded edge.
- Finally, cut along the length of the folded edge, but only on the parts that are between the cuts from the first step. Be careful not to cut the very ends.
- Carefully unfold the paper. You should have a large loop!
- Skills Developed: Spatial reasoning, fine motor skills, understanding perimeter, geometry, creative problem-solving, challenging assumptions. This activity is a fantastic demonstration of how simple changes can lead to unexpected results.
Flying High: Paper Helicopters (Aerodynamics & Gravity)
- Concept: Aerodynamics, lift, gravity, variables in experiments.
- Materials: Paper (copy paper or slightly heavier cardstock), scissors, paper clips (various sizes/weights if possible).
- The Challenge: Design a paper helicopter that spins effectively and then investigate how its design and weight affect its flight.
-
How to Do It:
- Fold a piece of paper into three equal sections lengthwise and cut. You'll use one section per helicopter.
- Fold one of these sections in half (short end to short end) and unfold.
- Cut along the center fold from one end almost to the middle fold. These will be your propeller blades.
- At the other end of the paper, cut two small slits on either side, about a third of the way in, at the fold. Fold these two sides to the center.
- Clip these folded sides together at the bottom with a paper clip. This adds weight and helps stability.
- Flip the top part, fold the two "propeller" flaps away from each other.
- Hold it by the paper clip and drop it from a height (e.g., stand on a chair, or drop it down a stairwell). Watch it spin!
- Skills Developed: Following instructions, fine motor skills, observation, understanding principles of lift and gravity, experimental design, variable analysis.
- Extension: Create multiple helicopters, each with a different weight paper clip (e.g., a small wire clip, a medium clip, a large clip). Drop them all from the same height. Which one lands first? Discuss how the weight of the paper clip affects the pull of gravity and the helicopter's descent. What if you used heavier paper? This helps solidify the concept of variables.
Kitchen Chemistry & Edible Science
The kitchen is a natural laboratory, offering endless opportunities for delicious DIY STEM activities for elementary students. These projects not only teach scientific principles but also introduce measurement, following instructions, and sometimes, the art of culinary creation!
Magic Milk & Colorful Reactions
- Concept: Surface tension, chemical reactions, molecular interactions.
- Materials: Milk (whole milk works best due to fat content), food coloring, dish soap, shallow dish or plate, cotton swab.
- The Challenge: Make colors dance and swirl in milk using just a drop of soap.
-
How to Do It:
- Pour a thin layer of milk into the shallow dish.
- Add several drops of different food colors to the milk. Try to space them out.
- Dip one end of a cotton swab into dish soap.
- Touch the soapy end of the cotton swab to the center of one of the colors in the milk. Watch the magic!
- The Science: Milk contains fats, proteins, vitamins, and minerals. Dish soap is designed to break down fats. When the soap touches the milk, it immediately starts chasing after the fat molecules, breaking the surface tension of the milk. This rapid movement and interaction cause the food coloring (which is simply suspended in the milk) to swirl and dance in mesmerizing patterns.
- Skills Developed: Observation, understanding chemical reactions, cause and effect, fine motor control, color mixing.
Fizzing Fun: The Science of Eruptions
- Concept: Acid-base reactions, gas production, physical and chemical changes.
- Materials: Baking soda, vinegar, dish soap (optional for more foam), food coloring (optional), a small bottle or cup, tray or baking dish for containment.
- The Challenge: Create a foamy, fizzing eruption!
-
How to Do It:
- Place the small bottle or cup inside a larger tray or baking dish to catch the overflow.
- Add a few tablespoons of baking soda to the bottle.
- Add a few drops of food coloring and a squirt of dish soap (if using) for extra foam.
- Pour vinegar into the bottle and watch it fizz and erupt!
- The Science: Baking soda is a base (sodium bicarbonate) and vinegar is an acid (acetic acid). When they mix, a chemical reaction occurs, producing carbon dioxide gas. This gas rapidly expands, creating bubbles and forcing the liquid out of the container, simulating a volcanic eruption. The dish soap traps the gas, making the eruption extra foamy.
- Skills Developed: Understanding chemical reactions, observation, predicting outcomes, measurement. This DIY activity is a classic for a reason and forms the basis for amazing learning experiences, like exploring a chemical reaction that makes our Erupting Volcano Cakes bubble over with deliciousness.
Taste Bud Tricks: Exploring Our Senses
- Concept: Sensory perception, the interconnectedness of senses (especially taste and smell).
- Materials: Various small pieces of food with distinct flavors (e.g., apple, potato, onion, jelly bean flavors), blindfold.
- The Challenge: Can you identify foods by taste alone when your other senses are "turned off"?
-
How to Do It:
- Prepare small, safe-to-eat pieces of food. Ensure no allergies are present.
- Blindfold your child.
- Ask them to pinch their nose closed.
- Give them a piece of food to taste. Can they identify it?
- Release their nose and try again. Does it become easier?
- The Science: This experiment demonstrates how closely our sense of smell is linked to our perception of taste. Our tongue primarily detects sweet, sour, salty, bitter, and umami. Most of the nuanced "flavor" we experience comes from the volatile compounds of food reaching our olfactory receptors (smell) in the back of our throats as we chew. Without smell, many foods taste very similar or bland.
- Skills Developed: Sensory awareness, observation, understanding the human body, scientific inquiry.
Slime Time: States of Matter Made Fun
- Concept: Polymers, states of matter (non-Newtonian fluid), chemical bonds.
- Materials: White school glue, liquid starch (or borax solution, or contact lens solution + baking soda), food coloring (optional), mixing bowl, spoon.
- The Challenge: Create a gooey, stretchy substance that acts like both a solid and a liquid.
-
How to Do It:
- Pour about 1/2 cup of glue into a bowl.
- Add a few drops of food coloring if desired and mix.
- Gradually add liquid starch, a tablespoon at a time, mixing continuously. You'll see the mixture start to pull away from the sides of the bowl and become "slimy."
- Once it's mostly pulled together, knead it with your hands until it reaches the desired consistency. If it's too sticky, add a bit more starch; if too stiff, a tiny bit more glue.
- The Science: Glue is a polymer, a long chain of repeating molecules. The liquid starch (or other activators) contains chemicals that react with the glue's molecules, creating cross-links between the polymer chains. This changes the glue's properties, forming a new substance – slime! Slime is a non-Newtonian fluid, meaning its viscosity changes depending on the stress applied. It can act like a liquid (oozing) or a solid (holding shape when squeezed quickly).
- Skills Developed: Chemical reactions, understanding states of matter, measurement, fine motor skills, observation.
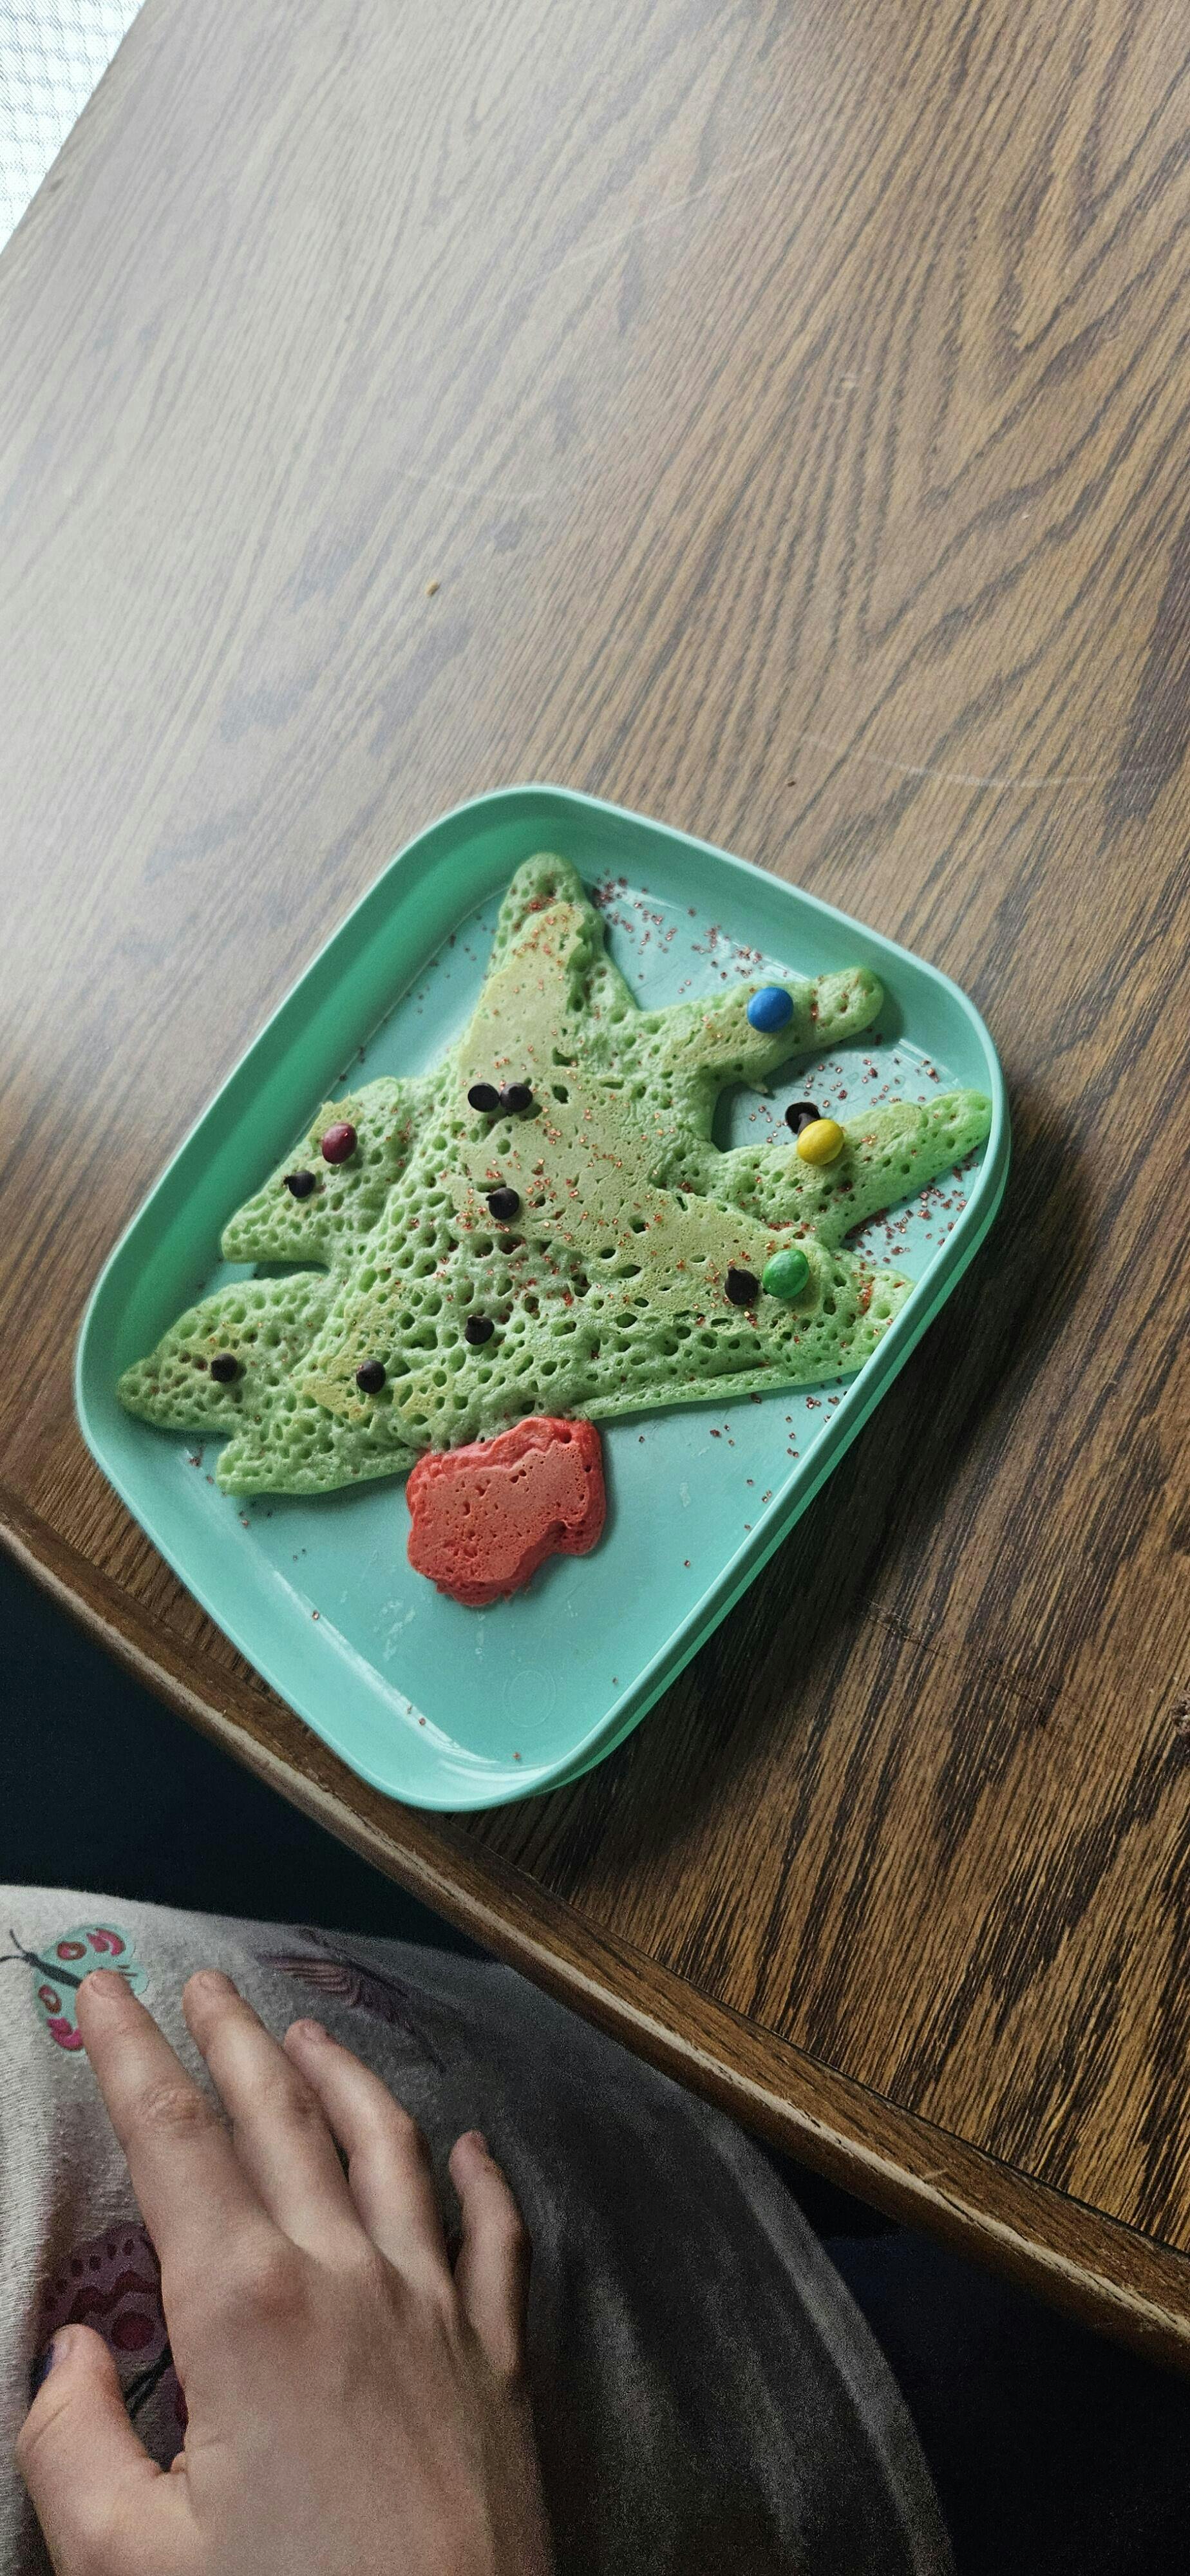
Edible Astronomy: A Sweet Trip Through Space
- Concept: Astronomy, planetary characteristics, scale of the solar system.
- Materials: Donuts, various candies, sprinkles, frosting, food coloring.
- The Challenge: Create edible planets and arrange them into a solar system.
-
How to Do It:
- Discuss the planets in our solar system: their order, relative sizes, and key characteristics (e.g., Jupiter is striped, Mars is red, Saturn has rings).
- Use donuts as the base for planets.
- Frost and decorate each donut to represent a different planet using colored frosting, sprinkles, and candies. For example, a plain donut could be Mercury, a red frosted one could be Mars, a large one with swirled frosting could be Jupiter.
- Arrange the "planets" in order on a tray or large piece of paper.
- The Science: This activity helps children visualize the planets and their characteristics in a fun, tangible way. It's a great springboard for discussions about orbital paths, gravity, and the vastness of space.
- Skills Developed: Astronomy knowledge, creativity, fine motor skills, proportional reasoning (even if simplified). For a stellar experience combining science and sweetness, you can explore astronomy by creating your own edible solar system with our Galaxy Donut Kit.
Building Brilliance: Engineering Challenges
Engineering is all about designing and building solutions. These DIY STEM activities for elementary students encourage creative problem-solving and an understanding of structural principles.
Tower Power: Pasta & Marshmallows
- Concept: Structural engineering, tension, compression, stability, geometry.
- Materials: Dry spaghetti (or other pasta shapes like penne, ziti), mini marshmallows (or gumdrops, play-doh), ruler (optional).
- The Challenge: Build the tallest freestanding tower that can support a small weight (like a marshmallow or a toy).
-
How to Do It:
- Introduce the challenge: Design and build a tower using only pasta and marshmallows. It must stand on its own and hold a small weight at the top.
- Brainstorm and sketch: Encourage your child to draw out some ideas first. What shapes seem strong? (Triangles are excellent for stability!)
- Build: Use marshmallows as connectors and spaghetti as beams. Guide them to think about a wide base for stability and how to create strong joints.
- Test and iterate: Once built, gently place the weight on top. Did it hold? If not, what collapsed? How can they modify their design to make it stronger? This iterative process is core to engineering.
- The Science: This activity demonstrates principles of tension (pulling forces) and compression (pushing forces) within a structure. Triangles are inherently stable shapes that distribute forces effectively, making them common in real-world structures like bridges and towers.
- Skills Developed: Design thinking, problem-solving, structural stability, fine motor skills, spatial reasoning, collaboration.
Bridge Building: Popsicle Sticks & Toothpicks
- Concept: Civil engineering, structural integrity, load-bearing, trusses, force distribution.
- Materials: Popsicle sticks (or toothpicks), white glue (or hot glue with adult supervision), small weights (pennies, toy cars).
- The Challenge: Build a bridge that spans a gap and holds as much weight as possible.
-
How to Do It:
- Set up the gap: Place two books or small blocks a few inches apart.
- Discuss bridge types: Talk about different types of bridges (beam, arch, truss) and which shapes might make a strong bridge.
- Design and build: Encourage experimentation with different designs. How can they use the sticks to create a strong, stable structure? Trusses (triangular frameworks) are key for distributing weight efficiently.
- Test: Once the glue is dry, test the bridge's strength by slowly adding weights (pennies are great for this) until it collapses.
- The Science: Bridges are engineering marvels designed to withstand various forces. This activity introduces concepts like how forces are distributed across a structure, the importance of strong connections, and how different shapes (like triangles in trusses) contribute to stability and strength.
- Skills Developed: Engineering design process, structural analysis, problem-solving, measurement, fine motor skills, patience.
Earthquake-Proof Structures: Shaky Science
- Concept: Civil engineering, stability, resilience, forces, structural design.
- Materials: Building materials (straws, pipe cleaners, toothpicks, mini marshmallows, play-doh), a Jell-O mold or shallow tray, Jell-O (optional, or just shake the tray).
- The Challenge: Design and build a structure that can withstand a simulated earthquake.
-
How to Do It:
- Discuss earthquakes: Briefly explain what an earthquake is and how engineers design buildings to resist them (flexible foundations, strong frames).
- Build: Provide the materials and challenge your child to build a structure (e.g., a small house, a tower) that they think will be "earthquake-proof." Encourage them to think about strong bases, rigid connections, and flexible elements.
- Simulate earthquake: Place the structure on the Jell-O mold (or simply a tray). Gently shake the mold/tray back and forth. Did the structure stand? What parts collapsed? How can they improve it?
- The Science: This activity vividly demonstrates how forces impact structures. Children learn about concepts like shear forces, base isolation (making the base flexible), and how different materials and designs react to shaking. They experience firsthand the importance of stability and resilience in engineering.
- Skills Developed: Design and iteration, understanding forces, structural stability, problem-solving, observation.
The Lego Balloon Car: Force and Motion
- Concept: Physics, force, motion, aerodynamics, Newton's Laws of Motion.
- Materials: Lego bricks (or other building blocks with wheels), a balloon, tape, scissors.
- The Challenge: Build a car powered by balloon air that travels the farthest.
-
How to Do It:
- Build a base: Have your child construct a simple car chassis using Lego bricks. Ensure it has wheels that spin freely.
- Attach the balloon: Securely tape a straw (or simply the neck of the balloon) to the top of the car. The straw should extend slightly beyond the back of the car.
- Inflate and release: Inflate the balloon through the straw (or directly if no straw) and then pinch the end. Place the car on a smooth surface and release the balloon. Watch it zoom!
- Experiment: Try different sized balloons, different car designs (lighter, heavier), or different attachment points for the balloon. Which design makes the car go the farthest?
- The Science: This activity demonstrates Newton's Third Law of Motion: For every action, there is an equal and opposite reaction. As the air rushes out of the balloon (action), it pushes the car forward (reaction). It also introduces concepts of friction (between wheels and surface) and aerodynamics (how the car moves through the air).
- Skills Developed: Engineering design, understanding force and motion, observation, experimentation, problem-solving.
Solo Cup Stacking: Design & Stability
- Concept: Engineering design, geometry, stability, balance, spatial reasoning.
- Materials: A pack of plastic (solo) cups.
- The Challenge: Build the tallest freestanding tower or bridge using only plastic cups.
-
How to Do It:
- Introduce the challenge: Build the tallest tower possible with a given number of cups, or build a bridge between two points.
- Experiment with designs: Let children discover different ways to stack or arrange the cups. They might try single columns, wide bases, interlocking patterns, or archways for bridges.
- Observe stability: Discuss which designs are most stable and why. Triangular arrangements (e.g., cups in a triangle base for a tower) often provide more stability than straight columns.
- The Science: This seemingly simple activity introduces principles of structural stability, weight distribution, and the importance of a strong base. It encourages experimentation with different geometric arrangements to achieve maximum height or span.
- Skills Developed: Engineering design process, spatial reasoning, problem-solving, observation, understanding stability and balance.
Integrating Math & Technology Naturally
Math and technology are woven into the fabric of everyday life and are essential components of any good STEM experience. Many DIY activities inherently involve mathematical thinking.
Math in Motion: Rocket Trajectories & Measurement
- Concept: Measurement, estimation, counting, basic geometry, data collection.
- Materials: Paper, markers, tape, measuring tape, small objects to launch (e.g., crumpled paper balls, cotton balls).
- The Challenge: Create a simple paper rocket launcher and measure how far different "rockets" travel.
-
How to Do It:
- Roll a piece of paper tightly around a pencil to make a tube, tape it, then remove the pencil. This is your "launcher tube."
- Make small paper rockets that fit loosely over the tube (crumple paper around the end of the tube and tape it).
- Insert the rocket onto one end of the tube. Take a deep breath and blow hard into the other end of the tube to launch the rocket.
- Measure the distance each rocket travels. Discuss: Which rocket went farthest? Why? Did the way they folded the rocket affect its flight?
- The Science: This simple activity touches on basic physics of force and motion. The math comes in with measuring distances (inches, feet, comparing lengths), counting launches, and potentially even graphing results.
- Skills Developed: Measurement, estimation, data recording, observation of cause and effect, basic physics of propulsion.
Probability Play: Dice, Coins, and Predictions
- Concept: Probability, statistics, data analysis, predictions.
- Materials: Coins, dice, paper, pencil.
- The Challenge: Explore the chances of certain outcomes when flipping coins or rolling dice.
-
How to Do It:
- Coin Flips: Have your child predict how many times heads vs. tails will appear in 10 or 20 flips. Flip a coin repeatedly, recording each outcome. Compare their prediction to the actual results. Discuss why it might not be exactly 50/50 in a small sample, but gets closer over many trials.
- Dice Rolls: Use one or two dice. Predict which number or sum will appear most often in 20 rolls. Roll the dice, record the results, and analyze the data. For two dice, discuss why 7 is the most probable sum.
- The Science: This is a fundamental introduction to probability and statistics, key areas of mathematics. Children learn about likelihood, randomness, and how to collect and interpret data.
- Skills Developed: Probability, data collection, tallying, graphing, critical thinking, understanding chance.
Decoding Time: The Art of Clock Reading
- Concept: Time, measurement, number sense, fractions (related to clock face).
- Materials: Paper plates, paper fasteners, construction paper, markers.
- The Challenge: Create a working model of a clock and practice telling time.
-
How to Do It:
- Decorate a paper plate as a clock face, writing the numbers 1-12.
- Cut out two hands from construction paper, one shorter for hours and one longer for minutes.
- Attach them to the center of the plate with a paper fastener, allowing them to spin freely.
- Use this model to practice telling time to the hour, half-hour, quarter-hour, and eventually to the minute. Ask them to set the clock to specific times, or to tell you what time it is when you set the hands.
- The Science: While seemingly simple, telling time involves understanding cyclical patterns, measurement units (minutes, hours), and number relationships (e.g., 60 minutes in an hour, 12 hours on a clock face).
- Skills Developed: Time telling, number recognition, counting by fives, understanding fractions of a circle, fine motor skills.
Simple Circuits & Basic Coding Concepts (unplugged)
- Concept: Electrical circuits (basic), logical thinking, sequencing, problem-solving.
- Materials: Play-Doh (homemade conductive and insulating dough works best), coin cell battery, small LED light.
- The Challenge: Light up an LED using homemade conductive dough.
-
How to Do It:
- Make two types of dough: one conductive (with salt) and one insulating (with sugar).
- Roll out two small "snakes" of conductive dough.
- Press the positive (+) leg of the LED into one dough snake and the negative (-) leg into the other.
- Place the coin cell battery flat on a surface. Connect one dough snake to the top of the battery and the other to the bottom. The LED should light up!
- Experiment: How can you turn it off? What happens if you connect the dough incorrectly? What if you use insulating dough?
- The Science: This introduces the basic concept of a closed circuit. Conductive dough allows electricity to flow through it, completing the circuit from the battery to the LED and back to the battery. Insulating dough blocks the flow.
- Skills Developed: Basic understanding of electricity and circuits, problem-solving, logical thinking, trial and error.
For those ready to dive deeper into integrated STEM experiences without the hassle of gathering individual supplies, remember that I'm the Chef Too! offers a fantastic solution. Our kits are designed to bring complex subjects to life in an engaging, hands-on way, covering everything from chemical reactions to astronomy. Browse our complete collection of one-time kits to find the perfect adventure for your little learner!
The Educator's Toolkit: Tips for Successful DIY STEM
Making DIY STEM activities successful goes beyond just gathering materials. It's about creating an environment that nurtures curiosity and effective learning.
Embracing the Scientific Method & Engineering Design Process
These aren't just for scientists and engineers; they're valuable frameworks for learning at any age.
-
The Scientific Method:
- Ask a Question: Start with something observable. "What will happen if...?" or "Why does this work?"
- Form a Hypothesis: Encourage predictions. "I think X will happen because..."
- Experiment: Do the activity, observing carefully.
- Analyze Results: What happened? What did you observe?
- Draw Conclusions: Did your hypothesis prove true? Why or why not? What did you learn?
-
The Engineering Design Process:
- Ask: What's the problem? What do we need to build?
- Imagine: Brainstorm ideas, sketch designs. There are no bad ideas at this stage!
- Plan: Choose the best idea, list materials.
- Create: Build your design.
- Improve: Test it. What worked? What didn't? How can we make it better? Then, go back to "Imagine" or "Plan" and refine.
By guiding children through these processes, you're teaching them a systematic approach to problem-solving that extends far beyond STEM.
Fostering Inquiry and Problem-Solving
- Ask Open-Ended Questions: Instead of just explaining, ask "What do you think will happen next?" "Why do you think it worked that way?" "What would happen if we changed this one thing?"
- Allow for Productive Struggle: It's tempting to jump in and "fix" things when a child is stuck, but resist the urge. Let them grapple with the problem, try different solutions, and experience the satisfaction of figuring it out themselves. Offer gentle nudges, not direct answers.
- Embrace "Failure": Emphasize that "failure" is just data. When an experiment doesn't go as planned, it's an opportunity to learn. "That didn't work as we expected. What did we learn from that? What can we change next time?"
- Document the Process: Encourage drawing, writing, or taking photos. This helps solidify learning, track progress, and provides a record for reflection.
Safety First: Kitchen & Home Lab Precautions
Even with simple DIY STEM activities for elementary students, safety should always be a priority.
- Adult Supervision is Key: All activities should be done with appropriate adult oversight, especially those involving cutting, heat, or non-edible chemicals.
- Read Instructions Carefully: Before starting any activity, ensure you understand all steps and potential hazards.
- Identify Allergens: If working with food, always be mindful of allergies or dietary restrictions.
- Wear Protective Gear (when needed): For some chemistry experiments (even basic ones), simple safety glasses can be a good habit to instill.
- Contain the Mess: Use trays, newspaper, or old tablecloths to protect your work surface. This makes cleanup easier and encourages more adventurous experimentation.
Encouraging Documentation & Reflection
The learning doesn't stop when the activity is over. Encourage children to:
- Draw or Sketch: What they built, what they saw, how something changed.
- Write Observations: Simple sentences or bullet points about what they did and what happened.
- Share Their Discoveries: Let them explain their project and what they learned to another family member or friend. Teaching others reinforces their own understanding.
- Reflect on the Process: What was challenging? What was surprising? What would they do differently next time?
Making it a Family Affair
DIY STEM activities are wonderful opportunities for family bonding.
- Collaborate, Don't Dictate: Work with your child, not just for them. Let them lead, make choices, and even make mistakes.
- Share Your Own Curiosity: Show genuine interest in the activity. Ask questions, make predictions alongside them, and celebrate their "aha!" moments.
- Integrate into Daily Life: Point out STEM concepts in everyday situations. "Look at how that bridge is built!" "Why do you think the water goes down the drain this way?" "How many steps do you think it is to the mailbox?"
We know how busy family life can be, which is why we’ve worked hard to create solutions that make STEM learning enjoyable and accessible. At I'm the Chef Too!, our unique blend of food, STEM, and the arts means you don't have to gather ingredients or scour for supplies. Our monthly Chef's Club subscription brings a complete, pre-measured, screen-free "edutainment" adventure right to your doorstep, facilitating wonderful family bonding moments with ease. Join The Chef's Club and enjoy free shipping on every box.
Beyond the Moment: Sustaining the Spark of Curiosity
The goal of DIY STEM isn't just to complete an activity; it's to ignite a lasting passion for learning and discovery.
The Benefits of Continuous Exploration
Consistent exposure to STEM concepts through hands-on play helps children:
- Develop a Growth Mindset: They learn that intelligence isn't fixed, but can grow through effort and perseverance.
- Enhance Critical Thinking Skills: They become adept at analyzing information, identifying patterns, and solving problems logically.
- Improve Dexterity and Fine Motor Skills: Many activities require precise movements, benefiting coordination.
- Boost Creativity and Imagination: They learn to think innovatively and express their ideas in tangible ways.
- Build Confidence and Resilience: Overcoming challenges in a fun, supportive environment teaches them to embrace new experiences without fear of failure.
- Foster a Love for Learning: When learning is an exciting adventure rather than a chore, children are more likely to seek out knowledge independently throughout their lives.
How I'm the Chef Too! Supports Your Journey
At I'm the Chef Too!, we are committed to providing parents and educators with fun, engaging, and educational activities for children that truly spark curiosity and creativity. Our approach, developed by mothers and educators, ensures that every experience is not only enriching but also fosters those invaluable family bonding moments.
While we wholeheartedly encourage the spirit of DIY STEM with everyday materials, we also understand that life is busy. Our specially designed kits take the guesswork and prep work out of your hands, delivering a complete, themed adventure directly to your home. Each kit is a meticulously planned "edutainment" experience, providing pre-measured dry ingredients and specialty supplies, ready for an immediate dive into delicious learning.
Whether you're looking for ongoing adventures or specific themed kits, we have options to suit your family's needs:
- For continuous discovery: Our Chef's Club Subscription is the perfect way to ensure a fresh, exciting STEM adventure arrives at your door every month. Choose from flexible 3, 6, or 12-month pre-paid plans, perfect for gifting or long-term enrichment. It's the ultimate screen-free educational alternative. Give the gift of learning that lasts all year with a 12-month subscription to our STEM cooking adventures.
- For specific interests or one-time fun: Not ready to subscribe? Explore our full library of adventure kits available for a single purchase in our shop. From the prehistoric wonders of our Fudgy Fossil Dig kit to the out-of-this-world excitement of our Galaxy Donut Kit, there’s a perfect theme for every little learner. Browse our complete collection of one-time kits.
We're passionate about making STEM education an accessible, joyful, and delicious experience for every child. We believe that by providing these hands-on opportunities, we're not just teaching science or math; we're nurturing future problem-solvers, critical thinkers, and lifelong learners.
Conclusion
The world of DIY STEM activities for elementary students is a boundless frontier of discovery, limited only by our imagination and the contents of our recycling bin and pantry. From turning a humble piece of paper into a soaring helicopter or a sturdy bridge, to transforming everyday kitchen staples into a vibrant chemical reaction or an edible solar system, the opportunities to spark curiosity are endless. These hands-on adventures provide invaluable opportunities for children to develop critical thinking, problem-solving skills, and a fundamental understanding of how the world works, all while having an incredible amount of fun.
At I'm the Chef Too!, we are dedicated to fostering these moments of "edutainment," blending the joy of cooking with the power of STEM and the creativity of the arts. We believe in providing screen-free alternatives that bring families together and build confidence in young learners. The journey of discovery is an ongoing one, filled with "aha!" moments and delicious successes.
Ready to embark on a new adventure every month, delivered right to your door with all the specialized ingredients and supplies you need? Join our community of curious young chefs and scientists! Join The Chef's Club and enjoy free shipping on every box. Let's make learning an unforgettable, delicious experience!
FAQ
Q1: What exactly is STEM for elementary students? A1: STEM for elementary students introduces foundational concepts in Science, Technology, Engineering, and Mathematics through fun, hands-on, age-appropriate activities. It’s less about complex theories and more about fostering curiosity, critical thinking, problem-solving, and a love for discovery. For example, building a paper bridge teaches engineering principles without needing advanced physics equations.
Q2: How can I make DIY STEM activities engaging for my child? A2: The key is to make it fun and child-led! Start with their interests (e.g., if they love space, try an edible solar system). Ask open-ended questions like "What do you think will happen?" or "How could we make this stronger?" Let them experiment, even if it means getting messy or making mistakes. Emphasize the process of discovery over a perfect outcome. Remember, our kits are designed to be instantly engaging, like our Erupting Volcano Cakes that fizz and delight as they teach chemical reactions.
Q3: Do I need special materials for DIY STEM activities? A3: Absolutely not! Many incredible DIY STEM activities use common household items you already have. Paper, cardboard, tape, glue, kitchen staples (baking soda, vinegar, milk, food coloring), craft supplies (popsicle sticks, pipe cleaners) are all fantastic starting points. The beauty of DIY STEM is its accessibility. Our Chef's Club boxes take this convenience a step further by providing pre-measured ingredients and specialty supplies for a complete experience delivered monthly.
Q4: My child gets frustrated easily when an experiment doesn't work. How can I help? A4: This is a common challenge! Frame "failure" as a learning opportunity. Say things like, "That's interesting! It didn't work the way we expected. What do you think happened? What could we try differently next time?" Emphasize that scientists and engineers learn from every attempt. Celebrate the effort and the questions, not just the successful outcome. Our mission at I'm the Chef Too! is to spark curiosity, knowing that persistence is a key part of the learning journey.
Q5: How often should we do DIY STEM activities? A5: There's no fixed rule! Even short, 15-minute activities can be highly beneficial. The most important thing is consistency and making STEM a natural part of your routine. This could be once a week, on rainy days, or during school breaks. A monthly subscription like our Chef's Club provides a consistent flow of new, engaging projects without requiring extra planning on your part. Ready for a new adventure every month? Join The Chef's Club and enjoy free shipping on every box.
Q6: What age range are these DIY STEM activities best for? A6: Most of the activities described are perfect for elementary students, typically ages 5-11. However, many can be adapted for younger children (with more direct supervision and simplified explanations) or older children (by adding more complex challenges, detailed observations, or mathematical analysis). The key is to adjust the depth of the learning to suit the child's developmental stage.
Q7: How do these activities teach all four components of STEM? A7: Many activities naturally integrate multiple STEM components. For example, building a paper tower involves Engineering (designing and building a structure), Science (understanding forces like compression and tension), and Math (measuring height, counting weights, understanding geometric shapes). Some may focus more heavily on one aspect, but the interdisciplinary nature of STEM often shines through.
Q8: What kind of supervision is required for these activities? A8: Adult supervision is always recommended, especially for activities involving scissors, heat, or any non-edible components. For kitchen-based experiments, ensure proper food safety and allergen awareness. The level of hands-on supervision will vary based on the complexity of the activity and your child's age and skill level.
Q9: Where can I find more ideas for DIY STEM activities? A9: Beyond this guide, explore educational websites, library books on science experiments, and resources from museums or science centers. And of course, for uniquely themed, ready-to-go STEM adventures that blend cooking with learning, don't forget to check out our entire range of products. Browse our complete collection of one-time kits for a wealth of engaging options!


")