Table of Contents
- Introduction
- The Wobbly Wonders of Jello: More Than Just a Dessert
- Why Jello is a STEM Superstar: A Kitchen Chemistry Lesson
- Getting Started: Your Jello Kitchen Toolkit
- Classic Creations: Homemade Jello Recipes for Kids
- Beyond the Basics: Unleashing Jello Creativity
- Jello Innovations: Fun Themes and Unique Textures
- Healthier Jello Options: Sweet Treats Without the Guilt
- Jello in Education: Learning Through Play
- Troubleshooting Jello: Common Questions and Solutions
Have you ever seen the sheer delight on a child’s face as they poke a vibrant, wobbly block of Jello, mesmerized by its jiggly dance before taking a bite? It's more than just a colorful dessert; it's a sensory marvel, a culinary playground, and, perhaps surprisingly, a powerful gateway to hands-on learning and boundless creativity. In an age where digital distractions often compete for our children's attention, discovering activities that genuinely engage their minds and hands is a true treasure. What if we told you that a simple packet of Jello, or even just unflavored gelatin, could be your secret ingredient for sparking curiosity, fostering precious family bonding, and exploring fascinating scientific concepts, all while whipping up delicious, edible creations?
This post is your comprehensive guide to unlocking the full potential of Jello, transforming it from a mere snack into an exciting educational and artistic medium. We’re about to dive deep into a world of fun jello recipes for kids, showing you how to perfectly blend deliciousness with delightful discovery. From classic finger foods to elaborate edible landscapes, we’ll provide step-by-step guidance, innovative ideas, and practical tips to ensure your Jello adventures are a resounding success. Our main message is clear: Jello offers a unique, accessible, and incredibly fun platform for culinary creativity and engaging STEM exploration, making it a perfect activity for sparking curiosity and creating lasting family memories. Get ready to embark on a wobbly journey of learning and laughter!
Introduction
There’s something inherently captivating about Jello. Its vibrant colors, its unique, bouncy texture, and its surprising transformation from a humble powder into a shimmering, solidified delight mystify and delight children and adults alike. For parents and educators, Jello isn't just a sweet treat to enjoy after dinner; it's an accessible medium for hands-on learning, a canvas for culinary creativity, and a wonderful way to spend quality, screen-free time together. It beckons us into the kitchen, a place where everyday ingredients become tools for extraordinary discovery.
At I'm the Chef Too!, our mission is rooted in the belief that blending food, STEM, and the arts creates one-of-a-kind "edutainment" experiences. We are passionate about sparking curiosity and creativity in children, facilitating family bonding, and providing screen-free educational alternatives that are both engaging and effective. We believe that the kitchen is a fantastic laboratory, ripe with opportunities for exploration, and Jello perfectly embodies this philosophy. It's a simple, affordable ingredient that provides endless opportunities for exploration, from understanding basic chemistry and physics to developing crucial fine motor skills and unleashing boundless imaginative play. This comprehensive guide will walk you through a delightful variety of fun jello recipes for kids, offering creative twists, practical tips, and seamless ways to integrate valuable learning into every wobbly creation. Get ready to transform your kitchen into a hub of discovery, where deliciousness and education go hand-in-hand, and every spoonful is an adventure! For even more amazing adventures delivered right to your door, consider joining The Chef's Club – a new journey awaits every month!
The Wobbly Wonders of Jello: More Than Just a Dessert
For many, Jello conjures up nostalgic memories of childhood parties, hospital trays, or maybe a quirky molded salad at a family gathering. But for kids, it’s pure magic. The way it jiggles, the way it catches the light, the vibrant colors that seem almost too bright to be real – it’s a feast for the senses even before it touches the tongue. This inherent appeal is precisely what makes Jello such an incredible teaching tool. Children are naturally drawn to its playful nature, and when they’re engaged, their minds are wide open to learning.
Beyond its visual and textural allure, Jello represents a profound transformation. It begins as a humble powder, almost indistinguishable from sugar, then it dissolves into a liquid, only to firm up into a semi-solid. This seemingly simple process is a real-world example of complex scientific principles at play, made completely accessible and understandable through hands-on experience. When kids are involved in measuring the powder, stirring the hot liquid, and patiently waiting for the transformation in the refrigerator, they're not just making a snack; they're conducting a scientific experiment. They’re observing cause and effect, understanding states of matter, and developing a deeper appreciation for how ingredients interact. It’s a multi-faceted learning experience disguised as delicious fun, perfectly aligning with our philosophy at I'm the Chef Too! of making complex subjects tangible and exciting.
Why Jello is a STEM Superstar: A Kitchen Chemistry Lesson
Before we dive into the delicious recipes, let's truly appreciate the hidden genius of Jello. It's a fantastic, tangible example of chemistry in action, making abstract scientific concepts incredibly easy for kids to grasp. It allows children to become junior scientists, experimenting with ingredients and observing fascinating changes right in their own kitchen.
The Magic of Gelatin (and Agar-Agar)
The true star of our Jello show is gelatin, a protein derived from collagen. When mixed with hot water, something remarkable happens: the long, coiled protein molecules begin to unwind and disperse throughout the liquid. As the mixture cools down, these unwound protein chains don't just stay separated; they start to link back up, forming a complex, three-dimensional network. This intricate network effectively traps water molecules within its structure, leading to the formation of a semi-solid, elastic gel. This entire process is called "gelling," and it's a beautiful, observable example of how changing temperature can profoundly alter the state of matter at a molecular level. It’s a concept that might sound advanced, but with Jello, kids literally see and feel it happening.
For those seeking a plant-based or vegetarian alternative, agar-agar is a fantastic substitute. Derived from red seaweed, agar-agar powder works much like animal gelatin to solidify liquid, but with some key differences. Jello made with agar-agar typically results in a firmer, less "bouncy" or wobbly texture. This difference in texture can even lead to engaging discussions about diverse sources of materials and their unique properties – a perfect science lesson in comparing and contrasting! Exploring both gelatin and agar-agar opens up a dialogue about ingredients, sustainability, and dietary choices, expanding the educational reach of a simple dessert.
States of Matter and Molecular Transformations
Making Jello involves several fundamental scientific principles, making it an excellent hands-on lesson:
- Dissolving and Solubility: Watching the gelatin powder seemingly disappear into hot water is a direct demonstration of solubility. Kids observe how a solid can be incorporated into a liquid to form a solution. You can even experiment with different water temperatures to see how quickly (or slowly) the gelatin dissolves, introducing the concept of variables in an experiment.
- States of Matter: Observing the transition from a dry powder (solid) to a liquid solution, and then to a wobbly gel (a unique semi-solid state), provides a clear, undeniable lesson in the physical changes of matter. You can even take it a step further: if you gently re-heat set Jello, it will return to its liquid state, demonstrating that these changes are often reversible. This cyclical transformation reinforces the understanding of solids, liquids, and gels in an incredibly tangible way.
- Polymers (in disguise): While you don't necessarily need to introduce the technical term "polymer" to younger children, the long chains of protein molecules in gelatin linking up to form the Jello's structure are, in essence, polymers. This concept is fundamental in material science and engineering, and Jello offers a simplified, approachable introduction to how molecules combine to create new materials with unique properties.
This kind of hands-on, edible transformation is exactly what we love about blending food and STEM at I'm the Chef Too!. It's like the thrilling experience kids have with our Erupting Volcano Cakes Kit, where they witness amazing chemical reactions that make their cakes bubble over with deliciousness. We believe that learning should always be an adventure, filled with wonder and discovery, and Jello provides a simple, delicious way to embark on one right in your kitchen!
Measurement, Observation, and Patience
Beyond the pure chemistry, Jello-making is fantastic for developing crucial life and academic skills:
- Measurement Skills: Following a Jello recipe requires precise measurement of both liquids and powders, teaching kids about volume (cups, tablespoons) and sometimes even fractions if scaling a recipe. This practical application makes abstract math concepts real and relevant.
- Observation: From noting how quickly the gelatin dissolves to carefully watching the mixture cool and solidify, Jello encourages keen observation skills. "What's happening to the liquid as it cools?" "Why does it get firmer?" "What do you notice about its texture now?" These are the kinds of open-ended questions that spark scientific inquiry and critical thinking.
- Patience: The most challenging, yet perhaps most rewarding, lesson is patience. Waiting for the Jello to bloom, cool, and set teaches children the value of delayed gratification. They learn that good things (and delicious Jello!) take time and that rushing the process can alter the outcome. This is a valuable life skill that extends far beyond the kitchen.
Through these simple steps, children not only create a yummy treat but also build a foundation in scientific thinking, mathematical accuracy, and essential life skills.
Getting Started: Your Jello Kitchen Toolkit
You don't need a professional kitchen or fancy gadgets to whip up amazing Jello creations. Most of what you'll need you likely already have on hand, making it an accessible activity for any family. The beauty of Jello is its simplicity, allowing the focus to remain on the fun and the learning, rather than complex equipment.
Essential Ingredients: The Foundation of Fun
The core of any Jello recipe is, of course, the gelling agent and a liquid. Here are your primary choices:
-
Gelatin (Animal-Derived):
- Flavored Jello Mix: This is the quickest and easiest option. It comes in a wide array of vibrant colors and fruit flavors, complete with pre-sweetened and colored ingredients. It’s perfect for instant gratification and a burst of familiar taste. Common brands like Knox often come in small envelopes of unflavored gelatin, which is incredibly versatile. For larger quantities or specific sourcing, you can also find grass-fed pasture-raised beef gelatin brands online, which have gained popularity for their ethical sourcing.
- Unflavored Gelatin Powder: Typically found in the baking aisle, this gives you complete control over the flavor, sweetness, and color of your Jello. It's perfect for using real fruit juices, fruit purees, or creating unique flavor combinations that aren't available in pre-mixed packets. This is ideal for those who prefer to limit artificial colors or excess sugar.
- Agar-Agar Powder (Plant-Derived): A fantastic vegetarian and vegan alternative made from seaweed. It solidifies liquids similarly to gelatin, though it often results in a slightly firmer, less elastic gel. It has no flavor, making it versatile for any juice or flavor profile. It's a great option for kids with dietary restrictions or for exploring different gelling properties.
-
Liquid:
- Water: Essential for dissolving gelatin or agar-agar. It serves as the base for the gelling agent.
- Fruit Juices: These are fantastic for adding natural flavor and color, especially when using unflavored gelatin or agar-agar. Apple, grape, cranberry, and cherry juices work beautifully. Be aware that some juices, particularly fresh pineapple, kiwi, and papaya, contain enzymes that can prevent gelatin from setting. If using these, boil the juice first to deactivate the enzymes.
- Other Liquids: Beyond juice, you can experiment with broths for savory Jello (for more adventurous palates), or even cooled teas for unique flavor profiles.
- Sweeteners (for unflavored gelatin/agar-agar): If using unflavored gelling agents with water or unsweetened juice, you'll want to add a sweetener. Options include granulated sugar, honey, maple syrup, agave nectar, or even fruit purees for natural sweetness.
- Add-ins and Toppings: The fun truly begins with extras! Think gummy candies (fish, worms, bears), fresh berries or sliced fruit (avoid the enzyme-rich ones mentioned above until the Jello is set), sprinkles, Nerds candy, whipped cream, or coconut cream for a dairy-free topping. These add layers of texture, flavor, and visual appeal, turning a simple Jello into a masterpiece.
Tools for Creative Jello Adventures
Having the right tools makes the process smoother and the results even more exciting.
- Measuring Cups and Spoons: Essential for accurate liquid and powder measurements. Involving kids in measuring helps them practice math skills. We encourage precise measuring in our I'm the Chef Too! kits, like when crafting our Galaxy Donut Kit where exact amounts ensure stellar results!
- Mixing Bowls: Have various sizes on hand for blooming gelatin, mixing liquids, and chilling.
- Whisks or Spoons: For thoroughly dissolving gelatin and combining ingredients. A child-sized whisk can be a great way to involve little hands.
- Saucepan: For heating water or juice to dissolve the gelling agent.
-
Molds (The Fun Part!):
- Glass Baking Dishes (9x13 inch or smaller): Ideal for making large sheets of Jello that can be easily cut into squares, cubes, or shapes with cookie cutters.
- Silicone Molds: These are fantastic! They come in endless shapes (animals, letters, numbers, mini figures, seasonal themes) and allow for easy popping out of delicate Jello creations without sticking.
- Mini Fish Bowls, Clear Cups/Glasses, or Mason Jars: Perfect for individual servings and themed creations like edible aquariums or layered parfaits. Clear containers allow kids to see all the layers and embedded treasures.
- Bundt Pans or Decorative Molds: For creating impressive, show-stopping molded Jello desserts for special occasions.
- Cookie Cutters: Small metal cookie cutters work best for cleanly cutting shapes from set Jello. Plastic ones can work but sometimes require a bit more pressure.
- Parchment Paper or Plastic Wrap: For lining pans (if you want super easy removal) or covering Jello while it chills to prevent a "skin" from forming.
Safety First: Fun with Adult Supervision
While Jello-making is a wonderfully kid-friendly activity, remember that it involves hot liquids and kitchen tools. Always ensure adult supervision is present, especially when:
- Heating Water or Juice: Stovetops and microwaves can be dangerous. An adult should always handle the hot pan or microwave.
- Pouring Hot Mixtures: Carefully pour hot liquids into bowls or molds, guiding children if they are assisting. Teach children to handle warm containers safely, perhaps using oven mitts or by having an adult pour while the child directs the placement.
- Using Knives or Sharp Objects: Adult supervision is crucial when using butter knives for cutting Jello or any other cutting tools.
- Food Allergies: Be mindful of any food allergies when choosing juices, sweeteners, and add-ins.
Our commitment at I'm the Chef Too! is always to provide practical, valuable advice and set realistic expectations, especially regarding safety in the kitchen. With careful guidance, Jello adventures can be both incredibly fun and wonderfully safe. If you're looking for more fun ways to engage your kids in the kitchen with safety in mind, be sure to Browse our complete collection of one-time kits – each designed with clear instructions and engaging activities for all skill levels.
Classic Creations: Homemade Jello Recipes for Kids
Let's begin our Jello journey with a beloved classic: homemade Jello jigglers or finger Jello. These are firmer than regular Jello you'd eat with a spoon, making them absolutely perfect for little hands to pick up, play with, and munch on without too much mess. They're also incredibly simple to make, often requiring just two main ingredients, which makes them an ideal starting point for introducing kids to the magic of kitchen chemistry.
The Perfect Finger Jello: A Simple, Customizable Recipe
This recipe uses unflavored gelatin and your favorite fruit juice, giving you complete control over the sweetness and flavor profile. It’s a wonderful way to avoid artificial colors and flavors often found in pre-made mixes, and it encourages kids to explore different fruit tastes.
Ingredients:
- 2 cups cold 100% fruit juice (e.g., apple, white grape, cranberry, or a blend – avoid fresh pineapple, kiwi, papaya unless boiled first)
- 2 cups hot 100% fruit juice (same as above)
- ¼ cup unflavored gelatin powder (this is typically about 4 envelopes of Knox brand gelatin, but check your specific package for precise measurements)
- Optional: 1-2 tablespoons of your preferred sweetener (sugar, honey, maple syrup) if using unsweetened juice or if you prefer a sweeter Jello.
Equipment:
- Medium mixing bowl
- Small saucepan
- Whisk
- 9x13 inch glass baking dish or a similar shallow pan (silicone molds also work wonderfully)
- Cookie cutters (optional, for fun shapes)
Step-by-Step Instructions:
- Bloom the Gelatin (Crucial Step!): Pour the 2 cups of cold fruit juice into your medium mixing bowl. Slowly and evenly sprinkle the unflavored gelatin powder over the entire surface of the cold juice. Do not stir it in immediately. Let it sit undisturbed for 5-10 minutes. This process, known as "blooming," allows the gelatin granules to absorb the liquid and soften. It will transform into a thick, lumpy, almost applesauce-like consistency. This step is absolutely essential for ensuring the gelatin dissolves smoothly later, preventing a grainy texture in your final Jello. Explain this to your child as the gelatin "waking up" or "drinking" the juice!
- Heat the Juice: While the gelatin is blooming, pour the remaining 2 cups of fruit juice into a small saucepan. Bring it to a gentle simmer or a light boil over medium-high heat. You're looking for it to be hot enough to dissolve the bloomed gelatin without being scorching hot. Adult supervision is critical here!
- Dissolve the Gelatin: Carefully, and with adult assistance, pour the hot juice into the bowl with the bloomed gelatin mixture. Immediately begin whisking continuously until all the gelatin is completely dissolved and the mixture is smooth. There should be no visible granules or lumps. If using optional sweetener, whisk it in now until fully dissolved.
- Pour and Chill: Pour the smooth Jello mixture into your 9x13 inch glass baking dish. For easier removal later, you can lightly spray the dish with a neutral cooking spray (though some find oil can affect the Jello's appearance) or line it with parchment paper. If using silicone molds, simply pour directly into the cavities.
- Refrigerate: Carefully place the dish or molds in the refrigerator and chill for at least 3-4 hours, or until the Jello is completely firm and springy to the touch. Smaller dishes or silicone molds might set faster, so check periodically. This is where patience comes in!
- Cut and Serve: Once fully set, remove the Jello from the fridge. If in a baking dish, use a butter knife to loosen the edges. You can then cut it into squares, or, for extra fun, press metal cookie cutters into the Jello to create delightful shapes like stars, hearts, or animals. Gently lift the pieces out and serve! Your kids will love picking up their jiggly creations.
Tips for Perfect Jigglers:
- Consistency is Key: This specific ratio (¼ cup gelatin to 4 cups liquid) creates a firm Jello, perfect for handling. If you prefer a softer, spoonable Jello, reduce the gelatin slightly (e.g., 3-3.5 envelopes).
- Juice Selection: 100% fruit juices without added sugars are ideal for a healthier treat. Experiment with different colors and flavors. Remember the enzyme warning for fresh pineapple, kiwi, and papaya.
- Clean Cuts: For the cleanest cookie cutter shapes, slightly warm your cookie cutters by dipping them in hot water before each cut, then wipe them dry.
- Storage: Store homemade finger Jello in an airtight container in the refrigerator for up to a week. The edges may dry out slightly over time, but the center will remain delicious.
Vegetarian/Vegan Jello with Agar-Agar
For a plant-based alternative, agar-agar is your best friend. The process is slightly different but equally straightforward.
Ingredients:
- 4 cups 100% fruit juice (any flavor, as agar-agar is not affected by fruit enzymes)
- 2-4 tablespoons agar-agar powder (start with 2 for a softer set, up to 4 for a very firm set, depending on brand and desired texture)
- Optional: Sweetener to taste.
Instructions:
- Combine Ingredients: Pour all 4 cups of fruit juice into a small saucepan. Sprinkle the agar-agar powder over the juice. If using an optional sweetener, add it now.
- Simmer and Whisk: Bring the mixture to a gentle simmer over medium heat, whisking constantly to ensure the agar-agar powder fully dissolves. It's crucial for agar-agar to boil for at least 1-2 minutes to fully activate its gelling properties. Continue whisking throughout.
- Pour and Chill: Once the agar-agar is fully dissolved and the mixture has simmered, remove it from the heat. Pour the hot liquid into your chosen baking dish or silicone molds.
- Refrigerate: Place in the refrigerator and chill until completely set. Agar-agar typically sets much faster than gelatin, often within 1-2 hours.
- Cut and Serve: Once firm, cut into shapes or remove from molds and enjoy! Agar-agar Jello will be firmer and less wobbly than gelatin-based Jello.
This simple recipe for finger Jello is a fantastic way to introduce kids to the joys of cooking and the wonders of scientific transformation. Ready for even more engaging kitchen adventures delivered straight to your home? Join The Chef's Club today and receive a new, exciting cooking STEM kit every month with free US shipping!
Beyond the Basics: Unleashing Jello Creativity
Once you've mastered the classic finger Jello, it's time to let your imagination soar! Jello is an incredibly versatile medium for edible art and multi-layered creations that delight the eyes as much as the taste buds. These projects are perfect for fostering creativity, planning skills, and a deeper understanding of patience in the kitchen.
Rainbow Jello Cubes: A Spectrum of Sweetness
Rainbow Jello cubes are visually stunning and surprisingly simple to make. They teach kids about color mixing (or at least color layering!) and the importance of sequential steps.
How to Make:
- Prepare Individual Jello Layers: Choose 3-5 different colors/flavors of pre-packaged Jello mixes (e.g., red, orange, yellow, green, blue). Prepare each flavor individually according to package directions, but use slightly less water than recommended (about ¾ cup water per 3oz packet) to make them a bit firmer for cutting.
- Pour and Set: Pour about 1/2 inch of the first color into a square or rectangular glass baking dish. Refrigerate until just set (firm enough to touch without sticking, but not rock hard – about 20-30 minutes).
- Layer Colors: Gently pour the next color over the first, being careful not to break the surface of the set layer. Repeat the chilling process. Continue layering colors, chilling each layer until just set, until your dish is full.
- Final Chill and Cut: Once all layers are complete, chill the entire dish for at least 3-4 hours, or until completely firm. Once set, cut the layered Jello into small cubes. The multi-colored cubes are a vibrant, playful treat.
Stained Glass Jello: Edible Art
Stained glass Jello creates a beautiful mosaic effect, showcasing different colored Jello pieces suspended in a creamy white Jello base.
How to Make:
- Colored Cubes: Prepare several different colors of firm Jello (using the finger Jello recipe or slightly less water with packaged mixes). Pour each color into separate shallow dishes and chill until completely firm. Once set, cut each color into small, uneven cubes.
- Creamy White Layer: For the white layer, you can use sweetened condensed milk mixed with unflavored gelatin, or a mixture of pineapple juice, unflavored gelatin, and whipped cream. The key is to create an opaque, white or off-white liquid.
- Combine and Chill: Gently fold the colorful Jello cubes into the slightly cooled (but still liquid) white Jello mixture. Pour the entire mixture into a decorative Bundt pan or a large glass bowl. Refrigerate until completely set.
- Unmold and Serve: To unmold, briefly dip the bottom of the mold in warm water (being careful not to melt the Jello too much), then invert onto a serving plate. The result is a stunning, colorful "stained glass" dessert.
Layered Jello Masterpieces: Patience Pays Off
Creating perfectly distinct Jello layers is a skill that teaches precision and patience. It’s a bit more time-consuming but incredibly rewarding.
The Secret to Success:
- Chill Each Layer: The absolute key is to chill each layer until it’s set, but not completely rock hard. If a layer is too firm, the next layer won't bind to it, and your Jello will simply slip apart when served. Aim for "just set" – firm enough to support the next liquid layer without breaking.
- Cool the Next Layer: Allow each subsequent layer of liquid Jello to cool and thicken slightly before pouring it over the previous set layer. Pouring hot Jello onto a chilled, set layer will cause the bottom layer to melt and blend, ruining the distinct lines. Let it sit at room temperature for 10-15 minutes until it's cool to the touch but still liquid.
- Gentle Pouring: Pour slowly and carefully, perhaps over the back of a spoon, to minimize disturbance to the layer below.
Example: Red, White, and Blue Layered Jello
- Blue Layer: Prepare blue Jello (use less water for firmness). Pour into your serving dish and chill until just set.
- White Layer: Prepare a white Jello mixture (e.g., unflavored gelatin + sweetened condensed milk + water, or coconut milk + agar-agar). Let it cool to room temperature. Carefully pour over the blue layer and chill until just set.
- Red Layer: Prepare red Jello. Let it cool to room temperature. Carefully pour over the white layer.
- Final Chill: Chill the entire creation for at least 4-6 hours or overnight until completely firm.
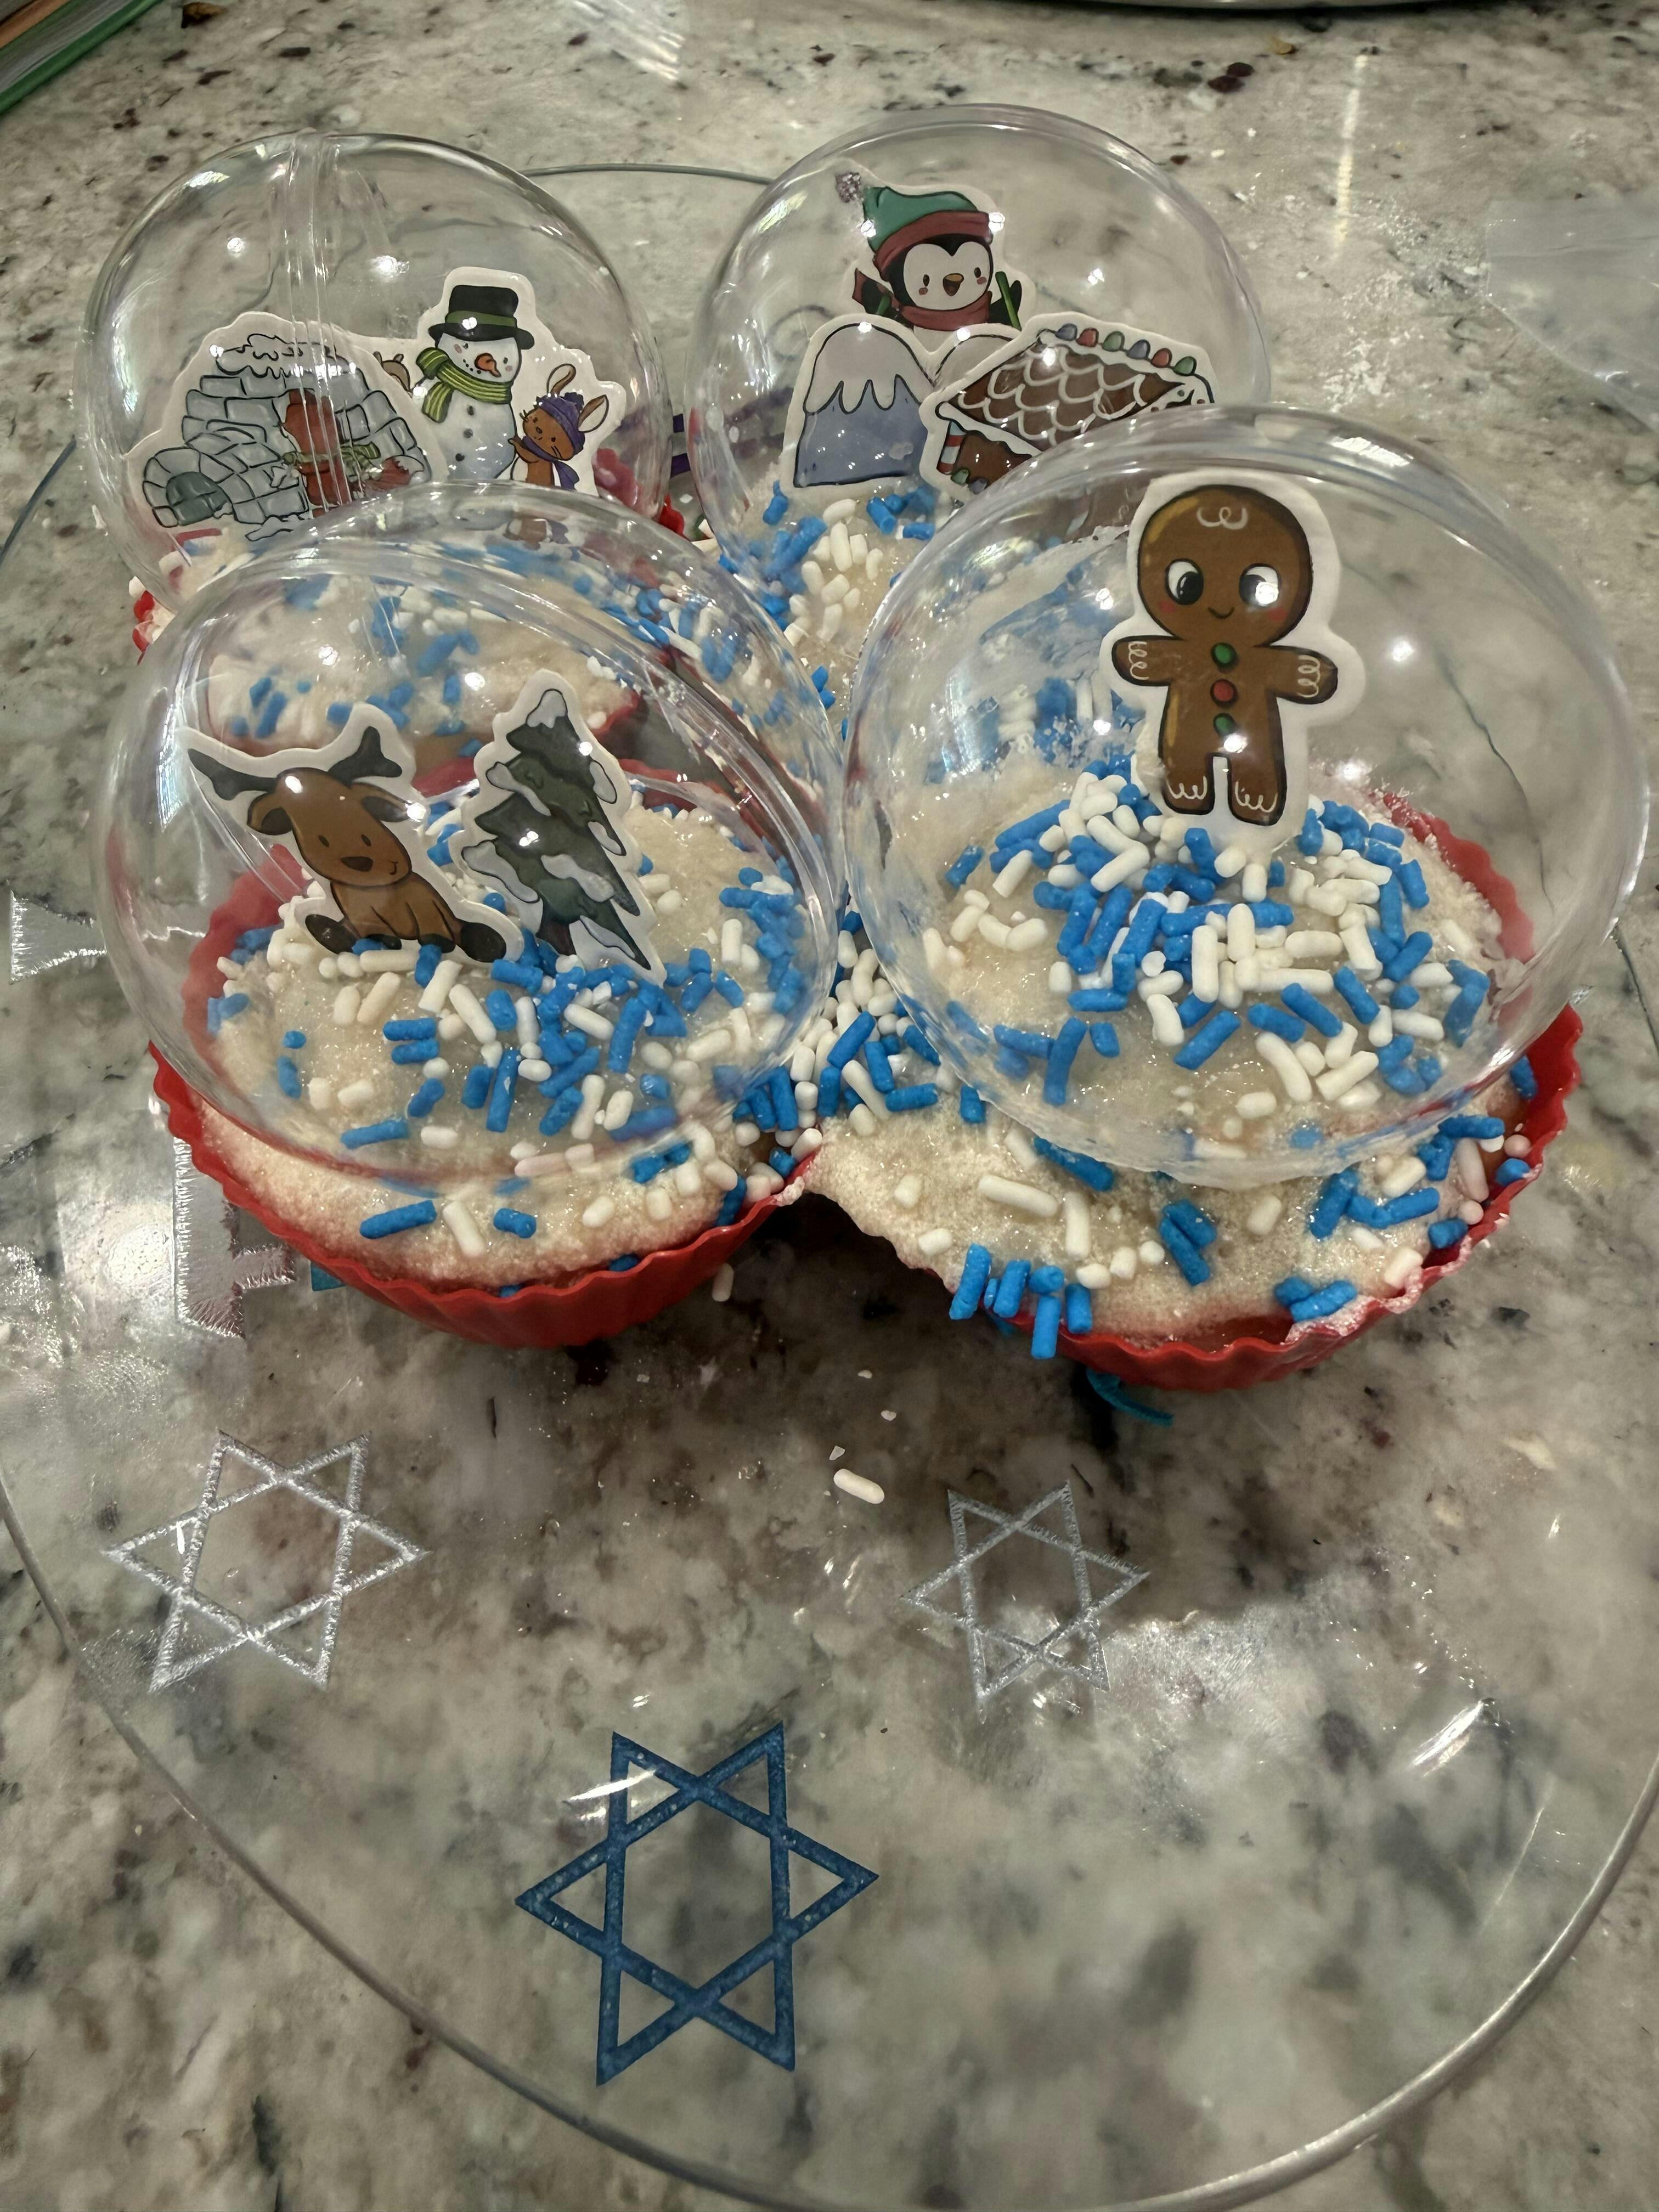
Edible Aquariums: Dive into Deliciousness (Jello Fish Bowls)
This creative Jello recipe turns individual servings into a captivating underwater scene, complete with "sand" and "fish." It's perfect for a themed party or a fun rainy-day activity.
Ingredients:
- 1 (3 oz) box blue Jello mix (Starburst blue raspberry or a lighter blue works best, or use lemon Jello with a drop of blue food coloring to avoid dark hues)
- 2 cups water
- ¼ cup Nerds candy (the rainbow variety adds a nice colorful touch, acting as "gravel")
- 8 gummy fish (or gummy sharks, turtles, etc.)
- 4 small clear drinking glasses or mini glass fishbowls
Instructions:
- Prepare Jello Mix: Add the blue Jello powder to a medium pitcher or mixing bowl.
- Heat Water: Have an adult carefully heat 1 cup of water in the microwave or on the stovetop until it comes to a boil (about 2 minutes in the microwave).
- Dissolve Jello: Carefully add the hot water to the Jello powder and stir vigorously until the Jello is completely dissolved. Then, stir in 1 cup of very cold water.
- Cool Down (Important!): Place the pitcher of Jello mixture in the fridge to cool down for at least 15-20 minutes while you prepare the glasses. Do NOT skip this step! Using hot or even warm Jello mixture will melt the Nerds candy and cause their colors to bleed excessively into the Jello, ruining the "gravel" effect. The Jello should be cool to the touch but still liquid.
- Add Nerds "Gravel": Scoop about ¼ cup of Nerds candy into the bottom of each clear glass.
- Pour Cooled Jello: Gently pour the cooled (but still liquid) Jello mixture over the Nerds in each glass. Pour slowly to minimize disturbance. If some Nerds float, gently nudge them down with a spoon until they sink, or scoop them out if stubborn.
- Refrigerate: Move the glasses to the fridge (loosely cover with plastic wrap if you wish) and refrigerate for about 90 minutes to 2 hours, or until the Jello is mostly set but still slightly soft.
- Add Gummy Fish: Once the Jello has set enough to support them, use a butter knife to cut one or two small slits in the top of the gelatin, near the edge of the glass. Gently insert a gummy fish into each slit, pressing it down as far as you want it to go below the surface, or simply let it rest on top so it’s more visible. If you mess up the top, don't worry – no ocean surface is perfectly smooth!
- Final Chill and Serve: Return the "fish bowls" to the fridge for another 30-60 minutes to completely set around the fish. Serve immediately for the best results!
Pro Tips for Pristine Ponds:
- Jello Color: Avoid very dark blue Jello (like some "berry blue" flavors) as it makes it harder to see the fish and Nerds. Aim for a lighter, more transparent blue.
- Timing is Key: These are NOT ideal make-ahead treats if you want them to look perfect. The longer they sit, the more the Nerds will bleed, and the gummy fish will become soggy. Make them the same day you plan to serve them. If serving for a party, time it so the Jello sets just before guests arrive, and consider having kids add their own fish as an activity!
- Container Choice: Small, clear drinking glasses work just as well as mini fishbowls. Use what you have to avoid buying single-use items.
These creative jello recipes for kids encourage kids to think like artists and engineers, planning their designs and executing steps to achieve a desired outcome. It’s a fantastic way to develop spatial reasoning and a keen eye for aesthetics. For families who love diving into themed culinary arts, our Peppa Pig Muddy Puddle Cookie Pies offer similar fun with beloved characters, turning playtime into delicious, hands-on learning!
Jello Innovations: Fun Themes and Unique Textures
The world of Jello is constantly evolving, offering endless possibilities for innovative, themed, and texturally intriguing treats. Moving beyond the standard molds, we can explore how Jello integrates with other ingredients to create novel and exciting culinary experiences for kids. These innovations push the boundaries of what Jello can be, encouraging further experimentation and culinary exploration.
Fruity Jello Parfaits: Layered Delights
Parfaits are fantastic because they allow for both visual appeal and a delightful mix of textures in every spoonful. They're also incredibly customizable, making them perfect for individual preferences.
How to Make:
- Prepare Jello Layers: Choose 2-3 contrasting colors of Jello (e.g., strawberry, lemon, lime). Prepare each according to package directions, but allow them to cool completely to room temperature before assembling.
- Add Fruit and Cream: In clear individual serving cups or glasses, layer chilled, diced fruit (berries, melon, grapes) with dollops of whipped cream (or Greek yogurt for a healthier twist) and small amounts of the cooled, liquid Jello.
- Chill Between Layers: Place a small amount of liquid Jello at the bottom, chill until slightly set, then add fruit, then cream, then another color of Jello. Repeat until your cup is full, chilling briefly between each Jello layer to prevent colors from mixing.
- Final Chill: Refrigerate until completely firm. Top with a final dollop of whipped cream and a fresh berry just before serving.
Gummy Jello Bites: Homemade Chewy Treats
Why buy gummy candies when you can make your own healthier, fruit-juice-based versions? This is a fantastic way to control ingredients and get creative with shapes.
How to Make:
- High Concentration: Prepare unflavored gelatin with a small amount of highly concentrated fruit juice (e.g., a mix of 1 cup fruit juice to 2-3 tablespoons unflavored gelatin). Heat gently until dissolved, then add sweetener if desired.
- Silicone Molds: Pour the warm mixture into small silicone candy molds (gummy bear shapes, Lego bricks, mini animals, etc.).
- Chill: Refrigerate for about 30-60 minutes, or until very firm.
- Pop Out: Gently pop the homemade gummies out of the molds. They'll have a delightful chewy texture, similar to store-bought gummies, but with natural flavors.
Jello Jigglers with Hidden Surprises
This idea builds on the classic Jello jigglers but adds an element of surprise and discovery, which kids absolutely adore.
How to Make:
- Partial Pour: Pour about half of your prepared (and cooled) Jello mixture into a baking dish or silicone mold. Chill until just set (about 20-30 minutes).
- Add Surprise: Arrange small, edible "treasures" onto the partially set Jello. These could be small gummy candies, fresh berries, or even edible glitter.
- Top Off: Carefully pour the remaining cooled liquid Jello over the surprises.
- Final Chill: Refrigerate until completely firm. When cut, each Jello piece will reveal a hidden treat!
Jello-Filled Fruits: A Healthy Twist
This is a visually impressive and healthier way to serve Jello, using the fruit itself as a natural, edible bowl.
How to Make:
- Hollow Out Fruit: Cut citrus fruits (oranges, lemons, limes), small melons (like cantaloupe or honeydew halves), or even apples in half. Carefully scoop out the flesh, leaving a sturdy "bowl."
- Prepare Jello: Prepare a complementary fruit-flavored Jello (or unflavored gelatin with juice) and let it cool slightly.
- Fill and Chill: Carefully pour the cooled Jello mixture into the hollowed-out fruit halves. Refrigerate until completely set.
- Slice and Serve: Once firm, slice the Jello-filled fruit halves into wedges. This creates beautiful, vibrant Jello "fruit slices" that are both refreshing and fun to eat.
These innovative jello recipes for kids are fantastic for encouraging kids to think outside the box and experiment with different ingredient combinations and presentations. It's a journey of culinary exploration, much like the exciting kits we offer. If your family enjoys these kinds of engaging, hands-on activities, remember that you can Browse our complete collection of one-time kits to find your next STEM adventure!
Healthier Jello Options: Sweet Treats Without the Guilt
While traditional Jello can be a fun treat, many parents and educators are looking for ways to make snacks a bit healthier. The good news is that Jello, especially when made from scratch with unflavored gelatin or agar-agar, offers incredible flexibility to tailor ingredients for a more nutritious outcome without sacrificing any of the fun or deliciousness. This approach aligns perfectly with our values at I'm the Chef Too!, where we encourage mindful eating and understanding the ingredients we use.
Natural Sweeteners and Fruit Purees
One of the easiest ways to healthify your homemade Jello is by controlling the sugar content and type of sweetener:
- Reduce Added Sugar: If using pre-packaged flavored Jello, you can't easily reduce the sugar. However, when using unflavored gelatin, you have complete control. Start by using naturally sweet 100% fruit juices, which often provide enough sweetness on their own.
- Natural Sweeteners: If more sweetness is desired, opt for natural alternatives like a small amount of honey, maple syrup, or agave nectar. These can be used sparingly and offer a more complex flavor profile than refined sugar.
- Fruit Purees: Blend fresh or frozen fruit (berries, mango, peaches) into a smooth puree and use this as part of your liquid base, or swirl it into the Jello mixture. Fruit purees add natural sweetness, fiber, and vitamins, boosting the nutritional value and creating delightful textures. For example, a raspberry puree-based Jello can be incredibly vibrant and flavorful without much added sugar.
Juice Choices: Maximizing Nutrition
The type of juice you choose for your Jello base significantly impacts its nutritional profile:
- 100% Fruit Juice (No Added Sugar): Always opt for 100% fruit juice. While fruit juice contains natural sugars, it also provides vitamins and minerals.
- Vegetable Juices: For adventurous eaters, consider blending in a small amount of milder vegetable juices (like carrot juice or a mixed veggie blend) with sweeter fruit juices for an extra nutritional boost. You might be surprised at how well it works!
- Infused Water: For a very low-sugar option, use water infused with fruit and herbs (cucumber and mint, strawberry and basil) and a minimal amount of natural sweetener. This creates a subtle, refreshing Jello.
- Kombucha: As an interesting twist for older kids and adults, you can use plain or fruit-flavored kombucha as part of your liquid base (ensure it's not too warm when adding to gelatin that has bloomed). This adds a tangy flavor and beneficial probiotics.
Exploring Agar-Agar: The Plant-Based Path
Agar-agar is a fantastic alternative for those avoiding animal products or simply looking for a different texture.
- Dietary Inclusivity: Using agar-agar ensures that children with vegetarian or vegan diets, or those with specific allergies, can also enjoy Jello treats. This is a wonderful way to teach empathy and accommodate diverse needs in shared activities.
- Firmer Texture: As mentioned, agar-agar creates a firmer, less bouncy gel. This can be an interesting sensory experience and a point of discussion for kids – "How is this different from the other Jello we made?"
- No Fruit Enzyme Issues: Unlike gelatin, agar-agar is not affected by the enzymes in fresh pineapple, kiwi, or papaya, meaning you can use these tropical juices without having to pre-boil them, offering more flexibility in fruit choices.
By making these mindful choices, you can transform Jello from a simple sugary treat into a fun, customizable, and more nutritious snack that kids will still adore. It’s all about balance and conscious ingredient selection, which are important lessons we champion at I'm the Chef Too!. This holistic approach to cooking extends to all our educational kits, ensuring delicious results while fostering a deeper understanding of food science.
Jello in Education: Learning Through Play
The beauty of cooking with kids, especially with something as engaging as Jello, lies in its ability to seamlessly integrate educational concepts into playful, screen-free activities. At I'm the Chef Too!, we believe that the best learning happens when children are actively involved, curious, and having fun. Jello is a perfect embodiment of this "edutainment" philosophy, offering a wealth of developmental benefits beyond just scientific understanding.
Developing Fine Motor Skills
The various steps involved in Jello making are excellent for refining fine motor skills:
- Sprinkling: Carefully sprinkling gelatin powder over cold liquid requires precision and control.
- Whisking and Stirring: Using a whisk or spoon to mix ingredients helps develop hand-eye coordination and strengthen wrist muscles.
- Pouring: Pouring liquids from measuring cups into molds or dishes hones controlled movement and prevents spills.
- Cutting Shapes: Using cookie cutters or a butter knife to cut shapes from set Jello improves dexterity and precision. Even peeling Jello off a baking sheet requires fine motor control.
- Adding Toppings: Placing small candies, sprinkles, or fruit pieces onto Jello develops pincer grasp and careful placement.
These seemingly small actions contribute significantly to a child's overall hand strength and coordination, which are crucial for tasks like writing, drawing, and using utensils.
Encouraging Creativity and Problem-Solving
Jello is a fantastic canvas for creative expression and imaginative play:
- Flavor and Color Combinations: Kids can experiment with different juice flavors and food colorings (if using unflavored gelatin) to create unique combinations. "What color would happen if we mixed blue and yellow Jello?" This is a practical art lesson!
- Themed Creations: Transforming Jello into edible aquariums, space scenes (like our Galaxy Donut Kit inspires edible planets!), or seasonal shapes encourages imaginative thinking and storytelling.
- Troubleshooting: When a Jello layer doesn't set perfectly, or colors bleed, it presents a gentle opportunity for problem-solving. "What do you think happened?" "How can we fix it next time?" This fosters critical thinking and resilience.
- Presentation: Arranging Jello pieces, layering parfaits, or decorating finished Jello creations allows children to explore aesthetics and presentation skills.
Fostering Independence and Confidence
As children participate in the Jello-making process, they gain a sense of accomplishment and build confidence:
- Following Instructions: Carefully reading and following recipe steps teaches valuable executive functioning skills.
- Taking Ownership: When kids are responsible for certain tasks, they feel valued and capable.
- Sense of Achievement: The pride they feel in creating a delicious treat from start to finish is immense. This positive reinforcement encourages them to try new things and embrace challenges.
- Decision-Making: Allowing children to choose flavors, colors, or molds empowers them and strengthens their decision-making abilities.
Screen-Free Family Bonding
Perhaps one of the most significant benefits of Jello-making is the opportunity for quality, screen-free family bonding. In a world saturated with digital media, hands-on activities in the kitchen provide invaluable moments for:
- Communication: Talking through steps, asking questions, and sharing observations fosters open communication.
- Collaboration: Working together as a team to create something delicious strengthens family relationships.
- Shared Memories: The laughter, the occasional mess, and the joy of tasting a homemade treat create lasting memories that children will cherish.
- Mindfulness: Focusing on a tangible task, away from screens, helps children (and adults!) be present and engaged in the moment.
At I'm the Chef Too!, we wholeheartedly believe in the power of these shared experiences. Our kits are designed by mothers and educators to facilitate exactly this kind of meaningful interaction, making learning a joyful, family-centered adventure. If you're looking to create more such memorable moments without the hassle of planning, ingredients, or endless clean-up, then joining The Chef's Club is the perfect solution. Each month, a new, exciting, and educational culinary adventure is delivered right to your door, ready for you and your child to explore together. It's the gift of learning, bonding, and delicious fun that keeps on giving!
Troubleshooting Jello: Common Questions and Solutions
Even seasoned Jello makers can encounter a wobbly dilemma now and then! Here are some common questions and practical solutions to ensure your Jello adventures are always a success.
Why didn't my Jello set?
This is the most common Jello problem, and there are a few usual suspects:
- Not Enough Gelatin/Agar-Agar: Double-check your measurements against the recipe. If you used too little gelling agent for the amount of liquid, it simply won't set properly. Different brands or types of gelatin/agar-agar might also have slightly different strengths, so minor adjustments might be needed.
-
Incorrect Liquid Temperature:
- For Gelatin: Gelatin needs to be bloomed in cold liquid first, then fully dissolved in hot liquid. If the water wasn't hot enough, the gelatin might not have fully dissolved, leaving it grainy and unable to form a strong gel. If you add hot Jello to a cold, set layer, it can melt that layer, leading to a runny result.
- For Agar-Agar: Agar-agar needs to be brought to a full boil for at least 1-2 minutes to activate its gelling properties. If it only simmered or didn't get hot enough for long enough, it won't set.
- Enzyme-Rich Fruits (for Gelatin only): Fresh pineapple, kiwi, papaya, and sometimes mango contain enzymes (proteases) that break down the proteins in gelatin, preventing it from setting. If you want to use these fruits, you must boil the juice or fruit first to deactivate these enzymes, or use canned versions (which are typically heat-treated). Agar-agar is not affected by these enzymes.
- Too Much Liquid: If you added more liquid than the recipe called for, the gelling agent will be too diluted to set properly.
- Not Enough Chill Time: Jello needs adequate time in the refrigerator. While some recipes suggest 2-3 hours, thicker or larger batches, or layered Jello, often require 4-6 hours or even overnight to set completely firm.
Solution: Unfortunately, for a completely unset Jello, it's often difficult to salvage. For a slightly soft Jello, you might be able to re-melt it over low heat, add a little more bloomed gelatin (or boiled agar-agar solution), whisk thoroughly, and then re-chill. However, for best results, it's often better to start fresh.
Why did my Nerds (or other candies) bleed color into the Jello?
- Too Hot Jello: This is the most common reason for color bleeding, especially with candies like Nerds. If the Jello mixture is poured over the candies while still warm or hot, it will dissolve the outer coating of the candies, causing their colors to leach into the Jello.
Solution: Always ensure your liquid Jello mixture is completely cooled to room temperature (but still liquid!) before pouring it over any color-sensitive candies or elements. For layered Jello, ensure the previous layer is also cool before adding the next.
How do I get clean cuts or unmold my Jello creations?
-
For Cutting (e.g., finger Jello):
- Ensure the Jello is completely firm and well-chilled. Cold Jello cuts much cleaner.
- Use thin, sharp metal cookie cutters. For an even cleaner cut, dip the cookie cutter briefly in hot water (and wipe dry) between each cut.
- Use a thin, sharp knife (like a paring knife) for straight cuts.
-
For Unmolding:
- Silicone Molds: These are the easiest! Simply peel back the silicone from the edges and gently push the Jello out from the bottom.
-
Glass or Metal Molds (like Bundt pans):
- Ensure the Jello is completely firm.
- Run a thin, sharp knife around the very edge of the Jello to loosen it.
- Briefly dip the bottom of the mold into a pan of warm (not hot!) water for about 10-15 seconds. The goal is to slightly loosen the Jello, not melt it.
- Place your serving plate upside down over the mold, then quickly and confidently flip the mold and plate together. A gentle shake might be needed. If it doesn't release, dip briefly in warm water again.
How long does homemade Jello last?
- Gelatin-Based Jello: When stored properly in an airtight container in the refrigerator, gelatin-based Jello typically lasts for about 5-7 days. Over time, the edges might dry out slightly, or the texture might become a little firmer.
- Agar-Agar Based Jello: Agar-agar Jello also lasts for about 5-7 days in the refrigerator. It tends to maintain its firmer texture well.
- Jello with Fresh Fruit/Dairy: If you incorporate fresh fruit (especially cut fruit) or dairy products (like whipped cream or yogurt) directly into your Jello, its shelf life might be slightly shorter, typically 3-4 days, due to the faster spoilage of these ingredients.
- Jello with Candies: As mentioned with the fish bowls, Jello containing candies like Nerds or gummy items is best enjoyed immediately or within a day or two, as candies can bleed color or become soggy.
Always use your best judgment. If Jello looks cloudy, smells off, or has any signs of mold, it's best to discard it. By understanding these common issues and their solutions, you can approach your Jello-making endeavors with confidence and ensure delicious, perfectly set results every time!
Conclusion
From its captivating jiggle to its vibrant hues, Jello is truly a magical ingredient that transcends the boundaries of a simple dessert. As we've explored, it offers an incredible playground for hands-on learning, artistic expression, and precious family bonding. Whether you're whipping up classic finger Jello, crafting elaborate layered masterpieces, or diving into edible aquariums, each wobbly creation is an opportunity for discovery. We've seen how Jello effortlessly transforms into a STEM superstar, teaching fundamental chemistry, states of matter, and crucial life skills like measurement, observation, and patience. It’s a medium that fosters creativity, builds confidence, and creates lasting, screen-free memories in the heart of your home kitchen.
At I'm the Chef Too!, we are dedicated to blending food, STEM, and the arts into one-of-a-kind "edutainment" experiences, developed by mothers and educators who understand the joy and value of hands-on learning. We believe that the most profound lessons are learned through tangible, delicious adventures. Jello perfectly embodies this philosophy, making complex concepts accessible and exciting for young minds. It's a reminder that learning doesn't always have to happen in a classroom; sometimes, the best lessons are found in a bowl of wobbly, colorful fun.
So, gather your ingredients, enlist your junior chefs, and get ready to transform your kitchen into a laboratory of laughter and learning. The world of Jello is waiting to be explored, promising endless fun and delicious results. Don't let the adventure stop here! For a continuous stream of engaging, educational, and utterly delicious cooking STEM kits delivered right to your door, join The Chef's Club today! A new, exciting culinary journey awaits you and your child every single month, complete with pre-measured dry ingredients, specialty supplies, and free shipping within the US. Spark curiosity, foster creativity, and create more joyful family memories with I'm the Chef Too! – because the best learning is always the most delicious!
FAQ
Q: What is the main difference between gelatin and agar-agar? A: Gelatin is an animal-derived protein that creates a wobbly, elastic gel and needs to be bloomed in cold water before dissolving in hot. Agar-agar is a plant-derived gelling agent (from seaweed) that creates a firmer, less elastic gel and needs to come to a full boil to activate. Agar-agar is also not affected by fruit enzymes, unlike gelatin.
Q: Can I use fresh pineapple or kiwi in my Jello? A: If using gelatin, fresh pineapple, kiwi, and papaya contain enzymes that prevent it from setting. You must boil these fruits or their juice first to deactivate the enzymes, or use canned versions. If using agar-agar, these fruits will not interfere with gelling.
Q: Why do I need to "bloom" gelatin? A: Blooming gelatin (sprinkling it over cold liquid and letting it sit) allows the granules to absorb liquid and soften evenly. This prevents clumping and ensures the gelatin dissolves smoothly when hot liquid is added, resulting in a clear, consistent Jello texture.
Q: How can I make Jello healthier for my kids? A: Use unflavored gelatin or agar-agar, which gives you control over ingredients. Opt for 100% fruit juices with no added sugar, use natural sweeteners like honey or maple syrup sparingly, or incorporate fruit purees for sweetness and added nutrients. You can also experiment with infused waters for very low-sugar options.
Q: My layered Jello keeps mixing together. What am I doing wrong? A: The most common reasons are not chilling each layer long enough (it needs to be "just set," not too firm, but firm enough to hold the next layer), or pouring the next layer of Jello when it's still too hot. Always allow subsequent Jello layers to cool to room temperature (but still liquid) before carefully pouring them over the previous, just set layer.
Q: What's the best way to get clean shapes when cutting Jello? A: Ensure your Jello is completely firm and well-chilled. Use thin, sharp metal cookie cutters. For extra clean cuts, briefly dip the cookie cutter in hot water and wipe it dry between each cut.
Q: How long does homemade Jello last in the refrigerator? A: Gelatin or agar-agar-based Jello, stored in an airtight container, typically lasts 5-7 days in the refrigerator. If you add fresh fruit or dairy, its shelf life may be reduced to 3-4 days. Jello with candies is best enjoyed immediately or within a day or two.
Q: Can I re-melt Jello if it didn't set correctly? A: If gelatin-based Jello didn't set well, you might be able to gently re-melt it over low heat, add a little more bloomed gelatin (dissolved in a small amount of hot water), whisk thoroughly, and then re-chill. For agar-agar, ensure it came to a full boil initially. However, sometimes it's easier and more reliable to start fresh.
Q: Is Jello a good STEM activity for kids? A: Absolutely! Jello making is an excellent STEM activity. It teaches basic chemistry (dissolving, gelling, states of matter), physics (viscosity, elasticity), math (measurement), and observation skills. It also encourages patience, problem-solving, and fine motor development, making it a fantastic "edutainment" experience.


")