Table of Contents
- Introduction
- Why Baking is More Than Just Mixing: The STEM & Arts Connection
- Our Go-To Easy Cupcake Recipe for Kids: Classic Vanilla Delight
- Step-by-Step Baking Adventure: Making the Cupcakes
- Crafting the Creamy Dream: Vanilla Buttercream Frosting
- Decorating Fun: Unleash Their Inner Artist
- Tips for Success: Making Baking a Breeze
- Beyond Vanilla: Easy Variations for Endless Fun
- Making Learning a Continuous Adventure with I'm the Chef Too!
- Storing Your Delicious Creations
- Conclusion
- FAQ: Your Baking Questions Answered
Ever found yourself in a quiet house, only to hear the inevitable cry of "I'm bored!"? Or perhaps you're looking for a joyful, screen-free activity that brings the whole family together? We've all been there! The kitchen, often seen as a place for grown-ups, holds incredible potential for adventure, learning, and delicious fun, especially when it comes to baking. And what could be more universally loved, more perfectly portioned, or more wonderfully customizable than a cupcake?
At I'm the Chef Too!, we believe that the kitchen is the ultimate classroom, a vibrant space where children don't just learn to bake, but truly learn. Our mission is to blend food, STEM (Science, Technology, Engineering, and Math), and the arts into one-of-a-kind "edutainment" experiences. We are passionate about sparking curiosity and creativity in children, facilitating precious family bonding moments, and providing a meaningful, screen-free educational alternative. Developed by mothers and educators, our unique approach teaches complex subjects through tangible, hands-on, and utterly delicious cooking adventures.
This post isn't just about sharing an easy cupcake recipe for kids – though we promise a truly simple and delicious one! It’s about unlocking the magic of baking as a powerful educational tool. We’ll walk you through our favorite kid-friendly vanilla cupcake recipe, share tips for making the process smooth and enjoyable, explore creative decorating ideas, and show you how simple kitchen activities can nurture vital skills, foster confidence, and create lasting memories. Get ready to transform flour, sugar, and eggs into a symphony of learning and laughter, one delightful cupcake at a time!
Introduction
In a world increasingly dominated by screens, finding engaging, hands-on activities that both entertain and educate our children can feel like a quest. Imagine a place where fun is baked into every lesson, where sticky fingers lead to scientific discoveries, and colorful frosting becomes a canvas for artistic expression. This isn't a fantasy; it's the everyday reality of baking with kids, and it's precisely what we champion here at I'm the Chef Too!.
Baking is far more than just following a set of instructions to create a sweet treat. For children, it's a dynamic, multi-sensory journey into the worlds of mathematics, science, engineering, and art. From measuring ingredients to observing chemical reactions, from designing delightful decorations to simply enjoying the fruits of their labor, every step of the baking process offers invaluable opportunities for growth. It’s a chance to build essential life skills, boost self-confidence, and create cherished family memories that will last a lifetime.
Today, we're diving deep into the delightful world of baking with an easy cupcake recipe for kids that is specifically designed to maximize these learning opportunities. We'll provide you with a foolproof vanilla cupcake recipe that even the youngest chefs can help with, alongside practical tips for making the experience smooth, fun, and genuinely educational. We’ll explore the underlying STEM principles in every stir and sift, unleash artistic potential through creative decorating, and guide you on how to turn a simple baking session into a rich, interactive learning experience. Prepare to embark on a delicious adventure where every crumb tells a story of discovery and joy.
Why Baking is More Than Just Mixing: The STEM & Arts Connection
Baking isn't just a culinary art; it's a dynamic, delicious science experiment unfolding right before your eyes. When children step into the kitchen, even for something as seemingly simple as making an easy cupcake recipe for kids, they engage with a multitude of academic concepts and life skills without even realizing it. This hands-on, multi-sensory approach is at the heart of what we do at I'm the Chef Too!, turning every recipe into a learning opportunity.
Math in the Kitchen: Measuring, Counting, and More!
From the moment you start gathering ingredients, math becomes an integral part of the baking process. Kids are naturally practicing foundational mathematical concepts in a very practical, real-world context:
- Measuring Magic: Scooping flour, pouring milk, and leveling sugar aren't just steps in a recipe; they are practical lessons in volume, weight, and precision. Understanding that "half a cup" is less than "one cup" is a direct application of fractions. Children learn to distinguish between different units of measurement (teaspoons, tablespoons, cups) and see how they relate to each other. This tangible experience makes abstract concepts like fractions and ratios much more concrete and understandable than simply seeing them on a worksheet.
- Counting Cupcakes: Counting cupcake liners, eggs, or sprinkles reinforces numerical literacy and one-to-one correspondence. It helps them understand quantities and proportions in a fun, edible way.
- Estimation Exploration: Learning to estimate quantities (e.g., "Do we have enough sprinkles?") or baking times ("How long until they're ready?") helps develop critical thinking and predictive skills. They learn to make educated guesses and then compare them to the actual outcome.
- Sequencing Success: Following a recipe step-by-step teaches logical order, sequential thinking, and the importance of process – crucial for problem-solving in all areas of life, from reading a story to completing a science experiment. They learn that skipping a step or doing things out of order can change the final result.
- Doubling and Halving Adventures: Want to make more or fewer cupcakes? This introduces multiplication and division in a very tangible way. "If we double the recipe, how many eggs do we need?" becomes a fun math problem with a delicious reward.
The Science of Baking: Transformations and Reactions
Every ingredient in an easy cupcake recipe for kids plays a specific scientific role, and watching these interactions is pure magic for curious young minds. The kitchen transforms into a vibrant laboratory where everyday ingredients undergo fascinating transformations:
- Chemical Reactions in Action: Baking powder and baking soda are not just dry ingredients; they are key players in a chemical ballet. When combined with liquid and heat, they create carbon dioxide gas, which gets trapped in the batter, making cupcakes rise and become wonderfully fluffy. This is a real-life chemical reaction that kids can observe and understand. You can even discuss how acids and bases interact, much like the exciting fizz in our Erupting Volcano Cakes Kit – a perfect example of chemistry in action that’s both educational and delicious!
- States of Matter Marvels: Observing butter melt from a solid to a liquid, or batter transforming from a liquid to a solid cake in the oven, vividly illustrates changes in states of matter. They see water evaporate from the batter, and ingredients dissolve, all demonstrating fundamental physics.
- Emulsification Exploration: When you mix butter and sugar vigorously, or combine wet and dry ingredients, you're creating an emulsion. This demonstrates how different substances can be combined to form a stable mixture, affecting the texture and consistency of the final product.
- Heat Transfer Happenings: Understanding how the oven's heat cooks the batter from the outside in, and why cooling on a wire rack is important (to stop the cooking process and allow proper setting), introduces concepts of heat transfer and thermodynamics in an accessible way.
Engineering & Design: From Batter to Beautiful Creation
Once the baking is done, the engineering and design challenges begin with decorating! This is where creativity meets structural thinking:
- Structure and Stability: Thinking about how to apply frosting without it sliding off, or how to arrange sprinkles for even coverage, involves basic engineering principles. Kids learn about weight distribution, adhesion, and visual balance. "If I pile too much frosting, will it fall?" is a real-world engineering question!
- Tool Usage & Dexterity: Learning to use a piping bag, spatula, or cookie cutters is an exercise in tool manipulation, precision, and fine motor skills. It helps develop hand-eye coordination and control.
- Problem-Solving & Adaptation: What if the frosting is too thick or too thin? What if a design doesn't work out as planned? Kids learn to adapt, experiment with solutions, and refine their techniques, just like real engineers and designers.
Art & Creativity: Edible Masterpieces
The arts flourish in the kitchen, offering a wonderful outlet for self-expression and imaginative play. A cupcake is a blank canvas waiting for a child's unique touch:
- Color Theory: Mixing food coloring to create new shades for frosting is a practical lesson in color theory. They learn about primary and secondary colors and how different hues can evoke different feelings or themes.
- Composition and Aesthetics: Arranging sprinkles, candies, or fruit toppings to create an aesthetically pleasing design helps develop an understanding of composition, symmetry, and visual appeal. It’s about making something beautiful that also tastes good!
- Personal Expression: Every child's decorated cupcake will be unique, reflecting their individual style, imagination, and preferences. It’s a completely edible canvas where they can safely experiment and celebrate their own creativity. Imagine creating your own edible solar system – that's the kind of artistic and scientific adventure you can have with our Galaxy Donut Kit!
Life Skills & Confidence: Growing Beyond the Recipe
Beyond academics, baking with kids nurtures essential life skills and boosts their self-esteem in powerful ways:
- Following Instructions: Carefully reading and adhering to recipe steps builds discipline, attention to detail, and a crucial understanding of cause and effect.
- Patience & Delayed Gratification: Waiting for butter to soften, batter to bake, or cupcakes to cool teaches patience and the rewards of waiting for a perfect outcome.
- Responsibility & Independence: Assigning age-appropriate tasks like washing hands, gathering ingredients, wiping down counters, or helping with cleanup fosters a sense of responsibility and encourages independence in a supportive environment.
- Fine Motor Skills Development: Stirring, pouring, cracking eggs, sifting flour, and decorating all enhance dexterity, grip strength, and hand-eye coordination.
- Reading Comprehension: For older children, reading the recipe themselves significantly improves their literacy skills and ability to interpret procedural text.
- Boosted Confidence: Successfully creating something delicious from scratch, especially an easy cupcake recipe for kids, gives children an immense sense of accomplishment and pride. This boosts their confidence, encourages them to try new challenges, and shows them that they are capable of amazing things.
Family Bonding & Screen-Free Fun: Connecting in the Heart of the Home
In today's fast-paced world, finding quality time to connect as a family can be a challenge. Baking offers a fantastic opportunity for genuine, meaningful interaction:
- Shared Experience & Teamwork: Working together on a common goal fosters teamwork, communication, and mutual support. Everyone has a role, and everyone contributes to the success.
- Conversation Starters: The relaxed, creative environment of the kitchen naturally invites conversation, storytelling, and sharing. It’s a wonderful space for open dialogue.
- Creating Lasting Memories: The smell of baking filling the home, the laughter, the inevitable (and often humorous) messes, and the shared joy of eating the finished product create cherished family memories that last a lifetime. These are the moments kids will talk about for years to come.
- A Welcome Screen-Free Alternative: This hands-on activity provides a much-needed break from digital devices, encouraging engagement with the physical world and with each other. It’s an investment in their development and your relationship.
At I'm the Chef Too!, we craft experiences that deliver these benefits right to your doorstep. Our kits provide everything you need for these "edutainment" moments, making it easy for families to jump right into the fun without the hassle of sourcing ingredients or planning activities. Ready to make learning an ongoing adventure? Join The Chef's Club today and enjoy free shipping on every box, bringing new STEM cooking adventures to your home every month!
Our Go-To Easy Cupcake Recipe for Kids: Classic Vanilla Delight
This recipe is designed with simplicity in mind, making it perfect for little hands and budding bakers. We've chosen classic vanilla because it's a crowd-pleaser and a fantastic base for all sorts of fun decorations. The best part? Most of these ingredients are likely already in your pantry, minimizing the need for special trips to the store! This particular easy cupcake recipe for kids focuses on straightforward steps and readily available ingredients to ensure a joyful and successful baking experience.
Ingredients for the Cupcakes (Makes 12 standard cupcakes)
- 1 ½ cups (180g) all-purpose flour: The structural backbone of our cupcakes! All-purpose flour is easy to find and works wonderfully.
- 1 ½ teaspoons baking powder: Our magical leavening agent that makes the cupcakes light and fluffy. Remember, baking powder and baking soda are different and not always interchangeable! Baking powder is a complete leavener, reacting twice – once with liquid and again with heat.
- ¼ teaspoon salt: A little pinch of salt enhances all the other flavors, especially the sweetness, making the vanilla really shine.
- ½ cup (113g) unsalted butter, softened to room temperature: Softened butter is crucial for a smooth batter and a tender crumb. It creams beautifully with sugar, incorporating air that contributes to a light texture. If your butter is too cold, it won't combine properly; if it's melted, the texture will be dense.
- 1 cup (200g) granulated sugar: Provides sweetness and helps create that wonderful tender texture and golden-brown crust.
- 2 large eggs, at room temperature: Eggs bind the ingredients, add richness, and contribute to the structure. Room temperature eggs emulsify better with the butter and sugar, resulting in a smoother, more uniform batter.
- 1 teaspoon pure vanilla extract: The star flavor! Use good quality pure vanilla extract for the best taste.
- ½ cup (120ml) whole milk, at room temperature: Adds moisture and helps thin the batter to the right consistency. Like eggs, room temperature milk mixes more easily and creates a better emulsion.
Ingredients for the Simple Vanilla Buttercream Frosting
- ½ cup (113g) unsalted butter, softened to room temperature: Just like for the cupcakes, softened butter is key for a creamy, smooth frosting.
- 2 cups (240g) powdered sugar (also known as confectioners' sugar or icing sugar): The primary sweetener and thickener for buttercream. Sifting it can help prevent lumps!
- 1-2 tablespoons milk (whole milk works best): Helps achieve the desired consistency. Start with one tablespoon and add more drop by drop until you reach a spreadable, yet firm, consistency.
- ½ teaspoon pure vanilla extract: For that classic vanilla flavor in the frosting.
- Pinch of salt (optional, but balances sweetness): A tiny bit of salt can cut through the sweetness of the sugar, making the frosting even more delicious and less cloying.
Equipment Needed
You don't need a professional kitchen to make these delightful treats. Here's a list of basic tools that will make the process smooth and enjoyable, many of which can be found in our comprehensive kits, designed to make your baking adventures seamless:
- 12-cup muffin tin: The vessel for our cupcakes!
- Paper cupcake liners: To prevent sticking and make cleanup easier.
- Large mixing bowl: For combining the wet and dry ingredients.
- Medium mixing bowl: For whisking dry ingredients.
- Whisk: For dry ingredients and sometimes for hand-mixing.
- Rubber spatula: Essential for scraping down the sides of the bowl and gently folding ingredients.
- Electric mixer (handheld or stand mixer): While not strictly essential, it makes creaming butter and sugar much easier and results in fluffier cupcakes and frosting. If you don't have one, a strong whisk and some arm power will do!
- Measuring cups and spoons: Crucial for accurate ingredient measurements – a fantastic way to practice math!
- Small bowl: Handy for cracking eggs into before adding to the main batter, to easily remove any errant shell pieces.
- Wire cooling rack: Allows air to circulate around the cupcakes, ensuring they cool evenly and don't get soggy.
- Small offset spatula or butter knife: For spreading frosting – a great starter tool for little decorators.
- Piping bag and decorating tips (optional, for fancy frosting): For those who want to get a bit more artistic with their frosting designs.
Step-by-Step Baking Adventure: Making the Cupcakes
Baking is a fantastic way to teach kids about following instructions, understanding sequences, and the joy of seeing a project through to completion. Let's get baking! Remember, adult supervision is key, especially around hot ovens and sharp tools. This easy cupcake recipe for kids is all about making the process fun and manageable.
1. Prepping the Stage for Baking Success (5 minutes)
This initial step is all about setting up for success and involves some great observational skills for kids.
- Preheat the Oven (Science & Responsibility): Ask your child to help you set the oven to 350°F (175°C). Explain that this gets the oven super warm and ready for baking, making sure the cupcakes cook evenly. Talk about how important it is to be careful around a hot oven.
- Line the Muffin Tin (Fine Motor Skills & Counting): Have your child place paper liners into each cup of the muffin tin. This is a great fine motor skill activity! You can count them together ("One for you, one for me, two for you..."). Discuss how the liners keep the cupcakes from sticking and make them easy to eat later.
2. The Dry Mix: A Foundation of Flavor (5 minutes)
This is where children begin to understand the role of different ingredients.
-
Measure Dry Ingredients (Math & Precision): In the medium mixing bowl, have your child measure out the flour, baking powder, and salt. Show them how to level off the measuring cup for accuracy. This is a practical lesson in precise measurement and understanding dry volume.
- Kid's Role: Scooping flour, leveling with a flat edge (like a butter knife), adding baking powder and salt.
- Learning Moment: "Why do we use baking powder?" (To make them fluffy!). "What happens if we add too much or too little?" (It changes the texture!)
-
Whisk Together (Science & Coordination): Gently whisk these dry ingredients together. This ensures the leavening agent and salt are evenly distributed throughout the flour, which is crucial for uniform rising.
- Kid's Role: Gently whisking the dry ingredients until just combined.
- Learning Moment: "We mix them so every bite gets a little bit of fluffiness and flavor!"
3. The Wet Wonders: Creaming and Combining (10-15 minutes)
This stage involves a bit more muscle (or an electric mixer!) and introduces the concept of emulsification.
-
Cream the Butter and Sugar (Science & Observation): In the large mixing bowl, add the softened butter and granulated sugar. Using an electric mixer (on low speed to start, then medium), beat them together until the mixture is light, fluffy, and pale yellow. This "creaming" process incorporates air, which is vital for a light texture. This should take about 3-5 minutes.
- Kid's Role: Holding the mixer (with supervision!), watching the butter and sugar transform. They can also scrape down the sides of the bowl with a rubber spatula to ensure everything gets mixed.
- Learning Moment: "See how fluffy it's getting? We're whipping in tiny air bubbles that will help our cupcakes rise!" Discuss how the butter changed from solid to creamy.
-
Add Eggs One at a Time (Patience & Fine Motor Skills): Crack the eggs into a small separate bowl first (this prevents shells from going into your batter and is great practice!). Add one egg to the butter mixture, beating until just incorporated before adding the next. This helps create a stable emulsion.
- Kid's Role: Carefully cracking eggs, dropping them into the mixer, watching them disappear into the batter.
- Learning Moment: "We add them one at a time so everything mixes together perfectly and stays smooth."
-
Stir in Vanilla (Sensory & Measurement): Add the vanilla extract and beat until combined. The wonderful aroma of vanilla is a fantastic sensory experience for kids!
- Kid's Role: Measuring and adding the vanilla extract.
- Learning Moment: "Smell that wonderful vanilla? It's going to make our cupcakes taste so good!"
4. Alternating Wet and Dry: The Art of Incorporation (5-7 minutes)
This step teaches balance and the importance of not over-mixing.
-
Alternating Additions (Sequencing & Gentle Mixing): With the mixer on the lowest speed, or by hand with a spatula, begin adding the dry ingredients alternately with the milk.
- Start by adding about one-third of the flour mixture to the wet ingredients, mixing until just barely combined.
- Then, add half of the milk, mixing until just combined.
- Repeat with another one-third of the flour mixture, then the remaining milk.
- Finish with the last third of the flour mixture, mixing just until no dry streaks of flour remain.
- Kid's Role: Helping pour small portions, gently mixing, learning when to stop.
- Learning Moment: "We don't want to over-mix, because that makes cupcakes tough! We want them soft and delicious!" Explain that too much mixing can develop gluten too much, which makes cakes chewy instead of tender.
5. Filling and Baking: The Transformation Begins! (20-25 minutes)
This is the exciting part where the batter finally enters the oven!
-
Fill the Liners (Estimation & Portion Control): Use a spoon or an ice cream scoop to divide the batter evenly among the 12 cupcake liners. Fill each liner about two-thirds full. This allows room for the cupcakes to rise without overflowing.
- Kid's Role: Scooping batter into liners (with supervision for younger kids to avoid overfilling).
- Learning Moment: "We fill them just right so they have space to grow in the oven!"
-
Bake to Perfection (Patience & Observation): Carefully place the muffin tin into the preheated oven. Bake for 17-20 minutes. The cupcakes are ready when they are golden brown, spring back lightly when touched, and a toothpick inserted into the center comes out clean.
- Kid's Role: Watching the cupcakes through the oven window (from a safe distance!), learning about timing.
- Learning Moment: "The oven's heat is working its magic, turning the runny batter into fluffy cakes!" Discuss how the ingredients are changing.
-
Cool Down (Safety & Structure): Once baked, carefully remove the muffin tin from the oven. Let the cupcakes cool in the tin for about 5 minutes before transferring them to a wire cooling rack to cool completely. Cooling completely is crucial before frosting to prevent the frosting from melting.
- Kid's Role: Carefully helping transfer (older kids with oven mitts) or simply observing and waiting patiently.
- Learning Moment: "We let them cool so they don't get soggy, and so our frosting doesn't melt!"
What an amazing adventure we've just had, full of science, math, and delicious anticipation! If you love the idea of turning everyday activities into extraordinary learning moments, you're going to adore what we do at I'm the Chef Too!. We bring these hands-on, educational experiences right to your home, blending food, STEM, and the arts into unique "edutainment" kits. Don't let the fun stop here – explore our full library of adventure kits available for a single purchase in our shop and find your next delicious discovery!
Crafting the Creamy Dream: Vanilla Buttercream Frosting
No cupcake is truly complete without a luscious topping! Our simple vanilla buttercream is easy to make and perfect for little decorators. This is another fantastic opportunity to understand how ingredients transform and to practice precision.
1. Softening the Butter (Again!)
- Room Temperature is Key: In a large mixing bowl, add the softened unsalted butter. Just like with the cupcakes, ensure it’s at true room temperature (soft to the touch but not melted). This will make for the smoothest, fluffiest frosting.
2. The Powdered Sugar Cloud
- Sift for Smoothness (Optional but Recommended): If you want an extra smooth frosting, you can sift the powdered sugar before adding it. This removes any lumps.
-
Initial Mix (Caution!): Add the powdered sugar to the bowl with the butter. Start mixing on a very low speed with your electric mixer (or with a wooden spoon) to combine the butter and sugar without creating a "sugar cloud" explosion in your kitchen! Once it starts to come together, you can increase the speed.
- Kid's Role: Gently adding powdered sugar, helping scrape the bowl, pressing the "start" button on the mixer (with supervision!).
3. Flavor and Fluidity
- Add Vanilla and Salt: Stir in the vanilla extract and the pinch of salt. The salt is a secret ingredient that truly balances the sweetness of the sugar.
-
Milk, Drop by Drop (Precision & Observation): Now, for the crucial part – achieving the right consistency. Add milk one tablespoon at a time, beating well after each addition. Watch the frosting carefully. You want it creamy and spreadable, but firm enough to hold its shape when piped or spread. This might take 1-2 tablespoons, or slightly more depending on humidity and butter consistency.
- Kid's Role: Carefully pouring milk, observing the texture change, tasting a tiny bit (with permission!).
4. Whip to Fluffy Perfection
-
High-Speed Whisking: Once all ingredients are combined, increase the mixer speed to medium-high and beat for another 3-5 minutes. This whips air into the frosting, making it wonderfully light and fluffy. It should be noticeably lighter in color and texture.
- Kid's Role: Holding the mixer (supervised), watching the frosting grow in volume and fluffiness.
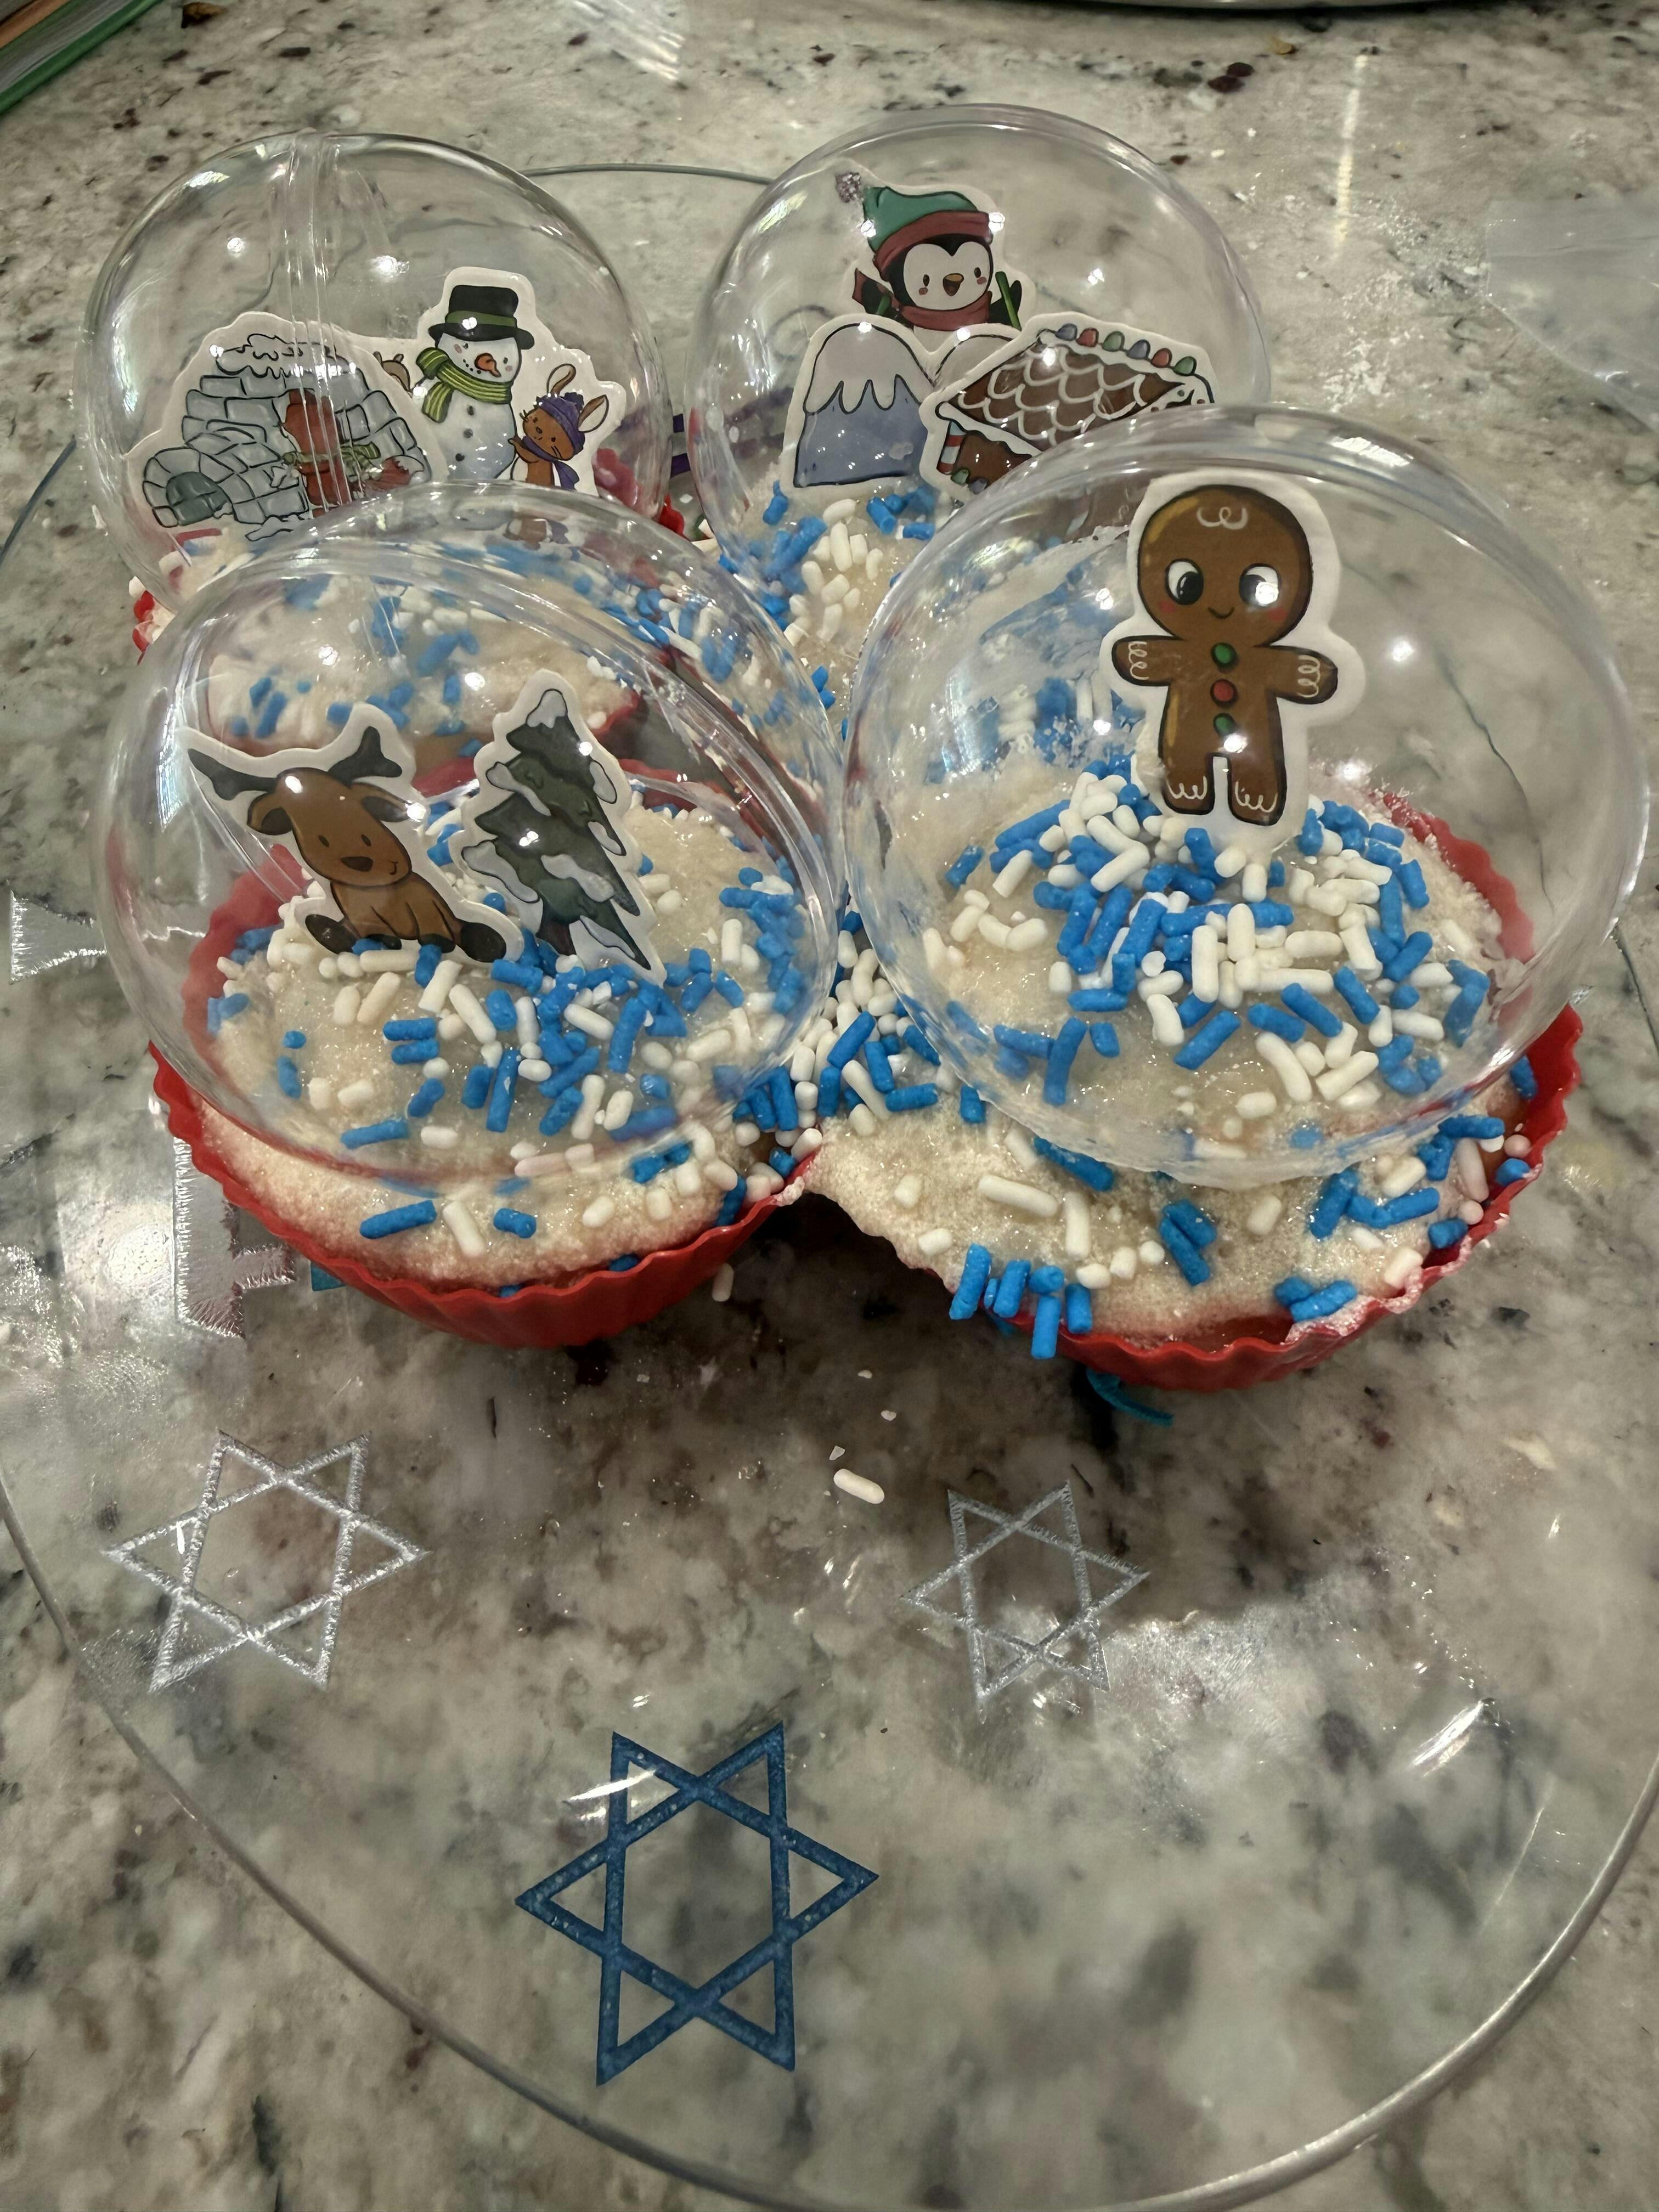
Decorating Fun: Unleash Their Inner Artist
Now for the best part – the artistic expression! This is where the "Arts" in STEM & Arts truly shines, allowing children to personalize their creations and develop their aesthetic sense. Each cupcake becomes a mini masterpiece, reflecting their unique style and imagination.
Simple Spreading Techniques (Great for All Ages)
-
The Classic Swirl: For younger children, a small offset spatula or even a butter knife works perfectly. Show them how to scoop a dollop of frosting onto the center of the cupcake and gently spread it outwards in a spiral motion.
- Kid's Role: Spreading frosting, choosing how much to use.
- Learning Moment: "How can we make it smooth? What happens if we put too much on one side?" (Basic physics of balance and gravity!).
- The Dome: Apply frosting and then use the back of a spoon to create a lovely, smooth dome. This is a simple yet elegant look.
Piping with Pizzazz (For Older Kids and Adventurous Younger Ones)
Using a piping bag adds a new layer of control and design possibilities, enhancing fine motor skills.
-
Loading the Bag: Carefully spoon the buttercream into a piping bag fitted with your favorite nozzle (a star tip is always a winner!). Twist the top of the bag to seal it and push the frosting down.
- Kid's Role: Holding the bag open, spooning frosting in (can be a bit messy, but fun!).
-
Basic Swirl (Fine Motor Skills & Practice): Guide your child's hand to hold the piping bag upright over the cupcake. Start piping from the outside edge, moving in a continuous circle towards the center, then pull up to create a peak. Practice on a plate first!
- Kid's Role: Squeezing the bag, guiding the nozzle, practicing consistency.
- Learning Moment: "What happens if we squeeze too hard? Or too lightly?" (Cause and effect).
Creative Toppings: The Sprinkles & Sweets Symphony
This is where individual creativity truly takes flight! Provide a variety of options and let their imaginations run wild.
- Classic Sprinkles: Always a favorite! Offer different colors, shapes, and sizes. Discuss color combinations and patterns.
- Mini Chocolate Chips: A delicious addition for chocolate lovers.
- Small Candies: M&Ms, gummy bears, or small jelly beans can add pops of color and texture.
- Fresh Fruit: Sliced strawberries, blueberries, or raspberries can add a touch of freshness and a healthier twist.
- Coconut Flakes: Toasted or plain, coconut adds a lovely texture and subtle flavor.
- Edible Glitter or Dust: For an extra magical touch!
- Kid's Role: Choosing toppings, arranging them, creating patterns or freestyle designs.
- Learning Moment: "What colors go well together? Can you make a pattern? What shape is this candy?" (Art, geometry, counting).
Remember, there's no "wrong" way to decorate a cupcake. The goal is to have fun, encourage self-expression, and enjoy the process. Every unique creation is a testament to their budding artistic and engineering skills!
Tips for Success: Making Baking a Breeze
Even with an easy cupcake recipe for kids, a few insider tips can make the difference between a good baking session and a truly great one. We've learned these tricks through countless hours of "edutainment" in the kitchen, and we're happy to share them with you to ensure your family's baking adventures are always enjoyable and stress-free.
Ingredient Insights
-
Room Temperature is Your Best Friend: This cannot be stressed enough! For both cupcakes and frosting, make sure butter, eggs, and milk are at room temperature. This allows them to emulsify properly, creating a smooth, cohesive batter and a light, even texture.
- Quick Tip: If you forget to take eggs and milk out, place eggs in a bowl of warm water for 5-10 minutes. For milk, microwave it for 10-15 seconds until slightly warm, or let it sit on the counter for about 30 minutes.
- Measuring Matters: Accuracy is important in baking, as it's a science. Teach kids to level off dry ingredients with a straight edge (like the back of a knife) and to measure liquids at eye level. This reinforces precision and attention to detail.
- Sift for Smoothness: While our recipe uses all-purpose flour, if you want an extra tender cupcake, consider sifting the flour and powdered sugar (for frosting). This removes lumps and aerates the ingredients, leading to a lighter crumb and smoother frosting.
Mixing Mastery
-
Don't Over-Mix: This is perhaps the most common baking mistake! Once you add the dry ingredients to the wet, mix just until no dry streaks of flour remain. Over-mixing develops gluten, which can lead to tough, dense cupcakes instead of light, fluffy ones.
- Kid's Role: Helping with gentle stirring, learning to recognize when the batter is "just right."
- Scrape Down the Bowl: Regularly scrape down the sides and bottom of your mixing bowl with a rubber spatula. This ensures all ingredients are fully incorporated, preventing pockets of unmixed flour or butter.
Baking & Cooling Wisdom
- Preheat Your Oven Properly: Always allow your oven to fully preheat. An oven that isn't at the correct temperature can lead to uneven baking, sunken centers, or cupcakes that don't rise properly. An oven thermometer can be a great tool to verify your oven's accuracy.
- Fill Cupcake Liners Evenly: For uniform cupcakes that bake at the same rate, aim to fill each liner about two-thirds full. An ice cream scoop is a fantastic tool for this, ensuring consistent portions.
- The Toothpick Test: This is the ultimate indicator of doneness. Insert a toothpick into the center of a cupcake. If it comes out clean (without wet batter), they are ready. If there are wet crumbs, give them a few more minutes. Avoid over-baking, which can lead to dry cupcakes.
- Cool Completely: After removing from the oven, let the cupcakes cool in the muffin tin for about 5 minutes, then transfer them to a wire rack to cool completely before frosting. Frosting warm cupcakes will cause the frosting to melt and slide right off. Patience is a virtue in baking!
Frosting Finesse
- Consistency is Key: For frosting, start with less liquid (milk) and add tiny amounts until you reach your desired consistency. You want it firm enough to hold its shape but soft enough to spread easily.
- Buttercream's Best Friend: A good buttercream should be whipped for several minutes after all ingredients are combined. This incorporates air, making it light, fluffy, and easier to pipe or spread.
- Practice Makes Perfect: If kids are new to piping, let them practice on a plate or a piece of parchment paper first. They can pipe shapes, lines, or swirls, then scoop the frosting back into the bag. It's a low-pressure way to build confidence.
By following these tips, your easy cupcake recipe for kids will consistently yield delicious results, making the baking journey just as rewarding as the treat itself.
Beyond Vanilla: Easy Variations for Endless Fun
While our classic vanilla cupcake recipe is a delightful foundation, the beauty of baking lies in its endless possibilities for customization! This is where you and your child can truly experiment, fostering creativity and a deeper understanding of flavor combinations. Think of the vanilla base as a canvas ready for new colors and textures.
Flavor Adventures: Changing the Base
- Chocoholic Delight: Add ½ cup of cocoa powder to the dry ingredients for chocolate cupcakes. You might need to add an extra tablespoon or two of milk to maintain the right batter consistency. You could even fold in mini chocolate chips for an extra chocolatey punch!
- Citrus Zest: For a brighter flavor, add 1-2 teaspoons of lemon, orange, or lime zest to the wet ingredients. The oils in the zest provide a wonderful, natural aroma and taste.
- Spice It Up: Incorporate ½ teaspoon of cinnamon, nutmeg, or a pumpkin pie spice blend into the dry ingredients for a warm, comforting twist. These are especially fun around holidays!
- Fruity Fun: Gently fold in ½ cup of finely chopped berries (like raspberries or blueberries) into the batter just before filling the liners. This adds natural sweetness, moisture, and a lovely pop of color.
- Nutty Nibblers: If there are no allergies, a ¼ cup of finely chopped nuts (pecans, walnuts) can add a delightful crunch and richness.
Frosting Fantasies: Beyond Vanilla Buttercream
The frosting is another fantastic area for experimentation, allowing for new flavors, colors, and textures.
- Color Burst: Divide your vanilla buttercream into separate bowls and add a few drops of food coloring to each. Let your child mix to create vibrant hues – a fun lesson in color theory! You can then pipe or spread different colors onto cupcakes for a rainbow effect.
- Chocolate Buttercream: Add ¼ cup of unsweetened cocoa powder to your powdered sugar (sifted together for best results) when making the buttercream. You might need a little extra milk to reach the right consistency.
- Cream Cheese Frosting: For a tangy, less sweet option, beat together 4 oz (113g) softened cream cheese with ½ cup (113g) softened unsalted butter, then slowly add 2 cups (240g) powdered sugar and ½ teaspoon vanilla extract, beating until fluffy.
- Lemon or Orange Buttercream: Add 1-2 tablespoons of fresh lemon or orange juice and 1 teaspoon of zest to your vanilla buttercream. Reduce the milk slightly to account for the added liquid from the juice.
Themed Toppings: Telling a Story
Decorations can transport your cupcakes to another world! This is where imagination and storytelling come into play.
- Galaxy Cupcakes: Use blue and purple food coloring for the frosting, then top with edible glitter and star sprinkles. It’s a great way to talk about astronomy while making delicious treats, much like our Galaxy Donut Kit!
- Animal Friends: Use various candies (M&Ms for eyes, pretzels for ears, licorice for whiskers) to turn cupcakes into adorable animal faces.
- Holiday Creations: Tailor your decorations to the season! Red and green sprinkles for Christmas, orange and black for Halloween, pastels for Easter.
- Storybook Scenes: Can you create a cupcake that looks like a muddy puddle for Peppa Pig, or a forest scene for a bear? The possibilities are endless!
By encouraging experimentation with these variations, you empower your child to become a creative problem-solver in the kitchen. They learn that recipes are not rigid rules, but flexible guidelines that can be adapted and personalized. It’s an invaluable lesson that extends far beyond baking, teaching them to innovate and express themselves in every aspect of life. And if you're looking for new, exciting themes to spark their imagination and learning, remember that you can always browse our complete collection of one-time kits for a fresh adventure!
Making Learning a Continuous Adventure with I'm the Chef Too!
The joy and educational value derived from baking an easy cupcake recipe for kids are just the beginning of what's possible when you blend food, STEM, and the arts. At I'm the Chef Too!, we've taken this concept and crafted it into a unique, convenient, and incredibly engaging experience designed to spark curiosity and creativity in children, facilitate family bonding, and provide a much-needed screen-free educational alternative.
We understand that life is busy. Planning elaborate educational activities, researching complex subjects, and then sourcing all the specific ingredients and supplies can feel like a daunting task for parents and educators. That's why we’ve dedicated ourselves to simplifying this process, bringing the magic of "edutainment" right to your doorstep.
Our Unique Approach to Edutainment
Our kits are not just about making a recipe; they are carefully designed adventures that teach complex subjects through tangible, hands-on, and utterly delicious cooking projects. Developed by mothers and educators, each box is a holistic learning experience:
- Seamless Integration of STEM & Arts: Every kit seamlessly weaves together scientific principles (like the chemical reactions we discussed with baking powder, or the geology of our Erupting Volcano Cakes Kit), mathematical concepts (measuring, fractions), engineering challenges (building edible structures), and artistic expression (decorating, color theory). This multidisciplinary approach ensures a rich and comprehensive learning experience.
- Tangible & Hands-On Learning: Children learn best by doing. Our kits provide all the pre-measured dry ingredients and specialty supplies needed for a complete, immersive experience. This allows kids to actively engage with the materials, see cause and effect in real-time, and develop fine motor skills without the frustration of missing ingredients or complicated preparation.
- Igniting Curiosity: By presenting educational concepts in a fun, edible format, we bypass the intimidation factor often associated with traditional learning. When kids are having fun, they are naturally more open to absorbing new information and asking "why?" and "how?"
- Fostering Family Bonding: Our kits are designed for shared experiences. They provide a perfect opportunity for parents, guardians, or older siblings to work alongside children, creating cherished memories, fostering communication, and strengthening family ties away from the distractions of screens.
- Screen-Free Enrichment: In an age where digital devices dominate, our kits offer a refreshing and meaningful alternative. They encourage children to engage with the physical world, use their senses, and interact directly with their environment and the people around them.
Why Choose I'm the Chef Too! for Ongoing Adventures?
We're not just about one-off activities; we're about fostering a continuous love for learning and discovery.
- The Chef's Club Subscription: Your Monthly Dose of Discovery Imagine a new, exciting adventure delivered to your door every month! Our Chef's Club subscription is the ultimate way to ensure ongoing educational fun. Each box is a complete experience, containing pre-measured dry ingredients, specialty supplies, and a new theme that blends cooking with fascinating STEM and art concepts. With free shipping in the US on every box, it's incredibly convenient. We offer flexible 3, 6, and 12-month pre-paid plans, perfect for gifting or long-term enrichment, ensuring that the magic of learning through delicious creations never stops. Join The Chef's Club today and make every month an opportunity for new skills and unforgettable family moments!
- One-Time Kits: Explore a World of Themes Not ready to commit to a subscription just yet? No problem! Our individual one-time kits are perfect for testing the waters, exploring specific interests, or finding the ideal gift. From exploring the cosmos with our Galaxy Donut Kit to digging for deliciousness with our Fudgy Fossil Dig Kit, there's a world of learning waiting for every child. You can browse our complete collection of one-time kits and pick the perfect adventure that aligns with your child's current passions.
- Inspiring Confidence, Not Guaranteeing Outcomes: While we focus on enriching experiences, we also believe in setting realistic expectations. Our goal isn't to guarantee your child will become a top scientist or master chef. Instead, we aim to foster a genuine love for learning, build confidence through successful completion of tasks, develop key critical thinking and fine motor skills, and most importantly, create joyful family memories that celebrate curiosity and creativity.
By choosing I'm the Chef Too!, you're not just buying a kit; you're investing in a continuous journey of discovery, laughter, and delicious education for your child and your family. Let us bring the wonder of learning into your kitchen!
Storing Your Delicious Creations
You've put in all that hard work, the kitchen smells amazing, and you have a batch of beautifully decorated cupcakes. Now, how do you keep them fresh and delicious for as long as possible? Proper storage is key to enjoying your easy cupcake recipe for kids creations.
Short-Term Storage (Up to 2-3 Days)
- Airtight Container: The most important rule for frosted cupcakes is to store them in an airtight container at room temperature. Exposure to air is what causes cupcakes to dry out and frosting to harden.
- Single Layer is Best: If possible, store cupcakes in a single layer to prevent the frosting from getting smushed. If you must stack them, use toothpicks inserted into the top of the cupcakes (avoiding the frosting) to create a barrier for the layer above, then place a piece of parchment paper on top of the toothpicks before adding the next layer. Cupcake carriers specifically designed for this purpose are also fantastic.
-
Avoid the Refrigerator (for most): For most buttercreams and plain vanilla cupcakes, storing them in the refrigerator can dry them out and make the cake firm. They are best kept at room temperature for optimal taste and texture. However, if your frosting contains perishable ingredients like fresh cream cheese or if your kitchen is very warm (over 75°F or 24°C), refrigeration might be necessary.
- If Refrigerating: Place the cupcakes in an airtight container. When you're ready to eat them, take them out of the fridge at least 30 minutes to an hour before serving to allow them to come back to room temperature. This will soften the cake and frosting, making them much more enjoyable.
Long-Term Storage (Freezing)
If you've made a large batch or want to prepare them in advance, freezing cupcakes (especially unfrosted ones) is an excellent option.
-
Unfrosted Cupcakes:
- Ensure the baked cupcakes are completely cooled.
- Wrap each individual cupcake tightly in plastic wrap.
- Place the wrapped cupcakes in a freezer-safe airtight container or a heavy-duty freezer bag.
- They can be stored in the freezer for up to 2-3 months.
- To defrost, unwrap them and let them thaw at room temperature for a few hours. Once thawed, you can frost and decorate as usual.
-
Frosted Cupcakes (with Buttercream):
- Allow the frosting to set slightly (you can pop them in the fridge for 15-30 minutes for this).
- Place the frosted cupcakes in a single layer on a baking sheet and freeze for about an hour, until the frosting is firm.
- Once firm, you can carefully transfer them to an airtight freezer-safe container. This "flash freezing" prevents the frosting from sticking together.
- Thaw in the refrigerator overnight, then bring to room temperature before serving for the best texture.
By following these simple storage guidelines, you can ensure that the delicious results of your family's baking adventure remain fresh and enjoyable, ready to bring a smile to anyone's face whenever a sweet craving strikes.
Conclusion
What an incredible journey we've taken through the delightful world of baking, all centered around a simple, easy cupcake recipe for kids! We've discovered that the kitchen is far more than just a place to prepare food; it's a dynamic classroom, a creative studio, and a cherished space for family connection. Every scoop of flour, every crack of an egg, and every colorful sprinkle offers a unique opportunity for learning, growth, and joy.
We've explored how baking is a natural blend of STEM and the arts, with each step offering lessons in math, science, engineering, and creative expression. From understanding chemical reactions to mastering precise measurements, from designing edible masterpieces to simply learning the patience of waiting for a treat, children develop a multitude of essential skills without even realizing they're "learning." More importantly, these hands-on activities foster confidence, spark curiosity, and create invaluable, screen-free memories that your family will treasure for years to come.
At I'm the Chef Too!, our mission is to bring these enriching "edutainment" experiences directly to your home. We are committed to making it easy for busy families to engage in meaningful activities that blend delicious food with fascinating STEM and arts concepts. We believe in the power of hands-on discovery and the magic that happens when learning is tangible, fun, and utterly delicious.
Don't let the adventure end with just one recipe! Imagine a continuous stream of exciting, educational cooking projects designed by mothers and educators, delivered right to your door. Ready to transform your kitchen into a hub of ongoing discovery and family fun?
Join The Chef's Club today and unlock a world of monthly STEM cooking adventures, complete with free shipping on every box! Give the gift of learning that lasts all year, building skills, confidence, and countless happy memories, one delicious creation at a time. Your next adventure awaits!
FAQ: Your Baking Questions Answered
We know that baking with kids, while incredibly rewarding, can sometimes spark a few questions. Here are some frequently asked questions to help make your easy cupcake recipe for kids experience even smoother.
Q1: What age is appropriate for kids to start baking cupcakes?
A1: Kids as young as 2 or 3 can participate in simple steps like pouring pre-measured ingredients, stirring, or placing liners in a muffin tin. By age 4-6, they can often help with measuring, cracking eggs (into a separate bowl first!), and simple decorating. Older children (7+) can take on more responsibility, including reading recipes, using an electric mixer with supervision, and more intricate decorating. Always tailor tasks to your child's abilities and ensure constant adult supervision, especially around hot ovens.
Q2: My cupcakes came out dry. What went wrong?
A2: Dry cupcakes are usually a sign of over-baking. Oven temperatures can vary, so it's always best to start checking for doneness at the lower end of the recommended baking time. Use the toothpick test: if it comes out clean, they're done! Another common cause is over-mixing the batter, which can develop too much gluten and result in a tough, dry texture. Ensure your butter, eggs, and milk are at room temperature for optimal moisture and tenderness.
Q3: My cupcakes sank in the middle. Why?
A3: Sunken centers can happen for a few reasons:
- Oven Door Opened Too Soon: If the oven door is opened before the cupcakes are set, the sudden change in temperature can cause them to collapse.
- Under-baked: If the center isn't fully cooked, it won't be able to support the top.
- Too Much Leavening: Too much baking powder or baking soda can cause a rapid rise followed by a collapse.
- Old Leavening Agents: Baking powder and soda lose their potency over time. Check their freshness!
- Too Much Liquid: An imbalance of wet ingredients can also contribute.
Q4: Can I make these cupcakes gluten-free or dairy-free?
A4: Yes, with some adjustments!
- Gluten-Free: Substitute all-purpose flour with a 1:1 gluten-free all-purpose flour blend (ensure it contains xanthan gum or add ¼ teaspoon per cup of flour). The texture might be slightly different but still delicious.
- Dairy-Free: Replace whole milk with an unsweetened plant-based milk (almond, soy, oat). For butter, you can use a dairy-free butter substitute or vegetable oil (use slightly less oil than butter, about ¾ of the amount, as oil is 100% fat). Ensure your frosting butter is also dairy-free.
Q5: How can I make cleanup easier after baking with kids?
A5:
- Prep Smart: Lay down parchment paper, foil, or an old tablecloth on your workspace for easy cleanup.
- Mise en Place: Measure all ingredients before you start mixing. This reduces frantic searching and potential spills.
- Assign Tasks: Get kids involved in cleanup! Even young children can wipe down counters with a damp cloth or put dirty spoons in the sink.
- Use Spatulas: Scrape bowls thoroughly with a rubber spatula to get all the batter/frosting out, making washing easier.
- Immediate Rinse: Rinse dirty bowls and tools right after use to prevent batter/frosting from drying and hardening.
Q6: What if I don't have an electric mixer? Can I still make this recipe?
A6: Absolutely! While an electric mixer makes the creaming of butter and sugar much easier and results in a lighter texture, you can absolutely make this easy cupcake recipe for kids with a whisk and good old-fashioned arm power. Just be prepared for a bit of a workout, especially during the butter and sugar creaming stage. The goal is to beat until the mixture is light and fluffy, even if it takes a bit longer by hand.
Q7: Can I use different types of sugar?
A7: For this specific recipe, granulated sugar is recommended for the best texture and consistency. Substituting with alternative sugars like brown sugar or liquid sweeteners (honey, maple syrup) can change the moisture content and crumb structure, potentially leading to a denser or chewier cupcake. If experimenting, start with small adjustments. For the frosting, powdered sugar is essential for achieving the right creamy, pipeable consistency.
Q8: My frosting is too stiff/too runny. How do I fix it?
A8:
- Too Stiff: Add milk (or cream) half a teaspoon at a time, mixing well after each addition, until you reach your desired consistency.
- Too Runny: Add powdered sugar, a tablespoon at a time, mixing well until it thickens.
- Temperature: Ensure your butter is softened but not melted. If your kitchen is very warm, the frosting might get too soft. A quick chill in the fridge (10-15 minutes) can help firm it up.
Q9: How can I encourage my child to try new flavors or ingredients in baking?
A9:
- Start Small: Introduce new ingredients in small amounts alongside familiar ones.
- Involve Them in Choices: Let them pick from a few "new" options. "Do you want to try blueberry or lemon zest in our cupcakes today?"
- Educational Context: Explain the origin of an ingredient or its health benefits. "Carrots give us vitamin A, and they taste surprisingly sweet in cupcakes!"
- Lead by Example: Show your enthusiasm for trying new things.
- No Pressure: Never force them to eat something they don't want. The goal is positive exposure and a fun experience, not a battle.
By addressing these common questions, we hope to empower you and your little chefs to confidently embark on many delicious baking adventures together!


")