Table of Contents
- Introduction
- Why Baking with Kids is a Recipe for Success: Our Edutainment Philosophy
- The Science Behind the Sweetness: Understanding Your Ingredients
- Our Go-To Kid-Friendly Chocolate Chip Cookie Recipe: Simplicity Meets Deliciousness
- Step-by-Step Baking Adventure with Your Little Chefs
- Troubleshooting Common Cookie Conundrums
- Beyond the Basic Bake: Customization and Creativity
- Making it a Full Edutainment Experience: Beyond the Recipe Card
- Storage and Future Baking Fun
- Conclusion
- FAQ: Your Chocolate Chip Cookie Questions Answered
Imagine a world where the simplest ingredients transform into a magical journey of discovery, where flour, sugar, and chocolate chips aren't just food, but tools for learning, creativity, and unforgettable family moments. This isn't just a fantasy; it's the everyday reality we embrace at I'm the Chef Too! We believe that the kitchen is the ultimate laboratory and art studio, a place where children can explore, experiment, and grow while making something truly delicious. Today, we're diving into the heartwarming, flour-dusted realm of the classic chocolate chip cookie – but with an I'm the Chef Too! twist that makes it an engaging, educational adventure for every child.
This blog post is your comprehensive guide to creating the perfect chocolate chip cookie recipe for kids, focusing on simplicity, safety, and maximizing the educational potential of every step. We'll walk you through a delightful, easy-to-follow recipe, uncover the fascinating science behind why cookies turn out soft or chewy, explore ways to customize your creations, and offer practical tips to make baking with your little ones a joyful, screen-free experience. Get ready to stir up more than just batter; you're about to stir up a love for learning, a boost in confidence, and a treasury of happy memories, one chocolate chip cookie at a time.
Introduction
There's a universal comfort in the warm, sweet scent of chocolate chip cookies baking in the oven. For many of us, it conjures images of childhood, family gatherings, and pure, unadulterated joy. But what if that simple act of baking could be so much more? What if it could be a stealthy science lesson, a hands-on math class, an artistic expression, and a powerful bonding experience all rolled into one delicious activity? At I'm the Chef Too!, this is precisely our mission: to blend food, STEM, and the arts into one-of-a-kind "edutainment" experiences. We are passionate about sparking curiosity and creativity in children, fostering deeper family connections, and offering a refreshing, screen-free alternative to learn and play.
We understand that the idea of baking with kids might sound daunting to some – visions of flour explosions and sticky countertops might come to mind. However, we promise you that with the right approach and a sprinkle of patience, it becomes an incredibly rewarding endeavor. This guide will empower you with our tried-and-true chocolate chip cookie recipe, specially designed to be kid-friendly, along with a wealth of insights that transform baking from a chore into a captivating learning adventure. We'll demystify the ingredients, break down the process into manageable, exciting steps for children of all ages, and show you how to turn every whisk and stir into an opportunity for discovery. So, tie on those aprons, gather your enthusiastic junior chefs, and prepare to embark on a delightful culinary journey that yields not just tasty treats, but also invaluable skills and cherished memories.
Why Baking with Kids is a Recipe for Success: Our Edutainment Philosophy
At I'm the Chef Too!, we believe that learning should be as engaging and delicious as possible. Our unique approach is rooted in the philosophy that children learn best through tangible, hands-on experiences. What could be more tangible and hands-on than mixing ingredients, watching them transform, and then getting to taste the delicious outcome? Our chocolate chip cookie recipe for kids is more than just a sweet treat; it's a carefully crafted educational opportunity that aligns perfectly with our core values.
When children step into the kitchen, even for a simple task like making cookies, they are engaging multiple senses and developing a wide array of skills. This isn't about turning every child into a gourmet chef or a Nobel laureate scientist (though who knows what future passions might ignite!). Instead, it's about fostering a love for exploration, building confidence, developing critical thinking, and creating joyful family memories that last a lifetime. Our kits, developed by mothers and educators, are designed to make these complex subjects accessible and fun, and our homemade recipes follow the same thoughtful principles.
Think about it:
- Math in Action: Measuring flour, sugar, and butter isn't just scooping; it's understanding fractions, volume, and even basic arithmetic. "We need half a cup of sugar, and then a quarter cup of brown sugar. How much sugar is that altogether?" These are real-world math problems that become exciting instead of intimidating.
- Science Experiments: Why does baking soda make cookies rise? What happens when butter melts? How does heat change the dough? Each step in cookie-making is a mini-experiment in chemistry and physics. Children observe cause and effect firsthand, making abstract concepts concrete and understandable. For instance, the bubbling reaction in our Erupting Volcano Cakes Kit is a fantastic way to introduce chemical reactions, just like the baking soda in our cookies!
- Language and Literacy: Reading a recipe develops comprehension, sequencing skills, and expands vocabulary. Talking through the steps encourages communication and active listening.
- Fine Motor Skills and Coordination: Stirring, cracking eggs, scooping dough – these actions refine hand-eye coordination and strengthen small muscles.
- Creativity and Art: Deciding on toppings, shaping cookies, or even just arranging chocolate chips into patterns allows for artistic expression. The kitchen becomes a canvas! What colors should we add? How can we make these cookies unique? It's just like the imaginative exploration found in our Galaxy Donut Kit, where creativity knows no bounds.
- Problem-Solving: What if the dough is too sticky? What if we run out of one ingredient? Baking often presents small challenges that encourage children to think critically and find solutions with your guidance.
- Patience and Delayed Gratification: Waiting for dough to chill or cookies to bake teaches valuable lessons in patience and the rewarding feeling of anticipating a delicious outcome.
- Family Bonding: Perhaps most importantly, baking together creates a shared experience, strengthening family ties and creating lasting memories. It’s a dedicated screen-free time to connect, chat, and laugh.
This holistic approach is at the heart of everything we do. Whether you're whipping up a batch of chocolate chip cookies with your child or exploring one of our themed cooking STEM kits, you're nurturing their innate curiosity and providing a rich environment for growth. Ready to transform your kitchen into a hub of learning and laughter? Join The Chef's Club today and receive new adventures delivered right to your door every month, complete with pre-measured ingredients and specialty supplies!
The Science Behind the Sweetness: Understanding Your Ingredients
Before we dive into the step-by-step process of our chocolate chip cookie recipe for kids, let's explore a little "kitchen chemistry." Understanding what each ingredient does not only makes you a more confident baker but also allows you to explain the "why" to your curious little scientists. This is where the magic of STEM truly comes alive in the kitchen!
Butter: The Foundation of Flavor and Texture We start with butter, and its temperature makes a big difference.
- Melted Butter: Our recipe uses melted butter for ease and to achieve a softer, chewier cookie. When butter is melted, it incorporates more easily into the sugar, which helps create that delightful chewy texture. It also allows for a quicker mix, often eliminating the need for a stand mixer and making it a true one-bowl wonder that’s perfect for little hands. If the butter is too hot, it can "cook" the egg prematurely, so we want it just barely melted.
- Softened Butter (Room Temperature): Some recipes call for softened butter, which is "creamed" with sugar. This process incorporates air, leading to a lighter, more cake-like cookie. For a kid-friendly, fuss-free approach, melted butter is our go-to for these cookies.
Sugars: Sweetness and Structure Most great chocolate chip cookies use a combination of two sugars:
- Granulated (White) Sugar: This sugar contributes to crispiness and helps the cookies spread. It also helps with browning through a process called caramelization.
- Brown Sugar (Light or Dark): Brown sugar contains molasses, which adds moisture, a richer flavor, and contributes significantly to the chewy texture. It also helps keep cookies softer for longer. Using a higher ratio of brown sugar to white sugar often results in a chewier cookie. This is a great opportunity to talk about how different ingredients change the final product – a real science experiment!
Eggs: The Binders Eggs are essential binders in cookies.
- Structure: They help hold all the ingredients together, providing structure to the cookie.
- Moisture: Eggs add moisture, contributing to a softer texture.
- Leavening: The egg whites can also contribute a small amount of leavening when whipped, though in our recipe, their primary role is binding and moisturizing.
Vanilla Extract: The Flavor Enhancer Vanilla extract might seem small, but it plays a huge role in enhancing all the other flavors in your cookie, adding a warm, aromatic depth that's instantly recognizable and comforting. It's like the secret ingredient that ties everything together.
Flour: The Main Structure All-purpose flour provides the main structure of our cookies.
- Gluten Development: When mixed with liquid, the proteins in flour form gluten, which gives cookies their chewiness. We want to mix the flour just until combined to avoid over-developing the gluten, which can lead to tough cookies. This is an important tip for young bakers – gentle mixing is key!
- Measuring Flour: This is a crucial step! Too much flour is a common culprit for dry, crumbly cookies that don't spread well. We'll show you the best way to measure flour accurately without a kitchen scale (though using a scale is always the most precise method!).
Baking Soda: The Leavening Agent Here's where the real chemistry lesson comes in!
- The Bubbles: Baking soda (sodium bicarbonate) is a base. When it combines with an acid (like the brown sugar's molasses, or even a little acidity in the chocolate), and heat from the oven, it creates carbon dioxide gas bubbles. These bubbles get trapped in the dough, causing the cookies to rise and become light and airy in the center. Without baking soda, your cookies would be flat and dense. It’s a fascinating chemical reaction right in your mixing bowl! This same principle is behind the amazing fizz in our Erupting Volcano Cakes Kit!
Salt: Flavor Balancer A pinch of salt might seem counterintuitive in a sweet cookie, but it's incredibly important. It balances the sweetness, enhances the chocolate flavor, and generally makes everything taste better. It's a subtle but powerful ingredient!
Chocolate Chips: The Star of the Show And finally, the beloved chocolate chips!
- Variety: You can use semi-sweet, milk, dark, or even white chocolate chips. Each type will melt slightly differently and impart a unique flavor. This is where personal preference and creativity come into play. You can even mix different kinds!
- Melt Factor: The amount of cocoa butter in the chocolate determines how smoothly it melts. Semi-sweet chips are a classic for a reason – they hold their shape just enough but still create pockets of gooey deliciousness.
By understanding these roles, you can turn your baking session into a rich, educational experience. You're not just following a recipe; you're conducting a delicious experiment! If you're looking for more ways to explore science in the kitchen, remember to explore our complete collection of one-time kits for more hands-on learning!
Our Go-To Kid-Friendly Chocolate Chip Cookie Recipe: Simplicity Meets Deliciousness
This recipe is designed to be incredibly approachable for young bakers, minimizing fuss and maximizing fun. We focus on a one-bowl method where possible and ingredients that are easy for little hands to manage. Always remember, adult supervision is key for safety, especially with hot ovens and sharp tools.
Yields: Approximately 2 dozen cookies Prep time: 15 minutes Bake time: 8-10 minutes
Ingredients:
- 1/2 cup (1 stick) unsalted butter, melted and cooled slightly (not hot!)
- 1/2 cup granulated sugar
- 1/4 cup packed light brown sugar
- 1 large egg
- 1 teaspoon vanilla extract
- 1 1/2 cups all-purpose flour (see measuring tip below)
- 1/2 teaspoon baking soda
- 1/4 teaspoon salt (or 1/2 teaspoon kosher salt)
- 1 cup semisweet chocolate chips
Important Measuring Tip for Flour: Flour can pack down in the bag, leading to over-measuring, which results in dry, crumbly cookies. To measure correctly for our chocolate chip cookie recipe for kids:
- Fluff: Use a spoon or fork to lightly fluff up the flour in its container.
- Spoon: Gently spoon the flour into your measuring cup until it's overflowing. Do not pack it down.
- Level: Use the back of a straight knife or a flat edge to level off the excess flour from the top of the measuring cup. This method ensures you get just the right amount!
Step-by-Step Baking Adventure with Your Little Chefs
Get ready for an exciting journey from simple ingredients to scrumptious cookies! Here’s how to make our chocolate chip cookie recipe for kids, broken down into manageable steps for your junior chefs.
Adult Prep (A few quick steps before the kids dive in):
- Preheat Oven: Preheat your oven to 350°F (175°C). This is a great moment to talk about oven safety and why we don't touch hot surfaces.
- Prepare Baking Sheets: Line two large baking sheets with parchment paper or silicone baking mats. This makes cleanup a breeze and helps prevent sticking.
- Melt Butter: Gently melt the butter in a microwave-safe bowl (about 30-45 seconds) or in a small saucepan over low heat. It should be fully melted but not sizzling or browned. Let it cool for a few minutes so it's warm, not hot. This step is usually best done by an adult to avoid burns.
Now, let the Kids Take Over! (with your guidance):
Step 1: The Wet Ingredients Mix-Up (The Foundation)
- Child's Role: In a large mixing bowl, have your child carefully pour the slightly cooled melted butter. Then, let them scoop in the granulated sugar and the packed brown sugar. This is a fantastic opportunity for them to practice precise pouring and scooping.
- Learning Moment: Talk about the different textures of the sugars. Why is brown sugar "packed"? (Because it’s moist!) Have them observe how the melted butter and sugars look.
- Adult Guidance: Help them whisk these together with a sturdy spoon or a whisk until they are well combined and look like a creamy, sandy mixture. This can be a good arm workout!
Step 2: Egg-cellent Addition (Binding the Magic)
- Child's Role: Help your child crack the egg into a separate small bowl first. This is a great trick to catch any shell pieces before they go into the main batter. Then, they can gently pour the egg into the butter-sugar mixture. Next, have them measure and add the vanilla extract.
- Learning Moment: Discuss what the egg does (helps hold everything together, adds moisture). Talk about the wonderful smell of vanilla!
- Adult Guidance: With a whisk or spoon, help your child thoroughly mix the egg and vanilla into the batter until everything is smoothly incorporated.
Step 3: Dry Ingredients Join the Party (Building the Structure)
- Child's Role: Using the proper measuring technique we discussed earlier, have your child measure out the flour, baking soda, and salt. Then, they can add these dry ingredients directly into the wet mixture in the bowl.
- Learning Moment: This is a perfect time to talk about what baking soda does (makes bubbles, helps cookies rise!). You can even have them look at the tiny crystals of salt.
- Adult Guidance: Gently guide your child to mix the dough just until combined. Emphasize that we don't want to overmix! Overmixing can make cookies tough. A wooden spoon or spatula works great here. The dough should come together but might still look a little crumbly in spots – that’s okay.
Step 4: The Chocolate Chip Treasure Hunt (The Best Part!)
- Child's Role: Pour in the chocolate chips! This is often the most anticipated step.
- Learning Moment: Count the chocolate chips as you add them! Discuss different types of chocolate chips and which ones they like best. This is also where creativity can begin – maybe they want to add a few sprinkles too?
- Adult Guidance: Help your child gently fold the chocolate chips into the dough using a spatula or spoon until they are evenly distributed.
Step 5: Scooping and Spacing (Cookie Architecture)
- Child's Role: Using a medium cookie scoop (about 1.5 tablespoons) or two spoons, have your child scoop rounded balls of dough and place them onto the prepared baking sheets.
- Learning Moment: Talk about spacing – "We need to leave enough room for the cookies to spread, like they're giving each other space to grow!" You can even measure the spacing (about 2 inches apart). This is a practical application of geometry and spatial awareness.
- Adult Guidance: Ensure the cookies are evenly spaced to prevent them from baking into one giant cookie blob. This is a great opportunity to demonstrate consistent sizing.
Step 6: Bake and Watch the Magic Happen (The Transformation)
- Adult's Role (Crucial!): Carefully place the baking sheets into the preheated oven. Set a timer for 8 minutes.
- Learning Moment: While waiting, discuss what's happening inside the oven. "The heat is turning our dough into cookies! The butter is melting, the sugar is caramelizing, and the baking soda is making tiny bubbles to make them soft." This is real-time science observation! The waiting time is also an excellent lesson in patience.
- Adult Guidance: Bake for 8-10 minutes. The cookies are ready when the edges are lightly golden and set, but the centers still look a little soft and slightly underdone. This is the secret to soft, chewy cookies! Oven temperatures vary, so keep an eye on them. If your child wants a softer cookie, aim for the shorter baking time. For a crispier edge, let them bake for a minute or two longer.
Step 7: Cool Down and Enjoy! (The Delicious Reward)
- Adult's Role: Carefully remove the hot baking sheets from the oven. Let the cookies cool on the baking sheet for about 5 minutes. They will continue to set during this time.
- Child's Role: After 5 minutes, with adult help, use a spatula to transfer the warm cookies to a wire cooling rack to cool completely.
- Learning Moment: Talk about why cooling is important (to firm up and prevent sticking). The best part, of course, is the tasting!
- Adult Guidance: Enjoy your delicious creations! This is the moment to celebrate your child's hard work and the amazing STEM and art adventure you just shared.
This whole process, from measuring to mixing to tasting, is packed with opportunities for discovery and connection. And if you enjoyed this hands-on activity, imagine the monthly excitement of new themes and culinary challenges delivered right to your door! Join The Chef's Club today for ongoing educational fun with free shipping in the US! Our 3, 6, and 12-month pre-paid plans are perfect for gifting or long-term enrichment, ensuring a complete experience with pre-measured dry ingredients and specialty supplies in every box.
Troubleshooting Common Cookie Conundrums
Even experienced bakers face little challenges sometimes, and that's perfectly okay! In fact, it's another valuable learning opportunity for kids – problem-solving in action. Here are some common cookie questions and how to address them with your junior chef:
My Cookies Are Too Flat!
This is one of the most common complaints, and there are a few usual suspects:
- Butter Temperature: If your butter was too warm or fully melted and then not cooled slightly, it might cause the cookies to spread too much before they can set. Melted butter should make a slightly flatter cookie than softened butter, but not pancake-flat.
- Too Little Flour/Too Much Butter: An incorrect ratio can lead to excessive spreading. Always measure flour carefully (fluff, spoon, level!).
- Oven Temperature: An oven that isn't hot enough can cause cookies to spread excessively before they begin to bake properly. Ensure your oven is preheated to the correct temperature.
-
Warm Dough: If your kitchen is warm or your dough has been sitting out for a while, it might be too soft.
- Solution: Try chilling your dough! Even 15-30 minutes in the refrigerator can make a huge difference in preventing excessive spreading. This is a great scientific observation for kids: "Look how firm the dough is now compared to before we chilled it!"
My Cookies Are Dry and Crumbly!
- Too Much Flour: This is the most likely culprit. Revisit our flour measuring tip (fluff, spoon, level) to ensure accuracy.
- Overmixing the Dough: Once the flour is added, mix only until the ingredients are just combined. Overmixing develops gluten too much, leading to tough, dry cookies. Explain to your child, "We want to be gentle with the dough so our cookies stay soft and chewy!"
- Overbaking: Baking cookies for too long will dry them out. Remember, the edges should be set, but the centers should still look slightly underdone for that perfect soft texture.
My Cookies Are Too Puffy and Don't Spread Enough!
- Too Much Flour: Again, measuring flour accurately is key.
- Too Little Butter/Too Much Leavening: If the ratios are off, you might get a cookie that rises high but doesn't spread out.
- Cold Butter: If you used butter that was too cold and not properly melted or softened (if you used a different recipe calling for softened butter), it won't incorporate properly, leading to less spread.
- Solution: If you want more spread, you can sometimes gently press down on the hot cookies with the back of a spoon immediately after taking them out of the oven, but it's usually best to adjust the recipe or technique for the next batch.
My Chocolate Chips Sunk to the Bottom!
- Solution: This usually happens with a very loose or warm dough. Chilling the dough can help. Also, ensure your chocolate chips are evenly distributed and gently folded in, rather than just stirred, which helps suspend them.
Troubleshooting in the kitchen isn't a failure; it's an opportunity to learn and refine! Each time you bake, you get a little better at understanding the science and art behind it. This is the essence of experimentation, a core tenet of STEM learning that we cherish at I'm the Chef Too!
Beyond the Basic Bake: Customization and Creativity
One of the most exciting aspects of baking with children is the endless opportunity for creativity and personalization. Once you've mastered our basic chocolate chip cookie recipe for kids, the kitchen becomes a canvas for culinary artistry! This is where the "Art" in our STEM & Arts edutainment truly shines.
Mix-In Madness: The humble chocolate chip cookie is a fantastic base for all sorts of delicious additions. This allows your child to experiment with flavors and textures.
- Different Chocolates: Try milk chocolate, dark chocolate, white chocolate, or even a mix! Chocolate chunks or mini chocolate chips can also offer a different melt.
- Candy Fun: M&Ms, chopped up candy bars, or even miniature marshmallows can add a burst of color and sweetness.
- Nutty Goodness: If there are no allergies, chopped walnuts, pecans, or even slivered almonds add a delightful crunch and earthy flavor. (Always check for nut allergies first!)
- Fruity Twists: Dried cranberries, raisins, or chopped dried apricots can introduce a chewy, fruity counterpoint.
- Spice It Up: A pinch of cinnamon or a tiny dash of nutmeg can add warmth and complexity, turning a familiar cookie into something new.
Shaping Sensations: Cookies don't always have to be perfectly round.
- Giant Cookies: Press the dough into a small, greased oven-safe skillet for a "cookie pizza" or a "deep-dish cookie." Bake until golden, then slice and serve warm with ice cream.
- Cookie Cutters: For a fun twist (though this dough can be a bit sticky), roll out slightly chilled dough between two sheets of parchment paper and use cookie cutters to make fun shapes. (You might need to add a tablespoon or two more flour to make it less sticky for rolling).
- Hand-Shaped Animals: Let your child get truly creative by shaping small portions of dough into simple animal figures or other imaginative forms. This is a wonderful tactile activity.
Decorating Delights: Once cooled, cookies become perfect canvases.
- Icing Art: A simple glaze made from powdered sugar and a tiny bit of milk or lemon juice can be tinted with food coloring for vibrant designs. Use a spoon to drizzle, or put the glaze in a small ziploc bag, snip off a corner, and let your child "pipe" designs.
- Sprinkle Explosion: A variety of sprinkles can transform a plain cookie into a festive masterpiece.
- Edible Glitter: For a truly magical touch, edible glitter can make cookies sparkle!
- Chocolate Drizzle: Melt a small amount of chocolate and let your child drizzle it over the cooled cookies for an extra chocolatey flourish.
Themed Baking: Tie your cookies into a theme!
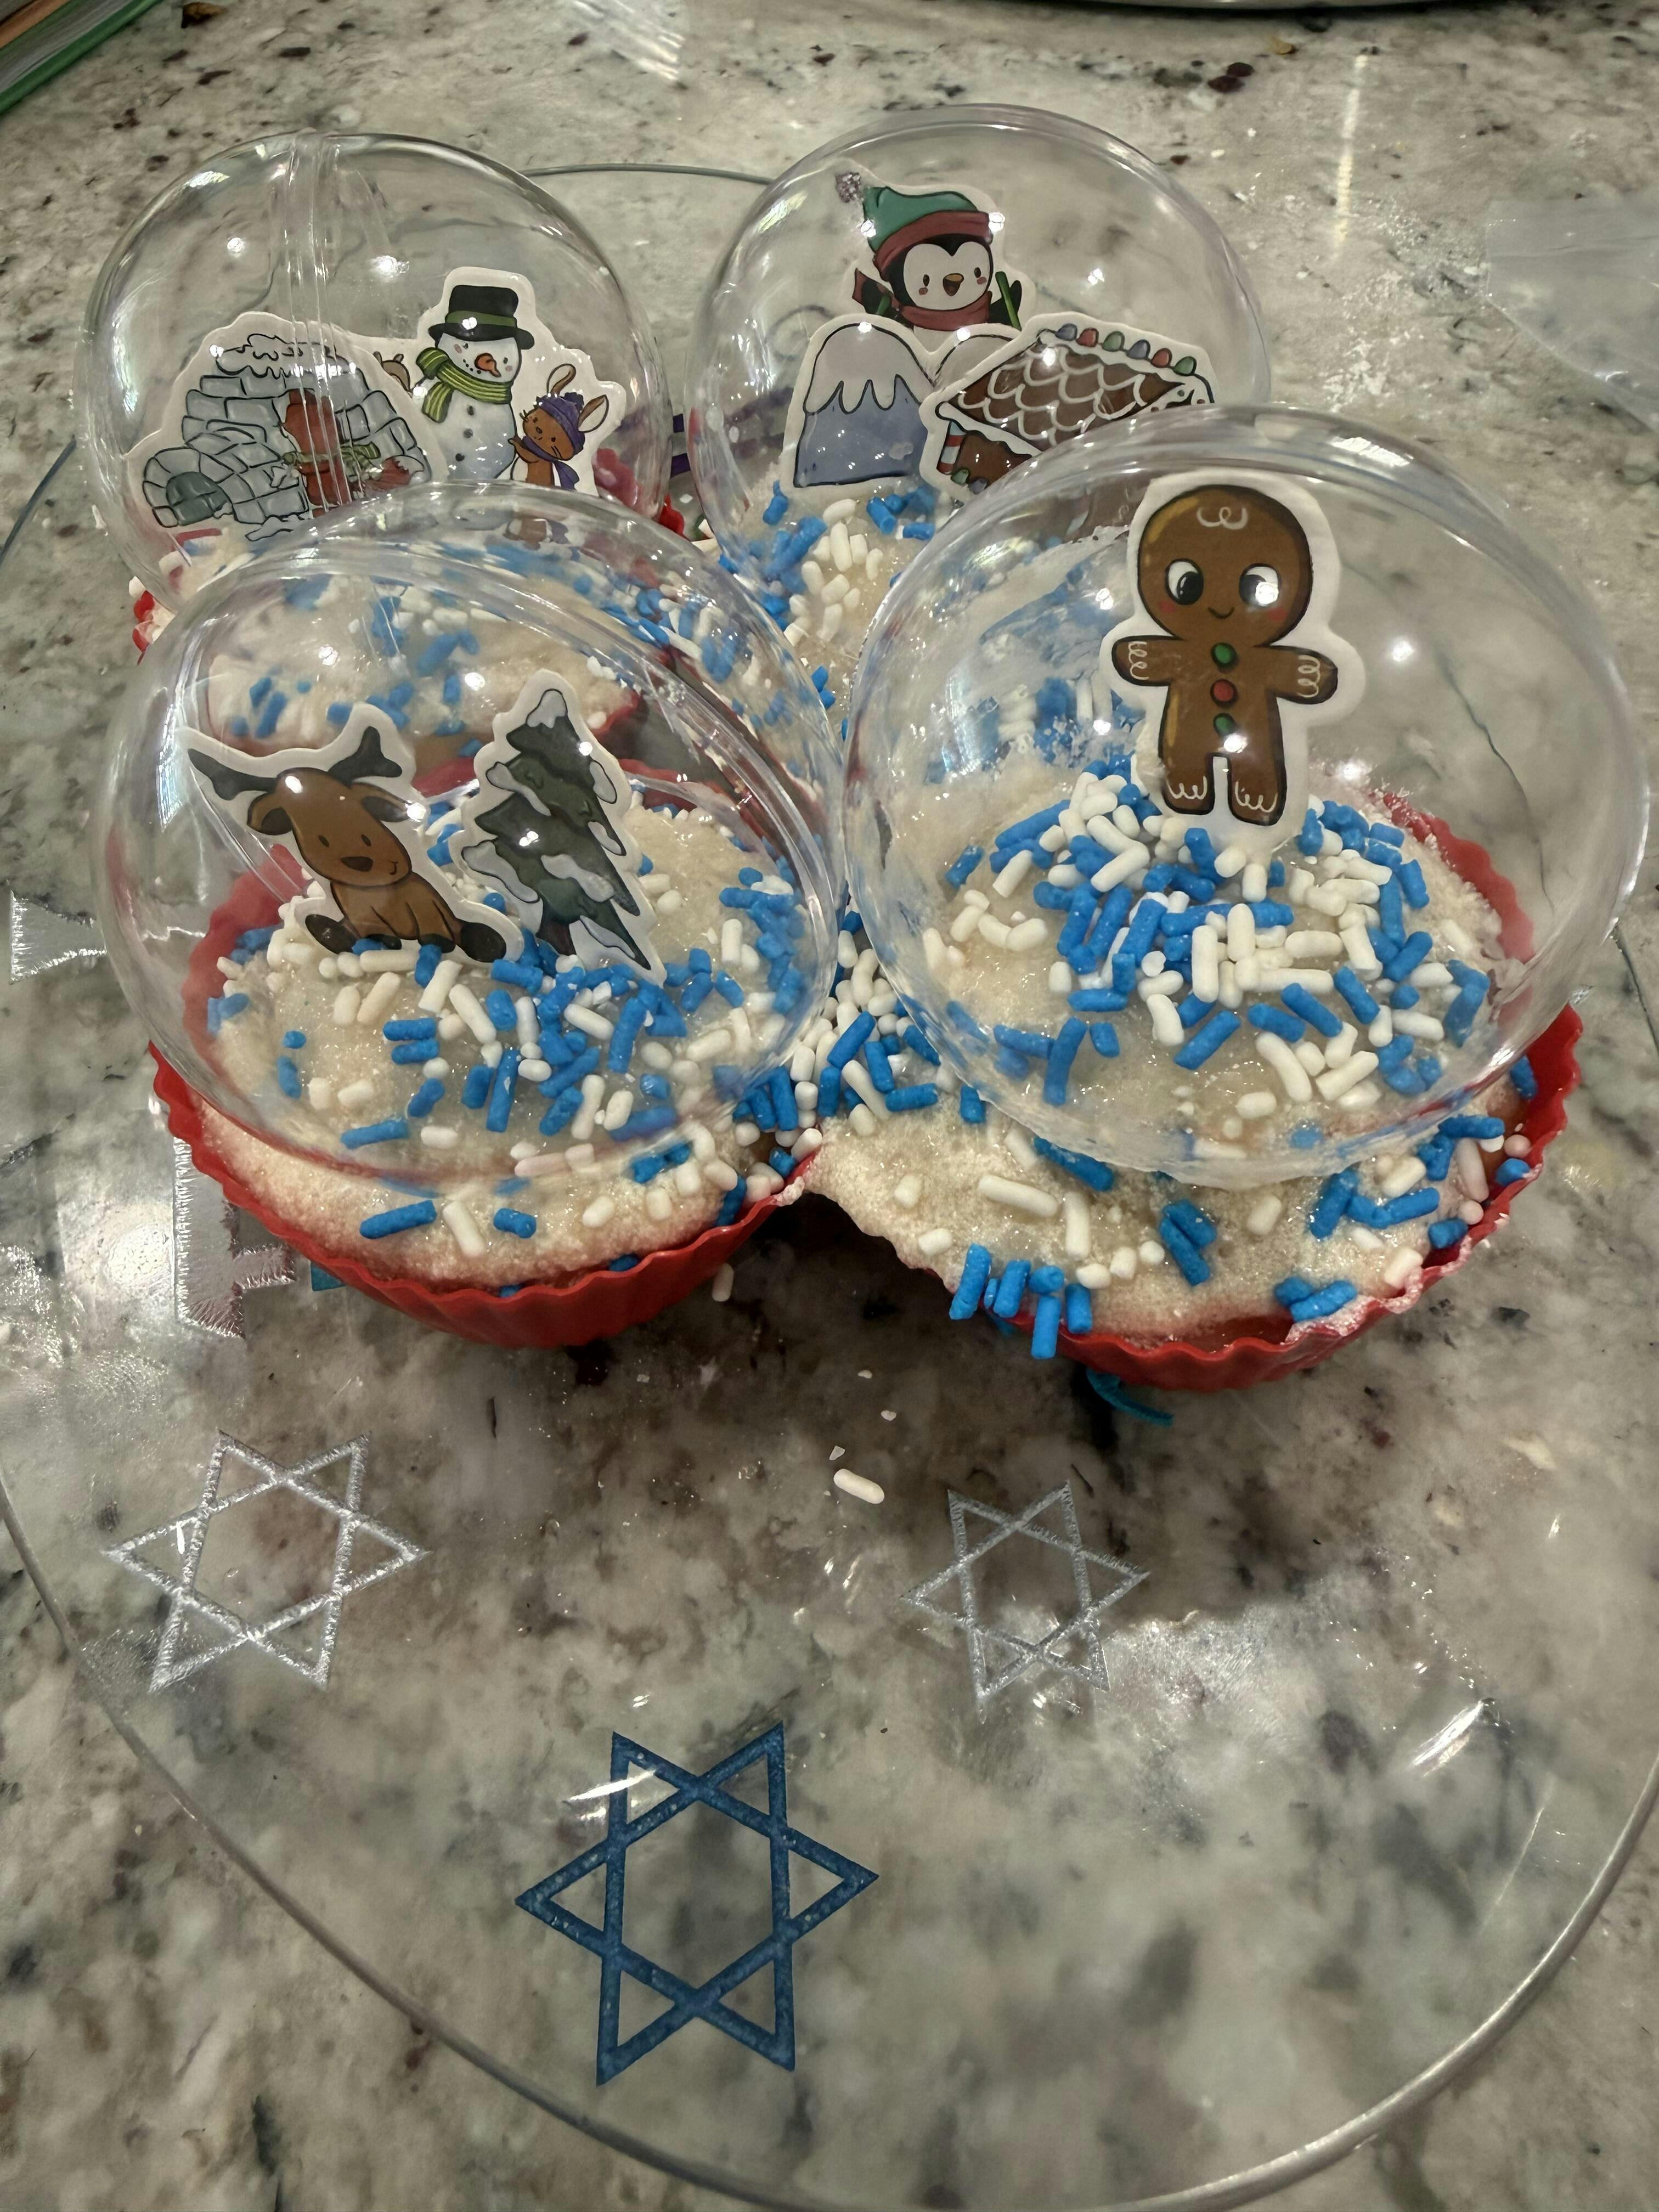
- Holiday Cookies: Red and green M&Ms for Christmas, pastel sprinkles for Easter, or orange and black chocolate chips for Halloween.
- Storybook Cookies: If your child loves a particular book, can you make cookies that relate to it? For example, making "muddy puddle" cookies for a Peppa Pig fan, just like our delightful Peppa Pig Muddy Puddle Cookie Pies kit!
- Science Cookies: Imagine making cookies that look like planets with different colored icings, much like the celestial creativity you can explore with our Galaxy Donut Kit.
Encouraging these creative explorations not only makes baking more enjoyable but also helps children develop their imagination, fine motor skills, and an understanding that food can be both delicious and a form of art. It’s all about empowering them to take ownership of their creations.
Making it a Full Edutainment Experience: Beyond the Recipe Card
At I'm the Chef Too!, we're not just about following recipes; we're about creating an environment where learning naturally unfolds. Baking a chocolate chip cookie recipe for kids is a fantastic starting point, but you can extend the "edutainment" long before and after the oven timer dings.
Before You Bake:
- Menu Planning & Shopping List (Math & Responsibility): Involve your child in reviewing the recipe and making a shopping list. This teaches them about ingredients, quantities, and organization. "Do we have enough butter? How many eggs do we need to buy?" This is practical math and helps them feel responsible for the project.
- Ingredient Exploration (Science & Sensory): Before you even start mixing, let your child explore the ingredients. Feel the texture of flour, smell the vanilla, taste a chocolate chip. Discuss where ingredients come from (e.g., milk for butter, cocoa beans for chocolate).
- Safety First (Life Skills): Review kitchen safety rules together: washing hands, asking for help with hot items or sharp tools, cleaning up spills. Make a catchy little song or rhyme about safety!
- Story Time (Literacy & Imagination): Read a storybook about baking or cookies. This can set a fun, imaginative tone for your activity.
During Baking:
- Narrate the Process (Language & Comprehension): As you go through each step, describe what you're doing and why. "First, we add the butter, which is melted to make our cookies soft. Next, the sugar, which makes them sweet and helps them turn golden."
- Ask Open-Ended Questions (Critical Thinking): "What do you think will happen when we add the baking soda?" "Why do you think we need to stir gently?" "How do you think these ingredients will change when they bake?"
- Sensory Engagement (Mindfulness): Encourage your child to describe what they see, smell, and feel at each stage. "What does the dough feel like?" "What does it smell like when the cookies are baking?"
- Clean-Up Crew (Responsibility & Teamwork): Make clean-up part of the activity. Assign age-appropriate tasks like wiping surfaces, putting away ingredients, or stacking dishes. Make it a game!
After Baking:
- Observation & Reflection (Scientific Method): Once the cookies are cooled, talk about the results. "Are they soft or crispy? Why do you think they turned out that way?" You can even compare them to other cookies you've made or store-bought ones. This fosters analytical thinking.
- Sharing & Gifting (Social-Emotional Learning): Encourage your child to share their delicious creations with family, friends, or neighbors. This teaches generosity and the joy of giving. Packaging them nicely is another artistic opportunity.
- Journaling/Drawing (Literacy & Art): For older kids, they could write down the steps of the recipe in their own words or draw pictures of the baking process. Even younger children can draw their favorite part of making cookies.
- Repeat & Refine: The beauty of hands-on learning is that it's iterative. Each time you bake, you can try something new, fix a previous "problem," or simply enjoy the process again.
By extending the learning beyond just the recipe itself, you're not just baking cookies; you're cultivating a curious mind, developing essential life skills, and strengthening the beautiful bond you share with your child. This holistic, engaging approach is at the core of every experience we create at I'm the Chef Too! If this sounds like the kind of enriching adventure your family would love, don't wait! Join The Chef's Club today for a new culinary and educational journey delivered right to your home each month.
Storage and Future Baking Fun
Congratulations, you've baked a batch of delicious cookies and created wonderful memories! Now, let's talk about how to keep those cookies fresh and how to prepare for future baking adventures.
Storing Your Baked Cookies
Chocolate chip cookies are best enjoyed fresh, but they can be stored to maintain their deliciousness for a few days.
- Room Temperature: Once completely cooled, store your cookies in an airtight container at room temperature. A piece of bread placed in the container with the cookies can help keep them soft by providing extra moisture. They are generally best eaten within 3-5 days.
- Freezing Baked Cookies: If you have more cookies than you can eat (a rare occurrence!), you can freeze them. Place the cooled cookies in a single layer on a baking sheet and flash freeze for about 30 minutes until solid. Then, transfer them to a freezer-safe bag or airtight container, separating layers with parchment paper. They can be frozen for up to 1 month. To enjoy, simply let them thaw at room temperature or warm them gently in the microwave or oven.
Freezing Cookie Dough for Future Fun
This is a fantastic hack for busy families and perfect for spontaneous baking!
- Scoop and Freeze: Scoop the cookie dough into individual balls (as if you were going to bake them) and place them on a parchment-lined baking sheet. Flash freeze for about 1-2 hours until the dough balls are firm.
- Store: Transfer the frozen dough balls to a freezer-safe bag or airtight container. Label with the date. They can be stored in the freezer for up to 1 month.
- Bake from Frozen: When a cookie craving strikes, simply place the frozen dough balls on a prepared baking sheet and bake them straight from the freezer. You might need to add 2-4 minutes to the baking time. This instant gratification is a huge win for kids (and adults!). It's like having a ready-made I'm the Chef Too! adventure at your fingertips, anytime!
Having frozen cookie dough on hand is a perfect way to ensure you're always ready for a quick baking session, a last-minute playdate treat, or a delightful after-school activity. It emphasizes forward planning and resourcefulness – more great life skills learned in the kitchen!
Conclusion
Baking, at its heart, is a labor of love – a fusion of simple ingredients, careful steps, and the warmth of shared experience. When we invite our children into the kitchen to make something as universally beloved as chocolate chip cookies, we're not just teaching them how to follow a recipe. We're opening up a world of "edutainment" where math, science, art, and invaluable life skills are learned through the most delicious, hands-on adventures.
From understanding the scientific roles of butter and baking soda, to practicing precise measurements and developing fine motor skills, every whisk, stir, and scoop contributes to their growth and confidence. More importantly, it carves out precious, screen-free moments for family bonding, creating memories that will be cherished long after the last cookie crumb is gone. This chocolate chip cookie recipe for kids is more than just a sweet treat; it's a testament to the power of learning through doing, a philosophy deeply embedded in the heart of I'm the Chef Too!.
We are committed to providing these unique experiences, designed by mothers and educators, to spark curiosity and creativity in every child. We hope this comprehensive guide inspires you to embrace the joy and educational potential of your kitchen. Remember, the journey of discovery is just as rewarding as the delicious destination.
Ready to embark on countless more culinary and educational adventures without the hassle of gathering ingredients? Make learning a delightful, ongoing tradition in your home. Join The Chef's Club today! A new, exciting STEM cooking kit, complete with pre-measured dry ingredients and specialty supplies, will arrive at your doorstep every month with free shipping in the US, bringing fresh inspiration and endless opportunities for family fun and learning. Discover the magic of edutainment, one delicious creation at a time! Or, if you're looking for a specific adventure to try next, browse our complete collection of one-time kits to find the perfect theme for your curious chef.
FAQ: Your Chocolate Chip Cookie Questions Answered
We know that baking with kids can sometimes lead to questions, so we've gathered some of the most common ones to help you feel confident in the kitchen!
Q1: What's the best type of chocolate chips to use for kids' cookies? A1: Semi-sweet chocolate chips are a classic for a reason – they offer a perfect balance of sweetness and rich chocolate flavor that most kids love. However, feel free to experiment with milk chocolate chips for a sweeter cookie, or even dark chocolate chips for a more intense flavor (if your kids enjoy it!). Mini chocolate chips are also great as they distribute more evenly in smaller cookies and ensure chocolate in every bite.
Q2: Can I make these cookies gluten-free? A2: While we haven't tested this specific recipe with gluten-free flours, many of our community members have had success substituting all-purpose flour with a measure-for-measure gluten-free flour blend. If you try this, look for a blend that specifically states it can be used as a 1:1 replacement for regular flour in baking. Results may vary slightly in texture and spread.
Q3: My child wants to use a mixer. Is that okay? A3: Absolutely! While our recipe is designed to be easily mixed by hand, using a stand mixer or hand-held electric mixer can be a fun experience for kids, especially with adult supervision. Just be extra mindful once you add the flour: mix only until the ingredients are just combined to avoid overmixing, which can lead to tough cookies. Let your child help push the buttons or hold the mixer with your hand guiding them.
Q4: How do I get my cookies to be extra soft and chewy? A4: For extra soft and chewy cookies, there are a few key tricks:
- Brown Sugar Ratio: Ensure you're using a good amount of brown sugar, as its molasses content adds moisture and chewiness.
- Don't Overbake: This is crucial! Remove cookies from the oven when the edges are set and lightly golden, but the centers still look soft and slightly underdone. They will continue to set as they cool.
- Melted Butter: Our recipe uses melted butter, which naturally contributes to a chewier texture.
- Chilling the Dough: Even a short chill (15-30 minutes) can help the flavors meld and prevent too much spreading, resulting in a slightly thicker, chewier cookie.
Q5: Can I add other mix-ins besides chocolate chips? A5: Yes, absolutely! This is where creativity can really shine. Consider adding chopped nuts (if no allergies), dried fruits like cranberries or raisins, M&Ms, sprinkles, or even a mix of different types of chocolate chips. Just ensure your total mix-in quantity doesn't exceed 1.5 cups to maintain the dough's structure. This is a wonderful way to let your child personalize their batch.
Q6: What if my dough is too sticky to scoop? A6: If your dough feels too sticky, it might be a bit too warm. Place the bowl of dough in the refrigerator for 15-30 minutes to chill. This will firm it up, making it much easier to scoop. If it's still too sticky, you might have slightly under-measured your flour, or your butter was too hot. A very small sprinkle (1-2 tablespoons) of extra flour can sometimes help, but be careful not to add too much.
Q7: How can I make baking more educational for my preschooler vs. my elementary-aged child? A7: The beauty of baking is its adaptability!
- For Preschoolers: Focus on sensory experiences (touching dough, smelling vanilla), simple counting ("How many scoops?"), pouring pre-measured ingredients, and mashing. Emphasize hand-washing and safety. Let them stir (with your help) and add chocolate chips.
- For Elementary-Aged Children: Introduce basic fractions in measuring, discuss the science of ingredients (what does baking soda do?), read the recipe instructions together, assign more independent tasks like cracking eggs (into a separate bowl first!), and encourage creative decorating. They can also help with clean-up.
Every age group can find joy and learning in the kitchen!


")