Thanksgiving Table Crafts for Kids: Creative Ideas for a Festive Feast

Table of Contents
- Why Crafts are Essential for a Memorable Kids' Thanksgiving Table
- Getting Started: Planning Your Thanksgiving Crafting Adventure
- The Heart of the Table: Engaging Centerpiece Crafts
- Place Setting Perfection: Crafts for Each Little Guest
- Beyond the Table: Functional & Fun Decor Crafts
- Educational Opportunities in Thanksgiving Crafts (STEM & Arts)
- Tips for Success & Keeping the Joy in Crafting
- Conclusion
- FAQ
Thanksgiving. Just the word conjures images of bustling kitchens, the aroma of roasting turkey and pumpkin pie, and the delightful chatter of family and friends gathered around a bountiful table. But for many parents, it also brings a familiar challenge: how to keep little ones engaged and happy during the long stretches of adult conversation and meal preparation. We’ve all been there – the excited energy of children quickly turns to restless wiggles, leading to cries of "I'm bored!" or "Can I watch TV?"
What if we told you there’s a magical solution that not only keeps tiny hands busy but also adds a heartfelt touch to your holiday celebration, fosters gratitude, and subtly weaves in incredible learning opportunities? Welcome to the wonderful world of Thanksgiving table crafts for kids! This season, let's transform the children's table, or even the main dining table, into a hub of creativity and connection. In this comprehensive guide, we'll explore a wealth of engaging, educational, and fun craft ideas designed to make your Thanksgiving feast truly memorable. From charming centerpieces to personalized placemats, we’ll show you how to blend fun and learning, ensuring your holiday is filled with laughter, unique decorations, and cherished family moments.
At I'm the Chef Too!, our mission is to blend food, STEM, and the arts into one-of-a-kind "edutainment" experiences. We believe that learning should be tangible, hands-on, and, most importantly, delicious! Through our unique approach, developed by mothers and educators, we're committed to sparking curiosity and creativity in children, facilitating family bonding, and providing a fantastic screen-free educational alternative. Thanksgiving crafts are a perfect embodiment of this philosophy, allowing children to explore, create, and learn while celebrating the spirit of gratitude. By integrating crafts into your Thanksgiving celebration, you can create meaningful memories, encourage learning through play, and make the children's table a truly special place, reflecting the warmth and joy of your family.
Why Crafts are Essential for a Memorable Kids' Thanksgiving Table
Thanksgiving is a time for togetherness, reflection, and feasting. While adults might relish the lengthy conversations and multi-course meals, children often have a shorter attention span. This is where engaging crafts come in as a true holiday hero. They offer so much more than just a distraction; they provide a rich, multi-faceted experience that enriches the holiday for everyone.
Keeping Little Hands Busy and Minds Engaged: The anticipation of a big meal can be overwhelming for kids. Providing them with a creative outlet right at the table helps channel their energy constructively. Instead of fidgeting or asking for screens, they'll be absorbed in a project, allowing adults to enjoy their meal and conversation. This is especially true when you have multiple age groups gathered, from toddlers needing simple activities to older kids who thrive on more complex projects.
Fostering Gratitude and Reflection: The true spirit of Thanksgiving is about giving thanks. Many crafts, like a "Gratitude Tree," directly encourage children to think about what they're thankful for. This simple act of reflection can be incredibly powerful, shifting the focus from holiday excitement to heartfelt appreciation. It’s a gentle, hands-on way to instill important values and traditions.
Developing Fine Motor Skills, Hand-Eye Coordination, and Creativity: Crafting isn't just fun; it's a powerful developmental tool. Cutting, gluing, coloring, painting, and assembling all contribute to the development of fine motor skills and hand-eye coordination. More importantly, it sparks creativity and imagination. Children get to express themselves, make choices about colors, shapes, and designs, and see their unique vision come to life. This kind of open-ended play is invaluable for cognitive growth.
Personalizing the Holiday Decor: What could be more charming than a Thanksgiving table adorned with decorations made by the little hands you love? Kid-made crafts add a unique, personal, and heartwarming touch to your holiday decor. These aren't just crafts; they're conversation starters, expressions of love, and proof of the creativity blooming within your family. From a turkey centerpiece created by a preschooler to personalized napkin rings designed by a school-aged child, every piece tells a story.
Creating Lasting Family Memories: The time spent crafting together, sharing ideas, and laughing over quirky creations becomes part of the cherished tapestry of family memories. These aren't just activities to pass the time; they are moments of connection, collaboration, and shared joy that children will remember long after the last piece of pie is eaten.
A Screen-Free Educational Alternative: In an increasingly digital world, finding meaningful screen-free activities is more important than ever. Thanksgiving crafts offer a refreshing break, encouraging kids to engage with tangible materials, use their imaginations, and interact with their environment and each other. At I'm the Chef Too!, we champion this screen-free approach, providing engaging, hands-on experiences that captivate children's attention without needing a single pixel. We believe in the magic of making, whether it’s crafting a turkey centerpiece or baking a delicious, scientifically inspired treat.
Getting Started: Planning Your Thanksgiving Crafting Adventure
A little preparation goes a long way in ensuring your Thanksgiving crafting session is a joyful success rather than a chaotic mess. Think of it like planning a delicious meal – the right ingredients and a clear recipe make all the difference!
Age-Appropriate Choices: Tailoring Crafts for Every Child One of the keys to successful holiday crafting is to consider the ages and abilities of the children involved. What captivates a toddler might frustrate a pre-teen, and vice-versa.
- Toddlers (1-3 years old): Focus on simple, sensory activities. Think large crayons for coloring pre-printed placemats, stickers, or simple gluing tasks with big pieces. Handprint art is always a hit! Ensure all materials are non-toxic and too large to be a choking hazard.
- Preschoolers (3-5 years old): They love cutting (with safety scissors!), gluing, and decorating. Projects like pinecone turkeys, leaf stamping, or decorating paper plate pilgrim hats are perfect. They can follow a few simple steps and enjoy the process of making.
- School-Aged Kids (6-9 years old): These children are ready for more detailed projects. They can write what they’re thankful for on gratitude tree leaves, design their own placemats, or contribute to a collaborative centerpiece. They enjoy a sense of accomplishment and can often work more independently.
- Pre-Teens and Tweens (10+ years old): Challenge them with crafts that involve more intricate design, pattern creation, or even functional elements. They might enjoy personalized napkin rings, more detailed painting projects, or even helping younger siblings with their crafts. You can even bring in elements of baking and cooking for more engaging "edutainment." This is where our unique blend of STEM and culinary arts truly shines, showing kids the science behind baking delicious treats. Ready for a new adventure every month? Join The Chef's Club and enjoy free shipping on every box.
Safety First: Essential Precautions for Happy Crafting Adult supervision is paramount for any crafting activity, especially when little ones are involved.
- Non-Toxic Materials: Always opt for non-toxic paints, glues, and markers.
- Child-Safe Tools: Provide safety scissors appropriate for their age. If using hot glue guns for older kids or adults, ensure strict supervision.
- Clear the Area: Remove any sharp objects, breakable items, or potential hazards from the crafting zone.
Material Prep: Gathering Your Supplies Before the holiday rush begins, take a moment to gather your materials. A well-stocked craft station makes the activity much smoother.
- Basics: Construction paper in fall colors, plain white paper (large sheets for placemats), crayons, washable markers, non-toxic glue sticks and liquid glue, child-safe scissors, pipe cleaners, googly eyes, cotton balls, glitter (optional, and usually messy!), tape.
- Natural Elements: Take a nature walk with your kids to collect pinecones, fallen leaves, small branches, and acorns. This adds an extra layer of fun and connects them to the outdoors.
- Repurposed Items: Think beyond new purchases. Empty paper towel rolls, paper plates, brown paper bags, old magazines for collages, fabric scraps, or even empty spice jars for crayon holders can all be repurposed.
- Specific Kit Additions: If you're looking for an all-in-one solution that delivers excitement and education, remember that our one-time kits come with most of what you need for a unique cooking and crafting adventure! Browse our complete collection of one-time kits for a variety of themes, some of which can inspire your holiday crafts.
Setting Up the Craft Zone: Protecting Surfaces and Ensuring Easy Access A designated craft area makes cleanup much easier.
- Table Protection: Cover your table with a disposable tablecloth, old newspaper, or a large sheet of kraft paper. This creates an easy-to-clean surface and can even become part of the craft itself if you let kids doodle on it!
- Organized Supplies: Place materials in easily accessible containers or trays. Small baskets for crayons, bowls for glue, and separate piles for different paper colors keep things tidy and prevent arguments over who gets the red marker.
- Washable Wipes/Paper Towels: Keep them handy for quick cleanups.
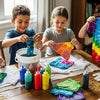
The Heart of the Table: Engaging Centerpiece Crafts
The centerpiece is the focal point of any Thanksgiving table, and when made by kids, it becomes a beacon of heartfelt joy. These crafts aren't just decorations; they're conversation starters and reminders of the true meaning of the holiday.
The Gratitude Tree: A Meaningful Family Tradition
The Gratitude Tree is a classic for a reason – it beautifully encapsulates the spirit of Thanksgiving. It's a wonderful way to pause amidst the feasting and remember all the blessings in your life.
- Concept: A centerpiece where each "leaf" or "fruit" represents something a family member is thankful for.
-
Materials:
- Small tree branches (collected from a nature walk, or sturdy twigs).
- A stable vase or a small pumpkin (scooped out) to hold the branches.
- Floral foam or small stones for stability inside the vase/pumpkin.
- Construction paper in fall colors (red, orange, yellow, brown, gold) for leaves.
- Markers, crayons, or colored pencils.
- Hole punch.
- Baker's twine, ribbon, or small craft clothespins.
- Optional: Decorative fall leaves, mini pumpkins, pinecones for the base.
-
How-to:
- Secure your branches in the vase with floral foam or stones.
- Cut out leaf shapes (or other shapes like apples or pumpkins) from the construction paper. Provide a template or let kids freehand.
- Distribute the paper leaves and writing tools to each family member.
- Ask everyone, kids and adults alike, to write down one or more things they are thankful for on a leaf. Encourage detailed answers ("I'm thankful for my dog, Sparky," rather than just "my dog").
- Once written, punch a hole in each leaf and tie it onto the branches with twine or attach with small clothespins.
-
Variations:
- Edible Gratitude Tree: Instead of paper leaves, bake small leaf-shaped cookies (sugar cookies work well) that can be written on with edible markers, or simply attached and eaten later.
- Seed of Thanks: Use actual fall leaves collected from outside. Kids can write on them with metallic markers, or you can attach small tags to them.
- Photo Gratitude Tree: Print small photos of people, pets, or experiences family members are thankful for, and hang those on the branches.
- I'm the Chef Too! connection: This activity fosters reflection and creativity, much like how our Chef's Club subscription sparks curiosity and learning through hands-on cooking adventures every month. We love seeing families connect over meaningful activities!
Pinecone Turkeys with a Twist: Nature's Little Fowl Friends
Bringing elements of nature indoors is a wonderful way to decorate for Thanksgiving. Pinecone turkeys are a timeless craft that combines outdoor exploration with artistic expression.
- Concept: Transform ordinary pinecones into charming turkey figures.
-
Materials:
- Pinecones (gathered from outside or store-bought).
- Colored construction paper or felt in fall colors for feathers (red, orange, yellow, brown, purple).
- Googly eyes (various sizes).
- Orange and red construction paper or felt for beaks and wattles.
- Craft glue or hot glue (adult supervision for hot glue).
- Scissors.
- Optional: Glitter, small craft hats, pipe cleaners for legs.
-
How-to:
- If using natural pinecones, ensure they are clean and dry.
- Cut out various sizes and shapes of "feathers" from colored paper or felt. Encourage kids to make unique patterns.
- Glue the feathers to the wide, flat end of the pinecone, layering them to create a full tail.
- Cut out small orange triangles for beaks and red teardrop shapes for wattles.
- Glue the beak, wattle, and googly eyes onto the narrower, front end of the pinecone to create the turkey's face.
-
Variations:
- Glitter Turkeys: Add a sprinkle of glitter to the feathers before the glue dries for extra sparkle.
- Pipe Cleaner Legs: Bend brown pipe cleaners into "M" shapes for turkey legs and glue them to the bottom of the pinecone.
- "Turkey Bowlers": Once the turkeys are dry, set them up on a flat surface and use a small ball to knock them over for a fun pre-dinner game! This adds an engineering element of design and stability.
- I'm the Chef Too! connection: This craft is a perfect example of blending art and nature, engaging children in creative design. Much like designing a unique turkey, our kits challenge kids to think creatively and build something wonderful, like exploring astronomy by creating your own edible solar system with our Galaxy Donut Kit, where they can design their own planetary creations.
Painted Gourd or Mini Pumpkin Displays: A Burst of Color
Simple, vibrant, and incredibly fun, painting gourds or mini pumpkins allows kids to express their artistic flair and add a playful touch to the Thanksgiving table.
- Concept: Decorate plastic or real gourds/mini pumpkins with colorful paints.
-
Materials:
- Mini pumpkins or gourds (plastic or real). If using real, ensure they are clean and dry. White plastic pumpkins are great for vibrant colors.
- Acrylic craft paints in various fall hues, metallics, or bright, playful colors.
- Paintbrushes (various sizes).
- Painter's tape or masking tape (optional, for stripes/patterns).
- Newspaper or a plastic tablecloth to protect the work surface.
-
How-to:
- Cover the work surface with newspaper.
- If desired, use painter's tape to create geometric patterns, stripes, or block sections on the pumpkins/gourds. Cover the stem with tape if you want to keep it natural.
- Let kids go wild with paint! Encourage different designs – polka dots, swirls, stripes, solid colors, or even abstract art.
- Allow the pumpkins to dry completely (this may take several hours, or even overnight, depending on paint thickness). Remove painter's tape if used.
- Arrange the painted pumpkins as a colorful centerpiece down the middle of the table.
-
Variations:
- Chalkboard Pumpkins: Use chalkboard paint as a base, then let kids draw or write thankful messages with chalk that can be easily erased and redrawn.
- Glitter Gourds: Apply a layer of glue and sprinkle with glitter for a dazzling effect.
- Pattern Play: Use sponges cut into shapes (stars, leaves) or cotton swabs for dot painting.
Place Setting Perfection: Crafts for Each Little Guest
Beyond the centerpiece, individual place setting crafts make each child feel cherished and provide instant engagement as they sit down. These personalized touches can be cherished mementos of the day.
Personalized Placemats: A Canvas for Creativity
A blank canvas waiting for imagination, personalized placemats are a fantastic way to keep kids busy from the moment they sit down.
- Concept: Large paper placemats that children can color, draw on, and customize.
-
Materials:
- Large sheets of kraft paper or white butcher paper (can be cut from a roll).
- Crayons, washable markers, colored pencils.
- Optional: Stickers, fall-themed stamps, pre-printed templates (e.g., a turkey outline to decorate, "I am thankful for..." prompts).
-
How-to:
- Cut large placemat-sized rectangles from the paper.
- Place one at each child's setting.
- Provide a basket of drawing tools.
- Encourage free drawing, or provide prompts like: "Draw your favorite Thanksgiving food," "Design a turkey," "What are you thankful for?"
- You can even pre-draw a simple maze, a tic-tac-toe grid, or a "decorate the turkey" outline for them to fill in.
- I'm the Chef Too! connection: This activity encourages self-expression and ownership, much like how our kits empower kids to create their own edible masterpieces. Want to bring even more hands-on fun to your kitchen? Browse our complete collection of one-time kits for a variety of themes that inspire creativity and independent learning.
DIY Turkey Handprint Art Napkins or Cards: Sentimental Keepsakes
This classic craft never goes out of style because it captures a fleeting moment in time – the size of a child's hand. It’s a wonderful, sentimental keepsake for family members.
- Concept: Turn a child's handprint into a turkey, suitable for paper cards or fabric napkins.
-
Materials:
- For cards: Construction paper (fall colors), non-toxic paint (brown, red, orange, yellow), googly eyes, markers, glue.
- For napkins: Plain fabric napkins (washed and ironed), non-toxic fabric paint, small paintbrushes, googly eyes (optional, can be glued on post-wash or drawn).
-
How-to (Paper Cards):
- Help your child paint their palm and fingers brown.
- Press their hand firmly onto a piece of construction paper.
- Once dry, use different colored paints or markers to add "feathers" to each finger (the turkey's tail).
- Add a googly eye, an orange triangle for a beak, and a red wattle. Write the child's name and the date.
-
How-to (Fabric Napkins):
- Place a piece of cardboard inside the napkin to prevent paint bleeding.
- Carefully apply brown fabric paint to the child's hand (or use a sponge to dab the paint on).
- Press the hand firmly onto the center of the napkin.
- Once dry, use fabric markers or paint to add details like feathers, eyes, beak, and wattle. Follow fabric paint instructions for heat setting if needed.
-
Variations:
- Family Handprint Platter: Use oven-safe paint markers on a ceramic plate to create a family of handprint turkeys, then bake according to instructions for a permanent keepsake.
- Footprint Turkeys: For babies, footprint turkeys can be adorable too!
Feather Napkin Rings and Silverware Holders: Elegant & Organized
These crafts add a touch of sophistication while keeping the children's table neat and tidy.
- Concept (Feather Napkin Rings): Create decorative rings to hold napkins, often with a feather motif.
-
Materials:
- Air-dry clay or cardboard.
- Feather cookie cutter (if using clay).
- Rolling pin (for clay).
- Small cup or toilet paper roll cardboard for forming rings.
- Acrylic craft paint and brushes.
- String or ribbon.
- Optional: Real craft feathers.
-
How-to (Clay Feathers):
- Roll out air-dry clay to about 1/4-inch thick.
- Use a feather cookie cutter to cut out feather shapes.
- Carefully wrap the base of each feather around a small cup or toilet paper roll to create a curved shape. Gently remove and allow to dry completely (may take 24-48 hours).
- Once dry, paint the feathers in fall colors.
- Tie a string or ribbon through a small hole (made with a straw before drying) at the top of each feather, then tie around napkins.
- Concept (Silverware Bags/Pouches): Decorative bags to hold silverware, making place settings feel special.
-
Materials:
- Brown paper lunch sacks or small decorative paper bags.
- Fallen leaves (real or paper cutouts).
- Thin colored paper (origami paper works well).
- Crayons (for rubbings).
- Glue dots or craft glue.
- Scissors.
- Optional: Washi tape.
-
How-to (Leaf Rubbing Silverware Bags):
- Have kids collect leaves with interesting textures.
- Place thin colored paper over a leaf and rub the side of a crayon over it to create a leaf imprint. Repeat with different leaves and colors.
- Cut out the leaf rubbings.
- For each lunch bag, cut a slit a third of the way down on each side of the front of the bag; fold the resulting flap down inside the bag to create a shorter front. (You can also fold the sides in and secure with washi tape to make the bag narrower.)
- Adhere a few leaf rubbings to each bag with glue dots and tuck silverware inside.
-
Variations:
- Edible Napkin Rings: Braid breadsticks or soft pretzels into rings and bake. Kids can decorate them with herbs or cheese.
Beyond the Table: Functional & Fun Decor Crafts
Thanksgiving crafts don't have to be confined to the immediate table setting. Expand the festive spirit with decorative items that can be displayed throughout your home or used as functional art.
Leaf Stamping Tablecloth or Runner: Nature's Art
This craft brings the beauty of autumn leaves directly to your dining area, creating a rustic and artful backdrop for your meal.
- Concept: Use real leaves as stamps to create patterns on paper or fabric.
-
Materials:
- Large roll of white paper (for a disposable tablecloth or runner) or a plain white/light-colored fabric tablecloth/runner.
- Leaves of various shapes and sizes (collected from nature).
- Fall-colored paints (acrylic for paper, fabric paints for fabric).
- Small paintbrushes or sponges.
- Newspaper or cardboard to protect the work surface and prevent bleed-through for fabric.
-
How-to:
- Lay out your paper or fabric tablecloth, protecting the surface beneath.
- Have children paint one side of a leaf with their chosen fall colors.
- Carefully press the painted side of the leaf onto the paper/fabric, creating a unique impression.
- Lift the leaf gently and repeat the process with different leaves and colors, creating a vibrant pattern across the tablecloth or runner.
- Allow to dry completely. If using fabric paint, follow curing instructions (often heat setting with an iron).
-
Variations:
- Metallic Leaf Stamps: Use metallic gold, silver, or copper paints for a sophisticated touch.
- "Thankful" Leaf Art: After stamping, use a fine-tip marker to write words of gratitude within or around the leaf prints.
Paper Plate Pilgrim Hats or Native American Headbands: Wearable History
These crafts add a touch of historical fun to your celebration, making for great photo opportunities and an imaginative playtime before the meal.
- Concept: Create wearable hats or headbands that represent historical Thanksgiving figures.
-
Materials:
- Paper plates (black for pilgrim hats, various colors for headbands).
- Black construction paper (for pilgrim hat bands).
- Yellow construction paper (for pilgrim hat buckles).
- Construction paper in various colors and patterns (for feathers for headbands).
- Real craft feathers (for headbands, optional).
- Scissors.
- Glue or tape.
- Optional: Glitter, markers.
-
How-to (Paper Plate Pilgrim Hats):
- Cut out the center of a black paper plate, leaving only the outer rim (this will be the brim of the hat).
- Cut a strip of black paper to create the "hatband" – measure around the child's head. Form into a cylinder and glue.
- Cut a square of yellow paper and then cut out the center to make a buckle shape.
- Glue or tape the black hatband to the brim of the plate.
- Attach the yellow buckle to the front of the hatband.
-
How-to (Native American Headbands):
- Cut strips of construction paper to fit around each child's head, then glue or tape to form a band.
- Cut feather shapes from various colored and patterned construction paper. Kids can also decorate these paper feathers with markers or glitter.
- Glue real craft feathers or the paper feathers onto the headband, standing upright.
- I'm the Chef Too! connection: These crafts connect to historical themes and encourage imaginative play, much like how we explore the science behind cooking in our kits. For more educational fun that sparks imagination and teaches through doing, consider joining The Chef's Club for a new adventure delivered monthly, blending learning and deliciousness.
Painted Coasters and Appetizer Plates: Functional Art
Elevate your table with functional pieces that double as delightful, kid-made art. These projects are great for older kids who enjoy precision and creating something durable.
- Concept: Decorate cork coasters or plain ceramic appetizer plates with paint or special markers.
-
Materials:
- Cork coasters or plain ceramic salad/appetizer plates (make sure they are oven-safe if using paint markers).
- Painter's tape (for coasters).
- Acrylic craft paint (for coasters).
- Medium-point black and brown Sharpie Oil-Based Paint Markers (for ceramic plates).
- Nail polish remover and cotton swabs (for ceramic marker errors).
- Paintbrushes.
-
How-to (Painted Coasters):
- Position strips of painter's tape on each cork coaster to create geometric patterns (stripes, triangles, checkerboards). Press down firmly.
- Paint the exposed sections with acrylic paint. Let dry completely.
- Remove the tape and add new strips in different directions or paint other sections. Repeat until desired design is achieved.
- Let dry completely before use.
-
How-to (Painted Appetizer Plates):
- Wash and thoroughly dry the ceramic plates.
- Using the oil-based paint markers, let kids draw their desired designs (fall leaves, turkeys, abstract patterns, words like "Thankful"). Use nail polish remover and cotton swabs for corrections.
- Once the designs are complete and dry, place the plates in a cold oven. Heat the oven to 400 degrees Fahrenheit and bake for 45 minutes.
- Turn off the heat and let the oven cool fully with the plates inside to finish the curing process. This makes the designs more durable (hand wash only).
- I'm the Chef Too! connection: This activity involves design, art, and the application of different materials, blending seamlessly with our "edutainment" philosophy. We love encouraging children to create functional art, much like how our Peppa Pig Muddy Puddle Cookie Pies kit allows kids to craft adorable treats inspired by their favorite characters.
Educational Opportunities in Thanksgiving Crafts (STEM & Arts)
While the immediate goal of Thanksgiving crafts is fun and engagement, they are also incredibly rich with hidden learning opportunities across Science, Technology, Engineering, Arts, and Math (STEM and Arts – STEAM!). This is the heart of what we do at I'm the Chef Too!, where every activity is designed to spark curiosity and learning through hands-on exploration.
Science in Crafting: Observing, Experimenting, and Understanding
- Botany (Leaf Identification): A nature walk to collect leaves and pinecones is a fantastic opportunity to talk about different types of trees, why leaves change color, and the life cycle of plants. Kids observe patterns, shapes, and textures, honing their observational skills.
-
Chemistry (Paint Mixing & Adhesives): Mixing paints to create new colors introduces basic color theory and the concept of compounds. Discussing how glue works (adhesion) or why certain paints dry faster than others touches on material science.
- I'm the Chef Too! connection: This understanding of chemical reactions is fundamental to cooking! For example, our Erupting Volcano Cakes kit vividly demonstrates acid-base reactions through a delicious, bubbling experiment, showing kids how ingredients interact to create magic in the kitchen.
Technology in Crafting: Tools and Techniques
- Tool Use: Learning to safely and effectively use child-safe scissors, hole punches, and even pencils or markers for specific tasks involves understanding basic technology. It's about problem-solving and efficiency.
- Designing with Templates: Using templates for leaf shapes or turkey outlines introduces the concept of design and replication, which are foundational technological skills.
Engineering in Crafting: Building, Stability, and Design
- Building Structures: When creating a Gratitude Tree centerpiece, kids are engaging in basic engineering principles. How do they make the branches stand upright? What materials provide stability (stones, floral foam)? This encourages critical thinking about structure and balance.
- Designing Functional Items: Creating a napkin ring that actually holds a napkin, or a silverware holder that doesn't tip over, involves practical engineering design. It’s about making something that serves a purpose.
Art in Crafting: Creativity, Aesthetics, and Expression
- Color Theory: Choosing fall colors, blending paints, or deciding on a color scheme for their turkey teaches children about hues, shades, and visual impact.
- Composition: Arranging feathers on a pinecone turkey or placing leaf prints on a tablecloth involves thinking about balance, repetition, and the overall aesthetic appeal of their creation.
- Texture and Form: Working with pinecones, felt, clay, and paper allows children to explore different textures and forms, enhancing their sensory experience and artistic vocabulary.
- Personal Expression: Every craft becomes a unique reflection of the child's personality and imagination. This self-expression is vital for emotional development and building confidence.
Math in Crafting: Counting, Measuring, and Geometry
- Counting and Sorting: Counting leaves, feathers, or pieces of paper. Sorting materials by color, size, or type.
- Measuring: Estimating how much paper is needed for a placemat, or how long a piece of twine should be for a gratitude leaf.
- Geometric Shapes: Identifying and creating shapes like circles (paper plates), triangles (beaks), or squares and rectangles (hat buckles, paper strips). The competitive analysis even mentioned tangrams, which are a fantastic way to introduce geometry through puzzles!
- I'm the Chef Too! connection: This integration of math is constant in our kits. For example, our Galaxy Donut Kit isn't just about delicious treats; it’s an opportunity to learn about astronomy and practice measuring ingredients, understanding fractions, and following step-by-step instructions.
At I'm the Chef Too!, we wholeheartedly believe in blending food, STEM, and the arts into one-of-a-kind "edutainment" experiences. Our commitment is to spark curiosity and creativity in children, facilitating family bonding, and providing a screen-free educational alternative. These Thanksgiving crafts are a testament to how effectively complex subjects can be taught through tangible, hands-on, and delicious (or artful!) adventures developed by mothers and educators. Ready to bring this integrated learning to your home consistently? Join The Chef's Club today!
Tips for Success & Keeping the Joy in Crafting
To ensure your Thanksgiving crafting experience is filled with joy, laughter, and successful creations (in their own unique way!), here are some practical tips.
Embrace Imperfection: Focus on the Process, Not Just the Perfect Outcome One of the most important lessons for both kids and adults is that crafting is about the journey. A wobbly turkey, mismatched colors, or a smudged handprint isn't a mistake; it's a testament to creativity and effort. Encourage children to enjoy the act of making, experimenting, and expressing themselves without the pressure of a "perfect" final product. The joy is in the doing, and the memories are in the shared experience.
Involve Kids in Planning: Foster Ownership and Excitement Give children a voice in choosing which crafts to do. Show them a few options and let them pick their favorites. When they feel like they've contributed to the decision-making, they'll be more invested and excited about the activity. This also builds their decision-making skills and sense of responsibility.
Prepare for Messes: Lay Down Barriers, Use Smocks, and Plan for Easy Cleanup Crafting can be messy, and that's part of the fun! But you can manage the chaos with a little preparation:
- Surface Protection: Always lay down newspaper, old sheets, a plastic tablecloth, or kraft paper to protect your tables.
- Smocks/Old Clothes: Have kids wear old clothes or craft smocks to protect their Thanksgiving outfits from paint or glue.
- Cleanup Station: Keep a roll of paper towels, a spray bottle of water, and some wet wipes handy for immediate spills and sticky fingers. A designated bin for trash also helps.
Take Photos: Capture the Memories These handmade treasures are fleeting, but the memories can last a lifetime. Snap photos of your children proudly working on their crafts, and of the finished products displayed on the table. These pictures will become cherished reminders of joyful holidays past.
Display Their Work Proudly: Boost Confidence and Encourage Future Creativity Once the crafts are complete, make sure they are prominently displayed. Whether it's a gratitude tree as the centerpiece, personalized placemats, or painted gourds scattered around, showing off their creations boosts children's confidence and encourages them to engage in more creative activities in the future. Their art makes your holiday decor unique and truly personal.
Connect to Food: Integrating Culinary Exploration Since we're I'm the Chef Too!, we always encourage connecting crafts to the delicious world of food!
- Discuss Ingredients: Talk about the ingredients in your Thanksgiving meal – where they come from, how they grow. If you're using real leaves, talk about trees that produce edible fruits or nuts.
- "Edible Crafts": Consider crafts that involve food, like decorating sugar cookies with fall themes or making mini pumpkin pies. This bridges the gap between traditional crafting and culinary arts, a core part of our mission.
- Beyond the Table: Remember that the learning doesn't stop at the crafts. Our mission is to blend food, STEM, and the arts into one-of-a-kind "edutainment" experiences that ignite a passion for discovery. Ready for adventures that combine learning and deliciousness? Browse our complete collection of one-time kits today!
Conclusion
As the aroma of Thanksgiving dinner fills your home, imagine a table that’s not just set with food, but with love, creativity, and the joyful handiwork of your children. Thanksgiving table crafts for kids offer a wonderful opportunity to blend festive fun with meaningful engagement. They transform waiting time into valuable learning experiences, fostering fine motor skills, sparking imagination, and instilling a deeper sense of gratitude. From crafting a "Gratitude Tree" that truly embodies the spirit of thanks, to personalizing placemats that make each child feel special, these activities create lasting memories and add a unique, heartfelt charm to your holiday celebrations.
At I'm the Chef Too!, we are passionate about bringing families together through "edutainment," demonstrating that learning can be both enriching and incredibly fun. Our unique kits, developed by mothers and educators, provide screen-free, hands-on adventures that teach complex subjects through tangible, delicious cooking experiences. We believe in sparking curiosity and creativity in children, helping them build confidence, and creating those precious family bonding moments.
This Thanksgiving, let's move beyond just decorating the table; let's enrich it with purpose and play. These crafts are more than just pretty decorations; they are tangible expressions of your family's love, creativity, and the joy of togetherness. We hope this guide inspires you to embrace the delightful chaos and incredible rewards of crafting with your kids this holiday season.
Ready to infuse your family's routine with ongoing educational fun and delicious discoveries, long after the Thanksgiving feast is over? We invite you to explore our unique offerings and see how we blend food, STEM, and the arts into one-of-a-kind experiences. Give the gift of learning that lasts all year. Join The Chef's Club today and enjoy a new adventure delivered to your door every month with free shipping in the US!
FAQ
Q1: What age group are these Thanksgiving crafts most suitable for? A1: We've included ideas suitable for a wide range of ages! Simple activities like handprint art and coloring placemats are perfect for toddlers and preschoolers (1-5 years). School-aged children (6-9 years) will enjoy creating gratitude trees, pinecone turkeys, and leaf stamping. Older kids and pre-teens (10+) can tackle more intricate designs like painted coasters or helping with the setup and execution of various projects. The key is to adapt the complexity to each child's skill level and interest, ensuring adult supervision for any potentially tricky steps.
Q2: How can I minimize the mess from crafting during a busy holiday? A2: Preparation is key! Lay down a disposable tablecloth, old newspapers, or a large sheet of kraft paper over your crafting surface. Have children wear old clothes or aprons/smocks. Keep all supplies organized in trays or baskets to prevent them from rolling off the table. Most importantly, keep wet wipes, paper towels, and a small bin for trash within easy reach for immediate cleanups. You might also choose "less messy" crafts like leaf rubbings or pre-cut gluing activities for younger children if you're particularly concerned about mess.
Q3: What if my child isn't "crafty" or gets easily frustrated? A3: It’s all about focusing on the process, not a perfect outcome. Encourage exploration and self-expression rather than strict adherence to an example. Offer choices so they feel in control, and provide positive reinforcement for effort, not just the final product. Simple activities like coloring, applying stickers, or sensory play (like squishing dough or manipulating natural elements) can be a great starting point. Remember, at I'm the Chef Too!, we believe every child has innate curiosity and creativity, and sometimes just finding the right medium – like cooking – can unlock it!
Q4: How can I make these Thanksgiving crafts truly educational? A4: Every craft holds educational potential! For science, talk about why leaves change color during a leaf collection walk (botany). For math, have kids count items, measure paper, or identify geometric shapes. For engineering, discuss how to make a gratitude tree stand stably. For art, talk about color mixing and composition. Engage them in conversation throughout the process, asking open-ended questions like, "What colors will you choose and why?" or "How can we make this stronger?" Our I'm the Chef Too! kits inherently blend STEM and the arts, proving that hands-on activities are powerful learning tools.
Q5: Can these crafts be made in advance of Thanksgiving Day? A5: Absolutely! Many of these crafts are perfect for making in the days or even weeks leading up to Thanksgiving. The Gratitude Tree leaves can be written and collected over time, pinecone turkeys can be assembled and dried, and painted gourds or personalized placemats can be created well in advance. This can reduce stress on the actual holiday and allow for more relaxed crafting sessions. Simply store finished items carefully until the big day.
Q6: How can I involve older kids and teens in these Thanksgiving crafts? A6: Older kids can take on more complex versions of the crafts, focusing on intricate designs, painting details, or even designing new craft ideas themselves. They can also be wonderful "crafting assistants" for younger siblings, guiding them and fostering a sense of leadership and patience. Involving them in the planning stages and assigning them specific roles, like preparing materials or setting up the craft station, also gives them ownership. Our philosophy at I'm the Chef Too! emphasizes family bonding, and having different age groups collaborate on a project is a beautiful way to achieve this.
Q7: What if I don't have all the specific supplies mentioned? A7: Don't worry about having every exact item! Many crafts can be adapted with common household items or substitutions. For example, use paper plates instead of cork coasters, magazine cutouts instead of specific construction paper, or yarn instead of baker's twine. The spirit of crafting is about resourcefulness and creativity. Encourage kids to think of alternative materials they could use. At I'm the Chef Too!, we provide pre-measured dry ingredients and specialty supplies in our kits to make it convenient, but we always encourage imagination and adapting to what you have on hand!