Table of Contents
- Introduction
- The Irresistible Allure of Space Exploration for Young Minds
- Beyond Just Crafting: The STEM Power of Rocket Projects
- Blasting Off with Different Types of Rocket Crafts
- Tips for a Successful Rocket Crafting Session
- Expanding the Learning: Beyond the Craft
- The "I'm the Chef Too!" Difference: Where Learning Takes Off!
- Conclusion
- FAQ Section
Do you remember looking up at the night sky as a child, perhaps watching a tiny airplane streak across the inky blackness, and dreaming of journeys beyond our planet? That boundless sense of wonder, the sheer excitement of imagining yourself soaring among the stars, is a universal childhood experience. For many of us, the allure of space exploration began with simple questions: How do rockets fly? What’s it like to be an astronaut? How far can we really go? These powerful questions, sparked by curiosity, are the launchpad for a lifetime of learning. And what better way to harness that natural inquisitiveness than by building rockets right in your own home?
At I'm the Chef Too!, we believe that the most profound learning happens when it's engaging, hands-on, and, let's be honest, a whole lot of fun. That's why we're so passionate about blending food, STEM, and the arts into one-of-a-kind "edutainment" experiences. Today, we’re embarking on an exciting journey that perfectly embodies this philosophy: the wonderful world of rocket crafts for kids. This isn't just about cutting paper and gluing pieces; it's about igniting imaginations, fostering a love for science and engineering, and creating unforgettable family memories. We'll explore various rocket craft ideas, dive into the science behind them, and offer practical tips to make your crafting sessions both educational and enjoyable. Get ready to launch into a universe of creativity and discovery with your little ones, because the sky is no longer the limit!
Introduction
The cosmos holds an undeniable fascination for children. From shimmering stars to distant planets and the powerful machines that take us there, space is a realm of endless possibilities and thrilling mysteries. This natural captivation makes space-themed activities, especially rocket crafts, an incredibly potent tool for engaging young minds. When children build a rocket, they're not just assembling materials; they're constructing a tangible representation of their dreams and an active experiment in physics. They're asking "what if?" and then immediately testing their hypotheses.
In this comprehensive guide, we'll blast off into the exciting realm of rocket crafts, providing you with everything you need to know to create awe-inspiring, educational, and fun projects with your kids. We’ll delve into simple yet effective crafts like paper cup launchers and straw rockets, explore more elaborate 3D designs, and even touch upon how to bring the magic of space into your kitchen with edible creations – a signature I'm the Chef Too! twist! Our aim is to equip parents and educators with practical advice, creative ideas, and a deeper understanding of the incredible STEM principles at play. Through these hands-on adventures, we hope to spark curiosity, build confidence, and develop crucial skills in your children, all while enjoying precious screen-free time together. The main message is clear: rocket crafts are a fantastic avenue for blending creativity, foundational STEM learning, and joyful family bonding, making them a perfect complement to our mission at I'm the Chef Too! of transforming learning into an adventure.
The Irresistible Allure of Space Exploration for Young Minds
Before we even begin cutting and gluing, let's consider why space, and rockets in particular, holds such a special place in a child's imagination. It’s more than just cool visuals; it taps into fundamental human drives:
- Curiosity about the Unknown: Space is vast and mysterious, an ultimate frontier. Children are naturally curious, and the idea of exploring new worlds resonates deeply with their innate desire to discover.
- The Thrill of Adventure: Rockets represent journeys, courage, and pushing boundaries. For a child, building a rocket is a symbolic act of embarking on their own grand adventure.
- Tangible Science in Action: Unlike abstract concepts, a rocket craft offers an immediate, visible result. They build it, they launch it, and they see physics happen right before their eyes. This tangible connection to science makes learning exciting and real.
- Heroic Figures: Astronauts are real-life heroes who venture into the unknown. Children often envision themselves in these roles, making rocket crafts a way to step into that fantasy.
Connecting these dreams to tangible activities like building a rocket helps bridge the gap between abstract concepts and concrete experiences. It transforms a distant aspiration into an achievable project, proving that complex ideas can be broken down into manageable, fun steps. This is the very essence of what we aim to do at I'm the Chef Too! – making learning accessible, exciting, and deeply personal for every child.
Beyond Just Crafting: The STEM Power of Rocket Projects
Rocket crafts are not merely artistic endeavors; they are powerful, disguised STEM lessons waiting to happen. Every snip, fold, and launch introduces fundamental principles from science, technology, engineering, and mathematics in a way that is intuitive and memorable.
Physics in Play
When a rocket takes off, it's a dynamic demonstration of several core physics concepts:
- Force and Motion: Children directly experience force (pushing air, stretching elastic bands) resulting in motion (the rocket flying). They intuitively grasp that more force often means more motion.
- Aerodynamics: How the shape of the rocket, its fins, and its nose cone affect its flight path and stability. Why does one design tumble while another soars? This opens up discussions about air resistance and streamlining.
- Gravity: What makes the rocket eventually come back down? Gravity is an invisible force, but its effects are unmistakably observed during every launch.
- Potential and Kinetic Energy: In a paper cup launcher, stretching the elastic band stores potential energy, which is then converted into kinetic energy as the cup flies. This is a brilliant, hands-on demonstration of energy transformation.
-
Newton's Laws of Motion:
- First Law (Inertia): A rocket at rest stays at rest until acted upon by a force (the launch).
- Second Law (F=ma): The force applied to the rocket determines its acceleration, and a heavier rocket might not go as high with the same force.
- Third Law (Action-Reaction): The air pushed out of a straw rocket creates an equal and opposite reaction, propelling the rocket forward.
Engineering Fundamentals
Designing and building a rocket craft is a mini-engineering challenge:
- Design Thinking: Kids consider what they want their rocket to do (fly high, fly straight) and then plan how to achieve it. They experiment with different materials and shapes.
- Structure and Stability: How do fins make a rocket fly straight? What's the best way to attach them so they don't fall off during launch? These questions encourage problem-solving related to structural integrity.
- Material Science: Which paper is best? Does tape hold better than glue? Does adding too much decoration make it too heavy? Children learn about the properties of different materials and their suitability for specific tasks.
Mathematical Concepts
Measurement, geometry, and spatial reasoning are all woven into rocket crafts:
- Measurement: Deciding how long to cut the fins, how wide the rocket body should be, or how much tape to use.
- Geometry: Recognizing and utilizing shapes like circles (nose cones, windows), triangles (fins), and cylinders (rocket body). How do these shapes contribute to the rocket's function?
- Data Collection & Analysis: For older children, they can measure launch distances, compare results from different designs, and even graph their findings.
Problem-Solving and Critical Thinking
Perhaps one of the greatest benefits, rocket crafts naturally foster problem-solving. If a rocket doesn't fly as expected, kids are challenged to:
- Identify the Problem: Is it too heavy? Are the fins crooked?
- Brainstorm Solutions: Add more fins? Reduce decoration? Change the nose cone?
- Test and Refine: Try the new design and see if it works better. This iterative process is at the heart of engineering and scientific discovery.
At I'm the Chef Too!, our mission is to create these kinds of engaging, hands-on opportunities. We believe that by presenting complex subjects through tangible, exciting adventures, children don't just learn facts; they develop a deep-seated curiosity and confidence in their abilities to explore, create, and understand the world around them. Ready to spark your child's inner scientist? Join The Chef's Club today and enjoy free shipping on every box for a monthly dose of educational fun that combines food, STEM, and the arts!
Blasting Off with Different Types of Rocket Crafts
Let's dive into some specific rocket craft ideas, ranging from simple to slightly more involved, ensuring there's something for every age and skill level.
1. The Amazing Paper Cup Launcher
This simple yet surprisingly effective rocket craft is a fantastic introduction to basic physics principles. It’s quick to assemble and provides immediate, satisfying results.
Materials You'll Need:
- 2 sturdy paper cups (e.g., disposable coffee cups or party cups)
- 2 elastic bands
- Scissors
- Optional decorations: Colored construction paper, tissue paper, markers, tape, glue, stickers.
Step-by-Step Instructions:
- Prepare the "Launch Cup": Take one paper cup. This will be your stable base. Set it aside for now.
- Modify the "Rocket Cup": Take the second paper cup. Using your scissors, make four small snips around the rim, evenly spaced. Each snip should be about ½ to ¾ inch deep. Be careful not to cut too far down.
- Prepare the Elastic Bands: Snip each elastic band once so that they become two long, straight pieces of elastic.
-
Attach the Elastic Bands:
- Thread one end of an elastic band through one of the snips on your rocket cup. Tie a knot to secure it.
- Bring the elastic band across the bottom of the cup and thread the other end through the opposite snip. Tie another knot. The elastic should be taut across the bottom, forming a "U" shape.
- Repeat this process with the second elastic band, attaching it to the remaining two snips. You'll now have two elastic bands crisscrossing the bottom of your cup.
- Pro Tip: Don't pull the elastics too tight. You want them to retain some stretch and not deform the cup. Trim any excess elastic after tying.
-
Decorate Your Rocket (Optional but Fun!): Now for the creative part!
- Flames: Cut strips of red, orange, and yellow tissue paper. Tape these strips to the inside rim of your rocket cup, facing downwards, to simulate rocket flames.
- Body: Cut out windows, doors, or unique patterns from colored construction paper and glue or tape them to the outside of your rocket cup. You could add fins by cutting out triangles and taping them to the sides. Just remember: keep decorations light! A heavy cup won't launch as high due to the principles of mass and acceleration.
- Hypothetical Case Study: A parent looking for a screen-free weekend activity for their 7-year-old who loves dinosaurs could try decorating their paper cup rocket to look like a "Dino-Explorer" vehicle, maybe even adding small paper dinosaur cutouts inside for the crew!
-
Launch Time!
- Place your unaltered first cup upside down on a flat, sturdy surface. This is your launch pad.
- Gently press your decorated rocket cup (the one with the elastic bands) down onto the upside-down launch cup. The elastic bands should be compressed between the two cups.
- Let go quickly and watch your rocket fly!
The Science Behind It: This simple craft beautifully demonstrates potential and kinetic energy. When you press the rocket cup down, you stretch the elastic bands, storing potential energy. As you release the cup, this stored potential energy is converted into kinetic energy (the energy of motion), propelling your rocket skyward. The force of the elastic bands pushing against the launch cup also demonstrates Newton's Third Law of Motion: for every action (the elastic bands pushing down), there is an equal and opposite reaction (the rocket flying up).
Extensions & Experiments:
- Try different sizes of paper cups. Does a smaller cup fly higher?
- Experiment with different thicknesses or numbers of elastic bands.
- Decorate two rockets – one very lightly, one with more embellishments. Which one goes higher, and why? This leads to a great discussion about mass.
2. The Mighty Straw Rocket
Straw rockets are another fantastic, low-cost way to explore aerodynamics and air pressure. They are incredibly satisfying to launch and perfect for indoor or outdoor play.
Materials You'll Need:
- Paper (plain printer paper, construction paper, or cardstock)
- Drinking straws (ideally, a wider straw for the rocket body and a narrower straw for launching, or plastic pipettes)
- Tape or glue dots
- Scissors
- Markers, crayons, or colored pencils
- Optional: Our free Rocket Template (if available, otherwise draw your own!)
Step-by-Step Instructions:
-
Design Your Rocket:
- Freehand: Draw various rocket shapes on your paper. Experiment with different body lengths, fin shapes (triangles, rectangles, swept-back), and nose cones (pointy, rounded).
- Template: If using a template, color your rockets and cut them out carefully.
- Pro Tip: For testing, start with a simple, symmetrical design.
-
Create the Rocket Body (The Air Tube):
- Cut a small section of a wider straw or a plastic pipette (if using a pipette, cut off the bulb end). This piece should be slightly shorter than your rocket design.
- Crucially, seal one end of this small straw/pipette piece completely. You can do this by folding the end and securing it tightly with tape, or by pinching and gluing it shut. This sealed end is vital for building air pressure.
-
Attach the Air Tube to Your Rocket:
- Using tape or glue dots, securely attach the sealed straw/pipette piece to the back (bottom) of your paper rocket design. Make sure the sealed end is at the very bottom. The open end of the tube should point upwards, ready to receive your launching straw. Ensure the attachment is smooth and doesn't create too much drag.
-
Prepare Your Launching Straw:
- Take your narrower drinking straw. This will be your breath-powered launcher!
-
Launch Time!
- Slip the narrower launching straw into the open end of the straw/pipette piece attached to your rocket.
- Hold the launching straw firmly. Take a deep breath, aim your rocket (away from faces and fragile objects!), and give a strong, quick puff of air through the launching straw.
- Watch your rocket zoom!
The Science Behind It: Straw rockets powerfully demonstrate air pressure and aerodynamics. When you blow into the straw, you force air into the sealed tube attached to the rocket. This rapidly increases the air pressure inside the tube. Because the air has nowhere to go but out the open end, it exerts a force that pushes the rocket forward. This is another excellent example of Newton's Third Law: the action of the air pushing out creates an equal and opposite reaction that propels the rocket. The design of your fins and nose cone will then affect how stable and far your rocket flies (aerodynamics).
Extensions & Experiments:
- Angle of Launch: How does the angle you hold the launching straw affect how far the rocket travels? Try launching at 45 degrees, 90 degrees, etc.
- Fin Design: Create several rockets with different fin shapes (large, small, swept-back, straight). Which design flies furthest or straightest?
- Nose Cone Shapes: Compare rockets with pointy vs. rounded nose cones. Which cuts through the air better?
- Mass Variation: Add a tiny bit of weight (a small paper clip) to the very tip of one rocket's nose cone. How does this affect its flight?
- This activity makes a fantastic science exploration for classroom settings, camp programs, or homeschool co-ops. Looking for more engaging STEM experiences for groups? Learn more about our versatile programs for schools and groups, available with or without food components!
3. Build a 3D Cardboard Tube Rocket
For a craft with a bit more structural integrity and decorative potential, cardboard tube rockets are a classic. These allow for more intricate designs and provide a sturdy base for creative expression.
Materials You'll Need:
- Cardboard tubes (from toilet paper or paper towels)
- Construction paper (various colors)
- Scissors
- Glue (liquid glue or glue sticks)
- Tape
- Markers, paint, glitter, stickers (for decoration)
Step-by-Step Instructions:
-
The Rocket Body: Your cardboard tube is the main body of your rocket. You can leave it as is or cover it with a piece of construction paper for a smooth, colorful base.
- To Cover: Measure and cut a piece of construction paper that wraps around the tube and is slightly taller than the tube itself. Apply glue to one edge of the paper, wrap it around the tube, and secure. Trim any excess.
-
The Nose Cone: This is crucial for aerodynamics and aesthetics.
- Draw a large quarter-circle (a pie slice shape) on a piece of construction paper.
- Cut it out.
- Roll the quarter-circle into a cone shape, overlapping the straight edges slightly.
- Secure the cone with glue or tape. Make sure the opening of the cone fits snugly over one end of your cardboard tube.
- Attach the finished nose cone to the top of your rocket body with glue or tape.
- Experiment: Try different nose cone shapes – a sharper point, a more rounded dome. How might this affect its theoretical flight?
-
The Fins: Fins provide stability, helping the rocket fly straight.
- Draw 3 or 4 identical triangle shapes on construction paper. For more stability, make the base of the triangle wide.
- Cut out your fins.
- Fold a small flap (about ½ inch) along one side of each fin's base. This flap will be used to attach the fin to the rocket body.
- Apply glue or tape to the flap and attach the fins evenly spaced around the bottom of your rocket body. Ensure they are aligned straight up and down.
-
The Flames: No rocket is complete without a fiery exhaust!
- Cut strips of red, orange, and yellow tissue paper or construction paper.
- Glue or tape these strips to the inside rim of the bottom of your cardboard tube, letting them hang down to create a vibrant flame effect.
-
Decorate Your Rocket! This is where creativity truly shines.
- Use markers, paints, glitter, or stickers to add windows, doors, control panels, or even the name of your rocket.
- Create a mission patch for your space adventure!
- Integration: This type of craft encourages kids to think about the aesthetic appeal of engineering. It's an opportunity to discuss how design isn't just about function, but also about inspiring awe and excitement.
- If you're looking for unique themes and all the supplies delivered, browse our complete collection of one-time kits for a ready-made adventure!
The Science Behind It: While cardboard tube rockets aren't typically launched with great force, they are excellent for understanding structural design and aerodynamics in a static model. The fins prevent tumbling and help maintain a stable flight path if thrown gently, and the nose cone helps reduce air resistance. This craft emphasizes the engineering design process: planning, constructing, and then refining a model.
Extensions & Experiments:
- Sturdy Launch: While not a true launcher, you can experiment with gently dropping these rockets from a small height to observe how fin placement affects stability.
- Payload: Can you design a small compartment inside the rocket to carry a "payload" (like a tiny pom-pom astronaut)? This introduces concepts of weight and capacity.
4. Recycled Material Rockets: Innovate and Create!
Encouraging children to use recycled materials is a wonderful way to foster ingenuity, environmental awareness, and resourcefulness. Almost anything can become a rocket with a little imagination!
Materials You'll Need:
- Empty plastic bottles (soda bottles, water bottles)
- Empty cereal boxes, tissue boxes, paper towel rolls
- Aluminum foil
- Newspaper
- Bottle caps, buttons, beads (for control panels, windows)
- Scissors, glue, tape
- Paint, markers, collage materials
Step-by-Step Instructions:
- Choose Your Base: A plastic bottle makes an excellent rocket body. Cereal boxes can be cut and folded.
- Brainstorm & Design: Before starting, encourage kids to sketch their rocket ideas. What will the body be? How will they make fins? What about the nose cone?
-
Construct & Attach:
- Plastic Bottle Rocket: Use the bottle as the body. Cut fins from cereal box cardboard and tape or glue them to the bottom. For a nose cone, you can use the bottom of another plastic bottle, a paper cone, or even mold aluminum foil.
- Cereal Box Rocket: Cut out large rocket shapes from the flattened box. Fold them to create a 3D effect. Add extra cardboard for fins and nose cones.
- Detailing: Use bottle caps for windows, aluminum foil for shiny accents, and newspaper for crumpled "exhaust."
- Decorate! Let creativity soar. Paint your rocket, add space-themed drawings, or glue on shiny bits.
The Science Behind It: This category of crafts highlights engineering constraints and creative problem-solving. How do you make a stable structure from an irregular object? It encourages adaptive thinking and understanding material properties. It's also a great way to introduce concepts of sustainability and upcycling.
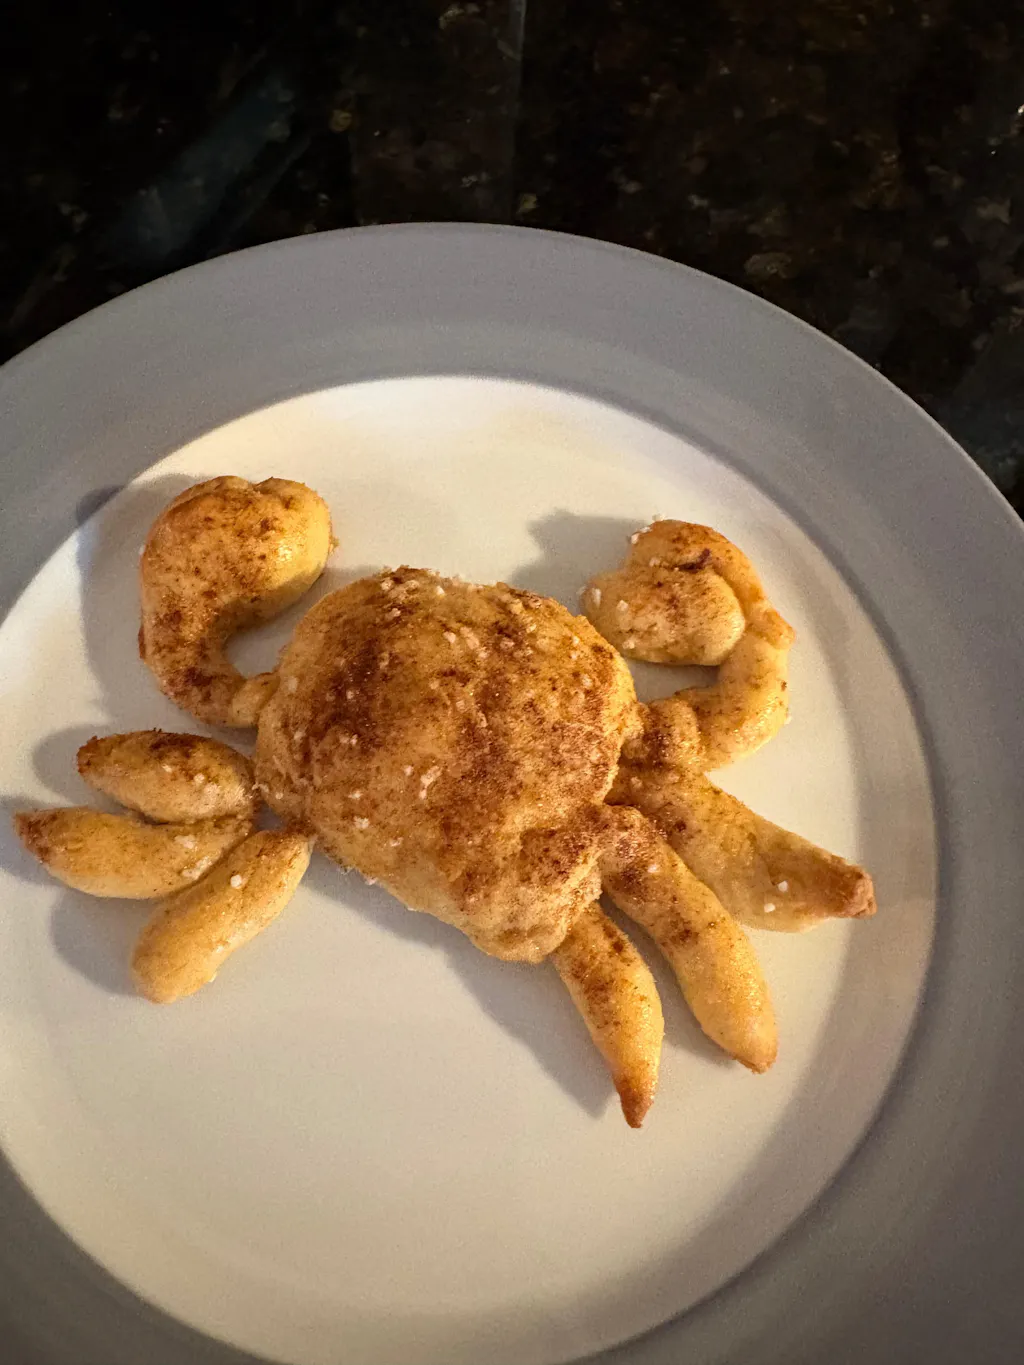
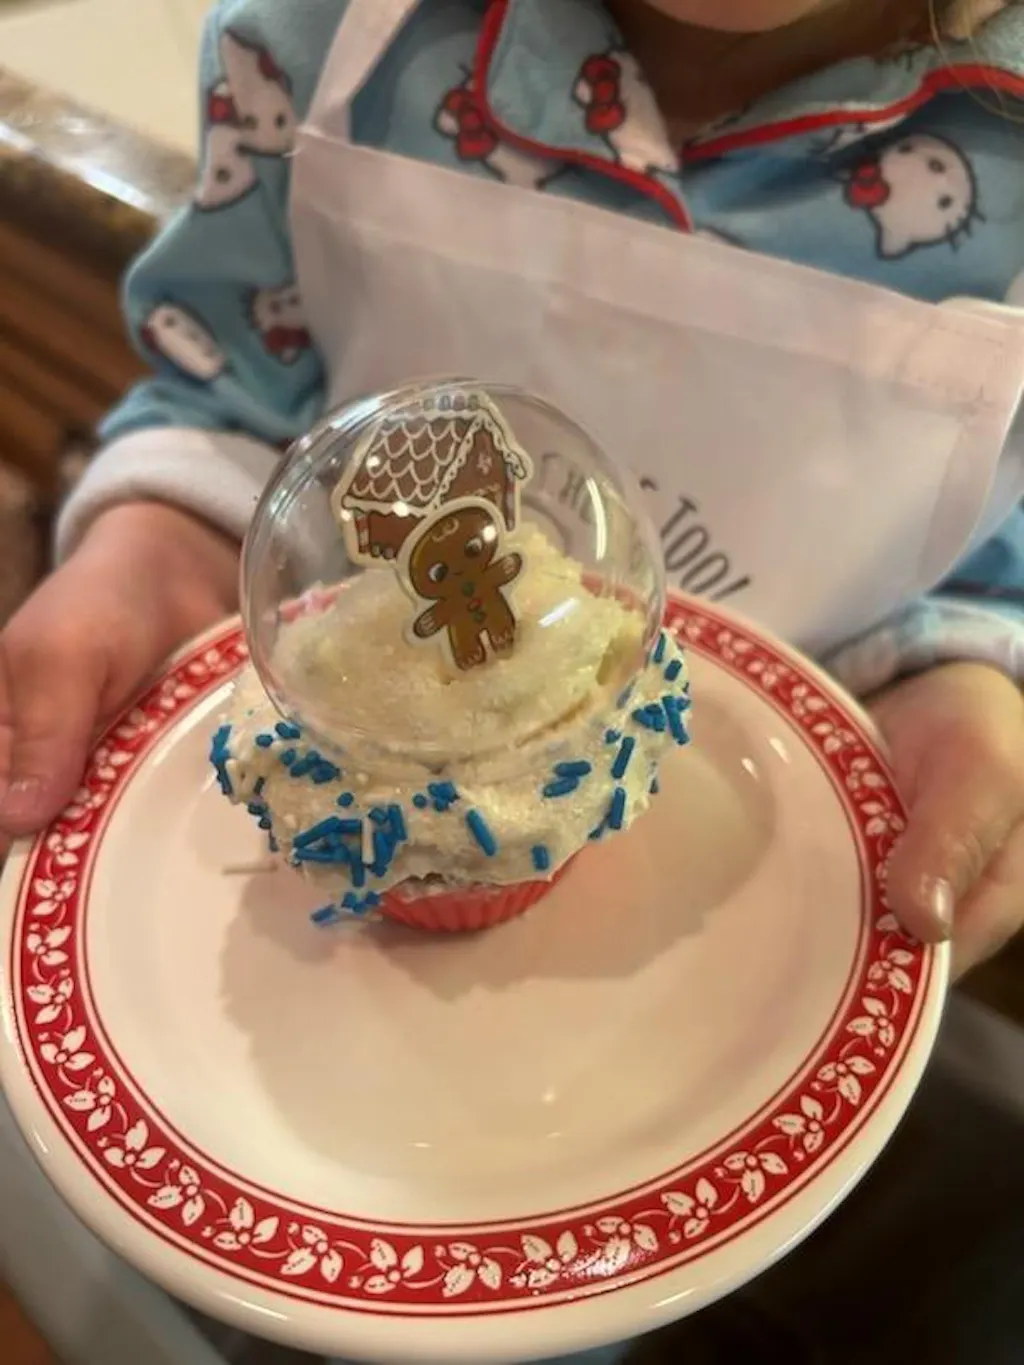
5. Edible Rocket Crafts: Our I'm the Chef Too! Twist!
Now for a truly unique way to engage with rocket crafts – in the kitchen! At I'm the Chef Too!, we firmly believe that learning is best when it's delicious. Teaching complex subjects through tangible, hands-on cooking adventures is what we do best. While we might not be launching food into orbit (yet!), we can certainly create edible rockets that make science and engineering principles a treat to learn.
Imagine a kitchen buzzing with excitement as your child crafts a rocket they can actually eat! This approach combines the joy of baking and decorating with the wonder of space exploration, creating a multi-sensory learning experience.
Hypothetical Edible Rocket Ideas:
-
Rice Krispie Treat Rockets:
- Concept: Use classic Rice Krispie treats as a moldable, edible "structure."
- How-to: Kids can press and shape the treats into rocket bodies. Use pretzel sticks or chocolate-covered graham crackers for fins, attaching them with melted chocolate or frosting. A gumdrop or half a marshmallow can be the nose cone.
- STEM Connection: This activity involves measuring ingredients, understanding how ingredients bond (engineering), and designing a stable edible structure.
-
Fruit Skewer Rockets:
- Concept: A healthier, colorful approach to rocket building.
- How-to: Thread various fruits (strawberries for a pointy top, banana slices for the body, kiwi slices for fins) onto a skewer. Use a pretzel stick or thin biscuit for the central support.
- STEM Connection: Focuses on sequential assembly, balance, and the different properties of food items as building blocks.
-
Cookie Rockets:
- Concept: Decorating pre-baked or homemade cookies into rocket shapes.
- How-to: Bake sugar cookies in rocket shapes (or use a rectangular cookie and cut out fins and nose cones). Use icing, sprinkles, and edible glitter to decorate them as control panels, windows, and flames.
- STEM Connection: Introduces color mixing (art + science), fine motor skills, and creative design within a defined shape.
-
"Fuel" Themed Snacks:
- Concept: Create snacks that represent rocket fuel or celestial elements.
- How-to: Blue gelatin with edible glitter for "space goo," green grapes or blueberries for "alien planets," or "star dust" made from sugar and edible glitter sprinkled on fruit.
- STEM Connection: Encourages imaginative play and connecting abstract concepts (like fuel) to a tangible, delicious form.
This is exactly the kind of "edutainment" we specialize in at I'm the Chef Too!. We take complex ideas and make them approachable, fun, and memorable through the magic of cooking. Instead of just reading about chemical reactions, your child might experience one firsthand while making our Erupting Volcano Cakes Kit bubble over with deliciousness! Or, they can explore astronomy by creating their own edible solar system with our Galaxy Donut Kit, which perfectly aligns with the space theme of rocket crafts.
Ready for a new adventure delivered to your door every month? Join The Chef's Club and enjoy free shipping on every box. Each box is a complete experience, containing pre-measured dry ingredients and specialty supplies, making it incredibly convenient for busy families to spark curiosity and creativity!
Tips for a Successful Rocket Crafting Session
To ensure your rocket crafting adventure is more fun than frustration, keep these tips in mind:
- Safety First, Always: Adult supervision is key, especially with scissors and any small parts. Teach children how to use tools safely.
- Embrace Experimentation & "Failures": Not every rocket will fly perfectly, and that’s okay! In fact, it’s a crucial part of the learning process. Encourage children to analyze why a rocket didn't fly as expected and to brainstorm solutions. This builds resilience and problem-solving skills. Remember, true learning often happens through trial and error.
- Encourage Personalization: This isn't about replicating a perfect model. Let your child's creativity lead the way in decoration and design. Their unique rocket is a reflection of their unique imagination.
- Set Up a "Launch Pad" (or Testing Zone): Designate a safe area for launching rockets, whether it's an open indoor space or a clear outdoor area. This adds to the excitement and ritual of the activity.
- Document the Process: Take photos or videos of your child building and launching their rockets. This creates wonderful memories and allows them to see their progress and different designs. For older kids, encourage them to keep a "Rocket Scientist's Journal" to jot down observations, design ideas, and launch results.
- Keep It Age-Appropriate: For younger children, focus on the joy of creating and the simple act of launching. For older kids, you can introduce more complex scientific terms and encourage more rigorous experimentation.
- Preparation is Key: Gather all materials before you start. This minimizes interruptions and keeps the momentum going.
- Focus on the Process, Not Just the Product: The value isn't just in the finished rocket, but in the discussions, decisions, and discoveries made along the way. This aligns perfectly with our philosophy at I'm the Chef Too!, where we prioritize the journey of learning and discovery over a guaranteed outcome. We aim to foster a love for learning, build confidence, and develop key skills, creating joyful family memories in the process.
Expanding the Learning: Beyond the Craft
Once the rockets have flown and the crafting table is clear, the learning doesn't have to stop. These crafts can be a springboard for further exploration of space and science:
- Dive into Books About Space: Visit your local library or bookstore for age-appropriate books about astronauts, the solar system, rocket science, or even fictional space adventures. Reading together reinforces concepts and expands vocabulary.
- Watch Educational Documentaries: There are many wonderful children's documentaries about space exploration, planets, and the universe. These can provide incredible visuals and spark new questions.
- Visit a Science Museum or Planetarium: If possible, a trip to a local science museum or planetarium can bring the wonders of space to life on a grand scale, offering immersive experiences that connect directly to your home crafts.
- Role-Playing: "Astronaut Training": Encourage imaginative play by pretending to be astronauts preparing for a mission. What gear do they need? What tasks do they perform? How do they communicate with "mission control"?
- Journaling Observations: For older children, suggest they keep a science journal. They can sketch different rocket designs, note what worked and what didn't, measure launch distances, and record their thoughts and questions about space.
- Explore Our Galaxy Donut Kit: To continue the space exploration theme with a delicious twist, check out our Galaxy Donut Kit. Your aspiring astronomers can create edible nebulas and star systems, blending culinary fun with cosmic creativity!
These extended activities transform a simple craft into a holistic learning experience, nurturing a lifelong love for science and discovery.
The "I'm the Chef Too!" Difference: Where Learning Takes Off!
At I'm the Chef Too!, we are driven by a singular mission: to blend food, STEM, and the arts into one-of-a-kind "edutainment" experiences that ignite a spark in every child. We understand that in a world increasingly dominated by screens, families crave meaningful, hands-on activities that truly engage and educate. Our unique approach does exactly that – we teach complex subjects through tangible, delicious cooking adventures.
We believe that children learn best by doing, by touching, by tasting, and by experiencing. When they're measuring ingredients, they're doing math. When they're observing a chemical reaction in their baking, they're doing science. When they're decorating their creations, they're engaging in artistic expression and fine motor skill development. And when they’re sharing the final product, they’re experiencing the joy of accomplishment and fostering family bonding.
Our kits are carefully developed by mothers and educators who understand the importance of making learning accessible, fun, and relevant. We ensure that every box delivered to your door is not just a kit, but an opportunity for discovery, creativity, and connection. We focus on fostering a love for learning, building confidence in new skills, and creating joyful memories that will last a lifetime. We don’t promise your child will become a top scientist overnight, but we do promise an enriching process that cultivates curiosity and fundamental skills in a truly delightful way.
Think of our approach as an extension of the engaging rocket crafts we've explored today. Just as building a rocket makes physics real, baking with us makes chemistry tangible and delicious.
Ready to embark on a continuous journey of discovery with your children? Imagine a new, exciting adventure delivered to your doorstep every single month, complete with pre-measured dry ingredients and specialty supplies. This is the convenience and value of The Chef's Club! Join The Chef's Club and enjoy free shipping on every box. We offer flexible 3, 6, and 12-month pre-paid plans, perfect for gifting or ensuring long-term enrichment for your little learners. Each box is a screen-free educational alternative designed to spark curiosity, foster creativity, and facilitate unforgettable family bonding moments.
If you're not ready for a subscription, that's perfectly fine! You can still explore our wide array of engaging activities. Browse our complete collection of one-time kits to find the perfect themed adventure that will captivate your child's imagination and introduce them to the magic of STEM through cooking. From erupting volcanoes to dazzling galaxy donuts, there's an I'm the Chef Too! kit waiting to transform your kitchen into a classroom of fun and learning.
Conclusion
The journey of creating rocket crafts with your children is far more than just a simple activity; it’s an incredible opportunity to ignite their imaginations, introduce them to fundamental STEM concepts, and build lasting family memories. From the satisfying launch of a paper cup rocket to the careful design of a straw-powered flyer and the creative construction of a 3D cardboard model, each project offers unique insights into the world of science and engineering. These hands-on adventures foster critical thinking, problem-solving skills, and a resilient spirit that embraces experimentation and learning from every attempt.
At I'm the Chef Too!, we champion this kind of engaging, inquiry-based learning. Our mission is to transform education into an exciting journey where every child can explore, discover, and create. By blending food, STEM, and the arts, we provide unique experiences that go beyond the ordinary, sparking curiosity and creativity in tangible, delicious ways. Whether it's through crafting paper rockets that reach for the sky or baking edible creations that explore the cosmos, the goal remains the same: to inspire a lifelong love for learning in your children, all while enjoying precious screen-free time together.
Don't let the adventure stop here. Continue to cultivate that boundless curiosity and passion for discovery. Join The Chef's Club today and enjoy free shipping on every box to bring a new world of educational fun and delicious learning experiences right to your kitchen every single month. Let's make every moment a learning moment, one exciting, hands-on, and delightful adventure at a time!
FAQ Section
Q1: What age group are rocket crafts suitable for?
Rocket crafts are incredibly versatile and can be adapted for a wide range of ages.
- Preschoolers (3-5 years): They can enjoy simpler crafts like decorating pre-cut rocket shapes, gluing tissue paper flames, and the exciting act of launching paper cup or straw rockets with adult help. The focus here is on fine motor skills, color recognition, and the joy of creation.
- Early Elementary (6-8 years): These children can follow more detailed instructions, design their own rockets, and begin to grasp basic scientific concepts like force and motion. They can actively participate in cutting, gluing, and experimenting with different designs.
- Older Elementary & Tweens (9-12+ years): At this age, kids can delve deeper into the scientific principles, conduct structured experiments (e.g., measuring launch distances, testing variables like fin size or nose cone shape), and troubleshoot design flaws independently. They might enjoy building more complex 3D models or even exploring air-powered bottle rockets.
Q2: What are the main educational benefits of making rocket crafts?
Rocket crafts offer a wealth of educational benefits across multiple domains:
- STEM Learning: They introduce fundamental concepts in physics (force, motion, gravity, aerodynamics, potential/kinetic energy), engineering (design, structure, materials), and mathematics (measurement, geometry).
- Problem-Solving & Critical Thinking: Children learn to identify why a rocket isn't flying well, brainstorm solutions, and iterate on their designs.
- Creativity & Imagination: Designing and decorating rockets allows for boundless artistic expression and imaginative play about space travel.
- Fine Motor Skills: Cutting, gluing, taping, and drawing all contribute to the development of fine motor skills and hand-eye coordination.
- Patience & Perseverance: Some designs require careful construction, and not every launch will be successful, teaching patience and encouraging perseverance.
- Family Bonding: It's a fantastic screen-free activity that encourages collaboration and shared joy between children and adults.
Q3: What if our rocket doesn't fly well, or at all?
This is a perfect learning opportunity! Instead of seeing it as a failure, frame it as a chance for scientific investigation:
- Observe: Ask your child, "What do you notice? What happened?"
- Hypothesize: "Why do you think it didn't fly as high/straight?" (e.g., "Maybe it's too heavy," "The fins are crooked," "I didn't blow hard enough.")
- Experiment: "What could we change?" (e.g., "Let's try fewer decorations," "Let's make the fins straighter," "Blow harder!")
- Try Again: Implement the change and re-launch. This iterative process is at the heart of the engineering design cycle and fosters resilience. Remember, it's the process of discovery that matters most.
Q4: How can I make rocket crafts more challenging for older children?
To increase the challenge:
- Introduce Variables: Have them systematically test different variables like fin shape, nose cone design, or body length, and record their observations.
- Measure & Graph: Encourage them to measure launch distances and plot the results on a simple graph to visualize how changes affect performance.
- Materials Science: Challenge them to use different materials for the same parts (e.g., cardstock vs. construction paper for fins) and analyze the impact.
- Payload Challenge: Can they design a rocket that can carry a small "payload" (like a paper clip or a tiny figurine) to a certain distance or height?
- Research: Encourage them to research real rocket designs and apply those principles to their own crafts.
- Complex Structures: Introduce multi-stage rockets or more intricate 3D designs.
Q5: How does I'm the Chef Too! relate to these kinds of hands-on STEM activities?
At I'm the Chef Too!, we share the exact same philosophy of hands-on, engaging, and multi-sensory learning. Just as rocket crafts make physics tangible, our unique cooking STEM kits make chemistry, biology, and engineering concepts delicious and accessible. We take the principles of discovery, experimentation, and creativity seen in rocket crafts and apply them to culinary adventures. Children learn about chemical reactions when baking, measurement when adding ingredients, and even historical or cultural concepts related to the food they create. Our kits provide all the convenience of pre-measured ingredients and themed supplies, allowing families to easily recreate the magic of learning and bonding that comes from activities like building rocket crafts, but in their own kitchen! We are committed to sparking curiosity and creativity, facilitating family bonding, and providing a fantastic screen-free educational alternative, much like the joy found in a successful rocket launch.