Table of Contents
- Introduction
- Why Blast Off with a Space Lander STEM Challenge?
- Decoding the Engineering Design Process (EDP)
- Your Mission Briefing: The Space Lander Challenge Essentials
- Engineering Marvels: Principles Behind a Successful Lander
- Step-by-Step Launch: Guiding Your Young Engineers
- Expanding the Universe: Variations and Advanced Missions
- Real-World Resonances: From Classroom to Cosmos
- Nurturing Young Innovators: Tips for Parents and Educators
- Beyond the Lander: Continuing the STEM Adventure with I'm the Chef Too!
- Conclusion
- FAQ
Introduction
Imagine the thrill of sending a spacecraft to another world, navigating the vast emptiness of space, and then, the nail-biting descent as it approaches an alien surface. How do we ensure those precious instruments—or even human astronauts—survive the impact? It's a monumental engineering feat, one that pushes the boundaries of human ingenuity. But what if we told you that your child could tackle a similar challenge right at home, learning fundamental physics and engineering principles while having an absolute blast?
Welcome to the exciting world of the Space Lander STEM Challenge! This isn't just another craft project; it's a hands-on, mind-engaging mission that invites young explorers to design, build, test, and refine their own miniature spacecraft. In this comprehensive guide, we'll dive deep into what makes this challenge so captivating, the core STEM skills it develops, the principles of successful lander design, and how you can guide your budding engineers through every thrilling step. Get ready to transform your kitchen table or classroom into mission control, sparking curiosity and creativity in a way that’s truly out of this world.
Why Blast Off with a Space Lander STEM Challenge?
The Space Lander STEM Challenge is much more than a fun afternoon activity; it's a powerful educational tool that connects children with real-world science and engineering in an incredibly tangible way. At I'm the Chef Too!, our mission is to blend food, STEM, and the arts into one-of-a-kind "edutainment" experiences, and this challenge perfectly embodies that philosophy, even without the culinary component. Here's why this mission is worth embarking on:
- Beyond the Textbook: Forget dry lectures and abstract theories. When children design and build a physical lander, they are actively engaging with concepts like gravity, force, impact, and stability. They learn by doing, observing immediate results, and feeling the satisfaction (or frustration!) of their design choices. This hands-on approach solidifies understanding in a way that passive learning rarely achieves.
- The Power of Play in Learning: Children are natural explorers and problem-solvers. This challenge taps into that innate curiosity, allowing them to experiment freely, make mistakes, and discover solutions in a low-stakes, playful environment. This joyous exploration is key to fostering a genuine love for learning.
-
Core STEM Skill Development:
- Engineering Design: The entire activity is a miniature engineering project, guiding children through the iterative process of problem definition, ideation, prototyping, testing, and refinement.
- Physics in Action: Children intuitively grasp concepts like kinetic energy, shock absorption, and weight distribution as they see how different materials and designs affect the lander's performance during impact.
- Problem-Solving & Critical Thinking: When a lander fails (and it will!), children are encouraged to analyze why it failed and strategize how to improve it. This develops crucial analytical and critical thinking skills.
- Material Science: They learn about the properties of different materials—flexibility of straws, cushioning of marshmallows, rigidity of cardboard—and how to best utilize them.
-
Cultivating Essential Life Skills:
- Resilience and Perseverance: Not every design will succeed on the first try. The challenge teaches children to embrace "failure" as a learning opportunity, encouraging them to iterate and persist until they achieve their goal.
- Creativity and Innovation: There's no single "right" answer. Children are free to experiment with wild and imaginative designs, fostering out-of-the-box thinking.
- Teamwork and Communication: If done in groups, children learn to collaborate, share ideas, delegate tasks, and communicate their design choices effectively.
- Attention to Detail: Small modifications can have big impacts, teaching the importance of precision.
- A Screen-Free Educational Alternative: In an increasingly digital world, activities like the Space Lander STEM Challenge provide a much-needed break from screens, offering tangible, real-world engagement that stimulates different parts of the brain and encourages physical interaction. It’s an opportunity for family bonding, creating shared memories and collaborative learning experiences that truly stick. Just like our carefully curated kits, this challenge fosters creativity and critical thinking away from digital distractions. If you're looking for more ways to unplug and engage, consider joining The Chef's Club for a fresh dose of hands-on learning delivered right to your door every month.
Decoding the Engineering Design Process (EDP)
At the heart of every great STEM challenge, especially those involving building and designing, is the Engineering Design Process (EDP). This isn't a rigid, linear checklist, but rather a flexible, iterative cycle that engineers worldwide use to solve problems and create innovative solutions. Understanding and applying the EDP is crucial for your young scientists and engineers, teaching them a systematic approach to problem-solving. It's the same kind of structured yet creative thinking that goes into every one of our I'm the Chef Too! kits, ensuring that learning complex subjects is both effective and fun.
The core steps of the EDP are:
- Ask: What is the problem? What are the constraints (materials, time, budget)? What is the goal?
- Imagine: Brainstorm possible solutions. Research existing ideas. Sketch out different designs. Don't censor ideas—quantity over quality at this stage!
- Plan: Choose the best idea (or a combination of ideas). Detail the materials needed and the steps for building.
- Create: Build your prototype based on your plan.
- Test: Evaluate your design against the criteria. Does it work? What went well? What didn't?
- Improve: Analyze the test results. What changes can be made to make the design better? Revise and repeat the process.
This cyclical nature, particularly the "Test and Improve" phases, is where the real learning happens. It teaches resilience, adaptability, and the understanding that "failure" is merely data for future success. Embrace it!
Your Mission Briefing: The Space Lander Challenge Essentials
Alright, future astronauts and engineers, it's time for your mission briefing! The objective is clear: design and build a lander that will protect your precious "astronauts" (typically marshmallows, but we'll explore variations!) from the impact of a controlled drop. You'll need to absorb shock, ensure stability, and withstand the forces of gravity.
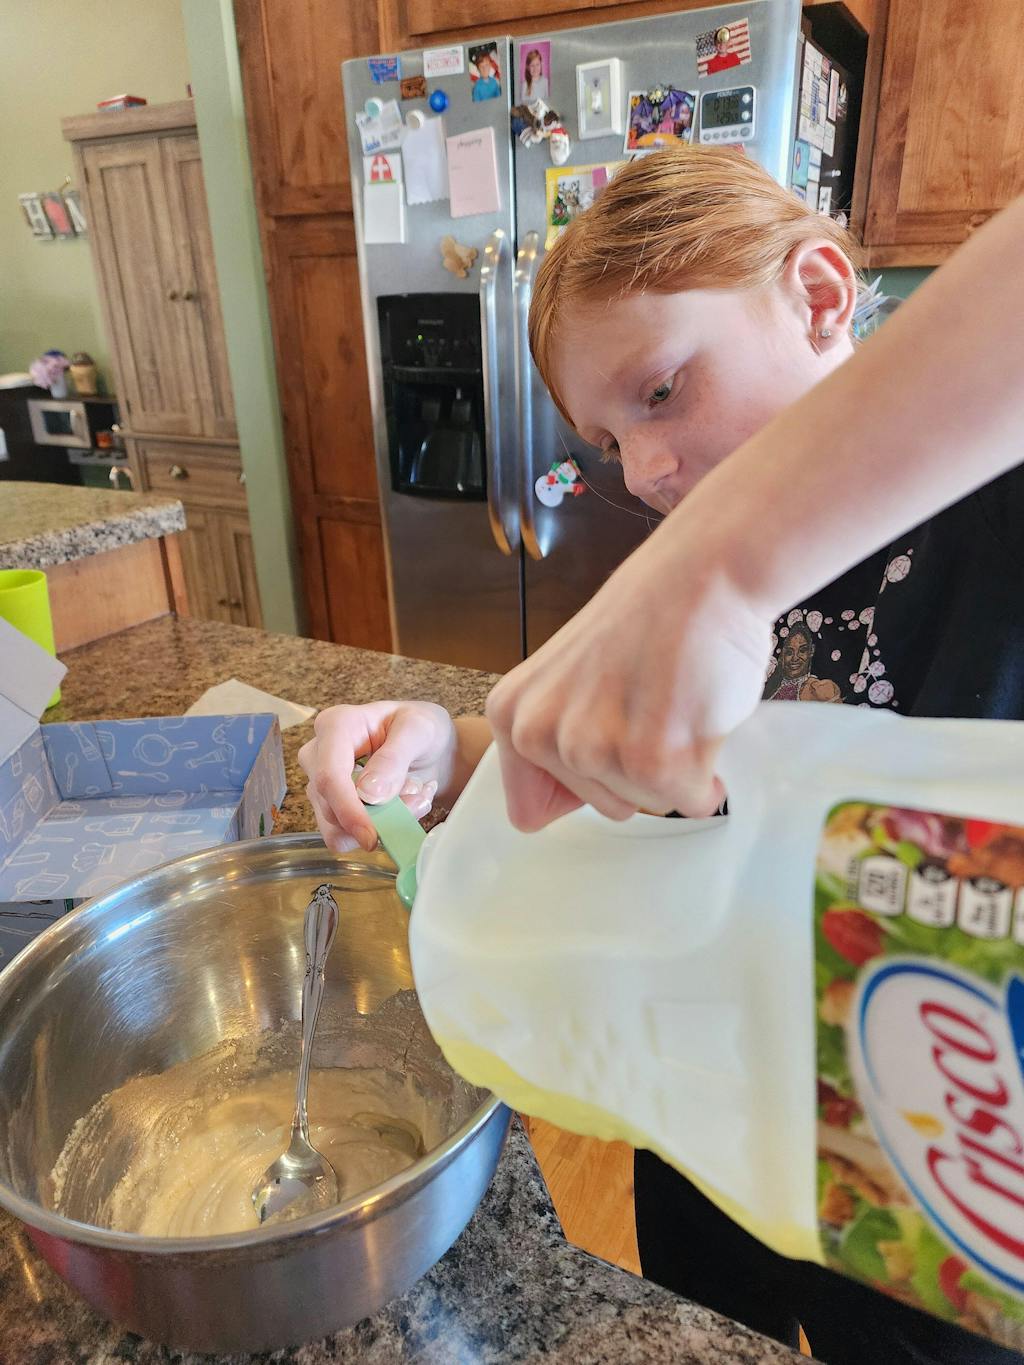
Core Materials (Gather Your Supplies!)
One of the beauties of the Space Lander STEM Challenge is its accessibility. Most of the materials can be found around your house or easily acquired. Resourcefulness is a key part of the design process!
Here’s a common list of materials, inspired by successful challenges and our own emphasis on tangible learning:
- Scissors: For cutting and shaping.
- 1 piece of stiff paper or cardboard: Approximately 4 x 5 inches (10 x 13 cm) is a good starting point. This will often serve as the base of your lander. A cereal box or tissue box cardboard works great!
- 1 paper or plastic cup (8 oz - 12 oz): This usually acts as the central compartment for your "astronauts."
- 3 index cards (3 x 5 in or 8 x 13 cm) or cardstock: Versatile for creating fins, structural supports, or crumple zones.
- 2 regular marshmallows: These are your "astronauts." Their squishiness makes for a fun, relatable payload.
- 10 miniature marshmallows: Excellent for cushioning, joining materials, or absorbing shock.
- 3 rubber bands: Act as springs, holding components together, or adding flexibility to the design.
- 8 plastic straws: Fantastic for creating lightweight structural supports, legs, or shock absorbers due to their hollow and somewhat flexible nature.
- Tape (approximately 1 meter): Your primary adhesive. Encourage children to use it judiciously—sometimes less is more!
Don’t worry if you don’t have all of these exact materials! Get creative and substitute. Part of the engineering process is working with what you have. Pipe cleaners, craft sticks, aluminum foil, fabric scraps, sponges, cotton balls, empty toilet paper rolls, paper plates, or even recycled plastic containers can all be fantastic additions or substitutions. The key is to think about the properties of the materials and how they can contribute to shock absorption, stability, or structure.
The Goal: Safe Landing!
Your mission's success criteria are simple:
- The lander must successfully protect both "astronauts" (marshmallows) from falling out or being visibly damaged (squished beyond recognition!) upon impact.
- The lander should ideally remain upright or close to upright after landing.
- The challenge is often to achieve this from increasing drop heights.
Safety First: Adult Supervision is Key
While this challenge uses safe, everyday materials, adult supervision is always important, especially when using scissors or dropping objects from height. Ensure a clear landing zone and discuss safe practices before starting. At I'm the Chef Too!, we believe in providing enriching experiences within a safe, supportive environment, whether it's in our kits or through DIY activities like this.
Engineering Marvels: Principles Behind a Successful Lander
To successfully build your space lander, understanding a few fundamental engineering and physics principles will be incredibly helpful. These are the same principles that real NASA engineers consider when designing spacecraft for missions to Mars or the Moon!
1. Shock Absorption: The Art of a Soft Landing
When your lander hits the ground, it experiences an impact force. This force needs to be absorbed or dissipated to protect your astronauts. Think of how car crumple zones work, or the springs in a mattress—they're all designed to absorb energy.
- How it works: Shock absorption is about extending the time over which the impact force is applied. A sudden stop transmits a huge force; a gradual stop allows the force to be spread out.
-
Material choices:
- Straws: Their hollow structure allows them to bend and buckle, absorbing energy. You can create triangular supports, springy legs, or even a lattice-like structure underneath the cup.
- Mini Marshmallows/Cotton Balls: Excellent for cushioning. Placing them strategically around and under the "astronauts" or within the lander structure can provide a soft buffer.
- Rubber Bands: These act as springs, stretching and recoiling to absorb impact energy. They can be used to suspend the cup or create spring-loaded landing gear.
- Crumple Zones: Designing parts of the lander (like index card flaps or extra cardboard) to deliberately deform on impact can absorb significant energy.
-
Design Ideas:
- Landing Legs: Multiple legs that can bend or splay outwards on impact are very effective.
- Suspension System: Can you use rubber bands or flexible straws to suspend the astronaut compartment within a larger frame, allowing it to "give" upon impact?
- Spring Mechanisms: Coiled straws or bent index cards can act like rudimentary springs.
2. Stability: Staying Upright
A successful landing isn't just about surviving the fall; it's also about landing upright. Nobody wants their astronauts tumbling out!
- How it works: Stability refers to an object's ability to return to its original position after being disturbed. In this case, it's about preventing the lander from tipping over.
- Center of Gravity: For maximum stability, you generally want a low and wide base, and the center of gravity (the average location of the weight of the lander) should be as low as possible.
-
Design Ideas:
- Wide Base: A wider footprint with splayed legs or a broad cardboard base will make the lander less prone to tipping.
- Multiple Legs: Three or four widely spaced legs provide a stable tripod-like base.
- Balanced Weight: Ensure the weight of your lander is evenly distributed. If one side is heavier, it will naturally tend to fall towards that side.
3. Weight Distribution: The Balancing Act
Related to stability, how you distribute the weight of your materials impacts how the lander falls and lands.
- How it works: An even distribution helps the lander descend predictably. Concentrating too much weight at the top can make it top-heavy and unstable.
- Design Ideas: Try to keep heavier elements (if you add any) closer to the base. Ensure your "astronauts" are securely placed to avoid shifting during descent.
4. Drag and Aerodynamics (Optional for Advanced Builders)
For longer drops or older children, you might consider how air resistance (drag) can slow the descent.
- How it works: Drag is the force that opposes motion through a fluid (like air). A parachute increases drag, slowing the fall.
- Design Ideas: Can you add a small parachute made from a plastic bag or fabric? What about fins made from index cards to guide the descent?
5. Material Science: Understanding Properties
Each material has unique properties. Straws are flexible, cardboard is rigid, marshmallows are squishy. Understanding these properties helps you decide how to use each material most effectively. This is similar to how we choose ingredients in our I'm the Chef Too! kits – each component has a role, both culinary and scientific!
By considering these principles, your children will move beyond simple building and into true engineering, thoughtfully designing their landers for success.
Step-by-Step Launch: Guiding Your Young Engineers
Now that we understand the core principles, let's walk through the Space Lander STEM Challenge using the Engineering Design Process. Remember, the goal isn't just a perfect lander on the first try, but the learning and problem-solving journey itself.
Phase 1: Ask – Define the Mission
Start by clearly stating the challenge. Engage your child's imagination!
- The Scenario: "Our marshmallow astronauts are on a critical mission to a new planet, and they need a safe landing! Your job is to design and build a spacecraft that will protect them during impact."
- The Goal: "The lander must safely carry two marshmallow astronauts inside a cup. When dropped from a height of [start with 1-2 feet, then increase], the astronauts must stay in the cup and be unharmed!"
- Constraints: "You can only use the materials provided [list them]. You have [set a time limit, e.g., 30-45 minutes] for design and build."
Phase 2: Imagine – Brainstorm & Sketch
This is the creative explosion phase! Encourage wild ideas and don't judge anything.
- Brainstorming: "How could we make something soft for the marshmallows? How can we make sure the lander doesn't tip over? What if it had legs? Or a parachute?" Ask open-ended questions.
- Research (Optional): Look at pictures of real lunar landers or Mars rovers. How did NASA engineers solve these problems? What kind of landing gear did they use?
- Sketching: Provide paper and pencils. "Draw at least two different ideas for your lander. Don't worry about making them perfect, just get your ideas down!" This helps visualize concepts and plan construction.
Phase 3: Plan – Material Selection & Initial Design
Based on their favorite ideas from the "Imagine" phase, it's time to get a bit more concrete.
- Choose a Design: "Which of your ideas do you think has the best chance of keeping the astronauts safe? Why?"
- Material Allocation: "Looking at your chosen design, which materials will you use for the legs? For cushioning? For the main body? How many straws do you think you'll need?"
- Detailed Sketch (Optional): For older kids, encourage a more detailed drawing showing where each material will go and how parts will connect.
Phase 4: Create – The Building Begins!
Now, the hands-on construction! This is where the designs come to life.
- Constructing the Lander: Guide them to follow their plan, but allow for improvisation. "Remember, engineers often change their plans as they build!"
-
Assembly Tips:
- Start with the cup (the astronaut compartment).
- Attach the cardboard base if using one.
- Add legs or a shock-absorbing structure underneath.
- Secure the marshmallows inside the cup.
- Emphasize careful taping and construction. Weak connections mean potential failure!
Phase 5: Test – The Moment of Truth!
This is often the most exciting (and sometimes nerve-wracking) part.
- Set up the Drop Zone: Choose a safe, clear area. Start with a low height (e.g., 1 foot, then 2 feet, then 3 feet).
- The Drop: "Ready for launch in 3... 2... 1... drop!"
-
Observe and Analyze:
- "Did your astronauts stay safe? Did they stay in the cup?"
- "Did the lander land upright? If not, how did it fall?"
- "What happened to the materials on impact? Did the straws bend? Did the cup squish?"
- "What worked well in your design?"
- "What didn't work as planned?"
- Document Results: Encourage a quick drawing or note of the outcome. This data is vital for the next phase.
Just like discovering the exciting chemical reaction that makes our Erupting Volcano Cakes bubble over with deliciousness, observing your lander's performance provides immediate, tangible feedback. Each experiment, whether culinary or engineering, offers invaluable learning.
Phase 6: Improve – The Iterative Loop
This is where the magic of engineering truly happens! Rarely does a design work perfectly on the first try.
-
Brainstorm Solutions: "Based on what you observed, what changes could you make to your lander to make it better?"
- If astronauts fell out: "How can we secure them better? Do we need a lid?"
- If it tipped: "How can we make the base wider or more stable?"
- If astronauts were squished: "How can we add more cushioning or better shock absorption?"
- Redesign and Rebuild: Make the changes. This could be small tweaks or a complete overhaul.
- Test Again: Repeat the drop, observe, and analyze. Continue this cycle as many times as interest and materials allow. Each iteration refines their understanding and skills.
This iterative process mirrors the real world of engineering, emphasizing continuous improvement and problem-solving. If your child loves exploring the cosmos with edible creations and hands-on experiments, our Galaxy Donut Kit offers another delicious dive into astronomy and the wonders of our solar system! It's a fantastic way to continue their STEM journey with a sprinkle of sweetness.
Expanding the Universe: Variations and Advanced Missions
Once your child has mastered the basic Space Lander STEM Challenge, there are countless ways to expand the mission and increase the complexity, keeping their minds engaged and curiosity soaring. These variations can introduce new scientific concepts and challenge their engineering prowess even further.
Different Payloads: Upping the Stakes
While marshmallows are fun and forgiving, switching up the "astronauts" can significantly alter the challenge:
- Ping Pong Balls: Lightweight and bouncy, these introduce different considerations for containment and gentle landing.
- Raw Egg (Advanced Challenge!): This is the ultimate test! Protecting a raw egg requires superior shock absorption and stability. The mess factor makes it high-stakes and highly memorable. Be prepared for potential breakage, but also for immense pride when a design succeeds! This variation truly emphasizes the fragility of a real spacecraft's cargo.
Varying Environments: Simulating Other Worlds
Each celestial body has unique conditions. You can simulate these in your home!
-
Different Drop Heights:
- The Moon: Lower gravity, so the impact might feel less severe, but precision still matters. (Use a standard drop height, e.g., 5 feet).
- Mars: Intermediate gravity, often with a thin atmosphere. (Maybe a slightly higher drop, e.g., 6-7 feet, or consider adding a small "parachute" element to simulate atmospheric drag).
- Earth: Highest gravity, heaviest impact. (Use the highest comfortable drop height, e.g., from a second-story window if safe, or a tall ladder with adult supervision).
-
Different Landing Surfaces:
- Carpet: Provides natural cushioning, making the challenge slightly easier.
- Hardwood/Concrete: A much harsher impact, requiring more robust shock absorption.
- Sand/Loose Dirt: Introduces the challenge of sinking or getting stuck, prompting designs with wider bases or specialized "feet."
- Water (in a bucket): Requires designs that can float or withstand water entry, touching on buoyancy and water resistance.
Adding Complexity: Real-World Engineering Constraints
Real engineers face numerous constraints. Introduce some of these to push your child's problem-solving skills:
- Target Landing Zones: Can the lander not only protect its payload but also land within a designated square or circle on the floor? This adds a dimension of accuracy and control to the design.
- Weight Limits: "Your lander cannot weigh more than X grams/ounces." This forces efficiency in material use and design.
- Material Budget: Assign a "cost" to each material (e.g., straws = $1 each, index cards = $0.50 each) and give your child a budget. This teaches resource management and cost-effective design.
- Time Constraints: Imposing stricter time limits for design and build phases simulates real engineering deadlines.
- No Tape Challenge: Can they connect materials using only other materials (e.g., slits in cardboard, weaving straws, mini marshmallow "glue")? This boosts creativity in joinery.
The Culinary Twist: An I'm the Chef Too! Signature
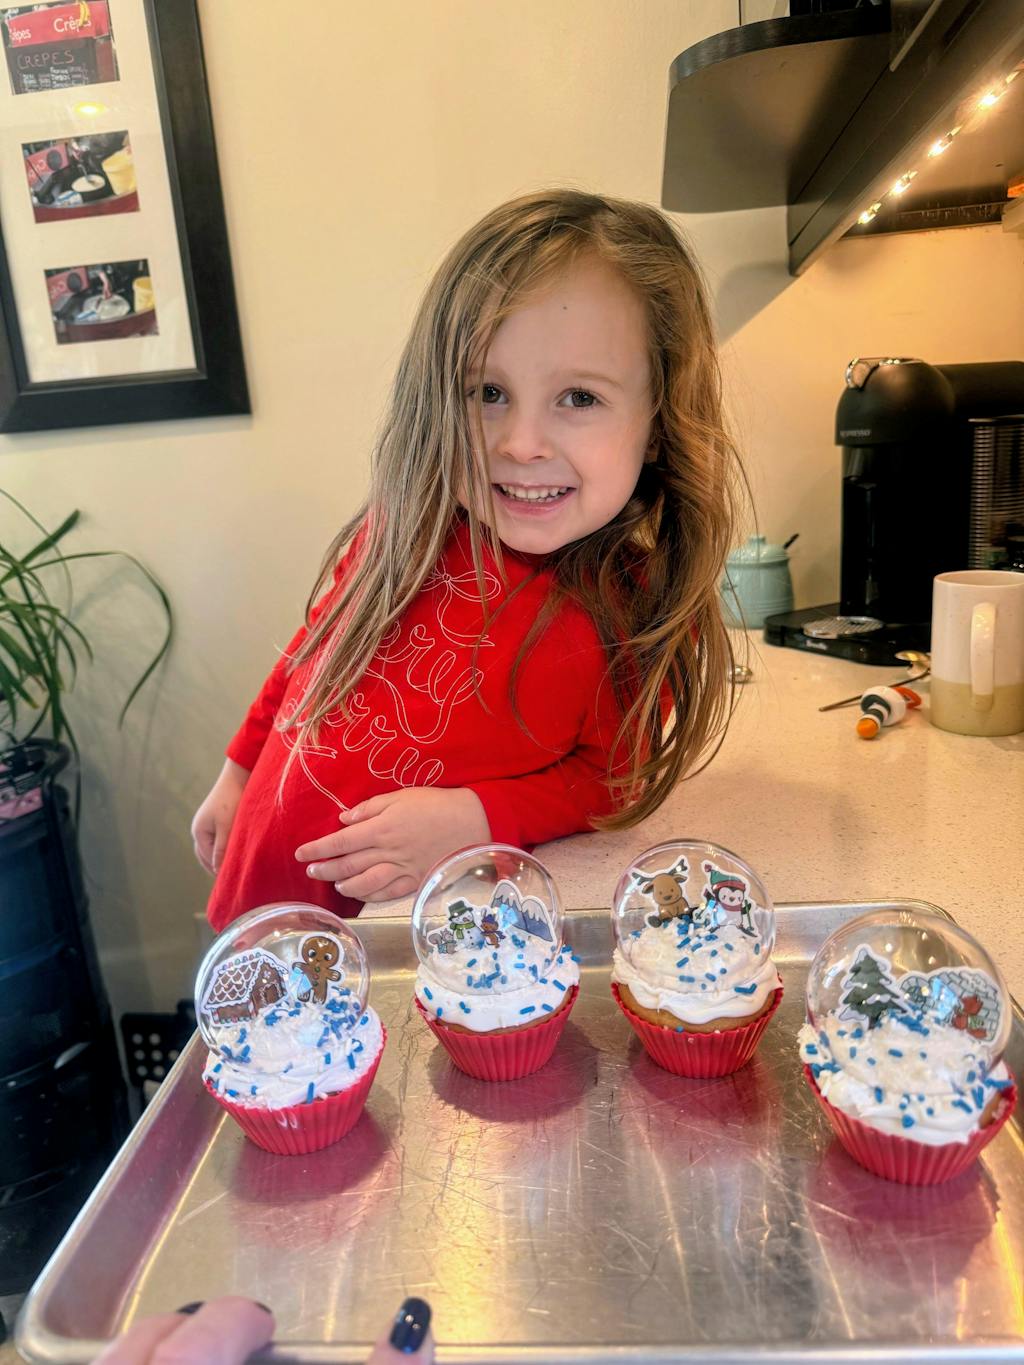
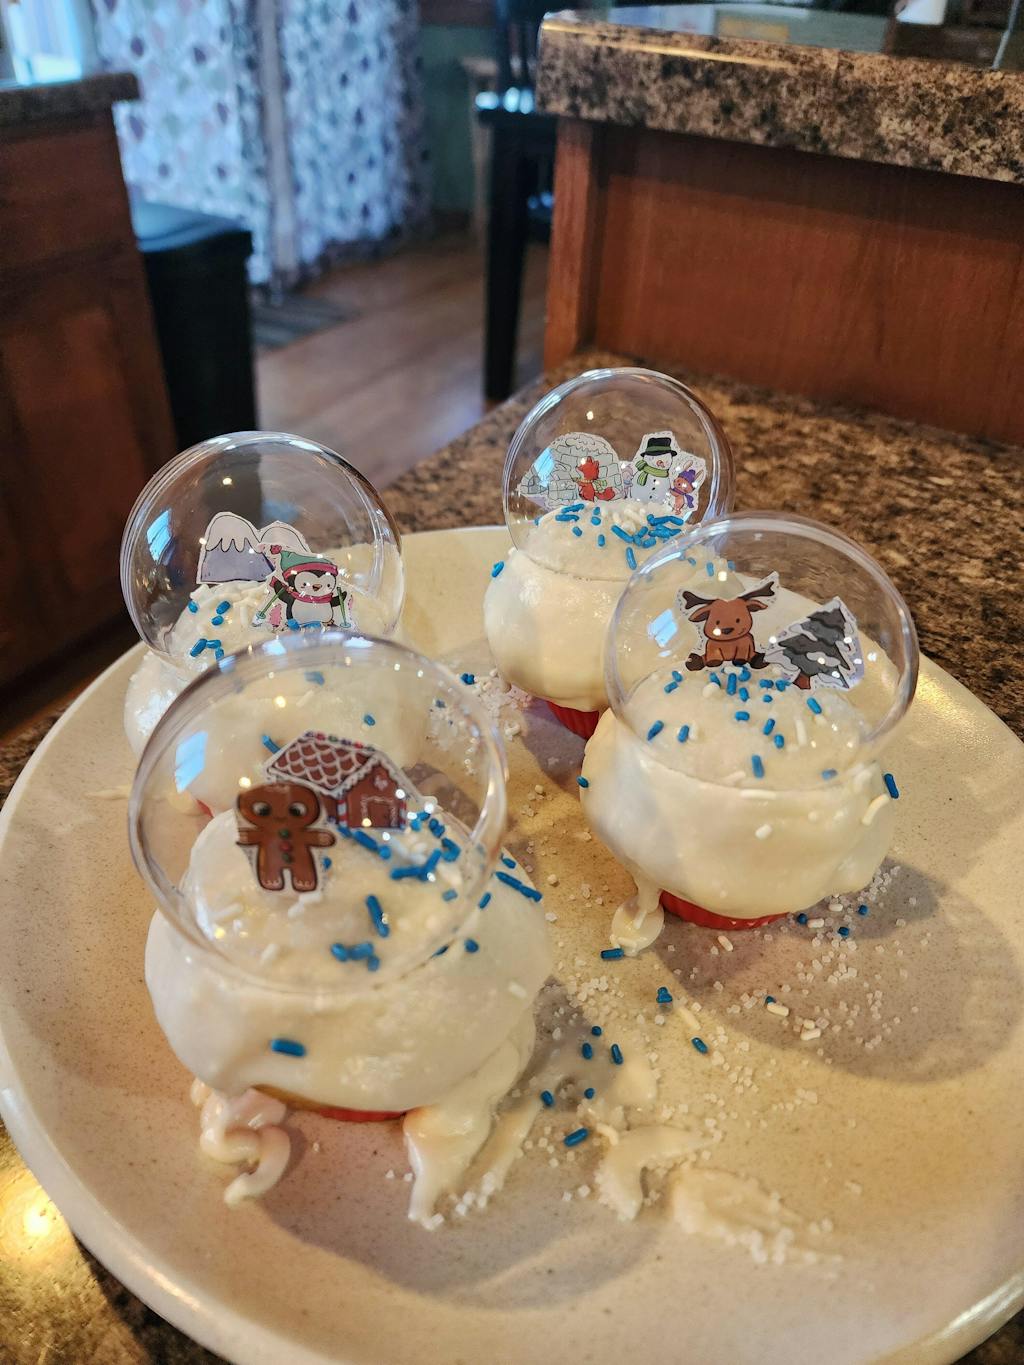
Of course, we can't talk about fun, hands-on activities without a delicious culinary component! This is where the "Chef" meets the "Too!" in I'm the Chef Too! You can seamlessly integrate food into your space lander adventure:
-
Edible Lander Components:
- Use pretzel sticks or chocolate-dipped wafer cookies for landing legs.
- Create a base out of a large cookie or rice krispie treat.
- "Glue" components together with frosting or melted chocolate.
- Decorate the cup (astronaut compartment) with edible markers or sprinkles.
-
Creating an Edible Planetary Surface:
- Use crumbled cookies (Oreos are great for a "moon dust" effect!) or green-dyed coconut flakes for a grassy alien planet.
- Top a brownie or cake base with edible "craters" (scoops of ice cream or frosting).
- Your marshmallow astronauts can then make their delicious landing on this edible terrain!
- This not only adds a sensory, delicious element but also ties into the art component of STEAM (Science, Technology, Engineering, Arts, and Math) that we champion. This kind of activity aligns perfectly with our mission: to spark curiosity and creativity in children by making complex subjects tangible, hands-on, and often, delicious! Our unique approach, developed by mothers and educators, ensures that learning is an adventure. If you're inspired to continue these "edutainment" experiences, remember that a new adventure is delivered to your door every month with free shipping in the US when you join The Chef's Club.
Real-World Resonances: From Classroom to Cosmos
The Space Lander STEM Challenge isn't just an abstract exercise; it's a direct reflection of the incredible feats accomplished by real-world scientists and engineers. Connecting your child's hands-on experience to these grand achievements can be profoundly inspiring.
Think about NASA's Apollo missions, which landed humans on the Moon. The Lunar Module, or "Eagle," was specifically designed to descend, land, and then ascend from the lunar surface. Its intricate honeycomb structure and crushable aluminum components were prime examples of shock absorption and lightweight design.
More recently, the Mars rovers like Curiosity and Perseverance faced even more daunting challenges. Landing a vehicle the size of a car on Mars involved a complex sequence: entering the atmosphere, deploying a supersonic parachute, firing retro-rockets, and then, for Perseverance, the innovative "sky crane" maneuver to gently lower the rover to the surface. Each step required meticulous engineering to manage speed, heat, and impact forces. These engineers had to account for Mars' thin atmosphere, which provides less drag for parachutes, and its rocky, unpredictable terrain. They iterated their designs countless times, just like your child will!
By undertaking the Space Lander STEM Challenge, your child is engaging with the same types of problems, the same principles of physics, and the same iterative design process that these pioneering engineers used. They're not just playing; they're stepping into the shoes of innovators, learning that complex problems can be broken down, experimented with, and ultimately solved through creativity and perseverance. This experience isn't about becoming a top scientist overnight, but about fostering a love for learning, building confidence, and developing key skills that will serve them in any future endeavor.
At I'm the Chef Too!, we believe in providing screen-free educational alternatives that truly engage young minds. Our kits are designed to connect these big ideas—whether it's space exploration, geology, or chemistry—to tangible, exciting, and delicious experiences, fostering the next generation of curious thinkers and innovators.
Nurturing Young Innovators: Tips for Parents and Educators
Guiding children through a STEM challenge is an art. It's about facilitation, not dictation. Here are some tips to maximize the learning and fun for your young engineers:
- Embrace Failure as a Teacher: This is perhaps the most crucial mindset shift. When a lander fails, resist the urge to step in and "fix" it or express disappointment. Instead, frame it as valuable data. "Wow, that didn't go as planned! What did we learn from that drop? What part of your design didn't work the way you thought it would?" This teaches resilience and problem-solving.
-
Ask Guiding Questions (Don't Give Answers): Instead of saying, "You should make the legs wider," ask, "What do you think made your lander tip over? How could you make it more stable?" Prompt them to think critically about their observations and ideas.
- "What materials do you think would cushion the impact best?"
- "How can you make sure the astronauts don't fall out?"
- "If we made this part stronger, what might happen to another part?"
- Encourage Documentation (Even Simple Doodles): For older children, suggest they sketch their initial design, note modifications, and draw the outcome of each test. Even a simple "thumbs up/thumbs down" or a quick sentence can help them track their learning. This mirrors the engineering notebook used by real professionals.
- Celebrate the Process, Not Just the Outcome: Praise their effort, their creative ideas, their perseverance through challenges, and their analytical thinking. A lander that fails but leads to significant learning is a huge success!
- Create a Safe & Supportive Environment: Ensure they feel comfortable experimenting, making mistakes, and sharing their ideas without judgment. This fosters confidence and encourages bold thinking.
- Foster Family Bonding: This challenge, like all our I'm the Chef Too! kits, is a fantastic opportunity for meaningful family interaction. Work together, laugh together, problem-solve together. These shared experiences build strong connections and create joyful, lasting memories.
- Convenience for Busy Families: We understand that preparing for these activities can take time. Just like how we make STEM learning easy and accessible with pre-measured dry ingredients and specialty supplies, you can create memorable learning moments without the fuss. Ready for a new adventure every month? Join The Chef's Club and enjoy free shipping on every box. It's the perfect way to bring ongoing "edutainment" right to your doorstep.
Beyond the Lander: Continuing the STEM Adventure with I'm the Chef Too!
The Space Lander STEM Challenge is a magnificent springboard into the vast and exciting world of STEM. It demonstrates how complex scientific and engineering principles can be explored through simple materials and creative problem-solving. At I'm the Chef Too!, our core mission is to extend this kind of engaging, hands-on "edutainment" directly into your home.
We believe that learning should be an adventure, blending food, STEM, and the arts into unique experiences that spark curiosity and creativity in children. Our kits, developed by mothers and educators, are meticulously designed to teach complex subjects through tangible, delicious cooking adventures. We champion family bonding and provide a much-needed screen-free educational alternative that truly captures children's imaginations.
Imagine the excitement of a new "edutainment" experience arriving at your doorstep regularly. Our monthly Chef's Club subscription delivers complete, hands-on STEM cooking adventures with free US shipping on every box. Each box is a complete experience, containing pre-measured dry ingredients and specialty supplies, so you can dive right into the fun without the hassle of shopping. We offer flexible 3, 6, and 12-month pre-paid plans, perfect for gifting or ensuring long-term enrichment for your budding chef-scientists.
If you're not quite ready for a subscription but are eager to explore more themed adventures, we invite you to browse our complete collection of one-time kits. From exploring prehistoric eras to cosmic journeys, you'll find the perfect theme to ignite your little learner's passion and curiosity. Every kit is an invitation to discover, create, and taste the wonders of STEM!
Conclusion
The Space Lander STEM Challenge is a powerful testament to the idea that some of the most profound learning happens outside of textbooks and beyond screens. By designing, building, testing, and refining their own spacecraft, children don't just learn about physics and engineering; they cultivate critical thinking, resilience, creativity, and a deep appreciation for the iterative process of innovation. It's an activity that fosters a love for learning, builds confidence in their problem-solving abilities, and creates joyful family memories that will last a lifetime.
As you conclude your mission to ensure safe landings for marshmallow astronauts, remember that the spirit of curiosity and hands-on discovery doesn't have to end. At I'm the Chef Too!, we are dedicated to providing ongoing opportunities for children to explore the exciting intersection of food, STEM, and the arts. Our unique "edutainment" experiences are crafted to ignite imaginations, facilitate family bonding, and offer enriching, screen-free educational adventures.
To keep the learning fun, engaging, and utterly delicious, consider joining The Chef's Club today! Give the gift of learning that lasts all year with a 3, 6, or 12-month pre-paid subscription to our STEM cooking adventures, and watch your child’s curiosity soar to new heights, one delicious experiment at a time.
FAQ
Q: What age is the Space Lander STEM Challenge best suited for? A: This challenge is incredibly versatile! It's great for children aged 5 and up. Younger children (5-7) will benefit from more guidance and simpler objectives (e.g., just keeping the marshmallow in the cup). Older children (8+) can tackle more complex designs, engage deeply with the engineering design process, and explore advanced concepts like weight distribution, specific drop heights, or even raw egg payloads.
Q: How long does the challenge typically take? A: The duration can vary based on age and how many iterations your child wants to do.
- Initial Build & Test: 30-60 minutes for younger children to build and test one or two designs.
- Iterative Design: Allow 1-2 hours or even break it into multiple sessions for older children who want to go through several cycles of design, test, and improve.
- Introduction & Discussion: Factor in an additional 10-15 minutes for the initial briefing and brainstorming.
Q: What if my child gets frustrated because their lander keeps failing? A: Frustration is a natural part of the engineering process! This is a prime opportunity to teach resilience.
- Empathize: "I see this is challenging. It's okay to feel frustrated when things don't work as you hoped."
- Reframe Failure: "Every time your lander doesn't work perfectly, we learn something new. What did this drop tell us about your design?"
- Ask Guiding Questions: Instead of fixing it, ask, "What part failed? Why do you think that happened? What's one small change you could try?"
- Take a Break: Sometimes a short break can help clear their mind and come back with fresh ideas.
- Remind them of Real Engineers: Even NASA engineers face countless failures before a successful mission. It's all part of the process!
Q: How can I make the challenge more challenging for older kids? A:
- Stricter Criteria: Introduce a target landing zone, a maximum weight limit for the lander, or a limited number of materials.
- Advanced Payloads: Challenge them to protect a raw egg.
- Higher Drop Heights: Gradually increase the drop height, perhaps from a second-story window (with careful adult supervision).
- Blind Design: Give them the criteria and materials, but no examples or pictures of real landers, forcing complete originality.
- Documentation: Require them to draw their plans, list materials, record test results, and explain their improvements in a "mission log."
Q: What are some good substitutions for the core materials if I don't have them? A:
- Stiff Paper/Cardboard: Cereal boxes, shoebox lids, paper plates, or even multiple layers of construction paper glued together.
- Paper/Plastic Cup: Any small, lightweight container like a yogurt cup, small plastic food container, or even a toilet paper roll (though it might need a bottom).
- Index Cards: Any stiff paper like cardstock, construction paper, or thin cardboard.
- Marshmallows (Astronauts/Cushioning): Cotton balls, crumpled paper, sponges, small soft toys, or even grapes (for the higher-stakes challenge!).
- Rubber Bands: String, yarn, or pipe cleaners can offer some flexibility and binding.
- Plastic Straws: Craft sticks, rolled-up paper tubes, skewers (with blunt ends for safety), or even empty pen tubes can work for structural support.
- Tape: Glue (hot glue with adult supervision, or school glue for longer drying times), string, or ingenious cuts/folds to interlock materials.
Q: How can I ensure my child connects this activity to real science concepts? A:
- Discuss Observations: Ask "Why do you think the lander landed that way?" or "What force is pulling your lander down?"
- Introduce Vocabulary: Use terms like "gravity," "force," "impact," "shock absorption," "stability," "kinetic energy" naturally in conversation.
- Watch Videos: Show short videos of real space landings (NASA's Mars rover landings are particularly dramatic) to illustrate the challenges real engineers face.
- Ask "What if?": "What if your lander had a huge parachute? How would that change its fall?" or "What if you added more weight to the bottom?" These questions encourage predictive thinking.
- Connect to Everyday Life: "Where else do you see shock absorption? (Car bumpers, shoes, playgrounds)." This helps bridge the gap between abstract science and their world.