Journey to the Ice Age: Epic Crafts & Activities for Kids

Table of Contents
- Introduction to the Frozen Past: Why the Ice Age Fascinates
- Our Mission: Blending Food, STEM, and Art for Prehistoric Fun
- Edible Expeditions: Delicious Ice Age Crafts for Little Explorers
- Hands-On Adventures: Non-Edible Ice Age Crafts & Explorations
- Beyond the Craft Table: Ice Age Learning Extensions
- Making Learning a Family Adventure: The I'm the Chef Too! Way
- Seamlessly Integrating STEM & Creativity
- The Convenience of Curiosity Delivered
- Conclusion
- FAQ: Your Ice Age Crafting Questions Answered
Imagine a time when colossal woolly mammoths roamed vast, icy plains, their shaggy coats battling the bitter winds. A world where agile saber-toothed cats prowled ancient forests, and colossal glaciers slowly carved out valleys and mountains across continents. This was the Ice Age, a breathtaking epoch in Earth's history, and it’s a period that instantly captures the imagination of children and adults alike. For curious young minds, the Ice Age isn't just a chapter in a textbook; it's a thrilling adventure waiting to be explored.
Here at I'm the Chef Too!, we believe that learning should be as exciting as unearthing a perfectly preserved fossil. That's why we're dedicated to blending food, STEM, and the arts into one-of-a-kind "edutainment" experiences that ignite curiosity and creativity in children. Today, we're embarking on a prehistoric journey, offering a treasure trove of engaging, educational, and fun Ice Age crafts and activities perfectly suited for your little paleontologists, geologists, and artists. We'll explore edible adventures, hands-on projects, and imaginative play that will transport your children straight into this captivating era, fostering a love for learning, building confidence, and creating joyful family memories.
Introduction to the Frozen Past: Why the Ice Age Fascinates
The Ice Age is more than just a cold spell in Earth's history; it was a dynamic period of profound environmental change, remarkable animal adaptations, and the emergence of early human ingenuity. It’s a natural hook for children for several compelling reasons:
- Magnificent Megafauna: Who isn't captivated by the thought of enormous woolly mammoths, formidable saber-toothed cats, gigantic ground sloths, and woolly rhinos? These creatures spark a sense of wonder and make the past feel incredibly tangible. Their sheer size and unique characteristics provide endless opportunities for creative exploration and scientific inquiry.
- Dramatic Landscapes: The idea of vast glaciers, ice caves, and shifting landmasses offers a dramatic backdrop for learning about geology, climate science, and the forces that shape our planet. Children can visualize a world so different from their own, which stimulates their geographical and environmental understanding.
- Early Human Story: The Ice Age also tells the story of early humans—how they survived, hunted, innovated, and expressed themselves through incredible cave art. This aspect connects children to their own history, fostering an appreciation for human resilience and creativity. They can imagine what life was like for children thousands of years ago, sparking empathy and a sense of continuity with the past.
- Mystery and Discovery: The ongoing discovery of fossils, ancient artifacts, and archaeological sites means the Ice Age is still revealing its secrets. This sense of mystery encourages scientific thinking, problem-solving, and a desire to explore. It teaches children that knowledge is constantly evolving and that they, too, can be discoverers.
At I'm the Chef Too!, our unique approach ensures that these complex subjects are taught through tangible, hands-on, and delicious cooking adventures developed by mothers and educators. We understand that sparking curiosity and facilitating family bonding through screen-free educational alternatives is paramount. These Ice Age crafts are designed not just to occupy time, but to truly engage minds, blending scientific principles with artistic expression in an unforgettable way.
Our Mission: Blending Food, STEM, and Art for Prehistoric Fun
At I'm the Chef Too!, our heart beats with the desire to make learning an adventure. We believe that some of the most profound lessons happen when children are immersed in an activity, using their hands, engaging their senses, and even tasting the results of their efforts! Our mission is to blend food, STEM, and the arts into one-of-a-kind "edutainment" experiences, and the Ice Age provides a perfect canvas for this philosophy.
Imagine your child learning about geology by "excavating" edible fossils, or understanding chemical reactions by making a treat that fizzes like a tiny geyser. This isn't just about making a snack; it's about igniting a passion for discovery. We're committed to sparking curiosity and creativity in children, facilitating precious family bonding moments away from screens, and providing a hands-on educational alternative that truly resonates.
Our unique approach, developed by mothers and educators, transforms abstract concepts into tangible, delicious cooking adventures. We don't promise your child will become a top scientist overnight, but we do promise an environment that fosters a genuine love for learning, builds confidence with every successful experiment, develops crucial fine motor and problem-solving skills, and creates a treasury of joyful family memories that will last far longer than any treat. We celebrate the process of discovery, the joy of creation, and the delicious taste of accomplishment.
Ready to bring new educational adventures to your home every month? Experience the convenience and excitement of a new themed kit delivered right to your door with free shipping. Join The Chef's Club today and start creating delicious memories!
Edible Expeditions: Delicious Ice Age Crafts for Little Explorers
What better way to dive into the prehistoric world than through delicious, hands-on edible crafts? These activities leverage the power of food to teach scientific principles, art techniques, and historical facts, all while engaging multiple senses and leading to a tasty reward. Remember, all kitchen activities should be undertaken with adult supervision for safety and maximum fun!
Fudgy Fossil Digs: An Archaeological Adventure
Imagine unearthing ancient relics, but instead of dust and dirt, it's rich, delicious chocolate! This activity is a fantastic way to introduce concepts of archaeology, paleontology, and geology in a deliciously tangible way.
Materials:
- Brownie mix (or your favorite brownie recipe)
- Crushed chocolate cookies (like Oreos, without the cream) for "dirt"
- Small, clean plastic toy dinosaurs or plastic animal bones (make sure they are food-safe and thoroughly washed)
- Spoons, small brushes (clean paintbrushes work well), or even small toy shovels for "excavation"
- Baking dish or individual cups
- Optional: a sprinkle of green sprinkles or edible moss for "ancient foliage"
Instructions:
- Bake the "Earth Base": Prepare and bake your brownies according to package directions in a baking dish. Once cooled, cut them into individual squares or crumble them into small cups. This forms your "earth."
- Hide the Fossils: Carefully embed the clean plastic toy dinosaurs or bones into the cooled brownie "earth." Push them down so they are partially or completely hidden.
- Create the "Sediment": Sprinkle a generous layer of crushed chocolate cookies over the brownies and hidden toys. This simulates the layers of sediment that would cover ancient fossils.
- Excavation Time! Provide your child with a spoon or small brush and challenge them to carefully "excavate" the fossils. Encourage them to brush away the "dirt" gently, just like real paleontologists.
- Identify Your Finds: As they uncover each "fossil," talk about the animal it represents. What might it have eaten? How big was it?
Educational Connections:
- Paleontology & Archaeology: Introduces the concept of digging for ancient remains and understanding the past through artifacts.
- Geology: The layers of brownie and cookie crumbs represent strata, showing how things get buried over time.
- Fine Motor Skills: The careful brushing and digging hone dexterity and hand-eye coordination.
- Patience & Problem-Solving: Children learn to work carefully and strategically to uncover their treasures.
Want to make a truly epic edible excavation? Our very own Fudgy Fossil Dig kit offers a complete, pre-measured adventure, taking the guesswork out of crafting and maximizing the fun! It's designed to bring the excitement of discovery right to your kitchen.
Glacial Goo & Edible Ice: Chilling Science Experiments
The Ice Age was defined by, well, ice! These activities bring the science of freezing and melting to life with delicious results.
1. Edible "Glacier" Goo:
Materials:
- Clear gelatin (unflavored)
- Blue food coloring (a few drops)
- Small edible "treasures" like gummy dinosaurs, sprinkles, or small candies
- Water
- A clear glass dish or individual clear cups
Instructions:
- Prepare Gelatin: Follow package instructions for preparing clear gelatin, but use slightly less water than recommended to make it firmer.
- Color the "Ice": Add a few drops of blue food coloring to the gelatin mixture, creating a subtle icy blue hue.
- Embed Treasures: Pour a thin layer of gelatin into your dish or cups. Let it set slightly in the refrigerator. Then, strategically place your edible "treasures" on top. Pour another layer of gelatin over them, allowing some to be partially visible, just like fossils trapped in ice.
- Chill and Explore: Refrigerate until completely set. Once firm, children can use spoons to "chip away" at their edible glacier, discovering the buried treasures within.
Educational Connections:
- States of Matter: Discuss how the liquid gelatin transforms into a solid, mimicking the freezing of water into ice.
- Encapsulation: Learn how objects can become trapped within materials like ice or amber.
- Sensory Exploration: The wobbly, cool texture of the gelatin provides a unique sensory experience.
2. Edible Ice Excavation:
Materials:
- Ice cube tray or small containers
- Small, food-safe toys or edible items (e.g., gummy worms, blueberries)
- Water
- Salt (table salt or rock salt)
- Warm water in a bowl
- Pipettes, eyedroppers, or small spoons
- Optional: Food coloring for colored ice
Instructions:
- Freeze Your Treasures: Place small toys or edible items into ice cube trays or containers. Fill with water (add food coloring if desired for a vibrant ice block). Freeze solid overnight.
- Set Up the Dig: Pop the ice blocks out into a shallow tray or bowl. Provide salt shakers, a bowl of warm water, and pipettes or spoons.
- Melt and Discover: Show your child how to sprinkle salt onto the ice (explaining that salt lowers the freezing point, making ice melt faster). Then, demonstrate using a pipette to drip warm water onto the ice. Watch as the ice melts, revealing the hidden treasures!
Educational Connections:
- Chemistry (Melting Point Depression): Explain how salt interacts with ice to make it melt more quickly, a fundamental concept in chemistry (and why we salt roads!).
- States of Matter: Observe the transition from solid ice to liquid water.
- Fine Motor Skills: Using pipettes and shakers strengthens hand muscles and coordination.
- Problem-Solving: Children experiment with different methods to free their treasures.
Mammoth & Saber-toothed Snacks: Prehistoric Culinary Art
Bringing Ice Age animals to life doesn't always require clay or paper; sometimes, cookies and cupcakes are the perfect medium!
1. Woolly Mammoth Cupcakes:
Materials:
- Your favorite cupcake recipe or mix
- Chocolate frosting
- Shredded coconut (toasted lightly for a more "woolly" look)
- Pretzel sticks for tusks
- Mini chocolate chips or candy eyes for eyes
Instructions:
- Bake Cupcakes: Bake and cool cupcakes.
- Frost: Frost each cupcake generously with chocolate frosting.
- Add Fur: Gently press toasted shredded coconut onto the frosting to create a "woolly" texture.
- Tusks & Eyes: Insert two pretzel sticks for tusks. Add mini chocolate chips or candy eyes for a friendly mammoth face.
Educational Connections:
- Animal Characteristics: Discuss the distinguishing features of a woolly mammoth (fur, tusks) and how they helped it survive in a cold environment.
- Sensory Exploration: The texture of the coconut, the crunch of the pretzel, and the sweetness of the cupcake engage multiple senses.
2. Saber-toothed Tiger Cookies:
Materials:
- Sugar cookie dough (store-bought or homemade)
- Yellow or orange food coloring (optional, for tiger stripes)
- Chocolate frosting or melted chocolate for stripes
- White chocolate chips or small white candies for "saber teeth"
- Candy eyes
Instructions:
- Bake Cookies: Roll out sugar cookie dough and use an oval or cat-shaped cookie cutter. Bake according to recipe directions and let cool.
- Decorate: Frost cookies with a thin layer of yellow or orange frosting. Use chocolate frosting or melted chocolate in a piping bag to draw tiger stripes.
- Add Features: Attach candy eyes. For the iconic "saber teeth," press two white chocolate chips (pointy side down) or small white candies near the mouth area, extending past the cookie edge.
Educational Connections:
- Animal Anatomy: Highlight the exaggerated saber teeth and discuss their function as predatory tools.
- Art & Design: Experiment with color and line to create realistic (or imaginative!) animal patterns.
Caveman Cookies & Art: Edible Art History
Cave paintings are one of the most enduring legacies of Ice Age humans. This activity allows children to recreate that ancient art form using edible materials.
Materials:
- Large, flat sugar cookies or plain shortbread cookies (these are your "cave walls")
- Powdered sugar
- Milk (a few drops)
- Food coloring (earthy tones like brown, black, red, yellow)
- Small, clean paintbrushes or cotton swabs
- Optional: Cocoa powder for brown "paint"
Instructions:
- Prepare "Paint": In separate small bowls, mix a few tablespoons of powdered sugar with just a few drops of milk to create a thick, paint-like icing. Add different food colorings to each bowl (or use cocoa powder for brown).
- Create Your Cave Art: Give your child the cookies and the edible "paints." Encourage them to draw Ice Age animals, stick figures, or symbolic patterns, mimicking ancient cave art. You can show them examples of real cave paintings (Lascaux, Altamira) for inspiration.
- Display & Devour: Let the edible paint dry slightly before admiring your prehistoric masterpieces. Then, enjoy your artistic creations!
Educational Connections:
- Art History: Introduce children to one of the earliest forms of human artistic expression. Discuss how ancient people used natural pigments.
- Symbolism & Storytelling: Talk about what the cave paintings might have meant to early humans (hunting magic, recording events, spiritual beliefs).
- Creative Expression: Allows children to express their understanding of the Ice Age visually.
Not ready to subscribe just yet, but craving some hands-on fun? We offer a fantastic selection of one-time kits! Explore our full library of adventure kits available for single purchase in our shop and find the perfect theme for your little learner!
Hands-On Adventures: Non-Edible Ice Age Crafts & Explorations
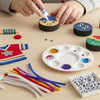
Beyond the delicious culinary creations, there's a vast world of non-edible crafts and activities that bring the Ice Age to life. These projects often focus on art, engineering, and sensory exploration, providing different avenues for learning and creativity.
Woolly Mammoth Wonders: Crafting the Giants
The woolly mammoth is arguably the most iconic creature of the Ice Age. Crafting these magnificent beasts offers opportunities for different artistic techniques and material exploration.
1. Paper Plate Woolly Mammoths:
Materials:
- Paper plates
- Brown or gray paint
- Yarn or shredded paper (brown, gray, tan)
- Pipe cleaners or construction paper for tusks
- Googly eyes
- Glue, scissors
Instructions:
- Paint the Body: Paint the paper plate brown or gray and let it dry. This will be the mammoth's body.
- Add Fur: Once dry, apply glue over the paper plate and have your child stick yarn pieces or shredded paper to create the woolly fur texture.
- Attach Features: Cut two ear shapes from construction paper and glue them on. Attach googly eyes. For tusks, curl pipe cleaners or cut curved shapes from construction paper and glue them to the bottom edge of the plate.
Educational Connections:
- Animal Anatomy: Reinforce the distinctive features of a woolly mammoth.
- Texture & Art: Experiment with different materials to represent textures (fur).
- Fine Motor Skills: Cutting, gluing, and manipulating small pieces.
2. Toilet Paper Roll Mammoths:
Materials:
- Empty toilet paper rolls
- Brown paint or brown construction paper
- Pipe cleaners for tusks and trunk
- Small pom-poms or cotton balls for fur
- Googly eyes
- Glue, scissors
Instructions:
- Body Base: Paint the toilet paper roll brown or cover it with brown construction paper.
- Add Features: Cut slits in one end for legs (or attach four small loops of paper for legs). For the trunk, attach a shorter piece of pipe cleaner or a strip of paper. For tusks, bend two pipe cleaners into curves and attach them to the front.
- Fur & Face: Glue small pom-poms or cotton balls for fur. Add googly eyes.
Educational Connections:
- Recycling & Upcycling: Using common household items for crafting.
- 3D Construction: Learning how to build a three-dimensional model.
Saber-toothed Shadow Play: Ancient Stories in Silhouette
Shadow puppets are an ancient art form that can bring the drama and mystery of the Ice Age to life. This activity combines art, storytelling, and a bit of science!
Materials:
- Cardstock or thin cardboard (black works best)
- Scissors or craft knife (adult supervision for knife)
- Brads (paper fasteners) for joints
- Thin wooden dowels or craft sticks
- Tape
- A white sheet or butcher paper (for the screen)
- A large cardboard box or frame to hold the screen
- A bright lamp or flashlight
Instructions:
- Design Your Puppets: Sketch Ice Age animals (saber-toothed cat, mammoth, dire wolf) or early human figures onto cardstock. For jointed puppets, draw limbs separately.
- Cut & Assemble: Carefully cut out your puppet pieces. If making jointed puppets, punch small holes where limbs connect to the body and secure them with brads. This allows for movement.
- Attach Controls: Tape a wooden dowel or craft stick to the back of each puppet (and to specific moving limbs if desired) to control its movements.
- Create Your Screen: Cut a large rectangle out of the center of a cardboard box or large piece of foam core (like a picture frame). Tape white butcher paper or a thin white sheet over this opening. Prop it up so it stands.
- Set the Scene: Position a bright lamp or flashlight behind the screen, pointing towards it.
- Perform Your Story! With the light behind the screen, hold your puppets against the paper. The light will cast shadows. Move the puppets and their limbs to tell a story. Experiment with distance from the light source to change the size of the shadows.
Educational Connections:
- Art & Drama: Develops creativity, storytelling, character design, and performance skills.
- Science (Light & Shadow): Understand how light travels and creates shadows, and how distance affects shadow size.
- Imaginative Play: Encourages children to create narratives and engage in imaginative scenarios.
- Animal Movement: Discuss how these ancient animals might have moved (e.g., the crouch and pounce of a saber-toothed cat).
Prehistoric Pottery & Cave Art Recreations: Tactile Explorations
Early humans used readily available materials to create tools, art, and even dwellings. These crafts mimic those ancient techniques.
1. Salt Dough "Fossils" & Artifacts:
Materials:
- Salt dough recipe: 1 cup flour, 1/2 cup salt, 1/2 cup water (adjust as needed)
- Small plastic toy dinosaurs or animal figures
- Natural items for impressions: leaves, sticks, shells
- Baking sheet
- Optional: Acrylic paints, clear sealer
Instructions:
- Make Salt Dough: Mix flour, salt, and water until a firm dough forms. Knead for a few minutes.
- Create Impressions: Roll out the dough. Press plastic toy animals, leaves, or other natural objects firmly into the dough to create impressions. You can also sculpt small tools or figures.
- Bake & Harden: Carefully place your dough creations on a baking sheet. Bake at a low temperature (around 200°F / 95°C) for several hours until completely hard and dry. The exact time depends on thickness.
- Decorate (Optional): Once cooled, paint your "fossils" to look aged, or highlight the impressions. Seal with a clear coat for durability.
Educational Connections:
- Geology (Fossil Formation): Discuss how impressions are left in sediment and turn into fossils over millions of years.
- Art & Sculpture: Hand-building with dough, creating textures.
- History (Artifacts): Understanding how ancient tools and objects teach us about past cultures.
2. "Cave Wall" Art:
Materials:
- Large brown paper bags (opened flat) or craft paper
- Charcoal sticks, pastels, or crayons in earthy tones (black, brown, red, yellow, white)
- Optional: crumpled paper for texture
Instructions:
- Prepare the "Cave Wall": Crumple the brown paper bags or craft paper repeatedly, then smooth them out partially. This creates a textured, rock-like surface.
- Draw & Shade: Encourage children to draw Ice Age animals, hunting scenes, or human figures using the earthy art supplies. Discuss how ancient artists might have used natural pigments.
- Smudge & Blend: Show them how to smudge and blend the charcoal or pastels with their fingers to create a soft, ancient look, just like real cave paintings.
Educational Connections:
- Art History: Introduces the art of the Paleolithic era, including techniques and common subjects.
- Observation Skills: Encourage children to observe real cave paintings (from books or online) and try to replicate styles.
- Cultural Understanding: Reflect on what these images tell us about the lives and beliefs of early humans.
DIY Ice Excavation & Sensory Bins: A Hands-On Dig
Drawing inspiration from the hugely popular "Ice Age Sensory Bin" idea, this activity combines sensory play with scientific exploration, keeping children engaged for extended periods.
Materials:
- Large plastic bin or tub
- Water
- Small plastic Ice Age animals, toy bones, rocks, or other themed trinkets
- Salt (table salt or rock salt)
- Warm water in a spray bottle or small bowls
- Pipettes, eyedroppers, small spoons, child-safe hammers (e.g., plastic play hammers), or paintbrushes
- Optional: Food coloring for colored ice, scoops, tongs
Instructions:
- Freeze Your Treasures: A day or two before, fill your plastic bin with water. Place the Ice Age animals and other treasures at various depths within the water. For an extra challenge, freeze layers over several hours. You can even add a few drops of blue food coloring to the water for an icy blue effect. Freeze the entire bin solid.
- Set Up the Dig Site: Place the large ice block (still in the bin) in an outdoor area or on a waterproof surface indoors. Gather your excavation tools: salt, warm water, pipettes, spoons, and any other implements you'd like to use.
-
The Great Thaw & Dig:
- Salt Power: Explain that salt helps ice melt faster. Encourage children to sprinkle salt over the ice block. They'll notice grooves and tunnels starting to form.
- Warm Water Wash: Provide warm water in small bowls or spray bottles. Children can use pipettes to squirt warm water onto the salt-affected areas, speeding up the melt.
- Gentle Chiseling: For older children, a child-safe hammer can be used with adult supervision to gently chip away at larger chunks of ice.
- Patience and Persistence: The goal isn't to break the ice instantly but to observe the melting process and carefully free the buried items. This can keep children engaged for a remarkably long time!
Educational Connections:
- Science of Ice & Water: Direct observation of melting, the effect of salt on freezing/melting points, and states of matter.
- Sensory Exploration: The coldness of the ice, the sensation of water and salt, and the textures of the buried objects provide rich sensory input.
- Fine Motor Skills: Using pipettes, sprinkling salt, and manipulating small tools develops dexterity and hand-eye coordination.
- Problem-Solving: Children experiment with different tools and techniques to achieve their goal. "What happens if I put more salt here?" "Does warm water work better than cold?"
- Patience & Focus: This activity naturally encourages sustained attention and persistence.
"Fossil Finds" Crafting: Making Your Own Ancient Relics
Creating replica fossils is a tangible way for children to understand the incredible process of fossilization and the world of paleontology.
1. Plaster of Paris Fossils:
Materials:
- Plaster of Paris
- Water
- Small plastic toy dinosaurs or animal figures with textured surfaces
- Modeling clay or playdough
- Aluminum foil trays or small disposable containers
- Mixing bowl and stirrer (disposable is best)
- Optional: Paint to decorate fossils
Instructions:
- Create Impressions: Press your plastic toy animals or figures firmly into a flattened piece of modeling clay or playdough. Ensure a deep, clear impression. Carefully remove the toy.
- Prepare for Casting: Place the clay with the impression into a small aluminum foil tray or disposable container. The tray should be just slightly larger than your clay impression.
- Mix Plaster: Follow the Plaster of Paris instructions carefully, mixing with water in your disposable bowl until it's a smooth, pourable consistency. Work quickly, as it sets fast!
- Pour & Set: Gently pour the plaster mixture over your clay impression, filling the tray. Tap the tray lightly to release any air bubbles.
- Cure: Let the plaster set completely (usually 30-60 minutes, but check instructions).
- Reveal Your Fossil: Once hard, carefully peel away the clay from the plaster. You'll have a perfect replica fossil!
- Decorate (Optional): Once fully dry (can take 24 hours), children can paint their fossils to make them look more realistic.
Educational Connections:
- Paleontology: Understanding how molds and casts are formed in the natural world to create fossils.
- Chemistry & Material Science: Observing the chemical reaction that hardens plaster.
- Observational Skills: Examining the details transferred from the toy to the plaster.
2. "Amber" Encapsulations (Gelatin or Clear Slime):
Materials:
- Clear gelatin or clear slime ingredients (for a non-edible version, ensure non-toxic)
- Small, lightweight natural objects: tiny leaves, small dried flowers, pebbles (representing insects or plant matter trapped in amber)
- Small clear containers (e.g., plastic shot glasses, small jars)
Instructions (using gelatin for an edible or non-edible option):
- Prepare Gelatin: Prepare clear gelatin according to package directions. For a firmer, more "amber-like" texture, use a bit less water.
- Layer & Embed: Pour a thin layer of gelatin into the bottom of your clear container. Let it set slightly in the refrigerator.
- Add Treasures: Place your small natural objects onto the partially set gelatin. Pour another layer of gelatin over them. You can continue layering until the container is full, embedding objects at different depths.
- Chill: Refrigerate until fully set.
Educational Connections:
- Geology: Explain how tree sap fossilizes into amber, often trapping ancient insects and plant material, providing incredible insights into prehistoric ecosystems.
- Preservation: Discuss different methods of natural preservation (like freezing, tar, or amber).
- Observation: Examine the trapped objects and imagine the ancient environment they came from.
The Earth has always been a place of incredible transformations, from ancient glaciers to fiery geological events. We even explore some of these powerful forces and chemical reactions with kits like our Erupting Volcano Cakes that teach about fizzing and bubbling in a delicious way!
Beyond the Craft Table: Ice Age Learning Extensions
Crafting is a fantastic starting point, but the Ice Age offers so many avenues for continued learning and imaginative play. These extensions help deepen understanding and keep the prehistoric excitement alive.
Storytelling & Imaginative Play: The Narrative of the Past
Crafts aren't just an end in themselves; they're props for grand adventures!
- Puppet Shows: Use your newly crafted shadow puppets or paper mammoths to act out stories of survival, hunting, or discovery. Encourage children to develop characters and plots. You can even read books like Jan Brett's "The First Dog" and then create a puppet show based on its themes of friendship and adaptation. Discuss literary elements like conflict and resolution.
- Role-Playing: Pretend to be early humans, hunting for food, seeking shelter, or creating cave art. This encourages empathy and an understanding of daily life in the Ice Age.
- "What If" Scenarios: Ask questions like, "What if a woolly mammoth came to our backyard?" or "How would you build a shelter if it was freezing cold outside?" These questions foster critical thinking and creative problem-solving.
Educational Connections:
- Literacy: Develops narrative skills, character development, and understanding of story structure.
- Social-Emotional Learning: Promotes empathy, cooperation (if playing with others), and self-expression.
- Historical Empathy: Helps children imagine and understand the challenges and ingenuity of ancient peoples.
Mini-Paleontologist Digs: Sandbox Archaeology
Transform your backyard sandbox (or a large container indoors) into an archaeological dig site.
Materials:
- Sandbox or large tub filled with sand, kinetic sand, or even dirt
- Clean plastic toy bones, toy dinosaurs, or salt-dough fossils
- Small shovels, brushes, sieves, and scoops
- Magnifying glass
- Field notebook and pencil
Instructions:
- Bury the Treasures: Hide the toy bones, fossils, or other Ice Age-themed items within the sand or dirt.
- Equip Your Paleontologist: Provide your child with the digging tools, magnifying glass, and notebook.
- Excavate! Encourage them to carefully dig and brush away the sand, just like a real paleontologist. As they find an item, have them "document" it by drawing it or describing it in their notebook.
- Analyze Finds: Once all items are found, discuss what they discovered. What animals did these bones belong to? How might they have gotten buried?
Educational Connections:
- Scientific Method: Introduces observation, careful excavation, and documentation.
- Patience & Focus: Requires sustained attention to detail.
- Sensory Play: Engaging with sand or dirt provides a tactile experience.
Exploring Ice Age Animals: Research and Discovery
Deepen your child's knowledge of the amazing creatures that roamed the Ice Age Earth.
-
Animal Research: Pick an Ice Age animal each week (woolly mammoth, saber-toothed cat, dire wolf, giant ground sloth). Read books, watch documentaries (age-appropriate), or explore online resources together. For older kids, they can research:
- When did this animal live?
- What did it eat (herbivore, carnivore, omnivore)?
- How big was it?
- What unique adaptations did it have for the cold?
- How do we know it existed (fossil evidence)?
- "Habitat" Dioramas: After researching an animal, create a small shoebox diorama showing its habitat. Use natural materials, drawings, or small toy animals.
- Life-Sized Drawings: On a large piece of butcher paper, try to draw a life-sized outline of a child's height compared to an Ice Age animal to truly grasp their scale.
Educational Connections:
- Biology & Ecology: Learn about animal adaptations, food chains, and ecosystems.
- Research Skills: Develop information-gathering and critical thinking skills.
- Art & Visual Representation: Express understanding through drawing and model-making.
Movie Magic & Educational Tie-ins: Fact vs. Fiction
Movies like the "Ice Age" series are incredibly popular with kids, and they offer a fun starting point for discussion.
- Fact vs. Fiction: Watch an Ice Age-themed movie together. Afterwards, discuss what was scientifically accurate and what was imaginative storytelling. For example, while continental drift is real, the specific depiction in "Ice Age: Continental Drift" is highly fictionalized. This is a great exercise in media literacy.
- Sensory Details: As you watch, encourage children to note the sights, sounds, and actions of the environment and characters. How do the animators convey "cold" or "danger"?
- Character Studies: Discuss the characters' personalities, their challenges, and how they overcome obstacles. This can tie into themes of friendship, family, and perseverance.
Educational Connections:
- Media Literacy: Helps children critically evaluate information presented in popular media.
- Scientific Accuracy: Reinforces the importance of distinguishing between entertainment and scientific fact.
- Observation & Analysis: Encourages closer attention to details within a story.
Making Learning a Family Adventure: The I'm the Chef Too! Way
At I'm the Chef Too!, we truly believe that the most impactful learning happens when families come together, share experiences, and discover new things side-by-side. Our Ice Age crafts and activities are more than just projects; they are invitations to create lasting memories. They provide a much-needed screen-free alternative, allowing children to engage with the world in a hands-on, tangible way, fostering genuine curiosity and creativity.
By choosing activities that blend food, STEM, and the arts, we are not only educating but also building confidence, developing key skills, and strengthening family bonds. Imagine the laughter as you excavate edible fossils, the focused concentration as your child paints their "cave art," or the shared "aha!" moment when they understand why salt melts ice faster. These are the moments that shape a love for learning, encouraging children to ask "why?" and "how?" long after the craft is complete.
Seamlessly Integrating STEM & Creativity
The Ice Age is a perfect example of how science, technology, engineering, art, and math (STEAM) are intertwined.
- Science: Understanding glaciers, fossil formation, animal adaptations, and climate change.
- Technology & Engineering: Thinking about how early humans developed tools and shelters. Building shadow puppet mechanisms.
- Art: Cave paintings, sculpting, drawing Ice Age animals.
- Math: Measuring ingredients for edible crafts, understanding scale when comparing animal sizes.
Every activity we've discussed today inherently integrates these elements, turning playtime into a powerful learning experience. This integrated approach, known as "edutainment," is at the core of what we do at I'm the Chef Too!. We don't just provide activities; we provide pathways to discovery.
Do you have a budding scientist or an imaginative artist at home? Browse our complete collection of one-time kits to find more adventures that perfectly match their interests and spark their unique passions!
The Convenience of Curiosity Delivered
We understand that as busy parents and educators, finding engaging, educational activities that are also convenient can be a challenge. That's precisely why we created The Chef's Club. Imagine a new, exciting adventure delivered directly to your door every month, complete with pre-measured dry ingredients, specialty supplies, and easy-to-follow instructions. No last-minute grocery runs, no hunting for obscure craft items – just pure, unadulterated "edutainment" ready to go.
Our flexible subscription plans, including 3, 6, and 12-month pre-paid options, are perfect for gifting or ensuring a continuous stream of hands-on learning throughout the year. Each box is a complete experience, designed by mothers and educators to blend food, STEM, and the arts, sparking curiosity and creativity in your children. It’s an investment in joyful learning, family bonding, and screen-free educational fun.
Ready for a new adventure every month? Join our family of happy learners and enjoy the ultimate convenience and educational value. Join The Chef's Club and enjoy free shipping on every box in the US!
Conclusion
The Ice Age, with its majestic creatures, dramatic landscapes, and the incredible story of early human survival, offers a fertile ground for engaging children in profound learning experiences. Through the diverse array of edible and non-edible crafts and activities we've explored, you have the power to transform your home into a prehistoric laboratory, an ancient art studio, and a stage for epic tales. These aren't just activities to fill an afternoon; they are opportunities to spark a lifelong love for science, art, and history, fostering critical thinking, creativity, and precious family connections.
At I'm the Chef Too!, we are passionate about providing these unique "edutainment" adventures that seamlessly blend food, STEM, and the arts. Our mission is to ignite curiosity, build confidence, and create unforgettable family memories, all while offering a screen-free alternative that truly nurtures young minds. We invite you to embrace the wonders of the Ice Age and embark on this incredible journey of discovery with your children.
Don't let the ancient past remain a mystery. Bring the excitement of discovery, the joy of creation, and the delicious taste of learning right into your home, month after month. Give the gift of learning that lasts all year, or simply start a new tradition of family fun. Join The Chef's Club today and let the adventure begin!
FAQ: Your Ice Age Crafting Questions Answered
Q1: What age group are these Ice Age crafts best suited for? A1: Many of these crafts are adaptable for a wide range of ages. Younger children (preschool-early elementary) will enjoy the sensory aspects, simple construction, and edible components with adult assistance. Older children (late elementary-middle school) can dive deeper into the scientific concepts, conduct more independent research, and handle more complex crafting techniques like detailed shadow puppet design or plaster casting. Always tailor the complexity to your child's developmental stage.
Q2: How can I make these activities more educational? A2: To enhance the educational value, encourage questioning, observation, and discussion. Before, during, and after an activity, ask questions like: "What do you notice happening?" "Why do you think that works?" "What does this tell us about the Ice Age?" Read related books, watch age-appropriate documentaries, or visit a natural history museum (virtually or in person). Connect the craft back to real Ice Age animals, geology, or human history. Our I'm the Chef Too! kits inherently integrate STEM concepts directly into the activity, making it easier to connect to learning.
Q3: What are the benefits of combining food with STEM and art activities? A3: Combining food with STEM and art engages multiple senses (sight, touch, smell, taste), making learning more immersive and memorable. It provides tangible results (a delicious treat!) which reinforces the learning process and boosts confidence. It naturally introduces concepts like measurement (math), chemical reactions (science), and artistic presentation, all within a familiar and appealing context. This "edutainment" approach fosters a holistic love for learning.
Q4: How can I ensure safety during these activities, especially with younger children? A4: Adult supervision is paramount for all activities, especially those involving kitchen tools, sharp objects (like scissors or craft knives), or small parts that could be choking hazards. For edible crafts, ensure all ingredients are fresh, child-friendly, and handled hygienically. Always verify that non-edible craft materials (like certain glues or paints) are non-toxic. Establish clear rules before starting, such as "no tasting until finished" for non-edible ingredients, and teach proper tool usage.
Q5: My child is particular about textures. How can I adapt sensory activities like the Ice Excavation? A5: You can adapt sensory activities by introducing textures gradually or offering choices. For example, if your child dislikes touching wet ice, they can use tools (gloves, spoons, pipettes) rather than bare hands. Instead of a full sensory bin, start with a smaller container. You can also vary the materials – kinetic sand might be less messy and appealing than wet sand or dirt. Focus on the observational aspects, which might be more comfortable.
Q6: What if my child gets frustrated with a craft? A6: Frustration is a natural part of learning! Encourage perseverance without forcing the activity. Offer assistance, break down complex steps into smaller, manageable ones, or suggest a break. Remind them that the goal is the process of learning and trying, not just a perfect outcome. Celebrate their effort and any progress they make. Sometimes, returning to a craft later with fresh eyes can make all the difference.
Q7: How do I store these Ice Age crafts once they're made? A7: Edible crafts are best enjoyed immediately or stored in airtight containers for a short period (refrigeration for items with perishable ingredients). Non-edible crafts like salt dough fossils, paper mammoths, or shadow puppets can be displayed, stored in a craft box, or become part of a playset. Consider creating a "museum" display of your child's Ice Age creations!
Q8: Can these Ice Age activities be adapted for a group setting like a classroom or party? A8: Absolutely! Many of these crafts are ideal for group settings. For a classroom or party, pre-measure ingredients for edible crafts, set up "stations" for different activities, and have plenty of adult helpers. The DIY Ice Excavation or a "Fossil Dig" can be highly engaging group activities. For educators looking to bring our hands-on STEM adventures to your classroom, camp, or homeschool co-op, we offer versatile programs. Learn more about our school and group programs, available with or without food components!