Spooktacular Halloween Crafts for Kids

Table of Contents
- Introduction
- The Magic of Making: Why Halloween Crafts are More Than Just Fun
- Safety First: Essential Tips for Happy Halloween Crafting
- Getting Started: Your Halloween Crafting Hub
- Spooky Sweet & Edible Crafts: A Delicious Twist on Learning
- Classic Halloween Character Crafts: Bringing Spooks to Life
- Pumpkin-Themed Crafts: No Carving Required!
- Sensory & Messy Play Crafts: Embracing the Splatter!
- Recycled & Upcycled Halloween Crafts: Giving New Life to Old Things
- Decorate Your Haunt: Halloween Home Decor Crafts
- Tips for Successful Crafting Sessions
- Connecting Crafts to STEM and the Arts: Our "Edutainment" Approach
- Conclusion
- FAQ: Your Halloween Crafting Questions Answered
The air crackles with anticipation as autumn leaves crunch underfoot, and the scent of pumpkin spice fills the air. But there's another kind of magic brewing, a playful mischief that only Halloween can conjure. It's a time when imagination takes flight, fueled by whimsical costumes, thrilling stories, and, best of all, the joy of creating something wonderfully spooky with your own hands. As parents and educators, we know the allure of crafting extends far beyond just making something pretty; it's a powerful tool for learning, bonding, and sparking genuine curiosity.
This year, let's transform our homes into bustling workshops where creativity reigns supreme. Forget the endless scroll of screens; it's time to dive into a world of tangible textures, vibrant colors, and delightful designs. In this comprehensive guide, we'll explore an enchanting array of Halloween crafts for kids to make, designed to engage little hands and minds from toddlers to pre-teens. We'll show you how simple materials can become masterpieces, how everyday objects can be transformed into ghoulish delights, and how these seemingly simple activities naturally blend elements of science, technology, engineering, and mathematics (STEM) with artistic expression. Get ready to unleash a wave of creativity, build cherished family memories, and discover the "edutainment" magic that happens when learning is delicious and fun!
Introduction
There's something uniquely captivating about Halloween. It’s more than just costumes and candy; it’s a canvas for imagination, a stage for storytelling, and a perfect opportunity for hands-on, screen-free fun. Picture the sparkle in your child’s eyes as they transform a humble paper plate into a cackling witch or turn a simple toilet paper roll into a friendly monster. These aren't just crafts; they're gateways to discovery, moments of shared laughter, and tangible memories that will be treasured long after the last piece of candy is gone.
At I'm the Chef Too!, we believe that the most profound learning happens when children are fully engaged, using all their senses in a creative process. Our mission is to blend food, STEM, and the arts into one-of-a-kind "edutainment" experiences, and Halloween crafts fit perfectly into this philosophy. This post isn't just a list of ideas; it's an invitation to explore the educational powerhouse disguised as holiday fun. We’ll delve into why crafting is so beneficial, share a treasure trove of engaging projects suitable for various ages, and offer practical tips to make your Halloween crafting sessions a smashing success. By the end, you'll be armed with inspiration and ready to spark curiosity, foster creativity, and enjoy unparalleled family bonding, all while making the most spooktacular Halloween crafts your kids have ever made!
The Magic of Making: Why Halloween Crafts are More Than Just Fun
Beyond the glitter and glue, engaging in Halloween crafts offers a rich tapestry of developmental benefits for children of all ages. It’s an immersive experience that naturally integrates various learning domains, providing a holistic approach to skill-building that aligns perfectly with our philosophy at I'm the Chef Too!.
Nurturing Creativity and Imagination
Crafting provides an open-ended platform for children to express themselves. There's no single "right" way to make a monster or decorate a pumpkin, which encourages divergent thinking and problem-solving. When a child chooses the color for their ghost or the expression for their jack-o-lantern, they are making creative decisions, developing their aesthetic sense, and bringing their unique vision to life. This process builds confidence and empowers them to trust their own imaginative instincts.
Developing Fine Motor Skills and Hand-Eye Coordination
From cutting with scissors to gluing tiny googly eyes, manipulating craft materials requires precision and control. These activities are excellent for strengthening the small muscles in children's hands and fingers, which are crucial for tasks like writing, drawing, and even tying shoelaces. The coordination between what their eyes see and what their hands do is constantly being refined, leading to greater dexterity and control. Think of a child carefully wrapping yarn around a popsicle stick to create a spider web – each loop is a mini-workout for their fine motor skills!
Boosting Cognitive Development and Problem-Solving
Crafts often involve following multi-step instructions, understanding spatial relationships, and even basic engineering principles. How do you make a bat balance? How can you make a ghost stand up? These questions spark critical thinking and encourage children to experiment with different approaches to achieve their desired outcome. They learn about cause and effect, material properties, and basic design challenges. At I'm the Chef Too!, we see this same kind of engaged problem-solving in our cooking adventures, where children learn scientific principles by seeing chemical reactions firsthand, like when baking powder makes cakes rise.
Fostering Language and Communication Skills
Crafting sessions are fantastic opportunities for conversation. Children can describe what they are making, discuss color choices, ask for specific materials, and explain their creative process. This rich verbal interaction expands vocabulary, improves descriptive language, and encourages active listening. When you’re crafting together, you're naturally engaged in a dialogue about the project, the holiday, and shared experiences.
Building Confidence and Self-Esteem
Successfully completing a craft project, no matter how simple, gives children a tremendous sense of accomplishment. Displaying their finished piece prominently around the house or sharing it with family members reinforces their efforts and boosts their self-esteem. It teaches them that with a little effort and creativity, they can bring an idea from conception to a tangible reality.
Promoting Family Bonding and Screen-Free Engagement
In an increasingly digital world, hands-on activities provide a much-needed antidote to screen time. Halloween crafting offers a wonderful opportunity for families to disconnect from devices and reconnect with each other. It’s about sharing space, collaborating on projects, laughing over silly mistakes, and creating lasting memories. These shared experiences are invaluable, strengthening family ties and creating traditions that children will remember for years to come. This is a core value for us at I'm the Chef Too! – providing engaging, screen-free educational alternatives that facilitate family bonding.
Introducing STEM and Art Concepts Naturally
Many crafts are inherently interdisciplinary. Mixing paint colors introduces basic chemistry. Measuring and cutting shapes involve math and geometry. Designing a sturdy paper plate mask touches on engineering principles. And, of course, the entire process is an artistic endeavor, teaching about color, texture, form, and composition. Our unique approach at I'm the Chef Too! seamlessly integrates these subjects, proving that learning about complex topics like geology or astronomy can be incredibly fun and even delicious, all through tangible, hands-on adventures.
Safety First: Essential Tips for Happy Halloween Crafting
Before we dive into the exciting world of Halloween crafts for kids to make, it's crucial to set up a safe and enjoyable environment. Adult supervision is always key, especially when working with younger children.
- Supervision is Paramount: Always keep a watchful eye, especially when children are using scissors, hot glue guns (for older kids and always with adult help), or small objects that could be choking hazards for toddlers.
- Child-Friendly Tools: Invest in age-appropriate scissors (blunt-tipped for preschoolers), washable markers, and non-toxic glues.
- Designated Crafting Space: Protect your surfaces! Lay down newspaper, old tablecloths, or a craft mat to catch spills and messes. This also helps define the "crafting zone."
- Read Labels: Ensure all paints, glues, and other materials are labeled non-toxic, especially if crafting with very young children who might put things in their mouths.
- Ventilation: If using spray paint or stronger glues (always with adult help), ensure the area is well-ventilated.
- Allergy Awareness: Be mindful of any allergies children might have, particularly if incorporating food items or natural materials like leaves and nuts.
Remember, a little preparation goes a long way in ensuring that your crafting session is fun, safe, and stress-free for everyone.
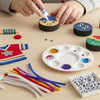
Getting Started: Your Halloween Crafting Hub
One of the beauties of kids' crafts is that you often don't need a trip to a specialty store. Many fantastic Halloween crafts can be made with items you already have around the house or can easily gather.
Essential Crafting Supplies to Stock Up On:
- Paper: Construction paper in various Halloween colors (orange, black, purple, green, white), cardstock, paper plates, paper bags.
- Drawing & Coloring: Crayons, markers, washable paints, paintbrushes.
- Cutting & Sticking: Child-safe scissors, glue sticks, liquid school glue, contact paper (great for mess-free collages!).
- Decorations: Googly eyes (a Halloween craft staple!), pipe cleaners, pom-poms, cotton balls, yarn, glitter, fabric scraps, stickers.
- Recyclables: Toilet paper rolls, paper towel rolls, old socks, empty jars, cardboard boxes.
- Natural Elements: Leaves, small twigs, sweetgum balls (for wreaths).
Having a dedicated "craft stash" makes spontaneous creativity much easier. When inspiration strikes, you'll be ready to transform simple materials into magical Halloween creations!
Spooky Sweet & Edible Crafts: A Delicious Twist on Learning
What's better than making a craft? Making a craft you can eat! Edible crafts blend the joy of creation with the delight of delicious treats, offering a unique sensory experience and a fantastic way to introduce basic cooking skills. This is where the "Chef" in I'm the Chef Too! truly shines, demonstrating how food can be a gateway to incredible learning.
Ghostly Goodies: Simple Treats with a Spooky Makeover
- Marshmallow Ghosts: Dip large marshmallows into melted white chocolate. Before the chocolate sets, add two mini chocolate chips for eyes. You can even stick them on a lollipop stick for easy handling. This simple activity teaches about states of matter (melting chocolate) and basic design.
- Mummy Pretzels: Dip pretzel rods into melted white chocolate, then use a spoon to drizzle more white chocolate back and forth, creating a "mummy wrap" effect. Add two candy eyes before it dries. Kids love the process of dipping and drizzling, and the visual transformation is always exciting.
- Spiderweb Pizzas: Use English muffins or small pita breads as a base. Spread with tomato sauce, then arrange shredded mozzarella cheese. Pipe a spiral of sour cream or mayonnaise onto the cheese, then use a toothpick to drag lines from the center outwards to create a spiderweb effect. Pop it in the oven (adult supervision for baking!) until the cheese is bubbly. This involves geometry (spirals, radial lines) and the science of baking.
These edible projects are wonderful for teaching about following instructions, measuring (even if just by eye), and understanding how ingredients combine and change. If your children love these kinds of hands-on, delicious explorations, they will be thrilled by the adventures found in our monthly Chef's Club subscription. Every box delivers a new culinary journey right to your door, complete with pre-measured dry ingredients and specialty supplies, making it easy to create edible masterpieces while learning fascinating STEM and art concepts.
Monster Munchies: Creative Culinary Creatures
- Monster Eye Cookies: Bake or buy plain sugar cookies. Frost them with green, purple, or orange icing. Use an edible marker to draw a pupil on a large round candy (like a Lifesaver or a large gumdrop) and press it onto the cookie as an "eye." You can even add edible glitter for a monstrous sparkle!
- Frankenstein Fruit Skewers: Thread green grapes onto a skewer. Add a slice of banana for a face, using edible marker to draw Frankenstein's features and hair. A small square of chocolate makes a great "bolt" on the side of his neck. This encourages healthy eating while engaging in creative construction.
- Gummy Worm Dirt Cups: Layer chocolate pudding and crushed Oreos in clear cups. Add gummy worms peeking out from the "dirt." This teaches about layering and texture, and it's always a hit!
These projects encourage creativity and precision, and they’re incredibly satisfying to make and then devour! For children who thrive on exciting, hands-on edible learning, we recommend exploring our full library of adventure kits available for a single purchase in our shop. You'll find unique experiences that blend culinary arts with scientific discovery, perfect for extending the fun beyond Halloween. Browse our complete collection of one-time kits today!
Pumpkin Patch Treats: Seasonal Sweets with an Artistic Touch
- Decorated Pumpkin Cookies/Cupcakes: Use orange icing for the base, then let kids decorate with black icing pens, sprinkles, candy corn, or mini chocolate chips to create unique jack-o-lantern faces. This is a classic for a reason – endless possibilities for expression!
- Pumpkin Pretzels: Dip pretzel twists into melted orange candy melts. While wet, add green sprinkles or a small green candy for the stem. These are simple, satisfying, and visually appealing.
At I'm the Chef Too!, we craft experiences that are not just delicious but also deeply educational. Imagine making edible treats that teach about the layers of the earth or the science of baking. We provide all the specialized tools and pre-measured ingredients, taking the guesswork out of learning and leaving more time for family fun. Ready for a new adventure every month? Join The Chef's Club and enjoy free shipping on every box, bringing the magic of edible "edutainment" right to your kitchen!
Classic Halloween Character Crafts: Bringing Spooks to Life
Some characters are simply synonymous with Halloween. Let’s explore how to create these iconic figures using simple materials, transforming them into playful works of art.
Ghosts Galore: From Puffy to Playful
Ghosts are perhaps the most quintessential Halloween figure, and incredibly versatile for crafting.
- Puffy Cotton Ball Ghosts: Draw a simple ghost outline on black or purple construction paper. Have kids glue cotton balls within the outline to create a soft, puffy texture. Add googly eyes and a marker-drawn mouth. This is excellent for sensory exploration and fine motor skills as children pick up and glue each cotton ball.
- Tissue Paper Ghosts: Cut out ghost shapes from white tissue paper. Hang them with string from light fixtures or branches. The delicate nature of tissue paper gives them an ethereal, floating quality. For a more structured ghost, glue strips of tissue paper over an inflated balloon, let it dry, then pop and remove the balloon. Add marker eyes.
- Chalk Ghosts: On black construction paper, draw ghost outlines. Kids can use white chalk to fill them in, smudge the edges for a smoky effect, and add facial features. This is a less messy alternative to paint but still provides a unique texture.
- Footprint/Handprint Ghosts: Paint your child's foot or hand white, press it onto black paper, and then add googly eyes and a "boo!" speech bubble with a marker once dry. These make wonderful keepsakes!
Batty Creations: Fluttering Fun
Bats, often misunderstood, are an integral part of Halloween lore and make for some truly engaging crafts.
- Paper Plate Bats: Paint a paper plate black. Once dry, cut out two triangular "ears" from the top and glue them on. Cut the bottom half of the plate in half to create two wings, and glue them to the sides of the "body." Add googly eyes and fangs!
- Handprint Bats: Trace your child's hands (fingers together, thumb sticking out) on black paper for the wings. Cut them out. Then, cut a small oval for the body. Glue the wings to the body, add googly eyes, and fangs.
- Balancing Bats: This is a fun science-meets-craft project. Cut out a bat shape from cardstock. The trick is to add weight to the wingtips (e.g., small paper clips or pennies taped on) so that the bat balances perfectly on the tip of your finger or the edge of a table. It's a wonderful way to introduce concepts of center of gravity in a playful, magical way.
Wicked Witches & Wacky Monsters: Playful and Creative Characterizations
These characters allow for endless creativity, making them fantastic Halloween crafts for kids to make, as each child's creation will be wonderfully unique.
- Paper Plate Witches: Paint a paper plate a skin tone or green. Cut a witch's hat from black paper and glue it to the top. Add yarn hair, googly eyes, a crooked nose, and a spooky smile. These can easily be turned into puppets by gluing a popsicle stick to the back!
- Toilet Paper Roll Monsters: Gather empty toilet paper rolls. Let kids paint them in bright, wild colors. Once dry, they can add googly eyes (lots of them!), pipe cleaner antennae, yarn hair, construction paper teeth, and felt spots. Each monster will have its own personality!
- Shape Monsters: Cut out various geometric shapes (circles, squares, triangles, rectangles) from colorful construction paper. Provide a larger piece of paper as the monster's "body." Children can arrange and glue the shapes to create their own unique monsters, discussing colors and shapes as they go. This is a brilliant way to reinforce early geometry and color recognition.
Spiders & Their Webs: Not-So-Creepy Crawlers
Spiders often get a bad rap, but in the crafting world, they can be wonderfully whimsical!
- Yarn-Wrapped Spider Webs: Take two or three popsicle sticks and glue them together in a starburst pattern. Once dry, tie a piece of yarn to the center and have kids weave the yarn around the sticks, creating a web pattern. Add a plastic spider when done. This activity is excellent for developing fine motor skills and spatial awareness.
- Paper Plate Spider Webs: Cut out the center of a paper plate, leaving a ring. Punch holes around the edge of the ring. Kids can then thread yarn through the holes to create a web. Add a pipe cleaner spider!
- Coffee Filter Spiders: Dye coffee filters with liquid watercolors (let them dry). Scrunch one up for the body, then cut another into strips for legs. Glue the legs to the body. Add googly eyes.
Creating these iconic characters not only sparks imagination but also builds a sense of connection to the holiday's rich traditions. The best part? There’s no right or wrong way to make them, allowing every child’s personality to shine through. For even more engaging educational experiences that blend creativity with core learning, consider our comprehensive programs for schools and groups, available with or without food components, perfect for bringing hands-on STEM and art adventures to your classroom, camp, or homeschool co-op. Learn more about our versatile programs for schools and groups.
Pumpkin-Themed Crafts: No Carving Required!
Carving pumpkins is a beloved Halloween tradition, but it’s not always suitable for very young children or those who prefer less mess and safer alternatives. Thankfully, there are countless ways to decorate a pumpkin without a knife!
Decorated Mini Pumpkins: Personalizing Produce
- Painted Pumpkins: Provide mini pumpkins or gourds and let children paint them with acrylic craft paints. They can create stripes, polka dots, spooky faces, or abstract designs. Once dry, add glitter or googly eyes for extra flair. This is a wonderful opportunity for color mixing and artistic expression.
- Glitter Pumpkins: Paint pumpkins with glue (PVA glue works well), then sprinkle generously with glitter. Different colored glitters can create dazzling effects. This is a highly sensory activity that’s always a hit.
- Googly-Eyed Pumpkins: Simply glue an assortment of googly eyes (and maybe some craft foam mouths) onto pumpkins for instant goofy or spooky faces. No paint needed, minimal mess!
- Sharpie Pumpkins: For older kids, black or metallic Sharpie markers can be used to draw intricate patterns, spider webs, or detailed faces onto pumpkins. This requires a bit more control and precision.
Puffy Paint Pumpkins: Textural Transformations
Make your pumpkins truly stand out with dimensional puffy paint.
- DIY Puffy Paint: Mix equal parts white glue and shaving cream in a bowl, then add a few drops of orange, black, or green food coloring. Kids can then "paint" their designs onto paper pumpkin cutouts or even directly onto real mini pumpkins (though it takes longer to dry). The texture is wonderfully squishy and creates a unique 3D effect.
Pumpkin Name Puzzles: Learning with a Seasonal Twist
- Draw a large pumpkin shape on a piece of orange cardstock. Write your child's name (or a simple Halloween word like "BOO") on it, with one letter per segment of the pumpkin. Cut the pumpkin into puzzle pieces along the segment lines. Children can then practice assembling the puzzle to spell out the word. This combines literacy skills with a fun, seasonal craft.
Stained Glass Pumpkins: Illuminating Decorations
- Cut out a pumpkin shape from black construction paper, leaving a border (like a frame). Cut various colors of tissue paper into small squares. Stick these tissue paper squares onto a piece of contact paper. Once covered, place the black pumpkin frame on top and seal with another piece of contact paper. Trim the edges. Hang these in a sunny window for a beautiful stained-glass effect. Kids will be mesmerized by the colors.
Pumpkin Hand-print Photo Keepsakes: Cherished Memories
- Paint your child’s hand orange and press it onto a piece of white cardstock. Once dry, draw a green stem and a curled vine at the top to turn the handprint into a pumpkin. In the center of the palm, glue a small photo of your child. This creates a precious keepsake that captures their growth and the spirit of the season.
These no-carve pumpkin crafts are fantastic for diverse age groups and skill levels. They provide opportunities for children to express their artistic flair, practice fine motor skills, and even learn a bit about shapes and letters in a fun, festive way. If you love discovering new ways to engage your children in hands-on learning that blends education with pure enjoyment, then our monthly Chef's Club is perfect for your family. Each box delivers a complete adventure with pre-measured ingredients and specialty supplies, making learning deliciously easy.
Sensory & Messy Play Crafts: Embracing the Splatter!
Sometimes, the best learning happens when we get a little messy. Sensory play is vital for young children’s development, engaging their senses and helping them understand the world around them. Halloween provides the perfect excuse for some wonderfully tactile and slightly wild crafting experiences!
Shaving Cream Jack-o-Lantern Art: A Foamy Masterpiece
- This one is for embracing the glorious mess! Spray a generous amount of shaving cream onto a flat surface (like a baking sheet or a protected table). Add drops of orange, yellow, and black liquid watercolor or food coloring. Kids can swirl the colors with a stick or their fingers to create a marbled effect. Press a piece of paper onto the colored shaving cream, lift it, and use a ruler or cardboard scrap to gently scrape off the excess foam. The paper will be left with a unique, marbled print. Once dry, you can cut it into a jack-o-lantern shape and add features. This engages visual, tactile, and olfactory senses, teaching about color mixing and transfer.
Hidden Ghost Painting: A Spooky Reveal
- This craft feels like magic! Provide white paper and a white crayon. Have children draw ghost shapes or other Halloween images (spiders, bats, pumpkins) on the paper, pressing firmly. The white crayon will be hard to see against the white paper. Then, give them watercolors (light blues, purples, or greys work best for a spooky background). As they paint over the paper, their "hidden" white crayon drawings will magically appear, resisting the watercolor. This demonstrates a simple scientific principle: crayon wax repels water.
Straw Blown Ghost Art: Breath-Powered Creations
- Drip small puddles of white liquid paint onto black paper. Give children a straw and encourage them to blow the paint, spreading it into ghostly wisps. They can add black marker dots for eyes once the paint dries. This activity strengthens oral motor skills and teaches about air pressure and fluid dynamics in a fun, creative way. Each ghost will be wonderfully unique.
DIY Halloween Sensory Bins: A Tactile World
- Fill a large bin with dried black beans, orange lentils, or pasta dyed orange and black. Add scoops, small plastic spiders, toy eyeballs, mini pumpkins, plastic bones, and even some glow-in-the-dark elements. Children can explore, scoop, pour, and discover hidden treasures, developing fine motor skills and imaginative play. This is not a "craft" in the traditional sense, but a fantastic sensory activity that promotes learning through exploration.
Embracing sensory and messy play is an investment in your child's development, fostering curiosity and a deeper understanding of textures, colors, and even basic science. It’s about the process, not just the perfect outcome, and that aligns perfectly with our philosophy at I'm the Chef Too!. We believe in giving children the space to explore, experiment, and learn through doing. These experiences lay the groundwork for a lifelong love of discovery, much like the exciting adventures found in our Chef's Club subscription, where every month brings a new opportunity to learn and create with delicious results.
Recycled & Upcycled Halloween Crafts: Giving New Life to Old Things
One of the most rewarding aspects of crafting is taking everyday items that might otherwise be thrown away and transforming them into something new and exciting. This teaches children about resourcefulness, sustainability, and the endless possibilities of their imagination.
Toilet Paper Roll Monsters & Characters: Cardboard Creativity
- Save those empty toilet paper and paper towel rolls! They are a goldmine for crafting. As mentioned before, they can be painted and decorated to become adorable monsters. You can also turn them into mummies (wrap with white paper strips), bats (paint black, add paper wings), or even miniature jack-o-lanterns. This promotes imaginative play and fine motor skills.
Paper Bag Monster Puppets: Roaring Fun
- Paper lunch bags are perfect for creating hand puppets. Kids can decorate the bottom flap of the bag with paint, markers, and construction paper features (eyes, teeth, horns) to make monstrous mouths that open and close. Once decorated, they can put on a spooky puppet show, encouraging storytelling and dramatic play.
Sock Ghosts: Playful Hangings
- Got an odd sock lying around? Stuff it with cotton balls, fabric scraps, or even dried beans to form a ghost body. Tie it off with string or a rubber band at the "neck." Add googly eyes and draw a mouth with a permanent marker. These are wonderfully soft, tactile, and can be hung as decorations or used as gentle toss toys.
Candy Wrapper Garland: Sweet Memories
- After the trick-or-treating fun, save those colorful candy wrappers! Cut them into shapes or strips and glue them onto a long piece of string or ribbon to create a festive, sparkly garland. This teaches about upcycling and pattern creation. It's also a great way to visually remember all the delicious treats!
Mason Jar Lanterns: Spooky Glows
- Empty glass jars can be transformed into enchanting lanterns. Clean and dry the jars. Kids can glue colored tissue paper squares onto the outside of the jar, creating a patchwork effect. Once dry, draw spooky faces with permanent markers. Place a battery-operated tea light inside for a safe, glowing decoration. This project involves layering, design, and understanding light.
Recycling and upcycling in crafts teaches children that creativity isn't limited by resources, but rather ignited by ingenuity. It's a powerful lesson in making the most of what you have, and a fantastic way to engage in hands-on fun without needing to buy many new supplies. If you're looking for more ways to spark creativity and learning with convenient, all-in-one kits, explore our full library of adventure kits available for a single purchase in our shop. You’re sure to find a new favorite project among our complete collection of one-time kits.
Decorate Your Haunt: Halloween Home Decor Crafts
One of the most exciting parts of Halloween is transforming your home into a festive, spooky, or whimsical wonderland. Involving children in making decorations fosters a sense of ownership and pride, making the holiday truly feel like theirs.
Window Clings & Art: Brightening Up Panes
- Contact Paper Jack-o-Lanterns/Ghosts: Cut out large pumpkin or ghost shapes from orange or white construction paper. Let children tear or cut small pieces of black paper for facial features. Stick a large piece of contact paper (sticky side up) onto a window or table. Kids can arrange their paper pieces onto the contact paper. Once done, cover with another piece of contact paper, pressing firmly to seal. Trim the edges. These can be stuck directly onto windows, creating vibrant "stained glass" effects.
- Bleach Pen Napkins: For older children (with adult supervision), use a bleach pen to draw spiderwebs, bats, or ghosts onto dark-colored cloth napkins. The bleach will lighten the fabric, creating a cool design. Make sure to follow safety instructions for bleach pens and rinse thoroughly after the design sets.
Garlands: Festive Chains of Fun
- Pipe Cleaner Monsters/Skeletons Garland: Twist pipe cleaners into various spooky shapes – spiders, simple skeletons, bats, or abstract monsters. Attach them to a string or wire with clothespins or by twisting the pipe cleaner directly around the string. Hang them across mantels, doorways, or windows. This is great for fine motor manipulation and creative construction.
- Yarn Pumpkin Garland: Cut out many small pumpkin shapes from orange cardstock. Kids can wrap orange yarn around the pumpkins, leaving gaps for a "ribbed" effect. Glue green yarn for stems. Attach these completed pumpkins to a long piece of string for a cozy garland.
- Paper Chains: A classic for a reason! Cut strips of orange, black, purple, and green construction paper. Form loops and staple or glue them together to create a long, festive chain. Kids can draw little Halloween symbols on each link before assembly.
Wreaths: Welcoming Spooky Spirits
- Sweetgum Ball Wreath: Gather sweetgum balls (spiky seed pods) from outside. With adult help, hot glue them onto a grapevine wreath form. Tuck in some faux spiderwebs or small plastic spiders for a natural, rustic, yet spooky wreath.
- Branch Spider Web Wreath: Cut a wreath shape out of cardboard. Gather small twigs and sticks from the yard. Hot glue these twigs onto the cardboard wreath, layering them to create a textured base. Once dry, stretch faux spider webbing around the twigs, crisscrossing to form a web. Add plastic spiders for a truly creepy crawly effect!
Crystal Ball Centerpieces & Witch's Lanterns: Magical Illumination
- Crystal Ball Centerpiece: Take a clear vase or jar. Carefully wrap a string of battery-operated LED fairy lights inside. The soft glow creates a magical, mysterious "crystal ball" effect perfect for a Halloween table.
- Witch's Lanterns (Jar Crafts): Collect empty glass jars. Use Mod Podge to glue cut-out silhouettes of bugs, frogs, bats, or witches onto the inside or outside of the jar. Then, layer three- to four-inch pieces of colored tissue paper (greens, purples, oranges) all around the jar, applying Mod Podge over the top to seal. Once dry, place a battery-operated tea light inside for a glowing, mystical lantern. This is a wonderful way to learn about decoupage and light.
Creating these decorations gives children a tangible connection to the holiday, transforming their environment with their own efforts. Each piece they make adds to the festive atmosphere and reinforces their sense of accomplishment. If you're looking to bring more structured, hands-on learning experiences to your community, consider our flexible programs for schools and groups, which can be tailored to various educational settings and budgets, with or without food components. Discover how to bring our unique STEM cooking adventures to your organization.
Tips for Successful Crafting Sessions
To ensure your Halloween crafting adventures are filled with joy and minimal stress, here are a few practical tips:
- Prepare Your Space: Before you even bring out the materials, lay down a protective covering (newspaper, old sheet, plastic tablecloth). Have wet wipes or a damp cloth ready for quick clean-ups.
- Set Realistic Expectations: Remember, it's about the process, not perfection. A child's craft will look like a child made it, and that's the beauty of it! Focus on the effort, imagination, and fun they're having.
- Gather Materials Ahead of Time: Nothing derails a crafting session faster than realizing you're missing a key ingredient. Lay out all the necessary supplies before inviting the children to join.
- Offer Choices (Within Limits): Give children options for colors, decorations, or how they want to tackle a step. This gives them a sense of control and fosters independence.
- Embrace the Mess: Mess is often a sign of engagement and exploration. If you're too worried about cleanliness, it can stifle creativity. Dress kids in old clothes and let them get a little messy!
- Work Alongside Them: Your presence and participation are often the greatest motivators. Sit down, make your own version of the craft, or simply offer encouragement and conversation.
- Allow for Open-Ended Exploration: Once the "main" craft is done, sometimes the best creativity happens when kids are left with leftover materials and free reign to create whatever they wish.
- Celebrate Their Creations: Display their finished artwork prominently. A simple "Wow, look at what you made!" goes a long way in building their confidence and pride.
By following these tips, you'll create an environment where children feel comfortable experimenting, learning, and expressing themselves, making your Halloween crafting sessions truly memorable. If you're looking for an even easier way to integrate engaging, educational, and delicious activities into your family's routine, remember that our Chef's Club delivers a new adventure monthly, perfectly curated for convenience and fun.
Connecting Crafts to STEM and the Arts: Our "Edutainment" Approach
At I'm the Chef Too!, we believe that every activity can be an opportunity for "edutainment" – a perfect blend of education and entertainment. Halloween crafts are no exception; they are fantastic, organic platforms for introducing and reinforcing concepts across STEM and the arts, often without children even realizing they are learning!
Science in Spooky Ways
- Chemical Reactions: The "hidden ghost painting" demonstrates how wax resists water. Creating puffy paint involves understanding how different substances (glue, shaving cream) combine to create a new texture. Edible crafts often involve changes in states of matter (melting chocolate) or chemical leavening (our Erupting Volcano Cakes Kit is a prime example of this in action, making science deliciously tangible!).
- Material Properties: Children explore how different materials behave: paper can be cut and folded, yarn can be woven, cotton balls are soft, glue is sticky. This hands-on exploration builds an intuitive understanding of the physical world.
- Light & Shadow: Making lanterns or stained-glass window clings introduces how light interacts with different materials to create patterns and illumination.
Technology Through Tools
- While not digital, technology in crafting refers to the use of tools. Children learn to properly use scissors, glue applicators, paintbrushes, and even simple stencils. Mastering these tools builds dexterity and problem-solving skills, laying a foundation for using more complex instruments later on.
Engineering & Design Challenges
- Structure & Stability: Can this paper ghost stand up? How do I attach the wings so they don't fall off? These questions introduce basic engineering principles. Crafting a balancing bat is a direct lesson in finding the center of gravity and understanding weight distribution.
- Design & Planning: Before cutting or gluing, children often visualize what they want to create, even if briefly. This planning phase is a rudimentary form of engineering design, where they consider function (e.g., a puppet needs a moving mouth) and form (e.g., how the monster will look).
Math in Mirthful Measurements
- Shapes & Geometry: Cutting circles for eyes, triangles for witch hats, or arranging various shapes to create a monster reinforces geometric concepts.
- Counting & Sorting: Sorting googly eyes by size, counting how many pumpkin pieces they have, or measuring yarn for a garland all involve mathematical thinking.
- Patterns & Symmetry: Creating a garland or decorating a pumpkin often involves repeating patterns or attempting symmetrical designs, teaching fundamental mathematical concepts in a visual way.
Arts for Artistic Expression
- Color Theory: Mixing paints, choosing complementary colors for a monster, or observing how light filters through stained glass crafts all introduce elements of color theory.
- Texture & Form: Exploring the feel of cotton balls, the smoothness of paper, or the squishy nature of puffy paint enriches their sensory vocabulary and understanding of artistic texture.
- Self-Expression: Most importantly, crafting provides an invaluable outlet for self-expression. Children can convey emotions, tell stories, and manifest their unique ideas in a tangible form, fostering confidence and a sense of identity.
At I'm the Chef Too!, our commitment is to provide enriching experiences that naturally weave these elements together. Our unique approach of teaching complex subjects through tangible, hands-on, and delicious cooking adventures developed by mothers and educators ensures that children are constantly learning while having immense fun. We believe in sparking curiosity and creativity in every child, making "edutainment" an everyday reality. If you're a parent or educator looking for comprehensive, engaging programs that bring this philosophy to life, we invite you to learn more about our versatile offerings for schools and groups.
Conclusion
As the crisp autumn air signals the arrival of Halloween, the opportunity to engage in creative, hands-on activities with our children becomes a cherished highlight. We've journeyed through a world of spooktacular possibilities, from edible delights and classic character creations to imaginative upcycled projects and enchanting home decorations. Each Halloween craft for kids to make isn't just a fun pastime; it's a powerful avenue for fostering creativity, honing fine motor skills, boosting cognitive development, and, most importantly, creating priceless family memories.
At I'm the Chef Too!, we wholeheartedly believe in the magic of "edutainment" – where learning is an adventure, and every discovery is delicious. Our unique blend of food, STEM, and the arts is designed to spark curiosity and creativity in children, offering a vibrant, screen-free alternative that brings families closer. These Halloween crafts perfectly embody our mission, proving that complex subjects can be taught in the most tangible, hands-on, and enjoyable ways.
So, gather your glitter, unleash your imagination, and get ready to create some truly unforgettable Halloween moments. The joy on your child's face as they proudly display their handmade ghost or monster is a reward unlike any other, a testament to the power of shared creation and joyful learning.
Ready to continue the adventure year-round? Elevate your family's bonding time and educational exploration with the ultimate convenience and excitement of our monthly subscription box. A new "edutainment" experience is delivered right to your door every month with free shipping in the US, packed with pre-measured dry ingredients and specialty supplies. Give the gift of learning that lasts all year, spark endless curiosity, and make cherished memories. Join The Chef's Club today!
FAQ: Your Halloween Crafting Questions Answered
Q1: What age group are these Halloween crafts suitable for?
A1: The crafts listed span a wide range of ages, from toddlers to pre-teens. Many simple crafts like puffy cotton ghosts, footprint ghosts, or decorating mini pumpkins are perfect for preschoolers and younger children, often with a little adult assistance. Activities involving scissors, detailed drawing, or more complex assembly (like yarn-wrapped webs or witch's lanterns) are better suited for older children (5+), often requiring more direct supervision or adult help for tricky steps like hot gluing. We've tried to provide a variety to ensure there's something for everyone to enjoy and learn from.
Q2: How can I make Halloween crafting less messy?
A2: While embracing some mess is part of the fun, you can definitely minimize it! Lay down newspaper, an old tablecloth, or a plastic craft mat before starting. Use washable paints and markers. Keep wet wipes or a damp cloth readily available for quick hand and surface clean-ups. For younger children, consider crafts that use glue sticks instead of liquid glue, or try contact paper for "mess-free" collages and window decorations. Pre-cutting shapes for toddlers also reduces scissor mess. At I'm the Chef Too!, we understand the value of convenience, which is why our subscription boxes come with pre-measured dry ingredients, helping to streamline the process and reduce unnecessary spills.
Q3: What are some good craft ideas for toddlers to participate in safely?
A3: For toddlers, focus on crafts that involve simple actions, large pieces, and non-toxic materials. Excellent choices include:
- Puffy Cotton Ball Ghosts: Gluing large cotton balls onto a pre-drawn ghost outline.
- Footprint/Handprint Art: Painting their hand or foot with washable paint to create a pumpkin or ghost.
- Sticker & Googly Eye Decorating: Simply letting them stick googly eyes and fun Halloween stickers onto paper plates or mini pumpkins.
- Shape Monsters: Providing pre-cut large shapes and letting them glue them onto a bigger paper to create a monster.
- Sensory Bins: Filling a bin with themed items for exploration and scooping. Always ensure materials are non-toxic and supervise closely to prevent choking hazards.
Q4: How can I incorporate learning into these Halloween crafts?
A4: Every craft is an opportunity for learning!
- Math: Count materials, identify shapes, discuss patterns (e.g., in a garland), compare sizes.
- Science: Observe color mixing, discuss why glue sticks, or how a balancing bat works. Edible crafts are fantastic for observing chemical changes (baking, melting).
- Fine Motor Skills: Cutting, gluing, tearing paper, wrapping yarn, threading.
- Language: Describe colors, textures, and what they are creating. Tell stories about their monsters or ghosts.
- Problem-Solving: Figuring out how to attach pieces, how to make something stand up, or how to achieve a desired effect. This integrated approach to learning through hands-on activity is at the heart of I'm the Chef Too!'s "edutainment" philosophy.
Q5: What if my child isn't interested in a particular craft idea?
A5: It's completely normal for children to have varying interests! Don't force a craft they're not enthusiastic about. Instead, offer a selection of ideas and let them choose. You can also adapt crafts to fit their interests – if they love dinosaurs, maybe they can make a dinosaur dressed as a ghost! The goal is engagement and fun, not adherence to a specific project. Having a diverse collection of ideas, or a subscription that offers new themed activities monthly, can help keep things fresh and exciting. Our Chef's Club ensures a fresh adventure is always just around the corner.
Q6: Can these crafts be adapted for a group setting like a classroom or party?
A6: Absolutely! Many of these Halloween crafts for kids to make are perfect for groups. Pre-prepare materials (cut out shapes, portion supplies) to streamline the process. Choose crafts that have fewer steps or allow for individual expression within a simple framework (like decorating mini pumpkins or paper plate monsters). Assign a few adults to help supervise. For larger groups, especially in educational settings, consider exploring our flexible and engaging programs for schools and groups, which are designed to bring our unique STEM and art adventures to multiple children seamlessly.
Q7: How can I store or display finished Halloween crafts?
A7: Displaying finished crafts boosts a child's confidence! Hang garlands and window clings in prominent places. Create a "gallery wall" on a bulletin board or refrigerator for flat art. Use a dedicated shelf or table for 3D creations like monsters or decorated pumpkins. Some crafts, like handprint keepsakes, can be stored in a memory box. For delicate paper crafts, you might carefully layer them between tissue paper in a box. Make sure edible crafts are enjoyed quickly!