Table of Contents
- Introduction
- The Chilly Core of STEM: Why Ice Experiments are Super Cool for Kids
- The Wonders of Melting: Investigating Rates and Conditions
- Salty Secrets: The Magic of Ice and Salt
- Creative & Sensory Ice Play: Art, Exploration, and Imagination
- Density, Displacement, and States of Matter: Deeper Dives with Ice
- The Dry Ice Dimension: Caution, Chemistry, and Cool Effects
- Beyond the Basics: Integrating Ice with Other STEM Concepts
- Setting Realistic Expectations and Maximizing Learning
- Conclusion
- FAQ: Your Chilly Questions Answered
Imagine a sizzling summer afternoon, the air thick with heat, and a child’s boundless energy craving an outlet. Or perhaps it’s a quiet winter day, and the very concept of ice sparks a curious glint in their eyes. What if we told you that the humble ice cube, often relegated to chilling drinks, holds the key to a fascinating world of scientific discovery, right in your own kitchen or backyard? At I'm the Chef Too!, we believe in transforming everyday moments into extraordinary learning experiences. We've seen firsthand how blending food, STEM, and the arts can ignite a child's imagination, and ice experiments are a perfect, accessible entry point into this world of "edutainment."
This post is dedicated to exploring a treasure trove of captivating ice experiments for kids, designed to spark curiosity, build foundational STEM skills, and create unforgettable family memories. We'll dive into the simple magic of melting and freezing, uncover the secrets of salt and density, and even venture into the exciting (and safe!) realm of dry ice. Our goal is to provide you with practical, hands-on activities that foster a love for learning, develop critical thinking, and offer a wonderful screen-free alternative for endless hours of engagement. You'll learn how to set up these experiments, understand the science behind them, and discover how these chilly adventures align perfectly with our mission to make education delicious and fun.
Introduction
Have you ever stopped to truly observe an ice cube? How it glistens, how it feels impossibly cold to the touch, or how it slowly transforms into a shimmering puddle? For children, these simple observations are the first steps into the vast and wondrous world of science. From the moment a child grasps an ice cube, they're engaging with states of matter, temperature, and physical properties – often without even realizing it. These everyday encounters are ripe for turning into playful investigations, fostering an early love for scientific inquiry.
At I'm the Chef Too!, we understand the power of hands-on exploration. Our mission is built on the belief that learning should be an adventure, a multi-sensory journey that combines the wonder of science with the joy of creating. That's why we champion activities like ice experiments. They are not only incredibly easy to set up, often utilizing materials you already have, but they also offer a fantastic, mess-manageable way for kids of all ages to engage with core scientific principles. From predicting melt rates to understanding density and exploring chemical reactions, ice offers a cool and captivating medium for discovery. This comprehensive guide will equip parents and educators with an array of engaging ice experiments, providing clear instructions, scientific explanations, and tips for extending the learning, all while emphasizing the fun and bonding that comes from doing science together.
The Chilly Core of STEM: Why Ice Experiments are Super Cool for Kids
Before we plunge into specific experiments, let’s briefly explore why ice experiments are such a fantastic tool for nurturing young scientists. They aren't just about passing the time; they are powerful vehicles for learning across multiple STEM disciplines.
- Science (Observation & Hypothesizing): Kids naturally observe what happens to ice. Does it melt faster in the sun? What happens if you add salt? These questions lead to predictions and hypotheses, the cornerstones of the scientific method. They learn about states of matter (solid, liquid, gas), phase changes, temperature, and properties of materials.
- Technology (Tools & Techniques): While simple, these experiments can introduce children to basic tools like thermometers, droppers, and timers, and the techniques of measurement and data collection.
- Engineering (Problem-Solving & Design): How can we make the ice melt slower? How can we get the string to pick up the ice? These challenges encourage creative problem-solving and an understanding of physical forces.
- Math (Measurement & Comparison): Timing how long ice takes to melt, comparing quantities of water, or charting observations introduces fundamental mathematical concepts in a practical context.
Beyond core STEM, ice experiments also bolster crucial developmental skills:
- Sensory Exploration: The cold, the wet, the visual transformation—ice stimulates multiple senses.
- Fine Motor Skills: Using pipettes, droppers, or carefully placing items in ice all refine dexterity.
- Language & Communication: Describing observations, explaining predictions, and discussing results enhance vocabulary and communication abilities.
- Patience & Focus: Some experiments require waiting, teaching patience and sustained attention.
- Creativity & Imagination: Decorating ice, creating "potions," or imagining arctic landscapes sparks artistic expression.
At I'm the Chef Too!, we understand that every hands-on activity is an opportunity to learn and grow. Just as our popular kits like the Erupting Volcano Cakes Kit blend the excitement of a chemical reaction with the joy of baking, ice experiments provide a tangible, engaging way for children to grasp abstract scientific concepts. These experiences are invaluable for building confidence and fostering a genuine love for discovery.
Ready to embark on a journey of discovery that continues month after month? Join The Chef's Club and get a new, unique STEM cooking adventure delivered right to your door with free shipping!
The Wonders of Melting: Investigating Rates and Conditions
One of the most fundamental and fascinating aspects of ice is its ability to melt. This seemingly simple process is packed with scientific principles waiting to be uncovered.
1. Basic Ice Excavations and Melting Race
The Setup:
- Ice cubes (or larger blocks of ice frozen with small toys inside)
- Various tools: droppers, pipettes, spoons, small cups
- Warm water, cold water, and room temperature water
- Optional: salt, food coloring
The Process:
- Freeze & Hide: Freeze small plastic toys (like LEGO bricks, animal figurines, or even dinosaur bones) inside ice cubes or a larger block of ice. This creates an "ice excavation" challenge.
- Predict & Explore: Ask your child, "How can we get our toy out of the ice?" Encourage them to brainstorm ideas.
- Melt Race: Set up several dishes. In one, place an ice cube in cold water. In another, place an ice cube in warm water. A third might just have an ice cube on a plate at room temperature. Ask your child to predict which will melt fastest and slowest.
- Hands-On Melting: For the excavation, provide droppers filled with warm water. Kids can carefully "excavate" their treasures by dropping warm water onto the ice. For older children, introduce a sprinkle of salt to one of the ice cubes and observe the difference.
The Science Behind It:
- Heat Transfer: Heat energy causes the water molecules in the ice to vibrate faster, breaking their rigid crystalline structure and turning into liquid. Warm water transfers heat more quickly than cold water or room temperature air.
- Surface Area: The more surface area of the ice exposed to heat (e.g., in flowing water versus still water), the faster it will melt.
- Salt & Freezing Point Depression: Salt (sodium chloride) interferes with the ability of water molecules to bond together and form ice crystals. When salt is added to ice, it dissolves in the thin layer of liquid water that always exists on the surface of ice, even below freezing temperatures. This salt water has a lower freezing point than pure water, meaning the ice needs to get even colder to refreeze. As a result, the ice melts faster at a given temperature. This principle is why salt is used on icy roads!
Extensions:
- Data Collection: Use a timer to record how long each ice cube takes to melt under different conditions. Create a simple chart to compare the results.
- Flowing Water vs. Still Water: Compare an ice cube melting in a bowl of warm water to one under a gentle stream of warm running water (using a colander to catch the ice). The running water will melt the ice much faster due to continuous heat transfer and erosion, mimicking how ocean currents affect glaciers. This connects to real-world phenomena like the melting of the Greenland ice sheet, where warm ocean currents play a significant role.
- "Titanic" Icebergs: Freeze various sizes of ice cubes (large and small) and float them in a bowl of water. Discuss how icebergs are mostly submerged (only about 10% visible above water) and how this could pose a danger to ships. Add some small "ships" (e.g., walnut shells) to illustrate the concept.
These simple yet profound explorations of melting are fantastic for children of all ages. For those eager to delve into more exciting science and culinary adventures, remember that our one-time kits offer a fantastic array of themed experiences. Browse our complete collection of one-time kits to find the perfect blend of STEM and delicious fun for your family!
Salty Secrets: The Magic of Ice and Salt
Salt isn't just for seasoning! Its interaction with ice is a truly captivating scientific phenomenon that lends itself to several amazing experiments.
2. The Levitating Ice Cube (Ice Cube on a String)
The Setup:
- Bowl of cold water
- Ice cubes
- A 12-inch piece of string (cotton string works best)
- Table salt
The Process:
- Float the Ice: Place an ice cube in the bowl of cold water.
- String It Up: Lay one end of the string over the top of the ice cube, letting the rest drape into the water or over the rim of the bowl.
- Sprinkle the Salt: Sprinkle a small amount of salt directly onto the part of the string that's resting on the ice cube.
- Wait and Lift: Wait for two to three minutes. Then, slowly and carefully lift the end of the string. The ice cube should be stuck to it!
The Science Behind It: This experiment beautifully demonstrates freezing point depression. When you sprinkle salt on the ice, it causes a thin layer of ice directly under the string to melt. This creates a tiny pool of very cold, salty water around the string. As the salt dissolves, it lowers the freezing point of the water significantly. However, the meltwater from the ice cube then dilutes the salty water, raising its freezing point back above the super-cold temperature of the surrounding ice. This causes the now-diluted water around the string to refreeze, trapping the string within the ice.
Extensions:
- Different Salts: Try different types of salt (Epsom salts, rock salt) to see if they yield different results or melting times.
- String Variations: Experiment with different types of string (thicker, thinner, different materials) or even wire.
- Observation Journal: Have children record their observations, drawing diagrams of what they think is happening.
3. Making Ice Cream in a Bag
This is one of our favorite kitchen chemistry experiments, showcasing the power of salt and ice in a delicious way!
The Setup:
- 1 cup half-and-half (or whole milk/heavy cream)
- 2 tablespoons sugar
- 1/2 teaspoon vanilla extract
- Ice cubes (plenty!)
- 1/2 cup rock salt (kosher salt or table salt also works, but rock salt is ideal)
- Small resealable plastic bag (pint or sandwich size)
- Larger resealable plastic bag (gallon size)
- Oven mitts or a towel (the large bag gets very cold!)
The Process:
- Combine Ingredients: In the small bag, combine the half-and-half, sugar, and vanilla. Seal it tightly, pressing out as much air as possible.
- Ice Bath: Fill the large bag about halfway with ice cubes. Add the rock salt to the ice.
- Shake It Up: Place the sealed small bag inside the large bag. Seal the large bag tightly, again pressing out air.
- Shake, Shake, Shake! Now, for the fun part! Put on oven mitts or wrap the bag in a towel to protect your hands from the cold. Shake the bag vigorously for 5-10 minutes, or until the mixture in the small bag has thickened into ice cream.
- Enjoy! Remove the small bag, rinse it quickly to remove any salt residue, and serve your homemade ice cream.
The Science Behind It: This experiment is a fantastic demonstration of freezing point depression and heat transfer. The salt mixed with the ice creates a super-cold brine solution (water and salt) with a freezing point significantly below 0°C (32°F). When the ice melts in the salty water, it absorbs heat energy from its surroundings. This surroundings includes the small bag of ice cream ingredients. As the ice cream mixture loses heat to the super-cold salt-ice bath, its temperature drops below its own freezing point, causing it to solidify into delicious ice cream!
Extensions:
- Flavor Variations: Experiment with different flavorings (chocolate syrup, fruit puree).
- Salt Types: Compare the results using different types of salt (table salt, kosher salt, rock salt). Does one work faster or get colder?
- Temperature Tracking: If you have a thermometer, you could carefully measure the temperature of the ice-salt mixture before and after shaking.
These kitchen-based ice experiments are a perfect example of how I'm the Chef Too! blends delicious fun with genuine learning. Our unique kits are designed by mothers and educators to make complex subjects digestible and delightful. If your child loves creating and discovering in the kitchen, our Chef's Club is an ideal choice for continuous inspiration. Give the gift of learning that lasts all year with a 12-month subscription to our STEM cooking adventures, and watch their love for science and cooking flourish! Join The Chef's Club today!
Creative & Sensory Ice Play: Art, Exploration, and Imagination
Ice isn't just for scientific inquiry; it's a fantastic medium for creative expression and sensory exploration. These experiments blend art and science beautifully.
4. Colorful Ice Painting
The Setup:
- Large block of ice (freeze water in a plastic container or baking dish)
- Liquid watercolors or food coloring mixed with a little water
- Paintbrushes, droppers, or pipettes
- Salt (optional, for textured effects)
- Trays or large plates to catch melting water
The Process:
- Ice Canvas: Place the large block of ice on a tray.
- Paint Away: Provide children with liquid watercolors or diluted food coloring and brushes/droppers. Let them paint directly onto the ice. Watch how the colors spread and blend as the ice slightly melts.
- Textured Effects (Optional): Sprinkle a little salt onto the painted ice. Observe how the salt creates tiny craters and channels, intensifying the colors in those areas.
The Science Behind It:
- Melting & Diffusion: As the ice slowly melts, the colored water spreads and diffuses across its surface. The cold temperature also affects the viscosity of the paint, making it move differently than on paper.
- Salt's Carving Action: When salt is sprinkled on ice, it causes localized melting (freezing point depression). The salt crystals create miniature "valleys" and "rivers" on the ice surface as they dissolve the ice around them, allowing the colors to seep into these crevices and create intricate patterns.
Extensions:
- Ice Sculptures: Freeze water in various molds (cupcake tins, silicone molds) to create different shapes for painting.
- Outdoor Ice Art: If it's cold enough outside, create ice decorations by freezing water with natural elements (leaves, berries, small flowers) in molds with a loop of string. Hang them as beautiful, temporary outdoor art.
- Refreezing: After painting, place the ice back in the freezer. What happens to the colors? Do they stay vibrant, or do they become more muted when refrozen?
5. Frozen Object Excavation / Ice Fishing
The Setup:
- Small plastic toys (fish, insects, small dinosaurs, LEGO bricks)
- Water
- Ice cube trays or small plastic containers
- Tools for excavation: warm water, droppers, pipettes, small hammers (toy ones, for gentle tapping), plastic knives, brushes
- Tray to catch water
The Process:
- Freeze Objects: Place one or two small plastic toys into each compartment of an ice cube tray or small container. Fill with water and freeze overnight.
- The Challenge: Present the frozen blocks to your child and challenge them to "rescue" the objects.
- Experiment with Tools: Let them experiment with different methods: gently tapping with a toy hammer, using warm water from droppers, or carefully chipping away with a plastic knife.
The Science Behind It: This activity reinforces the concepts of melting and heat transfer. Children learn that applying warmth (warm water) or physical force (tapping) can change the state of matter and break down the ice. It's also a great exercise in problem-solving and fine motor skills.
Extensions:
- Colored Ice: Freeze the objects in colored ice for an added visual element.
- Themed Excavations: Create themed ice blocks, like a "dinosaur fossil dig" or an "arctic animal rescue." For example, a child who loves dinosaurs might enjoy excavating plastic dino bones from a large block of ice, much like our Fudgy Fossil Dig Kit teaches about paleontology through edible archaeology!
- Time Trial: Race to see which method frees the toy fastest.
These creative experiments encourage open-ended play and allow children to lead their own discoveries. For more engaging, ready-to-go adventures that combine scientific learning with creative culinary arts, be sure to browse our complete collection of one-time kits. You'll find a world of themes to ignite their imagination!
Density, Displacement, and States of Matter: Deeper Dives with Ice
Ice can be a powerful tool for teaching more complex scientific principles like density and displacement in an intuitive, visual way.
6. Does it Sink or Float? The Density of Ice
The Setup:
- Clear container (tall glass or beaker)
- Water
- Ice cubes
- Various small, waterproof objects (e.g., small plastic toys, pebbles, corks, bottle caps, LEGO bricks)
The Process:
- Ice in Water: Fill the container with water and gently place an ice cube in it. Observe that the ice floats.
- Predict & Test: Ask your child to predict whether other objects will sink or float when placed in the water with the ice.
- Experiment: Place one object at a time into the water and observe.
- Ice vs. Water Density: Discuss why ice floats.
The Science Behind It: This experiment demonstrates the concept of density. Density is a measure of how much "stuff" is packed into a given space. Unlike most substances, water is less dense as a solid (ice) than as a liquid. This is because when water freezes, its molecules arrange themselves in a crystalline structure that takes up more space, making ice less dense than liquid water, and thus it floats!
Extensions:
- Saltwater Density: Repeat the experiment, but in one container, use plain water, and in another, dissolve a significant amount of salt to make saltwater. Place ice cubes in both. The ice will float higher in the saltwater because saltwater is denser than freshwater. This connects to how glaciers calve into the ocean and how the less dense freshwater melt rises above the denser salty ocean water.
- The Arctic vs. Antarctic: Discuss how ice formed from frozen freshwater (like the Arctic sea ice) floats on salty ocean water, while ice formed on land (like Antarctic glaciers) eventually breaks off and also floats.
7. Make "Hot Ice" - A Supercooling Illusion
This advanced experiment is a bit more involved but creates a truly spectacular visual demonstration of supercooling and rapid crystallization. Adult supervision and careful handling of hot liquids are essential.
The Setup:
- 1-2 cups sodium acetate trihydrate (can be purchased online or from science supply stores)
- 1-2 teaspoons water (distilled is best to avoid impurities)
- Glass jar or beaker
- Saucepan
- Stovetop
- Small, clean plate
- Seed crystal: a tiny speck of sodium acetate (or a piece of the solid that didn't dissolve, or even just touching the liquid with a dirty finger, though a clean seed is better for control)
The Process:
- Dissolve Sodium Acetate: In the saucepan, combine the sodium acetate trihydrate and water. Heat gently over low to medium heat, stirring constantly, until all the crystals are completely dissolved and the solution is clear. Do NOT boil.
- Cooling: Carefully pour the clear solution into a clean glass jar or beaker. Cover it loosely (e.g., with plastic wrap or foil) and let it cool undisturbed to room temperature. This can take an hour or more. Crucially, it must cool without any disturbances or impurities, allowing it to "supercool."
- Trigger Crystallization: Once completely cooled, touch the surface of the liquid with a tiny seed crystal of sodium acetate. You can also carefully pour the supercooled liquid onto a plate with a tiny crystal or simply touch it with a clean finger.
- Watch the Magic: Observe as the liquid instantly crystallizes, forming beautiful, warm "ice" structures that grow rapidly upwards. It feels warm because the process of crystallization is exothermic (releases heat).
The Science Behind It:
- Supercooling: The key to "hot ice" is supercooling. Sodium acetate has a freezing point, but when dissolved in water and cooled very carefully, it can remain liquid even below its freezing point without solidifying. It's in an unstable, supercooled state.
- Crystallization: The moment a "seed" crystal (or even a tiny impurity or disturbance) is introduced, it provides a nucleation point. The supercooled liquid molecules instantly "remember" their solid form and rapidly snap into a stable crystal structure.
- Exothermic Reaction: The formation of chemical bonds during crystallization releases energy in the form of heat, making the "ice" feel warm to the touch.
Safety Note: This experiment involves heating, so adult supervision is paramount. Ensure children only observe and do not handle the hot solution.
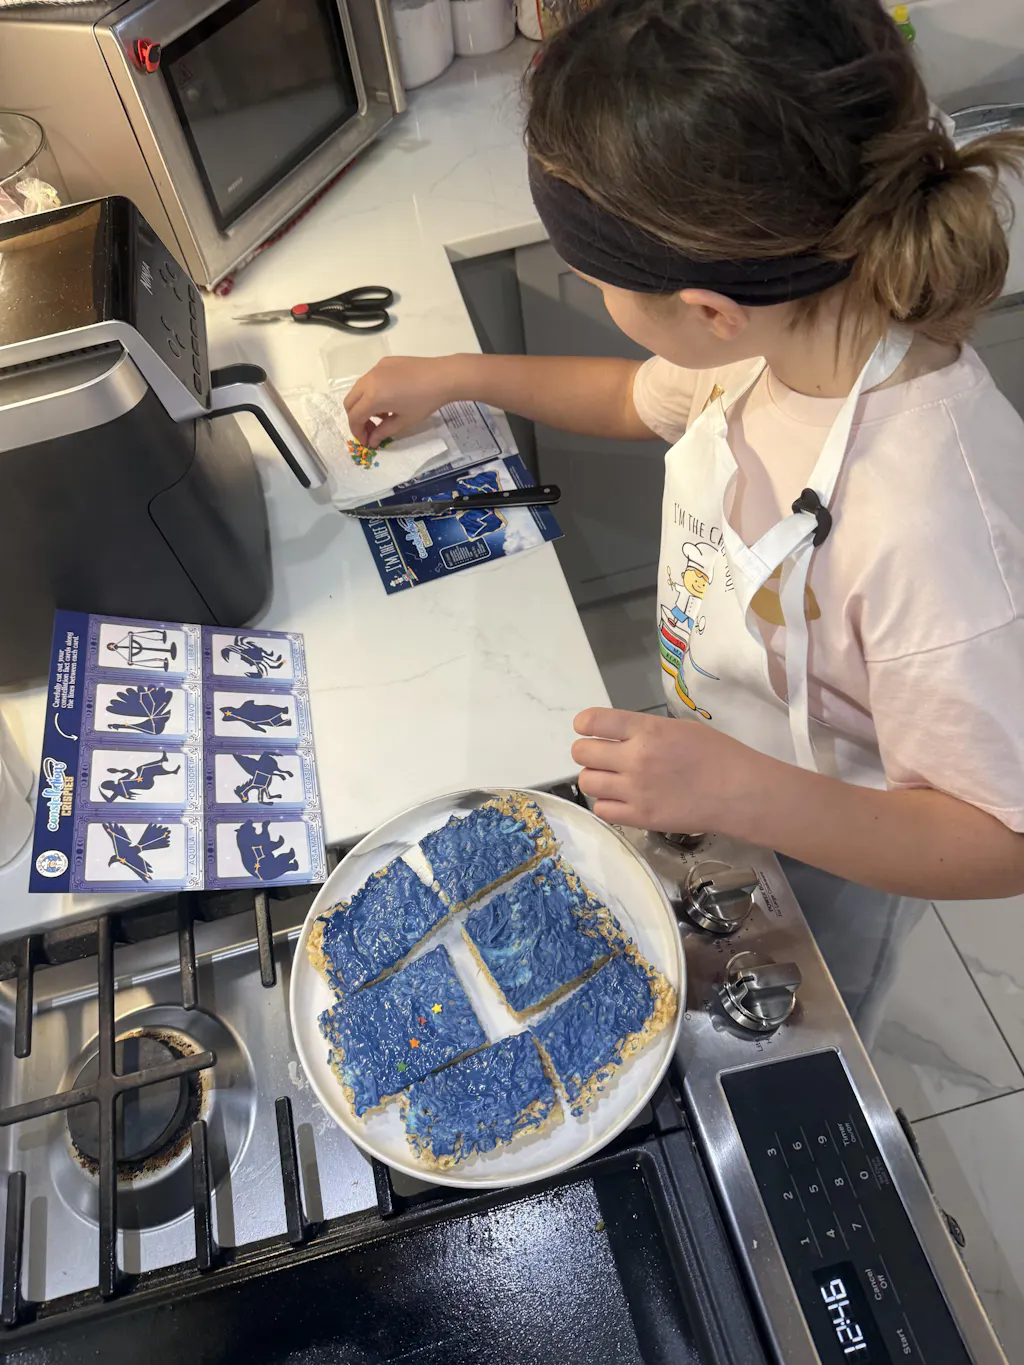
For more hands-on activities that blend science with awe-inspiring visuals, our Galaxy Donut Kit lets kids explore astronomy by creating their own edible solar system, sparking a similar wonder as they see scientific principles come to life.
The Dry Ice Dimension: Caution, Chemistry, and Cool Effects
Dry ice offers some of the most dramatic and visually stunning ice experiments, making it a favorite for special occasions or supervised science fun. However, it requires strict safety precautions.
Safety First with Dry Ice: CRITICAL Information
- NEVER Touch with Bare Skin: Dry ice is extremely cold (-109.3°F or -78.5°C) and can cause severe frostbite. Always use thick insulated gloves, tongs, or a scoop for handling.
- Ventilation is Key: Dry ice sublimates into carbon dioxide gas. In an enclosed space, this gas can displace oxygen, leading to suffocation. Perform all dry ice experiments in a well-ventilated area, preferably outdoors or in a very open room.
- No Airtight Containers: Never store or seal dry ice in an airtight container. As it sublimates, the gas will build up pressure, potentially causing the container to explode. Use a cooler with the lid ajar or a container that allows gas to escape.
- Adult Supervision is Mandatory: Dry ice experiments should always be conducted with direct adult supervision.
- Do Not Ingest: Dry ice is not for consumption.
8. The Foggy Cauldron
The Setup:
- Small chunks of dry ice
- Bowl of warm water
- Tongs or insulated gloves
The Process:
- Warm Water First: Fill a bowl with warm water.
- Add Dry Ice: Carefully add a few chunks of dry ice to the warm water using tongs.
- Observe: Watch as dense, cascading fog billows over the edges of the bowl.
The Science Behind It:
- Sublimation: Dry ice is solid carbon dioxide. Unlike regular ice (frozen water) which melts into liquid, dry ice "sublimates"—it goes directly from a solid to a gas, skipping the liquid phase entirely.
- Condensation: When the extremely cold carbon dioxide gas mixes with the warm, humid air above the water, it causes the water vapor in the air to condense, forming tiny water droplets. This is the visible "fog" you see, much like a cloud.
9. The Bubbling Brew (Adding Dish Soap)
The Setup:
- The same as the Foggy Cauldron, plus a few drops of dish soap.
The Process:
- Soap & Water: Add a few drops of dish soap to the warm water before adding the dry ice.
- Add Dry Ice: Carefully add dry ice chunks.
- Foamy Fun: The fog will now be trapped in bubbles, creating an erupting "brew" of foamy, smoky bubbles.
The Science Behind It: The dish soap creates a thin film that traps the carbon dioxide gas and water vapor as they rise, forming long-lasting, foggy bubbles that add an extra layer of visual intrigue to the sublimation process.
10. The Singing Spoon
The Setup:
- A chunk of dry ice
- A warm metal spoon (room temperature is fine, but slightly warmed is even better)
- Tongs or insulated gloves
The Process:
- Hold the Dry Ice: Securely hold a piece of dry ice with tongs.
- Press the Spoon: Press the warm metal spoon firmly against the surface of the dry ice.
- Listen: A high-pitched squealing or "singing" sound will emanate from the spoon.
The Science Behind It: When the warm spoon touches the extremely cold dry ice, the dry ice sublimates instantly, creating a layer of carbon dioxide gas between the spoon and the ice. This gas pushes the spoon away from the dry ice. However, the spoon's own weight then presses it back down. This rapid, repeated lifting and pressing of the spoon creates vibrations, which we perceive as a sound. It's like a tiny, self-sustaining pop-it!
11. The Inflating Balloon
The Setup:
- Small pieces of dry ice (pea to marble size)
- A balloon
- Tongs or insulated gloves
The Process:
- Place Dry Ice: Carefully place a few small pieces of dry ice inside the balloon using tongs.
- Tie & Watch: Tie the balloon securely.
- Observe Inflation: Over time, the balloon will inflate as the dry ice sublimates into carbon dioxide gas.
The Science Behind It: This is a direct demonstration of how gases take up space and create pressure. As the solid dry ice transforms into gaseous carbon dioxide, the gas expands to fill the balloon. The more dry ice, the more gas, and the larger the balloon will inflate (up to its capacity).
Safety Note: Do not use too much dry ice in a small balloon, as it could pop. Always supervise.
Dry ice experiments, when done safely, are unforgettable. They make for thrilling demonstrations of phase changes, gas properties, and heat transfer. Just as these dramatic experiments capture attention, our I'm the Chef Too! kits aim to make learning captivating. For families interested in continuous, exciting STEM learning, our Chef's Club subscription delivers a new "edutainment" experience right to your home every month, complete with all the dry ingredients and specialty supplies needed for a fantastic culinary and scientific adventure! Join The Chef's Club today!
Beyond the Basics: Integrating Ice with Other STEM Concepts
Ice experiments can seamlessly integrate with broader STEM concepts, tying into themes you might find in our I'm the Chef Too! kits.
12. Color Mixing with Ice
The Setup:
- Ice cubes in primary colors (freeze water with red, blue, yellow food coloring)
- Clear bowls or cups
- Plain water (optional)
The Process:
- Predict Colors: Place two different colored ice cubes (e.g., yellow and blue) in a clear bowl. Ask your child to predict what new color will form when they melt and mix.
- Observe Mixing: Watch as the ice cubes melt and the colors combine.
- Documentation: Have children draw or chart their predictions and actual results.
The Science Behind It: This is an artistic exploration of color theory combined with the science of melting. As the ice melts, the pigments are released into the water and mix, demonstrating how primary colors combine to create secondary colors.
Extensions:
- Colored Ice in Drinks: Add colored ice cubes to different low-sugar juices and observe how the drink's color changes as the ice melts.
- Ice Chalk Art: Grind chalk into powder, mix with a little water, pour into an ice cube tray, and freeze. Once frozen, use these "ice chalks" on dark construction paper or a sidewalk for vibrant, temporary art.
13. Winter-Themed Culinary Creations
Ice isn't just for experiments; it's a key ingredient in many delicious treats that can also teach science!
- Frozen Juice Popsicles: Pour favorite low-sugar juice into ice cube trays or popsicle molds. Place a stick in the center. Observe freezing over time (1 hour, 2 hours, overnight). Discuss liquid to solid transformation.
- Homemade Slushies: Freeze fruit juice into ice cubes. Blend the frozen cubes with a little extra juice or water until slushy. Experiment with different juice combinations.
- Edible Snow Globes: While not strictly an "ice" experiment, creating a themed dessert can evoke winter wonder. Imagine making edible snow globes with clear gelatin and edible glitter, or constructing an "igloo" out of marshmallows. Even beloved characters can make learning fun, like when kids make Peppa Pig Muddy Puddle Cookie Pies, which playfully introduces concepts like texture and basic baking.
These kitchen activities are at the heart of what we do at I'm the Chef Too!. We believe that cooking is chemistry, baking is math, and decorating is art. Every culinary adventure is a chance for discovery, blending academic concepts with hands-on joy. Our goal is to make these learning experiences accessible and engaging for every child, fostering skills that extend far beyond the kitchen.
Setting Realistic Expectations and Maximizing Learning
When engaging in ice experiments, or any STEM activity, it's essential to approach it with a mindset of exploration, not perfection.
- Focus on the Process, Not Just the Outcome: The real learning happens in the observation, the prediction, the discussion, and the "what ifs." Don't stress if an experiment doesn't work exactly as expected; often, that's where the most interesting questions arise!
- Ask Open-Ended Questions: Instead of telling your child what's happening, ask: "What do you think will happen next?" "Why do you think it did that?" "What would happen if we tried...?"
- Encourage Documentation: Have older children draw pictures, write down observations, or even create simple charts. For younger kids, simply talking through their experience is valuable.
- Prioritize Safety: Always supervise, especially with sharp objects, hot water, or any specialized materials like dry ice.
- Embrace the Mess (a little!): While many ice experiments are relatively mess-free, water is involved! Lay down towels or conduct experiments in a designated "splash zone" to minimize cleanup worries.
- Connect to Real-World Examples: Discuss how these small-scale experiments relate to bigger phenomena: how salt keeps roads from freezing, how glaciers melt, or why polar bears can walk on ice.
At I'm the Chef Too!, we are committed to providing screen-free educational alternatives that facilitate family bonding. Our kits are developed by mothers and educators who understand the importance of making learning tangible and fun. Whether it's the thrill of an ice excavation or the wonder of a bubbling dry ice cauldron, these shared moments of discovery strengthen family connections and build a lifelong love for learning.
Our Chef's Club is designed to continually deliver these valuable experiences to your home. With convenient monthly deliveries of unique, educational cooking adventures, you'll never run out of ways to spark curiosity and creativity. We offer flexible 3, 6, and 12-month pre-paid plans, perfect for gifting or ensuring a steady stream of engaging activities. Each box is a complete experience, containing pre-measured dry ingredients and specialty supplies, making it easy to jump right into the fun. Don't miss out on the opportunity to foster a love for STEM and create delicious memories together. Join The Chef's Club today!
Conclusion
From the simplest ice cube in a glass to the mesmerizing effects of dry ice, the world of frozen water offers an endless playground for scientific exploration. These engaging ice experiments for kids are more than just fun activities; they are powerful tools for introducing fundamental STEM concepts, developing critical thinking skills, and nurturing a lifelong love for learning. We've seen how the magic of melting, the secrets of salt, and the wonders of density can captivate young minds, turning everyday observations into profound discoveries.
At I'm the Chef Too!, our mission is to blend food, STEM, and the arts into one-of-a-kind "edutainment" experiences that ignite curiosity and creativity in children. Just like the experiments we've shared today, our kits are thoughtfully designed by mothers and educators to provide tangible, hands-on, and delicious adventures that bring complex subjects to life. We believe in fostering a love for learning, building confidence, and creating joyful family memories—all through the power of shared discovery in the kitchen.
So, gather your ice, unleash your curiosity, and embark on some frosty fun! And when you're ready for a continuous stream of innovative and educational activities that combine the best of science, cooking, and art, we invite you to join our family of aspiring young chefs and scientists.
Ready for a new adventure every month? Don't let the learning stop here! Join The Chef's Club and receive a fresh, exciting STEM cooking kit delivered directly to your door with free shipping in the US. It's the perfect way to keep curiosity alive and create delicious memories all year long!
FAQ: Your Chilly Questions Answered
Q1: What age group are these ice experiments best for?
A1: Most basic ice experiments (melting, floating, coloring) are suitable for preschoolers (ages 3+) with supervision. Experiments involving salt, more detailed observation, or recording data are great for elementary school children (ages 5-10). Dry ice experiments are best for older elementary and middle school children (ages 8+) due to the critical safety precautions required, and always with strict adult supervision.
Q2: How can I make ice experiments less messy?
A2: The key to minimizing mess with water-based activities is preparation.
- Use trays: Always conduct experiments on a large tray, baking sheet, or in a shallow basin to contain spills.
- Towels are your friend: Keep plenty of old towels or paper towels handy for quick cleanups.
- Outdoor play: When weather permits, take messy experiments outside! A patio, deck, or even a grassy area is perfect.
- Designated "splash zone": Use an old tablecloth or shower curtain under your workspace to protect surfaces.
Q3: What is "supercooling" and why is it important in the "hot ice" experiment?
A3: Supercooling is a phenomenon where a liquid is cooled below its freezing point without solidifying. It's an unstable state. In the "hot ice" (sodium acetate) experiment, carefully cooling the solution prevents the molecules from forming crystals. When a "seed" crystal or disturbance is introduced, it acts as a trigger, causing the supercooled liquid to rapidly crystallize and release heat, making it feel warm. This is a fascinating demonstration of phase change and energy release.
Q4: Can I use regular table salt for all experiments, or do I need specific types of salt?
A4: For most basic experiments like "ice on a string" or melting ice faster, regular table salt (sodium chloride) works well. For making ice cream in a bag, rock salt (larger crystals of sodium chloride) is often recommended because its larger surface area means it dissolves slower and absorbs heat more consistently, leading to a colder, more prolonged cooling effect. Epsom salts have a different chemical composition and will interact differently. It's fun to experiment with different salts to see the variations!
Q5: Where can I buy dry ice for experiments?
A5: Dry ice can often be purchased from local grocery stores (check with customer service), ice suppliers, or specialty gas companies. Always call ahead to confirm availability and inquire about any specific handling or purchasing requirements. Remember to transport it in a well-ventilated vehicle and never store it in an airtight container at home.
Q6: How do these experiments connect to what I'm the Chef Too! offers?
A6: At I'm the Chef Too!, we believe in the power of hands-on learning through "edutainment," just like these ice experiments! Our kits blend food, STEM, and the arts into unique cooking adventures. For example, understanding chemical reactions in ice experiments relates to baking soda volcanoes in our Erupting Volcano Cakes Kit. Learning about states of matter and changes in properties is central to many of our edible science projects. Both foster curiosity, creativity, fine motor skills, and family bonding through engaging, screen-free activities designed by mothers and educators. Our Chef's Club subscriptions provide a continuous stream of these exciting learning opportunities right to your door!