Table of Contents
- Introduction
- The Allure of Volcanoes for Young Minds
- Getting Started: The Classic Baking Soda & Vinegar Volcano Experiment
- The Science Behind the Fizz: How It Works
- Beyond the Basic Eruption: Creative Variations & Enhancements
- Turning Play into Powerful Learning: STEM & Beyond
- Deep Dive into Real Volcanoes: A Mini Geology Lesson
- Optimizing the Volcano Experiment for Different Ages
- Making It a Family Affair: Tips for Parents & Educators
- I'm the Chef Too!: Blending Fun, Food, and STEM
- Conclusion
- FAQ Section
Imagine the raw power of the Earth, a towering peak rumbling with unseen forces, then erupting in a dramatic display of smoke and "lava." For children, volcanoes aren't just geological formations; they're magnificent, awe-inspiring spectacles that ignite a primal sense of wonder. This fascination makes the classic volcano experiment an absolute favorite – a captivating, hands-on activity that brings the thrill of earth science right into your home or classroom. But what if we told you this simple fizzing reaction could be a launchpad for so much more than just a quick eruption?
At I'm the Chef Too!, we believe that learning should be an adventure, a delicious journey where curiosity leads the way. Our mission is to seamlessly blend food, STEM, and the arts into unique "edutainment" experiences that captivate young minds. This volcano for kids experiment perfectly embodies our philosophy, offering a tangible, exciting way to explore complex scientific concepts. In this comprehensive guide, we're not just showing you how to make a volcano erupt; we're diving deep into the fascinating science behind it, exploring creative variations, uncovering the multitude of skills it develops, and even venturing into the real-world geology of these incredible natural wonders. Get ready to transform a simple kitchen chemistry project into an unforgettable family bonding experience that sparks creativity, critical thinking, and a lifelong love for learning – all without a screen in sight.
Introduction
The Earth beneath our feet is a dynamic, living entity, constantly shifting and shaping the landscapes we see. Of all its powerful expressions, few capture the imagination quite like a volcano. For young explorers, the idea of molten rock, gas, and ash erupting from deep within the planet is nothing short of magical, a dramatic story unfolding right before their eyes. This inherent wonder makes the volcano experiment not just a fun activity, but a compelling entry point into the vast world of science.
Beyond the initial "wow" factor of a bubbly, colorful eruption, lies a rich tapestry of educational opportunities. This blog post aims to unearth these layers of learning, guiding you through the step-by-step process of creating your own fizzing volcano, explaining the simple yet profound chemical reactions at play, and inspiring you to explore creative extensions that enhance the experience. We'll delve into how this hands-on project fosters crucial STEM skills – from scientific observation and engineering design to mathematical measurement and artistic expression – all while encouraging delightful, screen-free family engagement. By the end, you'll see why the humble baking soda and vinegar volcano is more than just a momentary fizz; it's a powerful tool for cultivating curiosity, building confidence, and creating lasting memories. If you're eager to make learning an ongoing adventure, remember that a new culinary and scientific quest can arrive right at your door every month. Ready for a new adventure every month? Join The Chef's Club and enjoy free shipping on every box and keep the "edutainment" coming!
The Allure of Volcanoes for Young Minds
Why is it that the mere mention of a volcano can light up a child's eyes and launch them into a world of imagination? Perhaps it's the sheer power they represent, a glimpse into forces far grander than our everyday lives. Perhaps it's the dramatic visual – the towering mountain, the smoky plume, the fiery "lava" flow. For children, volcanoes are a captivating blend of danger and wonder, a perfect storm of elements that naturally sparks curiosity.
From the roaring dinosaurs that once roamed volcanic landscapes to the mysteries of Earth's interior, volcanoes connect children to vast concepts of time, geology, and natural history. They offer a tangible example of cause and effect, illustrating how processes deep within our planet can lead to dramatic changes on the surface. This inherent fascination provides an unparalleled opportunity for learning, serving as a natural hook to introduce fundamental scientific principles in a way that feels exciting and relevant. Instead of abstract theories, children can engage with a miniature, controlled version of this powerful phenomenon, asking questions, making predictions, and observing outcomes firsthand. This active engagement is precisely what we champion at I'm the Chef Too!, where we believe that the best learning happens when children are truly immersed in an experience, transforming complex subjects into tangible, delicious adventures.
Getting Started: The Classic Baking Soda & Vinegar Volcano Experiment
The heart of our volcano adventure lies in a classic chemical reaction. This experiment is fantastic because it uses common household ingredients, making it accessible and easy to set up. While the core ingredients remain consistent, you have plenty of room for creativity when it comes to building your volcano structure.
Essential Materials for the Eruption:
- Baking Soda (Sodium Bicarbonate): This is your solid reactant. Aim for ½ to 1 cup for a good initial eruption, but you can adjust for variations.
- White Vinegar (Acetic Acid): Your liquid reactant. A bottle of 400ml or more is ideal, as you’ll likely want to do multiple eruptions!
- Warm Water: About 100ml, helps dissolve the baking soda for a more consistent reaction.
- Dish Soap: A squirt (around 10ml) creates more foamy "lava," making the eruption visually impressive and longer-lasting.
- Food Coloring (preferably red or orange): A few drops to give your "lava" that iconic volcanic hue. Washable tempera paint can also be used for vibrant, less-staining colors.
- Empty 2-Liter Soda Bottle (or a plastic cup/bottle with a narrow opening): This will be your volcano's "vent" or "magma chamber."
- Spoon: For mixing.
- Pitcher or measuring cup: For easy pouring of the vinegar mixture.
Materials for Building Your Volcano Structure (Choose one or combine):
- Playdough or Soft Clay: Excellent for sculpting a reusable volcano mountain around your bottle. This is also great for developing fine motor skills and creativity.
- Sand or Pebble Rock: Ideal for outdoor experiments. Simply build a mound around your container.
- Cardboard or Poster Board: Can be cut and taped into a cone shape around your bottle, then decorated.
- A Large Tray or Tarp: Absolutely essential for containing the mess! This experiment is best done outdoors, but if inside, a tray with high sides is a must.
Step-by-Step Eruption Instructions (The Core Process):
Remember, safety and mess management are key! We highly recommend doing this activity outside on a surface that can get wet and bubbly.
-
Prepare Your Volcano Base:
- Place your empty soda bottle (or chosen container) on your large tray or tarp.
- If using playdough or clay: Sculpt a mountain shape around the bottle, leaving the opening clear. Make sure the base is wide and stable.
- If using sand/dirt: Mound the sand around the bottle to form a volcano shape.
- If using a cardboard cone: Place the cone over the bottle, securing it if needed.
- Ensure your setup is sturdy and can contain any overflow.
-
Combine the "Lava" Ingredients:
- In a separate pitcher or large measuring cup, combine the 400ml of white vinegar, 100ml of warm water, and 10ml of dish soap.
- Add 5-10 drops of red or orange food coloring (or a tablespoon of washable tempera paint) to this mixture. Stir gently. This will be your "lava" mixture.
-
Load the Volcano's Chamber:
- Carefully spoon the baking soda into the empty soda bottle (your volcano's "vent"). Start with ½ cup. If you’re making a slurry, mix ½ cup baking soda with some water until it’s a liquid consistency, then pour it in.
-
Initiate the Eruption!
- When you’re ready, quickly and steadily pour the vinegar and food coloring mixture from your pitcher into the soda bottle containing the baking soda.
- Step back and watch the magic happen! The mixture will begin to fizz, bubble, and overflow, simulating a vibrant volcanic eruption.
-
Repeat and Experiment:
- Once the eruption subsides, you can often get several more "erupts" by adding more baking soda to the bottle and pouring in more vinegar. This is a great way to observe repeated reactions.
- For an even more exciting twist, explore our Erupting Volcano Cakes Kit! This kit takes the volcano experiment to a delicious new level, allowing kids to bake and decorate their own erupting cake, turning science into an edible masterpiece. It’s a fantastic way to combine the fun of an experiment with the joy of baking.
The Science Behind the Fizz: How It Works
The magic of our DIY volcano lies in a fundamental chemical reaction, a process that transforms common household items into a bubbly, foamy spectacle. It's a fantastic introduction to basic chemistry, acids, bases, and gas production for curious young minds.
At the heart of the eruption are two key players: baking soda and vinegar.
- Baking Soda (Sodium Bicarbonate): This white powder is a base. In chemistry, bases are compounds that can accept hydrogen ions or release hydroxide ions in a solution.
- Vinegar (Acetic Acid): This common kitchen staple is an acid. Acids are compounds that donate hydrogen ions in a solution.
When these two ingredients mix, they don't just sit there; they react! The acetic acid in the vinegar reacts with the sodium bicarbonate in the baking soda. This reaction creates three new substances:
- Water (H₂O)
- Sodium Acetate (CH₃COONa) – a salt, which remains dissolved in the liquid.
- **Carbon Dioxide Gas (CO₂) ** – This is the star of our show!
The Eruption Explained:
Carbon dioxide is the same gas that gives sodas their fizz and causes bread to rise. When it's produced in the volcano bottle, it quickly expands. The narrow opening of the bottle restricts the gas from escaping too quickly, causing pressure to build up inside. As more and more carbon dioxide is produced and tries to spread out, it pushes the liquid (water, vinegar, dish soap, and food coloring) up and out of the bottle's opening.
The dish soap plays a crucial role here, too. It doesn't participate in the chemical reaction, but it acts as a surfactant. This means it lowers the surface tension of the water, allowing the carbon dioxide bubbles to become trapped within the liquid, forming a profusion of foam. This foam creates the visually spectacular, flowing "lava" effect that makes the experiment so engaging. Without dish soap, the eruption would still happen, but it would be much less foamy and dramatic.
Connecting to Real Volcanoes:
While our baking soda and vinegar eruption isn't exactly how real volcanoes work, it offers a fantastic analogy:
- Magma Chamber: The bottle can be thought of as a volcano's magma chamber, where molten rock and gases accumulate deep underground.
- Pressure Build-up: Just like our carbon dioxide gas, real volcanic gases (like water vapor, carbon dioxide, and sulfur dioxide) build up immense pressure within the magma chamber.
- Vent/Crater: The opening of the bottle represents the volcano's vent or crater, the pathway for eruption.
- Lava Flow: Our foamy, colored liquid mimics the flow of lava and ash during a real eruption.
This simple experiment beautifully demonstrates the principle of gas expansion creating pressure, leading to a visible eruption – a powerful lesson in basic chemistry and physics, wrapped in an exciting, hands-on activity. This kind of tangible learning, where kids can see and feel scientific principles in action, is central to what we do at I'm the Chef Too!, turning abstract ideas into memorable experiences.
Beyond the Basic Eruption: Creative Variations & Enhancements
Once you've mastered the classic baking soda and vinegar eruption, the fun doesn't have to stop there! This experiment is wonderfully adaptable, allowing for endless creativity and deeper exploration. Here are some fantastic ways to enhance your volcano for kids experiment, turning it into a truly unique learning adventure:
Color-Changing Volcanoes: A Splash of Art and Chemistry
Who says science can't be vibrant? Adding a color-changing element takes the visual appeal to the next level and introduces basic color theory.
-
How to Achieve It: Instead of mixing all your food coloring or paint into one batch of "lava" liquid, try this:
- Add one primary color (e.g., blue) of washable tempera paint or food coloring directly into the baking soda in the bottle.
- Mix your second primary color (e.g., yellow) into the vinegar solution.
- When you pour the yellow vinegar into the blue baking soda, watch as the eruption flows out in a vibrant green!
- Explore Color Theory: Experiment with red and blue to make purple, or red and yellow to make orange. Ask children to predict what new color will emerge before the eruption. This not only makes the experiment more engaging but also teaches fundamental principles of color mixing in a memorable way.
Building the Volcano Structure: Engineering and Artistry
The actual "mountain" around your bottle is where engineering and artistic skills truly shine.
- Playdough or Clay: This is a fantastic option, especially for younger children. They can sculpt, mold, and decorate their volcano, developing fine motor skills and spatial reasoning. The playdough can be reused, or allowed to dry for a temporary display. You can even try our Erupting Volcano Cakes Kit to build an edible volcano around your eruption source, merging the fun of baking with the thrill of science!
- Cardboard or Paper Cone: For a more structured approach, cut a large circle from cardboard or poster board, then cut a slit to the center and overlap the edges to form a cone. Cut a hole at the top for your bottle's neck. Children can then paint, draw, or collage the cone to create a realistic (or fantastical!) volcano landscape. This involves measuring, cutting, and taping – all great for early engineering skills.
- Sand or Dirt Mounds: The simplest and often cleanest option for outdoor play. Just pile sand or dirt around your bottle. This allows for quick setup and easy cleanup with a garden hose, perfect for repeated eruptions.
- Reusing Household Items: Get creative! An old plastic cup, a larger soda bottle cut in half, or even a small pot can serve as the inner chamber, giving you different eruption sizes and styles.
Themed Volcanoes: Igniting Imagination
Connect your volcano experiment to other topics of interest to enhance engagement.
- Dinosaur Land: Surround your volcano with toy dinosaurs. Imagine their world being reshaped by a prehistoric eruption.
- Space Exploration: Create a "Mars" volcano on a red-painted surface, or imagine an alien planet with strange eruptions. Our Galaxy Donut Kit provides a similar theme, allowing kids to explore astronomy by creating their own edible solar system, showing how seamlessly STEM and culinary arts can intertwine.
- Fantasy Island: Add small figures, green craft foam trees, or blue construction paper "oceans" around your volcano for a storytelling element.
Adding Visuals and Textures: More Sensory Fun
- Glitter: A pinch of red or gold glitter added to the baking soda can make the "lava" sparkle and shimmer as it flows, adding an extra sensory dimension.
- Small Objects: Place small, lightweight items (like green M&M "trees" or small plastic pebbles) around the base of your volcano. Observe how the "lava" interacts with them, pushing them away or covering them. This introduces ideas of force and flow.
By integrating these creative variations, the volcano experiment transforms from a single, quick reaction into an ongoing project that encourages problem-solving, artistic expression, and imaginative play. It’s a perfect example of the hands-on, multi-disciplinary learning experiences that we, at I'm the Chef Too!, are passionate about providing, ensuring every child finds a spark for their curiosity. For an even wider array of hands-on learning, you can always Browse our complete collection of one-time kits for more amazing adventures.
Turning Play into Powerful Learning: STEM & Beyond
The volcano experiment is much more than just a fizzy diversion; it's a powerful educational tool that naturally integrates various STEM disciplines and develops a host of critical life skills. At I'm the Chef Too!, we believe in this holistic approach to learning, where fun is the gateway to deeper understanding.
Science: Unveiling the Earth's Secrets
- Chemical Reactions: The most obvious scientific lesson is the chemical reaction between an acid (vinegar) and a base (baking soda) to produce carbon dioxide gas. Children learn about reactants, products, and the visible signs of a chemical change.
- States of Matter: Observe solids (baking soda), liquids (vinegar, water, soap), and gases (carbon dioxide) interacting. Discuss how a gas can be created and how it behaves.
- Pressure and Force: Witness firsthand how trapped gas builds pressure and exerts force to escape, causing the eruption. This introduces basic physics concepts.
- Geology & Earth Science: The experiment serves as an excellent analogy for real volcanic activity, prompting discussions about magma, lava, vents, and the Earth's dynamic processes. It's a stepping stone to understanding plate tectonics, seismic activity, and the formation of landforms.
Technology: Tools and Innovation
While not directly building technology, the experiment involves using tools effectively (spoons, pitchers, scissors for structures), and understanding that science often relies on specific equipment for observation and measurement. For older children, you could introduce recording devices like timers or simple cameras to capture and analyze the eruption, bridging into practical technological applications.
Engineering: Designing and Building
- Structure Design: Building the volcano mountain, whether from playdough, cardboard, or sand, is an engineering challenge. Children must consider stability, material properties, and functionality (ensuring the bottle opening is clear).
- Problem-Solving: What happens if the bottle isn't stable? How can we make the eruption bigger or last longer? These questions encourage iterative design and problem-solving.
- Measurement and Proportion: Deciding how much baking soda and vinegar to use, and how large to make the volcano base, involves practical application of measurement.
Math: Counting, Measuring, Comparing
- Measurement: Precisely measuring ingredients (cups, milliliters, tablespoons) reinforces standard units of measurement.
- Counting: Counting drops of food coloring or spoonfuls of baking soda.
- Comparison: Comparing the size or duration of different eruptions based on varying amounts of ingredients introduces concepts of variables and data comparison. Older children can even graph results.
- Estimation: Guessing how much "lava" will erupt or how far it will flow.
Arts: Creative Expression and Imagination
- Sculpting and Decorating: Shaping the volcano from playdough or painting a cardboard cone fosters artistic expression and creativity.
- Color Theory: Especially with color-changing volcanoes, children learn about primary and secondary colors and how they mix.
- Storytelling: Creating a narrative around the volcano (e.g., a dinosaur escape, a fantasy island) enhances imaginative play and language development.
Broader Skills Development: Beyond STEM
Beyond the core STEM subjects, the volcano experiment cultivates a range of invaluable skills:
- Observation and Prediction: Encouraging children to observe closely, hypothesize what will happen, and explain why.
- Critical Thinking: Analyzing results, asking "why" and "how."
- Fine Motor Skills: Scooping, pouring, stirring, and sculpting all refine hand-eye coordination and dexterity.
- Following Instructions: Carefully reading and executing steps in a sequence.
- Communication: Describing observations, explaining the science, and sharing ideas with others.
- Patience and Persistence: Waiting for the reaction, experimenting with different ratios, or rebuilding a structure.
- Family Bonding: A shared, exciting activity that encourages teamwork and joyful memories.
- Screen-Free Engagement: Providing a captivating alternative to digital entertainment, promoting active, hands-on learning.
This multi-faceted approach to learning is at the core of I'm the Chef Too!'s philosophy. We believe in sparking curiosity and creativity through tangible, hands-on activities that delight the senses and engage the mind. Our kits, developed by mothers and educators, are designed to make learning complex subjects an accessible and delicious adventure, just like this volcano experiment.
Deep Dive into Real Volcanoes: A Mini Geology Lesson
While our baking soda and vinegar experiment provides a fantastic model for understanding eruptions, the true complexity and majesty of real volcanoes offer an even deeper layer of scientific discovery. Let's explore some fascinating facts about Earth's fiery mountains, connecting our simple experiment to grand geological forces.
Earth's Dynamic Crust: Tectonic Plates
Our planet isn't a solid, unmoving sphere. Its outermost layer, the lithosphere (which includes the crust and upper mantle), is broken into several huge pieces called tectonic plates. These plates aren't static; they're constantly, albeit very slowly, gliding over a softer, flowing layer of rock beneath, called the asthenosphere. This slow motion causes plates to interact in several ways:
- Divergent Boundaries: Where plates pull apart, creating new crust. Many volcanoes form here, often underwater along mid-ocean ridges.
- Convergent Boundaries: Where plates collide. One plate often slides beneath another (subduction), leading to intense pressure and melting rock, which can rise to form volcanoes. This is where many of the world's most explosive volcanoes are found.
- Transform Boundaries: Where plates slide past each other horizontally. These are mainly associated with earthquakes, not typically volcanoes.
Volcanoes also form at "hot spots" – areas in the middle of plates where plumes of superheated rock rise from deep within the Earth's mantle, like the Hawaiian Islands.
Magma vs. Lava: What's the Difference?
This is a key distinction!
- Magma: This is the molten rock, superheated gases, and ash mixture while it's underground, beneath the Earth's surface. It's stored in magma chambers.
- Lava: Once magma erupts through a volcano and flows onto the Earth's surface, it's called lava. When it cools and solidifies, it forms igneous rock.
Types of Volcanoes: Shapes and Eruptions
Volcanoes come in a variety of shapes and sizes, largely determined by the type of magma they erupt and the way they behave.
-
Stratovolcanoes (or Composite Volcanoes):
- Appearance: These are the most iconic, tall, cone-shaped mountains with steep slopes. Think Mount Fuji or Mount Vesuvius.
- Eruptions: They typically produce explosive, violent eruptions. Their magma is sticky (high viscosity), meaning it doesn't flow easily and tends to trap gases, leading to dramatic blasts of ash, gas, and rock.
- Famous Examples: Mount Vesuvius, which famously buried the Roman city of Pompeii in 79 AD with fast-moving pyroclastic flows (hot mixtures of ash and gas). Mount St. Helens in the US also showed a powerful lateral blast in 1980.
-
Shield Volcanoes:
- Appearance: These volcanoes have a broad, gently sloping profile, resembling a warrior's shield laid on the ground. They can be enormous in width.
- Eruptions: Usually gentle and non-explosive, characterized by effusive lava flows and fountains. Their magma is very runny (low viscosity), flowing far and wide before solidifying.
- Famous Examples: The Hawaiian volcanoes like Mauna Loa and Mauna Kea are prime examples, formed over a hot spot. Olympus Mons on Mars is the largest volcano in our solar system, a colossal shield volcano.
-
Cinder Cones:
- Appearance: Relatively small, conical hills with steep sides and a bowl-shaped crater at the top. They are often short-lived.
- Eruptions: Usually result from explosive lava fountains that build up loose volcanic fragments (cinders) around a single vent.
- Famous Example: Parícutin in Mexico, which suddenly emerged in a cornfield in 1943 and grew to 300 meters tall in just nine years, allowing scientists to witness the full life cycle of a volcano.
-
Supervolcanoes:
- Appearance: Not typically cone-shaped mountains, but rather vast depressions called calderas, formed when the ground collapses after an enormous eruption empties the underlying magma chamber.
- Eruptions: Produce the largest, most catastrophic eruptions on Earth, capable of altering global climate.
- Famous Example: Yellowstone in the United States, known for its extensive geothermal activity (geysers, hot springs). Its last super-eruption was about 630,000 years ago. The Toba supervolcano in Indonesia, which erupted 73,000 years ago, is thought to have caused a "volcanic winter" impacting human history.
Understanding these different types of volcanoes and their geological contexts adds incredible depth to our simple kitchen experiment. It helps children grasp that the Earth is an active, ever-changing planet, and that the fizzing foam they create is a tiny echo of much grander, more powerful forces at play. This kind of expanded learning is at the heart of our mission at I'm the Chef Too!, where we develop kits that connect everyday experiences to extraordinary scientific phenomena. Our Erupting Volcano Cakes Kit is a fantastic example, allowing children to bake and build their own edible volcano, directly linking the fun of cooking with the wonders of earth science.
Optimizing the Volcano Experiment for Different Ages
The beauty of the baking soda and vinegar volcano is its incredible adaptability, making it suitable for a wide range of ages. By adjusting your approach, complexity, and discussions, you can tailor the experience to maximize learning and engagement for any child.
Toddlers and Preschoolers (Ages 2-5): Sensory Exploration and Basic Cause & Effect
For our youngest scientists, the focus should be on sensory engagement and observing basic cause and effect.
- Goals: Experience textures, colors, and sounds; understand that "A makes B happen."
-
Approach:
- Keep it Simple: Use a pre-made volcano structure (sand mound or playdough already around the bottle) to minimize frustration.
- Sensory Focus: Emphasize the bubbling sound, the feel of the foam, and the vibrant colors. Let them touch the "lava" (safely, of course, as it's just dish soap and baking soda).
- Basic Language: Use simple terms like "fizz," "bubble," "flow," "mix," and "erupt."
- Adult-Led: Adult does most of the pouring and mixing, with the child as the enthusiastic observer. They can help with spooning in baking soda.
- Questions: "What do you see?" "What do you hear?" "Look at the red bubbles!"
Early Elementary (Ages 5-8): Introducing Scientific Concepts and Prediction
Children in this age group are ready to grasp more complex ideas and start making simple predictions.
- Goals: Understand basic chemical reactions (acid + base = gas); develop observation skills; make simple hypotheses.
-
Approach:
- Hands-On Participation: Encourage them to help with measuring ingredients (using child-safe measuring cups and spoons) and pouring.
- Pre-Eruption Discussion: Ask, "What do you think will happen when we mix these?" "Which ingredient makes the bubbles?"
- Basic Science Explanation: Explain that vinegar is an "acid" and baking soda is a "base" and they make a new "gas" called carbon dioxide. Relate it to fizzy drinks.
- Structure Building: Guide them in building their own playdough or cardboard volcano, fostering early engineering skills.
- Repeat Experiments: Do multiple eruptions, asking, "Was this one bigger/smaller? Why?"
Upper Elementary (Ages 8-11): Deeper Inquiry, Variables, and Documentation
This is where the experiment can truly blossom into a scientific investigation. Children are capable of designing simple experiments and drawing conclusions.
- Goals: Understand variables; conduct controlled experiments; record observations; connect to real-world geology.
-
Approach:
- Experiment with Variables: "Does the amount of vinegar change the eruption?" "Does the amount of baking soda change the eruption?" "Does warm water make a difference?" Guide them in changing only one variable at a time.
- Hypothesis Formation: Encourage formal hypotheses: "If I add more baking soda, then the eruption will be..."
- Data Collection: Use a stopwatch to time eruption duration, or estimate/measure the height of the foam. Record findings in a notebook.
- Advanced Discussion: Explain acids and bases in more detail. Discuss real volcano types (stratovolcano, shield volcano) and their eruption styles. Introduce the concept of magma vs. lava.
- Creative Problem-Solving: Challenge them to make the longest-lasting or most colorful eruption.
- Connecting to Our Kits: For ongoing, structured STEM learning, remind them that our Chef's Club subscription brings a new, themed "edutainment" adventure to their door every month, perfect for continuing scientific exploration through delicious cooking.
Middle School and Beyond (Ages 11+): Chemical Principles and Geological Processes
For older students, the volcano experiment can be a springboard into more rigorous scientific and geological study.
- Goals: Explore acid-base chemistry in depth (pH scale); understand specific geological forces (plate tectonics, mantle plumes); discuss volcanic hazards.
-
Approach:
- pH Testing: Use pH strips to test the acidity of vinegar and the alkalinity of baking soda solution before and after the reaction.
- Stoichiometry (Advanced Chemistry): Discuss the balanced chemical equation and the concept of limiting reactants (which ingredient runs out first).
- Detailed Geological Research: Research specific volcanoes, their eruption history, and the plate tectonic settings that formed them.
- Safety Protocols: Emphasize proper laboratory safety (even for kitchen experiments) and the importance of controlled environments.
- "What If" Scenarios: Discuss the potential environmental and societal impacts of large volcanic eruptions.
- Explore More: Encourage exploring our diverse range of one-time kits for more advanced baking and science challenges that blend complex learning with delicious outcomes.
By adapting the volcano for kids experiment to your child's developmental stage, you ensure that the activity remains engaging, appropriately challenging, and profoundly educational. This mindful approach to learning is at the heart of everything we create at I'm the Chef Too!, where we strive to provide experiences that grow with your child's curiosity.
Making It a Family Affair: Tips for Parents & Educators
The volcano experiment, at its core, is an incredible opportunity for family bonding and collaborative learning. At I'm the Chef Too!, we believe that shared experiences, especially those that engage the senses and spark creativity, are invaluable for child development and strengthening family ties. Here are some tips to make your volcano adventure a truly memorable and enriching family affair:
- Embrace the Mess (and Plan for It!): Let’s be honest, chemical reactions can get a little messy. This is part of the fun! Lay down a tarp or old towels, use a large tray with high sides, and consider doing the experiment outdoors. Pre-empting the mess allows everyone to relax and fully enjoy the eruption without worrying about spills. Remember, a garden hose makes cleanup a breeze!
- Encourage Curiosity and Questions: Before, during, and after the eruption, ask open-ended questions: "What do you think will happen next?" "Why do you think the bubbles are red?" "What does this remind you of?" There are no wrong answers, only opportunities for discussion and discovery. This fosters critical thinking and a scientific mindset.
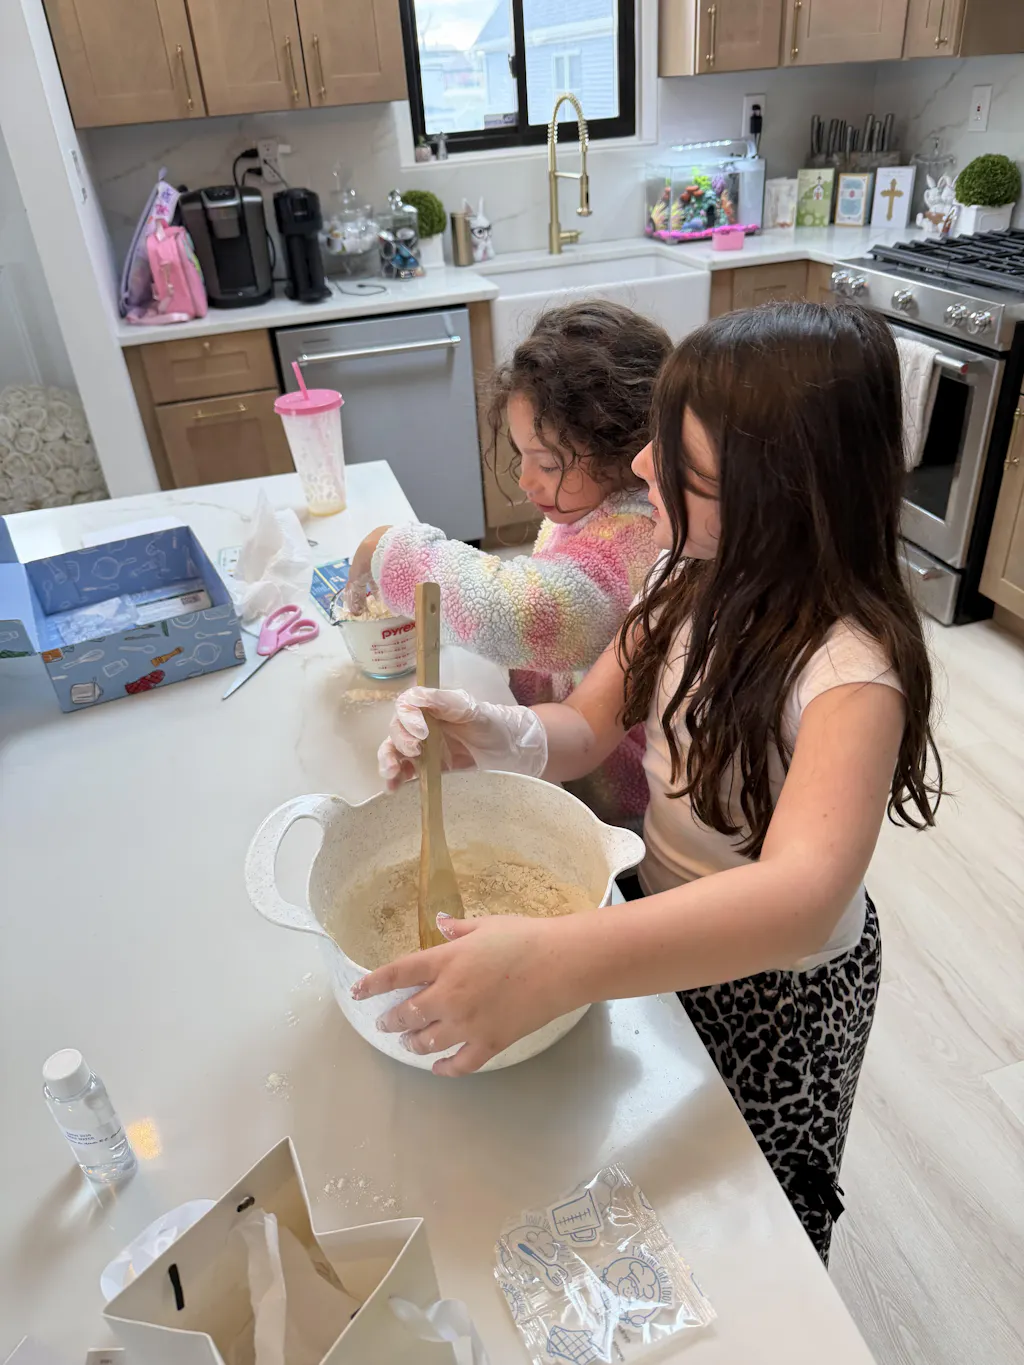
- Let Kids Lead (with Supervision): Give children age-appropriate tasks. Younger kids can spoon in baking soda or choose food coloring. Older kids can measure ingredients, build the volcano structure, or even design their own variations. Empowering them builds confidence and ownership of the learning process.
- Document the Fun: Take photos or videos of the eruption! Kids love to re-watch the action and share their scientific achievements. This also serves as a visual record of their learning journey. You can even encourage them to draw or write about their observations.
-
Extend the Learning Beyond the Experiment:
- Visit the Library: Check out books about volcanoes, geology, or even famous eruptions.
- Watch Documentaries: Explore age-appropriate videos about real volcanoes and tectonic plates.
- "Virtual" Field Trips: Many museums and national parks offer online tours or educational resources related to volcanoes (e.g., Yellowstone National Park, Hawaiian Volcanoes National Park).
- Craft and Play: Continue the theme by making volcano-themed art, drawing lava flows, or engaging in imaginative play with toy dinosaurs escaping an eruption.
- Connect to Real-World Phenomena: Discuss how scientists study volcanoes, how eruptions affect the environment, and how people live near active volcanoes. This helps children see the relevance of science in the world around them.
- Make it a Regular Activity: Don't let the fun stop with one eruption! Keep ingredients on hand for spontaneous science experiments. The more hands-on activities children engage in, the more their natural curiosity is nurtured.
At I'm the Chef Too!, we craft experiences specifically designed for this kind of joyful, screen-free family engagement. Our kits, developed by experienced mothers and educators, provide all the unique dry ingredients and specialty supplies needed for a complete "edutainment" adventure, making it easy for busy families to create delicious memories and spark a love for learning. We know that real learning happens when kids are engaged, exploring, and creating together. Give the gift of learning that lasts all year with a 12-month subscription to our STEM cooking adventures – a new adventure delivered to your door every month with free shipping in the US!
I'm the Chef Too!: Blending Fun, Food, and STEM
At I'm the Chef Too!, we believe that the most effective learning happens when children are fully engaged, their senses are activated, and their imaginations are ignited. That's why our mission is to create one-of-a-kind "edutainment" experiences that seamlessly blend the excitement of food, the discovery of STEM, and the creativity of the arts. Just like the volcano for kids experiment transforms simple ingredients into a scientific spectacle, our cooking kits turn the kitchen into a laboratory and an art studio, where learning is always delicious.
We understand the challenges parents face in finding screen-free, educational activities that genuinely captivate children. Our unique approach teaches complex subjects – from chemical reactions and planetary science to geometry and cultural studies – through tangible, hands-on cooking adventures. Each kit is developed by mothers and educators who are passionate about sparking curiosity and creativity in children, ensuring every experience is not only fun but also deeply enriching.
Imagine a world where your child learns about geology by creating an edible landscape, or understands chemical changes by baking a dessert that fizzes and foams. This is precisely the magic our kits deliver. We provide pre-measured dry ingredients and specialty supplies, taking the hassle out of preparation so you can focus on the fun and the learning. There's no need to hunt for obscure components or spend hours prepping; we bring the adventure right to your doorstep.
The volcano experiment you've just explored is a fantastic example of the kind of engaging, inquiry-based learning that we champion. It shows how simple ingredients can unlock profound scientific principles. Our Erupting Volcano Cakes Kit takes this concept to the next level, letting your child bake and decorate their very own volcano cake that actually "erupts" with deliciousness! It's an unforgettable way to reinforce scientific principles while developing culinary skills and artistic flair.
Whether you're looking for a single, exciting project or a consistent stream of educational fun, I'm the Chef Too! has an option for you. Not ready to subscribe? Explore our full library of adventure kits available for a single purchase in our shop and find the perfect theme to ignite your child's curiosity. And for continuous monthly inspiration, bringing a new culinary and scientific quest right to your door, consider our flexible subscription options. Our 3, 6, and 12-month pre-paid plans are perfect for gifting or ensuring long-term enrichment, with every box delivered with free shipping in the US. Ready to embark on a delicious journey of discovery? Join The Chef's Club today and let the "edutainment" begin!
Conclusion
The classic baking soda and vinegar volcano experiment is a timeless activity, but as we've explored, it's far more than just a momentary fizz. It's a dynamic gateway to understanding fundamental scientific principles, fostering critical thinking, developing fine motor skills, and igniting a lifelong passion for discovery. From the simple elegance of a chemical reaction to the grand geological forces that shape our planet, this humble experiment offers layers of learning for children of all ages. It transforms abstract concepts into tangible experiences, allowing kids to see, hear, and feel science in action, all while creating joyful family memories.
At I'm the Chef Too!, we are dedicated to bringing this kind of innovative, hands-on "edutainment" directly to your home. We believe that blending food, STEM, and the arts creates the most engaging and effective learning experiences, turning every lesson into an exciting adventure. We empower children to explore, create, and learn in a screen-free environment, nurturing their natural curiosity and building confidence with every delicious project.
Don't let the learning stop here. Keep the curiosity bubbling and the creativity flowing with our unique cooking STEM kits. Each month, a new themed adventure awaits, complete with pre-measured dry ingredients and specialty supplies, all designed by mothers and educators to spark wonder. Take the guesswork out of educational fun and make learning an ongoing, delightful journey for your family. Ready for a new adventure every month? Join The Chef's Club and enjoy free shipping on every box – because the greatest discoveries are often made with a sprinkle of science and a dash of deliciousness!
FAQ Section
Q1: Is the baking soda and vinegar volcano experiment safe for all ages? A1: Yes, this experiment is generally very safe! The ingredients are non-toxic household items. However, adult supervision is always recommended, especially for younger children, to ensure ingredients aren't ingested and to manage any mess. It's best done outdoors or on a protected surface.
Q2: How can I make the volcano eruption bigger or last longer? A2: To make a bigger eruption, increase the amount of baking soda in the bottle and ensure you have plenty of vinegar to pour in. Adding a good squirt of dish soap will create more foam, making the eruption look more substantial and often last a bit longer. Using warm water to dissolve the baking soda can also sometimes lead to a slightly more vigorous initial reaction. Experiment with ratios!
Q3: What's the best way to clean up after a volcano experiment? A3: If you did the experiment outdoors, a garden hose is your best friend! Simply rinse away the foamy residue. If done indoors, perform it on a large tray with high sides or a waterproof mat. The residue is easy to wipe up with a damp cloth or sponge. The ingredients are safe for drains, but avoid pouring large amounts of baking soda sludge down the sink to prevent potential clogs over time.
Q4: Can I use different acids or bases for this experiment? A4: While other acids and bases will react, baking soda and vinegar are ideal for their safety, availability, and the impressive amount of carbon dioxide they produce. Stronger acids or bases can be dangerous and are not recommended for children's experiments. Lemon juice (citric acid) can also work with baking soda, but vinegar is typically more acidic and yields a stronger eruption.
Q5: How can I make the volcano experiment more educational for older children? A5: For older children, introduce the concept of variables by testing different amounts of baking soda or vinegar and observing the effects. Encourage them to form hypotheses, record their observations, and analyze their results. Discuss the chemical equation, the pH scale, and dive deeper into real-world geology, including types of volcanoes and plate tectonics. Connecting the experiment to our Erupting Volcano Cakes Kit can also make the learning even more engaging and delicious!
Q6: What other STEM concepts can I explore using household ingredients? A6: Many! You can explore density with oil and water, create homemade slime to learn about polymers, build simple circuits with batteries and wires, or experiment with crystal growth using salt or sugar solutions. The kitchen is a fantastic laboratory for exploring science, technology, engineering, and math in fun, hands-on ways. If you're looking for curated experiences that deliver all the fun and learning straight to your door, remember to Browse our complete collection of one-time kits from I'm the Chef Too! for more inspiring ideas!