Table of Contents
- Introduction
- The Science Behind the Sizzle: What's Really Happening?
- Why This Classic Experiment Still Reigns Supreme for Kids
- Getting Started: Essential Materials and Safety First
- Basic Baking Soda & Vinegar Experiments: A Starting Point
- Taking it Further: Creative & Advanced Vinegar Baking Soda Projects
- Maximizing the Educational Impact
- Troubleshooting Common Issues
- Addressing the "Magic" vs. "Science" Debate
- Conclusion
- FAQ
Remember that moment of pure delight, perhaps from your own childhood, when a humble white powder met a clear liquid, and suddenly—fizz, bubble, whoosh!—a miniature volcano erupted, or a balloon magically inflated? This isn't just a nostalgic memory; it's the gateway to a world of scientific discovery, creativity, and unforgettable family moments. The vinegar baking soda experiment for kids isn't merely a classic; it's a powerful, accessible tool for hands-on learning that transcends generations and continues to ignite curiosity in young minds.
At I'm the Chef Too!, we believe that the most profound learning happens when it's engaging, tangible, and, ideally, delicious. Our mission is to seamlessly blend food, STEM (Science, Technology, Engineering, and Math), and the arts into one-of-a-kind "edutainment" experiences. The simple reaction between baking soda and vinegar perfectly embodies this philosophy, offering a fantastic opportunity to explore complex scientific concepts through play. In this comprehensive guide, we'll dive deep into the fascinating world of this experiment, uncovering its scientific secrets, exploring endless creative variations, emphasizing its immense educational benefits, and providing practical tips to ensure your child's next science adventure is both safe and spectacularly fun. Get ready to transform your kitchen into a vibrant laboratory where curiosity is the first ingredient!
Introduction
Imagine a quiet afternoon, perhaps a weekend morning, when screens are off and boredom threatens to creep in. Suddenly, with just a few common household ingredients, your child becomes a chemist, an engineer, or even a paleontologist, orchestrating bubbling reactions and marveling at the wonders of science right before their eyes. This isn't a scene from a science fiction movie; it's the everyday magic of the vinegar baking soda experiment. For generations, this simple yet profound activity has captivated children, sparking an innate sense of wonder and laying the groundwork for a lifelong love of discovery.
The purpose of this blog post is to celebrate and thoroughly explore the vinegar baking soda experiment for kids. We'll peel back the layers of this seemingly simple reaction to reveal the robust scientific principles at play, providing parents and educators with the knowledge and confidence to guide their children through truly enriching experiences. Beyond the basic fizz, we'll delve into a myriad of creative variations, showcasing how this single experiment can be adapted to teach diverse concepts from color mixing to engineering, all while developing crucial fine motor skills and fostering a spirit of inquiry. You'll learn how to set up, execute, and extend these activities, ensuring they are safe, engaging, and genuinely educational. By the end, you'll see why this timeless experiment is more than just a fleeting moment of fun; it's a powerful pathway to developing critical thinking, problem-solving abilities, and a profound appreciation for the world around us—values that stand at the very heart of everything we do at I'm the Chef Too!.
The Science Behind the Sizzle: What's Really Happening?
The iconic fizz and bubbles that erupt when baking soda and vinegar meet are not magic, but pure chemistry in action. Understanding the science behind this beloved experiment can transform it from a mere spectacle into a profound learning opportunity. Let's break down what's really happening in that bubbling concoction.
At its core, this is a classic acid-base reaction. In chemistry, acids are substances that donate protons (hydrogen ions), while bases are substances that accept protons. When they meet, they neutralize each other, often producing water and a salt.
- Baking Soda (Sodium Bicarbonate - NaHCO₃): This common pantry staple is a mild base. Its chemical name, sodium bicarbonate, tells us it contains sodium, hydrogen, carbon, and oxygen atoms.
- Vinegar (Acetic Acid - CH₃COOH): White vinegar, the most common type used in experiments, is a dilute solution of acetic acid. This acid is what gives vinegar its distinctive sour taste and smell.
When you combine baking soda and vinegar, a rapid chemical reaction occurs. The acetic acid in the vinegar reacts with the sodium bicarbonate in the baking soda. The sodium bicarbonate acts as a proton acceptor (base), and the acetic acid acts as a proton donor (acid).
The simplified chemical equation for this reaction looks like this:
Acetic Acid (from vinegar) + Sodium Bicarbonate (baking soda) → Sodium Acetate + Water + Carbon Dioxide Gas
CH₃COOH (aq) + NaHCO₃ (s) → CH₃COONa (aq) + H₂O (l) + CO₂ (g)
Let's unpack the products:
- Sodium Acetate (CH₃COONa): This is a salt that remains dissolved in the water. It’s harmless and tasteless, often found in things like hot ice packs (when supersaturated, it crystallizes to release heat).
- Water (H₂O): Another byproduct, essential to the reaction.
- Carbon Dioxide Gas (CO₂): This is the star of the show! Carbon dioxide is a gas at room temperature, and it’s the immediate release of this gas that causes all the dramatic fizzing and bubbling we observe. It’s the same gas that makes soda fizzy, that plants use for photosynthesis, and that we exhale every time we breathe.
The Role of Carbon Dioxide Gas
The carbon dioxide gas is responsible for the captivating visual effects of the experiment:
- Fizzing: As CO₂ is rapidly produced, it escapes from the liquid, creating countless tiny bubbles. This is the characteristic "fizz."
- Bubbling: When enough gas accumulates, it forms larger bubbles that rise to the surface and burst, making the bubbling sound.
- Pressure Build-Up: In a contained environment (like a bottle with a balloon or a corked rocket), the rapidly expanding gas creates pressure. This pressure can inflate balloons, launch rockets, or force "lava" out of a volcano.
The Magic of Surfactants (Dish Soap)
Often, when performing the volcano experiment or the "Fizzy Hands" activity, we add a squirt of liquid dish soap. This isn't just for cleaning; it plays an important scientific role! Dish soap contains surfactants, which are molecules that reduce the surface tension of water. When CO₂ gas is produced in the presence of dish soap, the surfactants trap the gas bubbles, preventing them from bursting immediately. Instead, they form a stable foam, creating a much thicker, more dramatic "eruption" that looks a lot more like lava or bubbly ooze. This adds another layer of scientific understanding to the experiment – showing how different substances can influence a chemical reaction's appearance.
By understanding these fundamental principles, you can guide your child through discussions about acids, bases, gases, and the transformation of matter. It’s an incredible foundation for future scientific exploration, turning a simple kitchen activity into a robust chemistry lesson!
Why This Classic Experiment Still Reigns Supreme for Kids
In a world filled with dazzling digital distractions and complex toys, the humble vinegar baking soda experiment continues to stand out. Its enduring popularity among parents, educators, and children alike is no accident. This classic activity offers a unique blend of benefits that makes it an indispensable tool for early STEM education and holistic child development, perfectly aligning with the "edutainment" philosophy we champion at I'm the Chef Too!.
- Unparalleled Accessibility: One of its greatest strengths is its simplicity. The core ingredients—baking soda and vinegar—are kitchen staples found in almost every home. This low barrier to entry means spontaneous scientific discovery is always just a cupboard away, eliminating the need for specialized equipment or expensive kits (though our own one-time kits offer themed, curated adventures for when you want to take it to the next level!).
- Inherent Safety (with Supervision): Compared to many other chemical experiments, the baking soda and vinegar reaction is remarkably safe. Both ingredients are non-toxic, and while eye protection is always a good practice, accidental splashes are generally harmless. This provides peace of mind for parents, allowing children to experiment with minimal risk, always under appropriate adult supervision.
- Instant and Engaging Feedback: Children thrive on immediate results, and this experiment delivers in spades. The instant fizz, satisfying hiss, and visible bubbling create an undeniable "wow" factor that grabs and holds attention. This immediate feedback loop is crucial for reinforcing cause-and-effect understanding and keeping young learners motivated.
- Incredible Versatility and Adaptability: Far from being a one-trick pony, the vinegar baking soda experiment is incredibly versatile. It can be scaled up or down, combined with art supplies for fizzy painting, used to "excavate" treasures from ice, or even to launch a mini-rocket. This adaptability means it can grow with your child, offering new layers of complexity and learning as they develop.
-
Robust STEM Foundations: This experiment is a microcosm of foundational STEM concepts:
- Science (Chemistry): Introduces acid-base reactions, gas production, chemical change, and observation skills.
- Technology: While not explicitly digital, understanding scientific principles is fundamental to technological innovation.
- Engineering: Designing a volcano structure or a rocket launcher involves basic engineering principles like containment, force, and structure.
- Math: Measuring ingredients, comparing quantities, and observing rates of reaction involve mathematical thinking.
- Crucial Fine Motor Skill Development: Activities like squeezing droppers, pouring liquids, and sprinkling powder are excellent for developing fine motor skills, hand-eye coordination, and dexterity—all essential precursors for writing and other complex tasks.
- Rich Sensory Play: The experiment engages multiple senses: the visual spectacle of bubbles and colors, the sound of fizzing, the tactile experience of foamy "lava," and sometimes even the distinct smell of vinegar. Sensory play is vital for brain development, helping children process and understand their world.
- Promotes Family Bonding and Communication: Gathering around a bubbling experiment transforms learning into a shared adventure. Parents can ask open-ended questions, make predictions together, and celebrate discoveries, fostering meaningful conversations and creating lasting family memories. This screen-free engagement is a cornerstone of our mission at I'm the Chef Too!, where we believe in fostering connection through creation.
- Fosters a Love for Learning: Ultimately, the vinegar baking soda experiment makes learning fun. By presenting scientific concepts in an exciting, hands-on manner, it cultivates an intrinsic motivation to explore, question, and understand—the true essence of scientific inquiry.
The enduring appeal of the vinegar baking soda experiment lies in its perfect blend of simplicity, engagement, and profound educational value. It’s a testament to the power of hands-on discovery and exactly the kind of joyful, screen-free "edutainment" that we strive to deliver with every kit at I'm the Chef Too!.
Getting Started: Essential Materials and Safety First
Embarking on a vinegar baking soda adventure requires minimal fuss, which is part of its charm! However, a little preparation goes a long way in ensuring the experience is both educational and stress-free. Let’s gather our supplies and talk about keeping everyone safe.
Core Materials (The Bare Necessities):
- Baking Soda (Sodium Bicarbonate): The star "base" ingredient. Any brand will do. You'll want a good amount, as you'll likely want to repeat the fun!
- White Vinegar (Acetic Acid): The star "acid" ingredient. Plain white vinegar works best as it's clear and won't interfere with color experiments.
-
Containers for Mixing and Reacting:
- Trays or Baking Sheets: Absolutely essential for containing messes and making cleanup easy. A cookie sheet with a rim or a large plastic sensory bin is perfect.
- Small Cups or Bowls: For holding vinegar, baking soda, and for the reaction itself. Plastic cups work well for disposability, or use small glass jars for visibility (with care).
- Measuring Spoons/Cups: For accurate (or semi-accurate) measuring, which is great for introducing early math concepts.
- Dish Soap (Liquid): A squirt of liquid dish soap is optional but highly recommended! It acts as a surfactant, trapping the carbon dioxide gas bubbles and creating a richer, foamier "lava" or "fizz."
Optional Enhancements (To Level Up the Fun!):
- Food Coloring or Liquid Watercolors: To add vibrant hues to your vinegar, making the reactions visually stunning and perfect for color mixing lessons.
- Pipettes or Droppers: Fantastic for developing fine motor skills and giving kids control over how much vinegar they add. Turkey basters also work for bigger splashes!
- Glitter or Small Beads: Sprinkle these into your baking soda for an extra sparkly, magical fizz.
- Plastic Bottles or Film Canisters: Great for experiments involving pressure, like inflating balloons or launching rockets.
- Modeling Clay or Playdough: Ideal for building a volcano around a cup or bottle, adding a sculptural, artistic element to the experiment.
- Small Toys (e.g., Plastic Dinosaurs, "Gems"): Incorporate these into "excavation" experiments with frozen baking soda.
- Safety Goggles or Glasses: Always a good practice, especially for more vigorous reactions or when multiple children are involved.
Safety First: A Parent's Guide
While the vinegar baking soda experiment is generally considered very safe, adult supervision is always key to ensure a positive and secure experience.
- Adult Supervision is Non-Negotiable: Always have an adult present to guide the activity, ensure safety, and facilitate learning.
- Protect Those Eyes: Even though the ingredients are mild, a splash of vinegar or baking soda solution in the eyes can cause temporary irritation. Encourage the use of safety goggles or even regular eyeglasses, especially for enthusiastic scientists.
- No Tasting/Ingestion: Emphasize that these are "science ingredients" and not for eating. While technically non-toxic, consuming large amounts of baking soda or vinegar can cause an upset stomach. Reinforce this rule before starting.
- Choose a Dedicated "Science Zone": Designate a workspace that can get messy. This could be a kitchen counter, a table covered with an old tablecloth or newspaper, or even outside on a patio or in a sandbox. This minimizes stress about spills and encourages free exploration.
- Watch for Slippery Surfaces: Spills are inevitable. Be mindful that wet surfaces can be slippery, so have paper towels or a cloth handy for quick cleanup.
- Handle Glassware with Care: If using glass jars or cups for better visibility, ensure they are sturdy and placed on a stable surface, especially with younger children. Plastic alternatives are often a safer bet.
- Ventilation: While the amount of carbon dioxide produced is minimal and harmless in open air, if conducting experiments in a very confined space, ensure there is some ventilation. This is generally not a concern for standard kitchen or outdoor play.
By gathering your materials thoughtfully and keeping these simple safety guidelines in mind, you're all set for an exciting journey into the world of chemical reactions. At I'm the Chef Too!, we believe in fostering a safe and joyful environment for discovery, ensuring every hands-on activity builds confidence alongside knowledge.
Basic Baking Soda & Vinegar Experiments: A Starting Point
The beauty of the vinegar baking soda reaction is its versatility. You can start with the most basic setup and still achieve a spectacular "wow" moment. These foundational experiments are perfect for introducing the concept to young children, building their confidence, and laying the groundwork for more complex investigations.
1. The Classic Fizz and Bubble Tray
This is the quintessential starting point, perfect for toddlers and preschoolers due to its simplicity and high sensory engagement.
- Materials: A large tray or baking sheet (with a rim!), a layer of baking soda, small cups with colored vinegar (using food coloring or liquid watercolors), and pipettes or spoons.
-
Method:
- Spread an even layer of baking soda across the bottom of your tray.
- In separate small cups, mix white vinegar with different food colors. This is a great opportunity to talk about primary colors.
- Hand your child a pipette or spoon and let them drip or pour the colored vinegar onto the baking soda.
- Observe! Watch as vibrant puddles of fizzing colors appear and mix, creating new hues.
-
Learning Points:
- Cause and Effect: Children quickly learn that adding vinegar makes the baking soda fizz.
- Color Mixing: As different colored vinegars mix on the baking soda, new colors emerge (e.g., yellow + blue = green), providing a hands-on art lesson.
- Fine Motor Skills: Squeezing a pipette or carefully spooning liquid helps develop crucial hand muscles and coordination, essential for writing and other tasks.
- Observation: Encourage children to describe what they see, hear, and feel.
- I'm the Chef Too! Connection: This sensory, hands-on discovery perfectly mirrors our approach to learning. We emphasize that blending the arts with science makes learning vibrant and unforgettable, just as we do in our kits that merge creativity with culinary adventures.
2. The Mighty Mini-Volcano
A timeless favorite, the volcano experiment brings geology and dramatic flair to your science station.
- Materials: A small plastic cup (like a shot glass or condiment cup), modeling clay or playdough, baking soda, white vinegar, dish soap, and red/orange food coloring. A tray is still essential for catching the "lava."
-
Method:
- Place the small cup in the center of your tray.
- Help your child sculpt a volcano shape around the cup using modeling clay or playdough, ensuring the clay doesn't go inside the cup. Make sure the opening of the cup is visible at the top, acting as the crater.
- Add 1-2 tablespoons of baking soda into the cup.
- In a separate small container, mix about 1/4 to 1/2 cup of vinegar with a few drops of red or orange food coloring and a squirt of dish soap.
- The Eruption! Carefully pour the colored vinegar mixture into the baking soda in the volcano's crater. Stand back and watch the foamy "lava" erupt and flow down the sides!
-
Learning Points:
- Geology (Simplified): Introduce concepts of volcanoes, lava, and eruptions in a safe, tangible way.
- Pressure and Gas: Discuss how the gas created by the reaction builds up and forces the "lava" out.
- Creativity and Engineering: Designing and building the volcano encourages imaginative play and basic structural thinking.
- Chemical Reactions: Witnessing a dramatic visual representation of a chemical change.
- CTA Integration: Just like this thrilling eruption, we love turning complex science into engaging, delicious experiences! Want to take the volcano fun to an edible level? Our Erupting Volcano Cakes Kit lets kids bake and decorate their own erupting cakes, blending geology, chemistry, and culinary arts in one exciting adventure!
3. Balloon Inflation Challenge
This experiment visually demonstrates the production of gas and the concept of invisible forces.
- Materials: An empty, clean plastic bottle (like a water bottle or soda bottle), baking soda, white vinegar, and a balloon. A funnel can be helpful.
-
Method:
- Pour about 1/2 to 1 cup of vinegar into the plastic bottle.
- Carefully add 2-3 tablespoons of baking soda inside the balloon. This can be tricky; a funnel helps, or you can stretch the balloon over a wide-mouthed jar opening to add the baking soda.
- Carefully stretch the opening of the balloon over the mouth of the plastic bottle, making sure not to let the baking soda fall into the vinegar yet. The baking soda should still be inside the balloon, hanging outside the bottle.
- Once the balloon is securely attached, lift the balloon so that the baking soda falls into the vinegar in the bottle.
- Watch the Magic! As the reaction starts, the balloon will inflate as it fills with carbon dioxide gas.
-
Learning Points:
- Gas Production: Children see tangible proof that an invisible gas is being created.
- Pressure and Volume: Discuss how the gas needs space and exerts pressure, causing the balloon to expand.
- Observation and Prediction: Ask children to predict what will happen before the baking soda falls into the vinegar.
- Invisible Forces: A great way to explain that not all scientific forces are visible.
- CTA Integration: Discovering the wonders of invisible forces and chemical reactions like this is incredibly satisfying. For even more exciting hands-on explorations and STEM adventures, why not browse our complete collection of one-time kits? Each kit is packed with engaging activities to spark your child's curiosity!
These basic experiments are fantastic entry points into the world of scientific inquiry. They are easy to set up, highly engaging, and provide concrete examples of fundamental scientific principles, paving the way for deeper learning and more complex explorations.
Taking it Further: Creative & Advanced Vinegar Baking Soda Projects
Once your child has mastered the basics, the vinegar baking soda experiment truly shines in its capacity for creative expansion. These projects merge science with art, engineering, and even edible fun, demonstrating our core belief at I'm the Chef Too! that learning is an integrated, multisensory experience.
1. Fizzy Painting & Art Exploration
Combine the visual spectacle of the reaction with artistic expression.
- Materials: A large tray or baking sheet, thick paper (like cardstock or watercolor paper), baking soda, liquid watercolors or heavily diluted food coloring, vinegar in spray bottles or small dishes with droppers.
-
Method:
- Option A (Baking Soda Paint): Mix baking soda with a tiny bit of water to form a thick paste. Divide the paste into several small containers and add different liquid watercolors or food coloring to each to create "paints." Your child can then paint designs directly onto the paper on the tray. Once the "paintings" are dry, they can use a spray bottle or dropper to apply vinegar, watching their artwork fizz and bubble into unique textures.
- Option B (Fizzy Canvas): Lay a piece of paper on the tray. Liberally sprinkle baking soda over the paper. Then, using droppers, let your child apply drops of colored vinegar all over the baking soda. The colors will mix and react, creating beautiful, frothy abstract art.
-
Learning Points:
- Art & Science Fusion: A perfect example of how these disciplines intertwine.
- Color Theory: Observe how colors mix and change as they react.
- Texture and Process Art: The fizzing creates unique textures and patterns, focusing on the creative process rather than a perfect outcome.
- Fine Motor Control: Spraying and dropping vinegar hones dexterity.
- I'm the Chef Too! Connection: Our mission is to blend food, STEM, and the arts into inspiring "edutainment." Fizzy painting perfectly exemplifies how artistic expression can be born from a scientific reaction, much like how our kits combine creative decorating with scientific baking.
2. Crafting a Rocket Launch (Simplified)
Explore principles of propulsion and engineering with a homemade rocket.
- Materials: An empty film canister (the old-fashioned kind with a lid that pops into the canister), or a small, sturdy plastic container with a tight-fitting lid that can pop off. Baking soda, vinegar, a small piece of tissue paper or paper towel.
-
Method:
- Go outside to a clear, open area for this experiment.
- Pour about 1-2 tablespoons of vinegar into the film canister.
- Place about 1/2 teaspoon of baking soda in the center of a small piece of tissue paper. Fold or roll the tissue paper around the baking soda to create a small packet. The tissue paper will slow down the reaction just enough for you to seal the lid.
- Drop the baking soda packet into the vinegar in the canister. Quickly and securely snap the lid onto the canister.
- Immediately flip the canister upside down and place it on a flat surface (e.g., pavement, a sturdy block).
- Stand Back! After a few seconds, the pressure inside will build, and the lid will pop off, launching the canister into the air!
-
Learning Points:
- Newton's Third Law (Action/Reaction): The gas pushes down on the lid (action), and the lid pushes the canister up (reaction).
- Propulsion: Understanding how expanding gas can generate force and movement.
- Engineering Design: Experimenting with different lid types, canister sizes, or even adding fins to see how it affects the launch.
- CTA Integration: Understanding propulsion through such a fun, hands-on project makes complex subjects tangible and exciting. This is exactly what we aim for at I'm the Chef Too! – transforming learning into an adventure. To keep the wonder coming with new edible science and art challenges delivered monthly, remember to Join The Chef's Club and enjoy free shipping on every box!
3. "Excavating" Frozen Dinosaurs or Gems
A perfect blend of paleontology, chemistry, and patience.
- Materials: Ice cube tray or small molds, small plastic dinosaurs, toy gems, or other small waterproof treasures. Baking soda, water, vinegar in a spray bottle or droppers, small brushes, a tray.
-
Method:
- Mix baking soda with just enough water to form a thick, moldable paste.
- Press the paste into the ice cube tray/molds. Insert a small toy (dinosaur, gem) into each section, burying it in the baking soda paste.
- Freeze the molds overnight until completely solid.
- Once frozen, pop out your "fossilized" blocks. Place them on a tray.
- Your child becomes a paleontologist, using a spray bottle or droppers filled with vinegar and small brushes to "excavate" their treasures. The vinegar reacts with the baking soda, slowly dissolving the "ice" and revealing the hidden objects.
-
Learning Points:
- Paleontology/Archaeology (Mock): Mimics the process of careful excavation.
- Patience and Persistence: This activity encourages sustained engagement.
- Chemistry in Action: Observing the dissolving process and the continuous fizz.
- Fine Motor Control: Using droppers and brushes for precise work.
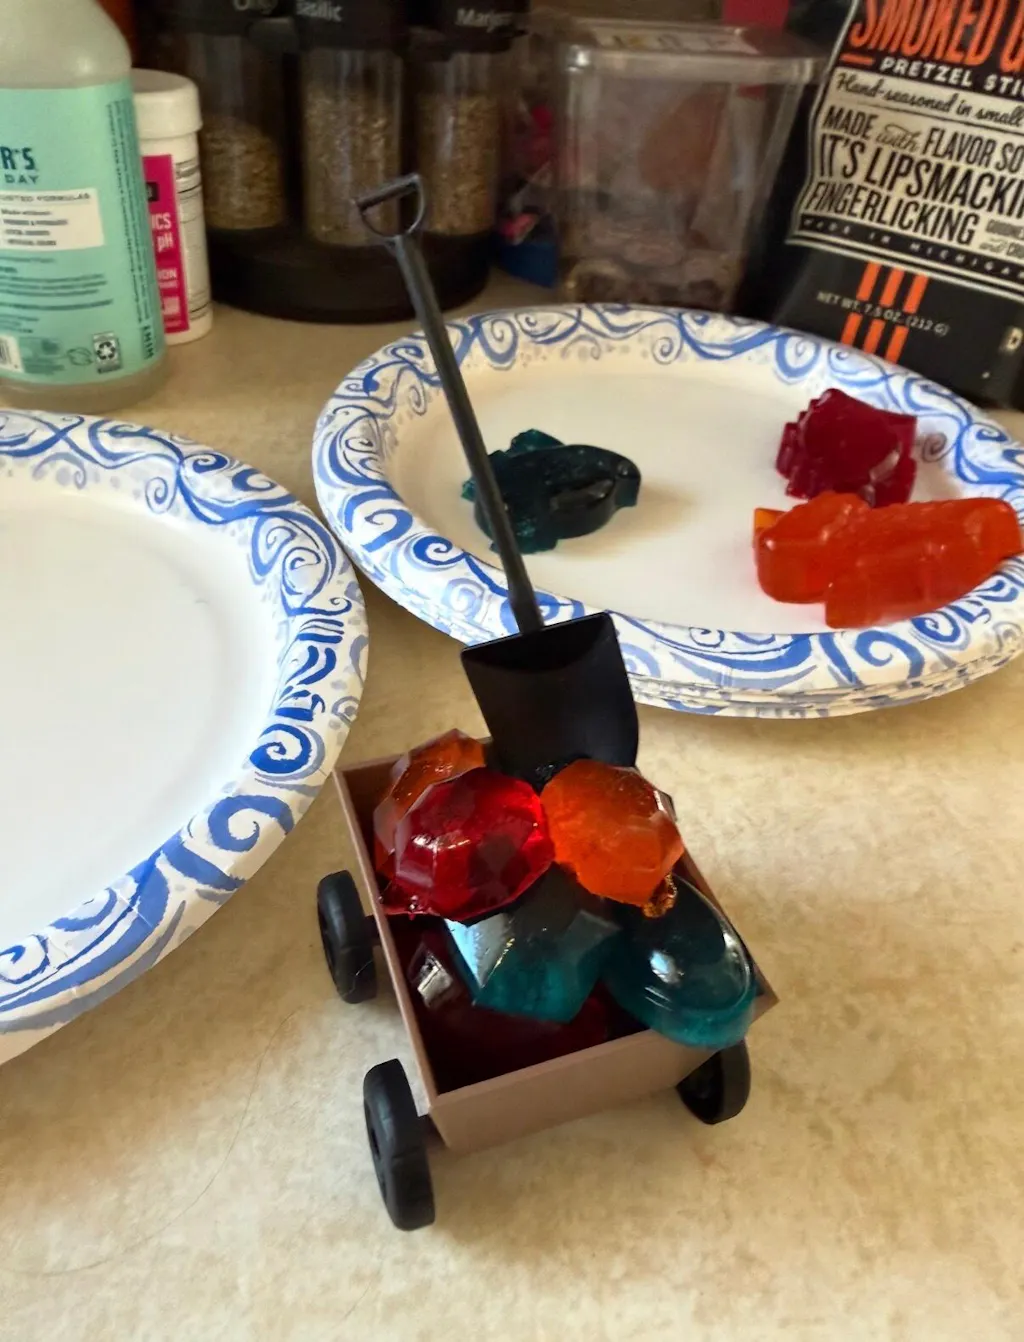
- I'm the Chef Too! Connection: We know how much kids love themed play! This "excavation" fun is reminiscent of our own Fudgy Fossil Dig kit, where kids get to uncover edible fossils while learning about paleontology. We always aim to connect play with meaningful educational experiences.
4. Exploring Density and Buoyancy: Dancing Raisins
A captivating visual experiment that introduces concepts of density and gas bubbles.
- Materials: A tall, clear glass or jar, water, vinegar, baking soda, and a handful of raisins.
-
Method:
- Fill the glass about two-thirds full with water.
- Add about 1/4 cup of vinegar to the water.
- Stir in 1-2 tablespoons of baking soda until it mostly dissolves.
- Drop a handful of raisins into the mixture.
- Observe! The raisins will initially sink. As the baking soda and vinegar react, tiny carbon dioxide bubbles will form and attach themselves to the rough surface of the raisins. When enough bubbles attach, the raisins become buoyant and rise to the surface. At the surface, the bubbles pop, the raisins lose their buoyancy, and they sink again, only to collect more bubbles and repeat the "dance."
-
Learning Points:
- Density and Buoyancy: Explain how objects float or sink based on their density relative to the liquid, and how attached gas bubbles can change an object's effective density.
- Gas in Action: Another visual demonstration of carbon dioxide's properties.
- Observation: Encourage detailed descriptions of the raisins' movement.
- CTA Integration: This kind of captivating, hands-on discovery is exactly what inspires us at I'm the Chef Too! To keep the learning adventures coming and explore even more fascinating science concepts through creative culinary projects, be sure to check out our complete collection of one-time kits.
5. Edible Science: The Fizzing Lemonade/Cupcakes (Adult-Supervised)
This takes the science into the most delicious realm—eating! This activity requires careful adult supervision and specific, food-grade ingredients.
- Materials: For "Fizzing Lemonade": lemon juice (citric acid), baking soda (food grade), sugar, water. For baking: a cupcake recipe that uses baking soda.
-
Method (Fizzing Lemonade):
- Mix water, sugar, and lemon juice (the acid).
- Just before serving, add a tiny pinch of baking soda. It will fizz! (Note: the taste might be slightly salty due to the sodium acetate, so experiment with very small amounts).
- Method (Baking): Discuss how baking soda, when combined with an acid (like buttermilk, yogurt, or brown sugar), produces carbon dioxide gas within the batter. This gas gets trapped, creating bubbles that make cakes and cookies light and fluffy as they bake.
-
Learning Points:
- Edible Chemistry: Understanding how chemical reactions play a role in the food we eat and drink.
- Taste Exploration: Experimenting with how ingredients affect flavor and texture.
- Role of Ingredients in Baking: The science behind why cakes rise.
- I'm the Chef Too! Connection: This is our core! At I'm the Chef Too!, we literally blend food and STEM. Our kits, developed by mothers and educators, make these connections delicious and tangible, teaching complex subjects through creative cooking adventures.
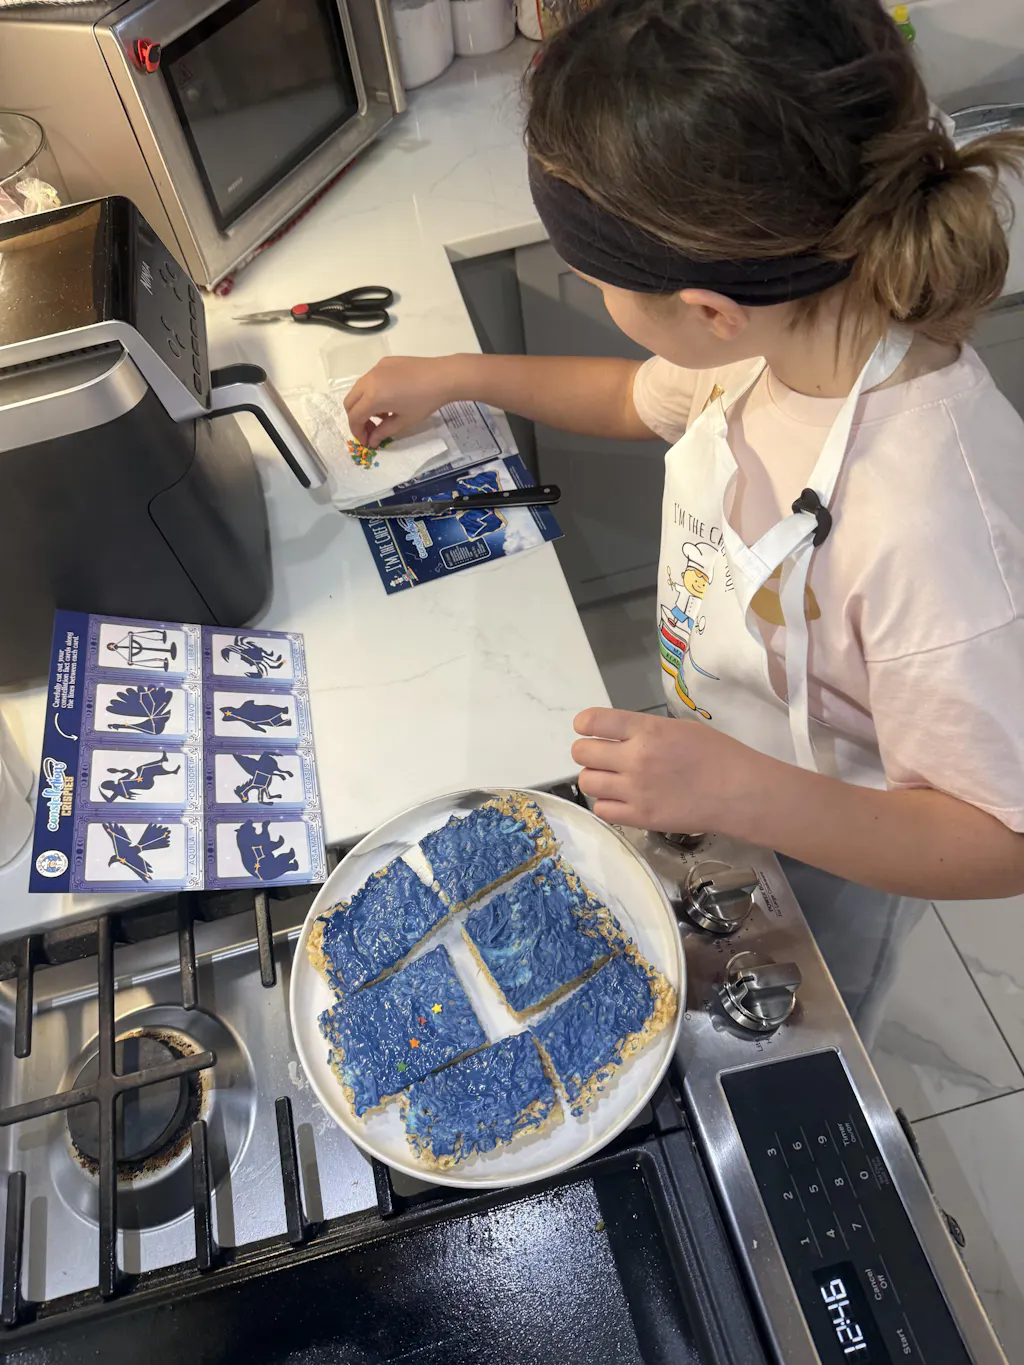
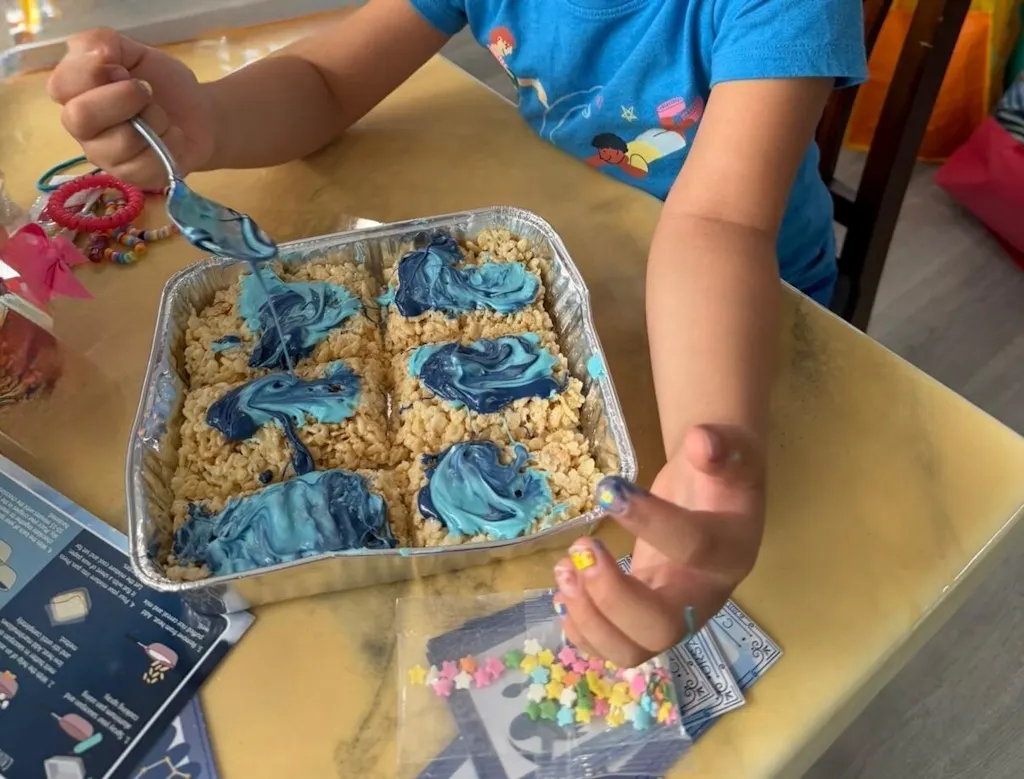
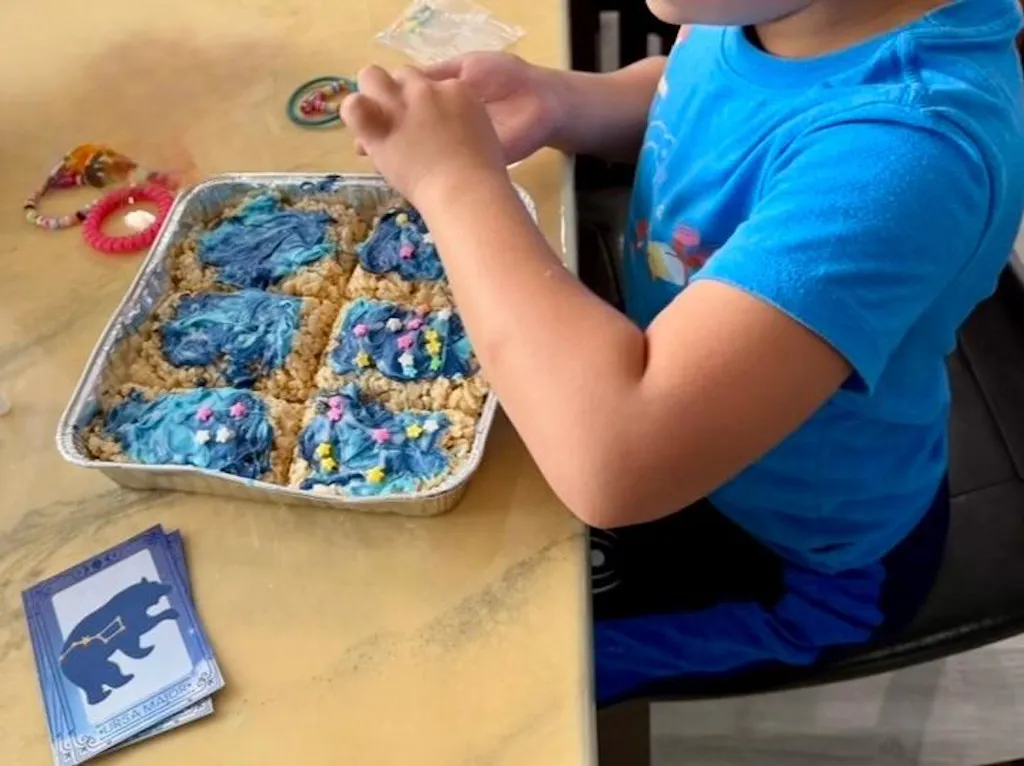
- CTA Integration: Curiosity is truly the first ingredient in every delicious discovery. If you love the idea of combining science and snacks, our Galaxy Donut Kit is an out-of-this-world example of edible STEM fun, where kids can explore astronomy by creating their own edible solar system!
These advanced variations prove that the vinegar baking soda experiment is far more than a simple fizz. It's a versatile platform for exploring a wide array of scientific principles, fostering creativity, and making learning an unforgettable, multi-faceted adventure.
Maximizing the Educational Impact
A simple fizzing reaction can be transformed into a powerful educational experience with a little intentional guidance. At I'm the Chef Too!, we believe in sparking curiosity and creativity, not just delivering outcomes. Here’s how you can maximize the learning potential of every vinegar baking soda experiment:
-
Ask Open-Ended Questions: Instead of just telling your child what's happening, prompt them to think critically.
- "What do you think will happen when we add the vinegar?" (Prediction)
- "What do you see/hear/feel happening?" (Observation)
- "Why do you think it's fizzing?" (Hypothesis/Reasoning)
- "What if we tried adding more baking soda? Or less vinegar?" (Experimentation)
- Encourage Journaling or Drawing: For older children, suggest they draw or write down their observations, predictions, and results. Even preschoolers can draw pictures of what they see. This helps solidify concepts and develops early scientific documentation skills.
-
Vary the Variables (and Discuss the Outcomes): This is the heart of scientific inquiry!
- Amount: What happens if you use more baking soda? More vinegar?
- Temperature: Does warm vinegar react faster or slower than cold vinegar?
- Concentration: If you dilute the vinegar with water, how does that change the reaction?
- Containment: How does using a bottle versus an open tray change the reaction? This teaches children about controlled experiments and how different factors influence results.
-
Connect to Real-World Phenomena: Help children see the relevance of their experiments to the world around them.
- "This fizzing gas is the same gas that makes soda bubbles!"
- "Our mini-volcano works like real volcanoes, but much smaller and safer."
- "The gas that inflates our balloon is the same gas that helps bread rise in the oven." This contextualization makes learning meaningful and shows them that science isn't just in textbooks—it's everywhere!
- Embrace the Mess: Science can be messy, and that's okay! Cover your workspace, put on old clothes, and let children freely explore without fear of making a mistake. The joy of discovery often thrives in a less-than-pristine environment. Frame cleanup as part of the process, too!
- Focus on the Process, Not Just the Outcome: It's not about achieving a perfect eruption every time. It's about the questions asked, the observations made, the hypotheses tested, and the joy of discovery. Celebrate effort, curiosity, and persistence. Reassure them that "failed" experiments still teach valuable lessons.
- Integrate Storytelling and Imagination: Weave narratives around the experiments. Are they scientists discovering a new element? Are they explorers excavating ancient ruins? This fuels imaginative play and connects learning to their inner worlds.
- Provide Screen-Free Engagement: In an increasingly digital world, hands-on, tangible activities like these offer a vital screen-free alternative that stimulates different parts of the brain and encourages direct interaction with physical materials. This fosters deeper learning and real-world skills.
- Facilitate Family Bonding: These experiments are perfect opportunities for shared experiences, laughter, and collaborative problem-solving. Spending quality time together learning and discovering strengthens family ties and creates cherished memories.
At I'm the Chef Too!, our goal is always to provide enriching experiences that facilitate family bonding and offer a screen-free educational alternative. We believe in teaching complex subjects through tangible, hands-on, and delicious cooking adventures developed by mothers and educators. The vinegar baking soda experiment, with its blend of simplicity and profound educational potential, perfectly embodies this philosophy.
To continue fostering this love for hands-on, screen-free learning, and family bonding, we invite you to explore The Chef's Club, where new adventures are delivered right to your door every month. Imagine a continuous stream of curated activities that spark curiosity, build confidence, and create joyful family memories—all without ever needing to search for ingredients or complicated instructions.
Troubleshooting Common Issues
Even the simplest experiments can sometimes throw a curveball. Don't let a minor hiccup dampen the scientific spirit! Here are some common issues you might encounter with the vinegar baking soda experiment and how to troubleshoot them, ensuring your little scientists stay engaged and successful.
Not Fizzing Enough (or at All!)
This is perhaps the most common frustration, especially for an experiment known for its dramatic reaction.
-
Culprit: Old Baking Soda. Baking soda loses its potency over time, especially if it's been exposed to moisture.
- Fix: Test your baking soda by dropping a pinch into some vinegar. If it fizzes vigorously, it's good. If not, it's time for a new box!
-
Culprit: Wrong Ratio. Too little baking soda, too little vinegar, or an imbalance can lead to a weak reaction.
- Fix: For a strong fizz, use a generous amount of baking soda (a few tablespoons) and pour in the vinegar rapidly. Don't be shy! You can always add more of either ingredient to restart or boost the reaction.
-
Culprit: Too Much Water Dilution. If you've pre-mixed your vinegar with too much water (e.g., for painting), the acid concentration might be too low.
- Fix: Use undiluted white vinegar for the primary reaction. If using colored vinegar, use liquid watercolors or concentrated food coloring so you don't need to add much water.
-
Culprit: Cold Ingredients. While it will still react, a colder temperature can slow down the chemical reaction.
- Fix: Use room-temperature vinegar and baking soda. A slightly warm vinegar can even enhance the reaction, making it more vigorous.
Too Much Fizz (Mess Overload!)
Sometimes the reaction is too good, leading to overflows that are more stressful than fun.
-
Culprit: Lack of Containment. Trying to do an eruption in a tiny cup without a tray is a recipe for a big mess.
- Fix: Always, always use a large tray, baking sheet with high sides, or even an outdoor space. This allows for enthusiastic reactions without overwhelming your cleanup efforts.
-
Culprit: Over-Enthusiastic Pours. When kids are excited, they might dump everything in at once!
- Fix: Guide them to pour slowly initially, or use droppers and pipettes to control the flow of vinegar. Explain that pouring slowly allows them to observe the reaction more carefully.
-
Culprit: Too Many Ingredients for the Container Size. A large amount of baking soda and vinegar in a small bottle will undoubtedly overflow.
- Fix: Match the quantity of ingredients to the size of your reaction container. Start with smaller amounts until you get a feel for the reaction's intensity.
Cleanup Concerns
The aftermath of a fizzy explosion can sometimes feel daunting.
-
Culprit: No Pre-Planning. Forgetting to prepare your workspace beforehand can turn a fun activity into a stressful chore.
- Fix: Before starting, lay down old newspapers, a plastic tablecloth, or an old towel. Have paper towels, sponges, and a small bucket of water ready for immediate wiping.
- Vinegar Smell: The distinct smell of vinegar can linger.
- Fix: A quick wipe down with soapy water and rinsing will usually remove any lingering odors. For persistent smells, a sprinkle of baking soda itself (which neutralizes odors) can help, followed by another wipe.
By anticipating these common challenges and having simple solutions ready, you can keep the focus on discovery and delight, minimizing any frustration for both you and your child. After all, science should be fun and approachable, not intimidating!
Addressing the "Magic" vs. "Science" Debate
For young children, the dazzling fizz and sudden eruptions of the vinegar baking soda experiment can seem like pure magic. Their eyes widen, their "oohs" and "aahs" fill the air, and they might even exclaim, "It's magic!" This is a wonderful moment, as it highlights their innate sense of wonder, which is the very spark of scientific curiosity.
However, it's also a precious teaching opportunity to gently guide them from the realm of "magic" to the fascinating world of "science." It’s important to acknowledge their amazement but then introduce the idea that there's a reason behind every amazing phenomenon.
Here's how to navigate this conversation:
- Validate their Wonder: Start by agreeing with them. "It does look like magic, doesn't it? It's so amazing to watch!" This validates their feeling and keeps them engaged.
- Introduce "Science" as the "How": Then, gently pivot. "But guess what? It's not magic, it's actually science! Science is how we understand how things work. There's a special scientific reason why the baking soda and vinegar fizz."
-
Keep Explanations Simple: You don't need a PhD-level explanation. Use simple terms they can grasp.
- "Baking soda and vinegar are like two special friends that like to get together. When they meet, they make a new friend called 'bubbly air' (carbon dioxide)!"
- "The baking soda and vinegar react, and that reaction makes lots of tiny bubbles of gas, just like the bubbles in soda!"
- "Science tells us that when these two ingredients touch, they create a gas that wants to escape, and that's why we see all the fizz."
- Emphasize Repetition and Predictability: Magic is often unpredictable. Science is often repeatable. Point out that you can do the experiment again and again, and the same thing will happen because of scientific laws. "See? It happened again! That's because science works the same way every time."
- Relate to Everyday Experiences: Connect the science to things they already know. "Remember how soda has bubbles? That's also from a kind of gas! And when we bake cookies, something like this helps them get puffy."
- Foster Further Questions: Encourage them to ask "why" and "how." This moves them from passive observation to active inquiry. "What else do you wonder about these bubbles?" "What other things do you think science can explain?"
By framing science as the fascinating "how" behind the magic, you're not diminishing their sense of wonder; you're actually expanding it. You're showing them that the world is full of incredible, explainable phenomena, and that understanding these explanations is a thrilling journey in itself. This approach nurtures critical thinking, curiosity, and a foundational respect for the scientific method, which are invaluable lessons we champion at I'm the Chef Too! through our "edutainment" adventures.
Conclusion
The humble vinegar baking soda experiment, with its captivating fizz and limitless variations, stands as a testament to the power of hands-on learning. It's more than just a momentary diversion; it's a dynamic doorway to understanding fundamental scientific principles, fostering creativity, and developing crucial fine motor skills. From the basic acid-base reaction that produces that mesmerizing carbon dioxide gas to elaborate fizzy art projects and "excavating" frozen treasures, this accessible experiment offers a rich tapestry of educational opportunities for children of all ages. It teaches us that profound discovery doesn't require complex labs or exotic materials—often, it's found right in our kitchen cupboards.
At I'm the Chef Too!, our mission is rooted in this very philosophy: to blend food, STEM, and the arts into one-of-a-kind "edutainment" experiences. We are passionate about sparking curiosity and creativity in children, facilitating precious family bonding, and providing screen-free educational alternatives that truly engage young minds. Our unique approach, developed by mothers and educators, ensures that complex subjects are taught through tangible, hands-on, and, most importantly, delicious cooking adventures. We've seen firsthand how turning a scientific concept into an edible creation or an artistic masterpiece can transform a child's understanding and ignite a lifelong love for learning.
We hope this comprehensive guide has inspired you to dive into the world of vinegar and baking soda with your children, armed with confidence, creativity, and a deeper appreciation for the science at play. These simple experiments build confidence, develop essential skills, and create joyful family memories that will last a lifetime.
Ready for a new adventure delivered to your door every month? Don't let the learning stop here! Continue your journey of delicious discovery and scientific exploration with us. Join The Chef's Club today and enjoy free shipping on every box in the US. Our monthly subscription offers convenient, curated kits packed with pre-measured dry ingredients and specialty supplies, making every experience effortless and exciting. Whether you're looking for ongoing enrichment or a thoughtful gift, explore our flexible 3, 6, and 12-month pre-paid plans and give the gift of learning that truly lasts!
FAQ
Q1: Is the vinegar baking soda experiment safe to do indoors? A1: Yes, absolutely! The vinegar baking soda experiment is perfectly safe to do indoors, especially with proper precautions. The amount of carbon dioxide gas produced is minimal and harmless in an open room. The main concern is the potential for mess, so always place your experiment on a large tray, baking sheet, or cover your workspace with newspaper or an old tablecloth to contain any spills.
Q2: What's the best ratio of baking soda to vinegar for a strong reaction? A2: There isn't one "perfect" ratio, as it depends on the desired effect and container size. However, a good starting point is usually 1-2 tablespoons of baking soda for every 1/4 to 1/2 cup of vinegar. For a more dramatic, foamy reaction, add a squirt of dish soap to the vinegar. Don't be afraid to experiment with different amounts to see how the reaction changes – that's part of the scientific process!
Q3: How can I make the fizz last longer? A3: To prolong the fizz, you can try a few techniques:
- Add dish soap: As mentioned, dish soap traps the carbon dioxide bubbles, creating a longer-lasting foam.
- Control the pour: Instead of dumping all the vinegar at once, use a dropper or pipette to add it slowly over time. This extends the reaction.
- Layer the baking soda: For volcano experiments, you can sometimes layer the baking soda, so subsequent pours of vinegar react with fresh baking soda.
- Use warmer vinegar: Slightly warm vinegar can react a bit more vigorously, potentially leading to a more sustained fizz if combined with other techniques.
Q4: What ages is this experiment suitable for? A4: The vinegar baking soda experiment is incredibly versatile and suitable for a wide range of ages, from toddlers to early elementary children, always with adult supervision.
- Toddlers (1-3 years): Focus on sensory exploration, cause and effect, and basic pouring/dropping.
- Preschoolers (3-5 years): Introduce color mixing, simple predictions, and fine motor skills with pipettes.
- Early Elementary (5-8+ years): Dive deeper into the "why" behind the fizz, experiment with variables, design structures (like volcanoes or rockets), and record observations.
Q5: Can I use expired baking soda or vinegar? A5: You can use expired baking soda, but its effectiveness might be reduced. Baking soda gradually loses its leavening power over time, meaning it won't react as vigorously with vinegar to produce carbon dioxide. To test it, mix a teaspoon of baking soda with a quarter cup of vinegar; if it fizzes strongly, it's still good for experiments. Expired vinegar is usually fine for experiments as its acetic acid content typically remains stable enough for the reaction.
Q6: How do I clean up the mess after the experiment? A6: Cleanup is easiest with a bit of pre-planning:
- Use a tray: Always conduct the experiment on a large tray or baking sheet to contain liquids.
- Cover surfaces: Lay down old newspapers, a plastic tablecloth, or an old towel underneath your tray.
- Have supplies ready: Keep paper towels, a sponge, and a bucket of soapy water nearby for immediate wiping.
- Rinse everything: Most of the residue is easily rinsed away with water. For any lingering vinegar smell, a quick wipe down with a damp, soapy cloth followed by a clean rinse should do the trick.
Q7: What other ingredients can I add for extra fun? A7: To boost engagement and creativity:
- Glitter: Adds a sparkling effect to the fizz.
- Small plastic toys: Bury them in baking soda paste or ice blocks for an "excavation" activity.
- Liquid watercolors: Provide vibrant colors that mix beautifully as they fizz.
- Cornstarch: Mixing a little cornstarch with baking soda can create a thicker paste for painting or molding, offering a different texture when vinegar is added.
- Essential oils (a drop or two): For a sensory twist (use sparingly and ensure they are child-safe).