Table of Contents
- Introduction to Home Chemistry: A World of Wonder
- Why Chemistry is Essential for Young Minds
- The Essential Rules of the Home Laboratory: Safety First!
- Unlocking Kitchen Chemistry: Edible & Everyday Experiments
- Beyond the Kitchen: Creative Chemistry Adventures
- Connecting Chemistry to Our World
- Tips for Maximizing Learning from Home Chemistry Experiments
- Conclusion: Ignite the Spark of Discovery
- Frequently Asked Questions About Home Chemistry Experiments
Ever watched your child’s eyes light up with pure wonder at a sudden "poof!" or a surprising "fizz!"? That spark of curiosity, that innate desire to understand how things work, is the very essence of a young scientist in the making. Chemistry, far from being a daunting subject relegated to high school labs, is all around us – especially right in our own homes! It’s the magic behind everyday transformations, and it offers an incredible playground for children to explore, question, and discover.
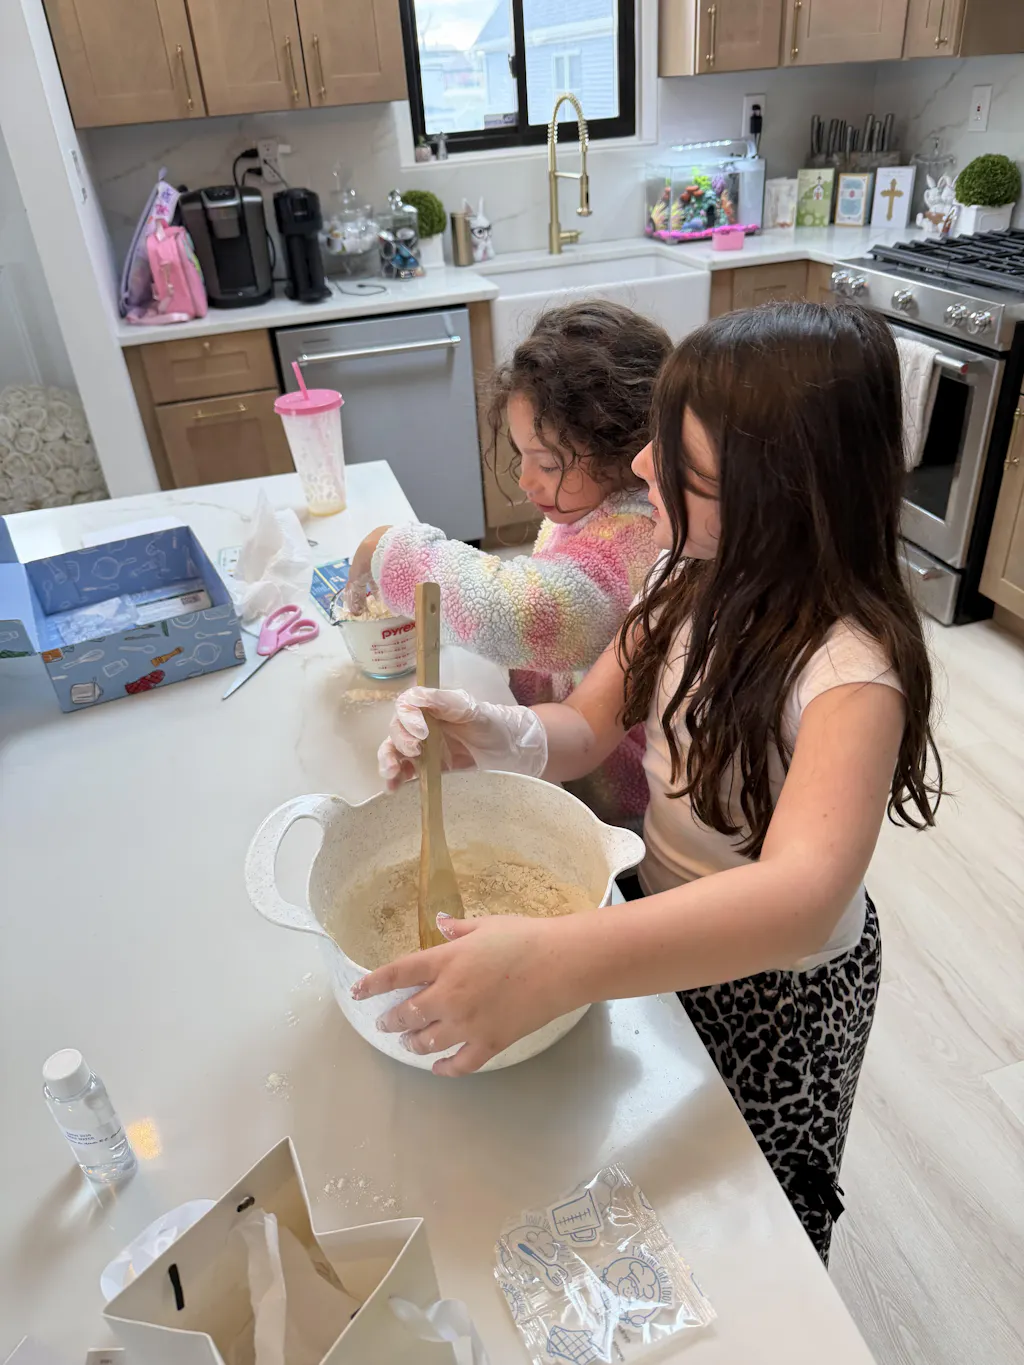
At I'm the Chef Too!, we believe that learning should be an adventure. Our mission is to blend food, STEM, and the arts into one-of-a-kind "edutainment" experiences, turning complex subjects into tangible, hands-on, and delicious cooking adventures. We’re all about sparking curiosity and creativity in children, facilitating family bonding, and providing a screen-free educational alternative that's developed by mothers and educators. This post is your guide to unlocking the wonders of chemistry with your kids, using simple household items to create unforgettable moments of discovery. We’ll explore a variety of easy chemistry experiments for kids at home, delving into the "why" behind the "wow," and showing you how to turn your kitchen into a vibrant laboratory where learning is always in good taste.
Introduction to Home Chemistry: A World of Wonder
Imagine a world where colorful liquids dance without touching, where invisible messages appear as if by magic, or where a simple fruit can power a light bulb. This isn't science fiction; it's the exciting reality of home chemistry! For young children, these experiences are not just fun; they are foundational. They nurture observational skills, encourage critical thinking, introduce basic scientific principles, and build a strong sense of confidence as kids successfully carry out experiments and understand their outcomes.
Chemistry experiments at home are fantastic because they break down barriers, showing children that science isn't confined to textbooks or sterile labs. Instead, it’s an active, engaging process that uses everyday ingredients. You don't need fancy equipment to explore concepts like acid-base reactions, density, solubility, or oxidation. All you need is a willingness to explore, a few common household items, and a sprinkle of enthusiasm.
Before we dive into the exciting world of bubbling brews and color changes, a crucial note: safety first! While the experiments we’ll discuss are designed for home use with common materials, adult supervision is always paramount. Ensure a clean, organized workspace, discuss safety rules with your children, and always be present to guide and assist. These activities are about shared discovery and safe exploration, fostering a love for learning rather than striving for specific, guaranteed outcomes. It's about the journey of asking "what if?" and finding out "what happens next!"
Why Chemistry is Essential for Young Minds
Introducing children to chemistry at an early age provides a multitude of developmental benefits that extend far beyond simply understanding scientific concepts. It’s about building a robust foundation for lifelong learning and essential life skills.
Fostering Curiosity and Inquiry
Children are naturally curious. They constantly ask "why?" and "how?" Chemistry experiments tap directly into this innate drive. When they see milk swirling with colors or a volcano erupting with fizz, it naturally leads to questions: Why did that happen? What made it change? Can we try it again with something different? This process of questioning and seeking answers is at the heart of scientific inquiry. By engaging in chemistry, kids learn to observe closely, hypothesize, and then test their ideas, all while developing a love for asking big questions.
Developing Critical Thinking and Problem-Solving
Each experiment presents a mini-problem or a mystery to solve. What ingredient causes the fizz? How can we make the colors mix differently? Why did the gummy bear get bigger? Children learn to identify variables, predict outcomes, and analyze results. When an experiment doesn't go as expected, it's a valuable learning opportunity to troubleshoot and think critically about what might have gone wrong, or what could be tried differently next time. This iterative process is a cornerstone of scientific method and vital for problem-solving in all areas of life.
Enhancing Fine Motor Skills and Coordination
Many chemistry experiments involve measuring, pouring, stirring, dropping, and transferring ingredients. These actions are excellent for developing fine motor skills and hand-eye coordination. From carefully adding drops of food coloring to meticulously layering liquids in a density jar, children refine their dexterity, which is crucial for tasks like writing, drawing, and even playing musical instruments.
Building Confidence and Resilience
Successfully completing an experiment, even a simple one, gives children a sense of accomplishment. They learn that they are capable of understanding complex ideas and making things happen. When experiments don't work out perfectly, they learn resilience – the ability to try again, adjust their approach, and not be discouraged by initial setbacks. This "growth mindset" is invaluable for facing challenges throughout their academic journey and beyond. We see this firsthand in our I'm the Chef Too! kits, where children follow steps, see immediate results, and beam with pride over their edible creations.
Promoting Family Bonding and Shared Experiences
Chemistry experiments are wonderful shared activities. They provide a common goal for parents and children, fostering teamwork, communication, and memorable moments. Imagine the laughter and excited chatter as a homemade lava lamp bubbles or a secret message appears. These are not just science lessons; they are opportunities to create lasting family memories, strengthening bonds through shared discovery and joy. Our mission at I'm the Chef Too! is deeply rooted in this belief: that the best learning happens when families connect over engaging, hands-on activities, transforming everyday moments into extraordinary learning adventures. Ready to bring more of these adventures home? Join The Chef's Club and enjoy free shipping on every box, delivering new discoveries right to your door each month!
The Essential Rules of the Home Laboratory: Safety First!
Before embarking on any chemistry adventure, it's crucial to establish a "safety first" mindset. While most home chemistry experiments use common, relatively safe ingredients, proper precautions and adult supervision are non-negotiable.
Always Supervise
Children, especially younger ones, should never be left unsupervised during experiments. An adult should be present to guide, assist, and ensure safety at all times. This isn't just about preventing accidents; it's also about facilitating learning, asking guiding questions, and sharing in the excitement.
Choose Safe Materials
Prioritize non-toxic, food-grade ingredients whenever possible. Most of the experiments detailed below rely on items found in your kitchen or pantry. When an experiment calls for ingredients that might be irritating (like Borax, hydrogen peroxide, or strong acids/bases), ensure they are handled exclusively by adults, in a well-ventilated area, and with appropriate protective gear like gloves. Always store chemicals safely and out of reach of children.
Protect Eyes and Skin
Even with safe ingredients, splashes can happen. Consider using safety goggles, especially for experiments involving fizzing, bubbling, or potential sprays. Remind children not to touch their eyes or mouth during experiments. Always wash hands thoroughly with soap and water before and after conducting experiments.
Work in a Ventilated Area
Some reactions can produce gases. While typically harmless, it's always best to work in a well-ventilated space, such as near an open window or with an exhaust fan running.
Prepare Your Workspace
Lay down old newspapers, a plastic tablecloth, or a baking sheet to protect your surfaces from spills and stains. Have paper towels or a cloth ready for quick cleanups. Use dedicated containers for experiments, separate from your regular food preparation items if possible, especially for non-food-grade chemicals.
Never Taste or Ingest
Even if an experiment uses food ingredients, establish a strict rule: nothing from the "science lab" goes into the mouth unless explicitly prepared for tasting and consumed under adult supervision (like one of our delicious I'm the Chef Too! creations!). This helps distinguish between cooking for consumption and experimenting for scientific discovery.
By following these simple guidelines, you can ensure that your home chemistry adventures are not only educational and fun but also safe and worry-free.
Unlocking Kitchen Chemistry: Edible & Everyday Experiments
The kitchen is truly the heart of home chemistry! It's a treasure trove of ingredients that can transform, react, and surprise, offering endless opportunities for easy chemistry experiments for kids at home. Plus, when you’re doing kitchen chemistry with I'm the Chef Too!, the delicious results are often part of the fun!
The Magnificent Milk Swirl
This vibrant experiment is a stunning visual demonstration of surface tension and how soap interacts with fat.
Materials:
- A shallow dish or plate
- Milk (full-fat works best for dramatic results)
- Food coloring (multiple colors)
- Dish soap
- Cotton swabs
Procedure:
- Pour enough milk into the shallow dish to cover the bottom.
- Add several drops of different food colors, spreading them out over the surface of the milk. Avoid stirring.
- Dip a cotton swab into dish soap, coating the tip generously.
- Gently touch the soap-coated swab to the center of the milk. Watch the colors explode and swirl!
- Try touching the swab in different places to create new patterns.
The Science Behind the Swirl: Milk contains fat and protein. The food coloring floats on top. Dish soap is a surfactant, meaning it reduces the surface tension of the milk. When the soap touches the milk, it rushes to spread out and interact with the fat molecules. As the soap molecules chase after the fat molecules, they push the food coloring around, creating a mesmerizing, ever-changing dance of colors. It’s a beautiful illustration of molecular movement and hydrophobic interactions!
The Classic Erupting Volcano
No list of chemistry experiments is complete without the iconic volcano! This is a fantastic way to see an acid-base reaction in action, producing impressive fizz and foam.
Materials:
- A container (a plastic bottle or small jar works well)
- Baking soda
- White vinegar
- Dish soap (optional, but makes more foam)
- Red food coloring (optional, for lava effect)
- Craft supplies for volcano decoration (optional, but fun!)
Procedure:
- If you want to create a volcano shape, build a cone around your container using playdough, clay, or papier-mâché, leaving the opening of the container exposed at the top.
- Add 1-2 tablespoons of baking soda into the container.
- In a separate cup, mix about 1/4 cup of vinegar with a few drops of red food coloring and a squirt of dish soap.
- Pour the vinegar mixture into the container and step back! Watch your volcano erupt with foamy "lava."
The Science Behind the Eruption: This is a classic acid-base reaction. Baking soda (sodium bicarbonate) is a base, and vinegar (acetic acid) is an acid. When they mix, a chemical reaction occurs, producing carbon dioxide gas. This gas rapidly expands and escapes, creating bubbles and pressure that force the foamy mixture out of the volcano's opening. The dish soap traps the gas, making the "lava" extra frothy and dramatic. It's a fantastic, tangible example of gas production and pressure. Want to experience an eruption that's both scientific and scrumptious? Our Erupting Volcano Cakes kit lets kids make delicious, bubbly treats while exploring these same chemical reactions!
Invisible Ink: The Secret Message Reveal
Unleash your inner spy with this simple yet magical experiment that demonstrates oxidation.
Materials:
- Lemon juice (fresh or bottled)
- White paper
- Cotton swabs or a small paintbrush
- Heat source (an adult-operated iron on low setting, a warm light bulb, or carefully held over a toaster on a very low setting)
Procedure:
- Dip a cotton swab or paintbrush into lemon juice.
- Use the lemon juice to write a secret message or draw a picture on a piece of white paper.
- Allow the "ink" to dry completely. The message will become invisible.
- To reveal the secret message, an adult should carefully apply heat to the paper. Iron it, hold it near a warm light bulb, or carefully pass it over a low-setting toaster. Watch as the message magically appears in brown!
The Science Behind the Magic: Lemon juice is an organic substance containing carbon compounds. When it dries on paper, it's largely invisible. However, when heated, the carbon compounds in the lemon juice oxidize (react with oxygen in the air). This oxidation process causes the compounds to break down and turn brown, making the previously invisible message visible. This introduces the concept of chemical reactions triggered by heat.
The Rainbow Density Tower
This visually stunning experiment is a fantastic way to illustrate the concept of density – that different liquids have different weights for the same volume.
Materials:
- A tall, clear glass or jar
- Various liquids of different densities (e.g., honey, corn syrup, dish soap, water, vegetable oil, rubbing alcohol)
- Food coloring (optional, to color clear liquids like water or alcohol)
- A spoon (for careful layering)
Procedure:
- Start with the heaviest liquid (highest density) at the bottom. Honey is a good choice. Pour a layer into the glass.
- Next, carefully pour the second heaviest liquid down the side of the glass or over the back of a spoon to create a distinct layer. Corn syrup is often next.
- Continue layering liquids from heaviest to lightest, taking care not to mix them. Good order might be: honey, corn syrup, dish soap, colored water, vegetable oil, and finally colored rubbing alcohol.
- Observe the distinct layers and the beautiful "rainbow" of colors.
- Extension: Gently drop small, solid objects (like a grape, a plastic bead, a paper clip) into the tower and observe where they settle. Do they float on a particular liquid? This helps reinforce the concept of density for solids as well.
The Science Behind the Layers: Density is a measure of how much "stuff" is packed into a given space. If you have two liquids of the same volume, the one with more mass is denser. Denser liquids will sink below less dense liquids. When you carefully layer them, each liquid finds its place based on its density, creating distinct, unmixed layers. This experiment is a wonderful visual aid for an abstract concept!
Red Cabbage pH Indicator
Discover the secret world of acids and bases with a vibrant natural indicator made from red cabbage!
Materials:
- Red cabbage
- Boiling water
- Strainer
- Clear cups or bowls
- Various household substances to test (e.g., lemon juice, vinegar, baking soda solution, clear soda, milk, dish soap solution)
Procedure:
- Make the indicator: Chop about a quarter of a red cabbage into small pieces. Place the pieces in a large bowl and pour enough boiling water over them to cover. Let it steep for 10-15 minutes (or until the water turns a deep purple).
- Strain out the cabbage pieces, keeping the purple liquid – this is your pH indicator!
- Pour small amounts of your test substances into separate clear cups.
- Add a few drops (or a small pour) of the red cabbage indicator to each cup.
- Observe the amazing color changes! Acids (like lemon juice, vinegar) will turn the indicator red or pink. Bases (like baking soda, dish soap) will turn it blue, green, or even yellow. Neutral substances (like water) will remain purple.
The Science Behind the Colors: Red cabbage contains a natural pigment called anthocyanin. Anthocyanins are natural pH indicators, meaning they change color depending on the acidity or alkalinity (pH level) of the solution they are in. Acids have a low pH, bases have a high pH, and neutral substances have a pH of around 7. This experiment visually demonstrates the pH scale in a fun, colorful, and completely safe way, using ingredients right from your kitchen!
Dancing Raisins
This simple, fascinating experiment uses the power of carbon dioxide gas to make raisins "dance" up and down.
Materials:
- A clear glass or jar
- Clear carbonated soda (club soda or lemon-lime soda works best)
- Raisins
Procedure:
- Fill the glass two-thirds full with carbonated soda.
- Drop a few raisins into the soda.
- Observe what happens! The raisins will sink, then rise, then sink again, performing a continuous "dance."
The Science Behind the Dance: Raisins are denser than soda, so they initially sink. However, carbonated soda contains dissolved carbon dioxide gas. The rough surface of the raisins provides nucleation sites where the dissolved gas can form bubbles. These tiny carbon dioxide bubbles attach themselves to the raisins, making them more buoyant (less dense). When enough bubbles attach, the raisins become light enough to float to the surface. At the surface, the bubbles pop, releasing the gas. With the bubbles gone, the raisins become denser again and sink back down, only to collect new bubbles and start the dance all over! This illustrates buoyancy, gas solubility, and density changes.
Homemade Lava Lamp
Recreate the groovy effect of a lava lamp using oil, water, and an effervescent tablet.
Materials:
- A tall, clear glass or jar
- Vegetable oil
- Water
- Food coloring
- Alka-Seltzer tablets (or similar effervescent tablets)
Procedure:
- Fill the jar about one-quarter to one-third full with water.
- Slowly pour vegetable oil on top of the water until the jar is almost full. The oil and water will separate into two distinct layers.
- Add several drops of food coloring to the oil layer. The food coloring drops will sink through the oil and mix with the water at the bottom.
- Break an Alka-Seltzer tablet into a few pieces and drop one piece into the jar.
- Watch as colorful "lava" blobs rise and fall! When the bubbling slows, add another piece of Alka-Seltzer.
The Science Behind the Lava: This experiment showcases several chemical and physical principles. First, oil and water don't mix (they are "immiscible") because water molecules are polar and oil molecules are non-polar. Second, the oil is less dense than water, so it floats on top. The food coloring, being water-soluble, sinks through the oil to color the water. When the Alka-Seltzer tablet hits the water, it reacts to produce carbon dioxide gas. These gas bubbles attach to the colored water droplets, making them lighter (more buoyant) than the surrounding oil. The bubbles carry the colored water up to the surface. When the gas bubbles pop at the top, the water, now denser than the oil again, sinks back down, creating the continuous lava lamp effect.
These kitchen chemistry experiments for kids at home are just the beginning! Each one offers a different window into the world of chemical reactions and physical properties, turning your kitchen into a dynamic learning lab. For even more ready-to-go adventures that combine the fun of cooking with exciting STEM lessons, explore our complete collection of one-time kits. You're sure to find the perfect theme for your little learner!
Beyond the Kitchen: Creative Chemistry Adventures
While the kitchen offers a fantastic starting point for chemistry experiments, the fun doesn't stop there. Many other household items and a few specialized ingredients can open up a whole new realm of creative chemistry, still keeping safety and supervision at the forefront.
The Wonder of Slime: Polymer Power!
Slime is a sensory delight and a fantastic introduction to polymer chemistry. There are various recipes, but contact lens solution and glue is a popular, safer version.
Materials (Contact Solution Slime):
- 1/2 cup white or clear school glue (PVA glue)
- 1/2 teaspoon baking soda
- 1 tablespoon contact lens solution (must contain borate or boric acid as an active ingredient)
- Food coloring or glitter (optional)
- Mixing bowls and spoons
Procedure:
- Pour the glue into a mixing bowl.
- Stir in the baking soda until well combined.
- Add food coloring or glitter if desired and mix thoroughly.
- Gradually add the contact lens solution, stirring continuously. You'll notice the mixture starting to pull away from the sides of the bowl and form a cohesive blob.
- Once it's too thick to stir, take it out and knead it with your hands until it reaches the desired slime consistency. If it's too sticky, add a tiny bit more contact solution.
The Science Behind Slime: Slime is a non-Newtonian fluid – it can act like both a liquid and a solid. The main ingredient, PVA glue, is a polymer, meaning it's made of long chains of molecules. The baking soda helps to adjust the pH, and the borate ions in the contact lens solution act as "cross-linkers." These borate ions form temporary bonds between the long polymer chains of the glue, connecting them and giving the slime its unique stretchy, gooey, yet sometimes solid-like texture. It's a fantastic hands-on way to explore states of matter and polymer formation.
Important Note on Borax Slime: While traditional Borax slime is common, Borax (sodium tetraborate) is a cleaning agent and should be handled with care. Always ensure strict adult supervision, use gloves, avoid ingestion, and wash hands thoroughly after handling. If using Borax, use a very dilute solution and consider it an adult-led experiment. For ease and safety with younger children, the contact lens solution recipe is generally preferred.
Sparkling Crystal Gardens
Growing crystals is a magical, patience-testing experiment that introduces the concepts of solutions, saturation, and crystallization.
Materials (Borax Snowflakes/Crystals):
- Borax (sodium tetraborate – see safety note above)
- Boiling water
- Pipe cleaners
- String
- Pencils or craft sticks
- Wide-mouthed jars or containers
- Food coloring (optional)
Procedure:
- Safety First: An adult should handle the boiling water and Borax. Wear gloves.
- Shape pipe cleaners into desired forms (e.g., snowflakes, stars, letters). These will be the "seeds" for your crystals.
- Tie a piece of string to each pipe cleaner shape and then tie the other end to a pencil or craft stick. The stick should be long enough to rest across the top of your jar, suspending the pipe cleaner shape without touching the bottom or sides.
- In each jar, add Borax to boiling water, stirring until no more Borax will dissolve (this creates a "supersaturated solution"). A general ratio is about 3-4 tablespoons of Borax per cup of boiling water.
- Add a few drops of food coloring to the solution if you want colored crystals.
- Carefully lower your pipe cleaner shapes into the supersaturated solution, making sure they are fully submerged but not touching the bottom or sides.
- Let the jars sit undisturbed overnight, or for at least 6-8 hours.
- The next day, carefully pull out your beautiful, sparkling crystals!
The Science Behind the Crystals: When you dissolve Borax in boiling water, you create a supersaturated solution, meaning it holds more dissolved solid than it normally would at room temperature. As the water slowly cools, the Borax molecules can no longer stay dissolved. They begin to come out of the solution and attach themselves to the pipe cleaner (the nucleation site) and to each other, forming crystalline structures. This process of orderly arrangement of molecules is called crystallization. It's a beautiful way to observe how solids can form from liquids.
The Power of a Lemon Battery
This experiment demonstrates basic electrochemistry and how chemical energy can be converted into electrical energy.
Materials:
- Several fresh lemons (at least 3-4 for a brighter LED)
- Copper coins (pennies minted before 1982 or copper strips)
- Galvanized nails or zinc strips (zinc-coated nails are common)
- Alligator clip wires
- A small LED light bulb (ensure it’s low voltage, around 1.5-3V)
Procedure:
- Gently roll each lemon on a table with a bit of pressure to break up the pulp inside – this helps the juice flow.
- Insert one copper coin (or strip) into one side of the lemon, and one galvanized nail (or zinc strip) into the other side. Make sure they are not touching each other inside the lemon.
- Repeat this for all your lemons.
- Connect the lemons in series: Use alligator clip wires to connect the copper coin of one lemon to the zinc nail of the next lemon. Continue this pattern.
- With your last lemon, you should have one free copper coin and one free zinc nail. Attach the free copper coin to one lead of the LED light bulb and the free zinc nail to the other lead of the LED.
- Observe if your LED lights up! If not, try reversing the LED leads (LEDs are directional). More lemons in series will generally produce more voltage and a brighter light.
The Science Behind the Battery: This setup creates a simple electrochemical cell (a battery!). The lemon juice acts as an electrolyte (an acidic solution that conducts electricity). The copper and zinc act as two different metals with different electrochemical potentials (electrodes). A chemical reaction occurs where zinc gives up electrons more readily than copper. These electrons flow from the zinc (the negative terminal) through the wire and the LED to the copper (the positive terminal), powering the light. This creates a basic electrical circuit and demonstrates the principles of electricity generation from chemical reactions.
Bouncy Egg Experiment
Turn an ordinary egg into a rubbery, translucent bouncy ball through the magic of a simple acid-base reaction.
Materials:
- Raw egg
- White vinegar
- A clear glass or jar with a lid
Procedure:
- Carefully place a raw egg into the clear glass or jar.
- Pour enough white vinegar over the egg to completely submerge it.
- You'll immediately notice tiny bubbles forming on the eggshell.
- Cover the jar and let it sit undisturbed for 24-48 hours. You might want to gently replace the vinegar after 24 hours for a stronger reaction.
- After 1-2 days, carefully remove the egg from the vinegar. Rinse it gently under cool water, rubbing off any remaining residue.
- You'll discover a translucent, rubbery, bouncy egg! You can even shine a flashlight through it to see the yolk inside.
- Caution: While bouncy, it’s still fragile! A gentle drop from a short height is fine, but it will still break if dropped from too high or handled roughly.
The Science Behind the Bouncy Egg: An eggshell is primarily made of calcium carbonate. Vinegar is acetic acid. When calcium carbonate reacts with acetic acid, a chemical reaction occurs that produces carbon dioxide gas (the bubbles you see) and dissolves the calcium carbonate. Over time, the entire eggshell dissolves, leaving behind the inner membrane, which is flexible and elastic. This membrane protects the egg's contents, giving it a rubbery, translucent quality. It's a striking visual of how an acid can dramatically change a solid substance.
These creative chemistry experiments for kids at home extend the learning beyond just the kitchen, showcasing the versatility and wonder of scientific exploration using accessible materials. They encourage observation, patience, and a deeper understanding of the physical and chemical world around us. For those who love the idea of hands-on learning but prefer the convenience of pre-measured ingredients and themed adventures, we invite you to discover our amazing one-time kits. Each kit offers a unique blend of STEM and culinary fun, perfect for sparking imagination and creating delicious memories!
Connecting Chemistry to Our World
The beauty of chemistry is that it’s not confined to experiments; it’s woven into the fabric of our everyday lives. Understanding basic chemistry helps children make sense of the world around them, from how bread rises to why leaves change color in the fall.
The Science of Cooking
Cooking itself is a delicious form of chemistry! Every time ingredients are mixed, heated, or cooled, chemical reactions are taking place.
- Baking: When you bake a cake, baking soda or powder reacts to produce carbon dioxide, creating air pockets that make the cake light and fluffy. This is the same reaction that makes our Erupting Volcano Cakes kit bubble over with deliciousness!
- Mixing: When oil and vinegar combine in a salad dressing, they create an emulsion – a temporary mixture of two liquids that don't usually mix, often held together by an emulsifier.
- Color Changes: The browning of toast (Maillard reaction), the ripening of fruit, or the vibrant colors of vegetables all involve complex chemical processes.
At I'm the Chef Too!, we make this connection explicit. Our kits transform cooking into a hands-on chemistry lesson, where children learn about states of matter, reactions, and solutions, all while creating edible masterpieces. It’s an approach developed by mothers and educators, ensuring that every activity is not only educational but also deeply engaging and satisfying.
Environmental Chemistry
Simple concepts like pH indicators can lead to discussions about acid rain and water quality. Understanding solubility can explain why certain pollutants dissolve in water while others don't. These foundational chemistry experiments for kids at home lay the groundwork for understanding bigger environmental issues in an accessible way.
Materials Science
The slime experiment, for instance, introduces polymers, which are the building blocks of many plastics, fabrics, and everyday materials. Crystal growing explains how minerals form in the earth. These simple activities provide tangible examples of advanced concepts, sparking an early interest in fields like materials engineering.
By framing chemistry experiments not just as isolated activities but as gateways to understanding the world, we empower children to see themselves as active participants in scientific discovery. We ignite their curiosity and show them that science is everywhere, ready to be explored. We are dedicated to providing screen-free educational alternatives that spark this kind of joy and discovery. Ready for a new adventure every month? Join The Chef's Club and enjoy free shipping on every box. It’s the perfect way to keep the learning and fun going all year long!
Tips for Maximizing Learning from Home Chemistry Experiments
To make the most out of your home chemistry adventures, consider these tips designed to deepen understanding and extend the learning experience.
Ask Open-Ended Questions
Instead of just telling your child what's happening, ask questions that encourage them to think and observe:
- "What do you think will happen if we add more of this?"
- "Why do you think the colors are moving like that?"
- "What do you notice that's different now?"
- "Can you describe what you see, smell, or feel?"
- "What would happen if we tried a different ingredient?"
These questions promote critical thinking and active engagement, making them true young scientists!
Encourage Predictions and Hypotheses
Before starting an experiment, ask your child to predict the outcome. "What do you think will happen when we mix the baking soda and vinegar?" After the experiment, compare the actual results to their predictions. This teaches them the scientific process of forming hypotheses and testing them.
Document Observations
Encourage your child to draw, write, or even dictate their observations in a "science journal." This can be as simple as a notebook where they sketch what they saw, note color changes, or describe sounds and smells. Documenting helps solidify learning and improves observation skills. For example, after creating a stunning edible solar system with our Galaxy Donut Kit, they could draw their favorite planet and explain its "ingredients."
Connect to Real-World Applications
Discuss how the chemistry they're learning applies to everyday life. For example, the acid-base reaction of the volcano is similar to how antacids work in your stomach. Density explains why ships float and balloons rise. Making these connections helps children understand the relevance and practical application of science.
Embrace "Failures" as Learning Opportunities
Sometimes experiments don't work exactly as planned, and that's perfectly okay! These moments are invaluable for teaching resilience and problem-solving. Ask: "What do you think went wrong? What could we try differently next time?" It's a chance to refine their approach and learn from unexpected outcomes.
Extend the Learning
Once an experiment is done, don't stop there!
- Vary the ingredients: What if you use lemon juice instead of vinegar? What happens with different types of milk in the milk swirl?
- Change the quantities: Does more baking soda make a bigger volcano?
- Repeat the experiment: Repetition helps solidify understanding and allows for new observations.
- Research together: If your child is particularly fascinated by a concept, look up more information online or at the library.
By incorporating these tips, you're not just doing fun activities; you're nurturing a truly scientific mindset, building confidence, and fostering a love for discovery that will last a lifetime. Our I'm the Chef Too! kits are designed with these principles in mind, offering structured yet open-ended learning opportunities that blend delicious fun with core STEM concepts, making complex subjects approachable and exciting for every child. Give the gift of learning that lasts all year with a 12-month subscription to our STEM cooking adventures!
Conclusion: Ignite the Spark of Discovery
Embarking on a journey of chemistry experiments for kids at home is one of the most enriching experiences you can share with your children. From the magical swirls of milk to the fizzing excitement of a homemade volcano, each activity is a portal to wonder, encouraging curiosity, honing critical thinking skills, and building a foundation for scientific literacy. These aren't just mere pastimes; they are powerful tools for development, designed to spark a lifelong love for learning in a hands-on, engaging, and unforgettable way.
Remember, the goal isn't to create future Nobel laureates (though who knows what sparks might ignite!), but to foster a love for exploration, to build confidence in their ability to understand the world, and to create joyful, screen-free memories together as a family. Chemistry at home is about embracing the process of discovery, celebrating every "aha!" moment, and learning that science is fun, accessible, and an integral part of our everyday lives.
At I'm the Chef Too!, we are passionate about making STEM education delicious and delightful. Our unique blend of food, science, and art ensures that every kit is an "edutainment" adventure, meticulously developed by mothers and educators to be both educational and incredibly fun. We provide the convenience of pre-measured dry ingredients and specialty supplies, delivered right to your door, so you can focus on the joy of discovery without the hassle of gathering materials.
Are you ready to transform your kitchen into a captivating laboratory and ignite a world of wonder for your child? There's a new adventure waiting for you every month.
Join The Chef's Club today and unlock a continuous stream of hands-on, delicious STEM experiences delivered with free shipping in the US!
Frequently Asked Questions About Home Chemistry Experiments
Q1: Are these chemistry experiments safe for young children? A1: Yes, the experiments highlighted here are generally safe for young children when conducted with strict adult supervision. We prioritize the use of common, non-toxic household ingredients. Always read through the experiment instructions completely, gather all materials beforehand, and ensure children understand that nothing from the "science lab" should be ingested unless explicitly prepared as food. Adult supervision for all steps, especially those involving heat or potentially irritating substances like Borax (if used), is crucial.
Q2: What age are these chemistry experiments suitable for? A2: Many of these experiments can be enjoyed by children as young as 3 or 4 with significant adult help and supervision, focusing on sensory exploration and observation. Older children (ages 6-12) can participate more actively in the steps, make predictions, and understand the basic scientific principles involved. The level of explanation can be tailored to the child's age and understanding.
Q3: Do I need special equipment for these chemistry experiments? A3: Absolutely not! Most of these experiments rely on common household items you already have in your kitchen or pantry, such as milk, vinegar, baking soda, food coloring, and basic kitchen tools like cups, spoons, and jars. This makes home chemistry accessible and budget-friendly. For those who appreciate convenience and unique themes, I'm the Chef Too! offers kits that come with almost everything you need, saving you time and hassle. Browse our complete collection of one-time kits for a taste of our culinary STEM adventures!
Q4: What if an experiment doesn't work as expected? A4: Don't worry! "Failures" are fantastic learning opportunities in science. First, double-check your measurements and ensure you've followed all steps. Discuss with your child what might have gone wrong: Were the ingredients fresh? Was enough of an ingredient used? Did you wait long enough? This teaches problem-solving, resilience, and the iterative nature of scientific inquiry. Sometimes, unexpected results can even lead to new discoveries!
Q5: How can I make these chemistry experiments more educational? A5: To maximize the educational value, encourage your child to:
- Predict: Ask what they think will happen before starting.
- Observe: Guide them to notice details, changes, and reactions.
- Explain: Ask them to describe what they saw and why they think it happened.
- Connect: Talk about how the science relates to real-world phenomena or other things they've learned.
- Document: Encourage drawing or writing down observations.
- Extend: Suggest trying variations (different colors, amounts, or ingredients) to see how the results change.
Q6: How do I store leftover chemicals or dispose of experiment waste? A6: For most of these kitchen chemistry experiments, the waste can be safely disposed of down the drain with plenty of water, or in your regular household trash. For experiments involving non-food-grade chemicals (like Borax), always follow product-specific disposal instructions and local regulations. Store any unused chemicals securely in their original containers, out of reach of children and pets.