Table of Contents
- Introduction
- The Wonders of Chemical Reactions: Fizzing, Foaming & Erupting!
- Density & Layers: Building Rainbows in a Jar
- Colorful Chemistry: Indicators, Solutions & Chromatography
- Polymer Power & Crystal Creations: Slime, Bouncy Eggs, & Growing Gems
- Edible Chemistry: Learning You Can Taste!
- The Importance of Safety and Supervision
- Beyond the Experiment: Fostering a Scientific Mindset
- Conclusion
- FAQ: Your Chemistry Experiment Questions Answered
Have you ever seen pure wonder in a child's eyes as something unexpected unfolds before them? That gasp of delight when a mundane liquid turns vibrant colors, or a simple mixture erupts with foamy splendor? That's the magic of chemistry, and it’s not confined to laboratories or advanced textbooks. In fact, some of the most captivating chemical reactions are waiting to happen right in your kitchen, often with ingredients you already have!
At I'm the Chef Too!, our mission is to blend food, STEM, and the arts into one-of-a-kind "edutainment" experiences. We believe that learning should be an adventure, sparking curiosity and creativity in children while facilitating precious family bonding. This is why we're so passionate about hands-on activities, especially those that provide a screen-free educational alternative. Today, we're diving deep into the fascinating world of simple chemistry experiments for kids. Our unique approach, developed by mothers and educators, focuses on teaching complex subjects through tangible, hands-on, and often delicious cooking adventures. This post will show you how to unlock the hidden scientist in your child, exploring everything from bubbling reactions to invisible inks, all while building foundational STEM skills and creating joyful family memories. Get ready to transform everyday materials into extraordinary learning opportunities!
Introduction
Imagine a world where everyday ingredients hold the keys to scientific discovery, where a simple pantry staple can ignite curiosity and transform into a bubbling spectacle. For many of us, the word "chemistry" conjures images of complex equations and sterile labs. But what if we told you that chemistry is happening all around us, especially in the heart of your home – the kitchen? From the moment you bake a cake to the fizz of a soda, chemical reactions are constantly at play, silently shaping our world.
This blog post is your comprehensive guide to bringing these wonders to life through simple chemistry experiments for kids. We'll explore a variety of safe, engaging, and easy-to-set-up activities that demystify chemistry and turn it into an exciting adventure. Our goal is to empower parents and educators with the knowledge and inspiration to foster a love for science in young minds. By engaging in these hands-on experiments, children will not only learn about fundamental chemical principles but also develop critical thinking skills, problem-solving abilities, and a keen sense of observation. We'll show you how to create memorable moments, spark intellectual curiosity, and build confidence, all while enjoying the thrill of discovery together. Let’s roll up our sleeves and embark on a journey of scientific exploration that promises to be as educational as it is fun!
The Wonders of Chemical Reactions: Fizzing, Foaming & Erupting!
Chemical reactions are at the heart of chemistry, where substances change into entirely new ones. For kids, these reactions are often the most exciting because they involve dramatic, visible changes like fizzing, foaming, and even eruption! These types of experiments are fantastic for demonstrating cause and effect, the production of gas, and the concept of acids and bases. Always remember to prioritize safety: supervise children during these experiments, wear appropriate safety gear (like old clothes or aprons), and ensure good ventilation.
The Classic Volcano Eruption
The baking soda and vinegar volcano is a quintessential chemistry experiment that never fails to impress. It’s a fantastic way to introduce acid-base reactions and gas production.
Materials:
- A container (an empty plastic bottle or cup works well)
- Baking soda (sodium bicarbonate)
- White vinegar (acetic acid)
- Dish soap (optional, for more foam)
- Red food coloring (optional, for lava effect)
- Water
- A tray or basin to catch the overflow
- Craft supplies (cardboard, playdough, paint) to decorate your volcano (optional)
Procedure:
- Build Your Volcano (Optional): If you're feeling crafty, mold clay, playdough, or even papier-mâché around your container to create a volcano shape. This adds to the excitement and allows for artistic expression – blending STEM with the arts, just like we love to do at I'm the Chef Too!.
- Add Baking Soda: Place 1-2 tablespoons of baking soda into your container (the "volcano crater").
- Prepare the "Lava": In a separate bowl, mix about a cup of water with a few drops of red food coloring and a squirt of dish soap. The soap isn't part of the chemical reaction but creates a fantastic foamy, lava-like texture.
- Initiate Eruption: Pour the colored water mixture into the volcano. Then, slowly add about a quarter to a half cup of white vinegar. Stand back and watch the magnificent eruption!
The Chemistry Unpacked: When vinegar (an acid) meets baking soda (a base), they react to produce carbon dioxide gas. This gas rapidly expands, creating bubbles. The dish soap traps these bubbles, turning them into a spectacular foam that spills over your volcano’s edges, mimicking lava. This teaches children about neutralization reactions and the visible evidence of gas being produced.
Learning Outcomes & Extensions:
- Observation: Children observe a dramatic physical change, learning about cause and effect.
- Concepts: Introduces acids, bases, and gas production.
- Experimentation: Ask questions like: What happens if we add more baking soda? More vinegar? Different amounts of soap? Does warm water change anything?
- Real-World Connections: Discuss real volcanoes, the Earth's geology, and how gas pressure can build up.
This explosive fun reminds us of the thrill of discovery we pack into every kit, like our Erupting Volcano Cakes kit, where kids make their own edible eruptions! If your child loves hands-on, delicious STEM adventures, imagine a new one delivered to your door every month. Join The Chef's Club today and enjoy free shipping on every box, bringing continuous "edutainment" right to your home.
Invisible Ink: The Secret Message Reveal
Who doesn't love a secret message? This simple chemistry experiment introduces oxidation and how heat can act as a catalyst.
Materials:
- Lemon juice (freshly squeezed or bottled)
- White paper
- Cotton swabs or a small paintbrush
- Heat source: an iron (adult supervision required!), a light bulb, or even the sun on a hot day.
Procedure:
- Write Your Message: Dip a cotton swab into lemon juice and use it to write a message or draw a picture on a piece of white paper.
- Let it Dry: Allow the lemon juice to dry completely. The message will become invisible. This step requires a little patience, a great lesson for young scientists!
- Reveal the Secret: Carefully apply heat to the paper. If using an iron, an adult should gently iron over the paper on a low setting. If using a light bulb, hold the paper close to, but not touching, the warm bulb. Watch as your invisible message slowly appears in brown!
The Chemistry Unpacked: Lemon juice contains carbon compounds. When these compounds are heated, they oxidize (react with oxygen in the air) and break down. This breakdown causes them to turn brown, making your message visible. The unwritten parts of the paper don't have these carbon compounds, so they remain white. Heat acts as a catalyst, speeding up the chemical reaction.
Learning Outcomes & Extensions:
- Observation: Witness a chemical change triggered by heat.
- Concepts: Introduction to oxidation, catalysts, and the idea that reactions can be invisible until activated.
- Experimentation: Try other acidic liquids like orange juice or vinegar. Does the type of paper matter? What happens if you try to "develop" the message with different heat sources?
Dancing Raisins: Buoyancy and Gas
This playful experiment demonstrates buoyancy and the behavior of carbon dioxide gas in a visually engaging way.
Materials:
- A tall, clear glass or jar
- Clear carbonated soda (e.g., club soda, Sprite, ginger ale)
- A handful of raisins
Procedure:
- Fill the Glass: Pour the carbonated soda into the clear glass, leaving some space at the top.
- Add Raisins: Drop a few raisins into the soda.
- Observe: Watch closely as the raisins begin to "dance," floating up and down within the glass.
The Chemistry Unpacked: The carbonated soda is filled with dissolved carbon dioxide gas. When you drop the raisins in, the gas bubbles adhere to the rough surfaces of the raisins. These bubbles act like tiny life rafts, making the raisins more buoyant (less dense than the soda). As the raisins float to the surface, the bubbles pop, releasing the gas. Without the bubbles, the raisins become denser again and sink back down, only to collect more bubbles and repeat the cycle.
Learning Outcomes & Extensions:
- Observation: Develop attention to detail as children watch the subtle movements.
- Concepts: Introduces buoyancy, density, and the properties of gases.
- Experimentation: Try different carbonated drinks. What about other small, textured objects like pasta or corn kernels? Do they dance too? How does temperature affect the amount of fizz?
These types of captivating activities are just a glimpse of the hands-on learning experiences we champion. Whether you're exploring the science of buoyancy or the secrets of invisible ink, these moments foster a love for learning that lasts a lifetime. For more themed adventures that blend science, cooking, and art into one exciting package, we invite you to Browse our complete collection of one-time kits. You're sure to find the perfect theme for your little learner!
Elephant Toothpaste: A Foaming Spectacle (Adult Supervision Essential!)
This is a showstopper, but it involves hydrogen peroxide and should only be done with strong adult supervision and appropriate safety measures.
Materials:
- Empty plastic bottle (e.g., a soda bottle or water bottle)
- Hydrogen peroxide (3% or 6% solution, found in pharmacies – higher concentrations yield bigger reactions but require more caution)
- Dry yeast
- Warm water
- Dish soap
- Food coloring (optional)
- Funnel (optional, but helpful)
- Measuring cups and spoons
- A large tray or basin for easy cleanup (essential!)
- Safety goggles for everyone involved
Procedure:
- Prepare the Yeast: In a small cup, mix 1 tablespoon of dry yeast with 3 tablespoons of warm water. Stir gently for about 30 seconds and set aside to activate.
- Prepare the Bottle: Pour ½ cup of hydrogen peroxide into the plastic bottle.
- Add Color & Soap: Add a few drops of your favorite food coloring along the inside walls of the bottle for stripes, or swirl it in. Then, add a good squirt (about 1 tablespoon) of dish soap into the bottle. Gently swirl to mix.
- The Grand Finale: Using the funnel, quickly pour the activated yeast mixture into the bottle with the hydrogen peroxide. Stand back and watch the "elephant toothpaste" erupt!
The Chemistry Unpacked: Hydrogen peroxide naturally decomposes into water and oxygen gas, but it's a very slow process. Yeast contains an enzyme called catalase, which acts as a catalyst, dramatically speeding up this decomposition reaction. The oxygen gas rapidly forms, and the dish soap traps these gas bubbles, creating a huge column of foam that resembles toothpaste fit for an elephant!
Safety Note: While 3% hydrogen peroxide is relatively safe, higher concentrations can irritate skin and eyes. Always wear safety goggles, and wash hands thoroughly after the experiment. This foam is not edible!
Learning Outcomes & Extensions:
- Observation: Witness a rapid, exothermic (heat-releasing) chemical reaction.
- Concepts: Introduces catalysts, decomposition reactions, and gas production.
- Experimentation: Try different concentrations of hydrogen peroxide (with increased caution). Does the temperature of the water used for the yeast affect the reaction?
Density & Layers: Building Rainbows in a Jar
Density is a fundamental property of matter, explaining why some things float and others sink. These experiments make this concept visually stunning and incredibly clear.
The Density Rainbow Jar
Creating a layered liquid rainbow is a beautiful way to illustrate that different liquids have different densities.
Materials:
- A tall, clear glass or jar
- Various liquids: honey, light corn syrup, dish soap, water, vegetable oil, rubbing alcohol
- Food coloring (optional, but highly recommended for water and rubbing alcohol)
- Pipettes or droppers (optional, for precise layering)
Procedure:
- Gather Your Liquids: Arrange your liquids from heaviest to lightest: honey, corn syrup, dish soap, water, vegetable oil, rubbing alcohol.
-
Slowly Layer: Carefully pour each liquid into the glass, one at a time, starting with the heaviest (honey) at the bottom. The trick is to pour very slowly, preferably down the side of the glass or over the back of a spoon, to prevent mixing.
- Honey (bottom layer)
- Corn syrup
- Dish soap (you might want to color your water before this step to make the contrast clearer)
- Water (add a few drops of food coloring to make it stand out)
- Vegetable oil
- Rubbing alcohol (add a different color food coloring to make it pop at the top)
- Observe: Marvel at the distinct layers!
The Chemistry Unpacked: Density is a measure of how much "stuff" is packed into a given space. Liquids with higher density will sink below liquids with lower density. Honey is denser than corn syrup, which is denser than dish soap, and so on. They don't mix because their molecules are arranged differently, and some are immiscible (they don't dissolve in each other, like oil and water).
Learning Outcomes & Extensions:
- Observation: See the clear stratification of liquids.
- Concepts: Understands density, immiscibility, and the properties of different liquids.
- Experimentation: Try dropping small objects (a grape, a paperclip, a plastic bead) into your density tower. Where do they stop? This helps reinforce the concept of an object's density relative to the liquids.
- Real-World Connections: Discuss how ships float (buoyancy, density), why oil spills don't mix with water, or even how hot air balloons work (hot air is less dense than cold air).
For parents looking to nurture a child's love for hands-on discovery and deepen their understanding of scientific principles, our kits are designed to make learning a tangible, delicious experience. If your budding scientist is captivated by the wonders of the cosmos, our Galaxy Donut Kit allows them to explore astronomy by creating their own edible solar system, combining art, food, and science in one amazing adventure.
Homemade Lava Lamp: Immiscibility and Gas Production
Create your own mesmerizing, bobbing lava lamp using simple household items.
Materials:
- Tall, clear glass or plastic bottle
- Vegetable oil
- Water
- Food coloring
- Alka-Seltzer tablets (or similar effervescent tablets)
Procedure:
- Layer the Liquids: Fill the glass or bottle about two-thirds full with vegetable oil. Then, slowly pour in water until it's nearly full, leaving some space at the top. Notice how the water sinks below the oil – another density demonstration!
- Add Color: Add about 5-10 drops of food coloring. Watch as the color droplets fall through the oil and mix with the water layer.
- Activate the Lamp: Break an Alka-Seltzer tablet into a few pieces. Drop one piece into the glass. Watch the bubbles form and carry colored water droplets up through the oil. As the gas escapes at the surface, the colored water falls back down, creating a continuous "lava" effect. Add more tablet pieces as needed to keep the reaction going.
The Chemistry Unpacked: This experiment beautifully demonstrates two key concepts:
- Immiscibility: Oil and water don't mix because water molecules are polar (have a slight charge), and oil molecules are non-polar. They repel each other, leading to distinct layers.
- Gas Production & Density: Alka-Seltzer reacts with water to produce carbon dioxide gas. These gas bubbles attach to the colored water droplets, making them less dense than the oil. They rise through the oil, and when the gas bubbles pop at the surface, the water droplets, now heavier, sink back down.
Learning Outcomes & Extensions:
- Observation: Enjoy the visual spectacle and track the movement of the "lava."
- Concepts: Reinforces density, immiscibility, and gas production in an exciting way.
- Experimentation: Try different types of oil. What happens if you use warm water versus cold water? How does the size of the Alka-Seltzer pieces affect the reaction?
Colorful Chemistry: Indicators, Solutions & Chromatography
Chemistry isn't always about dramatic explosions; sometimes it's about subtle changes in color that reveal hidden properties. These experiments are perfect for visual learners and introduce concepts like pH, solutions, and separation techniques.
Red Cabbage pH Indicator: Exploring Acids and Bases
Red cabbage juice is a fantastic natural pH indicator, changing color based on whether a substance is acidic or alkaline (basic).
Materials:
- ½ head of red cabbage
- Boiling water (adult handling only!)
- Strainer
- Various household substances: white vinegar, lemon juice, baking soda solution (baking soda mixed with water), dish soap solution, clear soda, milk
- Small, clear cups or glasses
Procedure:
- Make the Indicator: Chop the red cabbage into small pieces. Place them in a bowl and pour enough boiling water over them to cover. Let it sit for about 10-15 minutes (or until the water turns a deep purple).
- Strain the Juice: Carefully strain the purple liquid into another container. This is your pH indicator!
- Test Substances: Pour a small amount of each household substance into separate clear cups. Then, add a few drops of the red cabbage juice indicator to each cup.
-
Observe Color Changes: Watch as the indicator changes color!
- Acids (like vinegar and lemon juice) will turn red or pink.
- Neutral substances (like plain water) will stay purple.
- Bases/Alkaline substances (like baking soda solution or soap) will turn blue, green, or even yellow.
The Chemistry Unpacked: Red cabbage contains a pigment called anthocyanin. Anthocyanins are natural pH indicators, meaning their chemical structure changes depending on the pH (acidity or alkalinity) of their environment, which in turn changes the way they reflect light, resulting in different colors. This provides a clear, visual representation of pH differences without needing complex lab equipment.
Learning Outcomes & Extensions:
- Observation: See how different substances react with the indicator.
- Concepts: Introduces pH scale (though you don't need to teach the numbers), acids, and bases.
- Experimentation: Test other liquids from around the house (with adult permission). Can you predict the color change? Can you neutralize an acid with a base (e.g., add baking soda solution to lemon juice after adding the indicator)?
Magic Milk Experiment: Surface Tension & Hydrophobic Interactions
This dazzling experiment creates swirling patterns of color, demonstrating the science of surface tension and how soap interacts with fats.
Materials:
- A shallow dish or plate
- Milk (whole milk works best due to its fat content)
- Food coloring (various colors)
- Dish soap
- Cotton swabs
Procedure:
- Fill the Dish with Milk: Pour enough milk into the shallow dish to cover the bottom evenly. Let it settle for a moment.
- Add Food Coloring: Gently add drops of different food coloring colors onto the surface of the milk, spreading them out a bit.
- The Magic Touch: Dip one end of a cotton swab into dish soap, coating it well. Gently touch the soapy end of the swab to the surface of the milk, right in the center of the colors, and hold it there.
- Watch the Show: Observe as the colors burst outward and swirl in beautiful patterns! Move the swab to different spots for more movement.
The Chemistry Unpacked: Milk has surface tension, which holds its surface intact. Food coloring is less dense than milk, so it floats on top. When the dish soap touches the milk, it does two things:
- Breaks Surface Tension: The soap disrupts the surface tension of the milk, allowing the colors to spread.
- Reacts with Fat: Milk contains fat. Soap molecules are unique because they have both a hydrophilic (water-loving) head and a hydrophobic (fat-loving) tail. The soap's hydrophobic tails quickly seek out and attach to the fat molecules in the milk. As the soap molecules chase the fat molecules around, they carry the food coloring along, creating the mesmerizing swirls.
Learning Outcomes & Extensions:
- Observation: Witness dynamic color movement and learn about unexpected reactions.
- Concepts: Introduces surface tension, hydrophobic/hydrophilic interactions, and the properties of soap and fat.
- Experimentation: Try different types of milk (skim vs. whole). Does temperature affect the reaction? What happens if you use different types of soap?
Dissolving Skittles (or M&Ms): Diffusion and Solubility
This simple, colorful experiment is a gentle introduction to dissolution and diffusion.
Materials:
- Skittles or M&M candies
- A plate or shallow dish
- Warm water
Procedure:
- Arrange the Candies: Arrange the candies in a circle or other pattern around the edge of the plate, with the "S" or "M" facing up (this doesn't affect the chemistry but looks neat!).
- Add Water: Carefully pour warm water into the center of the plate until it just touches the bottom of the candies. Avoid pouring directly onto them.
- Observe: Watch as the colors slowly dissolve from the candies and spread towards the center of the plate, creating a beautiful rainbow.
The Chemistry Unpacked: The colorful coating on Skittles and M&Ms is made of sugar and food dyes. When warm water comes into contact with these coatings, the sugar and dyes dissolve in the water (solubility). The dissolved color then begins to spread out evenly through the water, moving from areas of higher concentration (at the candy) to areas of lower concentration (the center of the plate). This process is called diffusion. The colors stay separated initially because the different dyes have slightly different chemical properties and densities, and the water currents created by the dissolving sugar keep them distinct until they fully diffuse.
Learning Outcomes & Extensions:
- Observation: Notice how colors move and interact.
- Concepts: Introduces solubility, dissolution, and diffusion.
- Experimentation: Try different water temperatures (cold vs. warm) – does temperature affect the speed of dissolution? Try different brands of candy. What happens if you use too much water?
Polymer Power & Crystal Creations: Slime, Bouncy Eggs, & Growing Gems
Some of the most engaging chemistry experiments involve creating new substances with unique properties, like stretchy polymers or beautiful crystals. These activities foster patience and observation skills as children watch transformations unfold over time.
Slime: Exploring Non-Newtonian Fluids
Slime is a beloved classic for a reason – it's incredibly fun to make and play with, and it's a fantastic introduction to polymer chemistry and non-Newtonian fluids.
Materials:
- White school glue (PVA glue)
- Liquid starch OR Borax (sodium borate, dissolved in water) OR Saline solution (with baking soda)
- Water
- Food coloring (optional)
- Glitter (optional)
- Two bowls
- Measuring cups and spoons
Procedure (using Borax solution, adult supervision for Borax is critical):
- Glue Mixture: In one bowl, mix ½ cup of white school glue with ½ cup of water. Stir until fully combined. Add food coloring and glitter now if desired.
- Borax Solution: In a separate container, dissolve 1 teaspoon of Borax powder in ½ cup of warm water. Stir until the Borax is completely dissolved.
- Combine & Knead: Slowly pour the Borax solution into the glue mixture while stirring continuously. You'll immediately see the mixture start to thicken and form slime.
- Knead: Once it's too thick to stir, remove it from the bowl and knead it with your hands until it reaches the desired consistency. If it's too sticky, add a tiny bit more Borax solution. If it's too stiff, add a tiny bit more water or glue.
The Chemistry Unpacked: White school glue contains long chains of molecules called polymers. The Borax solution contains borate ions. When these borate ions are introduced to the glue, they act as "cross-linkers," forming connections between the long polymer chains. This creates a larger, more complex polymer network that gives slime its unique stretchy, gooey, yet somewhat solid-like properties. It's a non-Newtonian fluid, meaning its viscosity changes under stress – it can be liquid-like when poured slowly but solid-like when squeezed quickly.
Safety Note for Borax: Borax is a cleaning product and should not be ingested. Always supervise children closely, ensure they don't put it in their mouths, and have them wash their hands thoroughly after playing with slime.
Learning Outcomes & Extensions:
- Observation: Feel the change in texture from liquid to solid-like.
- Concepts: Introduction to polymers, cross-linking, and non-Newtonian fluids.
- Experimentation: Try different amounts of Borax solution. Does adding more or less change the slime's consistency? Experiment with different types of glue or even different activators (liquid starch, contact lens solution).
The Bouncy Egg Experiment: Dissolving Calcium Carbonate
Turn a fragile egg into a rubbery, bouncy orb with a simple acid-base reaction!
Materials:
- Raw egg (uncooked)
- White vinegar
- A clear glass or jar with a lid
- Patience (this takes a few days!)
Procedure:
- Submerge the Egg: Carefully place the raw egg into the clear glass.
- Add Vinegar: Pour enough white vinegar into the glass to completely submerge the egg.
- Observe & Wait: Put the lid on the jar (loosely, to allow gas to escape if needed) and place it somewhere safe. Over the next 24-48 hours, you'll see tiny bubbles forming on the eggshell. After a day or two, gently replace the vinegar with fresh vinegar.
- Reveal the Bouncy Egg: After about 2-3 days, carefully remove the egg from the vinegar. Rinse it gently under running water and gently rub off any remaining white film. You should be left with a translucent, rubbery, bouncy egg!
The Chemistry Unpacked: An eggshell is primarily made of calcium carbonate (CaCO3). Vinegar is acetic acid (CH3COOH). When calcium carbonate reacts with acetic acid, a chemical reaction occurs: the calcium carbonate dissolves, and carbon dioxide gas (the bubbles you see) is released, along with water and calcium acetate. The membrane inside the eggshell, made of protein, remains intact and becomes the "skin" of your bouncy egg!
Learning Outcomes & Extensions:
- Observation: Witness the slow dissolution of the shell and the transformation of the egg.
- Concepts: Introduction to acid-base reactions, dissolving calcium carbonate, and the properties of membranes.
- Experimentation: Try different types of vinegar (apple cider vinegar, balsamic). Does the type of acid affect the speed or outcome? What happens if you leave it in for too long? (It might just dissolve completely!).
Growing Crystals: Supersaturated Solutions
Making crystals is a captivating long-term experiment that teaches about solutions, solubility, and the formation of crystalline structures. Borax is excellent for quick, dramatic crystals.
Materials (for Borax Crystals):
- Borax powder (found in the laundry aisle, adult supervision needed)
- Boiling water (adult handling only!)
- Pencil or stick
- String
- Pipe cleaners (shaped into stars, snowflakes, or other designs)
- A wide-mouthed jar or heat-safe container
Procedure:
- Shape Pipe Cleaners: Bend pipe cleaners into your desired shapes (e.g., snowflakes, stars). Ensure they are small enough to fit inside your jar without touching the sides or bottom.
- Prepare String: Tie a piece of string to your pipe cleaner shape, and tie the other end to the pencil. The pencil will rest across the top of the jar, suspending the pipe cleaner in the solution.
- Make Supersaturated Solution: Pour boiling water into your jar. For every cup of water, stir in 3 tablespoons of Borax powder. Keep stirring until no more Borax dissolves (the solution is supersaturated).
- Suspend Shape: Carefully lower your pipe cleaner shape into the Borax solution, ensuring it is fully submerged but not touching the bottom or sides of the jar. Rest the pencil across the jar's rim.
- Wait & Watch: Leave the jar undisturbed overnight (or for several hours). As the water cools, the Borax will come out of the solution and crystallize onto your pipe cleaner.
- Reveal Crystals: The next day, carefully remove your beautiful, sparkling crystals!
The Chemistry Unpacked: When you dissolve Borax in hot water until no more can dissolve, you create a "supersaturated solution." As the water cools, it can no longer hold as much dissolved Borax, so the excess Borax molecules begin to link together and fall out of the solution. They are attracted to the rough surfaces of the pipe cleaners, where they slowly build up into intricate crystal structures.
Safety Note for Borax: As with slime, Borax is not for consumption. Handle with care, ensure children do not put it in their mouths, and wash hands thoroughly after handling.
Learning Outcomes & Extensions:
- Observation: Witness the gradual growth of crystals over time.
- Concepts: Introduces solutions (saturated, supersaturated), solubility, crystallization, and molecular structure.
- Experimentation: Try growing crystals on different objects (string, rocks). Experiment with food coloring in the solution. What happens if you try to grow sugar crystals (rock candy) over several days?
These hands-on journeys into the heart of chemistry are what we're all about! We believe in fostering a love for learning by making complex ideas tangible and fun. Our kits, developed by mothers and educators, offer these kinds of rich, screen-free experiences, sparking curiosity and facilitating family bonding. If you’re eager for more engaging activities and want the convenience of new adventures delivered right to your door with free shipping in the US, then it's time to explore what we offer. Join The Chef's Club and get started on a new STEM cooking adventure every month!
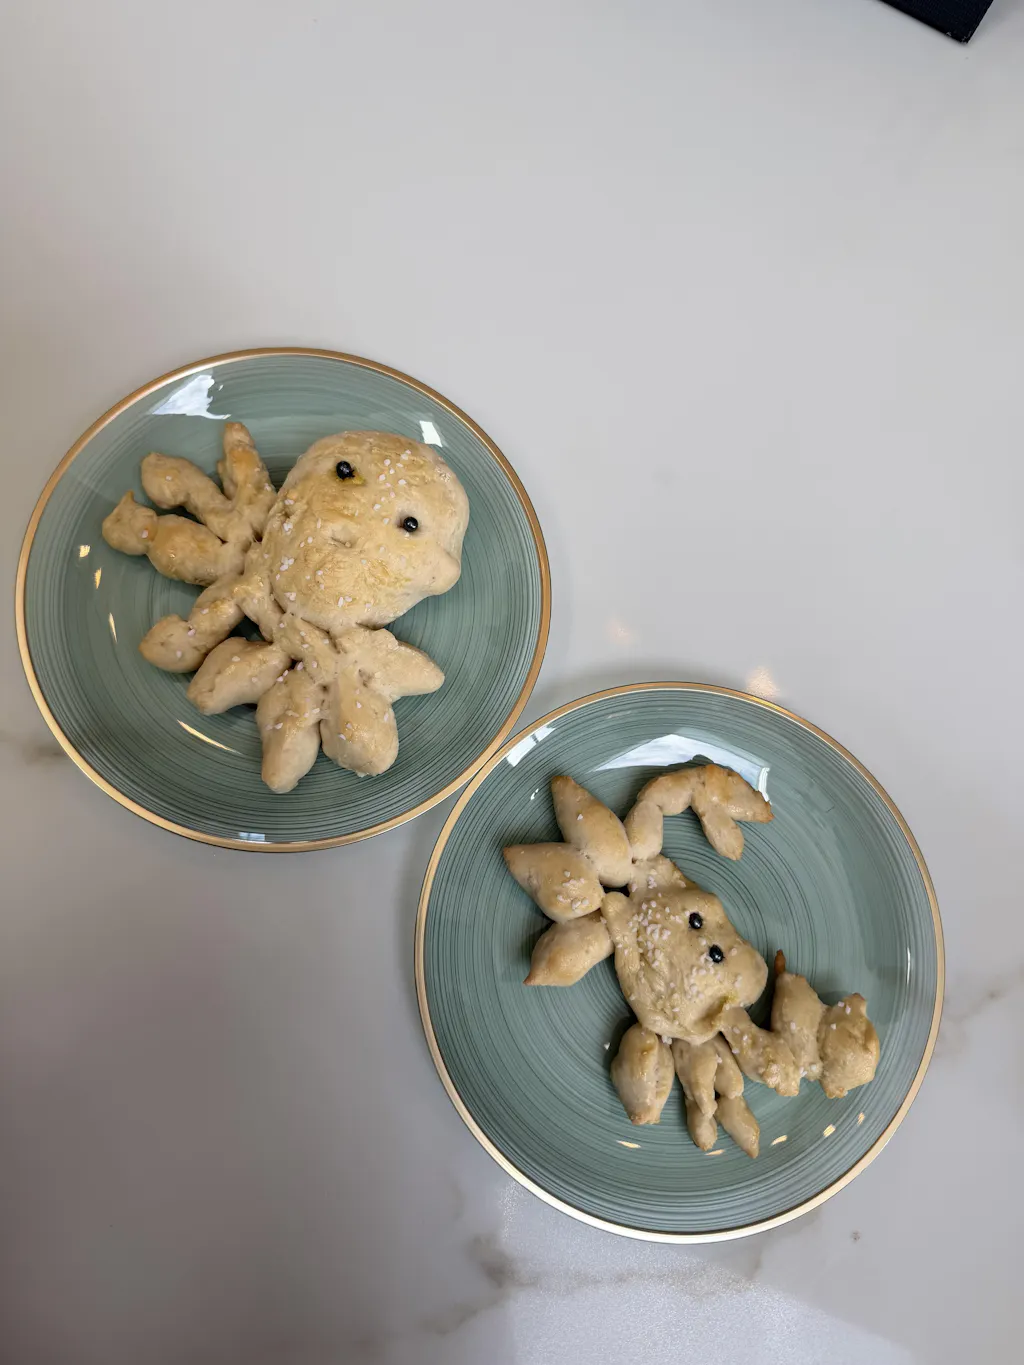
Edible Chemistry: Learning You Can Taste!
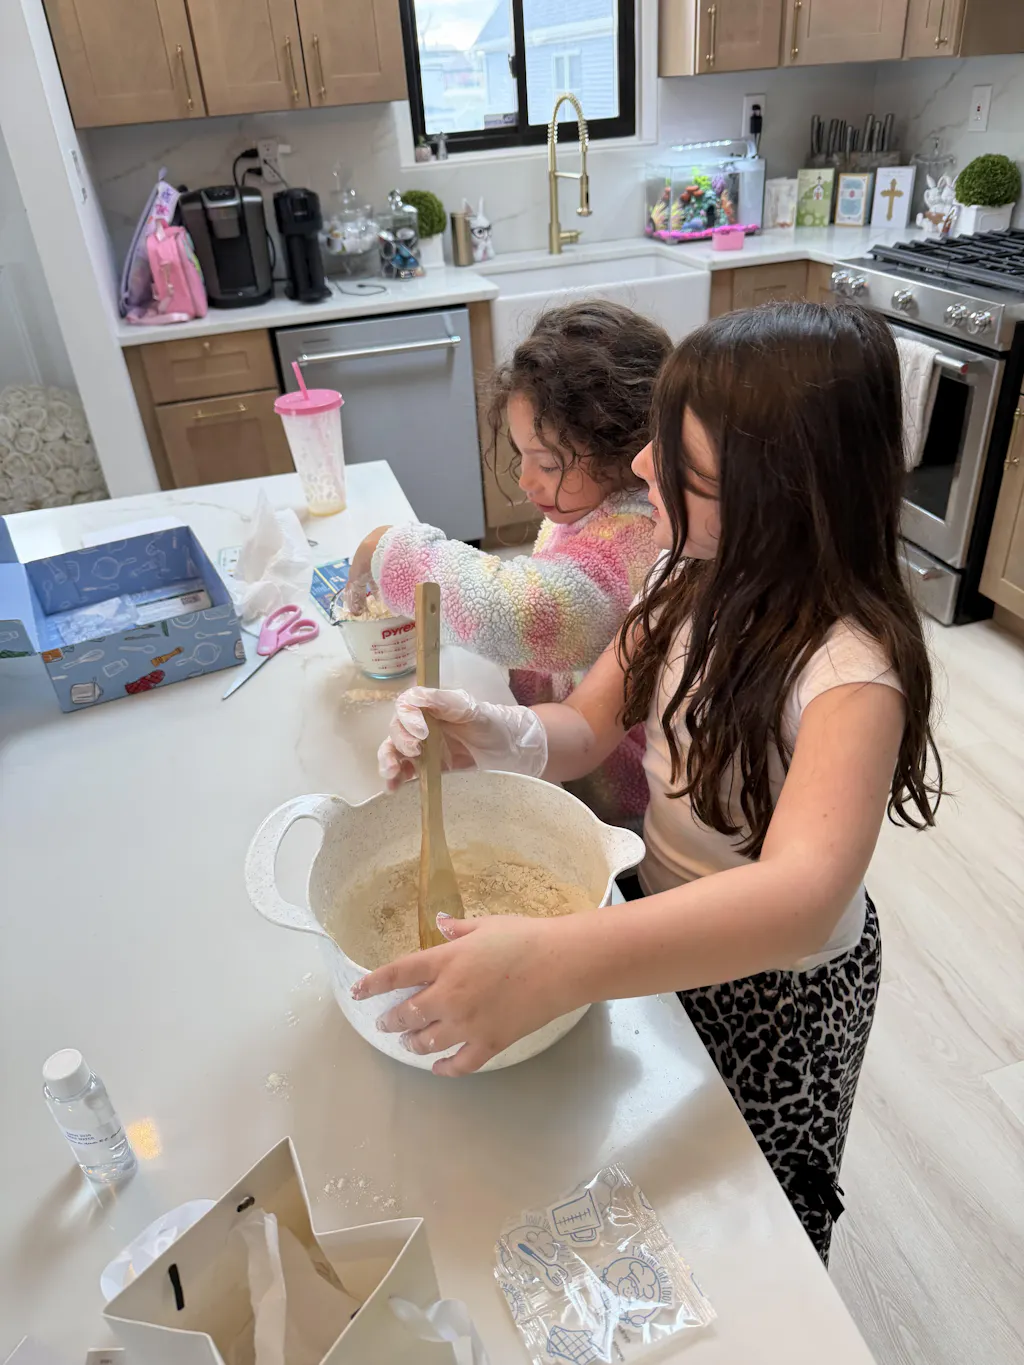
At I'm the Chef Too!, we wholeheartedly embrace edible chemistry. It's the ultimate way to make science accessible, relevant, and utterly delicious. When kids can literally taste the results of their experiments, the learning becomes unforgettable. These activities blend the best of food, STEM, and the arts into one truly "edutainment" experience.
Gummy Bear Osmosis: A Sweet Lesson in Diffusion
This simple experiment demonstrates osmosis, the movement of water across a semi-permeable membrane.
Materials:
- Gummy bears (2-3 per child)
- Small bowls or cups (3 per child)
- Plain water
- Saltwater (mix about 1-2 tablespoons of salt into a cup of warm water and stir until dissolved)
- A ruler
Procedure:
- Measure: Measure and record the initial length of each gummy bear. This is a great exercise in data collection!
- Set Up: Place one gummy bear in a bowl of plain water, another in a bowl of saltwater, and optionally, one in an empty bowl as a control.
- Wait & Observe: Let the gummy bears sit for several hours or overnight.
-
Compare: After the waiting period, remove the gummy bears and compare their sizes and textures. Measure them again!
- The gummy bear in plain water will likely be much larger and squishier.
- The gummy bear in saltwater might be smaller or the same size, and possibly firmer.
- The control gummy bear should be unchanged.
The Chemistry Unpacked: Gummy bears are mostly sugar and gelatin (a semi-permeable membrane).
- In Plain Water: The concentration of water outside the gummy bear is higher than inside. Water molecules move from the area of higher concentration (the plain water) to the area of lower concentration (inside the gummy bear) through the gelatin membrane. This process is called osmosis, causing the gummy bear to swell.
- In Saltwater: The concentration of water outside the gummy bear (in the saltwater) is lower than inside the gummy bear because the salt molecules displace some of the water. Therefore, water moves out of the gummy bear into the saltwater, causing it to shrink or at least not swell.
Learning Outcomes & Extensions:
- Observation: Clearly see the physical changes in the gummy bears.
- Concepts: Introduces osmosis, semi-permeable membranes, and concentration gradients in a fun, relatable way.
- Experimentation: Try different concentrations of salt. What about sugar water? Does temperature affect the rate of osmosis?
This experiment perfectly embodies our philosophy: learning doesn't just happen in a textbook; it happens through hands-on, engaging activities. And when those activities involve a beloved treat like gummy bears, the "edutainment" factor goes through the roof! These types of unique, delicious, and educational experiences are exactly what we curate for families. For even more ways to bring STEM learning into your kitchen, whether for individual curiosity or larger groups, consider our programs. You can Learn more about our versatile programs for schools and groups, available with or without food components.
Whipped Cream Science: Emulsions and Gas Incorporation
Making whipped cream seems like pure cooking, but it's a fantastic lesson in physical chemistry, emulsions, and gas incorporation!
Materials:
- Heavy whipping cream (cold)
- Sugar (optional, for taste)
- A mixing bowl (metal or glass, chilled is best)
- An electric mixer or whisk
Procedure:
- Chill Everything: For best results, chill your mixing bowl and whisk attachments in the freezer for 10-15 minutes beforehand. This helps the cream stay cold and whip up faster.
- Pour Cream: Pour the cold heavy cream into the chilled bowl. Add sugar now if desired.
- Whip! Start mixing on a low speed, then gradually increase to medium-high. Watch as the liquid cream transforms. It will thicken, become foamy, and eventually form soft peaks, then stiff peaks. Be careful not to over-whip, or you'll get butter!
The Chemistry Unpacked: Heavy cream is an emulsion, which means it's a mixture of two liquids (fat and water) that normally don't mix, with the fat droplets dispersed throughout the water. When you whip cream, you are forcing air into this emulsion. The fat molecules, which have a natural affinity for air, surround the tiny air bubbles, stabilizing them. The protein molecules in the cream also help to encapsulate these air bubbles, forming a stable foam. This trapping of air bubbles increases the volume and changes the texture of the cream, turning it into a light, airy foam.
Learning Outcomes & Extensions:
- Observation: Witness a dramatic physical change from liquid to foam.
- Concepts: Introduces emulsions, foams, and the incorporation of gas into liquids.
- Experimentation: Does the temperature of the cream matter? How does adding sugar affect the whipping process? (Sugar stabilizes the foam, making it last longer).
These delicious explorations are a testament to our philosophy: teaching complex subjects through tangible, hands-on, and delicious cooking adventures. Even beloved characters can make learning fun, like when kids make Peppa Pig Muddy Puddle Cookie Pies – an activity that blends imaginative play with foundational kitchen skills.
The Importance of Safety and Supervision
While all the experiments discussed here are designed to be simple and use common household ingredients, safety must always be the top priority. Think of it as a foundational "ingredient" in every successful science activity.
Key Safety Practices:
- Adult Supervision is Non-Negotiable: Always have an adult present and actively involved, especially when using heat sources, sharp objects, or ingredients like hydrogen peroxide or Borax.
- Read Instructions Fully: Before starting any experiment, read all steps thoroughly to understand the process and identify any potential hazards.
- Wear Protective Gear: While not always necessary for every simple experiment, wearing old clothes or an apron is always a good idea to protect against spills and stains. For experiments involving potential splashes (like the elephant toothpaste), safety goggles are a must for everyone involved.
- Do Not Ingest (Unless Edible!): Unless an experiment is specifically designed as "edible chemistry" (like our I'm the Chef Too! kits!), assume all materials are not safe for consumption. Emphasize this to children.
- Good Ventilation: Some reactions produce gases. Ensure you are in a well-ventilated area, or consider doing experiments outdoors.
- Cleanup: Have paper towels and a cloth handy for immediate cleanup of spills. Wash hands thoroughly with soap and water after completing any experiment.
- Proper Disposal: Dispose of materials responsibly. Most household experiment waste can go down the drain or in the regular trash, but if in doubt, research proper disposal methods for specific chemicals.
At I'm the Chef Too!, we implicitly understand the need for adult supervision and safety in all kitchen activities. Our kits are designed with this in mind, providing clear instructions and age-appropriate experiences that you can enjoy safely together as a family. We focus on fostering a love for learning, building confidence, developing key skills, and creating joyful family memories, all within a safe and supportive environment.
Beyond the Experiment: Fostering a Scientific Mindset
The true magic of simple chemistry experiments for kids isn't just in the 'oohs' and 'aahs' of the reaction itself, but in the questions they spark and the scientific mindset they build. As parents and educators, our role extends beyond simply guiding the steps; it's about nurturing that innate curiosity and transforming a simple activity into a profound learning experience.
Here’s how to take the learning further:
Ask Open-Ended Questions
Instead of just telling children what happened, ask questions that encourage them to observe, predict, and explain:
- "What do you think will happen when...?" (Prediction)
- "What did you notice during...?" (Observation)
- "Why do you think the colors moved that way?" (Explanation)
- "What would happen if we tried...?" (Hypothesizing and extending)
- "How does this relate to something you've seen in the real world?" (Connection)
Encourage Journaling and Drawing
Even young children can draw what they see before, during, and after an experiment. Older children can write down their predictions, observations, and conclusions. This develops scientific recording skills and reinforces learning.
Embrace "Failure" as a Learning Opportunity
Not every experiment will go as planned, and that's perfectly fine! Encourage children to think about why something didn't work and what they could change next time. This teaches resilience and problem-solving, crucial skills in both science and life.
Connect to Real-World Phenomena
Always try to link the experiment back to everyday life. The volcano relates to geology, the density tower explains why ships float, and the bouncy egg connects to how acids interact with common materials. This makes chemistry relevant and exciting.
Extend the Learning
Many experiments have natural extensions. If they loved the volcano, try a lemon volcano! If they enjoyed growing Borax crystals, try making rock candy. Continuous exploration keeps the flame of curiosity burning bright.
At I'm the Chef Too!, we are committed to sparking curiosity and creativity in children. Our kits are meticulously designed to be more than just recipes; they are "edutainment" experiences that blend food, STEM, and the arts, ensuring that every hands-on adventure is a gateway to deeper understanding. We believe in providing screen-free educational alternatives that facilitate family bonding and empower children to explore complex subjects in tangible, delicious ways. This philosophy is at the core of everything we do, inspiring the next generation of innovators and thinkers.
Conclusion
From the fizzing marvel of a baking soda volcano to the mesmerizing swirls of magic milk, simple chemistry experiments for kids offer an unparalleled gateway to scientific discovery. We've explored how everyday ingredients can transform into tools for learning, unveiling fundamental concepts like acids and bases, density, oxidation, and polymer chemistry. These hands-on adventures do more than just entertain; they ignite curiosity, foster critical thinking, and build confidence in young scientists.
At I'm the Chef Too!, we believe that the kitchen is the ultimate classroom, a place where delicious creations and scientific exploration go hand-in-hand. Our mission is to blend food, STEM, and the arts into one-of-a-kind "edutainment" experiences that spark creativity and facilitate invaluable family bonding time. By engaging in these screen-free, tangible activities, children learn to observe, question, and understand the world around them in a truly unforgettable way. We hope this guide inspires you to roll up your sleeves and embark on many memorable chemistry adventures with the children in your life.
Ready to continue the adventure and bring even more exciting STEM learning into your home? Don't let the fun stop here! Join The Chef's Club today and receive a new, unique STEM cooking kit delivered right to your door every month with free shipping in the US. It's the perfect way to ensure a steady supply of "edutainment" that nurtures your child's love for learning and creates lasting family memories.
FAQ: Your Chemistry Experiment Questions Answered
Q: What are easy chemistry experiments for kids? A: Easy chemistry experiments for kids typically involve readily available household ingredients and simple procedures. Popular examples include baking soda and vinegar reactions (like the volcano), dissolving experiments (like the Skittles rainbow), color mixing with milk and soap, and creating slime or bouncy eggs. These experiments are designed to be safe and engaging, providing clear visual results that children can easily observe and understand.
Q: Can kids do chemistry experiments at home? A: Absolutely! Many chemistry experiments are perfectly suited for the home environment, often requiring nothing more than kitchen staples, a bit of curiosity, and adult supervision. The experiments we've outlined in this post are prime examples of how to turn your kitchen into a science lab, fostering learning and family fun. Always remember to prioritize safety and supervise children during all activities.
Q: What age is appropriate for chemistry experiments? A: Chemistry experiments can be adapted for a wide range of ages, from preschoolers to upper elementary students, and even middle schoolers. For younger children (3-6), focus on simple observations, sensory experiences, and cause-and-effect (like the magic milk or a small baking soda volcano). For elementary-aged children (7-12), you can introduce more complex concepts, encourage predictions, and involve them more in the step-by-step process, like with slime making or density towers. The key is to choose age-appropriate materials and ensure the level of explanation matches their understanding.
Q: Are chemistry experiments safe for elementary students? A: Yes, chemistry experiments are generally safe for elementary students when age-appropriate materials are selected, and strict adult supervision is provided. It's crucial to always follow safety guidelines, such as wearing safety goggles when recommended, avoiding ingestion of non-edible materials, and ensuring good ventilation. At I'm the Chef Too!, safety is paramount; our kits are designed by mothers and educators to be fun and educational while keeping safety in mind, allowing families to create joyful memories with realistic expectations.
Q: How can I make chemistry experiments more educational? A: To enhance the educational value, go beyond just completing the steps. Encourage children to make predictions before the experiment, ask "why" and "what if" questions, and discuss their observations. Have them draw or write about what they saw and learned. Connecting the experiment to real-world phenomena (e.g., how the volcano relates to Earth science) helps deepen understanding and curiosity. Our I'm the Chef Too! kits inherently integrate these educational strategies, blending STEM and arts into every adventure.
Q: How do I store leftover chemicals from experiments? A: For the simple household chemicals used in these experiments (like baking soda, vinegar, oil), you can usually store them in their original containers or dispose of them according to your local household waste guidelines. For materials like Borax or hydrogen peroxide, always keep them in their original, clearly labeled containers, out of reach of children and pets, and follow any specific disposal instructions on the packaging. Never mix different leftover chemicals unless an experiment specifically calls for it.