Festive Reindeer Hat Craft for Kids

Table of Contents
- Introduction
- Why Crafting is More Than Just Fun: The Educational Magic of a Reindeer Hat
- Essential Supplies for Your Reindeer Hat Craft Adventure
- Crafting Your Reindeer Hat: Step-by-Step Guides for Different Approaches
- Expanding the Reindeer Fun: Integrating Crafts with STEM and Storytelling
- Tips for a Smooth and Stress-Free Crafting Session
- Expanding the Fun Beyond the Hat: Reindeer-Themed Activities and Learning
- Conclusion
- FAQ: Your Reindeer Hat Craft Questions Answered
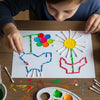
Ever notice how a simple craft can transform a quiet afternoon into a buzzing hub of creativity and laughter? Imagine the sparkle in your child's eyes as they don their very own, handmade reindeer hat craft for kids, ready to lead Santa's sleigh (or at least the living room parade!). In a world increasingly dominated by screens, finding engaging, hands-on activities that foster imagination and critical thinking is more important than ever. At I'm the Chef Too!, we believe in the magic of blending food, STEM, and the arts to create unforgettable "edutainment" experiences, and a delightful craft like a reindeer hat fits perfectly into this philosophy. It's not just about cutting and gluing; it's about exploring shapes, developing fine motor skills, and sparking joyful holiday memories.
This blog post is your ultimate guide to creating enchanting reindeer hats with your children. We’ll dive into various techniques, from simple printable templates perfect for preschoolers to more elaborate designs for older kids, ensuring every family can find their perfect holiday project. You’ll discover how this seemingly simple craft becomes a powerful tool for early learning, family bonding, and screen-free fun. Get ready to gather your materials and embark on a creative journey that will bring smiles, foster new skills, and perhaps even inspire a love for culinary adventures in the kitchen, just like those found in our Chef's Club subscription boxes! Our mission is to spark curiosity and creativity, and what better way to do that than with a festive craft that encourages imaginative play?
Introduction
The holiday season brings with it a unique kind of magic, a time when homes are filled with the scent of spices, the sound of carols, and the warmth of family togetherness. Yet, for many parents and educators, the challenge remains: how do we keep children engaged and learning amidst the excitement, offering them enriching experiences that go beyond passive entertainment? The answer often lies in the simplest, most classic activities, reimagined for today's curious minds. That's where a charming reindeer hat craft for kids steps in, offering a delightful blend of creativity, learning, and festive cheer.
This isn't just another craft project; it's an opportunity to create cherished memories, develop essential skills, and ignite a child's imagination. From the moment they trace an antler to the final placement of a sparkly red nose, children are actively participating in a process that enhances fine motor control, spatial reasoning, and artistic expression. This post will explore the myriad benefits of crafting, provide a comprehensive guide to creating various reindeer hats, and offer innovative ideas to extend the learning and fun. We'll delve into step-by-step instructions, discuss material options, and suggest ways to integrate this craft into broader educational themes, much like how we integrate STEM concepts into our delicious cooking kits. By the end, you'll be equipped with everything you need to host a magical crafting session, fostering a love for hands-on exploration and imaginative play that lasts long after the hats are made.
Why Crafting is More Than Just Fun: The Educational Magic of a Reindeer Hat
At I'm the Chef Too!, we firmly believe that learning should be an adventure – one that engages all the senses and sparks genuine curiosity. Crafting a reindeer hat craft for kids embodies this philosophy perfectly. While it might seem like a simple artistic endeavor, it’s a powerhouse of educational benefits, subtly weaving in crucial developmental skills that children will use throughout their lives. It's a prime example of how tangible, hands-on activities can teach complex subjects without children even realizing they're learning.
Developing Fine Motor Skills and Hand-Eye Coordination
Think about the intricate movements involved in cutting out shapes, applying glue precisely, or carefully placing embellishments. These actions are fundamental for strengthening the small muscles in a child's hands and fingers, which are vital for tasks like writing, buttoning clothes, and eating independently. As children manipulate scissors, paper, and craft sticks, their hand-eye coordination improves dramatically. This practice refines their ability to perform delicate tasks, laying a strong foundation for future academic and life skills.
Boosting Creativity and Imagination
A blank sheet of paper and a template are just the starting points. Children love to personalize their creations. Will their reindeer have glittery antlers? A goofy smile? Maybe a different colored nose? Crafting provides an open canvas for self-expression, encouraging children to make choices, experiment with colors and textures, and bring their unique vision to life. This imaginative play extends beyond the crafting table; once the hats are complete, children often engage in pretend play, embodying their reindeer characters, which further nurtures storytelling and social skills.
Enhancing Problem-Solving and Critical Thinking
What if the antlers are too floppy? How do we make the hat fit just right? These are the kinds of mini-challenges that naturally arise during a craft project. Children learn to adapt, troubleshoot, and think creatively to find solutions. They might experiment with different ways to attach pieces, or realize they need to reinforce a certain part. This iterative process of trying, observing, and adjusting is a foundational element of STEM learning, akin to the experiments we encourage in our kitchen adventures. These experiences build resilience and teach children that "mistakes" are just opportunities for learning and innovation.
Fostering Focus and Concentration
In an age of constant digital stimulation, finding activities that encourage sustained attention can be a godsend. A captivating craft like making a reindeer hat requires children to focus on the task at hand, follow instructions, and see a project through to completion. This focused engagement strengthens their ability to concentrate, a skill that is paramount for academic success and daily life. The tangible reward of a finished hat further motivates them, reinforcing the positive outcomes of focused effort.
Promoting Family Bonding and Communication
Crafting together is a wonderful way to connect. It creates a shared experience where parents and children can collaborate, chat, and enjoy each other’s company without the distraction of screens. Guiding a child through the steps, sharing tips, and celebrating their achievements together strengthens family ties and creates lasting memories. It’s an opportunity for gentle conversation, collaborative problem-solving, and celebrating individual expression, much like the shared culinary journeys our Chef's Club subscription boxes are designed to facilitate. Ready for more family adventures? Explore our full library of adventure kits available for a single purchase in our shop.
By engaging in a simple reindeer hat craft for kids, you're not just creating a festive accessory; you're investing in your child's holistic development. You're sparking curiosity, building confidence, developing key skills, and creating joyful family memories – precisely what we champion here at I'm the Chef Too!.
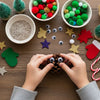
Essential Supplies for Your Reindeer Hat Craft Adventure
Before we dive into the exciting world of crafting, it's essential to gather your tools and materials. Having everything ready beforehand makes the process smooth, enjoyable, and minimizes interruptions – especially crucial when crafting with eager little hands! Most of these items are probably already lurking in your craft drawer, but a quick check will ensure you're prepared for your reindeer hat craft for kids adventure.
Here's a comprehensive list of what you'll typically need, along with some optional additions for extra flair:
Core Materials:
-
Cardstock or Construction Paper:
- Brown: This will be the main color for the reindeer's head and antlers. Opt for varying shades if you want a more natural look.
- Red: Crucial for Rudolph's iconic nose! Red glitter cardstock adds an extra festive touch.
- Pink or Cream: For the inner ears and rosy cheeks.
- Sentence Strips or Extra Cardstock Strips: For the headband portion. These are sturdy and provide a good base for the hat.
- Scissors: Kid-safe scissors are a must for younger crafters. Ensure they are sharp enough to cut through paper easily.
- Glue: A glue stick is usually best for paper crafts, offering less mess and quicker drying times. Craft glue or tacky glue can be used for heavier embellishments like pompoms.
- Stapler and Staples: For securing the headband and perhaps reinforcing floppy antlers. Always supervise when using a stapler.
- Pencil: For tracing templates and marking cuts.
- Ruler: Handy for measuring headband strips and ensuring straight lines.
Optional Embellishments and Tools for Extra Sparkle:
- Wiggle Eyes: These add instant personality and a touch of whimsy to any creature craft.
- Red Pompoms: For a three-dimensional, fluffy Rudolph nose.
- Glitter (Bio-Glitter Preferred): Who doesn't love a bit of sparkle? Red glitter on the nose is classic, but gold or silver on the antlers can also be magical.
- Craft Sticks or Popsicle Sticks: Excellent for reinforcing flimsy antlers, especially if using thinner paper. Tape them to the back for added stability.
- Markers or Crayons: For coloring in black-and-white templates or adding extra details like smiles, eyelashes, or patterns to the antlers.
- Yarn or Pipe Cleaners: For a textured touch on antlers or to create hanging elements if turning the hat into a decoration.
- Hole Punch and Elastic String: If you prefer a chin strap over a full headband, a hole punch and elastic string work wonderfully.
- Paint: For a different artistic approach, children can paint their reindeer parts before assembling.
- Laminator: For making templates reusable or hats more durable if you plan on extended play or using them for a performance.
Preparing Your Workspace:
- Cover Your Work Surface: A tablecloth, old newspaper, or craft mat will protect your table from glue and stray glitter.
- Organize Materials: Keep everything within easy reach for both you and your child. Small bowls can hold pompoms or wiggle eyes.
- Have Wipes or Paper Towels Handy: For quick clean-ups of sticky fingers or spills.
By gathering these supplies, you're not just preparing for a craft; you're setting the stage for a delightful experience that encourages creativity and skill-building. Remember, at I'm the Chef Too!, we believe in providing everything you need for a complete experience, just like our kits come with pre-measured dry ingredients and specialty supplies. Ready for a new adventure every month? Join The Chef's Club and enjoy free shipping on every box!
Crafting Your Reindeer Hat: Step-by-Step Guides for Different Approaches
Now for the fun part – bringing your reindeer to life! We'll explore a few different methods for creating your reindeer hat craft for kids, from simple printable designs perfect for younger children to slightly more involved cut-and-paste versions for older crafters. Remember, adult supervision is always key, especially when using scissors or a stapler.
Method 1: The Classic Printable Reindeer Hat (Ages 3-6)
This is an excellent option for preschoolers and early elementary students, as it streamlines the cutting and assembly process, focusing more on coloring and gluing.
Supplies Needed:
- Printable reindeer hat template (many free versions available online, usually including a head, antlers, ears, and headband strips)
- Brown, red, pink/cream cardstock (or just white if coloring)
- Scissors (kid-safe)
- Glue stick
- Markers or crayons (if using black & white templates)
- Optional: Red pompom, wiggle eyes, glitter
Step-by-Step Instructions:
- Print Your Template: Download and print your chosen reindeer template. For a sturdier hat, print directly onto colored cardstock (brown for the head/antlers, red for the nose, pink/cream for ears) or print onto white paper and trace the shapes onto colored cardstock. For a coloring activity, print the black-and-white template onto white cardstock.
- Coloring (Optional): If using a black-and-white template, invite your child to color in the reindeer's head, antlers, and ears using their favorite shades of brown, red, and pink. This adds a personal touch and enhances fine motor skills.
- Cut Out the Pieces: Carefully cut out all the template pieces: the reindeer head, two antlers, two ears, and the headband strips. Depending on your child's age and scissor skills, you might do the intricate cutting yourself or guide them.
-
Assemble the Face:
- Glue the inner pink or cream ear pieces onto the larger brown ear shapes.
- Glue the completed ears onto the top sides of the reindeer's head.
- Glue the antlers onto the top of the head, behind the ears, ensuring they stand upright.
- Attach wiggle eyes to the face. If you don't have wiggle eyes, draw eyes with a marker.
- For the nose, glue a red circle (cut from red cardstock) or a fluffy red pompom onto the center of the muzzle area. Add a smile with a black marker.
-
Create the Headband:
- Take the long headband strips. Measure around your child's head to determine the correct length. You'll likely need to tape or staple two strips together for an adult or larger child's head.
- Glue or staple one end of the headband strip to the back of one side of the reindeer's head (at about ear level).
- Wrap the strip around your child's head and mark where the other end needs to be attached.
- Staple or glue the other end of the strip to the other side of the reindeer's head, creating a snug but comfortable loop. Secure any staples with a bit of tape for comfort.
Method 2: The Cut-and-Paste Reindeer Hat (Ages 6+)
This method offers more flexibility in design and is great for practicing basic geometric shapes and independent assembly.
Supplies Needed:
- Brown, red, pink/cream cardstock
- Scissors
- Glue stick
- Black marker
- Ruler
- Pencil
- Optional: Wiggle eyes, red pompom, glitter, craft sticks
Step-by-Step Instructions:
-
Prepare the Headband:
- Measure a piece of brown cardstock around your child's head to get the circumference. You may need to tape two pieces together for a larger head.
- Cut the paper into a long strip, about 2-3 inches wide.
- Wrap it around your child's head again, double-checking the fit.
- Staple the ends together to form a sturdy headband loop. (You can also wait to staple it until all the face pieces are on to ensure correct placement).
-
Shape the Reindeer's Head:
- On a separate piece of brown cardstock, draw a large oval or a rounded rectangle for the reindeer's face. Cut it out. This will be attached to the front of the headband.
-
Create the Antlers:
- Fold a piece of brown cardstock in half.
- Draw one antler shape along the fold. Think branching tree limbs!
- Cut out the antler shape while the paper is folded to get two identical antlers.
- For extra stability, glue craft sticks to the back of the antlers if they are thin.
-
Make the Ears:
- Cut out two larger ear shapes from brown cardstock and two smaller, inner ear shapes from pink or cream cardstock.
- Glue the inner ears onto the brown ears.
-
Assemble the Face:
- Glue the ears onto the top sides of the reindeer's head shape.
- Glue the antlers behind the ears, attaching them firmly to the back of the head shape.
- Draw or attach wiggle eyes.
- Cut a circular muzzle from a lighter shade of brown or cream cardstock and glue it onto the bottom half of the head.
- Glue a red circle or a red pompom onto the muzzle for the nose.
- Draw a smile with a black marker.
-
Attach to Headband:
- Once the reindeer's face is complete, carefully glue or staple the entire face piece onto the front of the prepared headband loop. Ensure it's centered and secure.
Method 3: The Minimalist Headband (Ages 2-4 with adult help)
This simplified version focuses on just the antlers and a red nose, perfect for very young children or when time is short.
Supplies Needed:
- Brown cardstock (for antlers)
- Red cardstock or a red pompom (for the nose)
- Headband strip (brown cardstock or a sentence strip)
- Scissors, glue stick, stapler
Step-by-Step Instructions:
- Headband Base: Create the headband loop as described in Method 2, step 1.
- Antlers: Draw and cut out two simple antler shapes from brown cardstock.
- Nose: Cut out a red circle or use a red pompom.
-
Assembly:
- Staple or glue the antlers to the inside top of the headband, spaced appropriately.
- Glue the red nose directly onto the front center of the headband, between the antlers.
- Add drawn eyes if desired directly onto the headband or just enjoy the simple, iconic look!
No matter which method you choose for your reindeer hat craft for kids, the key is to have fun and enjoy the creative process with your children. These hands-on activities are a fantastic way to develop skills and create cherished memories. If your family enjoys engaging in such creative learning experiences, you'll love our Chef's Club subscription boxes, which deliver new educational adventures right to your door every month.
Expanding the Reindeer Fun: Integrating Crafts with STEM and Storytelling
At I'm the Chef Too!, our unique approach is all about teaching complex subjects through tangible, hands-on, and delicious cooking adventures. This same philosophy can be applied to a simple reindeer hat craft for kids, transforming it from a standalone activity into a springboard for broader learning and imaginative play. Let's explore how we can connect our festive reindeer creations to STEM, literacy, and even some culinary fun!
STEM Connections with Your Reindeer Hat
Even a paper hat can open doors to scientific exploration and engineering principles.
- Engineering Challenges: "How can we make the antlers stand up straight without flopping?" This question introduces basic engineering concepts. Children might experiment with different materials (cardstock vs. construction paper), reinforcements (craft sticks, pipe cleaners), or attachment methods (glue vs. staples vs. tape). They're learning about structural integrity, weight distribution, and problem-solving through trial and error. This is real-world physics in action, disguised as fun!
- Measurement and Geometry: Crafting involves precise cutting and measuring. "How long should the headband be to fit your head?" "What shape is the reindeer's nose? A circle!" Children naturally engage with concepts of circumference, basic shapes, and spatial awareness as they assemble their hats.
- Material Science (Sensory Exploration): Discussing the properties of different materials used – the smooth texture of cardstock, the fluffiness of a pompom, the stickiness of glue, the shine of glitter – introduces early material science concepts. Why does glitter stick to glue but not dry paper? It’s all about surface tension and adhesion!
Igniting Literacy and Storytelling
The finished reindeer hat isn't just an accessory; it's a prop for endless stories and dramatic play.
- Reindeer Read-Alouds: Before or after crafting, immerse yourselves in beloved reindeer stories. Classics like "Rudolph the Red-Nosed Reindeer" or "Dasher: The Reindeer Who Didn't Want to Fly" can inspire creativity and provide context for their craft. Reading together enhances vocabulary, comprehension, and a love for books.
- Character Play and Role-Playing: Once the hats are on, encourage children to become their reindeer characters. "What's your reindeer's name? What special talent does it have? What kind of adventures will it go on?" This fosters imaginative play, builds confidence, and develops narrative skills. They might even act out their favorite parts of a story or create entirely new ones.
- Writing Prompts: For older children, the reindeer hat can inspire writing. "If I were a reindeer, I would..." or "My reindeer's Christmas adventure." This connects the craft to creative writing, allowing them to express their ideas and practice their penmanship. You could even create a "reindeer parade" where each child introduces their reindeer and its story.
Culinary Connections: Delicious Reindeer Treats!
Since we're I'm the Chef Too!, we can't resist bringing food into the mix! Just like our kits turn baking into a scientific exploration, these ideas can add a delicious dimension to your reindeer theme.
- Reindeer Antler Pretzels: Dip pretzel rods into melted chocolate, then press on mini pretzels at the top to create edible antlers. Add a red candy nose! This simple snack incorporates geometry (lines, angles) and chemistry (melting chocolate!).
- Reindeer Cookie Decorating: Bake or buy plain sugar cookies and let children decorate them to look like reindeer using icing, candies, and sprinkles. They can practice drawing faces, adding antlers with pretzel sticks, and, of course, giving Rudolph his famous red nose. This is a delightful way to explore patterns, colors, and unleash culinary creativity.
- Reindeer Chow (Muddy Buddies): A mix of Chex cereal, melted chocolate, peanut butter, and powdered sugar makes for a delicious and easy-to-make "reindeer food." Children can help measure ingredients, mix, and shake, engaging in practical math and chemistry. If your little one loves movie characters and delicious treats, they might enjoy making Peppa Pig Muddy Puddle Cookie Pies with one of our specific kits!
By weaving these elements together, your reindeer hat craft for kids becomes more than just an art project; it becomes a multi-faceted learning experience. It’s about sparking curiosity, facilitating family bonding, and providing a screen-free educational alternative that truly engages the mind and hands. Ready to continue the learning fun? Discover even more engaging themes and kits by browsing our complete collection of one-time kits. And for ongoing adventures delivered right to your door, consider joining our Chef's Club and enjoy free shipping on every box!
Tips for a Smooth and Stress-Free Crafting Session
Crafting with kids is a joyful experience, but a little preparation can go a long way in ensuring it remains stress-free and fun for everyone. Here at I'm the Chef Too!, we understand the dynamics of family activities, and these practical tips, developed by mothers and educators, are designed to help your reindeer hat craft for kids session be as delightful as possible.
Set Up for Success
- Prepare Your Workspace: Before your children even sit down, lay out an old tablecloth, newspaper, or a designated craft mat. This protects your surfaces from glue, glitter, and markers, making cleanup much easier.
- Pre-Cut Where Necessary: For younger children, pre-cutting some of the more intricate shapes (like the antler outlines or small inner ear pieces) can significantly reduce frustration and keep the activity flowing. Older children can practice their scissor skills, but don't hesitate to lend a hand if needed.
- Organize Materials: Place all the necessary supplies in individual bowls or clearly separated piles. Having everything within easy reach, categorized by color or type, helps children easily find what they need and encourages independence. For instance, put all red items (pompoms, glitter, paper) in one spot for Rudolph's nose.
- Visual Aids: If you're following a template or specific design, have a completed example or clear step-by-step pictures on hand. Visual instructions are often more effective than verbal ones for young children.
Managing Expectations (Your Own and Theirs!)
- Embrace Imperfection: Remember, the goal isn't to create a perfectly symmetrical, magazine-worthy reindeer hat. It's about the process, the learning, and the joy of creation. Encourage your child's unique artistic expression, even if their reindeer ends up with mismatched eyes or a glitter beard!
- Focus on the Process, Not Just the Product: Celebrate every snip, every glue application, and every decision your child makes. Praise their effort and creativity more than the final outcome. This builds confidence and fosters a love for hands-on activities.
- Short and Sweet: Adjust the complexity and duration of the craft to your child's attention span. It's better to have a short, engaging session than a long, frustrating one. You can always break the activity into smaller steps over multiple days if needed.
Engaging Your Little Crafters
- Give Clear, Simple Instructions: Break down each step into manageable chunks. Instead of "Make the head," try "First, let's find the big brown circle. Now, can you put glue on the back?"
- Offer Choices (Within Limits): Give children a sense of control by offering choices. "Would you like a glitter nose or a pompom nose?" or "Which color marker will you use for the smile?" This boosts their autonomy and engagement.
- Tell a Story: Weaving a little narrative into the crafting process can make it more engaging. "This little reindeer needs his ears so he can hear Santa's sleigh bells!" or "Let's give him a super sparkly red nose so he can light up the way!"
- Sing Songs: Put on some festive music! Holiday tunes can create a cheerful atmosphere and make the crafting feel even more special.
Cleanup Strategies
- Involve Your Child: Make cleanup part of the activity. Assign simple tasks like "Put all the markers back in the box" or "Throw the paper scraps in the trash." This teaches responsibility and reinforces the idea that every activity has a beginning, middle, and end.
- Quick Wipes: Keep baby wipes or a damp cloth nearby for quick hand and surface cleanups, especially after using glue or glitter.
By following these tips, your reindeer hat craft for kids session will be filled with smiles, learning, and treasured memories, perfectly aligning with our commitment at I'm the Chef Too! to facilitate family bonding through engaging, screen-free educational alternatives. Looking for more convenient ways to spark creativity and learning? Consider our Chef's Club subscription, delivering new adventures to your door every month.
Expanding the Fun Beyond the Hat: Reindeer-Themed Activities and Learning
Creating a delightful reindeer hat craft for kids is just the beginning! At I'm the Chef Too!, we believe in extending the learning and fun, turning a single activity into a broader, enriching experience. Our mission is to spark curiosity and creativity, and these additional reindeer-themed ideas are perfect for keeping that educational momentum going, blending arts, STEM, and even some delicious cooking.
Reindeer Games and Movement
Once the hats are made, it’s time to move! Physical activity is crucial for development, and imaginative play makes it extra fun.
- Reindeer Relay Race: Have children put on their hats and pretend to be reindeer pulling Santa's sleigh. Set up a simple obstacle course in your living room or backyard.
- "Pin the Nose on Rudolph": A classic party game, easily adapted with a large drawing of a reindeer face and red pompom "noses."
- Reindeer Freeze Dance: Play some festive music, and when the music stops, everyone freezes like a statue. This is great for listening skills and gross motor control.
Culinary Adventures: Edible Reindeer Treats
What better way to combine learning with deliciousness than by bringing your reindeer theme into the kitchen? This aligns perfectly with our hands-on cooking adventures!
- Reindeer Rice Krispie Treats: Mold Rice Krispie treats into reindeer head shapes, use pretzel sticks for antlers, and M&Ms or red candies for the nose and eyes. This is a fantastic opportunity for measuring, mixing, and understanding how ingredients combine.
- "Reindeer Munch" Snack Mix: Combine pretzels, Cheerios, M&Ms, chocolate chips, and mini marshmallows. Children can help measure and mix, practicing early math skills.
- Hot Cocoa Bar with Reindeer Marshmallows: Make or buy hot cocoa, and let kids decorate marshmallows to look like tiny reindeer faces using edible markers and mini pretzels. This is a fun science experiment in melting and dissolving! If your family loves unique edible creations, you might enjoy exploring astronomy by creating your own edible solar system with our Galaxy Donut Kit.
Science and Nature: Learning About Real Reindeer
Beyond the festive imagery, real reindeer are fascinating creatures!
- Reindeer Facts Exploration: Watch short documentaries or read non-fiction books about reindeer. Where do they live? What do they eat? Why do they shed their antlers? This introduces biology and geography.
- Antler Study: Collect fallen branches or twigs and compare them to the shape of reindeer antlers. Discuss why animals have antlers and how they grow. This is an exciting way to observe natural patterns and forms.
- "Snow" Experiments: If you're exploring winter, try a simple "fake snow" experiment using baking soda and conditioner. Children can then play with their reindeer in this sensory snow, much like how a chemical reaction makes our Erupting Volcano Cakes bubble over with deliciousness in our kits!
Extending the Creativity: Reindeer Art Projects
- Reindeer Handprint or Footprint Art: Use brown paint to make a handprint or footprint, then add antlers, eyes, and a red nose to turn it into a reindeer. These make wonderful keepsakes.
- Reindeer Drawing Challenge: Provide various art supplies (crayons, markers, watercolors) and challenge children to draw their favorite reindeer, real or imaginary.
By integrating these diverse activities, your reindeer hat craft for kids becomes a central piece in a rich tapestry of learning. It’s about building confidence, developing key skills, and creating joyful family memories – all core to our philosophy at I'm the Chef Too!. We are committed to providing screen-free educational alternatives that spark curiosity and creativity.
For families seeking a structured way to continue these hands-on educational adventures, consider joining our Chef's Club. Each month, a new kit arrives at your door with everything you need for a unique blend of food, STEM, and the arts. And if you’re not ready for a subscription, remember you can always browse our complete collection of one-time kits to find the perfect adventure for your little learner.
Conclusion
As we wrap up our creative journey, it's clear that a simple reindeer hat craft for kids is far more than just a festive accessory. It's a gateway to a world of learning, imagination, and cherished family moments. We've explored how this engaging activity acts as a powerful tool for developing crucial fine motor skills, boosting creativity, fostering problem-solving abilities, and enhancing focus. More importantly, it provides a wonderful opportunity for screen-free family bonding, allowing you to connect and create together in a meaningful way.
At I'm the Chef Too!, our mission is to blend food, STEM, and the arts into one-of-a-kind "edutainment" experiences, sparking curiosity and creativity in children. The joy and learning derived from making a reindeer hat perfectly embody our values – emphasizing tangible, hands-on adventures that teach complex subjects in an accessible, fun, and delicious way. By engaging in crafts like these, you're not just making a hat; you're nurturing a love for learning, building confidence, and creating memories that will last a lifetime.
Why stop the fun here? The spirit of curiosity and hands-on discovery that you brought to life with your reindeer hats can continue all year long. Imagine a new, exciting adventure delivered directly to your home every month, complete with pre-measured dry ingredients and specialty supplies, ready to transform your kitchen into a learning lab.
Ready for a new adventure every month? Join The Chef's Club and enjoy free shipping on every box!
Our monthly subscription boxes offer a unique blend of culinary delights and engaging STEM projects, all developed by mothers and educators to inspire young minds. Give the gift of learning that lasts all year with a 3, 6, or 12-month pre-paid plan. It's the perfect way to keep that spark of curiosity alive, facilitate family bonding, and provide a continuous stream of screen-free educational fun. Don't miss out on the magic of learning through doing.
Click here to join The Chef's Club today and start your next delicious STEM adventure!
FAQ: Your Reindeer Hat Craft Questions Answered
We know you might have a few lingering questions as you plan your reindeer hat crafting session. Here are some frequently asked questions to ensure your experience is as smooth and enjoyable as possible!
Q1: What age group is this reindeer hat craft best suited for?
A1: The beauty of the reindeer hat craft for kids is its versatility!
- Ages 2-4: With significant adult help (pre-cutting, guiding hand-over-hand), they can enjoy coloring and gluing larger pieces. The minimalist headband approach is perfect here.
- Ages 5-7: Can independently cut and glue, and follow simple multi-step instructions. The classic printable template works wonderfully.
- Ages 8+: Can handle more intricate cutting, detailed embellishments, and might enjoy designing their own antler shapes. The cut-and-paste method offers more creative freedom.
Always tailor the complexity to your child's individual skill level and attention span.
Q2: What if I don't have all the suggested materials? Can I still make a great reindeer hat?
A2: Absolutely! Don't let a missing item stop your creativity. The beauty of crafting is improvisation.
- No brown paper? Use white paper and have kids color it brown with crayons, markers, or even paint.
- No red pompom? Cut a red circle from any red paper, fabric, or even a piece of red felt.
- No wiggle eyes? Draw eyes with a black marker or use small paper circles.
- No cardstock? Thinner construction paper works, though the hat might be less durable. You can reinforce floppy antlers with tape and a craft stick or even a folded piece of paper.
Q3: How do I make the hat fit different head sizes?
A3: The key is the headband strip.
- Measure: Always measure the strip around the child's head before stapling or gluing it into a loop.
- Extend: For larger heads (including adults who want to join the fun!), you'll likely need to tape or staple two or more headband strips together to achieve the desired length.
- Adjustable: You can also add a small piece of elastic string (threaded through holes punched at the ends of the headband) instead of stapling the paper directly, offering more flexibility.
Q4: How can I make the reindeer hat more durable for extended play?
A4:
- Use Cardstock: Thicker paper like cardstock holds up much better than regular construction paper.
- Laminate: If you have a laminator, laminate the main reindeer head and antlers before cutting them out. This makes them waterproof and tear-resistant.
- Reinforce: For antlers, glue a craft stick, popsicle stick, or even a folded strip of cardstock to the back of each antler. Use strong tape for a secure hold.
- Strong Adhesives: For embellishments, hot glue (adult use only!) or tacky craft glue provides a stronger hold than a glue stick.
Q5: My child gets frustrated easily when cutting or gluing. Any tips?
A5:
- Pre-cut tricky parts: For children under 5, pre-cutting the more complex shapes (like detailed antlers) can prevent frustration. Let them focus on simpler cutting.
- Break it down: Offer one step at a time. "First, let's cut out the head. Great job! Now, let's find the ears."
- Focus on the fun, not perfection: Remind them that it's okay if it's not perfect. The goal is to have fun creating!
- Use glue dots or tape: If liquid glue is too messy or glue sticks too difficult, try using pre-cut tape pieces or glue dots for attaching small items.
Q6: How can I turn this into a group activity for a classroom or party?
A6: This is a fantastic group craft!
- Station Approach: Set up different stations: a "cutting station," a "coloring station," an "assembly station," and an "embellishment station."
- Pre-prep: Pre-cut all the pieces for younger groups to save time and reduce chaos.
- Have examples: Display a finished hat and clear step-by-step visuals.
- Volunteer Helpers: Enlist parents or older children to help at each station.
If you're an educator or run a group program, remember that I'm the Chef Too! offers versatile programs for schools and groups, available with or without food components. Learn more about our school and group programs here to bring hands-on STEM adventures to even more children.