Table of Contents
- Introduction
- What Exactly Is a Chemical Reaction?
- Why Bring Chemical Reactions into Your Kitchen (or Classroom)?
- Safety First: Essential Tips for Kitchen Chemistry
- Our Favorite Chemical Reaction Science Experiments for Kids (with Household Ingredients!)
- Taking the Learning Further: Beyond the Reaction
- Seamless Learning with I'm the Chef Too!
- Conclusion
- FAQ Section
Imagine a moment of pure wonder: your child watches wide-eyed as a mixture fizzes, bubbles, or changes color right before their eyes. It’s not magic; it’s chemistry! And it’s happening all around us, every single day. From the fluffy cakes we bake to the surprising eruption of a homemade volcano, chemical reactions are the exciting backbone of our world, transforming ordinary ingredients into extraordinary experiences.
At I'm the Chef Too!, we believe that learning should be an adventure—a delicious, hands-on journey that sparks genuine curiosity. That's why we meticulously blend food, STEM, and the arts into one-of-a-kind "edutainment" experiences. We understand that complex subjects, when taught through tangible, engaging activities like cooking, become accessible and incredibly fun for children. This blog post is designed to demystify chemical reactions, offering a treasure trove of simple, safe, and exciting chemical reaction science experiments for kids that you can do right at home or in a classroom setting, proving that science isn't just for laboratories, but for kitchens too! We'll explore what makes things fizz and pop, how colors can magically change, and what truly happens when substances transform, all while building confidence, critical thinking skills, and unforgettable family memories.
Introduction
Have you ever wondered why bread rises, or how a bath bomb creates such a delightful fizzy spectacle? These aren't just everyday occurrences; they're fascinating examples of chemical reactions in action! For children, understanding these transformations can unlock a whole new appreciation for the world around them, turning seemingly mundane moments into opportunities for scientific discovery. The thought of "chemistry" might conjure images of complex equations and sterile labs, but the reality for kids is much more vibrant and accessible, often involving ingredients found right in your pantry.
The purpose of this comprehensive guide is to empower parents and educators with easy-to-understand explanations and engaging, hands-on chemical reaction science experiments for kids that can be conducted safely and effectively. We'll dive into what a chemical reaction truly is, why these experiments are so beneficial for young minds, and provide a collection of exciting activities using common household items. From erupting volcanoes to color-changing concoctions, you'll find everything you need to ignite a passion for science in your little learners. Our goal is to transform your kitchen into a dynamic learning space where curiosity is celebrated, creativity flourishes, and every experiment is a step towards understanding the amazing chemical world.
What Exactly Is a Chemical Reaction?
At its core, a chemical reaction is a process that involves the rearrangement of the molecular or ionic structure of a substance, as distinct from a change in physical form or a nuclear reaction. In simpler terms, it's when two or more substances mix together and create something entirely new! Think of it like building with LEGOs: you might have a pile of individual bricks (your starting substances, or reactants), and when you put them together in a specific way, you create a new structure (your product). The individual bricks are still there, but their arrangement has changed, forming something with different properties.
This is different from a physical change, where a substance might change its form but not its chemical identity. For instance, when an ice cube melts into water, it's still H2O—just in a liquid state instead of a solid. If you freeze it again, it's still H2O. However, if you bake a cake, the raw batter (a mix of eggs, flour, sugar, etc.) undergoes a chemical reaction in the heat of the oven. The cake you pull out is fundamentally different from the batter; you can't simply "unbake" it back into its original ingredients. New substances have been formed, and the change is irreversible.
How can you tell if a chemical reaction has occurred? Your senses are your best scientific tools! Look for these tell-tale signs:
- Bubbling or Fizzing (Gas Formation): This is one of the most exciting and recognizable signs. Think of a soda opening or baking soda mixing with vinegar. The bubbles indicate a new gas is being produced.
- Color Change: If you mix two clear liquids and they suddenly turn vibrant blue, you've witnessed a chemical change!
- Temperature Change: Some reactions release heat (exothermic), making the mixture warmer, while others absorb heat (endothermic), making it feel colder.
- Odor Change: A new smell, whether pleasant or not, can signal that new substances have formed.
- Light Production: Sometimes, a reaction might produce light, like a glow stick.
- Formation of a Precipitate: This is when two liquids mix and form a new solid that doesn't dissolve, making the mixture cloudy or forming clumps.
Understanding these observable signs transforms children into real-life detectives, scrutinizing experiments for clues that a transformation is underway. This foundational knowledge is crucial for appreciating the chemistry at play in everything from cooking to digestion, and it lays the groundwork for more complex scientific understanding in the future.
Why Bring Chemical Reactions into Your Kitchen (or Classroom)?
Beyond the sheer awe factor, engaging children in chemical reaction science experiments offers a wealth of developmental benefits. At I'm the Chef Too!, we wholeheartedly believe in the power of hands-on learning, especially when it integrates the delicious fun of cooking with core STEM principles. Here’s why these activities are so invaluable:
- Making Abstract Concepts Concrete: Chemistry can seem daunting, filled with invisible atoms and molecules. But when children see baking soda fizz with vinegar, or milk transform into "plastic," these abstract concepts become tangible and real. They can observe, touch, and even taste the results of chemical changes, embedding the learning deeper than any textbook ever could.
- Sparking Curiosity and Inquiry: The "what if?" question is the cornerstone of scientific discovery. When kids are actively involved in experiments, they naturally start asking questions: "What if we add more?", "What if we use something else?", "Why did that happen?" This innate curiosity is what drives innovation and critical thinking.
- Developing Observation Skills: Paying close attention to how things change, noting colors, sounds, smells, and textures, hones crucial observational skills. Children learn to document their findings, whether through drawing, describing, or simple journaling, a fundamental practice in scientific methodology.
- Boosting Confidence and Problem-Solving: Successfully completing an experiment, even a simple one, gives children a tremendous sense of accomplishment. When things don't go as expected (which happens often in science!), they learn to troubleshoot, adapt, and think critically about what might have gone wrong, fostering resilience and problem-solving abilities.
- Screen-Free Engagement and Family Bonding: In a world increasingly dominated by screens, these hands-on activities offer a refreshing, engaging, and educational alternative. They create opportunities for families to work together, communicate, and share moments of discovery, strengthening bonds and creating cherished memories. Our mission at I'm the Chef Too! is to facilitate just this kind of joyful, screen-free family learning.
- Fostering a Love for Learning: When science is presented as an exciting game rather than a chore, children are far more likely to develop a lifelong love for learning. The "edutainment" approach, which is central to our philosophy, ensures that fun and education go hand-in-hand, making every experience a positive and enriching one.
- Connecting to Real-World Applications: Chemical reactions aren't confined to the lab; they're happening in our bodies, our kitchens, and our environment constantly. These experiments help children see the science in their everyday lives, from why fruit browns to how soap cleans.
By integrating food, STEM, and the arts, I'm the Chef Too! ensures that these learning moments are not only educational but also incredibly fun and memorable. We are committed to nurturing the next generation of curious thinkers, innovators, and problem-solvers, one delicious chemical reaction at a time. Ready to bring the magic of chemistry home? Join The Chef's Club today and have new adventures delivered to your door every month!
Safety First: Essential Tips for Kitchen Chemistry
While many chemical reaction science experiments for kids use common household items, safety should always be your top priority. Think of yourself as the lead scientist, responsible for creating a safe and supervised environment. Here are some essential guidelines to ensure your kitchen chemistry adventures are both fun and secure:
- Adult Supervision is Non-Negotiable: Every experiment, regardless of how simple, requires direct adult supervision. An extra set of eyes can prevent spills, misuse of materials, and ensure all instructions are followed correctly.
-
Wear Protective Gear:
- Eye Protection: Goggles are highly recommended, especially for experiments involving fizzing, bubbling, or potential splashes. Old sunglasses can offer some protection in a pinch.
- Gloves: Disposable gloves can protect sensitive skin from certain chemicals (like hydrogen peroxide or strong acids/bases) and help keep hands clean from food coloring.
- Old Clothes/Aprons: Accidents happen! Dress in clothes you don't mind getting messy, or wear an apron to protect clothing from stains and spills.
-
Choose a Suitable Workspace:
- Well-Ventilated Area: Some reactions might produce odors or gases; good ventilation is key. Open a window or conduct experiments outdoors if possible.
- Easy-to-Clean Surface: Cover your work area with old newspapers, a plastic tablecloth, or a baking sheet to contain messes and simplify cleanup.
- Keep it Clear: Remove any unnecessary items from the workspace to prevent accidental knocking over or contamination.
- "Taste, Don't Eat" (Unless Otherwise Stated): While many of our I'm the Chef Too! kits focus on edible science, many general chemical experiments are not for consumption. Clearly communicate to children which experiments are safe to eat (like bread in a bag) and which are strictly for observation. Emphasize that even common ingredients can be harmful if not used as intended.
- Understand Your Ingredients: Before starting, quickly review the safety information for all materials, especially if using anything beyond basic kitchen staples. Know what to do if something gets in eyes or on skin.
- Proper Disposal: Follow local guidelines for disposing of chemical waste. Most household experiment waste can go down the drain with plenty of water, but it's always good to be mindful.
- Keep a First-Aid Kit Handy: For minor cuts or irritations, having a basic first-aid kit nearby is always a good idea.
By establishing these safety protocols from the outset, you not only protect your children but also instill in them a respect for scientific procedures and responsible experimentation. Now, with safety ensured, let's dive into some truly captivating chemical reaction science experiments for kids!
Our Favorite Chemical Reaction Science Experiments for Kids (with Household Ingredients!)
Get ready to transform your kitchen into an exhilarating science lab! These chemical reaction science experiments for kids are designed to be fun, educational, and easy to set up with everyday items. Each activity highlights a different type of chemical change, encouraging keen observation and curious questioning.
Fizzing Favorites (Acid-Base Reactions)
Acid-base reactions are some of the most dramatic and easily observable chemical changes, often producing exciting fizzing and bubbling due to the release of carbon dioxide gas.
1. The Classic Erupting Volcano
What you'll observe: A spectacular foamy "lava" eruption! Simple Explanation: This iconic experiment demonstrates an acid-base reaction. Baking soda is a base (sodium bicarbonate), and vinegar is an acid (acetic acid). When they mix, they react to produce carbon dioxide gas, which creates the bubbles and pressure for the eruption. Adding dish soap traps the gas, making the "lava" extra foamy and dramatic. Materials Needed:
- Baking soda (1-2 tablespoons)
- White vinegar (about 1/2 cup)
- Dish soap (a squirt)
- Red or orange food coloring (optional)
- A small container (like a plastic bottle or jar) to be your volcano
- A tray or basin to catch the overflow Procedure:
- Place your "volcano" container on a tray.
- Add the baking soda to the container.
- Add a squirt of dish soap and a few drops of food coloring (if using) to the baking soda.
- Pour the vinegar into the container and watch the eruption! Discussion Points:
- What happens if you use more baking soda or more vinegar?
- How is this similar to what happens in a real volcano (though the chemistry is different)?
- For a truly immersive experience, explore geology and chemistry with our Erupting Volcano Cakes kit, where the chemical reaction makes your delicious treats bubble over!
2. Inflating Balloon Experiment
What you'll observe: A balloon magically inflates without you blowing into it! Simple Explanation: This is another excellent example of a baking soda and vinegar reaction, but instead of letting the gas escape, we trap it. The carbon dioxide gas produced inflates the balloon, showing that a new substance (gas) is being created. Materials Needed:
- Baking soda (2-3 tablespoons)
- White vinegar (about 1/2 cup)
- Empty plastic bottle (e.g., water bottle)
- A balloon
- A funnel (optional, but helpful) Procedure:
- Carefully pour the vinegar into the plastic bottle.
- Using a funnel, put the baking soda inside the balloon. Try not to let any fall into the bottle yet.
- Carefully stretch the opening of the balloon over the mouth of the bottle, ensuring a tight seal and that the baking soda is still inside the balloon, not in the vinegar.
- Once the balloon is securely attached, lift the balloon so the baking soda falls into the vinegar.
- Watch as the balloon inflates! Discussion Points:
- What happens to the balloon? Why do you think that is?
- Can you feel any temperature changes on the bottle? (It might get slightly cooler, an endothermic reaction).
3. The Naked Egg Experiment
What you'll observe: An eggshell that disappears, leaving a bouncy, rubbery egg! Simple Explanation: Eggshells are primarily made of calcium carbonate. Vinegar, an acid, reacts with the calcium carbonate in the shell, breaking it down and releasing carbon dioxide gas (you'll see tiny bubbles!). Over time, the entire shell dissolves, leaving the membrane-covered egg. Materials Needed:
- Raw egg (uncooked)
- White vinegar
- A clear glass or jar Procedure:
- Carefully place the raw egg into the glass.
- Pour enough vinegar over the egg to completely submerge it.
- Observe the egg; you should immediately see small bubbles forming on the shell.
- Leave the egg in the vinegar for 24-48 hours, changing the vinegar after 24 hours for best results.
- Gently rinse the egg under water to remove any remaining shell residue. Discussion Points:
- What are those bubbles? What do they tell us?
- Why did the eggshell disappear?
- Carefully, can you bounce your "naked egg"? What does it feel like? (Be gentle, the membrane can still break!)
4. Fizzy Lemon Play
What you'll observe: A frothy, bubbly, citrus-scented eruption! Simple Explanation: Similar to the volcano, this uses the acid in lemon juice and the base of baking soda to create a fizzing chemical reaction. Adding dish soap helps trap the gas, making it extra foamy and fun for sensory play. Materials Needed:
- Lemon, halved or quartered, or lemon juice
- Baking soda
- Liquid dish soap
- Food coloring (optional)
- A tray or shallow dish
- Spoon or dropper Procedure:
- Place the lemon halves on a tray.
- Sprinkle baking soda generously over the cut surface of the lemon.
- Add a few drops of dish soap and food coloring on top of the baking soda.
- Use a spoon or dropper to add more lemon juice (or gently squeeze the lemon itself) onto the baking soda.
- Watch the fizzing action and experiment with stirring it with a spoon! Discussion Points:
- What makes the bubbles?
- How does the smell change during the reaction?
- What other acidic fruits do you think might work?
5. Homemade Bath Bombs
What you'll observe: A colorful, fragrant fizz when dropped in water! Simple Explanation: Bath bombs work on the principle of an acid-base reaction, but with a twist! They typically contain citric acid and baking soda. When these dry ingredients come into contact with water, they dissolve and react, releasing carbon dioxide gas (the fizz!) and often a lovely scent and color. Materials Needed:
- 1 cup baking soda
- 1/2 cup citric acid (found in baking aisles or online)
- 1/2 cup cornstarch
- 2-3 tablespoons Epsom salts (optional, for skin soothing)
- 2-3 tablespoons carrier oil (e.g., coconut, almond, grapeseed)
- 1 teaspoon water
- Essential oils (optional, for scent)
- Food coloring (optional)
- Molds (e.g., silicone molds, plastic ornaments, muffin tins) Procedure:
- In a large bowl, whisk together all the dry ingredients: baking soda, citric acid, cornstarch, and Epsom salts.
- In a separate small bowl, mix the wet ingredients: carrier oil, water, essential oils, and food coloring.
- Slowly add the wet mixture to the dry ingredients, a few drops at a time, mixing well after each addition. The mixture should feel like damp sand and hold together when squeezed. If it starts fizzing too much, you've added too much liquid too quickly.
- Press the mixture firmly into your chosen molds. If using two-part molds, overfill each half slightly and press them together.
- Let the bath bombs dry in their molds for at least 24 hours (or up to 48 hours for best results).
- Gently remove from molds. Discussion Points:
- What happens when the bath bomb touches water? Why does it fizz?
- Why do we have to be careful when adding the liquid to the dry ingredients?
Color-Changing Wonders
Color changes are visually stunning indicators of chemical reactions, where new substances with different light-absorbing properties are formed.
1. Magic Milk Experiment
What you'll observe: A dazzling swirl of colors spreading and mixing in milk! Simple Explanation: This experiment elegantly illustrates concepts of surface tension and hydrophobic interactions. Milk contains fat. Dish soap disrupts the surface tension of the milk and reacts with the fat molecules. As the soap molecules chase and bind to the fat, they push the food coloring around, creating a vibrant, swirling show. Materials Needed:
- Shallow dish or plate
- Milk (whole milk works best due to higher fat content)
- Food coloring (multiple colors)
- Dish soap
- Cotton swabs Procedure:
- Pour a thin layer of milk into the shallow dish.
- Add several drops of different food colors onto the surface of the milk, spreading them out a bit.
- Dip one end of a cotton swab into dish soap.
- Gently touch the soap-coated swab to the center of the milk, then try touching other areas.
- Watch the colors dance and swirl! Discussion Points:
- What happens when the soap touches the milk?
- Why do the colors move?
- What do you think would happen with skim milk (less fat)?
2. Red Cabbage pH Indicator
What you'll observe: A vibrant spectrum of colors as liquids change from purple to pink, blue, or green! Simple Explanation: Red cabbage juice is a natural pH indicator. This means it contains a pigment called anthocyanin that changes color depending on whether it's in an acidic solution (like vinegar, which turns it pink/red) or a basic (alkaline) solution (like baking soda, which turns it blue/green/yellow). Materials Needed:
- Red cabbage
- Boiling water
- Strainer
- Clear cups or jars
- Various household liquids to test: lemon juice, vinegar, baking soda solution (baking soda mixed with water), soap solution, milk, tap water, etc. Procedure:
- Make the Indicator: Chop about 1/4 of a red cabbage. Place the chopped cabbage in a bowl and pour enough boiling water over it to cover. Let it steep for 10-15 minutes (or until the water turns a deep purple).
- Strain the liquid into a jar; this is your pH indicator. Let it cool.
- Test the Liquids: Pour a small amount of each household liquid you want to test into separate clear cups.
- Add a splash of the red cabbage indicator to each cup.
- Observe the color changes! Discussion Points:
- Which liquids turned pink/red? Which turned blue/green?
- What do the different colors tell us about the liquids?
- How does this help us understand what "acid" and "base" mean?
3. Invisible Ink
What you'll observe: A hidden message revealed by heat! Simple Explanation: Lemon juice is a mild acid. When you write with it, the "ink" is clear and dries invisibly on the paper. However, when heated, the compounds in the lemon juice oxidize (react with oxygen) and decompose, turning brown. This chemical reaction reveals your secret message! Materials Needed:
- Lemon juice (freshly squeezed or bottled)
- Cotton swab or paintbrush
- White paper
- Heat source (e.g., an adult-supervised iron on low setting, light bulb, or carefully held over a toaster - ADULT ONLY) Procedure:
- Dip a cotton swab or small paintbrush into lemon juice.
- Write a secret message or draw a picture on the white paper.
- Let the paper dry completely; the message will disappear.
- With adult supervision, carefully apply heat to the paper. If using an iron, press it gently over the paper. If using a light bulb, hold the paper close (but not touching) the warm bulb.
- Watch as your invisible message slowly appears! Discussion Points:
- What made the message appear?
- Do you think other acidic liquids, like orange juice, would work?
Energetic Explosions (Exothermic/Gas Production)
Some chemical reactions release energy, often as heat, making them feel warm. Others rapidly produce gas, creating dramatic visual effects.
1. Elephant Toothpaste
What you'll observe: A massive, foamy eruption that resembles toothpaste squeezing out of a giant tube! Simple Explanation: This is an exothermic (heat-releasing) reaction involving the rapid decomposition of hydrogen peroxide into water and oxygen gas. Yeast acts as a catalyst, speeding up this process. The dish soap traps the oxygen gas, creating the impressive foam. Materials Needed:
- Empty plastic bottle (e.g., water bottle)
- Hydrogen peroxide (3% solution, found in pharmacies – higher concentrations are dangerous and should not be used by kids)
- Packet of active dry yeast
- Warm water
- Dish soap
- Food coloring (optional)
- Tray or basin
- Safety goggles Procedure:
- Place the empty bottle on a tray or in a basin.
- Pour about 1/2 cup of hydrogen peroxide into the bottle.
- Add a good squirt of dish soap and a few drops of food coloring (if using). Swirl gently to mix.
- In a separate small cup, mix one packet of yeast with about 3 tablespoons of warm water. Stir until the yeast is dissolved.
- Pour the yeast mixture into the bottle and quickly step back!
- Observe the foamy reaction and carefully feel the bottle (it will be warm!). Discussion Points:
- What caused the huge foam?
- Why did the bottle get warm?
- What happens if you use cold water for the yeast instead of warm?
2. Alka-Seltzer Lava Lamp
What you'll observe: Colorful blobs rising and falling like a real lava lamp! Simple Explanation: This experiment combines density (oil and water don't mix) with a chemical reaction. When Alka-Seltzer (containing citric acid and baking soda) hits the water, it reacts to produce carbon dioxide gas. These gas bubbles attach to the colored water droplets, making them less dense and float to the top. When the gas escapes, the water droplets sink, creating the "lava lamp" effect. Materials Needed:
- Tall, clear bottle or jar
- Vegetable oil
- Water
- Food coloring
- Alka-Seltzer tablets (broken into pieces) Procedure:
- Fill the bottle about 1/4 to 1/3 full with water.
- Slowly pour vegetable oil into the bottle until it's nearly full, leaving a small space at the top. Notice how the oil and water separate.
- Add about 10-15 drops of food coloring. Watch them sink through the oil and mix with the water.
- Drop a piece of Alka-Seltzer tablet into the bottle.
- Watch the colorful blobs rise and fall! Add more pieces as the fizzing slows down. Discussion Points:
- Why do the oil and water stay separate?
- What makes the colored water blobs move up and down?
- For more cosmic fun, explore astronomy by creating your own edible solar system with our Galaxy Donut Kit, where science and art collide!
Transformative Textures
Some chemical reactions change the physical properties of substances, creating entirely new textures or forms.
1. DIY Slime
What you'll observe: Liquids transforming into a stretchy, gooey, non-Newtonian fluid! Simple Explanation: Slime is a polymer! When white school glue (a polymer itself, meaning long chains of molecules) is mixed with a borax solution (sodium tetraborate), a chemical reaction called cross-linking occurs. The borate ions from the borax link together the long chains of glue molecules, creating a new, gooey, stretchy substance that has properties of both a liquid and a solid. Materials Needed:
- 1/2 cup white school glue (PVA glue)
- 1/2 cup water (for glue mixture)
- 1 teaspoon Borax (sodium tetraborate)
- 1/2 cup warm water (for Borax solution)
- Food coloring (optional)
- Two bowls
- Measuring cups and spoons Procedure:
- In the first bowl, mix 1/2 cup of white school glue with 1/2 cup of water. Add food coloring if desired.
- In the second bowl, dissolve 1 teaspoon of Borax in 1/2 cup of warm water. Stir until fully dissolved.
- Slowly pour the Borax solution into the glue mixture while stirring continuously.
- As you stir, you'll see the mixture start to clump together and form slime.
- Once it's mostly formed, remove it from the bowl and knead it with your hands until it reaches the desired consistency. Discussion Points:
- What happened to the liquid glue and water?
- How is slime different from glue or water?
- Is slime a liquid or a solid? (It's a non-Newtonian fluid, acting like both!)
2. Milk Plastic (Casein Plastic)
What you'll observe: Liquid milk transforming into a hard, moldable "plastic"! Simple Explanation: Milk contains a protein called casein. When you add an acid (vinegar) to warm milk, a chemical reaction occurs that causes the casein proteins to unravel and coagulate, or clump together. This solid mass can then be molded and, once dry, forms a hard, plastic-like material. Materials Needed:
- 1 cup milk (whole milk works best)
- 4 tablespoons white vinegar
- Saucepan
- Strainer or cheesecloth
- Paper towels
- Cookie cutters or molds (optional) Procedure:
- Pour the milk into the saucepan and heat it gently over medium heat until it's steaming but not boiling.
- Remove the milk from the heat and slowly stir in the vinegar.
- You'll immediately see the milk curdle and separate into solid clumps (casein) and watery whey.
- Pour the mixture through a strainer or cheesecloth to separate the solid casein curds.
- Press out as much excess liquid as possible from the curds, using paper towels to blot them dry.
- Now you have milk plastic! You can mold it into shapes, use cookie cutters, or leave it to dry into a hard material for a few days. Discussion Points:
- What happened when you added vinegar to the milk?
- How did the texture change?
- What real-world materials do you think this is similar to? (Early plastics were made this way!)
3. Fermentation in a Bag
What you'll observe: A balloon inflating from a sugary yeast mixture! Simple Explanation: Fermentation is a chemical process where yeast (a living microorganism) converts sugars into alcohol and carbon dioxide gas. This experiment lets kids observe the gas production and the power of microscopic life. Materials Needed:
- 1 packet active dry yeast
- 1 tablespoon sugar
- 1/2 cup warm water
- Small plastic bottle or zip-top bag
- Balloon (if using a bottle) Procedure:
- In the bottle or bag, combine the warm water, sugar, and yeast. Stir gently to mix.
- If using a bottle, stretch a balloon over the opening. If using a bag, seal it, leaving some air trapped inside.
- Place the bottle or bag in a warm spot.
- Over the next 30 minutes to an hour (or longer), observe what happens. Discussion Points:
- What is happening inside the bottle/bag?
- What causes the balloon to inflate (or the bag to swell)?
- How do we use yeast in cooking (e.g., bread)?
These chemical reaction science experiments for kids are just the beginning of a lifelong journey of discovery. Each one offers a unique opportunity to explore fundamental scientific principles in a memorable, engaging way. Remember, the process of asking questions, observing, and experimenting is just as important as the outcome!
Taking the Learning Further: Beyond the Reaction
Once your children have experienced the thrill of these chemical reaction science experiments, the learning doesn't have to stop. These activities are excellent springboards for deeper scientific exploration and skill development.
-
Embrace the Scientific Method: Encourage your child to think like a scientist.
- Ask a Question: "What if...?" or "Why...?" are great starting points.
- Form a Hypothesis: "I think that if I add more baking soda, the volcano will erupt bigger because..."
- Experiment: Conduct the activity, making sure to only change one variable at a time.
- Observe and Record: What did you see, hear, smell, feel? Draw pictures, write notes, or create simple charts.
- Form a Conclusion: What did you learn? Was your hypothesis correct?
- Journaling and Drawing: Provide a dedicated "Science Journal" where children can record their experiments. They can draw what they see before, during, and after a reaction, write down their observations, and even sketch diagrams of the setup. This reinforces literacy and artistic expression alongside scientific inquiry.
- Vary the Ingredients and Quantities: What happens if you use lemon juice instead of vinegar? More or less of a certain ingredient? Colder or hotter water? These variations teach about variables and their impact on outcomes, fostering a deeper understanding of chemical principles.
- Connect to Real-World Applications: After an experiment, discuss where else they might see this kind of chemical reaction. How does a baking soda and vinegar reaction relate to baking a cake, or even cleaning? How is the milk plastic similar to other plastics they encounter? This helps children see the relevance of science in their daily lives.
- Encourage Critical Thinking: Ask open-ended questions: "Why do you think that happened?", "What surprised you?", "How could we make this even better?", "What problems did we encounter, and how did we solve them?"
At I'm the Chef Too!, we design our kits to foster exactly this kind of comprehensive learning. Our unique approach, developed by mothers and educators, ensures that every "edutainment" experience is rich with opportunities for critical thinking, creativity, and discovery. We want to empower families to engage in meaningful learning moments that go beyond the experiment itself, building a foundation for lifelong curiosity.
If you're looking to bring these enriching experiences to a larger group, whether it's for a classroom, a homeschool co-op, or a camp, we've got you covered. Learn more about our versatile programs for schools and groups, available with or without food components, and tailored to suit different needs!
Seamless Learning with I'm the Chef Too!
We know that life can be busy, and gathering all the specific ingredients and instructions for engaging chemical reaction science experiments for kids can sometimes feel like another chore. That's where I'm the Chef Too! steps in. Our mission is to make the magic of "edutainment" accessible and enjoyable for every family. We seamlessly blend food, STEM, and the arts into unique cooking adventures, taking the guesswork out of hands-on learning.
Imagine having a perfectly curated, screen-free educational experience delivered right to your doorstep, complete with pre-measured dry ingredients, specialty supplies, and easy-to-follow instructions developed by mothers and educators. That's the convenience and value we offer. Our kits are designed not just to teach scientific concepts, but to spark curiosity, unleash creativity, and build confidence in children as they create something delicious and learn something profound.
We focus on the benefits of the process: fostering a love for learning, developing key skills like observation and critical thinking, and creating joyful family memories that last a lifetime. While we can't promise your child will become the next Nobel laureate, we can guarantee a fun, enriching, and educational experience that lays a strong foundation for future learning.
Ready to embark on a new adventure every month? Join The Chef's Club and enjoy free shipping on every box, bringing delightful science experiments and culinary creations directly to your home! It's the perfect way to ensure a steady stream of engaging, educational fun without the hassle of planning. You can choose from flexible 3, 6, and 12-month pre-paid plans, perfect for gifting or long-term enrichment.
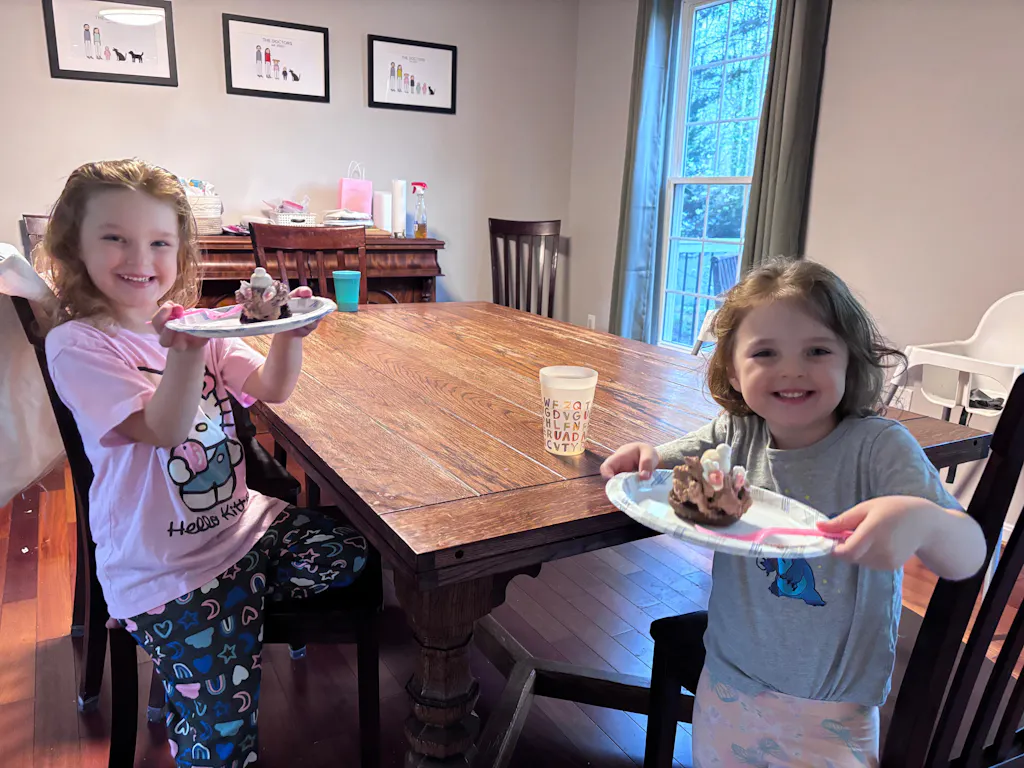
Not ready for a subscription just yet? No problem! You can still dive into the excitement of our STEM cooking adventures at your own pace. Explore our full library of adventure kits available for a single purchase in our shop, and find the perfect theme for your little learner! From exploring the cosmos with edible planets to digging for delicious "fossils," there's a kit for every curious mind. Even beloved characters can make learning fun, like when kids make Peppa Pig Muddy Puddle Cookie Pies – a sweet way to explore measurement and mixing!
And for our educational partners, remember that I'm the Chef Too! is also committed to supporting structured learning environments. Bring our hands-on STEM adventures to your classroom, camp, or homeschool co-op. Learn more about our versatile programs for schools and groups, available with or without food components, to perfectly fit your curriculum and needs. We're dedicated to making science and culinary arts engaging for everyone!
Conclusion
The world of chemical reaction science experiments for kids is a vibrant, exciting realm waiting to be discovered, often with ingredients already residing in your pantry. We've journeyed through the mesmerizing fizz of acid-base reactions, witnessed the magic of color changes, marveled at energetic transformations, and even created new textures from familiar liquids. These hands-on activities are more than just fun; they are powerful tools for sparking curiosity, developing critical thinking, and fostering a deep, enduring love for learning in children. By engaging in these simple yet profound experiments, we equip young minds with the foundational understanding and skills needed to make sense of the scientific wonders that surround them every day.
At I'm the Chef Too!, we are passionate about making science accessible, enjoyable, and delicious. Our thoughtfully designed kits embody the perfect blend of food, STEM, and the arts, turning complex concepts into tangible, memorable experiences. We believe that every child deserves the opportunity to explore, create, and discover in a screen-free, family-friendly environment.
Don't let the adventure stop here! Continue to nurture your child's innate curiosity and provide them with a world of exciting, educational experiences. Join The Chef's Club today and unlock a monthly delivery of expertly crafted, themed cooking STEM kits designed to inspire, educate, and delight. Ignite a lifelong passion for science and creativity—one delicious, educational adventure at a time!
FAQ Section
Q1: What exactly is a chemical reaction in simple terms for kids? A1: A chemical reaction is like a cooking experiment where you mix different ingredients (called reactants) together, and they change to create something completely new (called a product)! It's not just mixing; the ingredients actually transform into different substances. You can often tell a chemical reaction is happening if you see bubbles, a color change, or if something gets hot or cold.
Q2: Are chemical reaction experiments safe for young children? A2: Yes, many chemical reaction science experiments for kids are very safe and use common household ingredients. However, all experiments should always be conducted with direct adult supervision. It's important to use appropriate safety gear like goggles, work in a well-ventilated area, and emphasize that only edible ingredients should be tasted. At I'm the Chef Too!, safety is paramount, and our kits are designed with this in mind, making family-friendly learning a priority.
Q3: What are the easiest chemical reaction experiments to start with? A3: The easiest experiments often involve baking soda and vinegar! Creating a "volcano" that fizzes and bubbles, or using the reaction to inflate a balloon, are fantastic and highly visible introductions. The "Magic Milk" experiment with food coloring and dish soap is another simple, mesmerizing option that demonstrates surface tension and chemical interaction.
Q4: How can I make these experiments more educational for my child? A4: Encourage your child to ask "what if" questions, make predictions (hypotheses), observe carefully, and record their findings (by drawing or writing). Discuss what they see, hear, and feel during the experiment. Connect the science to everyday life, like how baking soda helps cakes rise. Our I'm the Chef Too! kits are specifically designed to prompt these kinds of educational discussions and hands-on learning.
Q5: What's the difference between a chemical change and a physical change? A5: A physical change is when a substance changes its form but not its identity. For example, melting an ice cube into water is a physical change because it's still H2O. A chemical change (or reaction) is when a substance changes into an entirely new substance with different properties. Baking a cake, for instance, is a chemical change because the batter turns into something new and you can't easily reverse it back to the original ingredients.
Q6: What if an experiment doesn't work as expected? A6: That's a great learning opportunity! In science, experiments don't always go perfectly, and that's okay. Encourage your child to troubleshoot: "What might have been different?", "Did we use the right amounts?", "Was the water the right temperature?" This teaches problem-solving and perseverance, vital scientific skills.
Q7: How do I get more hands-on STEM cooking kits like those mentioned? A7: It's easy! Join The Chef's Club for a monthly delivery of unique "edutainment" kits, complete with pre-measured ingredients and step-by-step instructions. You can also browse our full collection of one-time kits in our shop to find specific themes that spark your child's interest. We're dedicated to bringing the joy of food, STEM, and art right to your home.