Table of Contents
- Introduction
- The Developmental Benefits of Mosaic Art
- Essential Materials for Your Mosaic Toolkit
- Step-by-Step: Traditional Tile Mosaics for Older Kids
- Air Dry Clay Mosaics: A Sensory Adventure
- Edible Mosaics: Art You Can Eat!
- Paper and Nature Mosaics: Easy and Eco-Friendly
- Tips for Success and Safety
- Why Hands-On Edutainment Matters
- Troubleshooting Common Mosaic Challenges
- Advanced Ideas: Taking Mosaics Further
- Frequently Asked Questions
- Conclusion
Introduction
Have you ever watched a child find a smooth, sparkling pebble on the ground and treat it like a long-lost diamond? There is something inherently magical about small, colorful objects. Whether it is a bowl of bright buttons, a handful of sea glass, or a box of ceramic tiles, these tiny treasures spark an immediate "I want to touch that!" reaction in kids. This natural curiosity is the perfect foundation for exploring mosaic art projects for kids. Mosaic art is essentially the ancient craft of creating images or patterns by assembling small pieces of colored glass, stone, or other materials. It is like a puzzle where your child gets to invent the picture as they go.
At I’m the Chef Too!, we believe that every moment in the kitchen or at the craft table is an opportunity for "edutainment"—a blend of education and entertainment that makes learning feel like an adventure. Our mission is to spark curiosity and creativity in children by blending food, STEM, and the arts into one-of-a-kind experiences. Just as our cooking kits teach science through delicious recipes, mosaic art teaches children about geometry, patience, and fine motor skills through tactile, hands-on creation.
In this comprehensive guide, we are going to dive deep into the world of mosaics. We will cover everything from traditional tile-and-grout methods for older children to safe, mess-free paper and clay mosaics for the little ones. We will also explore the "why" behind this art form—how it builds confidence, fosters family bonding, and provides a much-needed screen-free alternative to digital play. By the end of this post, you will have all the tools and inspiration you need to turn a rainy afternoon into a masterpiece-making session.
Our goal is to help you facilitate these joyful family memories while building key developmental skills. Whether you are a parent looking for a weekend activity or an educator seeking a new way to teach patterns and textures, this guide is for you. Ready for a new adventure every month? Join The Chef's Club and enjoy free shipping on every box, where we bring these types of hands-on STEM adventures right to your doorstep.
The Developmental Benefits of Mosaic Art
Before we get our hands messy with glue and tiles, it is worth looking at why mosaic art projects for kids are so highly recommended by educators. At I’m the Chef Too!, we focus on the benefits of the process rather than just the final product.
Fine Motor Skill Development
When a child picks up a tiny tile or a single sequin, they are using their "pincer grasp." This movement—using the thumb and index finger—is crucial for developing the strength and coordination needed for handwriting, tying shoelaces, and even using a fork and knife. Placing these pieces into a specific spot on a baseboard requires precision and steady hands, which is excellent practice for growing muscles.
Patience and Persistence
Unlike a quick drawing, a mosaic takes time. You have to glue pieces one by one, wait for things to dry, and sometimes even apply grout and polish the surface. This "slow art" helps children understand that some of the most rewarding results come from taking their time. It is a wonderful way to foster a love for learning that isn't about instant gratification.
Math and Spatial Awareness
Mosaics are essentially a lesson in geometry. Kids have to figure out how squares, triangles, and irregular shapes fit together to fill a space. They learn about "tessellation"—the covering of a surface using one or more geometric shapes with no overlaps or gaps. They also experiment with patterns, symmetry, and color theory, deciding which colors look best next to each other to make their design "pop."
Confidence and Creativity
There is no "wrong" way to make a mosaic. If a tile goes on crooked, it just adds character! This freedom allows children to take risks and trust their creative instincts. When they see the final, polished product, the sense of accomplishment is immense. We love seeing that sparkle of pride in a child’s eyes when they’ve built something with their own two hands.
Essential Materials for Your Mosaic Toolkit
To get started with mosaic art projects for kids, you don’t need a professional studio. Most of these supplies can be found at your local craft store or even in your kitchen pantry and recycling bin.
The "Tesserae" (The Mosaic Pieces):
- Traditional Tiles: Glass mosaic tiles, ceramic bits, or glitter tiles are standard favorites.
- Found Objects: Flat stones, sea glass, seashells, and pebbles from the garden.
- Recycled Materials: Plastic bottle caps, colorful buttons, old CDs (cut by an adult), and even dried beans or pasta.
- Paper and Foam: For younger kids, colorful cardstock squares or adhesive foam shapes work wonders.
The Base (What You Build On):
- Wood: A5 wooden project bases or old picture frames.
- Clay: Air dry clay is perfect for a 3D mosaic experience.
- Terra Cotta: Small flower pots or plant saucers.
- Cardboard: Thick cereal boxes or shipping boxes work for lightweight mosaics (like paper or beans).
Adhesives and Finishing:
- Glue: Non-toxic tacky craft glue is best for kids. For outdoor projects, an outdoor-rated PVA glue is better.
- Grout: Premixed kid-safe grout or traditional grout (to be handled by an adult).
- Sealant: A mixture of PVA glue and water (DIY Mod Podge) to seal wood or protect the finished piece.
If you find that your child loves these tactile, material-focused projects, they might also enjoy exploring the science of textures in our other kits. Find the perfect theme for your little learner by browsing our complete collection of one-time kits.
Step-by-Step: Traditional Tile Mosaics for Older Kids
For children aged eight and up, traditional mosaics provide a sophisticated challenge. This process involves planning, gluing, grouting, and polishing. It makes them feel like "real" artists because they are using materials similar to those used by professionals.
Step 1: Planning the Design
We always suggest starting with a plan. Have your child trace the shape of their baseboard onto a piece of paper. They can then arrange their tiles on the paper first. This allows them to see if they have enough tiles and if the colors work together before anything is permanent.
Hypothetical Case Study: Imagine a 9-year-old who is obsessed with space. They might use deep blue glass tiles for the "sky," a large yellow button for the sun, and silver sequins for distant stars. By laying it out on paper first, they can ensure the "sun" doesn't get crowded out by the "sky."
Step 2: Preparing the Base
If you are using a wooden base, it is a good idea to seal it first. Wood is porous and can soak up the glue, making the tiles more likely to fall off later. We recommend painting on a thin layer of DIY Mod Podge (one part PVA glue mixed with one part water) and letting it dry completely.
Step 3: Gluing the Tiles
Once the base is dry, it’s time to glue! Your child can either put a small dot of glue on the back of each tile or spread a thin layer of glue over a small section of the board. Tip: Remind them to leave a small "river" of space between the tiles. This is where the grout will go later. If the tiles are touching, the grout won't have anywhere to sit, and the final piece won't be as sturdy.
Step 4: The Grouting Process (Adult Supervision Required)
This is the part that makes the mosaic look "finished." Grout is like the frosting on a cake—it fills in the cracks and holds everything together.
- Safety Note: Traditional grout can be dusty. We recommend that adults mix the grout away from children to avoid inhalation. Once it's mixed to the consistency of peanut butter, it’s safe for kids to help spread it with gloves on.
- Use a plastic scraper or even a piece of stiff cardboard to push the grout into all the crevices.
- After about 20 minutes, use a damp (not dripping) sponge to gently wipe the excess grout off the surface of the tiles.
Step 5: The Final Polish
Wait another hour or so, then use a dry, soft cloth to buff each tile until it shines. The transformation from a messy, grout-covered board to a sparkling work of art is truly magical!
For ongoing inspiration that combines this kind of artistic flair with STEM learning, give the gift of learning that lasts all year with a 12-month subscription to our STEM cooking adventures.
Air Dry Clay Mosaics: A Sensory Adventure
For younger children (ages 4-7), traditional grouting might be a bit too complex. This is where air dry clay comes in. Using clay as the base for mosaic art projects for kids turns the activity into a wonderful sensory experience. It’s less about "perfect" placement and more about the joy of squishing things into the clay.
Creating a Mosaic Pinch Pot
- The Ball: Give your child a handful of air dry clay and have them roll it into a smooth ball.
- The Thumb: Show them how to push their thumb into the center of the ball to create a hole.
- The Pinch: Using their "pinching fingers," they can gently squeeze the sides of the hole to grow the walls of the bowl or nest.
- The Embellishment: Now for the mosaic part! Instead of glue, they simply press buttons, beads, or small pebbles directly into the wet clay.
The clay acts as both the adhesive and the grout. As the clay dries, it shrinks slightly, gripping the mosaic pieces tightly in place. This project is fantastic for building confidence because it is very forgiving. If they don't like where a bead is, they can just pull it out and smooth the clay over.
This type of three-dimensional building is a great precursor to more advanced science concepts, like geology. For example, kids can explore the world of rocks and chemical reactions when they create Erupting Volcano Cakes Kit where the "lava" and "mountain" are built with edible materials in a similar hands-on fashion.
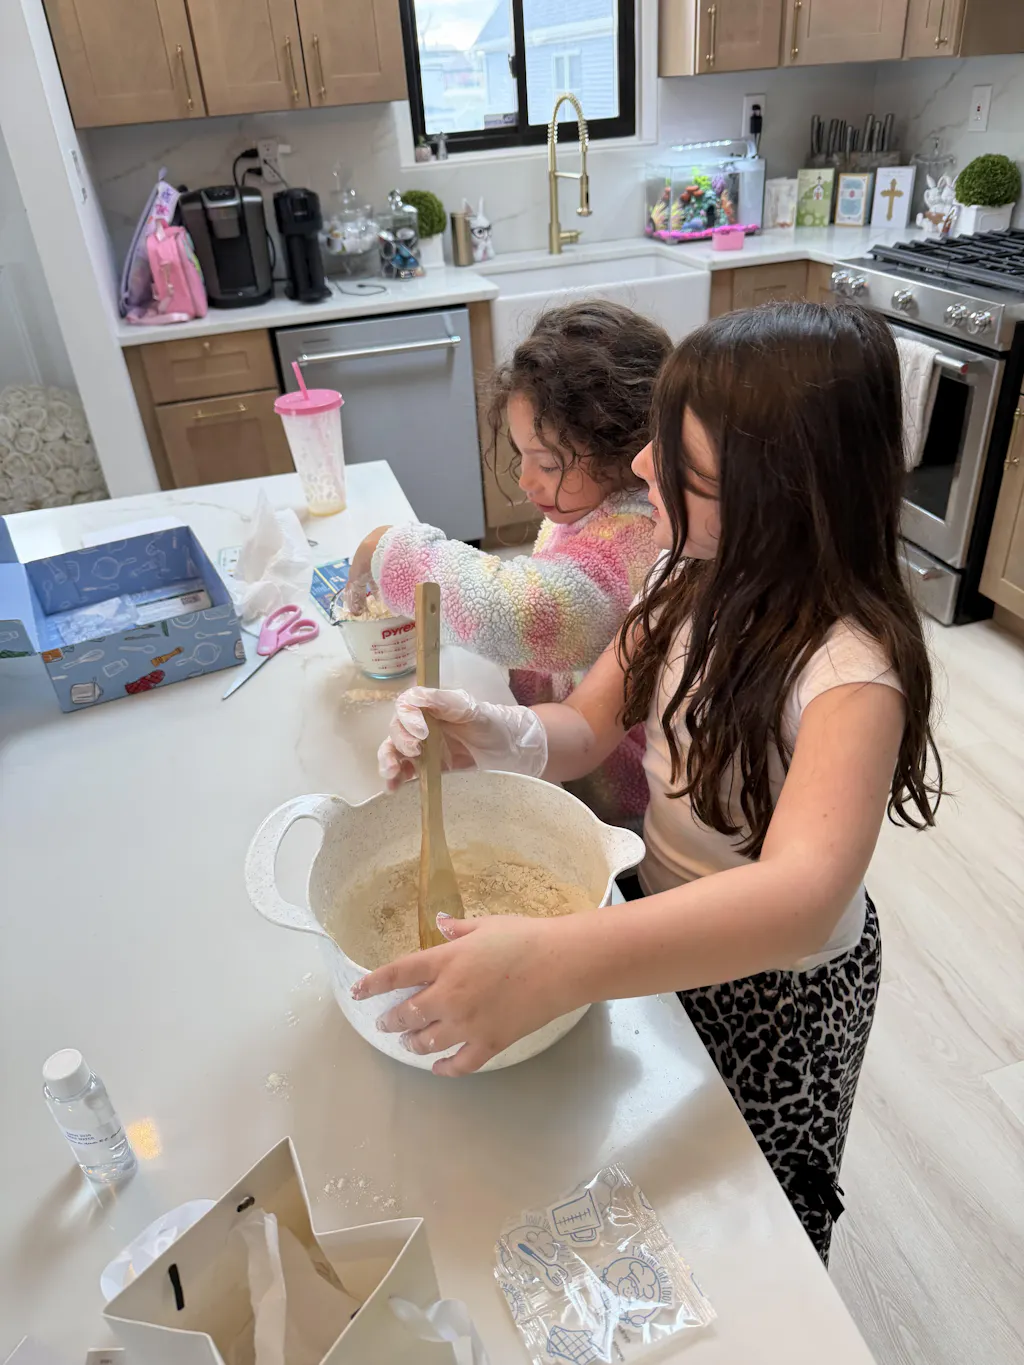
Edible Mosaics: Art You Can Eat!
At I’m the Chef Too!, we are experts at finding the intersection between food and art. Why not apply the principles of mosaic art to the kitchen? Edible mosaic art projects for kids are a fantastic way to make healthy eating fun or to turn a baking session into a geometry lesson.
Fruit and Veggie Mosaics
Give your child a large white plate and a variety of colorful chopped fruits or vegetables.
- Red: Strawberries, raspberries, or peppers.
- Orange: Oranges, carrots, or cantaloupe.
- Green: Grapes, kiwi, or cucumbers.
- Blue/Purple: Blueberries or blackberries.
Challenge them to create a pattern or a picture using these "tesserae." Can they make a fruit rainbow? A veggie flower? This screen-free activity keeps them engaged while they snack on nutritious food.
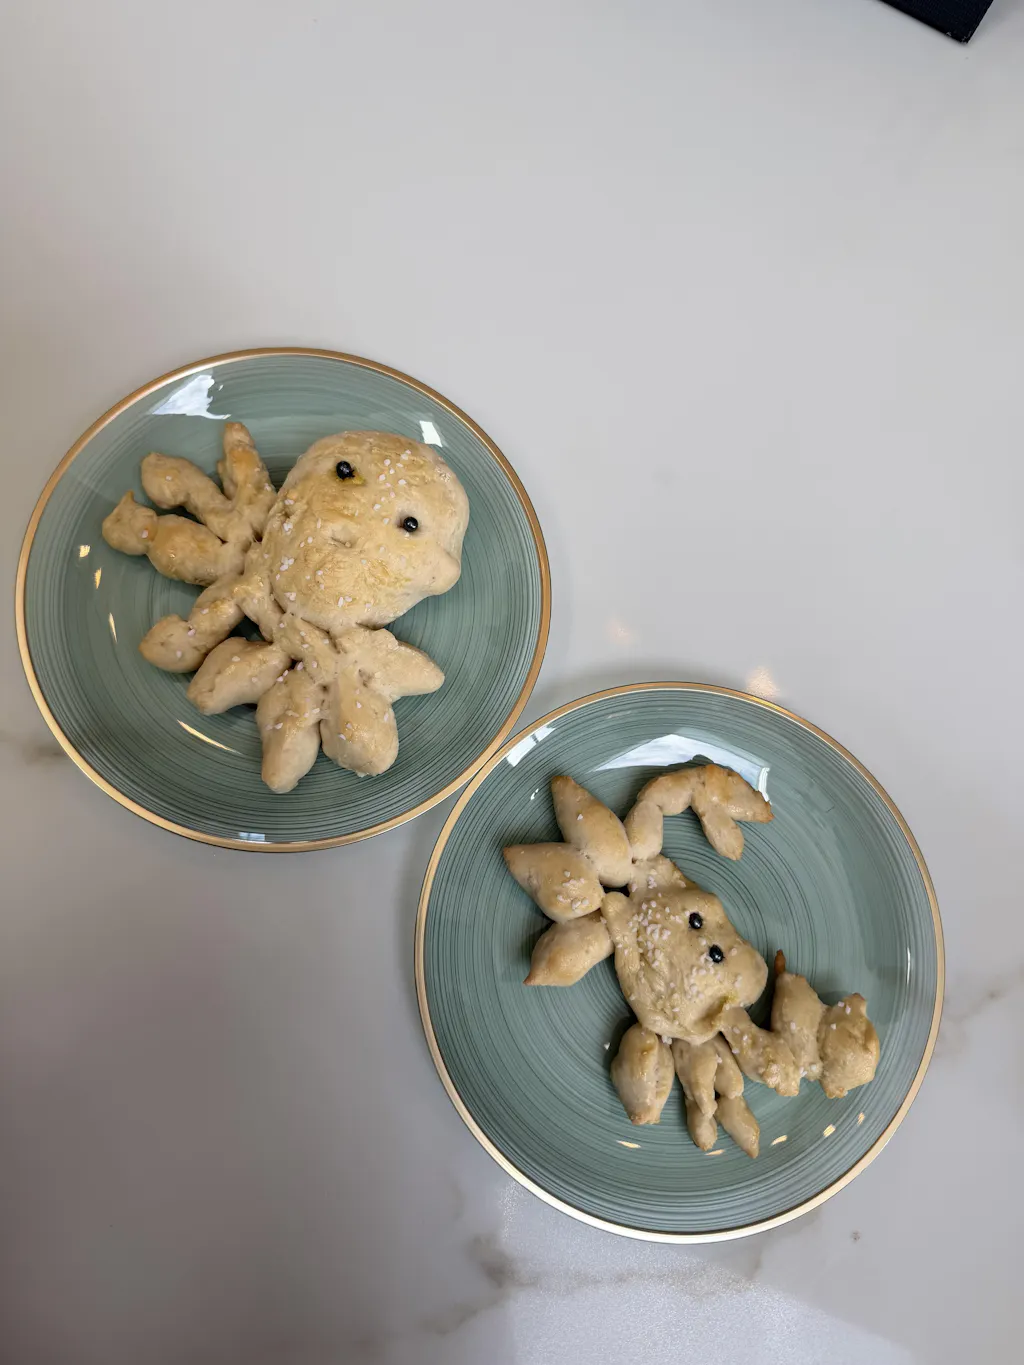
Cookie or Pizza Mosaics
You can also do this with baking! Use a rectangular sugar cookie base or a round pizza crust. Instead of spreading toppings randomly, have the kids place pepperoni slices, pepper bits, or fruit slices in a deliberate mosaic pattern.
Creating patterns with circular shapes is also a great way to talk about the solar system. You can explore astronomy by creating your own edible solar system with our Galaxy Donut Kit, where the colors and swirls mimic the beautiful patterns found in space.
Paper and Nature Mosaics: Easy and Eco-Friendly
Sometimes the best materials are right under our noses. Paper and nature mosaics are low-cost, easy to set up, and perfect for classrooms or large groups.
The Upcycled Magazine Mosaic
Instead of throwing away old magazines or catalogs, have your child rip them into small bits of different colors. On a piece of heavy cardstock, they can draw a simple shape—like a leaf or a heart—and then fill it in with the paper scraps. This is a great way to talk about recycling and how we can turn "trash" into treasure.
Nature’s Mosaic
On your next family walk, bring a small bag and collect flat items:
- Dry leaves (which can be crushed into colorful "confetti")
- Flat stones
- Acorn caps
- Pinecone scales
Back at home, use these items to create a nature scene on a piece of cardboard. These projects help children connect with the world around them, observing the different textures and shades found in the wild. If they love learning about the natural world, they might also enjoy making Wild Turtle Whoopie Pies, where they can learn about animal shells and habitats while they bake.
Tips for Success and Safety
To ensure your mosaic art projects for kids are successful and stress-free, keep these tips in mind:
- Work in Sections: If you are doing a large mosaic, don't spread glue over the whole board at once. It might dry before your child gets to the other side! Work in 2-inch sections.
- Mind the Sharp Edges: If you are using broken ceramic or glass, ensure an adult does the cutting with tile nippers. Sand down any particularly sharp edges with a bit of sandpaper, or better yet, use "tumbled" glass tiles which are smooth to the touch.
- Use the "Right Side" of the Tile: Many glass tiles have a smooth side and a ridged side. The ridged side is meant to face down into the glue to help it stick better. Show this to your child before they start.
- Protect Your Surfaces: Mosaics (especially the grouting part) can be messy. Lay down an old plastic tablecloth or some newspaper before you begin.
- Wear Aprons: Glue and grout don't always wash out of clothes easily. Put on an old t-shirt or an apron to keep things clean.
We are committed to providing a screen-free educational alternative that doesn't feel like a chore. Part of that is making sure the experience is safe and manageable for parents. Explore our full library of adventure kits available for a single purchase in our shop to see how we simplify complex activities into easy-to-follow, fun experiences.
Why Hands-On Edutainment Matters
In a world full of screens, the value of a tangible, hands-on project cannot be overstated. When a child works on mosaic art projects for kids, they aren't just making a picture; they are interacting with the physical world. They feel the coldness of the glass, the stickiness of the glue, and the grit of the grout.
At I’m the Chef Too!, we understand that kids learn best when they are fully engaged—not just with their eyes, but with their hands and their hearts. Our philosophy of "edutainment" is about making sure the "learning" part of the project is so much fun that the kids don't even realize they are practicing math or science.
When you sit down to make a mosaic with your child, you are facilitating family bonding. You are working together to solve a "puzzle" that you created yourselves. These are the moments that build confidence and create lasting memories. A child who learns to patiently place tiles to create a beautiful image is a child who is learning that they can tackle complex tasks one small step at a time.
Ready for a new adventure every month? Join The Chef's Club and enjoy free shipping on every box. It’s the perfect way to keep that spark of curiosity alive all year long.
Troubleshooting Common Mosaic Challenges
Even the best-planned art sessions can hit a snag. Here is how to handle some common mosaic "oops" moments:
- The Glue is Showing: If glue squishes up between the tiles, don't worry! If it's clear-drying glue, it will disappear. If you plan to grout, you can use a toothpick to scrape away excess glue while it's still wet so there's room for the grout.
- Tiles Falling Off: This usually happens if the base wasn't sealed or if there wasn't enough glue. Simply scrape off the old glue, re-seal the spot, and try again.
- Grout is Cracking: If the grout cracks as it dries, it might have been mixed with too much water. You can usually apply a second, thinner layer of grout over the cracks to fill them in.
- Too Much Space: If your child leaves a very large gap between tiles, the grout might look a bit plain. You can encourage them to drop a small bead or a bit of glitter into the wet grout to add some extra "pizazz."
Advanced Ideas: Taking Mosaics Further
Once your child has mastered the basic mosaic art projects for kids, they might want to try something even bigger.
Mosaic Stepping Stones
You can buy kits for these, or simply use a shallow plastic tub as a mold. Fill it with concrete (adult job!), and have your child press large glass stones, marbles, or even old ceramic plate pieces into the top before it sets. These make beautiful additions to the garden and are a wonderful way to mark a child’s growth over the years.
Upcycled Birdhouses
Take a plain wooden birdhouse and cover the roof in a mosaic of colorful tiles or "shingles" made from old CDs. Not only does it look beautiful, but the glass and plastic make the roof waterproof for your feathered friends!
Kitchen Backsplash Art
If you are doing a home renovation, why not let your child create a small mosaic "tile" on a mesh backing? This can be professionally installed as a small accent in a mudroom or kitchen, giving them a permanent place in the home’s history.
Activities like these foster a love for learning and build confidence in a way that digital games simply can't. If you want to bring this level of creativity into your home on a regular basis, give the gift of learning that lasts all year with a 12-month subscription to our STEM cooking adventures.
Frequently Asked Questions
What is the best age to start mosaic art projects for kids?
While toddlers can enjoy "paper mosaics" (gluing large scraps of paper to a page), we recommend traditional tile-and-grout mosaics for children aged 8 and up. Air dry clay mosaics are perfect for the 4-to-7 age range because they don't require the same level of precision or the use of potentially dusty grout.
Is mosaic grout safe for children?
Traditional grout is a cement-based product and can be an inhalation risk when it is in powder form. We recommend that an adult mixes the grout outdoors or in a well-ventilated area while wearing a mask. Once the grout is mixed with water into a paste, it is much safer, but children should still wear gloves to prevent skin irritation. There are also "kid-safe" pre-mixed grouts available at many craft stores that eliminate the dust issue entirely.
Can I use regular school glue for mosaics?
For paper or lightweight bean mosaics, regular school glue is fine. However, for glass or ceramic tiles, we highly recommend "Tacky Glue" or a specialized mosaic adhesive. These glues are thicker and have a stronger "grab," which prevents the tiles from sliding around while you work.
How long does a mosaic project take to finish?
Mosaics are a multi-day project! On day one, you plan and glue your tiles. You must then wait at least 24 hours for the glue to dry completely. On day two, you apply the grout and polish. This waiting period is actually a great lesson in patience for kids!
What if we don't have tile nippers?
You don't need them! You can buy "pre-cut" mosaic tiles in various shapes (circles, triangles, squares) that fit together beautifully without any cutting required. You can also use buttons, beads, and flat pebbles which are already the perfect size.
Are these projects messy?
They can be! But with a little preparation—like using tablecloths and aprons—the mess is easily managed. We believe that a little bit of mess is a sign of a lot of learning!
Conclusion
Mosaic art projects for kids are more than just a way to pass the time; they are a gateway to a world of color, geometry, and tactile exploration. From the very first moment your child picks up a sparkling tile to the final polish that makes their masterpiece shine, they are engaging in a process that builds patience, fine motor skills, and a sense of creative pride.
At I’m the Chef Too!, we are dedicated to creating these kinds of "edutainment" experiences. Whether it’s through a mosaic art project or one of our signature cooking kits, our mission is to spark curiosity and creativity in children, facilitating family bonding and providing a screen-free educational alternative. We want to help you create joyful family memories while your children develop key skills that will serve them for a lifetime.
Remember, the goal isn't to create a "perfect" piece of art, but to enjoy the journey of creation. Every crooked tile and every smudge of grout is a part of your child’s unique artistic voice. By encouraging them to explore these hands-on activities, you are fostering a lifelong love for learning and discovery.
Ready for a new adventure every month? Join The Chef's Club and enjoy free shipping on every box. With a new STEM-themed cooking adventure delivered to your door every month, the learning and fun never have to end. Whether you choose a 3, 6, or 12-month plan, you are giving your child a gift that inspires creativity and sparks the imagination. Let’s get creating!