Table of Contents
- Introduction
- Why Boat Building STEM Challenges Are Essential for Young Minds
- The Science Behind Floating: Buoyancy, Density, and Archimedes' Principle
- Setting Up Your Build a Boat STEM Challenge
- Designing the Challenge: Capacity vs. Speed vs. Obstacle Course
- The Engineering Design Process: A Step-by-Step Approach
- Enhancing the Learning: Extension Activities
- Tips for Parents and Educators
- Age-Appropriate Adaptations
- Beyond the Boat: Continuing the STEM Adventure with I'm the Chef Too!
- FAQ Section
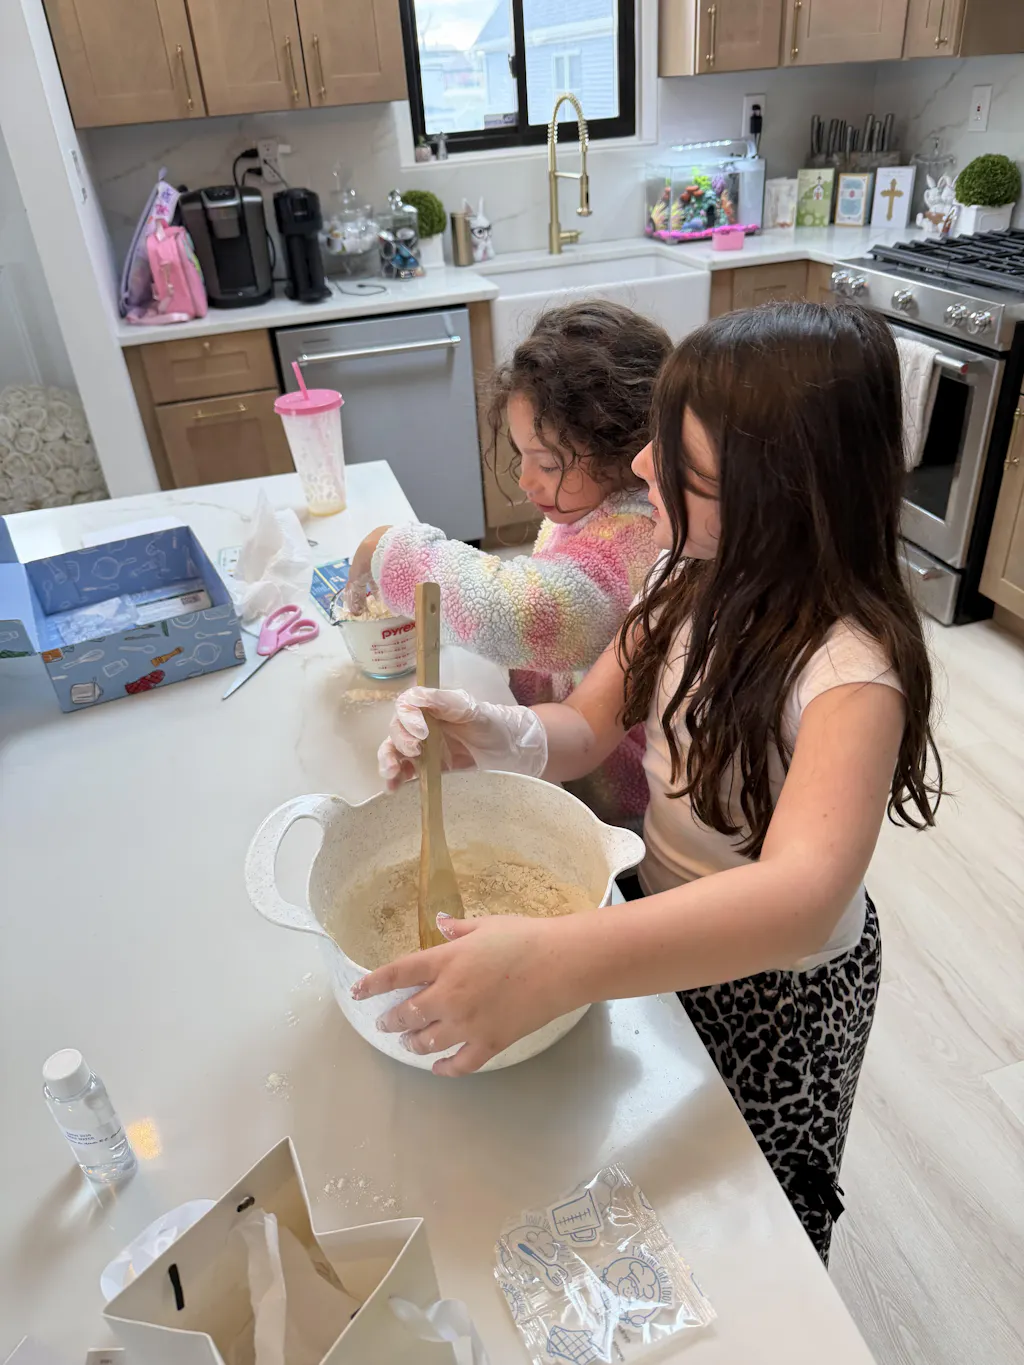
Imagine a quiet afternoon. Your child, usually glued to a screen, is instead meticulously folding a piece of aluminum foil, their brow furrowed in concentration. Next, they carefully place it into a tub of water, holding their breath. A cheer erupts as it floats, laden with pennies. This isn't just playtime; it's the exciting world of a build a boat STEM challenge, where curiosity meets hands-on learning.
At I'm the Chef Too!, we believe that the most profound learning happens when it's fun, tangible, and sparks genuine curiosity. That's why we’ve dedicated ourselves to blending food, STEM, and the arts into one-of-a-kind "edutainment" experiences. Today, we're diving deep into the build a boat STEM challenge – an activity that perfectly embodies our mission. It’s a fantastic way to introduce fundamental scientific principles, foster critical thinking, and encourage imaginative problem-solving, all while providing a wonderful, screen-free opportunity for family bonding. We'll explore the science behind why things float, guide you through setting up diverse challenges, and provide practical tips to make this an unforgettable learning adventure for children of all ages. Get ready to embark on a journey where engineering, creativity, and discovery sail hand-in-hand!
Introduction
Have you ever wondered why a massive cargo ship, weighing thousands of tons, glides effortlessly across the ocean, while a tiny pebble sinks instantly? This seemingly simple question opens the door to a fascinating world of scientific principles, engineering challenges, and boundless creativity. It's a question that captivates young minds and serves as the perfect springboard for a build a boat STEM challenge.
In this comprehensive guide, we're going to navigate the exciting waters of boat building as a STEM activity. We’ll arm you with everything you need to transform a few simple household materials into an engaging lesson in science, technology, engineering, and mathematics. From understanding the core concepts of buoyancy and density to designing innovative vessels for capacity or speed, we'll cover it all. Our aim is to provide parents and educators with practical, valuable advice and realistic expectations for facilitating an activity that fosters a love for learning, builds confidence, develops key skills, and creates joyful family memories. By the end of this journey, you'll be fully equipped to guide your young explorers through a truly enriching and deliciously educational experience.
Why Boat Building STEM Challenges Are Essential for Young Minds
A build a boat STEM challenge isn't just about crafting a small vessel; it's about building a foundation for future learning, one creative splash at a time. This activity seamlessly integrates multiple disciplines, making abstract concepts concrete and accessible for children.
- Problem-Solving at its Core: Children are presented with a clear problem: how to make something float, or float better, or move faster. This immediate, tangible challenge encourages them to think critically, experiment with different solutions, and adapt their designs when initial attempts don't go as planned. It's a real-world application of the engineering design process, teaching resilience and innovative thinking.
- Igniting Scientific Curiosity: The "why" behind floating and sinking becomes a personal quest. This challenge naturally introduces fundamental physics concepts like buoyancy, density, and displacement in a way that’s far more engaging than a textbook. When kids see a heavy object float because of its shape, or a light object sink because of its density, those "aha!" moments are incredibly powerful.
- Developing Engineering Skills: From brainstorming initial designs and sketching blueprints to selecting appropriate materials and constructing their boats, children actively engage in the engineering design process. They learn about structural integrity, material properties, and the importance of iterative design – building, testing, refining, and rebuilding.
- Fostering Creativity and Imagination: While there are scientific principles to adhere to, the actual design and aesthetics of the boat are left entirely to the child's imagination. Will it be a sleek speed boat? A sturdy cargo ship? A whimsical raft? This freedom encourages creative expression and personal ownership of the project.
- Cultivating Mathematical Understanding: Depending on the complexity, children can engage with math concepts like measurement (of materials, of cargo, of distance), data collection (how many pennies did it hold?), graphing results, and even calculating speed or material costs for older students.
- Encouraging Collaboration and Communication: When done in groups, boat building necessitates teamwork, negotiation, and clear communication. Children learn to share ideas, divide tasks, and collectively troubleshoot problems, developing essential social-emotional skills.
- Providing Screen-Free Engagement: In an increasingly digital world, hands-on activities offer a refreshing alternative. A build a boat STEM challenge gets kids away from screens and into a tactile, interactive experience that engages their senses and minds in a different, yet equally vital, way. At I'm the Chef Too!, we are committed to providing these screen-free educational alternatives, offering tangible, hands-on, and delicious cooking adventures that teach complex subjects through play.
- Facilitating Family Bonding: Working together on a STEM challenge creates shared experiences, laughter, and lasting memories. Parents become facilitators of discovery, observing their child's ingenuity and celebrating their successes. It’s these moments of shared exploration that truly foster deep connections.
Ready to dive into a world of ongoing educational fun and family bonding? Join The Chef's Club today! A new adventure is delivered to your door every month with free shipping in the US, providing continuous opportunities for screen-free learning and delicious discoveries.
The Science Behind Floating: Buoyancy, Density, and Archimedes' Principle
Before embarking on the actual build a boat STEM challenge, it’s incredibly helpful to understand the core scientific principles at play. Demystifying why some objects float and others sink not only enriches the learning experience but also empowers children to make more informed design decisions. We can explain these concepts using simple, everyday language.
What is Buoyancy?
Imagine trying to push a beach ball under water. It’s hard, right? The ball constantly tries to pop back up to the surface. That upward push is what we call buoyancy.
Buoyancy is the upward force exerted by a fluid (like water) that opposes the weight of an immersed object. Simply put, when you put something in water, the water pushes up on it. If this upward push (buoyancy) is stronger than the object's downward pull (its weight), the object floats. If the object's weight is stronger, it sinks. Think of it like a silent tug-of-war between the object and the water.
Understanding Density
Density is a key factor in whether something floats or sinks, and it's simply a measure of how much "stuff" is packed into a certain amount of space. We often talk about it as "heavy for its size" or "light for its size."
- Dense objects have a lot of mass (stuff) squeezed into a small volume (space). Think of a rock – it's dense.
- Less dense objects have less mass spread out over the same or a larger volume. Think of a sponge or a piece of cork – they're less dense.
The rule of thumb is: if an object is less dense than the fluid it's placed in, it will float. If it's more dense, it will sink. Water has a certain density; if your boat (and everything inside it) is less dense overall than the water it displaces, it will float. This is why even a heavy steel ship can float – its overall density, including the air inside its hull, is less than the density of water.
Archimedes' Principle: The "Eureka!" Moment
This is where it all comes together! Archimedes, an ancient Greek scientist, made a groundbreaking discovery in his bathtub (legend says he yelled "Eureka!" – meaning "I've found it!" – and ran naked through the streets!).
Archimedes' Principle states that the buoyant force on an object submerged in a fluid is equal to the weight of the fluid displaced by the object.
What does that mean for our boats? When you put your boat in water, it pushes some of that water out of the way – it "displaces" it. The amount of water it pushes out has a certain weight. The buoyant force pushing your boat up is exactly equal to the weight of that displaced water.
So, to make a boat float, it needs to be able to displace a weight of water that is equal to or greater than its own weight (plus the weight of any cargo it's carrying). This is why the shape of a boat is so crucial! A flat piece of aluminum foil will sink, but if you shape that same piece of foil into a bowl, it can displace a much larger volume of water and thus create enough buoyant force to float, even with pennies inside. The bowl shape allows it to push aside more water without itself becoming heavier.
Understanding these concepts gives children a powerful advantage in their build a boat STEM challenge. They're not just guessing; they're applying scientific principles to engineer their designs. It's a fantastic example of how real-world challenges connect directly to scientific inquiry and discovery.
Setting Up Your Build a Boat STEM Challenge
Getting started with a build a boat STEM challenge is simpler than you might think. The beauty of this activity lies in its flexibility and the use of everyday materials.
Materials: Beyond the Basics
While aluminum foil and pennies are classic choices, expanding the material list can lead to even more creative and diverse engineering solutions. Remember to encourage kids to think about the properties of each material – is it waterproof? Flexible? Sturdy?
Here's a breakdown of materials you might consider, categorized for easy selection:
-
Structural & Base Materials:
- Aluminum Foil: Excellent for shaping, easily manipulated, but can tear.
- Plastic Wrap: Very lightweight and waterproof, but lacks rigidity on its own.
- Straws: Great for creating frameworks, masts, or propulsion tubes.
- Cardboard: Sturdy when dry, but needs waterproofing.
- Craft Sticks / Popsicle Sticks: Good for reinforcing structures, decks, or paddles.
- Plastic Bottles/Containers: Can serve as buoyant hulls, or cut up for components.
- Milk/Juice Cartons: Recyclable, easy to cut, but require sealing.
- Styrofoam / Pool Noodles: Highly buoyant, good for rafts or stabilizers.
- Wax Paper: Water-resistant, but not fully waterproof like plastic.
- Clothespins: Good for holding pieces together temporarily.
- Corks: Naturally buoyant, excellent for rafts or adding extra floatation.
- Sponges: Absorbent but can be used for flotation if sealed, or as part of a multi-material design.
- Leaves/Small Branches: For a natural, rustic boat.
-
Adhesives & Fasteners:
- Duct Tape / Masking Tape: Essential for joining pieces and sealing. Consider limiting the length to add an extra challenge.
- Glue (Hot Glue Gun - with adult supervision, or craft glue): For more permanent bonds.
- Rubber Bands: For securing components or creating propulsion systems.
- Pipe Cleaners: Flexible, good for connecting parts or creating small sails.
-
Propulsion & Sails:
- Paper/Fabric Scraps: For sails. Experiment with different shapes and sizes.
- Balloons: Can provide "wind" propulsion when deflating, or add buoyancy.
- Straws: For blowing wind, or as part of a baking soda reaction system.
- Elastic Bands: To power propellers or paddle wheels.
- Small Fan: (Optional) To provide a consistent "wind" for sailboat races.
-
Cargo / Weights:
- Pennies / Marbles: Standard, uniform weights for capacity challenges.
- Candy Corn / Small Candies: Fun, themed cargo (especially for younger kids).
- Small Plastic Figures / Beads: Offer varied weights and sizes.
- Base-ten Blocks / Paperclips: Classroom-friendly options.
Remember, the challenge isn't just to build a boat, but to build one with specific constraints. Limiting materials (e.g., "only 10 straws and 3 inches of tape") adds a layer of ingenious problem-solving. This teaches children resourcefulness and how to make the most of what they have. It's a lot like how we design our I'm the Chef Too! kits, ensuring that children have all the specialty supplies and pre-measured dry ingredients they need for a complete, delightful, and educational experience right out of the box!
The Testing Ground: Water Basins
You'll need a suitable body of water for testing. The size will depend on your challenge (capacity vs. speed) and the size of the boats.
- Small Tubs / Basins: Perfect for individual capacity tests or small-scale floating. A shoebox-sized plastic container per group allows for preliminary balance tests before the main event.
- Under-the-Bed Storage Bins: A great mid-sized option for testing larger boats or short speed runs.
- Kiddie Pools: Ideal for speed challenges, obstacle courses, or when multiple boats need to be tested simultaneously.
- Stream Tables: (For classrooms) Offer controlled environments for studying water flow and hydrodynamics.
Important Note: Always set up your water basin in its final location before filling it. Trust us, it saves a lot of back pain and accidental spills! And, as always, adult supervision is key when working with water and small children.
Designing the Challenge: Capacity vs. Speed vs. Obstacle Course
The build a boat STEM challenge is highly adaptable. You can tweak the "mission" of the boat to focus on different engineering principles and scientific concepts, keeping the activity fresh and engaging, even if you’ve done boat challenges before.
1. The Capacity Challenge: How Much Can It Hold?
This is perhaps the most classic boat STEM challenge and an excellent starting point, especially for younger learners. The goal is simple: design a boat that can hold the most "cargo" (pennies, marbles, candy corn, etc.) before it sinks.
- Focus: Buoyancy, displacement, structural integrity, volume, and material strength.
-
Key Design Considerations:
- Shape: How can the boat displace the most water? A wide, flat bottom or a deep, bowl-like shape will typically displace more water than a narrow, V-shaped hull.
- Volume: A larger interior volume allows for more cargo.
- Material Strength: The boat needs to be robust enough to hold the weight without collapsing or tearing.
- Waterproofing: Any leaks will quickly lead to sinking!
- Measuring Success: Count the number of cargo items held before the boat becomes submerged or completely sinks.
-
Tips for Facilitation:
- Start with a simple material like aluminum foil (e.g., "one sheet of aluminum foil, how many pennies can it hold?").
- Encourage iteration: "My boat only held 10 pennies. What can I change to make it hold more?"
- Discuss where the weight is placed – adding pennies to one side often makes a boat tip and sink prematurely.
- Challenge older students to calculate the estimated volume of their boat or graph their results.
2. The Speed Challenge: Race to the Finish!
Shift the focus from carrying capacity to swiftness. This challenge is fantastic for exploring hydrodynamics, aerodynamics (with sails), and different propulsion methods.
- Focus: Hydrodynamics (how water flows around the boat), aerodynamics (for sails), thrust, friction, and energy transfer.
-
Key Design Considerations:
- Sleek Shape: A streamlined hull reduces drag (resistance from the water).
-
Propulsion System: How will the boat move?
- Sails: Design different sail shapes and sizes. How does the wind catch it? (You can use a small fan or even just kids blowing through straws).
- Elastic Bands: Create a paddle wheel or propeller powered by a twisted elastic band.
- Baking Soda & Vinegar: A chemical reaction can produce carbon dioxide gas, forcing the boat forward like a jet! This is similar to the exciting chemical reactions kids explore in our Erupting Volcano Cakes kit, where science makes delicious things bubble over!
- Balloons: Inflate a balloon and release the air to propel the boat.
- Balance: A stable boat will move more efficiently.
- Measuring Success: Time how long it takes for the boat to travel a set distance.
-
Tips for Facilitation:
- Ensure a clear start and finish line in your water basin.
- Discuss the direction of wind if using natural wind or a fan.
- Allow students to use straws or balloons to "nudge" their boats if they get stuck, without physically touching them.
- Encourage experiments with sail geometry – a wide, shallow sail versus a tall, narrow one.
3. The Obstacle Course Challenge: Navigate the Waters!
This challenge adds a layer of problem-solving and maneuverability, perfect for developing spatial reasoning and strategic thinking.
- Focus: Steering, stability, controlled movement, and advanced problem-solving.
-
Key Design Considerations:
- Maneuverability: How easily can the boat turn or change direction? This might involve rudder-like elements or precise propulsion.
- Stability: The boat needs to remain upright through turns and potential "waves."
- Durability: The boat should withstand gentle bumps against obstacles.
-
Setting Up the Course:
- Use bottles, vases, or even floating toys to create gates, narrow passages, or "ports."
- Introduce "cargo collection" where boats must touch a "port" and pick up a small item before proceeding.
- "Capture the Flag": Rig a string across the water with small rings (e.g., pipe cleaners) dangling. Boats must be designed to sail past and capture a ring.
-
Measuring Success:
- Time how long it takes to complete the course.
- Count how much cargo is collected within a set time limit.
-
Tips for Facilitation:
- Start with a simple course and gradually increase complexity.
- Encourage students to test sections of the course individually before attempting the whole thing.
- Discuss how the boat's shape or propulsion method affects its ability to steer.
No matter which challenge you choose, the goal is to foster a love for exploration and discovery. These activities are designed to spark curiosity, much like when kids explore astronomy by creating their own edible solar system with our Galaxy Donut Kit, making learning an out-of-this-world adventure!
Not quite ready for a subscription, but eager for some hands-on fun? Explore our full library of adventure one-time kits for a single purchase in our shop!
The Engineering Design Process: A Step-by-Step Approach
The build a boat STEM challenge is a perfect hands-on illustration of the Engineering Design Process (EDP), a systematic approach that engineers use to solve problems. Guiding children through these steps teaches them a valuable framework for tackling any challenge, not just boat building.
1. Ask: What is the Problem?
Every great design starts with understanding the challenge.
- Clarify the Goal: "Our goal is to build a boat that can hold 25 pennies without sinking" (capacity challenge) or "Our goal is to build the fastest boat to cross the tub" (speed challenge).
- Identify Constraints: What are the rules? "You can only use 10 straws, 3 inches of duct tape, and 10 inches of plastic wrap." What about the testing environment?
- Research: What do we already know about boats, floating, or speed? (This is where discussing buoyancy, density, and Archimedes' Principle comes in handy!).
2. Imagine: Brainstorm & Sketch Solutions
This is the creative phase where ideas flow freely, without judgment.
- Brainstorm: Encourage children to come up with as many different ideas as possible. There are no "bad" ideas at this stage. Think about shapes, materials, and how they might fit together.
- Sketch Designs: Have them draw their ideas. Sketching helps to visualize the concept, think through components, and predict how it might function. Encourage labels and simple notes. A boat that looks great on paper might reveal flaws when translated into a 3D model, and that's perfectly okay!
3. Plan: Choose & Detail a Design
From the brainstormed ideas, select the most promising concept and refine it.
- Select the Best Idea (for now): Based on the constraints and research, which design seems most likely to succeed?
- Detailed Drawing/Blueprint: Create a more precise drawing, including estimated measurements for materials. This helps in allocating resources efficiently.
- Material Selection & Justification: Why are they choosing certain materials? How will they use the limited tape or foil? This step can also involve an optional "cost calculation" for older children, assigning a value to each material to simulate real-world budgeting.
4. Create: Build the Boat
Time to bring the design to life!
- Construct the Boat: Follow the detailed plan, but be flexible. Sometimes, what looks good on paper needs adjustments in practice. This is a crucial learning point – engineering is often about adapting on the fly.
- Careful Craftsmanship: Emphasize the importance of neatness and precision, especially with waterproofing and joining materials.
5. Test: Evaluate the Design
The moment of truth!
- Place in Water: Carefully put the boat in the testing basin.
- Measure & Observe: For a capacity challenge, slowly add cargo one by one, counting as you go. For a speed challenge, time its journey. Observe how it performs: Does it list to one side? Does it leak? Is the propulsion effective?
- Collect Data: Record the results (e.g., "Boat A held 18 pennies," "Boat B took 15 seconds"). This quantitative data is essential for the next step.
6. Improve: Refine & Redesign
This iterative step is what truly defines the engineering process and leads to innovation.
- Analyze Results: Why did the boat sink? Why was it slow? What worked well? What didn't?
- Brainstorm Improvements: Based on the test, what changes could be made? A different shape? More tape in one area? A bigger sail?
- Modify & Re-test: Implement the changes and repeat the testing phase. This cycle of "build, test, improve" can be repeated multiple times, leading to increasingly effective and refined designs.
By following the Engineering Design Process, children don't just build a boat; they become engineers, problem-solvers, and critical thinkers. They learn that "failure" is just data, an opportunity to learn and improve, fostering a growth mindset. This process is at the heart of every I'm the Chef Too! kit, where children engage in hands-on challenges, building confidence and developing key skills through tangible and delicious cooking adventures.
Enhancing the Learning: Extension Activities
Once the initial build a boat STEM challenge is complete, the learning doesn't have to stop. Extension activities can deepen understanding, connect to other subjects, and keep the excitement going.
-
Data Analysis and Graphing:
- For capacity challenges, have children (or groups) record how many items their boat held. Then, as a class, compile the data. Which design held the most? The least?
- Create bar graphs to visually represent the results. This is an excellent way to introduce or reinforce graphing skills and compare different designs.
- Older students can calculate averages, ranges, or even percentages of cargo held relative to the boat's material.
-
Calculating Speed:
- For speed challenges, if boats covered a set distance, older students can calculate the speed (distance/time). This is a direct application of mathematical formulas in a real-world context.
- Discuss units of measurement (centimeters per second, inches per second).
-
Design Your Own Experiment (Scientific Method):
- Challenge students to isolate one variable and conduct a controlled experiment. For example:
- "How does the shape of a sail affect a boat's speed?" (Test square, triangular, and trapezoidal sails while keeping the boat body constant).
- "Does the type of tape affect waterproofing?" (Test masking vs. duct tape).
- "How does the placement of cargo affect stability?" (Load pennies in the middle vs. spread out).
- Guide them through forming a hypothesis, designing a procedure, collecting data, and drawing conclusions.
- Challenge students to isolate one variable and conduct a controlled experiment. For example:
-
Cross-Curricular Connections:
- Art & Design: Encourage students to decorate their boats, turning them into artistic vessels. Discuss aesthetics, color theory, and balance.
- History & Social Studies: Research different types of historical boats (Viking longships, Egyptian papyrus boats, Mayflower, modern cargo ships). How did their design meet the needs of their time? This can be a great way to learn about explorers or specific historical periods.
- Language Arts: Have children write a "design report" explaining their process, what worked, what didn't, and what they would do differently. They could also write a story about their boat's adventures or create "process flow maps" illustrating their design journey.
- Environmental Science: Discuss how modern ships impact marine ecosystems. Explore sustainable materials for boat building or the importance of clean waterways.
-
Advanced Materials Exploration:
- Introduce more complex materials like silicone sealant (with adult help) for waterproofing, or small battery-operated motors (again, with careful supervision and safety checks for waterproofing the electronics).
-
Presentations & Showcases:
- Allow children to present their boats, explain their design choices, and share their results with peers or family members. This builds public speaking skills and reinforces learning.
These extensions transform a fun activity into a rich, multi-faceted learning experience, reinforcing that STEM isn't just about science, technology, engineering, and math in isolation, but how they intertwine to solve real-world problems. For more creative ideas that blend learning across subjects, we invite you to browse our complete collection of one-time kits. Each kit is thoughtfully designed to spark curiosity and provide comprehensive, engaging "edutainment."
Tips for Parents and Educators
Facilitating a build a boat STEM challenge can be incredibly rewarding. Here are some practical tips to ensure a smooth, educational, and fun experience for everyone involved:
-
Safety First, Always:
- Adult Supervision: Always have an adult present, especially when working with water, scissors, or hot glue guns.
- Water Safety: Ensure the water basin is in a safe location where spills won't cause hazards. For younger children, ensure the water depth is appropriate.
- Material Safety: Check that all materials are non-toxic and appropriate for the child's age.
-
Embrace the Process, Not Just the Product:
- Focus on Learning: The goal isn't to build the "perfect" boat, but to learn through experimentation. Emphasize the thinking, designing, testing, and improving stages.
- Celebrate "Failures": When a boat sinks or doesn't perform as expected, frame it as a learning opportunity. "What did we learn from that? What could we try next time?" This builds resilience and a growth mindset. At I'm the Chef Too!, we believe in fostering a love for learning and building confidence, understanding that the journey is as important as the outcome.
-
Encourage Iteration:
- "Build, Test, Improve": Highlight that engineers rarely get it right on the first try. Provide enough materials or time for children to modify their designs after testing.
- Limited Materials: Sometimes, limiting materials (e.g., "you get one more piece of foil for redesign") encourages careful planning and thoughtful modifications.
-
Facilitate, Don't Dictate:
- Ask Open-Ended Questions: Instead of telling children what to do, ask questions like, "What do you think will happen if...?" or "Why did you choose that shape?" or "How could you make it stronger/faster?"
- Provide Guidance, Not Answers: Offer suggestions or demonstrate techniques if they're truly stuck, but let them discover solutions.
- Observe and Learn: Pay attention to their problem-solving strategies and celebrate their unique approaches.
-
Manage Materials Effectively:
- Pre-cut Materials: For younger children, pre-cutting tape, foil, or plastic wrap can reduce frustration and save time.
- Organized Stations: Set up different stations for materials to keep things tidy and accessible.
- "Shopping" for Materials: For older kids, you can create a "materials shop" where they "buy" their supplies with a budget, adding a math element.
-
Consider Group Dynamics:
- Individual vs. Group: Decide if the challenge is individual or group-based. Group challenges develop teamwork and communication skills.
- Assign Roles: In groups, encourage different roles (designer, builder, tester, recorder) to ensure everyone participates.
-
Connect to Real-World Applications:
- Discuss Real Boats: Talk about different types of boats, their purposes, and how engineers design them for specific functions (e.g., cargo ships, submarines, speedboats).
- Environmental Context: Connect to local waterways, marine life, or the importance of keeping our oceans clean.
By following these tips, you can create a vibrant, engaging learning environment where children feel empowered to explore, create, and discover the wonders of STEM. Whether you're a parent looking for a fun weekend activity or an educator seeking to enrich your curriculum, the build a boat STEM challenge is a fantastic way to spark curiosity and creativity. If you’re organizing an activity for a classroom, camp, or homeschool co-op, remember that our versatile School & Group Programs offer options with or without food components, making it easy to bring hands-on STEM adventures to any group setting.
Age-Appropriate Adaptations
One of the greatest strengths of the build a boat STEM challenge is its versatility. It can be easily adapted to suit different age groups, ensuring that every child, from a curious preschooler to a budding middle school engineer, can participate meaningfully and learn at their own pace.
For Our Youngest Explorers (Pre-K to Kindergarten)
At this age, the focus is on sensory exploration, basic concepts, and fostering a love for discovery.
- Simplified Concepts: Focus on the very basic idea of "float or sink." Introduce terms like "light" and "heavy" in relation to water.
- Simple Materials: Provide larger, easier-to-handle materials like foil sheets, small plastic containers, corks, leaves, or sponges. Avoid intricate cutting or taping.
- Open-Ended Exploration: Less emphasis on a specific "challenge" (like holding X pennies) and more on "Can you make it float? What happens if we put a toy in it?"
- Sensory Play: Let them explore the textures of materials, the feel of water, and the joy of making something move on the surface.
- Minimal Constraints: Offer a wide variety of materials and very few rules, allowing for maximum creative freedom.
- Storytelling: Encourage them to tell stories about their boats and who might live in them or where they might travel. Even beloved characters can make learning fun, like when kids make Peppa Pig Muddy Puddle Cookie Pies – sometimes simple themes resonate the most!
For Elementary Engineers (Grades 1-5)
This age group is ready for more structured challenges and can begin to grasp the underlying scientific principles.
- Introduce Specific Challenges: Capacity (e.g., "hold 20 pennies") or simple speed ("make it go from one side to the other").
- Guided Introduction to EDP: Introduce the steps of the Engineering Design Process (Ask, Imagine, Plan, Create, Test, Improve) in a simplified, child-friendly way. Use visual aids.
- Expand Material Use: Introduce straws, plastic wrap, craft sticks, and limited tape. Encourage them to experiment with different shapes.
- Observation and Data Collection: Guide them to observe why a boat sinks or floats. Encourage simple data recording ("My first boat held 5 pennies, my second held 12!").
- Discussion of Concepts: Begin to use terms like "buoyancy" and "displacement" and relate them to their observations. "Why did the flat foil sink, but the bowl-shaped foil float?"
- Teamwork: Introduce collaborative elements, having small groups work together to design and build.
- Basic Extensions: Graphing the number of items held, simple comparisons of different designs.
For Middle School Innovators (Grades 6-8)
Middle schoolers are ready for more complex challenges, detailed scientific inquiry, and independent problem-solving.
- Advanced Challenges: Introduce multiple criteria (e.g., "build a boat that holds the most weight and can navigate an obstacle course") or specific propulsion challenges (e.g., "design an elastic-powered paddleboat").
- In-Depth EDP Application: Emphasize all steps of the EDP, including detailed planning, precise measurements, and systematic testing.
- Scientific Method Integration: Challenge them to design controlled experiments (e.g., testing the effect of different hull shapes on speed, or different sail materials on wind efficiency).
- Quantitative Analysis: Encourage calculating speed (distance/time), graphing results with multiple variables, and analyzing data to draw statistically sound conclusions. They can even explore material costs and budget constraints.
- Complex Materials & Techniques: Introduce more varied materials, and potentially allow for more complex construction techniques (e.g., using more specific cutting/folding, or even investigating waterproofing with sealants under supervision).
- Research and Presentation: Encourage independent research into hydrodynamics, different types of boat engineering, or historical ship designs. Have them present their findings and design process, justifying their choices with scientific reasoning.
- Cross-Curricular Depth: Integrate historical contexts of famous ships, the physics of water resistance, the chemistry of propulsion (like the baking soda boat), and the mathematical modeling of efficiency.
By tailoring the build a boat STEM challenge to the developmental stage of the children involved, you ensure that the activity is appropriately challenging, deeply engaging, and genuinely educational for everyone. This mindful approach to education is something we champion at I'm the Chef Too!, where our kits are developed by mothers and educators to be both enriching and developmentally appropriate.
Beyond the Boat: Continuing the STEM Adventure with I'm the Chef Too!
The build a boat STEM challenge is a magnificent starting point, a true testament to how simple materials can unlock profound scientific and engineering principles. The "aha!" moments, the joyful triumphs of floating, and the valuable lessons learned from sinking designs are all part of the invaluable process of discovery. We've seen how blending problem-solving, creativity, and hands-on engagement fosters a genuine love for learning – a love that we at I'm the Chef Too! are passionate about nurturing every single day.
Our mission is to extend this excitement beyond a single activity, integrating food, STEM, and the arts into unique "edutainment" experiences that continue to spark curiosity and creativity in children. Just as you've explored buoyancy with boats, we explore chemistry through edible experiments, geology with delicious dirt cups, and astronomy with cosmic treats. Our approach, developed by mothers and educators, is all about teaching complex subjects through tangible, hands-on, and utterly delicious cooking adventures, providing a screen-free educational alternative that strengthens family bonds.
We believe that every child deserves the chance to experience the thrill of scientific discovery and the satisfaction of engineering their own creations, whether it’s a floating vessel or a delicious edible masterpiece. These are the moments that build confidence, develop key skills, and create cherished memories.
Ready for a new adventure delivered right to your door every month? Don't let the learning stop here! Join The Chef's Club today and discover the magic of ongoing STEM exploration. With free shipping in the US and flexible 3, 6, and 12-month pre-paid plans perfect for gifting or long-term enrichment, our monthly subscription boxes provide all the pre-measured dry ingredients and specialty supplies needed for a complete, delightful, and educational experience. Ignite your child’s imagination and cultivate a lifelong love for learning with I'm the Chef Too!
FAQ Section
Q1: What age group is the build a boat STEM challenge best for?
A1: The beauty of this challenge is its adaptability! It can be enjoyed by children as young as 3-4 with a focus on simple float/sink exploration, up to middle schoolers who can delve into complex engineering, calculations, and scientific method experiments. The key is to adjust the materials, constraints, and learning objectives to match the child's developmental stage.
Q2: What are the essential materials needed for a basic boat challenge?
A2: For a simple capacity challenge, you can start with just one sheet of aluminum foil, a tub of water, and some pennies (or other small, uniform weights) as cargo. From there, you can expand to include straws, plastic wrap, duct tape, craft sticks, and various recycled materials. The more variety, the more creative the solutions!
Q3: My child's boat keeps sinking! What should we do?
A3: Don't worry, sinking is part of the learning process! It means valuable data has been collected. Encourage your child to observe why it sank. Was it too heavy? Did it leak? Was the shape not displacing enough water? This is the "Improve" step of the Engineering Design Process. Talk about changes they could make – a wider base, taller sides, different materials, or better sealing. Every failed attempt is a step closer to success!
Q4: How can I make this challenge more difficult for older children?
A4: For older children, you can:
- Add strict material limitations (e.g., specific lengths of tape, only a few straws).
- Introduce multiple criteria (e.g., must hold 50 pennies and be the fastest across the tub).
- Design an obstacle course.
- Require detailed blueprints and cost calculations for materials.
- Challenge them to perform controlled experiments, changing only one variable at a time (e.g., testing different sail shapes for speed).
- Encourage data analysis, graphing, and speed calculations.
Q5: How can a build a boat STEM challenge connect to other subjects?
A5: This challenge is a fantastic cross-curricular activity!
- Math: Measuring materials, counting cargo, calculating speed, graphing data.
- Art: Designing the boat's aesthetics, drawing blueprints, decorating the vessel.
- Language Arts: Writing a design report, explaining their process, creating stories about their boat.
- History/Social Studies: Researching famous ships, explorers, or historical uses of boats.
- Environmental Science: Discussing sustainable materials or the impact of shipping on oceans.
Q6: How does I'm the Chef Too! integrate STEM like this?
A6: At I'm the Chef Too!, our mission is to make learning fun and tangible, much like a build a boat challenge. We blend food, STEM, and the arts into unique cooking adventures. For example, our kits teach chemistry through delicious edible reactions (like the Erupting Volcano Cakes), explore geology through edible fossil digs, or even astronomy by creating edible planets and galaxies (Galaxy Donut Kit). Each box is designed by mothers and educators to spark curiosity, creativity, and critical thinking in a screen-free, hands-on environment. It's about making complex subjects delicious and accessible!
Q7: Where can I find more hands-on STEM activities like this for my child?
A7: We're so glad you asked! For continuous, exciting STEM adventures delivered right to your home, we encourage you to join The Chef's Club. Each month, a new themed kit arrives with everything you need for a complete, educational, and tasty experience. You can also explore our diverse range of one-time kits in our shop for a specific adventure that catches your eye!