Table of Contents
- Introduction
- The Magic Behind the Shimmer: What Makes Bubbles So Fascinating?
- Crafting the Perfect Potion: Your Ultimate Bubble Solution Recipe
- Essential Gear for Your Bubbly Lab
- Dive into Discovery: Captivating Bubble Science Experiments for Kids
- Beyond the Pop: Maximizing Learning and Fun with Bubbles
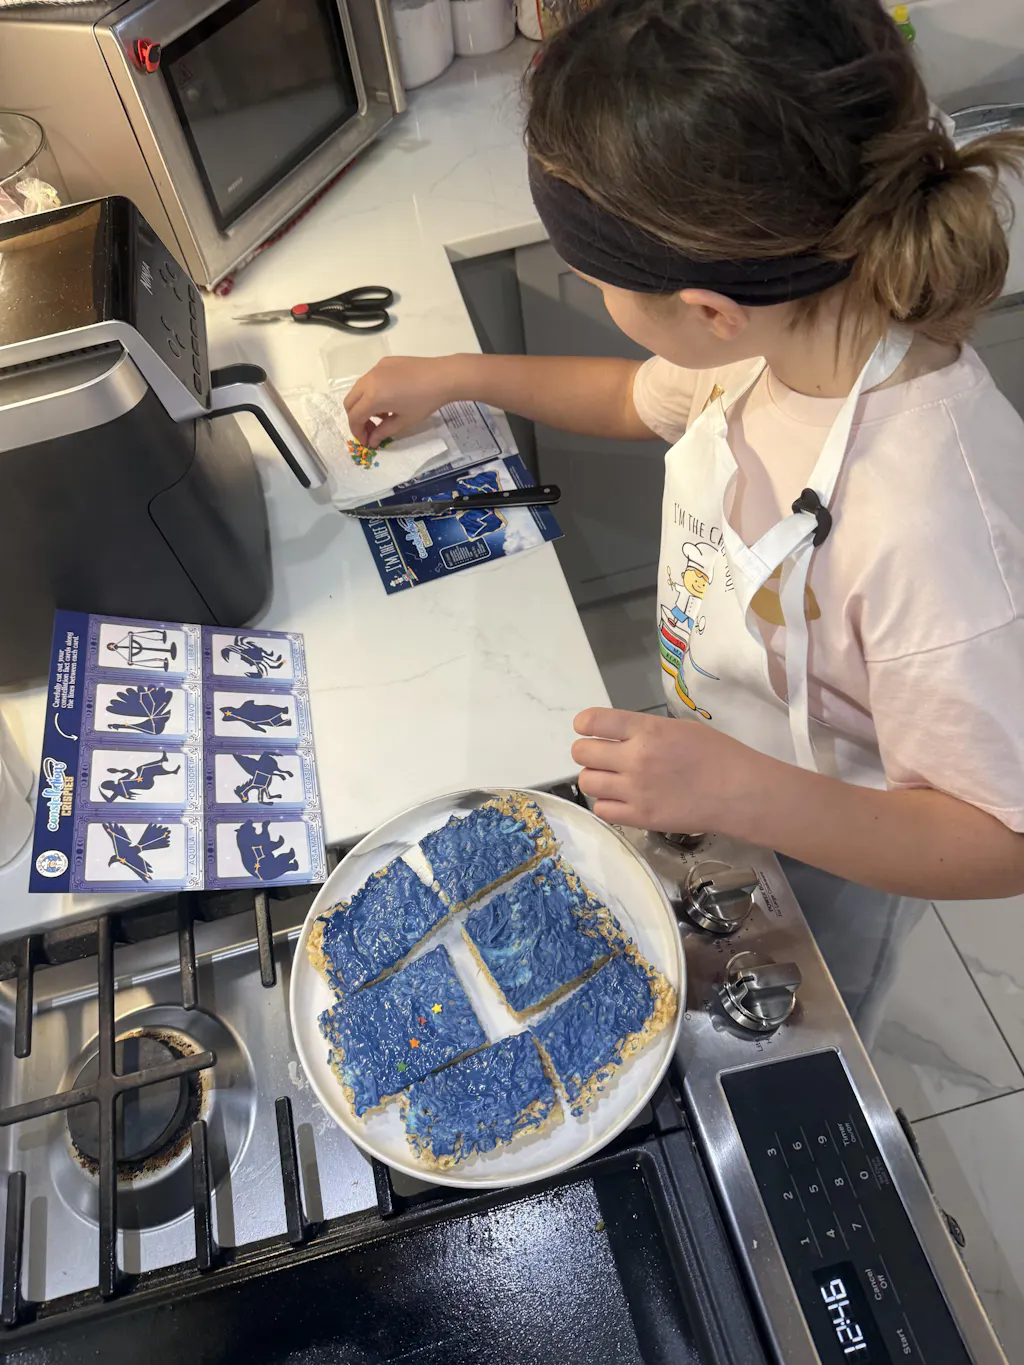
- Why I'm the Chef Too! Embraces Hands-On STEM Learning
- Conclusion
- FAQ Section
Did you know that a simple bubble, shimmering with iridescent colors and floating effortlessly in the air, holds a universe of scientific wonder? For children, bubbles are pure magic—a momentary, fragile sphere of delight that invites wonder and laughter. But beyond the simple joy of chasing and popping them, bubbles offer a fantastic, accessible gateway into complex scientific principles, making them perfect for hands-on learning at home or in the classroom.
At I'm the Chef Too!, our mission is to blend food, STEM, and the arts into one-of-a-kind "edutainment" experiences that spark curiosity and creativity in children. We believe that the best learning happens when it's tangible, engaging, and, dare we say, delicious! Just like our cooking adventures, exploring the science of bubbles offers a rich, screen-free educational alternative that fosters critical thinking, develops fine motor skills, and creates unforgettable family bonding moments. This post will dive deep into the captivating world of bubble science, exploring everything from crafting the perfect bubble solution to conducting a variety of mesmerizing bubble science experiments for kids that will turn everyday ingredients into profound learning experiences. Get ready to transform your kitchen or backyard into a bubbly laboratory of discovery!
Introduction
Imagine the sheer delight on a child's face as a giant, shimmering bubble floats gracefully into the sky, reflecting a miniature rainbow on its surface. Or the focused concentration as they carefully try to bounce a bubble without popping it. These aren't just moments of play; they are powerful learning opportunities, disguised as pure fun. Bubbles, those ephemeral spheres of soapy water, are much more than simple toys; they are dynamic, observable scientific phenomena begging to be explored.
In a world increasingly dominated by screens, finding engaging, hands-free activities that genuinely educate can be a challenge. That's where the magic of bubble science steps in. This blog post is your ultimate guide to unlocking the scientific secrets hidden within every bubble. We'll show you how to create the best bubble solutions, gather your supplies, and embark on a series of captivating bubble science experiments for kids—from the surprisingly simple to the truly spectacular. You'll learn about surface tension, light interference, gas laws, fluid dynamics, and so much more, all while having an absolute blast. Our goal is to empower parents and educators with practical, valuable advice and activities that foster a love for learning, build confidence, develop key skills, and create joyful family memories, right in line with the "edutainment" philosophy that drives every one of our I'm the Chef Too! kits. So, roll up your sleeves, because a world of soapy delight and scientific discovery awaits!
The Magic Behind the Shimmer: What Makes Bubbles So Fascinating?
Before we dive into the exciting experiments, let's understand the fundamental science that gives bubbles their unique properties. At its core, a bubble is a very thin film of soapy water trapping air. But what makes this simple combination so extraordinary?
- Surface Tension: This is the superstar of bubble science! Water molecules are highly attracted to each other, pulling together tightly. This inward pull creates "surface tension," making the surface of water behave almost like a thin, elastic skin. Soap, however, is the secret ingredient that lowers water's surface tension, making the water film flexible enough to stretch and form a bubble without immediately snapping back or breaking. Without soap, water molecules would pull too hard and the bubble wouldn't form.
- Cohesion and Adhesion: Cohesion is the attraction between like molecules (water to water), while adhesion is the attraction between different molecules (water to soap). In a bubble, water molecules cohere strongly, maintaining the spherical shape, while soap molecules adhere to both the water and the air, stabilizing the film.
- Light Interference and Rainbows: The stunning, iridescent colors you see on a bubble aren't painted on; they're a trick of light! As light waves hit the super-thin soap film, some waves reflect off the outer surface, while others penetrate the film and reflect off the inner surface. When these reflected waves recombine, they can either reinforce each other (making certain colors appear brighter) or cancel each other out (making certain colors disappear). The exact colors you see depend on the thickness of the soap film and the angle at which you're viewing it. As the film thins (due to evaporation or drainage), the colors shift, eventually showing a clear, dark spot just before the bubble pops.
- Why Are Bubbles Always Round? This is another fascinating aspect of surface tension. A sphere is the shape that encloses the most volume for the least amount of surface area. Nature, in its infinite efficiency, prefers this minimal energy state. The surface tension of the soap film pulls the bubble into this perfect spherical shape because it requires the least amount of film to hold the trapped air. Even if you use a square bubble wand, the bubble that forms will still be round, though it might momentarily take on a square "frame" from the wand.
- Evaporation and the Pop: Bubbles are fleeting because the water in the soap film slowly evaporates into the air. As the water disappears, the film thins and weakens. Eventually, a single point on the film becomes too thin to withstand the internal air pressure or an external disturbance (like a speck of dust or contact with a dry object), and pop! the bubble bursts.
Understanding these basic principles transforms simple bubble play into a profound scientific investigation. Just as our I'm the Chef Too! kits break down complex scientific concepts into palatable, hands-on cooking projects, bubble science makes abstract physics and chemistry tangible and exciting for young learners.
Crafting the Perfect Potion: Your Ultimate Bubble Solution Recipe
The secret to truly spectacular bubble science experiments for kids often lies in the quality of your bubble solution. While store-bought solutions work, making your own allows for customization, a deeper understanding of ingredients, and often produces much stronger, longer-lasting bubbles perfect for more advanced experiments like bouncing or giant bubbles.
The Basic Bubble Solution (Your Foundation)
This simple recipe is the starting point for all your bubbly adventures:
- 1 cup warm water
- 1/4 cup liquid dish soap (Choose a good quality, original formula dish soap, often without "ultra" or "concentrated" labels which can sometimes make the solution too thick or difficult to bubble consistently.)
Instructions: Gently stir the dish soap into the warm water. Stir slowly to avoid creating too many suds, as excessive foam can make it harder to blow good bubbles. Allow the mixture to sit for at least an hour, or even better, overnight. This resting period allows the ingredients to fully incorporate and any foam to dissipate, resulting in a more stable solution.
Enhancing Your Solution for Super Bubbles
To make your bubbles stronger, more elastic, and longer-lasting, you need to add ingredients that slow down water evaporation and increase the film's durability.
1. The Glycerin Boost (Preferred for Bouncing Bubbles):
Glycerin is a humectant, meaning it attracts and holds onto water molecules. Adding it to your bubble solution helps the water evaporate more slowly, thus extending the life of your bubbles.
- Add 1-2 tablespoons of glycerin to your basic bubble solution.
- How to make it: Combine 1 cup water, 1/4 cup dish soap, and 2 tablespoons glycerin. Stir gently and let it rest.
2. The Corn Syrup/Sugar Alternative:
If glycerin isn't readily available, light corn syrup or even sugar can serve a similar purpose, thickening the water and slowing evaporation. Your bubbles might be a bit stickier with these options, but they still work wonderfully!
- Add 1-2 tablespoons of light corn syrup or sugar to your basic bubble solution.
- How to make it: Combine 1 cup water, 1/4 cup dish soap, and 2 tablespoons corn syrup (or sugar). Stir gently until dissolved and let it rest.
Tips for Success:
- Distilled Water: For the absolute best results, especially for giant or unpoppable bubbles, use distilled water. Tap water contains minerals that can interfere with the soap film's stability.
- Gentle Mixing: Always stir slowly to prevent excessive sudsing. Foam means soap molecules are already working to encapsulate air, rather than forming a stable film.
- Patience is Key: Allowing your solution to sit overnight is a game-changer. It helps the polymers in the soap and glycerin (or syrup) fully hydrate and integrate, leading to a much stronger and more flexible bubble film.
- Experimentation: Just like in our I'm the Chef Too! kits, where a precise blend of ingredients creates a magical culinary and scientific outcome, feel free to experiment with the ratios slightly! A little more soap, a little more glycerin – observe how each change affects your bubbles. This hands-on tinkering is a core part of the scientific process we love to foster.
Essential Gear for Your Bubbly Lab
You don't need a fancy laboratory to conduct incredible bubble science experiments for kids. Most of what you need can be found around your house!
- Bubble Solution: Your homemade potion is step one!
-
Bubble Wands: Store-bought wands are great, but DIY options add another layer of STEM learning.
- Straws: Excellent for individual bubbles, blowing into containers, or making a bubble inside a bubble.
- Plastic Bottles & Socks: Cut the bottom off a plastic bottle, stretch an old sock over the end, secure with an elastic band. Dip the sock-covered end into solution and blow through the mouthpiece to create amazing "bubble snakes."
- Pipe Cleaners/Wire: Bend pipe cleaners or sturdy wire (like a straightened metal coat hanger) into various shapes (circles, squares, triangles) to create custom bubble wands. Wrap the wire with string to help hold more solution.
- Gloves: Clean knit gloves (like soft winter gloves) are essential for bouncing bubbles. They prevent the natural oils and dirt on your skin from popping the delicate bubble film.
- Bowls/Trays: Wide, shallow containers for dipping wands are ideal. Trays can help contain any mess.
- Food Coloring: For artistic bubble experiments.
- Dry Ice (with adult supervision and proper handling): For dramatic fog-filled bubbles. Always use tongs and ensure good ventilation.
- Measuring Cups and Spoons: For precise solution mixing.
- Paper/Cardstock: For bubble painting.
- Other household items: Sponges, funnels, string, rubber bands – encourage kids to think about how these can be repurposed for bubble fun.
Remember, the emphasis is on accessible learning. We believe that engaging kids in STEM doesn't require complex equipment, but rather a curious mind and a willingness to explore, a philosophy at the heart of every I'm the Chef Too! kit.
Dive into Discovery: Captivating Bubble Science Experiments for Kids
Now, for the exciting part! Let's get hands-on with a variety of bubble science experiments that will mesmerize and educate. For each experiment, we'll explain the "how-to," the "science behind it," and what "observations" to look for. Always remember that adult supervision is crucial for all activities, especially when working with younger children or specific materials like dry ice.
I. Classic & Foundational Bubble Explorations
These experiments are fantastic entry points into the world of bubble science, highlighting core principles.
1. Bouncing Bubbles: Catching the Uncatchable!
This is often one of the most astonishing bubble tricks for kids, making them feel like true bubble masters!
-
How-To:
- Make sure you've prepared a strong bubble solution, ideally with glycerin, and let it rest.
- Each participant puts on a clean, soft knit glove.
- Dip your bubble wand into the solution and gently blow a medium-sized bubble.
- Carefully hold out your gloved hand, flat and steady, and try to catch the bubble.
- Once caught, try gently bouncing it from hand to hand, or even passing it to another gloved friend!
- The Science: Bubbles usually pop upon contact with your bare skin because of the natural oils, dirt, and microscopic textures that disrupt the delicate soap film. The clean knit glove acts as a protective, dry, and smooth barrier. The fabric absorbs any slight moisture and prevents the bubble from touching anything that would break its surface tension. It's like giving the bubble a soft, cushioned landing pad!
-
Observations:
- Compare how long bubbles last on bare hands versus gloved hands.
- Experiment with different types of gloves (e.g., fleece, cotton, wool) to see which works best.
- Notice the gentle "give" of the bubble as it lands on the fabric.
Just like discovering the secret to bouncing bubbles, imagine the excitement of a new scientific adventure delivered to your door every month! Our Chef's Club Subscription brings these kinds of hands-on discoveries right to your kitchen, complete with pre-measured ingredients and specialty supplies for stress-free learning and fun.
2. Unpoppable Bubbles: The Illusion of Immortality
While no bubble is truly unpoppable, we can make them remarkably resilient by fortifying their film. This experiment builds on the bouncing bubbles concept.
-
How-To:
- Use your strongest bubble solution (with glycerin and distilled water, rested overnight).
- Blow a bubble and try to catch it on a gloved hand (as above).
- Alternatively, you can try to "pop" it with another gloved finger. It will resist!
- For a different approach, use a straw to blow a bubble onto a slightly damp, smooth surface (like a clean countertop or mirror) that has been lightly wiped with a tiny bit of bubble solution. Sometimes, a very stable bubble can briefly "stick" without popping.
- The Science: The reinforced bubble solution, with its increased viscosity and reduced evaporation rate, creates a more robust and flexible film. The gloved hand provides a surface that doesn't disrupt the film's integrity. When on a prepared smooth, damp surface, the surface tension of the bubble can briefly merge with the surface tension of the damp surface, holding it in place.
-
Observations:
- How long can you keep an "unpoppable" bubble intact?
- What happens if you try to pop it with a dry finger versus a gloved finger?
- Can you gently push two unpoppable bubbles together without them merging immediately?
3. Bubble Snakes: A Train of Bubbles
This is a visually stunning and incredibly fun experiment that shows how airflow and a continuous soap film can create long chains of bubbles.
-
How-To:
- Cut the bottom off a plastic water bottle.
- Stretch an old sock (or a piece of fabric) over the cut end of the bottle, securing it with a rubber band.
- Pour a shallow amount of bubble solution into a plate or tray.
- Dip the sock-covered end of the bottle into the solution.
- Place your mouth on the drinking end of the bottle and gently blow out. A long "snake" of bubbles will emerge from the sock!
- Optional: Add a few drops of food coloring to the sock for colorful bubble snakes!
- The Science: When you blow through the bottle, air is forced through the mesh of the sock. Each tiny hole in the sock acts like a mini bubble wand, creating many small bubbles that adhere to each other due to surface tension, forming a continuous "snake." The soap film on the sock gets refreshed with each dip, allowing for a continuous stream.
-
Observations:
- How does changing the blowing force affect the snake? (Gentle vs. hard blow).
- What happens if the sock is too wet or too dry?
- Try different sock textures (e.g., thin nylon vs. thick cotton).
4. Bubble Inside a Bubble: A Dazzling Sphere Within a Sphere
This experiment requires a little patience and a steady hand but yields an incredibly satisfying result.
-
How-To:
- Pour your strong bubble solution into a wide, shallow bowl or tray.
- Dip one end of a straw into the bubble solution.
- Carefully blow a medium-sized bubble onto the surface of the solution in the bowl. Don't let it pop! It should sit like a dome.
- Dip the straw into the solution again, then very gently push the wet end of the straw through the wall of the first bubble, into its center.
- Slowly blow a second, smaller bubble inside the first one.
- Carefully withdraw the straw. With luck, you'll have a perfect bubble inside a bubble!
- The Science: The key here is the thin layer of bubble solution coating the straw when you insert it. This wet film allows the straw to pass through the outer bubble's wall without breaking its surface tension. The inner bubble forms independently, held in place by its own surface tension and the air trapped within the outer sphere.
-
Observations:
- What happens if the straw isn't wet enough?
- Can you create three or more bubbles nested within each other?
- Notice how the inner bubble floats freely within the outer one, almost like a miniature planet.
5. Make Giant Bubbles: Bigger is Better!
Who doesn't love a colossal bubble? Making giant bubbles is a breathtaking experience that demonstrates the strength and elasticity of a good bubble solution.
-
How-To:
- You'll need a large "wand" for this. You can make one by tying two straws together with string, or by creating a large loop from a straightened wire coat hanger wrapped with string (to absorb more solution).
- Prepare a very strong bubble solution, using glycerin or corn syrup, and let it rest overnight.
- Pour a generous amount of solution into a shallow tub or kiddie pool.
- Dip your giant wand fully into the solution, ensuring the entire loop is covered.
- Slowly and steadily lift the wand out, holding it vertically. Walk backward slowly to allow air to fill the film, or gently wave the wand to catch a breeze.
- Close the wand (by bringing the ends together if using the string/straw method) to release the bubble.
- The Science: Giant bubbles require a solution with extremely high surface elasticity and excellent resistance to evaporation. The large wand creates a massive film, and the slow movement allows enough air to be trapped before the film stretches to its limit. They also demonstrate how even a huge volume of air can be contained within a surprisingly thin, strong film.
-
Observations:
- How long can you keep a giant bubble afloat?
- How do wind conditions affect giant bubbles? (A slight breeze can help, too much wind can pop them).
- Notice the amazing shifting colors as the light catches the vast surface area of the bubble.
If your child loves the creative challenge of building with bubbles, they'll adore exploring the variety of hands-on STEM and cooking kits in our main shop, each designed for a unique adventure. Find the perfect theme for your little learner by browsing our complete collection of one-time kits!
6. Building with Bubbles / Bubble Sculptures: Soap Film Geometry
This experiment allows kids to explore the natural geometric tendencies of bubbles as they connect and form structures.
-
How-To:
- Prepare a good bubble solution in a wide, shallow container.
- Using a straw, blow a few bubbles onto a clean, flat surface that has been lightly wetted with bubble solution.
- As the bubbles form, gently push them together with another bubble or a wet straw. Observe how they merge and share walls.
- You can also try dipping the end of a straw into solution and blowing a bubble. Then, quickly dip the straw into the solution again, and touch the wet straw to the first bubble. Blow another bubble that attaches to the first one. Continue this process to build "towers" or "sculptures" of bubbles.
- The Science: When bubbles meet, they don't pop; they merge, and their soap films rearrange to minimize surface area, following strict geometric rules. Where three bubble walls meet, they always form 120-degree angles. Where four bubble walls meet, they create a vertex at 109.5 degrees. This is a fundamental principle of minimal surfaces in mathematics and physics.
-
Observations:
- Count how many bubble walls meet at a junction.
- Can you create a long "tunnel" of connected bubbles?
- Notice how adding more bubbles changes the overall structure and stability of your sculpture.
II. Visual & Transformative Bubble Adventures
These experiments add an extra layer of visual appeal and introduce concepts like light, temperature, and states of matter.
7. Square Bubbles: Defying Expectations
While individual bubbles are always round, we can use frames to explore how soap films interact with geometric boundaries.
-
How-To:
- Construct a cube-shaped frame using straws and pipe cleaners (or thin wire). Make sure the joints are secure.
- Prepare a strong bubble solution in a container large enough to submerge your cube frame.
- Carefully dip the entire cube frame into the solution, ensuring all sides are coated.
- Slowly lift the frame out. Observe the amazing flat, square-shaped soap films that form within the frame, and sometimes, a spherical bubble trapped inside these films.
- The Science: The soap film still tries to minimize its surface area, but the rigid geometric frame imposes constraints. Flat films form along the edges of the cube, creating "windows." If a bubble forms within this structure, it will still be spherical, but it will be contained by the flat films, creating an illusion of squareness. This experiment demonstrates how surface tension interacts with external forces.
-
Observations:
- How many flat films form within the cube?
- Can you see the spherical bubble trapped within the square films?
- What happens if you gently tilt the frame? Do the films shift?
8. Rainbow Bubbles: The Colors of Light
This experiment is less about manipulating bubbles and more about observing the beautiful physics of light.
-
How-To:
- Blow a variety of bubbles, both small and large, using your regular solution.
- Observe them under different lighting conditions: direct sunlight, indirect light, near a lamp.
- Pay close attention to the shifting colors on their surface.
- The Science: As mentioned earlier, the stunning rainbow colors are due to light interference. The thin soap film causes light waves reflecting off its inner and outer surfaces to interfere with each other. As the film thins (due to drainage or evaporation), the distance between these two surfaces changes, causing different wavelengths (colors) of light to be reinforced or canceled out. This creates the ever-changing kaleidoscope of colors you see.
-
Observations:
- Can you see bands of color moving as the bubble floats?
- Notice how the colors change just before the bubble pops (often a dark, clear spot appears at the top, indicating extreme thinness).
- Does the intensity of light affect how vibrant the colors appear?
9. Dry Ice Bubbles: Foggy Spheres of Wonder
This is a show-stopper experiment, but it requires strict adult supervision and careful handling of dry ice.
-
How-To:
- Place a few chunks of dry ice into a tall glass or beaker.
- Carefully pour some warm water over the dry ice. Immediately, dense white fog will begin to form and cascade out of the container.
- Dip a piece of string or a long, thin strip of cloth (like a dish towel) into your strong bubble solution.
- Gently wipe the wet string across the rim of the glass or beaker, trying to create a soap film over the top, trapping the fog inside.
- As the dry ice continues to sublimate (turn directly from solid to gas), the fog will expand, pushing the soap film upwards, creating a large, fog-filled bubble.
- Optional: As the large bubble grows, you can gently pop it with a gloved hand to release the spooky fog!
- The Science: Dry ice is solid carbon dioxide (CO2). When it comes into contact with warm water, it sublimes, turning directly into CO2 gas. This gas is much denser than regular air, so it sinks. The soap film traps this dense, cold CO2 gas, along with condensed water vapor (the "fog"), creating a bubble filled with swirling white clouds. It's a fantastic demonstration of sublimation and gas density.
- Safety Note: Dry ice is extremely cold (-109.3°F / -78.5°C) and can cause frostbite. Always handle with gloves or tongs. Ensure good ventilation as it produces CO2 gas. Never ingest dry ice.
-
Observations:
- Watch the mesmerizing swirling fog inside the bubble.
- How does the bubble grow and change shape as more gas is produced?
- What happens when the bubble finally pops, releasing the fog?
These kinds of captivating demonstrations are perfect for group learning! Discover how to bring our hands-on STEM adventures to your classroom, camp, or homeschool co-op. Learn more about our versatile programs for schools and groups, available with or without food components, designed to make learning engaging and fun for everyone.
10. Frozen Bubbles: A Winter Wonderland Experiment
If you live in a cold climate, this experiment offers a unique perspective on bubble formation and the effects of temperature.
-
How-To:
- Wait for a day when the temperature is below freezing (ideally below 15°F or -9°C).
- Take your strong bubble solution outside. It helps if the solution itself is very cold.
- Blow bubbles, either by hand or using a wand.
- Observe them as they float and land on a cold surface (like snow or frozen ground).
- The Science: When the water in the bubble's film reaches freezing temperatures, ice crystals begin to form. You might see intricate snowflake-like patterns spread across the bubble's surface. The soap and other additives (like glycerin) in the solution can lower the freezing point slightly and make the ice crystals form in unique ways. The bubble might freeze solid, or just partially, creating a beautiful, delicate frozen shell.
-
Observations:
- Watch the delicate ice crystals form on the bubble's surface.
- Does the bubble pop or remain intact once frozen?
- How does the wind affect the freezing process?
III. Artistic & Reactive Bubble Explorations
These activities blend science with art, fostering creativity alongside scientific inquiry.
11. Bubble Painting: Art with Air
This is a wonderfully messy and creative STEAM (Science, Technology, Engineering, Art, Math) activity!
-
How-To:
- Mix small batches of bubble solution with different food colorings in separate shallow bowls.
- Place a piece of paper (cardstock works well) on a protected surface.
- Dip a straw into a colored bubble solution and gently blow out (emphasize blowing out, not sucking in!).
- As the colored bubbles overflow the bowl, gently guide them to land on your paper.
- Repeat with different colors, overlapping the bubbles to create beautiful, abstract patterns.
- Let your artwork dry completely.
- The Science: This experiment showcases surface tension, color mixing, and pattern formation. The bubbles carry the colored soap film, and when they pop on the paper, they leave behind circular prints. Overlapping colors blend, demonstrating basic color theory. It's a fantastic example of how seemingly simple scientific phenomena can lead to complex and beautiful artistic expressions.
-
Observations:
- What kinds of patterns do the bubbles leave?
- How do the colors mix and blend when bubbles overlap?
- Does the size of the bubble affect the size of the paint print?
We believe in blending art and science, just like bubble painting! Our I'm the Chef Too! kits embrace this "edutainment" philosophy, combining delicious recipes with engaging STEM concepts for a truly enriching experience.
12. Make Foaming Bubbles: Over the Top Fun
This experiment explores different ways to create foam and bubbles, focusing on air entrapment.
-
How-To:
- In a bowl, combine water and dish soap, similar to your regular bubble solution.
- Instead of gently stirring, use an egg beater or whisk to vigorously whip the solution.
- Watch as a mountain of thick, stable foam forms!
- Optional: Add a few drops of food coloring for colorful foam. You can also add a little cornstarch to the mix to make the foam even thicker and more stable for sensory play.
- The Science: Whipping the soap solution traps a large amount of air within the soap film, creating many tiny, stable bubbles that aggregate into foam. The soap molecules surround each air pocket, and the cohesion of the water, along with the elasticity provided by the soap, holds the foam together. This is similar to how meringue forms from egg whites, where proteins stabilize air bubbles.
-
Observations:
- How does the foam feel compared to individual bubbles?
- How long does the foam last before collapsing?
- What happens if you try to blow bubbles into the foam?
13. Watercolor Bubble Blowing Sensory Play Bin: A Multi-Sensory Experience
Combine the joy of bubble blowing with tactile exploration and color.
-
How-To:
- Fill a shallow bin or tub with a few inches of water.
- Add drops of liquid watercolors or dilute food coloring in different sections of the bin to create colorful areas.
- Add a generous squirt of dish soap to each colored section.
- Provide straws, small whisks, and perhaps some plastic scoops or toys.
- Encourage children to blow into the colored water with straws to make foamy, colorful bubbles. They can also swirl the water, mix colors, and explore the textures.
- The Science: This activity engages multiple senses while demonstrating concepts like solubility, color mixing, and foam creation. Children observe how colors diffuse in water, how soap creates bubbles when agitated, and how different tools affect the foam. It’s a wonderfully open-ended exploration.
-
Observations:
- Which colors mix to create new colors?
- How does the texture of the water change with the addition of soap and bubbles?
- What sounds do the bubbles make when they pop or when you stir them?
14. Electrostatic Soap: The Power of Attraction
This experiment introduces basic principles of static electricity using a simple soap film.
-
How-To:
- Blow a regular bubble and try to get it to rest on a clean, dry surface, or just let one float in the air.
- Rub an inflated balloon vigorously on your hair or a wool sweater to build up a static charge.
- Slowly bring the charged balloon close to the bubble, without touching it.
- The Science: The balloon picks up electrons from your hair or sweater, giving it a negative static charge. When this negatively charged balloon is brought near the bubble (which is electrically neutral), it repels the electrons within the bubble's soap film, pushing them to the far side. This leaves the side of the bubble closer to the balloon with a slight positive charge. Opposite charges attract, so the bubble will be drawn towards the balloon, appearing to "dance" or move without being touched.
-
Observations:
- Does the bubble always move towards the balloon?
- What happens if you bring a different, uncharged object near the bubble?
- How close does the balloon need to be to affect the bubble?
15. Bubble Volcano / Fizzing Lemon Volcano: The Bubbling Reaction
This experiment combines a classic chemical reaction with the fun of bubbles, showing how gases can be trapped.
-
How-To:
- Stand a small cup inside a larger container (like a baking dish or tub) to catch any overflow.
- Pour about 1/4 cup of baking soda into the small cup.
- Add 1-2 tablespoons of dish soap to the baking soda.
- Optional: Add a few drops of food coloring for a more dramatic effect.
- Finally, pour about 1/2 cup of vinegar (or lemon juice for a "lemon volcano") into the cup. Stand back and watch the bubbly eruption!
- The Science: This is a classic acid-base chemical reaction. Baking soda (sodium bicarbonate) is a base, and vinegar (acetic acid) or lemon juice (citric acid) is an acid. When they mix, they react vigorously to produce carbon dioxide (CO2) gas. The dish soap traps this rapidly forming gas, creating a spectacular, overflowing "volcano" of foam and bubbles.
-
Observations:
- How quickly does the reaction happen?
- Does adding more soap create more foam?
- What happens if you use less vinegar?
From fizzing reactions to bouncy experiments, the wonders never cease when you engage in hands-on STEM. Keep the learning fun and continuous by joining The Chef's Club today! Our convenient monthly subscription boxes deliver a new adventure to your door with free shipping in the US, making it easy to foster a love for science and cooking all year long. You can choose from our flexible 3, 6, and 12-month pre-paid plans, perfect for gifting or ensuring long-term enrichment.
Beyond the Pop: Maximizing Learning and Fun with Bubbles
These bubble science experiments for kids are more than just fun; they are powerful tools for developing crucial skills. To truly maximize the learning potential, here are some tips:
- Encourage Observation and Questioning: Don't just show them; ask them! "What do you notice?" "Why do you think that happened?" "What would happen if we tried...?" This fosters scientific inquiry and critical thinking.
- Hypothesis and Experimentation: Before trying a variation, ask your child to make a guess (a hypothesis) about what they think will happen. Then, test it out! This is the core of the scientific method.
- Record Keeping (Bubble Journals): For older kids, encourage them to draw their observations, write down their hypotheses, and record the results. This builds literacy, observation skills, and scientific documentation habits.
-
Troubleshooting Tips:
- Windy Days: Bubbles don't like wind! Try bubble experiments indoors or on a very calm day.
- Solution Strength: If bubbles keep popping, your solution might be too weak or too diluted. Let it rest longer, or try adding a little more glycerin/corn syrup.
- Dirty Wands/Surfaces: Even tiny bits of oil or dirt can break the surface tension. Keep wands and hands clean.
- Safety First: Always remember that adult supervision is paramount, especially when working with younger children. For experiments involving dry ice, ensure proper handling with gloves/tongs and good ventilation.
- Embrace the Mess: Bubble play can be messy, and that's part of the fun! Prepare your space with drop cloths or do experiments outdoors. The joy of discovery often comes with a little bubbly chaos.
At I'm the Chef Too!, our philosophy, developed by mothers and educators, is all about fostering this kind of holistic learning. We believe in providing screen-free activities that not only teach complex subjects like chemistry and physics through tangible, hands-on cooking adventures but also build confidence, develop problem-solving skills, and facilitate meaningful family bonding. Every bubble that floats, shimmers, or pops is a mini lesson waiting to be explored, inspiring the next generation of curious minds.
Each bubble experiment offers a unique learning moment, much like every kit from I'm the Chef Too! is a complete, themed educational journey. Browse our complete collection of one-time kits to find your child's next passion, from delicious culinary creations to dazzling STEM discoveries!
Why I'm the Chef Too! Embraces Hands-On STEM Learning
The joy and educational value derived from simple bubble science experiments for kids perfectly embody the core mission and values of I'm the Chef Too!. We are passionate about creating "edutainment" experiences that seamlessly blend food, STEM, and the arts, transforming learning into an adventure. Our approach is rooted in the belief that children learn best when they are actively engaged, using their hands, senses, and imaginations.
- Sparking Curiosity and Creativity: Just as children are captivated by the shifting colors of a bubble or the unexpected bounce of a gloved hand, our kits are designed to spark wonder. Whether they're exploring the geology of edible rock candy or the chemical reactions that make our "Erupting Volcano Cakes" bubble over with deliciousness, we aim to ignite a lifelong passion for discovery.
- Facilitating Family Bonding: In today's fast-paced world, finding quality time to connect as a family is more important than ever. Our kits, much like a shared bubble experiment, provide a common ground for parents and children to collaborate, learn, and create lasting memories together.
- Providing a Screen-Free Educational Alternative: We understand the challenges of limiting screen time. Bubble science offers a refreshing, tangible alternative that engages children deeply without reliance on digital devices, encouraging them to interact with the physical world. Our kits deliver this same screen-free engagement, turning kitchen time into learning time.
- Teaching Complex Subjects Through Tangible Adventures: The abstract concepts of surface tension, light interference, and gas laws become concrete and understandable when observed in a bubble. Similarly, our cooking adventures transform complex STEM principles—from measuring and fractions to states of matter and chemical reactions—into edible lessons that are both engaging and delicious.
- Developed by Mothers and Educators: Every I'm the Chef Too! experience is thoughtfully crafted by a team of mothers and educators. This means our activities are not only scientifically sound and educationally rich but also practical, safe, and genuinely fun for children and families.
The principles of hands-on exploration and discovery are at the heart of our mission. If you're an educator or run a group, consider bringing our engaging programs to your setting. Learn more about our versatile school and group programs, available with or without food components, designed to make learning engaging and fun for everyone!
Conclusion
From the simple joy of blowing a single bubble to the intricate beauty of a frozen sphere, bubble science experiments for kids offer an unparalleled opportunity for hands-on, engaging STEM learning. We've explored the fascinating physics of surface tension, the magic of light interference, and the satisfying reactions of acids and bases, all encapsulated within those shimmering, ephemeral films. These activities are more than just entertainment; they are gateways to critical thinking, creative problem-solving, and a profound appreciation for the science that surrounds us every day.
By embracing these screen-free, interactive experiments, you're not just occupying your child's time; you're nurturing their innate curiosity, building their confidence, and creating invaluable family memories. This spirit of discovery and "edutainment" is precisely what drives I'm the Chef Too!. We are committed to delivering unique experiences that blend food, STEM, and the arts, turning complex concepts into tangible, delicious adventures.
Ready to bring a new world of scientific and culinary exploration right to your home? Don't let the learning stop here! Join thousands of families who are already experiencing the joy of discovery every month. Take the next step in fostering a love for learning in your child by subscribing to The Chef's Club today! A new adventure, complete with pre-measured ingredients and specialty supplies, is delivered to your door with free shipping in the US, making ongoing educational fun easier than ever.
FAQ Section
Q1: Why do bubbles always pop?
Bubbles pop because the water in their thin soap film slowly evaporates into the air. As the water leaves, the film becomes too thin and weak to hold the air inside, and it eventually breaks. Dust particles, oils from hands, or friction with dry surfaces can also puncture the delicate film, causing a pop.
Q2: What makes a good homemade bubble solution?
A good homemade bubble solution requires the right balance of water, liquid dish soap (avoiding "ultra" or "concentrated" formulas that might be too thick), and an additive like glycerin or light corn syrup. Glycerin or corn syrup are crucial because they thicken the water and slow down its evaporation, making the bubble film stronger and longer-lasting. Letting the solution rest overnight also helps the ingredients fully integrate, improving bubble quality.
Q3: Are bubble science experiments safe for young kids?
Yes, most bubble science experiments are very safe for young children when conducted with appropriate adult supervision. The ingredients are typically non-toxic (dish soap, water, glycerin/corn syrup). For experiments involving dry ice, strict adult supervision, proper handling with gloves or tongs, and good ventilation are essential due to its extreme cold and gas production. Always ensure children understand not to ingest bubble solution.
Q4: What scientific concepts can children learn from bubble experiments?
Bubbles are fantastic for teaching a wide range of STEM concepts, including:
- Surface Tension: How water molecules stick together and how soap reduces this tension.
- Cohesion & Adhesion: The attraction between molecules.
- Light & Optics: How light interferes to create rainbow colors.
- Fluid Dynamics: How air and liquids move and interact.
- Gas Laws: Demonstrated by expanding bubbles with gas (like CO2 from a baking soda and vinegar reaction).
- Evaporation: Why bubbles don't last forever.
- Geometry: How bubbles always form spheres and how they merge into specific angles.
- Static Electricity: How charged objects interact with bubbles.
Q5: Can I reuse bubble solution?
Yes, you can absolutely reuse bubble solution! Store it in an airtight container in a cool, dark place. Over time, the solution might degrade slightly, or small contaminants might accumulate, but generally, it will remain good for several weeks or even months. If you notice it's not making good bubbles anymore, it might be time to make a fresh batch.