Bright Ideas: Fun Lantern Craft Kids Will Adore

Table of Contents
- Introduction
- The Enduring Magic of Lanterns: Why Kids Love Them
- Beyond the Glow: Educational Benefits of Lantern Craft Kids
- Gathering Your Glow-Up Gear: Essential Supplies for Lantern Craft Kids
- DIY Dazzle: A Guide to Popular Lantern Craft Kids Projects
- Tips for a Sparkling Success: Making Lantern Crafts Fun & Safe
- Beyond Lanterns: Continuing the Hands-On Learning Journey
- Conclusion
- FAQ Section
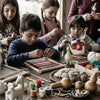
Imagine a crisp autumn evening, the air buzzing with anticipation. Or perhaps a cozy winter night, the scent of hot cocoa filling the kitchen. Now, picture your child’s face, aglow not just with the ambient light, but with the radiant pride of a handmade lantern they crafted themselves. It’s a scene that captures the essence of childhood wonder – a moment when creativity, a touch of science, and a spark of imagination converge.
At I'm the Chef Too!, we believe these moments are golden. We understand that hands-on activities are the purest form of "edutainment," blending fun with profound learning. This isn't just about making something pretty; it's about igniting curiosity, fostering family connection, and offering a cherished screen-free alternative. Today, we're diving deep into the enchanting world of lantern craft for kids, exploring how these simple projects can illuminate young minds and create lasting memories. From gathering natural treasures to transforming everyday items, we’ll uncover the magic behind each glowing creation, demonstrating that crafting a lantern is more than an activity – it's an adventure in discovery.
Introduction
There's something inherently magical about light. From the twinkling stars above to the flickering flame of a candle, light has captivated humanity for millennia, symbolizing hope, warmth, and discovery. For children, this fascination is even more pronounced. What if we told you that harnessing this ancient wonder into a tangible, beautiful object could also be a powerful learning experience? Welcome to the delightful world of lantern crafts for kids! These charming projects offer a fantastic way to blend artistic expression with foundational scientific principles, all while creating cherished keepsakes.
In this comprehensive guide, we'll journey through the multifaceted benefits of engaging children in lantern-making, from boosting fine motor skills and problem-solving abilities to sparking an early interest in STEM and the arts. We’ll explore various types of lanterns you can create with readily available and often upcycled materials, providing step-by-step instructions and practical tips for success. Our aim is to equip you with everything you need to transform a simple afternoon into an illuminating adventure, emphasizing the process of discovery and the joy of creation. By the end of this post, you'll be inspired to gather your little ones, switch off the screens, and embark on a glowing crafting escapade, celebrating the wonder of light and the endless possibilities of hands-on learning.
The Enduring Magic of Lanterns: Why Kids Love Them
Before we delve into the how-to, let's consider the "why." Why do children gravitate so naturally towards lanterns? It’s more than just a passing fancy; it’s an innate response to something deeply fundamental.
Firstly, lanterns engage the senses in profound ways. The soft, shifting glow of an LED tealight through colored paper or natural leaves is visually captivating. The textures of the materials – smooth glass, crinkly tissue paper, rough bark, delicate dried leaves – offer a tactile exploration. The act of creation itself often involves the subtle scent of glue or the earthy aroma of collected foliage. This multi-sensory engagement is incredibly stimulating for young minds, helping them process and understand their environment.
Secondly, there’s an undeniable sense of accomplishment that comes with bringing a lantern to life. Children, regardless of age, beam with pride when they hold up their finished project, seeing their efforts culminate in a functional, beautiful object. It validates their creativity and shows them that their hands can transform simple materials into something extraordinary. This boost in self-esteem is crucial for their developing sense of agency and confidence.
Furthermore, lanterns connect us to celebrations, traditions, and storytelling across cultures. Think of festive parades, quiet evening walks, or simply creating a cozy atmosphere for reading. Crafting a lantern can be an entry point into learning about cultural holidays like St. Martin’s Day or simply creating a special, personalized nightlight for their bedroom. This connection to broader narratives and personal rituals adds depth and meaning to the crafting experience.
Finally, and perhaps most importantly in our increasingly digital world, lantern crafts offer a truly screen-free engagement. They demand focus, patience, and direct interaction with physical materials. In a society saturated with flashing lights and instant gratification, the slow, deliberate process of making a lantern provides a calming, meditative experience that encourages presence and thoughtful creation. It’s a wonderful way to foster imagination, encouraging kids to dream up worlds where their lantern guides an adventure or illuminates a secret fort. This unplugged play is invaluable for holistic development, allowing children to engage with the real world in a meaningful, tangible way. Just like the engaging, hands-on cooking and STEM adventures we champion at I'm the Chef Too!, lantern crafts provide that crucial bridge between imagination and tangible achievement.
Beyond the Glow: Educational Benefits of Lantern Craft Kids
While the visual appeal of a handmade lantern is immediate and undeniable, the educational benefits that unfold during the crafting process are truly where the magic lies. At I'm the Chef Too!, our mission is to blend food, STEM, and the arts into one-of-a-kind "edutainment" experiences, and lantern crafts perfectly embody this philosophy, albeit in a different medium. These projects are rich with opportunities for children to explore complex subjects through tangible, hands-on engagement.
STEM Learning in Disguise
Lantern crafts are stealthy STEM teachers, introducing fundamental concepts without feeling like a classroom lesson.
- Physics of Light: As children experiment with different materials – translucent tissue paper, opaque cardboard, clear glass – they intuitively learn about how light interacts with objects. They discover translucency (allowing light to pass through softly), opacity (blocking light), and transparency (allowing clear light passage). This exploration lays a basic foundation for understanding light transmission and refraction. What makes a lantern glow? How does the light bounce or diffuse? These are real-world physics questions they engage with.
- Engineering Principles: Building a lantern involves basic structural engineering. How do you make it stand? How do you attach a handle so it can be carried? Kids consider stability, balance, and how to connect different components securely. Whether they're folding paper to create a sturdy frame or bending wire for a handle, they're engaging in design and construction challenges, learning about forces and materials.
- Chemistry in Action: The role of glue might seem simple, but it’s a direct application of chemistry. Kids observe how liquid glue adheres to different surfaces and then transforms as it dries, creating a bond. They might even notice how certain glues work better with specific papers or how a DIY Mod Podge mixture (glue and water) changes consistency. This is a practical lesson in adhesion and material properties.
- Mathematical Concepts: From cutting shapes to fitting pieces together, math is subtly woven into lantern making. Children practice geometry when cutting circles, squares, or triangles for decoration. They engage in measurement (estimating paper size for a jar, cutting wire for a handle) and spatial reasoning (how pieces fit together in three dimensions). This intuitive application of math makes abstract concepts concrete and relatable.
Artistic Expression & Creativity
Lantern crafts are a canvas for imagination. Children make choices about colors, patterns, and arrangements, developing their aesthetic sense.
- Color Theory: Layering different colored tissue papers teaches them about how colors combine and how light changes their appearance. A blue layer over a yellow layer might create a green glow, for instance.
- Design and Composition: Deciding where to place leaves, how to arrange geometric shapes, or what pattern to create encourages thoughtful design. There’s no right or wrong, fostering a sense of artistic freedom and personal style.
- Texture Exploration: Working with various materials – smooth paper, rough leaves, glass – allows for sensory exploration and understanding of different textures.
Fine Motor Skills & Coordination
The physical acts involved in lantern making are excellent for developing essential motor skills.
- Cutting: Using scissors to cut paper into shapes or strips hones hand-eye coordination and strengthens hand muscles.
- Gluing: Applying glue precisely with a brush or finger helps refine fine motor control.
- Tearing, Folding, and Shaping: Manipulating different materials, whether it's carefully tearing tissue paper for a feathered edge or folding paper into a specific structure, improves dexterity and coordination.
Problem-Solving & Patience
Not every step goes perfectly, and that's part of the learning!
- Troubleshooting: What if the paper isn't sticking? How do I make the handle strong enough? These challenges encourage children to think critically and find solutions, building resilience and adaptability.
- Patience: Waiting for glue to dry or carefully assembling intricate parts teaches patience and the rewards of sustained effort. The anticipation of the final glowing product makes the waiting worthwhile.
Following Instructions & Independent Play
While following instructions is important, lantern crafts also allow for significant independent exploration. Children learn to interpret and execute steps, but then they can deviate, add their own flair, and truly make the project their own. This balance fosters both structured learning and imaginative, self-directed play.
At I'm the Chef Too!, we see these same principles at play when kids are measuring ingredients, observing chemical reactions in baking, or decorating their culinary creations. It's about empowering children to be curious, creative, and confident in their abilities. We believe these tangible, hands-on experiences, whether in the kitchen or with craft supplies, are fundamental to developing a lifelong love for learning. Ready to spark even more hands-on creativity? Explore our full library of adventure kits available for a single purchase in our shop. You might just find the perfect next adventure to continue this journey of discovery!
Gathering Your Glow-Up Gear: Essential Supplies for Lantern Craft Kids
One of the beautiful things about lantern crafts is their versatility and how many can be made with items you already have around the house or can easily collect. We’re all about making learning accessible and fun, and that starts with simple, manageable supplies. Here’s a rundown of what you’ll typically need to get started, along with some eco-friendly upcycling ideas.
Core Crafting Supplies
-
Paper Power:
- Tissue Paper: Comes in a rainbow of colors, perfect for translucent, stained-glass effects. It's inexpensive and easy for kids to tear or cut.
- Greaseproof/Baking Paper: Often used in leaf lanterns, this paper has a slight translucence and waxiness that helps preserve natural elements and diffuse light beautifully. White varieties are especially effective.
- Kite Paper: A stiffer, more durable translucent paper that offers vibrant colors and holds up well to glue, making it ideal for more robust designs or for younger children.
- Construction Paper/Cardboard: Essential for creating sturdy bases, tops, or structural elements for your lanterns. Look for colorful options to add flair.
-
Adhesive Allies:
- Mod Podge: A crafter’s best friend, it acts as a glue, sealant, and finish. It dries clear and provides a durable, smooth surface.
- Diluted White Glue: An excellent, budget-friendly alternative to Mod Podge. Mix 2 parts white school glue to 1 part water for a similar effect. It works wonders for adhering paper to surfaces and sealing designs.
- Glue Sticks/Stapler: Good for younger kids or for quickly securing paper seams where less precision is needed.
-
Cutting & Spreading Tools:
- Kid-Safe Scissors: For cutting paper and lighter materials. Always supervise children when using scissors.
- Paint Brushes: Small, inexpensive brushes are perfect for applying glue smoothly and evenly, especially for Mod Podge or diluted glue.
- Small Disposable Bowls: Handy for mixing and holding glue.
-
The Light Source (Crucial for Safety!):
- Electric/LED Tealights: These are highly recommended for all kid-made lanterns, especially those using paper or natural elements. They are flameless, battery-operated, and eliminate any fire hazard, making them safe for children’s rooms or lantern walks. You can find them cheaply online or at craft stores.
- Real Candles: While traditional, real candles introduce a significant fire risk, especially with paper-based crafts. If used, adult supervision is absolutely mandatory, and the lantern must be designed with ample ventilation and made from non-flammable materials (like thick glass) with a secure base. For children's projects, we always advocate for the safety of LED alternatives.
Nature's Contributions
- Autumn Leaves: A staple for many beautiful lanterns. Look for leaves in various colors and sizes. Smaller leaves tend to fit better on curved surfaces. You don't always have to press them, but a day or two between newspaper can help them flatten and absorb dampness.
- Dried Flowers or Petals: Can add another delicate, natural element, though they may require careful handling.
Upcycled Treasures (Our Favorite!)
Embracing upcycling aligns perfectly with our ethos of creative problem-solving and making the most of what you have. It's a fantastic way to teach kids about sustainability and resourcefulness.
- Glass Jars: Clean, sturdy glass jars (pickle jars, jam jars, Mason jars) are ideal for many lantern projects. They provide a transparent, durable base that can be decorated with paper, paint, or natural elements.
- Plastic Containers: Upcycled yoghurt tubs, milk bottles (cut to size), or other frosted plastic containers make excellent bases. They are lightweight and durable, perfect for little hands. Frosted plastic is particularly good as it naturally diffuses light. If using clear plastic, consider gluing a layer of white tissue paper underneath first for better light diffusion.
- Cheese Boxes/Cardboard Cylinders: The round cardboard boxes from certain cheeses (like Camembert or even Dairy Lea) are perfect for providing a ready-made structure for paper or leaf lanterns. If you don't have these, you can easily create a cylindrical base from recycled cardboard or even a paper towel roll.
Having these materials on hand ensures you’re always ready for an impromptu creative session. It’s amazing what beautiful things can emerge from a few simple items and a splash of imagination! For even more creative fun delivered right to your door, consider joining The Chef's Club! Each month brings a new blend of culinary and STEM adventure, complete with pre-measured ingredients and specialty supplies, making hands-on learning effortless and exciting.
DIY Dazzle: A Guide to Popular Lantern Craft Kids Projects
Now that we've gathered our supplies and understand the "why," let's get to the "how"! Here are some beloved lantern craft projects that are perfect for kids of various ages and skill levels, promising a delightful blend of creativity and discovery.
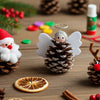
A. Nature's Glow: Leaf Lanterns
Inspired by the beauty of autumn, leaf lanterns capture the vibrant colors of fall and turn them into a stunning, glowing display. These are a fantastic way to bring the outdoors in and appreciate natural wonders.
Materials:
- Autumn leaves (smaller leaves work best)
- Greaseproof or baking paper (white is ideal for better glow)
- Mod Podge or diluted white glue (2 parts glue to 1 part water)
- Paintbrush
- Scissors
- Upcycled cheese boxes or cardboard (for base and top) OR a glass jar
- Electric tealight
- Optional: Wire and pliers (for handle) or string
Step-by-Step Guide:
- Leaf Collection & Prep: Head outdoors for a nature walk and collect a variety of colorful leaves. If your leaves are damp, spread them between sheets of newspaper for a day or two. This helps absorb moisture and slightly flatten them, resulting in a smoother finish. Don't worry about fully pressing or preserving them for weeks; a couple of days is usually enough to remove dampness.
- Paper Prep: If using a cheese box, cut two sheets of greaseproof paper to fit the height and circumference of your box. If using a glass jar, cut the paper to fit around the jar, slightly overlapping.
- First Layer of Glue: Lay one sheet of greaseproof paper flat on your protected workspace. Apply a thin, even layer of Mod Podge or diluted glue over the entire surface using your paintbrush.
- Leaf Placement: Let your child arrange the leaves onto the glued paper. Encourage them to experiment with overlapping, creating patterns, or simply covering the surface. Smaller leaves allow for more intricate designs. Remind them that less overlap might allow more light to shine through later, but creativity is key!
- Second Paper Layer: Apply another layer of glue over the leaves and gently press the second sheet of greaseproof paper on top. Smooth it down carefully to remove any air bubbles or wrinkles. For a very flat finish, you can place some heavy books on top for an hour or so while it dries.
-
Assembly (Cheese Box Method):
- Carefully remove the "top part" of the cheese box lid, leaving just the rim to create an opening for the LED tealight.
- Once the leaf-covered paper is dry, curl it into a cylinder. Glue or staple one short edge to the other to form a seam.
- Glue this paper cylinder to the inside rim of the cheese box base. Repeat for the top lid. This creates a sturdy, open-ended lantern.
-
Assembly (Glass Jar Method):
- Once the leaf-covered paper is dry, wrap it around your clean glass jar. Use glue to secure the seam where the paper overlaps.
- You can also glue the paper directly to the outside of the jar in layers, creating a collage effect.
- Add a Handle (Optional): If you want to carry your lantern, create a wire handle by bending a piece of flexible wire around the top edge of your cheese box or jar, securing it with pliers. Alternatively, punch two holes at the top and thread a string through.
- Illuminate! Place an electric tealight inside and enjoy the magical glow of your nature-inspired lantern. These make gorgeous Thanksgiving decorations or a lovely light for a St. Martin's Day walk.
B. Upcycled Radiance: Tissue Paper Container Lanterns
This project champions resourcefulness, transforming everyday household waste into dazzling light art. It's a fantastic way to teach kids about sustainability while having loads of creative fun.
Materials:
- Upcycled frosted plastic yoghurt tubs, milk bottles (top cut off), or clean glass jars
- Tissue paper in assorted colors
- Mod Podge or DIY Mod Podge (2 parts white glue to 1 part water)
- Paintbrush
- Scissors
- Electric tealight
Step-by-Step Guide:
- Container Prep: Thoroughly wash and dry your chosen plastic container or glass jar. Remove any labels. If using clear plastic, you might want to glue a base layer of white tissue paper first to help diffuse the light more evenly.
- Tissue Paper Shapes: Cut or tear the tissue paper into various geometric shapes – squares, circles, triangles, strips, or even abstract torn pieces. Encourage your child to experiment with different sizes and forms. Tracing around small objects like bottle caps can create perfect circles.
- Apply Mod Podge: Brush a section of the container with Mod Podge (or diluted glue).
- Layering Magic: Start placing the tissue paper shapes onto the wet glue, gently pressing them down. Overlap the shapes to create interesting color combinations and patterns. Your child can create a deliberate design or a beautiful abstract collage.
- Seal and Repeat: Once a section is covered, brush another thin layer of Mod Podge over the tissue paper to seal it. This creates a smooth, durable finish and enhances the translucency. It’s a good idea to let layers dry slightly before adding more glue to prevent the tissue paper colors from bleeding too much. Continue this process until the entire container is covered.
- Final Dry: Allow the lantern to dry completely. This can take several hours, or even overnight, depending on how thick the glue layers are. The Mod Podge will dry clear and firm.
- Light It Up! Place an electric tealight inside and watch your upcycled creation glow! These make charming DIY nightlights or decorative accents for any room.
Just as these crafts transform simple materials into something extraordinary, we at I'm the Chef Too! believe in transforming learning into an adventure. Ready for a new blend of creativity and discovery delivered to your door every month? Join The Chef's Club today and enjoy free shipping on every box, bringing unique "edutainment" experiences right to your family!
C. Celestial Light: Starry Night Jar Lanterns
Let's reach for the stars with a lantern that evokes the wonder of the night sky! This project uses glass jars as its base and encourages artistic expression through painting, stenciling, and glitter.
Materials:
- Clean, sturdy glass jars (Mason jars work wonderfully)
- Acrylic paints (dark blues, purples, black, white, silver, gold)
- Sponge brushes or regular paintbrushes
- Glitter (fine or chunky, various colors)
- Star stickers or stencils (optional)
- Permanent markers (metallic colors work well)
- Mod Podge (for sealing and glitter application)
- Electric tealight
- Newspaper or drop cloth to protect your workspace
Step-by-Step Guide:
- Jar Prep: Ensure your glass jar is spotless and completely dry. Clean glass allows for better paint adhesion and a clearer glow.
- Base Coat (Optional): For a truly "night sky" effect, you can paint the inside of the jar with a thin layer of dark blue or purple acrylic paint. Allow it to dry completely. Alternatively, paint the outside if you want the colors to be more opaque. Painting the inside often gives a softer, diffused glow.
- Creating the Sky: Using sponge brushes, dab and blend different shades of blue, purple, and black acrylic paints onto the outside of the jar (or inside, if you opted for that). Encourage swirling and blending to create a nebulae-like effect. Leave some areas lighter or completely clear for contrast.
-
Adding Stars:
- Paint Dots: Dip the back of a small paintbrush or a cotton swab into white or silver paint and dot small "stars" across the painted surface.
- Stencils/Stickers: If using star stickers, place them on the jar before painting the base, then peel them off after the paint dries to reveal clear star shapes. If using stencils, dab paint over them to create crisp star outlines.
- Permanent Markers: Once the base paint is dry, use metallic permanent markers to draw intricate stars, constellations, or swirling galaxies directly onto the glass.
- Glittery Galaxies: While the paint is still slightly tacky, or after applying a thin layer of Mod Podge to specific areas, sprinkle fine glitter over the "sky" to create shimmering constellations and nebulae. Press gently to adhere. You can use different colors of glitter to represent distant galaxies or shooting stars. A final coat of Mod Podge over the glitter will help seal it in place once everything is dry.
- Dry and Cure: Let the jar dry completely. Acrylic paint needs time to cure, so resist the urge to handle it too much until it's fully set.
- Light Up Your Universe! Place an electric tealight inside the jar. The flickering light will bring your starry night scene to life, casting beautiful patterns and colors. This project connects to astronomy and sparks conversations about the universe, much like exploring different scientific concepts through our kits. For another out-of-this-world adventure, explore astronomy by creating your own edible solar system with our Galaxy Donut Kit!
D. Pattern Play: Simple Paper Lanterns
This classic craft is wonderfully accessible for even the youngest crafters, focusing on basic cutting, folding, and gluing techniques to create charming lanterns.
Materials:
- Construction paper or colorful cardstock
- Kid-safe scissors
- Glue stick or white glue
- Ruler and pencil (optional, for straight lines)
- Embellishments: glitter, stickers, craft punches (optional)
- Electric tealight
Step-by-Step Guide:
- Choose Your Paper: Select a piece of construction paper or cardstock in your favorite color. The size will determine the height and width of your lantern.
- Fold It Up: Fold the paper in half lengthwise (hotdog style).
- Mark Your Cuts: Along the folded edge, use a pencil and ruler (or just freehand for younger kids) to mark lines for cutting. Start about an inch from one long edge and draw lines about an inch apart, stopping about an inch from the other long edge. Do not cut all the way through!
- Cut the Slits: Carefully cut along the marked lines. This will create the "slats" of your lantern.
- Unfold and Shape: Unfold the paper. It will look like a series of parallel cuts.
- Form the Cylinder: Bring the two short ends of the paper together, aligning them to form a cylinder. Glue or staple these ends together securely.
- Create a Handle (Optional): Cut a thin strip of paper (about 1 inch wide and 6-8 inches long) from another piece of construction paper. Glue or staple each end of this strip to the top inside edges of your lantern to form a handle.
- Decorate! Now's the time for personalization! Your child can add stickers, draw patterns with markers, glue on glitter, or use craft punches to create additional cut-outs on the slats.
- Illuminate! Place an electric tealight inside, and watch your simple, elegant paper lantern glow. This is a fantastic starter project that builds confidence and basic crafting skills.
These projects highlight how simple materials can lead to incredible creations. Whether it's the natural beauty of leaves, the clever reuse of plastic, or the artistic expression on glass, each lantern is a testament to your child's budding creativity and burgeoning understanding of the world. And just as these crafts reveal exciting reactions and artistic flair, our Erupting Volcano Cakes Kit brings the "wow" factor of chemical reactions and delicious discovery right to your kitchen! Explore the exciting world of hands-on learning with our Erupting Volcano Cakes Kit.
Tips for a Sparkling Success: Making Lantern Crafts Fun & Safe
Creating lanterns with kids is an incredibly rewarding experience, but a little preparation and guidance can make it even more enjoyable and, most importantly, safe. At I'm the Chef Too!, we always emphasize a supportive and secure environment for learning and creativity, and the same principles apply here.
Adult Supervision is Key
This cannot be stressed enough. Even with seemingly simple crafts, adult oversight is crucial.
- Scissors and Sharp Tools: Always supervise when children are using scissors, even kid-safe ones, or any other sharp objects like wire cutters (if making handles). Offer to do the more challenging cuts yourself if your child is very young or struggles with fine motor control.
- Glue and Adhesives: While most craft glues are non-toxic, it’s best to prevent ingestion and ensure they are used properly. Supervise the application to avoid sticky messes on clothes or furniture and ensure hands are washed afterward.
- Real Candles (Avoid if Possible): As mentioned earlier, we highly recommend using LED tealights for all kid-made lanterns. If, for any reason, a real candle is used, constant and vigilant adult supervision is absolutely non-negotiable. Ensure the lantern is made of non-flammable materials (like sturdy glass), has excellent ventilation, and is placed on a stable, heat-resistant surface away from any flammable objects. Never leave a lit candle unattended, even for a moment.
Embrace Imperfection
One of the greatest gifts you can give your child during a crafting session is the freedom to create without pressure for perfection.
- Focus on the Process: The joy is in the making, not just the outcome. Crooked cuts, uneven glue application, or lopsided designs are all part of a child's unique artistic journey. Celebrate their effort and creativity, not just the "finished product."
- Encourage Experimentation: Let them choose colors, shapes, and arrangements. If they want to put purple glitter on a blue leaf, great! This fosters independent thinking and personal expression.
Storytelling & Imagination
Transform the craft into an even richer experience by adding a narrative element.
- What's the Lantern For? Ask your child, "Who will this lantern light the way for?" or "What magical creatures live inside this glowing house?" This sparks imagination and adds purpose to their creation.
- Lantern Walks: Plan a special "lantern walk" around the house, in the garden, or even a safe neighborhood path (with LED lanterns). This creates a memorable experience and gives their creation a practical, enchanting use.
Displaying Their Creations
Proudly displaying your child's artwork validates their efforts and boosts their confidence.
- Special Spot: Designate a special shelf, windowsill, or corner where their lanterns can glow.
- Gift-Giving: Encourage them to gift their lanterns to family members or friends. The act of giving a handmade item is incredibly rewarding.
Screen-Free Zone
Lantern crafts are a wonderful antidote to screen time. Use the opportunity to connect without digital distractions.
- Mindful Engagement: Encourage conversation, observation, and sensory exploration during the crafting process. Talk about the textures of the leaves, the shimmer of the glitter, or the way the light shines through different colors.
- Family Bonding: Crafting together provides a shared experience that strengthens family ties. It's a time for laughter, collaboration, and creating joyful memories that will last a lifetime.
At I'm the Chef Too!, we believe that fostering a love for learning, building confidence, and creating these joyful family memories are the true measures of success. Our kits are designed by mothers and educators to provide exactly these kinds of enriching, screen-free experiences, teaching complex subjects through tangible, hands-on, and delicious cooking adventures. We're committed to sparking curiosity and creativity in children, offering them a unique approach to education that's both fun and impactful. Give the gift of learning that lasts all year with a 12-month subscription to our STEM cooking adventures – a monthly dose of discovery delivered to your door with free shipping! Join The Chef's Club today!
Beyond Lanterns: Continuing the Hands-On Learning Journey
The enchanting world of lantern crafts is just one entry point into a vast universe of hands-on learning, where creativity, STEM, and the arts converge. Once your child experiences the profound satisfaction of transforming simple materials into a glowing piece of art, they’ll be eager for more opportunities to create, discover, and learn. This is where the true power of "edutainment" shines – fostering an intrinsic motivation to explore and understand the world around them.
The skills honed during lantern making – fine motor control, problem-solving, understanding material properties, and artistic expression – are transferable to countless other activities. Whether it’s building a fort, experimenting with homemade playdough, or embarking on a culinary adventure, the underlying principles of discovery and tangible creation remain the same.
At I'm the Chef Too!, we are passionate about nurturing this natural curiosity. Our unique approach seamlessly blends the wonder of scientific discovery with the joy of artistic expression and the delicious results of cooking. We develop one-of-a-kind kits that turn complex subjects into exciting, accessible adventures. Imagine your child learning about chemical reactions by baking erupting volcano cakes, or exploring astronomy while creating edible galaxy donuts! These aren't just recipes; they are carefully curated experiences designed by mothers and educators to ignite passions and build foundational knowledge. We focus on inspiring a lifelong love for learning, building confidence through successful creations, and strengthening family bonds through shared, screen-free experiences.
Just like the light from a handmade lantern illuminates a room, hands-on learning illuminates a child's mind, opening doors to endless possibilities. We encourage you to continue this journey of exploration and discovery beyond the glow of your lanterns. From kitchen chemistry to edible art, there's always a new adventure waiting to be baked, built, or brainstormed.
Ready to provide your child with ongoing, engaging educational fun that sparks their imagination every month? Join The Chef's Club for a fresh adventure delivered right to your door with free shipping in the US. We offer flexible 3, 6, and 12-month pre-paid plans, perfect for gifting or long-term enrichment, each box a complete experience with pre-measured dry ingredients and specialty supplies. If you're not quite ready for a subscription, don't worry! You can still dive into our world of discovery. Browse our complete collection of one-time kits and find the perfect theme for your little learner by exploring our main shop collection. Browse our complete collection of one-time kits and pick your next "edutainment" adventure today!
Conclusion
The humble lantern craft for kids is far more than just a decorative item; it's a powerful tool for holistic child development. From the simple act of gathering leaves to the intricate process of layering tissue paper, children engage in a symphony of learning – honing fine motor skills, grappling with basic engineering and scientific principles, expressing their artistic flair, and developing invaluable problem-solving abilities. These glowing creations spark imagination, foster a sense of accomplishment, and offer precious screen-free moments for family bonding.
At I'm the Chef Too!, our core belief is that learning should be an adventure – engaging, tangible, and fun. We champion activities that ignite curiosity and provide children with the joy of discovery through hands-on experiences, just like the magic of creating a personal lantern. We're committed to offering unique "edutainment" that blends food, STEM, and the arts, proving that the most profound lessons are often the most delicious and delightful.
So, embrace the light! Gather your materials, invite your children to the crafting table, and embark on a luminous journey of creativity. Watch their eyes light up as they bring their unique lantern to life, knowing that with every snip, glue, and sprinkle, they are building skills, confidence, and treasured memories. The glow of their handmade lantern is a testament to their potential and a beacon for future learning.
Ready to keep that spark of curiosity burning bright month after month? Empower your child with endless opportunities for discovery and fun. Join The Chef's Club today and receive exciting STEM cooking adventures delivered straight to your door, complete with everything you need for unforgettable learning experiences!
FAQ Section
Q1: What age are lantern crafts best suited for?
Lantern crafts are incredibly versatile and can be adapted for a wide range of ages!
- Toddlers (18 months - 3 years): Can enjoy tearing tissue paper, dabbing glue with supervision, and placing larger leaves. Focus on sensory exploration and the process. Adult help will be significant.
- Preschoolers (3-5 years): Can cut with kid-safe scissors (supervised), apply glue, arrange items, and choose colors. Simple paper lanterns or basic leaf collages on jars are perfect.
- Elementary Schoolers (6-10 years): Can follow multi-step instructions, use more intricate cutting, apply Mod Podge, and create detailed designs. They can also participate in gathering natural materials and brainstorming design ideas.
- Tweens/Teens (11+ years): Can tackle more complex designs, wire work for handles, painting techniques, and intricate patterns, bringing a sophisticated touch to their creations.
The key is to tailor the complexity to your child's developmental stage and always provide appropriate supervision, especially with cutting tools and adhesives.
Q2: What kind of glue works best for lantern crafts?
For most paper-based or natural material lanterns:
- Mod Podge: This all-in-one glue, sealer, and finish is a crafter's favorite. It dries clear, provides a durable finish, and works well for adhering paper, fabric, and leaves to surfaces like glass or plastic.
- Diluted White School Glue: A fantastic, budget-friendly alternative. Mix 2 parts white school glue (like Elmer's) with 1 part water to achieve a similar consistency to Mod Podge. It dries clear and holds well.
- Glue Sticks: Best for very simple paper-to-paper adhesion, especially for younger kids, but may not be strong enough for heavier materials or for sealing purposes.
- Hot Glue: Use with extreme adult supervision only for quickly securing structural elements or handles, but it's not ideal for covering large surfaces or for direct child use due to the burn risk.
Q3: How can I make lantern crafts safe for kids?
Safety is paramount, especially when working with light!
- Use LED Tealights: This is the #1 safety tip. Always opt for battery-operated LED tealights instead of real candles. They eliminate fire risk, heat, and wax messes, making lanterns safe for display anywhere and for kids to carry.
- Supervise Tools: Closely supervise children when they are using scissors, even kid-safe ones, or any other sharp craft tools.
- Ventilation for Adhesives: If using glues or paints with strong odors, ensure good ventilation in your crafting area.
- Clean Up: Encourage children to wash their hands after crafting, especially after handling glues or paints.
- Sturdy Construction: Ensure any handles are securely attached and the lantern base is stable to prevent tipping.
Q4: Can I use real candles in kid-made lanterns?
We strongly advise against using real candles in kid-made lanterns, especially those made from paper, leaves, or plastic. These materials are highly flammable, and the risk of fire is significant. Even in glass jars, the heat from a real candle can ignite nearby paper decorations or create dangerously hot surfaces.
For safety, always use battery-operated LED tealights. They offer the same beautiful, flickering glow without any of the associated hazards, giving you peace of mind while your children enjoy their creations.
Q5: How long do these lanterns typically last?
The longevity of a handmade lantern depends on the materials used and how well it's cared for:
- Paper/Tissue Paper Lanterns: With a good Mod Podge seal, these can last for many months, especially if kept indoors and away from direct sunlight or humidity, which can fade colors or weaken glue.
- Leaf Lanterns: While beautiful, natural leaves will eventually dry out further, become brittle, and can change color or crumble over time. A good seal with Mod Podge will help preserve them for a few weeks to a couple of months, but they are generally more temporary.
- Glass Jar Lanterns: These tend to be the most durable. If paint and glitter are properly sealed with Mod Podge or a clear sealant, they can last for years as long as the jar doesn't break.
- Upcycled Plastic Lanterns: Similar to paper, if well-sealed, they can last for many months or even years indoors.
Regardless of durability, the memories made during the crafting process will last a lifetime!
Q6: What if I don't have specific materials like "cheese boxes" or "kite paper"?
Don't let specific material requirements stop you! Part of the fun of crafting is adapting and improvising.
- For Cheese Boxes: You can easily create a cylindrical base and top from recycled cardboard (like from a cereal box or other food packaging). Simply cut cardboard into strips, shape into a circle, and glue the ends together. You can also use a sturdy glass jar as a base instead of a cardboard structure.
- For Kite Paper: Regular colored tissue paper or even greaseproof paper can be substituted for kite paper. While kite paper is stiffer, tissue paper offers a delicate translucency that is equally beautiful.
- For Leaves: If you're crafting out of season or don't have access to leaves, consider cutting leaf shapes from colored tissue paper, construction paper, or even using dried flower petals.
The core idea is to encourage creativity with what you have! The beauty is in the process and the unique outcome.