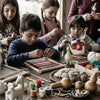
Magical Pine Cone Christmas Crafts for Kids

Table of Contents
- Introduction
- The Magic of Pine Cone Crafts for Christmas: Why Bother?
- Prepping Your Pine Cones: The Essential First Steps
- Core Supplies for Pine Cone Crafting
- Inspiring Pine Cone Christmas Tree Crafts
- Whimsical Pine Cone Animal Ornaments
- Creative Pine Cone Christmas Decorations & Ornaments
- Beyond Ornaments: Pine Cone Wonders
- The Educational Value of Crafting with Nature
- Safety First: Important Crafting Tips
- Making Learning Delicious with I'm the Chef Too!
- Conclusion
- FAQ Section
The air grows crisp, the scent of cinnamon and evergreen fills our homes, and a special kind of magic begins to unfold. As the holiday season approaches, many of us yearn for activities that truly connect us with our children, fostering wonder and creativity away from the ever-present glow of screens. It’s a time to gather, to create, and to make memories that will warm our hearts for years to come. What if we told you that some of the most enchanting and educational Christmas activities are literally right outside your door?
At I'm the Chef Too!, we believe in blending food, STEM, and the arts into one-of-a-kind "edutainment" experiences, but the core principle of hands-on, tangible learning extends far beyond our kitchen. This festive season, we're inviting you to embrace the simple beauty of nature with us by diving into the wonderful world of pine cone crafts for kids this Christmas. These humble woodland treasures offer a blank canvas for imagination, transforming into delightful ornaments, whimsical decorations, and cherished keepsakes. In this comprehensive guide, we'll journey through everything you need to know: from gathering and preparing your pine cones safely, to a bounty of inspiring craft ideas for all ages, highlighting the incredible educational benefits along the way. Get ready to spark curiosity, unleash creativity, and create some truly unforgettable family moments, one pine cone at a time.
Introduction
Do you remember that incredible feeling of discovering something magical in the everyday? The crunch of fallen leaves, the sparkle of frost on a winter morning, or the perfect, intricate pattern of a pine cone found beneath a towering evergreen? For children, these small discoveries are gateways to vast imaginative worlds. As parents and educators, we often seek out ways to bottle that wonder, to transform ordinary moments into extraordinary learning experiences, especially during the festive flurry of Christmas. The holiday season is synonymous with crafting, baking, and creating, and few materials offer as much natural charm and versatility as the humble pine cone.
We all know the challenge of keeping kids engaged and entertained during school breaks or long winter afternoons. It's easy to default to digital distractions, but there's a profound joy and developmental benefit in tangible, hands-on activities. That's precisely why we at I'm the Chef Too! are so passionate about blending education with delight – whether it's through our unique cooking adventures or by inspiring simple, nature-based crafts. Today, we're going to explore how pine cone crafts for kids can become a cornerstone of your family's Christmas traditions, offering not just beautiful decorations, but a rich landscape for learning and connection. This post will arm you with practical tips for collecting and preparing pine cones, provide a treasure trove of festive craft ideas ranging from whimsical ornaments to charming decorations, and delve into the surprising educational value these simple projects hold. Our aim is to help you transform common woodland finds into cherished Christmas memories and foster a deeper appreciation for both nature and the creative process in your children. Let’s get ready to transform the forest’s gifts into holiday masterpieces!
The Magic of Pine Cone Crafts for Christmas: Why Bother?
Before we dive into the delightful details of crafting, let's take a moment to appreciate why pine cone crafts are such a fantastic choice for kids, especially during Christmas. It’s more than just making something pretty; it’s about the entire experience, from the scavenger hunt to the final display.
Connecting with Nature, Even Indoors
In an increasingly digital world, getting children to engage with nature can sometimes feel like a challenge. Pine cone crafts bridge this gap beautifully. The process often begins with a family walk in the woods or a park, turning a simple outing into an exciting "nature hunt." Children learn about trees, ecosystems, and the changing seasons firsthand. Bringing these natural elements indoors for crafting helps them maintain that connection, appreciating the beauty and textures of the world around them. It’s a wonderful way to teach about natural cycles and sustainability in a very tangible way.
Fostering Creativity and Imagination
A pine cone, in its raw form, doesn't scream "Christmas tree ornament" or "reindeer." But with a few simple additions and a child's boundless imagination, it can become anything! This open-ended approach to crafting is invaluable. Children aren't just following instructions; they're envisioning, problem-solving, and expressing their unique artistic flair. They decide the colors, the characters, the stories behind their creations. This freedom nurtures imaginative play, which is crucial for cognitive development and emotional expression.
Developing Essential Skills
Crafting, particularly with natural, sometimes irregular materials like pine cones, is a fantastic workout for a child’s developing brain and body.
- Fine Motor Skills: Picking up small pom-poms, manipulating felt, squeezing glue, or carefully painting the scales of a pine cone all require precision and dexterity. These activities strengthen the small muscles in the hands and fingers, which are essential for tasks like writing, tying shoelaces, and eventually, even complex kitchen tasks in the future!
- Hand-Eye Coordination: Aligning a googly eye, placing a twig antler, or painting within specific areas refines hand-eye coordination, a fundamental skill for many academic and athletic pursuits.
- Problem-Solving: What if the twig for the antler breaks? How can we make the Santa hat stay on? Children encounter mini-challenges and learn to adapt, experiment, and find solutions, building resilience and critical thinking.
- Patience and Focus: Some crafts require drying time, careful assembly, or repetitive actions. These projects gently encourage patience and the ability to focus on a task from start to finish.
- Sensory Exploration: The bumpy texture of the pine cone, the stickiness of the glue, the softness of felt, the vibrant colors of paint – pine cone crafts offer a rich sensory experience that is vital for early childhood development. This aligns perfectly with our philosophy at I'm the Chef Too!, where our edible adventures engage all the senses, transforming learning into a truly immersive experience. Just as a pine cone holds countless seeds of potential, our kits ignite curiosity. For instance, when we explore the natural world, we might think of the thrilling chemical reactions that make our Erupting Volcano Cakes bubble over with deliciousness, teaching about geology through an unforgettable, edible experiment.
Promoting Family Bonding and Screen-Free Fun
In our busy lives, carving out dedicated family time can be challenging. Crafting together provides a wonderful opportunity for genuine connection. Parents and children work side-by-side, sharing ideas, helping each other, and chatting freely. These shared experiences become precious family traditions, building a strong sense of togetherness. Pine cone crafts are inherently screen-free, offering a refreshing break from digital devices and encouraging present-moment engagement.
Ready to make more amazing memories? If you love the idea of screen-free educational fun that promotes family bonding and sparks curiosity, then you’re going to adore The Chef's Club! Imagine a new adventure delivered to your door every month with free shipping in the US. Each box is a complete experience, containing pre-measured dry ingredients and specialty supplies, making it as convenient as it is exciting.
Prepping Your Pine Cones: The Essential First Steps
Before you can transform those woodland treasures into festive masterpieces, a little preparation is in order. This crucial step ensures your crafts are clean, bug-free, and ready for decorating.
1. The Great Pine Cone Hunt
This is often the most fun part! Gather your family and head to a local park, forest, or even your backyard if you have pine trees. Look for pine cones of various sizes and shapes – some work better for certain crafts than others. Avoid any that look moldy, damaged, or are still green and tightly closed. Different types of pine trees yield different shapes of cones, so it’s a great opportunity to explore local flora. Remember to only collect fallen pine cones; do not pick them directly from trees.
2. Cleaning Your Woodland Wonders
Once you've amassed your haul, it's time for a spruce-up.
- Shake and Brush: First, give each pine cone a good shake outdoors to dislodge any loose dirt, needles, or tiny critters. A stiff brush (like an old toothbrush) can help remove stubborn bits.
- Wash (Optional but Recommended): For an extra clean, you can give them a quick bath. Fill a bucket or sink with warm water and a splash of vinegar or a tiny bit of dish soap. Submerge the pine cones and let them soak for about 20-30 minutes, agitating them gently to loosen any remaining grime. You might notice they close up – don't worry, they'll reopen in the oven! Rinse them thoroughly under clear water.
3. Debugging and Drying: The Oven Method
This step is vital for two reasons: it kills any lingering insects (you don't want unexpected guests in your Christmas decorations!) and it ensures the pine cones are thoroughly dry and fully open, which makes them much easier to craft with.
- Preheat Oven: Preheat your oven to a low temperature, around 200°F (90°C). Anything higher could risk burning them.
- Prepare Baking Sheet: Line a baking sheet with parchment paper or aluminum foil. This will catch any sap that might melt and drip from the pine cones.
- Arrange Pine Cones: Spread the pine cones in a single layer on the prepared baking sheet.
- Bake and Monitor: Bake for approximately 30-60 minutes, or until they are completely dry and their scales have fully opened. Baking times will vary depending on the pine cones' moisture content and size. Keep a close eye on them to prevent burning. You'll smell the wonderful aroma of pine as they dry!
- Cool Down: Once dry, turn off the oven and let the pine cones cool completely on the baking sheet. They will be fragile when hot.
Now your pine cones are clean, bug-free, and beautifully open, ready for their festive transformation!
Core Supplies for Pine Cone Crafting
Most pine cone crafts require only a few inexpensive and readily available materials. Stocking up on these basics will ensure you’re ready for spontaneous crafting sessions.
- Pine Cones: Of course! Various sizes are best.
- Paints: Acrylic paints in festive colors (red, green, white, gold, silver) are ideal. Non-toxic craft paints are a must for kids.
- Brushes: Foam brushes are great for covering larger areas, while smaller paintbrushes are perfect for details.
- Glitter: Fine glitter in various colors adds that essential Christmas sparkle. Glitter glue is also a less messy alternative.
- Pom-Poms: Assorted sizes and colors. These are perfect for adding "berries," noses, or fluffy accents.
- Felt: Sheets of craft felt in various colors for cutting out shapes like ears, hats, wings, or scarves.
- Googly Eyes: A craft staple! Assorted sizes will give characters more personality.
- Hot Glue Gun & Sticks: (Adult use only, with extreme caution!) A low-temp hot glue gun can be used by older children with very close adult supervision and finger protectors, but it’s generally safer for adults to handle. It provides quick, strong adhesion. For younger children, liquid craft glue (like Elmer's glue) is a safer alternative, though it requires more drying time.
- Scissors: Kid-safe scissors for cutting felt and ribbon.
- Ribbon/Twine/Thread: For making hanging loops for ornaments.
- Natural Elements: Small twigs (for antlers), acorns, tiny pebbles – these can add an organic touch.
Inspiring Pine Cone Christmas Tree Crafts
The most intuitive transformation for a pine cone is into a miniature Christmas tree. Its natural shape lends itself perfectly to this festive role, making these crafts a fantastic starting point for little hands.
1. Classic Painted Pine Cone Trees
This is perhaps the simplest and most iconic pine cone Christmas craft.
- Materials: Clean pine cones, green acrylic paint, foam brushes, assorted small pom-poms (red, green, gold, silver), hot glue gun (adult supervision) or craft glue, ribbon/twine.
-
Instructions:
- Paint Green: Have your child paint the entire pine cone green. Encourage them to get into all the nooks and crannies of the scales. This is a great opportunity to talk about different shades of green, like "Christmas Tree Green" or "Forest Green." Let it dry completely.
- Decorate with "Ornaments": Once dry, use a hot glue gun (adult) or craft glue (kids) to attach small, colorful pom-poms onto the green scales, mimicking tiny ornaments.
- Add a Star: Place a slightly larger yellow or gold pom-pom at the very top to represent the tree's star.
- Hanging Loop: Cut a small length of ribbon or twine, form a loop, and hot glue it securely to the back of the pine cone for hanging.
These little trees are quick to make and endlessly customizable, allowing kids to express their color preferences.
2. Snowy Tipped Pine Cone Trees
Bring a touch of winter wonderland to your tree with these elegant snowy pine cones.
- Materials: Clean pine cones, white acrylic paint or glitter glue, small paintbrush, fine white glitter (optional), ribbon/twine.
-
Instructions:
- Dust with Snow: Using a small paintbrush, lightly brush white paint or glitter glue onto the tips of each pine cone scale. The goal is to create a "snow-dusted" effect, not to completely cover the pine cone.
- Add Sparkle (Optional): While the paint/glue is still wet, sprinkle a little fine white or iridescent glitter over the snowy tips for extra sparkle.
- Dry and Hang: Let dry completely. Attach a ribbon loop for hanging.
3. Yarn Wrapped Pine Cone Christmas Ornaments
This craft adds a lovely texture and a cozy, handmade feel to your tree.
- Materials: Clean pine cones, colorful yarn (various weights and textures work), craft glue (like Elmer's), small pom-poms or beads for decoration, ribbon/twine.
-
Instructions:
- Apply Glue: Spread a thin layer of craft glue onto the pine cone, focusing on the scales or crevices.
- Wrap Yarn: Begin wrapping yarn around the pine cone, tucking it into the scales. You can wrap it tightly or loosely, covering the pine cone completely or leaving some of the natural brown showing. Mix and match colors for a striped effect.
- Decorate: Once the yarn is secure and the glue is dry, add small pom-poms, beads, or other embellishments with glue.
- Hang: Attach a ribbon loop for hanging.
4. Miniature Pine Cone Trees on Wood Slices
These are perfect for mantle displays or as charming place settings.
- Materials: Small to medium pine cones, wood slices (available at craft stores), green paint, small pom-poms, hot glue gun (adult).
-
Instructions:
- Paint: Paint the pine cones green and decorate with pom-poms as described in the Classic Painted Pine Cone Trees.
- Attach to Base: Once dry, use a generous amount of hot glue to secure the base of the pine cone to the center of a wood slice.
- Display: These make lovely freestanding decorations.
As we explore different creative avenues, remember that the joy of crafting is in the journey, not just the destination. Much like how our themed cooking kits bring a whole world of learning to your kitchen, pine cone crafts open up a universe of artistic possibilities. If you're looking for more exciting ways to combine hands-on fun with education, why not browse our complete collection of one-time kits? Discover themes ranging from science to history, all designed to spark curiosity and creativity!
Whimsical Pine Cone Animal Ornaments
Transforming pine cones into adorable creatures is a guaranteed way to bring smiles and laughter to your crafting table. The natural texture and shape of a pine cone often lend themselves perfectly to the bodies of woodland animals or festive characters.
1. Rudolph Reindeer Pine Cones
Rudolph and his bright red nose are a Christmas icon, and these pine cone versions are utterly charming!
- Materials: Medium to large pine cones (with a flatter end for the face), brown felt, large red pom-poms (preferably sparkly!), medium googly eyes, small twigs (collected outdoors are best for authenticity!), hot glue gun (adult), scissors, ribbon/twine.
-
Instructions:
- Cut Ears: From brown felt, cut two ear shapes. Fold the bottom edge of each ear slightly and glue to create a more natural, cupped ear shape.
- Attach Ears: Hot glue the ears to the "top" (flatter end) of the pine cone, near where the face will be.
- Add Antlers: Gather small, V-shaped twigs from outside. These make perfect antlers! Hot glue them behind the felt ears.
- Create the Face: Glue two googly eyes below the ears. Then, attach a large, sparkly red pom-pom in the center for Rudolph’s famous nose.
- Hanging Loop: Attach a ribbon loop to the back for hanging.
These Rudolph ornaments are not only cute but also a great way to incorporate natural elements found during your pine cone hunt.
2. Cute Owl Pine Cones
With their wise eyes and festive hats, these owls are a hoot!
- Materials: Medium to large pine cones, brown, red, white, and orange felt, large googly eyes, small white pom-poms, hot glue gun (adult), scissors, ribbon/twine.
-
Instructions:
- Felt Wings: Cut two wing shapes from brown felt. Pinch one end of each wing and glue it to the side of the pine cone, giving it a natural, feathered look.
- Eyes and Beak: Hot glue two large googly eyes onto the pine cone. Cut a small orange felt triangle for the beak and glue it just below the eyes.
- Santa Hat: Cut a half-circle from red felt. Roll it into a cone shape and glue the edge to form a mini Santa hat. Glue a small white pom-pom to the tip and a strip of white felt around the base of the hat.
- Attach Hat: Glue the finished Santa hat onto the top of the pine cone, placing a larger white pom-pom underneath the hat if needed to give it height and stability.
- Hanging Loop: Add a ribbon loop to the back.
3. Penguin Pine Cones
These dapper little penguins will waddle their way into your heart!
- Materials: Medium pine cones, black and white felt, orange felt (for feet/beak), small googly eyes, hot glue gun (adult), scissors, ribbon/twine.
-
Instructions:
- Penguin Body: Cut a piece of white felt to cover the "belly" area of the pine cone. Glue it in place.
- Wings: Cut two small black felt wing shapes and glue them to the sides of the pine cone.
- Face: Glue two small googly eyes. Cut a tiny orange triangle for the beak and glue it on.
- Feet: Cut two orange felt "webbed foot" shapes and glue them to the bottom of the pine cone, allowing it to stand or dangle.
- Optional Scarf/Hat: Add a thin strip of colored felt for a scarf, or a tiny pom-pom hat for extra charm.
- Hanging Loop: Attach a ribbon for hanging.
For those moments when imagination takes flight, creating adorable characters from pine cones can be as delightful as baking Peppa Pig Muddy Puddle Cookie Pies – a sweet way to blend beloved stories with hands-on cooking fun, much like our very own unique edutainment experiences!
4. Pine Cone Snowman Ornaments
Frosty friends made from forest finds!
- Materials: Pine cones (preferably ones that are wider at the base), white paint, small black pom-poms or beads, orange felt, thin colored ribbon, hot glue gun (adult), cotton balls or white pom-poms for a "snowball head".
-
Instructions:
- Paint White: Lightly paint the pine cone white to create a snowy base. Let it dry.
- Add Head: Glue a large white pom-pom or a tightly rolled cotton ball onto the very top of the pine cone to form the snowman's head.
- Face Details: Glue two tiny black pom-poms or beads for eyes on the white head. Cut a small triangle from orange felt for the carrot nose and glue it below the eyes.
- Buttons & Scarf: Glue a few tiny black pom-poms down the front of the pine cone for buttons. Tie a thin ribbon around the "neck" of the snowman for a scarf.
- Hanging Loop: Add a ribbon loop to the back.
These whimsical characters not only decorate your tree but also encourage storytelling and imaginative play.
Creative Pine Cone Christmas Decorations & Ornaments
Beyond individual creatures and trees, pine cones can be incorporated into a wide array of festive decorations, adding rustic charm and natural beauty to every corner of your home.
1. Gnome Ornaments
These adorable little gnomes are a huge hit, embodying the cozy spirit of Christmas.
- Materials: Elongated pine cones, colorful felt (red, green, grey, white), wooden beads for noses, small white pom-poms (for hat tip), cotton balls or faux fur for beards, hot glue gun (adult), scissors, ribbon/twine.
-
Instructions:
- Make the Hat: Cut a quarter-circle from felt (e.g., red or green). Roll it into a cone shape and glue the edge to form a pointed gnome hat. Glue a small white pom-pom to the tip.
- Attach Beard: Fluff out a cotton ball or cut a small piece of faux fur for the beard. Hot glue it to the wider end of the pine cone, covering the lower scales.
- Add Nose: Glue a wooden bead just above the beard, peeking out from under where the hat will sit.
- Attach Hat: Hot glue the felt hat onto the very top of the pine cone, resting it slightly over the wooden bead nose.
- Hanging Loop: Add a ribbon loop to the back of the hat for hanging.
Line them up on a mantelpiece, tuck them into your Christmas tree, or gift them to loved ones for a truly heartfelt present.
2. Christmas Pine Cone Angels
Elegant and simple, these angels bring a peaceful touch to your holiday decor.
- Materials: Small to medium pine cones, white or gold felt, small wooden beads (for heads), pipe cleaners (gold or silver), hot glue gun (adult), fine glitter (optional), ribbon/twine.
-
Instructions:
- Angel Head: Glue a wooden bead to the narrower, top end of the pine cone.
- Wings: Cut two angel wing shapes from white or gold felt. You can draw them freehand or use a template. Lightly dust with glitter for extra shimmer.
- Attach Wings: Hot glue the wings to the back of the pine cone, just below the wooden head.
- Halo: Form a small circle with a gold or silver pipe cleaner, then twist the ends together to form a "stem." Glue the stem to the back of the wooden head for a halo.
- Hanging Loop: Attach a ribbon loop to the top or back.
3. Pine Cone Stars
These intricate stars are surprisingly simple and make beautiful, rustic ornaments.
- Materials: Small pine cone scales (carefully pulled or cut from larger pine cones), sturdy cardboard or craft foam (for the base), hot glue gun (adult), glitter or metallic paint (optional), ribbon/twine.
-
Instructions:
- Prepare Base: Cut a small star shape (about 2-3 inches across) from cardboard or craft foam.
- Attach Scales: Starting from the outer edges of the star, hot glue pine cone scales onto the base, overlapping them slightly and pointing outwards. Work your way inward, creating layers and filling the entire star shape.
- Decorate (Optional): Once the glue is dry, you can lightly brush the tips of the scales with metallic paint or sprinkle glitter for extra festive flair.
- Hang: Attach a ribbon loop to one point of the star.
4. Pine Cone Garlands & Wreaths
For a grander statement, pine cones are perfect for creating impressive garlands and wreaths. These projects might require a bit more time and adult involvement but yield stunning results.
- Materials: Numerous cleaned pine cones, sturdy floral wire or strong twine, hot glue gun (adult), additional decorative elements (berries, bows, greenery).
-
Instructions (for a simple garland):
- Prepare Pine Cones: For each pine cone, wrap a piece of floral wire around the top (just below the scales) and twist to secure, leaving a long "tail."
- Assemble Garland: Begin twisting the "tails" of the wired pine cones around a length of sturdy twine or another piece of floral wire, spacing them out evenly.
- Embellish: Once the pine cones are attached, fill in gaps with artificial berries, small sprigs of faux greenery, or festive ribbons, securing everything with hot glue.
5. Golden Hanging Pine Cones
Simple, elegant, and instantly festive.
- Materials: Clean pine cones, gold or silver spray paint (adult use only, in a well-ventilated area), sheer ribbon.
-
Instructions:
- Spray Paint: Outdoors or in a well-ventilated area, have an adult carefully spray paint the pine cones gold or silver. Apply light, even coats and let dry completely between coats.
- Attach Ribbon: Once fully dry, cut lengths of sheer ribbon. Tie a ribbon around the top of each pine cone, leaving a long enough loop to hang.
- Display: Hang these from chandeliers, door handles, or as elegant additions to your tree.
6. Pine Cone Fire Starters (Adult Supervision Essential!)
These make wonderful, thoughtful gifts, but require careful adult handling.
- Materials: Clean pine cones, unscented wax flakes (soy or paraffin), wicks, old saucepan (for melting wax), tin cans or double boiler, essential oils (optional, for scent), ribbon/labels.
-
Instructions:
- Melt Wax (Adult): Using a double boiler method (placing a tin can with wax flakes into a saucepan of simmering water), carefully melt the wax flakes. Do not melt wax directly over a flame.
- Prepare Wicks: Cut wicks to a length that will allow them to extend beyond the pine cone.
- Dip Pine Cones (Adult): Dip each pine cone into the melted wax, turning to coat evenly. Allow excess wax to drip off. Immediately press a wick into the top of the pine cone while the wax is still warm, wrapping it around the scales. Repeat dipping a few times, allowing layers to build up and the wick to be secured.
- Dry: Hang the pine cones to dry completely over newspaper or a drop cloth.
- Decorate: Once dry, you can tie a festive ribbon around them and add a small label.
These projects offer a vast range of crafting opportunities, allowing for different skill levels and interests. And just like discovering the intricate patterns of a pine cone, children can explore the vast wonders of the cosmos by creating their own edible solar system with our Galaxy Donut Kit, making astronomy a truly out-of-this-world adventure, blending creativity with scientific exploration.
Beyond Ornaments: Pine Cone Wonders
Pine cones aren't just for hanging on the tree. Their natural charm makes them perfect for various other decorative and even practical applications around the home.
1. Pine Cone Bird Feeders
Combine crafting with nature education and community service by making bird feeders.
- Materials: Large, open pine cones, peanut butter (or sunflower butter for allergies), birdseed, strong twine or string.
-
Instructions:
- Spread Butter: Have children use a dull knife or spreader to liberally coat the pine cone with peanut butter, making sure to push it into all the crevices.
- Roll in Seed: Roll the peanut butter-coated pine cone in a tray of birdseed, pressing gently to ensure the seeds adhere.
- Hang: Tie a strong piece of twine around the top of the pine cone and hang it from a tree branch in your yard. Observe the birds that come to visit!
This craft is a wonderful way to teach children about local wildlife and the importance of caring for nature.
2. Table Centerpieces & Jars
Create stunning, rustic table decorations for your holiday feast.
- Materials: Assorted pine cones (painted or natural), glass jars or vases, battery-operated fairy lights, faux berries, small branches of evergreen.
-
Instructions:
- Layer: Place a handful of pine cones at the bottom of a glass jar.
- Add Lights: Gently nestle a string of battery-operated fairy lights among the pine cones.
- Fill: Add more pine cones, interspersed with faux berries or small sprigs of evergreen.
- Display: Place these glowing jars on your dining table, mantelpiece, or entryway console for a warm, inviting glow.
3. Edible Pine Cone Decorations
Yes, you can even make edible pine cones! These are often made from cereal and peanut butter, offering a unique twist on the pine cone theme.
- Materials: Crispy rice cereal, peanut butter, powdered sugar, chocolate frosting (optional), pretzels or almond slices.
-
Instructions:
- Mix Base: Combine crispy rice cereal with peanut butter and a little powdered sugar to create a moldable "dough."
- Shape: Form the mixture into a cone shape.
- Add Scales: Press small pretzels or almond slices into the cone, starting from the wider base and overlapping them, to mimic pine cone scales.
- Decorate: Dust with powdered sugar for a snowy effect, or drizzle with chocolate frosting.
These edible versions are a fantastic way to bring the pine cone theme into the kitchen, reminding us of our own mission at I'm the Chef Too! – making learning delicious and hands-on.
4. Framed Pine Cone Art
Turn pine cone scales into a unique piece of wall art.
- Materials: Pine cone scales (from larger pine cones), sturdy piece of cardboard or canvas, paint, hot glue gun (adult), old photo frame.
-
Instructions:
- Paint Scales: Paint individual pine cone scales in various colors, or leave them natural.
- Arrange and Glue: On a piece of cardboard or canvas, arrange the scales to create a floral pattern, a mosaic, or an abstract design. Hot glue them securely.
- Frame: Once dry, place the artwork in an old photo frame for a rustic, unique decoration.
These diverse projects demonstrate the incredible versatility of pine cones, proving they're a true gift from nature for creative minds.
The Educational Value of Crafting with Nature
Beyond the sheer delight of creating something beautiful, pine cone crafts offer a wealth of educational opportunities that align perfectly with our "edutainment" philosophy at I'm the Chef Too!. These activities aren't just fun; they're foundational.
STEM Learning in Action
Crafting might not immediately scream "STEM," but natural crafts are full of it!
- Science: Children observe the natural world (how pine cones grow, different types of trees). Baking pine cones teaches about heat and moisture. Making bird feeders introduces ecology and animal habitats.
- Technology (Tools): Using scissors, glue guns (with supervision), and paintbrushes teaches about basic tool use and safety.
- Engineering: Planning how to attach antlers to a reindeer, balancing components for a stable snowman, or arranging scales for a star all involve basic engineering principles of design and structure.
- Math: Counting pom-poms, comparing pine cone sizes, understanding symmetry in designs, or measuring ribbon lengths all engage mathematical thinking.
Art & Creativity (The "A" in STEAM)
The "Art" component is undeniable. Children experiment with colors, textures, and forms. They learn about composition, aesthetics, and self-expression. There's no "right" or "wrong" in creative crafting, which fosters confidence and a willingness to explore.
Language and Communication
Crafting together naturally encourages conversation. Children describe what they're doing, ask questions, tell stories about their creations, and follow instructions. This strengthens vocabulary, listening skills, and the ability to articulate ideas.
Social-Emotional Development
Working on a shared project with family or friends teaches cooperation, sharing materials, and patience. The sense of accomplishment upon completing a craft boosts self-esteem and confidence. It also provides a safe outlet for emotional expression.
At I'm the Chef Too!, our mission is to spark curiosity and creativity, facilitate family bonding, and provide screen-free educational alternatives. Pine cone crafts embody these values beautifully, offering tangible, hands-on experiences that teach complex subjects in an accessible, engaging way. We are committed to developing activities that are not only fun but also thoughtfully designed by mothers and educators to nurture well-rounded development. Just as these simple crafts transform nature into art, our kits transform ingredients into lessons and memories. We focus on fostering a love for learning, building confidence, developing key skills, and creating joyful family memories, rather than promising guaranteed outcomes. We truly believe in the power of process over product, and the lasting benefits of shared, creative endeavors.
Safety First: Important Crafting Tips
While pine cone crafts are generally safe and enjoyable, keeping a few safety guidelines in mind will ensure a smooth and fun experience for everyone.
- Adult Supervision is Key: Always supervise children during crafting activities, especially when using scissors, paint, or any small parts that could be choking hazards for very young children.
- Hot Glue Gun Safety: Hot glue guns (even low-temp versions) can cause burns. They should always be operated by an adult or an older child under very close adult supervision, using finger protectors. For younger children, stick to liquid craft glue, which is non-toxic and safer, even if it requires more drying time.
- Non-Toxic Materials: Ensure all paints, glues, and embellishments are labeled as non-toxic and child-safe.
- Ventilation: If using spray paint (adults only), always do so in a well-ventilated outdoor area.
- Choking Hazards: Be mindful of small items like pom-poms, beads, and googly eyes, especially with toddlers and preschoolers. Keep these out of reach until needed for older children, and ensure constant supervision.
- Allergies: If making edible pine cones, be aware of any food allergies (e.g., peanuts).
- Mess Management: Lay down newspaper, old sheets, or a disposable tablecloth to protect your workspace. Have wet wipes or a damp cloth handy for quick clean-ups. Embrace the mess as part of the creative process!
By following these simple guidelines, you can ensure your pine cone crafting sessions are safe, enjoyable, and mess-free enough to be truly stress-free.
Making Learning Delicious with I'm the Chef Too!
While we've explored the magic of pine cone crafts, the spirit of hands-on "edutainment" doesn't stop there. At I'm the Chef Too!, we extend this philosophy directly into your kitchen, transforming everyday cooking into an extraordinary learning adventure. Our mission is to blend food, STEM, and the arts, offering a unique screen-free alternative that ignites curiosity, fosters creativity, and creates priceless family memories.
We understand that finding engaging, educational activities that genuinely captivate children can be a challenge. That's why we've carefully crafted our cooking STEM kits. Developed by mothers and educators, each box is a complete experience, designed to teach complex subjects through tangible, delicious cooking adventures. Imagine your child learning about chemical reactions while baking erupting volcano cakes, exploring fractions by measuring ingredients for galaxy donuts, or delving into different cultures by making treats from around the world. These aren't just recipes; they are carefully curated lessons that turn your kitchen into a vibrant laboratory of discovery.
Our kits are all about convenience and value, ensuring that a new adventure is delivered right to your door every month with free shipping in the US. We offer flexible 3, 6, and 12-month pre-paid plans, perfect for gifting or providing long-term enrichment. Each box contains pre-measured dry ingredients and specialty supplies, meaning less hassle for you and more fun for your little chef. We believe in the power of the process: fostering a love for learning, building confidence, developing key skills, and most importantly, creating joyful family memories that will last a lifetime.
Whether you're discovering the wonders of nature through pine cone crafts or exploring the science of baking with one of our themed kits, the goal remains the same: to engage, educate, and inspire. These are not just activities; they are invitations to bond, to explore, and to grow together.
Conclusion
As the festive season twinkles around us, the desire to create meaningful, lasting memories with our children becomes even stronger. We've journeyed through the enchanting world of pine cone crafts for kids this Christmas, uncovering how these simple gifts from nature can be transformed into much more than just decorations. From the joyful scavenger hunt to collect them, to the careful preparation and the boundless possibilities for creativity, pine cone crafts offer a unique blend of nature connection, artistic expression, skill development, and invaluable family bonding.
We've explored a treasure trove of ideas, from charming pine cone Christmas trees and whimsical Rudolph reindeer to elegant snowy owls and impressive garlands. Each craft provides a hands-on opportunity to engage with STEM principles, develop fine motor skills, and ignite imagination, all while fostering patience and problem-solving abilities. At I'm the Chef Too!, we champion this kind of screen-free, tangible learning, where every activity is an "edutainment" experience designed to spark curiosity and creativity. The joy isn't just in the finished ornament, but in the laughter, the shared effort, and the stories created during the making.
As you deck your halls this Christmas, let these humble pine cones be a testament to the magic that happens when nature meets imagination. Embrace the simple beauty, the festive spirit, and the profound educational value of crafting with your children. These handcrafted treasures, made with love and effort, will become cherished heirlooms, carrying the warmth of your family's holiday traditions for years to come.
Ready to fill your home with more screen-free learning, family fun, and delicious discoveries? Bring the magic of hands-on education into your kitchen all year long! Join The Chef's Club today and get a new, exciting cooking STEM adventure delivered right to your door every month with free shipping. It's the perfect way to continue sparking curiosity and building wonderful memories together!
FAQ Section
Q1: Where can I find pine cones for crafting?
A1: The best place to find pine cones is usually in local parks, forests, or even your own backyard if you have pine trees. Look for fallen pine cones that are already dry and open. Always collect responsibly, only taking what has naturally fallen from the trees. You can also purchase craft pine cones from hobby stores or online if you don't have access to natural ones.
Q2: How do I clean and prepare pine cones for crafting?
A2: First, shake off any loose debris like dirt or needles. For a deeper clean and to remove any hidden critters, bake them. Preheat your oven to a low temperature (around 200°F or 90°C), place pine cones on a parchment-lined baking sheet, and bake for 30-60 minutes, or until fully dry and open. Keep a close eye on them to prevent burning. Let them cool completely before crafting.
Q3: What age group are pine cone crafts suitable for?
A3: Pine cone crafts are incredibly versatile and can be adapted for almost all ages.
- Toddlers (with heavy supervision): Simple tasks like painting pine cones with non-toxic paint, sticking on large pom-poms with craft glue, or rolling them in birdseed for a feeder. Focus on sensory exploration.
- Preschoolers: Can handle more detailed painting, gluing googly eyes, attaching felt shapes, and selecting embellishments. Adult supervision is still crucial, especially with small pieces.
- School-Aged Children: Can manage more intricate designs, use kid-safe scissors independently, and participate more actively in planning the craft. Older kids might be able to use a low-temp hot glue gun under strict adult supervision with finger protectors.
- Teens and Adults: Can tackle more advanced projects like pine cone wreaths, elaborate garlands, or intricate painted designs.
Q4: What are the best types of glue to use for pine cone crafts?
A4:
- Hot Glue Gun (adult use or supervised older children): Provides quick, strong adhesion and is ideal for attaching larger or heavier embellishments like twigs, felt pieces, or pom-poms securely. Use a low-temp gun for safety.
- Liquid Craft Glue (e.g., Elmer's Glue): A safer, non-toxic option for younger children. It works well for lighter embellishments like glitter, pom-poms, and felt, but requires more drying time.
- Glitter Glue: Offers a mess-free way to add sparkle.
Q5: Can I reuse pine cone crafts year after year?
A5: Absolutely! With proper care and storage, most pine cone crafts can be cherished for many holiday seasons. Store them gently in tissue paper or individual bags in a sturdy box, away from extreme temperatures and humidity. If they get a little dusty, a soft brush or a quick blast with canned air can clean them up.
Q6: How can pine cone crafts teach kids about STEM?
A6: Pine cone crafts are a fantastic way to introduce STEM concepts:
- Science: Observing pine cone structures, understanding natural materials, learning about trees, and making bird feeders (ecology).
- Technology: Using tools like scissors, paintbrushes, and glue guns.
- Engineering: Planning designs, balancing components, and figuring out how to attach different materials.
- Math: Counting, sorting by size, recognizing shapes, and understanding patterns.
These hands-on activities make abstract concepts tangible and engaging.