Table of Contents
- Introduction
- The Power of Hands-On Learning: Why Woodworking Matters
- Creating a Safe and Inspiring Workspace
- Essential Materials for Your Little Builder's Kit
- Beginner Woodworking Projects (Ages 4-7)
- Intermediate Woodworking Projects (Ages 8-12)
- Advanced Projects for the Experienced Young Carpenter
- Integrating STEM and Art into Woodworking
- Case Study: A Weekend of "Maker" Magic
- Tips for Teaching Woodworking to Kids
- Woodworking and Group Learning
- Expanding the Adventure: From the Shop to the Kitchen
- Frequently Asked Questions (FAQ)
- Building a Future of Creativity
Introduction
Have you ever watched a child’s eyes light up when they realize they’ve built something entirely from scratch? There is a certain kind of magic that happens when a pile of raw materials—whether it's flour and sugar in the kitchen or wood and nails in the workshop—transforms into a tangible masterpiece. At I’m the Chef Too!, we believe that hands-on learning is the most powerful tool for sparking a child’s curiosity. While we are best known for our "edutainment" experiences in the kitchen, we recognize that the spirit of creation extends far beyond the stovetop. Woodworking, much like cooking, is a fantastic way to blend STEM (Science, Technology, Engineering, and Math) with the arts, allowing children to explore the physical world through their own creativity.
In this post, we are going to dive deep into the world of woodworking for young learners. We will explore why these tactile activities are so beneficial for child development, how to set up a safe and encouraging workspace, and, most importantly, provide a massive list of fun woodworking projects for kids that range from simple crafts to functional household items. Whether you are a parent looking for a screen-free weekend activity or an educator seeking to bring more "maker" culture into your curriculum, we are here to help you guide your little builders through every step of the process.
Our mission is to foster a love for learning by making complex subjects accessible and delicious—or in this case, sturdy and splinter-free! By the end of this guide, you’ll have a roadmap for nurturing your child's confidence, patience, and problem-solving skills through the rewarding craft of woodworking.
The Power of Hands-On Learning: Why Woodworking Matters
Before we pick up a hammer, it’s important to understand why we advocate so strongly for these types of activities. At I'm the Chef Too!, our educational philosophy centers on the idea that children learn best when they are actively engaged. Woodworking provides a multi-sensory experience that reinforces key developmental milestones in ways a textbook or a screen simply cannot.
Developing Fine and Gross Motor Skills
Woodworking is a full-body workout for a child’s motor systems. Hammering a nail requires hand-eye coordination and gross motor control, while threading a screw or sanding a small corner demands precise fine motor skills. These actions strengthen the muscles in the hands and wrists, which are the same muscles kids need for writing, drawing, and even using kitchen utensils.
Practical Application of STEM Concepts
When a child builds a birdhouse, they aren't just "making a box." They are practicing geometry, measurement, and physics. They have to understand that two sides must be equal in length for the roof to sit flush. They learn about structural integrity and how weight-bearing works. This is exactly how we approach our cooking kits—by showing kids that math and science are real-world tools they can use to create things they love. Ready for a new adventure every month? Join The Chef's Club and enjoy free shipping on every box.
Building Confidence and Resilience
Woodworking is rarely perfect on the first try. A nail might go in crooked, or a measurement might be off by half an inch. These moments are where the real learning happens. When a child encounters a problem and works through it to find a solution, they build resilience. Completing a project—holding a finished, solid object in their hands—provides a massive boost to their self-esteem. They realize, "I can do hard things," which is a mindset that will serve them well in every area of life.
Creating a Safe and Inspiring Workspace
Safety is our top priority whenever we are working with kids, whether we are using a whisk or a wood rasp. To make woodworking a positive experience, you need to create an environment where children feel empowered but remain protected.
The Golden Rule: Supervision
Always frame kitchen or workshop activities with an implicit understanding of adult supervision. A child should never use woodworking tools without a "co-pilot." Use this time as a bonding experience. Much like when you are following a recipe together from one of our kits, you are there to guide, demonstrate, and ensure everyone stays safe.
Choosing Age-Appropriate Tools
You don't need a table saw or a drill press to get started. In fact, we recommend starting with high-quality, real hand tools that are scaled for smaller hands.
- Stubby Hammers: These have shorter handles, making them easier for kids to balance.
- Hand Drills: Great for teaching the mechanics of drilling without the speed and power of an electric drill.
- Clamps: These are essential for keeping wood steady so the child can focus on the tool rather than holding the material.
- Sanding Blocks: A safe and satisfying way for even very young children to contribute to a project.
Setting the Scene
Choose a well-lit area with a sturdy work surface. If you don't have a workbench, a solid outdoor table or even a piece of thick plywood on top of two sawn horses works well. Keep the area clutter-free to prevent tripping hazards.
Safety Tip: Always require safety glasses. Even if they aren't using power tools, a stray wood chip or a bouncing nail can be dangerous. Making safety gear a "cool" part of the "uniform" helps kids take the responsibility seriously.
Essential Materials for Your Little Builder's Kit
Starting out doesn't have to be expensive. In fact, some of the best fun woodworking projects for kids come from salvaged materials.
- Soft Woods: Pine, cedar, and basswood are ideal for beginners. They are easy to saw, hammer into, and sand.
- Scrap Wood: Visit a local cabinet shop or home improvement store and ask for their offcuts. These odd shapes often spark the most creativity.
- Non-Toxic Finishes: Use food-grade mineral oil, beeswax, or milk paint. Since we love blending the world of food and craft, using finishes that are safe for the kitchen is always a plus!
- Wood Glue: A high-quality wood glue is often stronger than the wood itself and is a great way to assemble projects without needing a dozen nails.
If you are looking for more ways to engage your child's hands and mind without having to scour the hardware store, give the gift of learning that lasts all year with a 12-month subscription to our STEM cooking adventures. Our boxes provide everything you need for a complete educational experience, much like a well-stocked woodshop.
Beginner Woodworking Projects (Ages 4-7)
At this age, the focus should be on "tinkering" and getting used to the feel of the materials. The goal isn't a perfect finished product, but the joy of the process.
1. The "Nail Art" Board
This is a fantastic way to practice hammering. Give your child a thick piece of soft pine and a handful of wide-head nails. Let them hammer the nails in partially to create shapes, letters, or even a "galaxy" of stars.
- STEM Connection: Fine motor control and spatial awareness.
- Creative Twist: Once the nails are in, they can wrap colorful yarn around them to create "string art."
2. Hand-Sanded Alphabet Blocks
Buy a long 2x2 piece of pine and cut it into cubes (an adult should do the cutting). Give the child different grits of sandpaper, starting from coarse to fine. Once they are smooth, they can paint letters or numbers on them.
- STEM Connection: Learning about friction and surface textures.
- Pairing Idea: After a day of building blocks, why not explore astronomy by creating your own edible solar system with our Galaxy Donut Kit? It’s the perfect way to reward a hard day's work with something sweet and educational.
3. Stick Puppets and Wood Creatures
Using small scraps of wood, wood glue, and some "loose parts" like buttons or bottle caps, kids can assemble their own wooden friends. This is very similar to how we encourage kids to decorate their treats in our "edutainment" kits—there are no wrong answers, only creative choices!
Intermediate Woodworking Projects (Ages 8-12)
Older children are ready for projects that require following multi-step instructions and achieving a functional result.
4. The Classic Birdhouse
This is the quintessential woodworking project for a reason. It teaches basic joinery and measurement.
- The Steps: You'll need a front, back, two sides, a floor, and two roof pieces.
- The Lesson: Kids learn how to create an entrance hole (great for introducing a hand drill) and how to ensure the floor has drainage.
- Enhancing the Experience: Talk about the birds in your local area. What size hole do they need? This adds a biological science element to the engineering task.
5. Desktop Pencil Caddy
Every student needs a place for their supplies. A simple box with dividers is a great way to practice measuring and using a square to ensure 90-degree angles.
- Personalization: Encourage them to use wood burners (with supervision) or paint to make it their own.
- The I'm the Chef Too! Touch: We love organization in the kitchen, and a pencil caddy is just like a utensil organizer. If you want to see more ways to keep kids engaged with practical skills, find the perfect theme for your little learner by browsing our complete collection of one-time kits.
6. Smartphone or Tablet Stand
This project is very popular with modern kids. It involves cutting a wide groove into a block of wood at a slight angle.
- The Challenge: Getting the angle right so the device doesn't tip over. This is a lesson in center of gravity and balance.
7. Custom Wooden Spatula or Butter Knife
Since we are all about the kitchen, making your own cooking tools is a wonderful bridge between woodworking and food.
- Process: Use a template to draw the shape on a piece of maple or cherry. Help the child cut the rough shape, and then spend several hours sanding it into a smooth, ergonomic tool.
- Finishing: Soak it in food-safe mineral oil together. This is a great time to talk about how wood "breathes" and how the oil protects it from water—another great chemistry lesson!
Advanced Projects for the Experienced Young Carpenter
For those who have mastered the basics, it’s time to move on to furniture and complex assemblies.
8. The Step Stool
A step stool is a big milestone. It needs to be sturdy enough to hold the child's weight, which introduces the concept of structural engineering and load-bearing joints.
- Assembly: Use screws and wood glue for maximum strength. Teach the child how to pre-drill holes to prevent the wood from splitting.
- Practical Use: Once finished, they can use it in the kitchen to help reach the counter when they are working on their next Galaxy Donut Kit.
9. Treasure Box with a Hinged Lid
Installing hardware like hinges and latches requires extreme precision.
- The Math: If the hinges aren't perfectly aligned, the lid won't close. This is a high-stakes way to practice measurement and patience.
10. A Simple Storage Crate
Whether it’s for toys or gardening tools, a slatted crate is a great way to learn about repetition and spacing.
- Tip: Use a "spacer" block (a small piece of wood of the same width) to ensure the gaps between the slats are even. This is a classic carpentry trick that makes the job much easier.
Integrating STEM and Art into Woodworking
At I'm the Chef Too!, our mission is to blend food, STEM, and the arts. We believe the same should be done with woodworking. A project shouldn't just be functional; it should be an expression of the child's imagination.
The "Science" of Wood
Wood is a living material. Talk to your kids about grain patterns, growth rings, and how trees transport water. Why does some wood smell like vanilla (like Ponderosa Pine) while others smell like a pencil (like Cedar)?
The "Art" of the Finish
Once the structure is built, the "edutainment" continues with the aesthetic phase.
- Staining with Food: Did you know you can stain wood with coffee, tea, or beet juice? This is a fun, non-toxic way to experiment with natural pigments.
- Wood Burning: For older kids, using a pyrography tool to "draw" on wood is a mesmerizing way to combine illustration with craft.
If your child loves the "art" side of building, they will likely adore our themed adventures. Ready for a new adventure every month? Join The Chef's Club and enjoy free shipping on every box. It's a great way to keep that creative momentum going all year long.
Case Study: A Weekend of "Maker" Magic
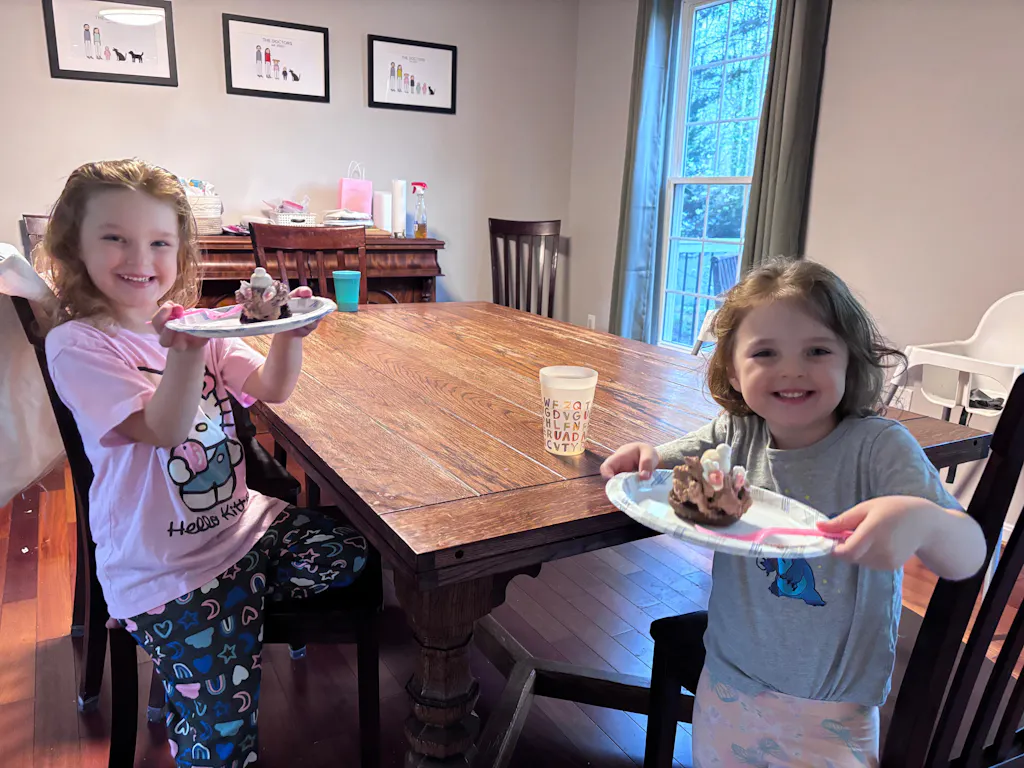
Imagine a parent, Sarah, and her 8-year-old son, Leo. Leo is fascinated by how things work and is currently obsessed with space. Sarah wants to find a way to engage him that doesn't involve a video game.
On Saturday morning, they head to the garage to build a "Galactic Treasure Chest" for Leo’s rock collection. They spend the morning measuring and sawing (with Sarah's help) four sides and a bottom. Leo practices his hammering, learning that if he hits the nail straight on, it goes in much easier. By lunch, they have a solid wooden box.
In the afternoon, they transition from the workshop to the kitchen. To celebrate their progress, they open their Galaxy Donut Kit. While the donuts bake, Leo uses some leftover blue and purple paint to create a nebula effect on his wooden box. He realizes that the swirling patterns he’s making on the donuts look remarkably like the paint on his box.
By Sunday, the box is dry, and the donuts are eaten. Leo has learned about measurement, friction, and the chemistry of baking, all while creating a memory with his mom. This is the heart of what we do: providing a screen-free educational alternative that brings families together.
Tips for Teaching Woodworking to Kids
To ensure the experience is fun and not frustrating, keep these pointers in mind:
- Focus on the Benefit of the Process: Don't worry if the birdhouse is a little lopsided. Focus on the fact that your child learned how to use a square or how to sand out a rough edge. We are fostering a love for learning, not training master carpenters overnight.
- Keep it Short: For younger kids, their attention span might only last 20-30 minutes. Break projects into "build phases" and "finish phases" over several days.
- Use Realistic Expectations: A 5-year-old will not be able to saw through a 2x4. Give them tasks they can succeed at, like applying glue or choosing the paint colors.
- Praise the Effort, Not Just the Result: "I love how you didn't give up when that nail bent!" is much more powerful than "That's a nice box."
Woodworking and Group Learning
Woodworking is a fantastic activity for homeschool co-ops, scout troops, or classroom settings. It encourages teamwork—one child holds the wood while the other saws—and allows for peer-to-peer teaching.
If you are an educator looking to bring this kind of hands-on STEM adventure to your group, we have resources for you too. Bring our hands-on STEM adventures to your classroom, camp, or homeschool co-op. Learn more about our versatile programs for schools and groups, available with or without food components. While we specialize in culinary STEM, the principles of following instructions, safety, and creative exploration are universal across all "maker" disciplines.
Expanding the Adventure: From the Shop to the Kitchen
The skills your child learns at the workbench—precision, patience, following a sequence—are exactly the same skills they need to excel in the kitchen. At I'm the Chef Too!, we’ve seen how kids who are confident with tools become confident with ingredients.
When a child measures a piece of wood, they are reinforcing the same math skills they use when measuring a cup of flour. When they wait for glue to dry, they are practicing the same patience required while waiting for a cake to rise. This holistic approach to education is what makes our "edutainment" kits so effective.
Not ready to subscribe? Explore our full library of adventure kits available for a single purchase in our shop. You might find a kit that perfectly complements your child's current woodworking project!
Frequently Asked Questions (FAQ)
What is the best age to start woodworking?
While every child is different, children as young as 3 or 4 can begin with very simple tasks like sanding pre-cut blocks or using a hammer with large-head nails in soft materials like Styrofoam or soft pine. Real building projects usually start around age 6 or 7.
Do I need to buy expensive power tools?
Absolutely not! In fact, we recommend staying away from most power tools until a child is much older (usually 11-12+ and with significant experience). Hand tools are safer, quieter, and provide a much better "feel" for the material, which is crucial for learning.
Isn't woodworking dangerous for kids?
Any activity involving tools has risks, but with proper adult supervision and safety gear, woodworking is a safe and incredibly rewarding hobby. Teach tool safety early: never run with tools, always wear safety glasses, and keep fingers away from the "business end" of a saw or hammer.
Where can I get wood for cheap?
Check the "scrap bin" at your local hardware store. Many stores sell these offcuts for a deep discount. You can also look for free pallets, but be careful—some are treated with chemicals. Look for the "HT" (Heat Treated) stamp to ensure they are safe for kids to handle.
How can I keep my child interested in a long project?
Break it up! Do the assembly one day and the decoration the next. You can also mix in other activities. For example, while waiting for glue to dry, you could Give the gift of learning that lasts all year with a 12-month subscription to our STEM cooking adventures. Having a new adventure arriving every month keeps the "maker" spirit alive even between woodworking projects.
Building a Future of Creativity
Woodworking is about so much more than making fun woodworking projects for kids. It’s about teaching our children that they have the power to shape the world around them. It’s about the quiet pride of a well-sanded surface and the loud joy of a successfully driven nail. It’s about the bond created when a parent and child lean over a workbench together, solving a problem.
At I’m the Chef Too!, we are committed to sparking that same curiosity and creativity through our unique blend of food, STEM, and the arts. Whether you are building a birdhouse in the garage or baking a galaxy in the kitchen, you are providing your child with a foundation of confidence and a love for learning that will last a lifetime.
We hope this guide has inspired you to clear off a corner of your garage or kitchen table and start building. Remember, the goal is joy, family bonding, and screen-free education. The projects you build today are the memories they will carry into tomorrow.
Are you ready to keep the adventure going? Our monthly kits are designed by mothers and educators to provide tangible, hands-on, and delicious adventures that your kids will look forward to every single month.
Join The Chef's Club today and let’s start building, baking, and learning together!