Fun Camping Food for Kids: Delicious Adventures for Your Next Trip

Table of Contents
- Why Camping Food is More Than Just Sustenance
- Safety First: Mastering Campfire Cooking with Kids
- Essential Gear for Your Campfire Kitchen
- Breakfast Bonanza: Waking Up to Deliciousness
- Lunchtime Adventures: Quick Bites and Creative Meals
- Snack Time Savvy: Fueling Outdoor Explorers
- Dinner Delights: Hearty Meals for Hungry Campers
- Dessert Dreams: Sweet Endings to a Perfect Day
- The I'm the Chef Too! Philosophy in the Great Outdoors
- Making it Easy: Prep and Planning for Stress-Free Camping
- Conclusion
Imagine this: the gentle crackle of a campfire, the crisp night air, and the excited whispers of children as they gaze at the stars. Camping offers an incredible escape, a chance to reconnect with nature and, most importantly, with each other. It's a world away from screens and schedules, a perfect canvas for creating cherished family memories. But let's be honest, feeding a crew of energetic, outdoor-loving kids three square meals (plus snacks and desserts!) can feel like a daunting task when you're far from your fully stocked kitchen. Suddenly, that peaceful vision of sipping coffee by the fire morphs into a frantic scramble for breakfast before anyone's even out of their sleeping bag.
But what if we told you that camping food for kids doesn't have to be a challenge? What if it could be another exciting part of the adventure, blending delicious meals with hands-on learning and family bonding? At I'm the Chef Too!, our mission is to transform everyday activities into one-of-a-kind "edutainment" experiences, blending food, STEM, and the arts. We believe that cooking, especially in the unique environment of a campsite, is a powerful tool for sparking curiosity and creativity in children. This post will go far beyond the classic hot dog, diving into easy, fun, and truly memorable camping food ideas that kids will love to help make and devour. Get ready to turn mealtime into an unforgettable part of your outdoor journey, proving that the best camping food is made and enjoyed together, outside.
Why Camping Food is More Than Just Sustenance
Camping meals aren't just about filling hungry bellies; they're an integral part of the outdoor experience, offering unique opportunities for growth and connection. Think about it: when you're cooking over an open fire, you're engaging with primal elements, observing how heat transforms ingredients, and working together as a team. This aligns perfectly with our philosophy at I'm the Chef Too! – we see food as a incredible vehicle for hands-on learning, a tangible way to explore complex subjects without even realizing it.
Just like in our kitchen-based STEM adventures, campfire cooking naturally introduces children to fundamental scientific principles. They might observe how heat causes water to boil, how ingredients combine to form new textures, or how different cooking methods yield different results. It's a practical application of physics, chemistry, and even biology (think about yeast rising in dough!) unfolding right before their eyes. This isn't about turning your child into a top scientist overnight, but rather about fostering a natural love for learning, encouraging observation, and building confidence in their abilities to create.
Beyond the academic benefits, preparing meals together around the campfire is a powerful catalyst for family bonding. It’s a shared activity that requires cooperation, communication, and patience. Children gain a sense of accomplishment when they contribute to a meal that everyone enjoys. This collaborative effort helps build self-esteem and teaches valuable life skills in a fun, relaxed setting. In a world increasingly dominated by screens, these screen-free educational alternatives are invaluable. The memories forged around a crackling fire, sharing stories and delicious food, are the ones that truly last. We're committed to providing experiences that spark curiosity and creativity, and campfire cooking is a natural extension of that commitment.
Safety First: Mastering Campfire Cooking with Kids
The magic of cooking over an open flame comes with a crucial caveat: safety. While involving your children in campfire cooking is incredibly rewarding, it’s paramount to ensure everyone understands and follows basic safety guidelines. As adults, we often instinctively know the dangers, but kids, in their excitement, might not. This is a prime opportunity to teach them essential life skills and responsible behavior around potential hazards.
Before you even light the fire, have a clear discussion about fire safety. Establish firm rules and ensure every child understands them. Here are some non-negotiables:
- Maintain a Safe Distance: Designate a clear "safety zone" around the fire pit. A physical boundary like a metal or rock fire ring helps reinforce this. Kids should know not to cross this line unless actively involved in cooking and under direct adult supervision.
- No Running or Roughhousing: The area around the campfire is not a playground. Emphasize that running, pushing, or any kind of rough play is strictly prohibited.
- Handle Hot Tools with Care: Utensils, cooking grates, and especially cast iron cookware can get extremely hot. Teach children to only touch equipment when instructed and always use heat-resistant gloves or thick hot mats.
- Mind Those Sticks: Hot dog and marshmallow sticks become incredibly hot. Remind children not to wave them around, especially when they have flaming marshmallows! This is a common source of accidental burns or even starting small fires. Teach them to hold sticks steady and point them away from others.
- Adult Supervision is Non-Negotiable: Never leave children unsupervised near a campfire, even for a moment. An adult should always be actively present and attentive when cooking is underway.
- Emergency Plan: Briefly discuss what to do in case of an emergency, such as a small fire starting outside the pit or a burn. Knowing where the water bucket or fire extinguisher is located can provide peace of mind.
By setting clear expectations and demonstrating safe practices, you empower your children to participate confidently and responsibly. This hands-on learning about safety is just as valuable as the cooking skills they'll acquire. It’s about building awareness and respect for the elements, fostering capable and responsible little chefs.
Essential Gear for Your Campfire Kitchen
One of the best things about camp cooking is that you don't need a sprawling gourmet kitchen to whip up delicious meals. In fact, keeping your equipment simple and versatile is the key to stress-free outdoor culinary adventures. We've found that a few core pieces of equipment can unlock a world of possibilities for fun camping food for kids.
The Campfire Cooking Trio
These three items are our go-to essentials for almost any camping meal:
-
Cast Iron Dutch Oven: This is truly the workhorse of the campfire kitchen. Its heavy, even heating capabilities make it perfect for everything from baking fluffy biscuits and cinnamon rolls to simmering hearty stews and one-pot dinners.
- Why it's great for kids: It introduces them to the concept of slow cooking and how heat is retained and distributed. They can help layer ingredients, stir (with supervision!), and marvel at how a meal transforms inside. You can talk about how the thick iron holds heat, much like a thermos keeps things warm.
- What to look for: A Dutch oven with a lid and a sturdy handle is ideal. You can hang it over the fire, place it directly on hot coals, or set it on a cooking grate.
-
Hobo Pie Iron: These simple, hinged cast iron or aluminum tools are incredibly fun and versatile, making them a huge hit with kids. They consist of two hinged halves that clamp together, perfect for holding sandwiches, fruit pies, or even mini omelets.
- Why it's great for kids: Hobo pie irons allow for immense creativity and customization. Kids can choose their own fillings, assemble their "pies," and then experience the magic of watching their creation cook over the fire. It’s a fantastic way to introduce them to the concept of direct heat cooking and the physical changes that occur as ingredients melt and toast. The satisfying "crispy, melty goodness" is a reward in itself!
- What to look for: Single or double pie irons are available. Having a couple on hand can speed up mealtime for larger families.
-
Hot Dog Sticks (or Roasting Forks): While you can always improvise with sharpened branches, sturdy, long-handled roasting sticks are invaluable for safety and ease of use.
- Why it's great for kids: Roasting hot dogs and marshmallows over an open flame is a quintessential camping experience. Kids love the independence of holding their own stick and watching their food cook. It's a simple yet deeply satisfying activity that engages their senses.
- What to look for: Ones with wooden or heat-resistant handles are best. Some even have multiple prongs, allowing for more hot dogs or marshmallows at once.
Supporting Cast for Your Campfire Kitchen
Beyond the core trio, a few other items will significantly enhance your camping cooking experience:
- Foldable Cooking Grate: While some campgrounds provide grates over fire rings, bringing your own ensures you have a stable surface for pots, pans, and even direct grilling. They're compact and easy to transport.
- Heavy-Duty Heat-Resistant Gloves/Mitts: Essential for handling hot cast iron, moving coals, or adjusting grates. Prioritize durability and heat resistance.
- Long-Handled Utensils: Tongs, a spatula, and a stirring spoon with extended handles keep hands safely away from the flames.
- Heavy-Duty Aluminum Foil: The ultimate camping multi-tool! Perfect for creating foil packets for individual meals, wrapping baked potatoes, or lining cookware for easier cleanup. It’s a fantastic way to experiment with steam cooking and direct-on-coal methods.
With this simple yet effective collection of tools, you'll be well-equipped to create a wide array of fun camping food for kids, making every meal an adventure.
Breakfast Bonanza: Waking Up to Deliciousness
There's nothing quite like waking up in a tent to the sounds of nature, but that serene moment often quickly gives way to the inevitable chorus of "I'm hungry!" from eager little campers. The key to a smooth camping morning is having breakfast ideas that are both delicious and easy to prepare with limited space and equipment. Forget the elaborate pancake stacks; we're all about simple, satisfying meals that get everyone fed and happy without the stress.
Campfire Cinnamon Rolls: A Sweet Start
Refrigerated cinnamon rolls are a true camping breakfast hack. They offer the warm, gooey deliciousness of baked goods with minimal effort, making them a fantastic introduction to Dutch oven baking for kids.
- The Science & Fun: This activity subtly introduces the concept of baking and how heat works. Kids can help unroll the dough, arrange the spirals in the greased Dutch oven, and observe how the rolls puff up as they bake. You can even talk about how the yeast in the dough creates gases that make them rise – a little bit of biology and chemistry in action!
-
How to Make Them:
- Lightly grease the bottom and sides of your Dutch oven.
- Carefully separate the pre-made cinnamon rolls and arrange them in a single layer in the Dutch oven, leaving a little space between each for expansion.
- Place the lid on the Dutch oven.
- Set the Dutch oven on a cooking grate over a bed of low, steady coals, or hang it from a tripod over the fire. You want gentle, even heat, not direct flames, to prevent burning. If you have coals, you can even place a few on top of the lid for more even baking.
- Bake for 15-25 minutes, checking periodically. They're done when golden brown and cooked through.
- Once cooked, drizzle with the included icing.
- Tip: If you're not confident with Dutch oven temperature control, you can also cook them in a foil pan placed on a grill grate over low coals, covered with foil.
Hash Browns & Sausage Skillet: Savory Satisfaction
A hearty skillet meal is perfect for fueling a day of outdoor adventures. This one-pot wonder combines crispy hash browns with savory sausage, and it’s surprisingly easy over a campfire.
- The Science & Fun: Kids can help crumble pre-cooked sausage or slice fresh kielbasa (with supervision), and then watch as the potatoes brown and crisp up. This is a great way to observe the Maillard reaction in action – how heat transforms sugars and amino acids to create delicious flavors and colors.
-
How to Make It:
- In your Dutch oven or a large cast-iron skillet, cook sliced sausage or kielbasa until browned. Remove and set aside.
- Add a little oil to the skillet if needed, then add frozen hash browns (the shredded kind work best). Spread them out evenly.
- Cook, stirring occasionally, until the hash browns are golden brown and crispy. This might take 15-20 minutes.
- Stir the cooked sausage back into the hash browns. You can also add some pre-cooked chopped onions or peppers if desired.
- Season with salt, pepper, and a little seasoned salt.
- Variations: Crack a few eggs directly into the hash brown mixture and scramble them for a complete breakfast.
Make-Ahead Breakfast Burritos: Grab-and-Go Genius
For those truly early risers or mornings when you want zero fuss, pre-made breakfast burritos are a lifesaver.
- The Science & Fun: This emphasizes planning and organization, important life skills. It also touches on food preservation and how different ingredients hold up when prepared ahead of time.
-
How to Make Them (Pre-Camp):
- Scramble eggs and cook any desired breakfast meats (sausage, bacon).
- Sauté diced peppers, onions, or spinach.
- Combine eggs, meat, veggies, and shredded cheese.
- Spoon the mixture into large tortillas, roll them up tightly, and wrap each in aluminum foil.
- Store in a cooler or freeze for longer trips.
- At Camp: Place the foil-wrapped burritos directly on warm coals or on a grill grate over medium heat, flipping occasionally, until heated through (about 10-15 minutes).
Overnight Oats & Cold Options: Effortless Mornings
Sometimes, you just want breakfast to be ready when you are, with no cooking required.
- Overnight Oats: Combine rolled oats, milk (dairy or non-dairy), chia seeds, and your favorite fruit or sweetener in a jar or container the night before. Store in the cooler. By morning, they'll be thick and creamy – a cool, refreshing, and nutritious start.
- Cereal & Milk: Pack individual servings of cereal and small, shelf-stable milk cartons for the ultimate grab-and-go breakfast. Minimal cleanup, maximum convenience.
Camping mornings can be busy, but they don't have to be stressful. By choosing easy, fun camping food for kids, you ensure everyone starts the day fueled and ready for adventure. Ready for a new adventure every month, delivered right to your door with free shipping? Join The Chef's Club and enjoy the convenience of pre-measured ingredients and exciting themes, perfect for busy mornings or any time you want to spark curiosity!
Lunchtime Adventures: Quick Bites and Creative Meals
Lunch during a camping trip often needs to be quick and easy, allowing more time for exploring, hiking, or just relaxing. Yet, "quick" doesn't have to mean "boring." These lunchtime ideas for fun camping food for kids are designed to be interactive, customizable, and of course, delicious.
Hobo Pies: The Ultimate Customization Station
Hobo pies are a camping classic for a reason: they're incredibly fun to make, totally customizable, and result in a perfectly crispy, melty sandwich or dessert. Kids absolutely love being in charge of their own creations.
- The Science & Fun: This activity is a fantastic way to introduce the concept of "contained cooking" and the physics of heat transfer. Kids will see how the heat from the campfire causes cheese to melt, bread to toast, and fillings to warm up inside the sealed pie iron. It’s also a great lesson in creativity and personal preference, as each child can design their own unique "pie."
-
Savory Hobo Pies:
- Lightly butter the outside of two slices of bread.
- Place one slice, butter-side down, into one half of the open pie iron.
- Add your desired fillings: sliced cheese, pepperoni, pre-cooked ham, leftover chili, or even a mini hot dog. Think "pizza pocket" or "grilled cheese deluxe."
- Top with the second slice of bread, butter-side up.
- Close the pie iron securely, trimming any excess crust that hangs out.
- Place the pie iron in the hot coals or over a medium flame, flipping every few minutes, until the bread is golden brown and the fillings are hot and melty (typically 5-10 minutes).
- Carefully open and enjoy!
-
Sweet Hobo Pies:
- Butter the outside of two slices of bread (or use biscuits from a can).
- Place one slice in the pie iron.
- Add a spoonful of pie filling (apple, cherry, blueberry), a few chocolate chips, or mini marshmallows.
- Top with the second slice of bread.
- Cook as above until golden. The warm, gooey fruit pies are a delightful treat!
- Example for I'm the Chef Too! Integration: Just like our Peppa Pig Muddy Puddle Cookie Pies bring beloved characters into the kitchen for a fun, hands-on "pie" experience, hobo pies let kids get creative with their fillings, making each bite an adventure!
Foil Packet Power-Ups: Minimal Mess, Maximum Flavor
Foil packets are a camper's best friend. They're incredibly versatile, require almost no cleanup, and allow for individual customization, making them perfect for even the pickiest eaters.
- The Science & Fun: This method demonstrates steam cooking and how heat is trapped within the foil to cook food evenly. Kids can help assemble their own packets, choosing their favorite ingredients, which encourages independence and healthy eating choices. It’s like a mini science experiment where they get to design their own outcome!
-
How to Make Them:
- Use heavy-duty aluminum foil (or double wrap with regular foil).
- Layer pre-cooked protein (chicken, sausage, black beans), quick-cooking vegetables (sliced bell peppers, onions, corn, zucchini), and a small amount of liquid or sauce (broth, salsa, BBQ sauce).
- Season generously with salt, pepper, and your favorite spices.
- Fold the foil tightly around the ingredients to create a sealed packet.
- Place packets directly on medium-hot coals or on a grill grate over the fire. Cooking time varies greatly depending on ingredients and heat, but generally 15-30 minutes, flipping once.
- Carefully open the packets (watch for steam!) and enjoy.
-
Popular Combos:
- Chicken & Veggies: Diced pre-cooked chicken, broccoli florets, carrot slices, a splash of broth, and Italian seasoning.
- Sausage & Potatoes: Sliced kielbasa, thinly sliced potatoes, onions, and bell peppers with a little oil and seasoned salt.
- Black Bean & Corn Salsa: Canned black beans (rinsed), corn, diced tomatoes, cilantro, and a squeeze of lime. Serve inside tortillas.
Quick Sandwiches & Wraps: No-Cook Simplicity
When time is truly of the essence, or you don't want to tend a fire, classic no-cook options are always a winner.
- Peanut Butter & Jelly: A timeless favorite. Pre-slice bread and pack individual packets of peanut butter and jelly for easy assembly.
- Deli Meat & Cheese Wraps: Tortillas are less likely to get squished than bread. Pack a variety of deli meats, cheese sticks, and maybe some pre-sliced cucumbers or carrots.
- Tuna or Chicken Salad: Prepare these at home and store them in an airtight container in the cooler. Serve with crackers, pita bread, or in lettuce cups.
Lunchtime camping doesn't have to be complicated to be fun. By involving kids in the preparation and giving them choices, you turn a simple meal into another enjoyable part of their outdoor adventure. Looking for more ways to engage your child's curiosity with hands-on activities? Browse our complete collection of one-time kits for a variety of themes that blend cooking with STEM and art!
Snack Time Savvy: Fueling Outdoor Explorers
Kids on a camping trip are constantly on the move, burning energy at an incredible rate. Snacks aren't just a treat; they're essential fuel to keep those little adventurers going between meals. The best camping snacks are portable, easy to eat, and provide sustained energy.
Kid-Friendly Trail Mix: A Customizable Energy Boost
Trail mix is the quintessential camping snack: easy to pack, non-perishable (mostly), and endlessly customizable. It's also a fantastic way to introduce kids to basic math and measurement concepts as they help assemble their own mixes.
- The Science & Fun: Creating trail mix allows children to explore concepts of proportion and balance (e.g., how much of each ingredient to add). It's also a great way to discuss the different types of energy sources in food – carbohydrates for quick energy, proteins for sustained energy, and healthy fats.
-
Recipe Breakdown: The beauty of trail mix is that there's no single "right" recipe. Encourage your kids to choose their favorite ingredients!
-
Base (Carbohydrates for energy):
- Pretzels (mini twists or sticks)
- Cheerios or other whole-grain cereals
- Goldfish crackers
-
Nuts/Seeds (Protein and Healthy Fats for sustained energy):
- Honey-roasted peanuts
- Cashews
- Sunflower seeds (check for allergies!)
- Pumpkin seeds
-
Dried Fruit (Natural Sweetness and Fiber):
- Dried cranberries
- Raisins
- Dried apricots (chopped)
- Banana chips
-
Treats (For Fun and Motivation!):
- Chocolate chips or mini chocolate candies (M&M's)
- Peanut butter chips
- Mini marshmallows
-
Base (Carbohydrates for energy):
-
Assembly:
- Provide individual bowls or zip-top bags.
- Let each child measure out their desired amounts of each ingredient (e.g., "add 1/2 cup of pretzels, 1/4 cup of raisins," etc.). This is a great practical math lesson!
- Mix everything together thoroughly.
- Store in airtight containers or individual snack-size bags for easy, grab-and-go portions.
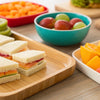
Fruit & Veggie Sticks: Freshness on the Go
Hydrating and vitamin-packed, fresh fruits and vegetables are always a good idea, especially when kids are active.
-
Preparation: Wash and chop fruits and vegetables at home.
- Fruits: Apple slices (toss with a little lemon juice to prevent browning), orange segments, grapes, berries (in a sturdy container), banana boats (pre-sliced in peel for easy cooking later).
- Vegetables: Carrot sticks, cucumber slices, bell pepper strips, cherry tomatoes.
- Serving: Pack with small containers of hummus or ranch dip for added appeal.
Energy Bites (No-Bake): A Sweet & Wholesome Treat
These no-bake wonders are quick to make ahead and provide a concentrated burst of energy.
- The Science & Fun: Making energy bites involves understanding how ingredients bind together to form a new texture – a simple chemistry lesson. Kids can help mix, roll, and even customize with different add-ins.
-
How to Make Them (Pre-Camp):
- Combine 1 cup rolled oats, 1/2 cup peanut butter (or other nut/seed butter), 1/3 cup honey or maple syrup, and optional mix-ins like mini chocolate chips, shredded coconut, or ground flaxseed.
- Mix well until a sticky dough forms.
- Roll into bite-sized balls.
- Store in an airtight container in the cooler.
- At Camp: Enjoy as a quick, satisfying snack.
Popcorn over the Fire: An Interactive Classic
Making popcorn over a campfire is a fun, interactive activity that delights kids with its popping sounds and delicious aroma.
- The Science & Fun: This is a fantastic demonstration of physics – how heat turns the tiny bit of water inside each kernel into steam, building pressure until it pops!
-
How to Make It:
- Use a long-handled, lidded popcorn popper designed for campfires, or create a foil packet.
- For a foil packet: Place a handful of popcorn kernels and a tablespoon of cooking oil in a large piece of heavy-duty foil. Fold tightly to create a sealed packet, leaving room for the kernels to expand.
- Hold the popper or packet over medium heat, shaking constantly, until the popping slows down.
- Carefully open and season with salt.
Snack time is more than just a break; it's another opportunity for connection and hands-on fun. With these easy and engaging options for fun camping food for kids, you'll keep those little adventurers happy and energized throughout your trip.
Dinner Delights: Hearty Meals for Hungry Campers
After a day of exploring, hiking, and playing, hungry kids need a hearty, satisfying dinner. Campfire dinners can be incredibly delicious and memorable, and with a little planning, they don't have to be complicated. The goal is to create warm, comforting meals that are easy to prepare and even easier to clean up.
One-Pot Kielbasa, Beans, and Red Potatoes: A Campfire Comfort Food
This recipe is a true campfire champion: it's incredibly simple, uses minimal ingredients, and cooks beautifully in a single Dutch oven, making cleanup a breeze. It's a go-to for many camping families because it's both satisfying and kid-friendly.
- The Science & Fun: This meal is a great example of a balanced, one-pot meal. Kids can help wash and chop vegetables (with supervision), and observe how different ingredients cook at different rates. You can talk about how the flavors meld together as the ingredients simmer.
-
Ingredients:
- 1 lb Polish kielbasa, sliced into rounds
- 6 large red potatoes, scrubbed and cubed (about 1-inch pieces)
- 2 cans (15 oz each) green beans, drained (or fresh green beans, trimmed)
- 2 cloves garlic, minced (optional)
- 2 tablespoons olive oil or butter
- Salt, black pepper, and seasoned salt to taste
- 1/2 cup water or broth (optional, to prevent sticking)
-
Instructions:
- Heat olive oil or butter in your cast iron Dutch oven over medium coals or a grill grate.
- Add the sliced kielbasa and cook, stirring occasionally, until lightly browned (about 5-7 minutes). If using garlic, add it during the last minute of cooking with the kielbasa.
- Stir in the cubed red potatoes. Cook for about 10-15 minutes, stirring periodically, until the potatoes start to soften slightly.
- Add the drained green beans and the water or broth (if using).
- Season generously with salt, pepper, and seasoned salt.
- Cover the Dutch oven with its lid. Nestle it back among the coals or place it on a grill grate over low to medium heat.
- Simmer for 20-30 minutes, or until the potatoes are tender, stirring occasionally to prevent sticking and ensure even cooking. Add more liquid if necessary.
- Serve hot. This dish pairs wonderfully with freshly cooked biscuits (also easy in a Dutch oven!) or even some simple cornbread.
This hearty meal is a guaranteed crowd-pleaser and embodies the ease and flavor of great camping food. For families looking for continuous engagement and delicious new learning experiences, our monthly Chef's Club subscription delivers a complete experience right to your door with free shipping!
Walking Tacos: Fun and Minimal Dishes
A "walking taco" is a brilliant, kid-friendly concept that minimizes dishes and maximizes fun.
- The Science & Fun: This is all about assembly and personal preference. Kids can practice fine motor skills by crushing chips and scooping toppings. It’s also a great way to talk about different food groups and building a balanced meal.
-
How to Make Them:
- Prepare Taco Meat Ahead: At home, cook and season ground beef or turkey with taco seasoning. Store in an airtight container in your cooler.
- At Camp: Reheat the taco meat in a skillet or Dutch oven.
- Provide individual-sized bags of corn chips (like Fritos or Doritos).
- Carefully open each bag, crush the chips slightly, then spoon in hot taco meat.
- Offer a variety of toppings: shredded cheese, salsa, sour cream, chopped lettuce, diced tomatoes, or black olives.
- Kids can eat directly from the bag with a fork – no plates required!
Campfire Nachos: Melty Goodness
Nachos are a fantastic shareable meal that's quick to assemble and cook.
- The Science & Fun: Observing cheese melt and bubble is always fascinating! This activity also involves layering and understanding how heat distributes through different materials.
-
How to Make Them:
- Line a cast iron skillet or a sturdy foil pan with a layer of tortilla chips.
- Add cooked taco meat (if desired), black beans, corn, and a generous amount of shredded cheese.
- Repeat layers if making a larger batch.
- Place the skillet/pan on a grill grate over medium coals or a medium flame until the cheese is melted and bubbly (5-10 minutes).
- Top with salsa, sour cream, guacamole, or jalapeños (for adults).
Kabobs (Pre-Marinated): Grilling Fun
Pre-marinating meats and chopping veggies at home makes assembling kabobs at camp a breeze.
- The Science & Fun: Skewering food helps kids with hand-eye coordination. Grilling demonstrates direct heat cooking and the browning reaction that creates delicious flavors.
-
How to Make Them (Pre-Camp):
- Cut chicken, steak, or firm tofu into bite-sized pieces.
- Marinate in your favorite sauce (teriyaki, BBQ, Italian dressing) for at least 30 minutes, or overnight in the cooler.
- Chop quick-cooking vegetables like bell peppers, onions, zucchini, or cherry tomatoes.
- Store meat and veggies separately in airtight containers.
- At Camp: Thread meat and veggies onto metal skewers (or pre-soaked wooden skewers). Grill over a hot grate until cooked through, turning frequently.
Make-Ahead Wonders: Meals that Travel Well
For maximum convenience, prepare certain meals entirely at home and simply reheat them at the campsite.
- Chili or Soup: Make a big batch of your favorite chili or a hearty soup (like a tortellini sausage soup) at home. Transport in a sturdy container and reheat in your Dutch oven over the campfire.
- Baked Mac and Cheese: Cook a family-sized pan of mac and cheese. At camp, cover with foil and reheat on a grill grate over low coals until warm and bubbly.
- Cooked Pasta & Sauce: Cook pasta al dente at home and toss with a little olive oil to prevent sticking. Pack in a bag. Prepare your favorite meat sauce or meatballs separately. Reheat the sauce/meatballs in a Dutch oven, then add the cooked pasta.
These dinner ideas ensure that even after a day of non-stop fun, your family will gather around the campfire for a satisfying meal. For families who love to explore new culinary adventures and learn along the way, our diverse range of one-time kits offers something for every interest and age!
Dessert Dreams: Sweet Endings to a Perfect Day
No camping trip is complete without a delicious campfire dessert. These sweet treats are often the highlight for kids, providing a memorable end to a day of outdoor fun. Beyond the classic s'mores, there are many creative and equally fun options for sweet fun camping food for kids.
The S'mores Buffet: Elevating a Classic
S'mores are iconic for a reason, but why stop at the basics? A s'mores buffet takes this beloved treat to a whole new level of customization and creativity.
- The Science & Fun: Roasting marshmallows demonstrates a chemical change (caramelization) and a physical change (melting). The "buffet" aspect encourages kids to experiment with different flavor combinations, engaging their creativity and taste buds.
-
How to Set Up Your Buffet:
- Marshmallows: Offer a variety – classic jumbo, flavored (chocolate, strawberry), or even gourmet square marshmallows for better coverage.
-
Chocolate: Beyond classic milk chocolate bars, consider:
- Peanut butter cups
- White chocolate bars
- Caramel squares
- Chocolate hazelnut spread (Nutella)
- Chocolate-covered pretzels
-
Crackers/Cookies: Graham crackers are a must, but also include:
- Chocolate chip cookies
- Peanut butter cookies
- Fudge stripe cookies
- Waffle cone pieces
-
Extra Toppings:
- Sliced bananas
- Coconut flakes
- Sprinkles (for extra fun!)
- Mini M&M's
- Crushed potato chips (for a sweet and salty crunch!)
- The Process: Each child roasts their marshmallow to their desired level of golden perfection, then assembles their unique s'more creation using the buffet ingredients. The joy is in the experimentation!
- Example for I'm the Chef Too! Integration: Just like the exciting chemical reaction that makes our Erupting Volcano Cakes bubble over with deliciousness, the melting marshmallows and chocolate in a s'mores buffet create a delightful, interactive "wow" factor that kids adore!
Banana Boats: Foil-Wrapped Goodness
Banana boats are a simple, healthy-ish, and incredibly delicious campfire dessert that’s easy for kids to customize.
- The Science & Fun: This is another great example of cooking in a foil packet, demonstrating how steam and indirect heat can cook and melt ingredients. Kids love stuffing their bananas with toppings and watching them transform.
-
How to Make Them:
- Take an unpeeled banana and slice it lengthwise down the middle, being careful not to cut all the way through the bottom peel. You want to create a "boat."
- Gently open the banana to create a pocket.
- Stuff the pocket with your favorite fillings: mini chocolate chips, mini marshmallows, peanut butter chips, crushed cookies, or even a sprinkle of cinnamon.
- Wrap the banana tightly in aluminum foil.
- Place the foil-wrapped banana directly on medium-hot coals or on a grill grate over medium heat for 10-15 minutes, or until the banana is soft and the fillings are melty.
- Carefully unwrap and eat with a spoon directly from the peel.
Monkey Bread (Dutch Oven): A Gooey Delight
Monkey bread is a pull-apart, cinnamon-sugar treat that bakes beautifully in a Dutch oven, filling the campsite with a delightful aroma.
- The Science & Fun: This activity introduces the concept of baking in a Dutch oven and the magic of caramelization as the sugar melts and coats the dough. Kids can help cut the biscuit dough and shake it in the cinnamon sugar mixture.
-
How to Make It:
- Grease your Dutch oven.
- Open two cans of refrigerated biscuit dough. Cut each biscuit into quarters.
- In a large zip-top bag, combine 1/2 cup granulated sugar and 2 teaspoons ground cinnamon. Add the biscuit pieces and shake to coat thoroughly.
- Arrange the coated biscuit pieces evenly in the greased Dutch oven.
- In a small bowl, melt 1/2 cup butter and stir in 1/2 cup brown sugar. Pour this mixture evenly over the biscuits.
- Cover the Dutch oven and bake over low to medium coals (with some coals on the lid too, if possible) for 25-40 minutes, or until golden brown and cooked through.
- Let cool slightly before inverting onto a plate. Pull apart and enjoy!
Baked Apples: Simple and Wholesome
For a simpler, fruit-focused dessert, baked apples are a warm and comforting option.
- The Science & Fun: This is a gentle introduction to baking and how heat softens fruit, releasing its natural sugars. Kids can help core the apples and stuff them.
-
How to Make Them:
- Core apples (like Fuji or Gala), leaving the bottom intact.
- Stuff the center with a mixture of brown sugar, cinnamon, a pat of butter, and a few raisins or chopped nuts.
- Wrap each apple tightly in aluminum foil.
- Place directly on medium coals for 20-30 minutes, turning occasionally, until the apples are very soft.
- Carefully unwrap and enjoy the warm, sweet apple.
These dessert ideas for fun camping food for kids are sure to create sweet memories around the campfire, cementing the joy of your outdoor adventure.
The I'm the Chef Too! Philosophy in the Great Outdoors
At I'm the Chef Too!, our core mission is to blend food, STEM, and the arts into one-of-a-kind "edutainment" experiences. We are passionate about sparking curiosity and creativity in children, fostering deeper family bonding, and providing a much-needed screen-free educational alternative. When you look at camping cooking through this lens, you realize it's a natural extension of everything we believe in.
Our unique approach, developed by mothers and educators, emphasizes that learning doesn't have to be confined to a classroom or even a traditional kitchen. The great outdoors, with its raw elements and hands-on challenges, provides an incredible learning laboratory.
Think about the STEM connections inherent in campfire cooking:
- Science: Observing how fire cooks food (heat transfer, combustion), the chemical reactions that cause dough to rise or marshmallows to caramelize, the physical changes as ice melts in a cooler or water boils.
- Technology: Understanding how different cooking tools (Dutch ovens, pie irons, grates) function and optimize heat.
- Engineering: Designing a meal plan that works with limited resources, building a safe and efficient fire, constructing foil packets to cook food evenly.
- Math: Measuring ingredients for recipes, calculating cooking times, understanding proportions for trail mix.
Beyond STEM, there's a strong artistic component. The creativity involved in customizing a hobo pie, arranging a s'mores buffet, or even plating a simple campfire meal taps into a child's imagination and aesthetic sense. It’s about more than just sustenance; it’s about creating an experience.
Camping cooking, just like our kits, encourages problem-solving. What if the fire is too hot? How do we keep ingredients fresh? These are real-world challenges that build resilience and critical thinking skills. And perhaps most importantly, it's about connection. The shared laughter, the teamwork, and the sense of accomplishment when a delicious meal is created together strengthens family bonds in a way that few other activities can.
We are committed to providing tangible, hands-on, and delicious adventures that make learning unforgettable. Every time you cook with your children, whether it's a complex recipe from one of our kits or a simple meal over a campfire, you're investing in their curiosity, their confidence, and the joyful memories you're building together. Ready to bring this blend of food, STEM, and art into your home every month? Join The Chef's Club for ongoing educational fun delivered directly to your door with free shipping!
Making it Easy: Prep and Planning for Stress-Free Camping
The secret to enjoyable camping meals, especially when cooking with kids, lies in thorough preparation and smart planning. While the idea of spontaneous outdoor cooking is romantic, a little bit of foresight can save you a lot of stress and ensure you have more time for actual fun.
The Power of Pre-Camp Prep
Do as much as you can at home, where you have access to a full kitchen, running water, and all your tools.
- Meal Planning is Key: Before you even pack, create a detailed meal plan for every breakfast, lunch, dinner, and snack. Factor in the number of people, the length of your trip, and the types of activities you'll be doing (more active means hungrier kids!).
-
Pre-Chop & Pre-Measure: This is arguably the biggest time-saver.
- Chop all vegetables (onions, peppers, potatoes, carrots).
- Measure out dry ingredients for recipes (spices, flour, sugar) and store them in clearly labeled zip-top bags or small containers.
- Pre-mix pancake batter (store in a squeeze bottle for easy pouring).
- Pre-cook any meats that can be reheated (taco meat, shredded chicken, bacon).
- Assemble Foil Packets: Create individual foil packets for dinners or lunches at home, ready to toss on the fire.
- Make Trail Mix & Energy Bites: Prepare all your snacks ahead of time and portion them into individual bags.
- Wash & Store Produce: Wash all fruits and vegetables thoroughly before packing to make them ready to eat.
Smart Storage and Cooler Management
Keeping food safe and organized is crucial for a successful camping trip.
-
Cooler Organization:
- Layer items: drinks on the bottom (they can get wet), then meats, then dairy/eggs, then produce.
- Use separate, sealed containers for raw meats to prevent cross-contamination.
- Use block ice or frozen water bottles (which can double as drinking water as they melt) for longer-lasting cold.
- Open the cooler as infrequently as possible to maintain temperature.
- Pantry Box: Designate a sturdy bin or box for all your non-perishable items like pasta, canned goods, bread, snacks, and cooking oils. This keeps everything organized and protected.
- Dishwashing Station: Plan for cleanup. Bring biodegradable soap, a scrub brush, and a few collapsible bins for a wash, rinse, and air-dry setup.
Involving Kids in the Planning
Don't forget to get your children involved in the planning process!
- Menu Input: Let them choose some of the meals or snacks. When kids have a say, they're more likely to eat what's prepared and be excited about the process.
- Packing Helpers: Assign them simple tasks like gathering non-breakable utensils or helping to pack their own snack bags.
- "Chef's Helper" Role: At camp, give them specific, age-appropriate roles, whether it's stirring, adding pre-measured ingredients, or helping with cleanup. This builds ownership and enthusiasm.
By embracing these preparation strategies, you transform camping mealtime from a potential source of stress into another joyful, collaborative adventure. It frees up more time for family bonding, exploring, and simply enjoying the beauty of the outdoors. The convenience of pre-measured ingredients and curated experiences is something we deeply value at I'm the Chef Too!. That's why our Chef's Club delivers complete, ready-to-go STEM cooking adventures right to your door, making learning fun and easy for parents and kids alike. If you're looking for more ways to make educational activities simple and engaging, browse our complete collection of one-time kits for a wide variety of themes!
Conclusion
Camping offers a truly unique opportunity for families to disconnect from the daily grind and reconnect with each other amidst the beauty of nature. And at the heart of many memorable camping trips lies the shared experience of cooking and eating together around a crackling campfire. As we've explored, creating fun camping food for kids goes far beyond just hot dogs; it's an adventure in itself, full of hands-on learning, creative problem-solving, and invaluable family bonding.
From sizzling breakfast skillets to customizable hobo pies, hearty one-pot dinners, and delightful s'mores buffets, every meal can be an "edutainment" experience. You're not just feeding hungry bellies; you're sparking curiosity about how things cook, developing practical skills, fostering teamwork, and building confidence in your little chefs. These screen-free moments, filled with the aroma of campfire smoke and delicious food, are the ones that truly become cherished family lore.
At I'm the Chef Too!, we are committed to making learning an exciting, tangible, and delicious journey. Our approach, developed by mothers and educators, seamlessly blends food, STEM, and the arts, proving that the kitchen – or in this case, the campfire – is a fantastic classroom. We believe in the power of hands-on experiences to ignite a lifelong love for discovery.
So, as you plan your next outdoor escape, embrace the culinary adventure. Get your kids involved in every step, from planning the menu to preparing the ingredients and, of course, enjoying the fruits of their labor. The memories you create around that campfire, sharing laughter and delicious food, will be just as enriching and enduring as the wilderness around you.
Ready to bring the magic of hands-on learning and delicious discovery into your home every month? Join The Chef's Club today and let us deliver new, exciting STEM cooking adventures directly to your door with free shipping!
FAQ
Q1: How do I keep food safe and fresh while camping?
A1: Proper cooler management is key. Use good quality coolers, pre-chill them, and use block ice or frozen water bottles (they melt slower than cubes). Pack raw meats in separate, sealed containers at the bottom. Keep the cooler in the shade and open it only when necessary. For non-perishables, use sturdy, airtight bins to protect against pests and moisture.
Q2: What's the best way to clean dishes at a campsite?
A2: Set up a three-bin washing station: one for hot, soapy water (biodegradable soap is best for nature), one for hot rinse water, and one for sanitizing water (a capful of bleach per gallon, or a sanitizing tablet). Scrape off excess food into a trash bag before washing. Air dry dishes on a clean cloth or mesh bag. Some campgrounds have designated dishwashing sinks, so check beforehand.
Q3: Can we cook fun camping food for kids without a campfire?
A3: Absolutely! Many of these recipes can be adapted for a portable camp stove or even a grill. Foil packets and skillet meals work wonderfully on a stove. Hot dogs and marshmallows can be roasted over a propane fire pit or even a small charcoal grill. The key is to adjust cooking times and heat levels as needed.
Q4: What if my child is a picky eater? How can I encourage them to try new camping foods?
A4: Involving them in the process is the best strategy! Let them choose ingredients for trail mix or hobo pies. Give them a sense of ownership over their meal. Keep portions small, and don't pressure them to finish everything. The novelty of cooking outdoors can often make kids more adventurous. Having a few familiar "safe" foods on hand is also a good idea.
Q5: How can I involve very young children (toddlers/preschoolers) in campfire cooking safely?
A5: Even the youngest campers can help! Focus on age-appropriate, safe tasks away from the hot fire. They can:
- Wash fruits and vegetables.
- Stir ingredients in a bowl (before cooking).
- Add pre-measured items to a pot or foil packet.
- Help assemble sandwiches or s'mores (away from the fire).
- Hand you tools or ingredients.
- Collect small sticks for kindling (away from the fire pit). Always ensure constant, direct adult supervision.