Table of Contents
- Introduction
- Why Bake Christmas Cookies with Kids? More Than Just a Treat!
- Setting Up for Success: Kid-Friendly Kitchen Prep
- Our Go-To Easy Christmas Cookie Recipe for Kids: The Versatile Sugar Cookie Base
- No-Bake Wonders: Quick & Easy Christmas Cookie Alternatives
- Unleash Creativity: Decorating Station Ideas
- Beyond the Basics: Fun Variations for the Adventurous Little Chef
- Turning Cookies into Gifts: The Joy of Giving
- Making it Educational: Simple STEM Questions to Ask
- Tips for Success (and Sanity) in the Holiday Kitchen
- Conclusion
- FAQ: Your Christmas Cookie Baking Questions Answered!
The air crackles with anticipation, the scent of pine needles dances through your home, and the gentle hum of holiday music fills the background. As the festive season approaches, there’s a particular magic that unfolds when children’s laughter mingles with the clatter of mixing bowls and the sweet aroma of baking cookies. More than just a delicious treat, baking Christmas cookies with kids transforms your kitchen into a vibrant laboratory of learning, creativity, and unforgettable family memories.
At I'm the Chef Too!, we wholeheartedly believe in the power of hands-on "edutainment" – blending food, STEM, and the arts into experiences that truly spark joy and curiosity. Developed by mothers and educators, our approach is all about making complex subjects tangible and delicious. This holiday season, we invite you to embrace this philosophy right in your own kitchen. This comprehensive guide will arm you with truly easy, kid-friendly Christmas cookie recipes and creative decorating ideas designed to inspire budding chefs and scientists alike. We'll explore how these simple kitchen adventures foster essential skills, from mathematical measurements to artistic expression, all while creating cherished family traditions and, of course, a delightful assortment of edible masterpieces. Get ready to turn flour, sugar, and sprinkles into a joyful, educational, and scrumptious holiday journey!
Introduction
Imagine the scene: tiny hands covered in flour, eyes wide with wonder as cookie cutters transform dough into festive shapes, and the triumphant cheer when the first batch of warm, sweet cookies emerges from the oven. This isn't just a nostalgic holiday dream; it's an achievable reality, even for busy parents and first-time bakers. Many parents wonder if baking with kids is more trouble than it’s worth, envisioning sticky messes and frustrated sighs. But what if we told you that holiday cookie baking could be one of the most rewarding, screen-free educational activities you undertake this season?
At I'm the Chef Too!, our mission is rooted in transforming everyday activities into extraordinary learning opportunities. We blend the joy of cooking with the wonders of STEM (Science, Technology, Engineering, and Math) and the creativity of the arts, crafting one-of-a-kind "edutainment" experiences. This article isn't just about giving you an easy Christmas cookie recipe for kids; it’s about empowering you to create a vibrant, engaging, and educational environment right in your own home. We'll guide you through simple recipes, offer clever tips for involving children of all ages, and show you how to seamlessly weave in lessons in math, science, and art, all while building confidence and creating joyful family memories. Our goal is to make holiday baking an accessible, fun, and enriching adventure that lights up your child's curiosity and creativity, leaving you with delicious treats and an even sweeter sense of accomplishment.
Why Bake Christmas Cookies with Kids? More Than Just a Treat!
Baking isn't just about the final product; it's a journey filled with invaluable lessons and moments of connection. When you invite your children into the kitchen to bake Christmas cookies, you're not just making dessert; you're building a foundation for a love of learning, fostering essential life skills, and strengthening family bonds.
STEM in the Sweet Science Lab
The kitchen is a fantastic, edible laboratory where STEM principles come alive in the most delicious ways. Every scoop, mix, and bake offers a hidden lesson:
- Math Magic: Measuring ingredients introduces fractions, volume, and counting. "We need two cups of flour, and we've added one. How many more do we need?" This simple question turns baking into an interactive math lesson. Kids learn to estimate, compare quantities, and understand basic numerical concepts without even realizing it.
- Scientific Discoveries: Why do cookies spread? What makes them rise? These questions open doors to understanding chemical reactions. The baking powder and baking soda interact with other ingredients to create gases, making the cookies light and fluffy. Melting butter or chocolate demonstrates changes of state. For instance, when we explore a chemical reaction that makes our Erupting Volcano Cakes bubble over with deliciousness, children are witnessing science in action, similar to how leavening agents work in cookies.
- Engineering Edibles: From structuring cookie dough so it holds its shape, to designing a gingerbread house, kids are engaging in basic engineering principles. They learn about stability, balance, and how different components fit together. Decorating involves planning and execution, thinking about how to best apply icing or arrange sprinkles to achieve a desired look.
- Artistic Expression: Decorating cookies is pure edible art! Children experiment with colors, patterns, and textures. They can design intricate patterns with icing, create whimsical faces on gingerbread men, or construct festive scenes with candies. This fosters creativity, fine motor skills, and self-expression.
- Sensory Exploration: Baking engages all five senses: the feel of the dough, the smell of spices, the sound of stirring, the sight of colorful sprinkles, and, of course, the taste of the warm cookies. This multi-sensory experience helps children develop their sensory processing skills and language as they describe what they see, hear, smell, touch, and taste.
Cultivating Life Skills and Confidence
Beyond academics, baking instills practical life skills that serve children well into adulthood:
- Following Instructions: Recipes teach the importance of sequential steps and attention to detail.
- Patience: Waiting for dough to chill, cookies to bake, or icing to set are excellent lessons in delayed gratification.
- Problem-Solving: What if the dough is too sticky? Too dry? Kids learn to adapt and find solutions with your guidance.
- Responsibility: Assigning tasks and entrusting children with parts of the baking process builds a sense of responsibility and capability.
- Teamwork: Baking together requires cooperation, communication, and sharing tasks.
- Cleanliness: Learning to tidy up as you go, and how to wash dishes after, is a fundamental life skill that’s easily integrated into a fun baking session.
At I'm the Chef Too!, our mission is precisely this: to facilitate family bonding and provide screen-free educational alternatives that build confidence and skills. Our unique kits, designed by mothers and educators, bring these valuable experiences right to your doorstep. We believe in fostering a love for learning through tangible, hands-on, and delicious adventures. Ready for a new adventure every month? Join The Chef's Club and enjoy free shipping on every box and discover how easy it is to blend learning and fun!
Setting Up for Success: Kid-Friendly Kitchen Prep
Before the flour starts flying and the sprinkles begin to sparkle, a little preparation goes a long way in ensuring a joyful and safe baking experience for everyone. Our philosophy at I'm the Chef Too! is about making learning accessible and fun, and that starts with a well-organized and safe environment.
Safety First in the Sweet Spot
Adult supervision is always paramount, especially when working with ovens, hot pans, and sharp tools. Here are a few essential safety tips:
- Hot Zones: Clearly designate "hot zones" around the oven and stove. Teach children to never touch these areas without an adult's help.
- Sharp Tools: Keep knives and graters out of reach for younger children. For older kids, teach proper handling techniques and always supervise. Cookie cutters are generally safe, but some can have sharper edges.
- Handwashing: Emphasize washing hands thoroughly before, during (if touching raw ingredients then cooked), and after handling food.
- Allergy Awareness: If baking for others, be mindful of any food allergies.
- Non-Slip Surfaces: Ensure cutting boards and bowls are stable to prevent slips.
Age-Appropriate Tasks: Every Little Chef Can Help!
One of the beautiful aspects of baking is that there’s a role for every child, regardless of age. Tailoring tasks to their developmental stage builds confidence and avoids frustration.
-
Toddlers (1-3 years old): The Little Explorers
- Stirring: With a sturdy spoon in a stable bowl, they can stir already measured dry ingredients.
- Pouring: Guide their hands to pour pre-measured liquids or sprinkles into the bowl.
- Mashing: If your recipe involves bananas or soft fruit, mashing is a wonderful sensory activity.
- Decorating: Placing large, easy-to-handle sprinkles or candies onto frosted cookies.
- Implicit understanding: Focus on sensory exploration and participation rather than precision.
-
Preschoolers (4-6 years old): The Eager Helpers
- Rolling Dough: Give them a small portion of dough and a kid-sized rolling pin. Embrace the imperfect shapes!
- Cookie Cutters: They love pressing out shapes. Teach them to press firmly and wiggle the cutter gently.
- Decorating: Piping simple lines with pre-filled squeeze bottles, arranging candies, painting with edible colors.
- Washing Produce: A gentle task that builds responsibility.
- Implicit understanding: Learning sequences and following simple instructions.
-
School-Aged Kids (7-10 years old): The Budding Bakers
- Measuring Ingredients: With guidance, they can accurately measure flour, sugar, and liquids. This is fantastic for practical math skills.
- Cracking Eggs: A classic rite of passage in the kitchen.
- Mixing: Using a hand mixer (with supervision) or thoroughly mixing dough by hand.
- Kneading Dough: A great physical activity that connects them to the texture of food.
- Icing Details: More intricate piping, spreading frosting evenly.
- Implicit understanding: Developing precision, understanding cause and effect, and building independence.
-
Tweens & Teens (11+ years old): The Junior Chefs
- Reading Recipes Independently: Encouraging self-reliance and comprehension.
- Managing Baking Times: Keeping an eye on the clock and checking for doneness.
- Complex Decorating: Using piping bags with tips, creating different icing consistencies.
- Developing Flavor Combinations: Encouraging creativity in adding spices or extracts.
- Scaling Recipes: Learning to adjust ingredient quantities for larger or smaller batches.
- Implicit understanding: Taking ownership, problem-solving, and advanced culinary skills.
Organization is Key: A Stress-Free Zone
A clear and organized workspace makes all the difference:
- Gather & Measure: Before you begin, pull out all ingredients and tools. Pre-measure some ingredients (especially for younger kids) to streamline the process.
- Clear Counters: Remove anything unnecessary from your baking area.
- Aprons & Smocks: Protect clothing and embrace the inevitable mess!
- Step-by-Step: Break the recipe down into manageable steps. A printed recipe with checkboxes can be helpful for older kids.
At I'm the Chef Too!, we craft our kits with this mindful preparation in mind, ensuring that each step is clear, engaging, and age-appropriate. Our goal is to make every cooking adventure a positive experience, fostering a love for learning and building confidence, not just in the kitchen, but in all aspects of life. While we can’t promise your child will become a top scientist overnight, we are committed to providing the tools and experiences that nurture their potential and create joyful family memories. Browse our complete collection of one-time kits to find the perfect theme for your little learner!
Our Go-To Easy Christmas Cookie Recipe for Kids: The Versatile Sugar Cookie Base
When it comes to holiday baking with kids, the simpler the recipe, the better. Our foundational Easy Sugar Cookie recipe is designed to be forgiving, fun, and a perfect canvas for all kinds of festive decorations. This dough comes together quickly, requires minimal chilling, and holds its shape beautifully – a triple win for little bakers!
This recipe is intentionally egg-free, making it a great option for those with egg sensitivities or for families looking for a versatile base.
Truly Easy Christmas Sugar Cookie Base Recipe
Yields: Approx. 2-3 dozen cookies (depending on cutter size) Prep time: 15 minutes + 30 minutes chilling (optional, but recommended) Bake time: 8-12 minutes
Ingredients:
- 2 ½ cups (300g) all-purpose flour, plus more for dusting
- 1 teaspoon baking powder
- ½ teaspoon salt
- ¾ cup (1½ sticks, 170g) unsalted butter, softened to room temperature
- 1 cup (200g) granulated sugar
- 2 teaspoons pure vanilla extract
- ¼ cup (60ml) milk (whole, 2%, or non-dairy for dairy-free option)
Equipment:
- Large mixing bowl
- Whisk
- Rubber spatula or sturdy spoon
- Parchment paper
- Rolling pin (a child-sized one is great!)
- Cookie cutters
- Baking sheets
- Wire rack for cooling
Step-by-Step Instructions for Little Hands and Big Hearts:
- Prep the Dry Team: In a large bowl, whisk together the flour, baking powder, and salt. This step is super important to make sure all the rising power (baking powder) is spread evenly! Little ones can help by whisking carefully.
-
Cream the Wet Wonders: In a separate, medium bowl (or in the large bowl if you're going straight to hands-on mixing), combine the softened butter and granulated sugar. With a rubber spatula or sturdy spoon (or even clean hands!), mash and mix them together until they're light, fluffy, and well combined. This is a great arm workout for older kids!
- I'm the Chef Too! Tip: Make sure your butter is truly soft, but not melted. It should indent easily when poked, but not be greasy. This is a scientific concept about emulsions that affects the final texture of the cookie!
- Add the Flavor: Stir in the vanilla extract and the milk until just combined.
- Combine Forces: Gradually add the dry ingredient mixture to the wet mixture, mixing until just combined. The dough will start to look crumbly at first, then come together into a soft ball. This is where clean hands are truly the best tools! Kids will love squishing and kneading the dough gently until it forms a cohesive ball. Be careful not to overmix, as this can make cookies tough.
- Chill Out (Optional but Recommended): Form the dough into a flat disc, wrap it in plastic wrap, and refrigerate for at least 30 minutes. This helps the flavors meld and makes the dough easier to roll out, ensuring your cookies hold their shapes perfectly. For a quick bake, you can skip this, but chilling really helps for crisp edges and soft centers.
- Roll it Out! Preheat your oven to 350°F (175°C). Line two baking sheets with parchment paper. Take a portion of the chilled dough. Place it between two sheets of parchment paper. This trick prevents sticking and makes cleanup a breeze! Little chefs can take turns with the rolling pin, aiming for about ¼-inch thickness.
- Cookie Cutter Fun: Unleash the cookie cutters! Press them firmly into the rolled-out dough. Wiggle gently to release. Transfer the cut-out shapes onto your prepared baking sheets, leaving a little space between each cookie. Gather the scraps, gently re-roll, and cut more cookies until all the dough is used.
- Bake to Golden Perfection: Bake for 8-12 minutes, or until the edges are lightly golden. Baking times can vary based on your oven and cookie thickness, so keep an eye on them!
- Cool Down: Once baked, let the cookies cool on the baking sheets for a few minutes before carefully transferring them to a wire rack to cool completely. This prevents them from breaking.
This versatile dough is the perfect starting point for any holiday cookie decorating adventure, turning simple ingredients into a canvas for creativity. At I'm the Chef Too!, we design our experiences to be exactly this: approachable, hands-on, and utterly engaging. Not ready to subscribe? Explore our full library of adventure kits available for a single purchase in our shop and find more unique recipes that transform baking into learning!
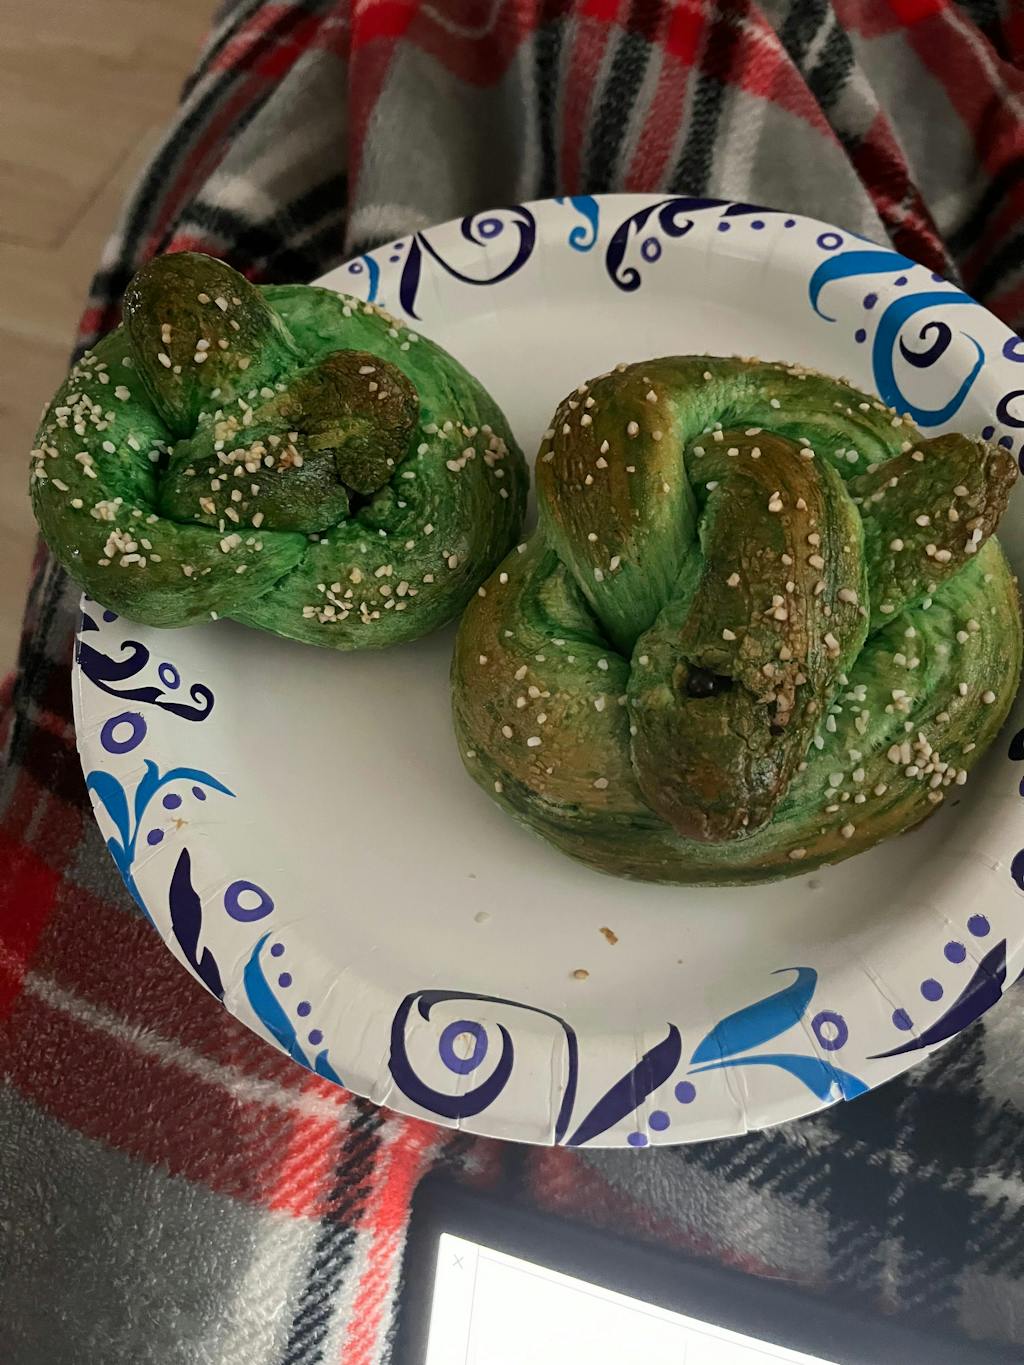
No-Bake Wonders: Quick & Easy Christmas Cookie Alternatives
Sometimes, the holiday hustle calls for speed, or perhaps you're simply looking for a fun kitchen activity that doesn't involve firing up the oven. No-bake Christmas cookies are fantastic for little ones who love immediate gratification and are perfect for smaller hands to manage without the risk of burns. These recipes offer a different kind of scientific exploration – exploring states of matter and the properties of different ingredients without heat!
1. Cornflake Wreaths: A Festive Green Delight
These iconic holiday treats are as fun to make as they are to eat, offering a vibrant burst of green and red that truly signals the season.
Ingredients:
- 4 tablespoons unsalted butter
- 4 cups mini marshmallows
- ½ teaspoon green food coloring (gel works best for vibrant color)
- 6 cups cornflake cereal
- Red cinnamon candies (like Red Hots) or small red M&Ms for decoration
Instructions:
- Melt & Mix: In a large microwave-safe bowl, melt the butter and marshmallows together. You can do this in the microwave in 30-second intervals, stirring after each, until smooth. Alternatively, melt in a saucepan over low heat. This demonstrates the change of state from solid to liquid!
- Color Splash: Stir in the green food coloring until the marshmallow mixture is a uniform festive green. Kids will marvel at the color transformation!
- Cornflake Crunch: Gently fold in the cornflake cereal until evenly coated. This is a great task for kids to do with a sturdy spoon or spatula, observing how the sticky marshmallow coats each flake.
- Shape & Decorate: While still warm, butter your hands lightly (or spray with cooking spray). Take spoonfuls of the mixture and quickly form them into wreath shapes on parchment paper. Press red cinnamon candies or M&Ms onto each wreath to represent berries.
- Set & Enjoy: Let the wreaths set at room temperature for about 30 minutes, or chill in the refrigerator for 15 minutes for a quicker set.
2. Peanut Butter Balls: Decadent & Dippable
These "Reese's-like" treats are a consistent kid-pleaser and offer a chance to work with different textures and coatings.
Ingredients:
- 1 cup creamy peanut butter
- ½ cup (1 stick) unsalted butter, softened
- 2 cups powdered sugar
- 1 teaspoon vanilla extract
- 10 ounces chocolate chips (milk or semi-sweet)
- 1 tablespoon coconut oil (optional, for smoother melting chocolate)
- Assorted festive sprinkles for decoration
Instructions:
- Cream & Mix: In a large bowl, combine the peanut butter, softened butter, powdered sugar, and vanilla extract. Mix with a sturdy spoon or clean hands until thoroughly combined and smooth. This becomes a delightful, pliable dough.
- Roll 'Em Up: Have kids roll small portions of the mixture into bite-sized balls (about 1-inch in diameter). This is excellent for fine motor skills. Place the balls on a parchment-lined baking sheet.
- Chill Time: Refrigerate the peanut butter balls for at least 30 minutes. This helps them firm up and keeps them from falling apart when dipped in chocolate.
- Melt the Chocolate: In a microwave-safe bowl, melt the chocolate chips with the optional coconut oil in 30-second intervals, stirring until smooth. The coconut oil helps create a thinner, more dippable consistency.
- Dip & Decorate: Using a toothpick or a fork, dip each chilled peanut butter ball into the melted chocolate, coating it completely. Let excess chocolate drip off. Place the dipped balls back onto the parchment paper. While the chocolate is still wet, encourage kids to sprinkle their festive decorations.
- Set: Return the finished balls to the refrigerator for another 15-20 minutes until the chocolate shell has hardened.
3. Reindeer Cookies: Adorably Easy
This no-bake option uses store-bought cookies as a base, minimizing effort and maximizing fun!
Ingredients:
- 1 package of round shortbread or chocolate wafer cookies
- Pretzels (small twists or sticks)
- Mini chocolate chips
- Red M&Ms or small red candies (for the nose)
- White icing (store-bought tube or simple powdered sugar glaze)
Instructions:
- Antler Assembly: Break pretzels into "antler" shapes.
- Glue & Attach: Using a dab of icing, "glue" two pretzel antlers onto the top half of each round cookie.
- Eyes & Nose: Use tiny dots of icing to attach two mini chocolate chips for eyes and one red M&M for the reindeer's nose.
- Set: Allow the icing to set for a few minutes.
These no-bake options offer immediate gratification, perfect for young children with shorter attention spans. They also provide different sensory experiences and skills development. At I'm the Chef Too!, we love activities that bring learning to life in simple, engaging ways. We're committed to sparking curiosity and creativity, facilitating family bonding, and providing screen-free educational alternatives that deliver a new adventure to your door every month. Join The Chef's Club and enjoy free shipping on every box for ongoing fun and discovery!
Unleash Creativity: Decorating Station Ideas
This is where the real "art" in "edutainment" comes to life! Decorating cookies allows children to express their creativity, develop fine motor skills, and experiment with colors and patterns. Setting up a dedicated decorating station transforms a simple task into an exciting, hands-on artistic project.
1. Simple Glaze Icing: Your Versatile Canvas
Forget complicated royal icing! A simple glaze is easy to mix, easy for little hands to handle, and dries to a lovely sheen.
Ingredients:
- 1 cup powdered sugar, sifted
- 2-3 tablespoons milk (or water, for a brighter white)
- ¼ teaspoon vanilla extract (optional)
- Gel food coloring (various colors)
Instructions:
- Mix the Base: In a small bowl, whisk together the sifted powdered sugar, 2 tablespoons of milk, and vanilla extract until smooth. You're aiming for a consistency that's thick enough to coat a spoon but still flows slowly. Add more milk a tiny drop at a time if too thick, or more powdered sugar if too thin.
- Color Power: Divide the icing into separate small bowls for different colors. Add 1-2 drops of gel food coloring to each bowl and stir until you achieve your desired hue. Gel colors are best as they don't thin the icing as much as liquid colors.
-
Application Tools:
- Squeeze Bottles: Small squeeze bottles (like condiment bottles) are fantastic for kids. They offer great control without the intimidation of piping bags.
- Small Spoons or Butter Knives: Perfect for spreading larger areas of color.
- Paintbrushes: Clean, food-safe paintbrushes can be used to "paint" details or broad strokes onto cookies.
2. The Sprinkle & Candy Buffet: A Treasure Trove of Textures
This is where the magic really happens! Lay out a variety of sprinkles and candies in small bowls or muffin tins. This encourages choice and design.
- Classic Sprinkles: Nonpareils (tiny balls), jimmies (long strands), sanding sugar (fine, sparkling sugar) in Christmas colors (red, green, white, gold, silver).
- Festive Candies: Mini M&Ms, small gumdrops, mini marshmallows, chocolate chips, peppermints (crushed or whole), mini candy canes.
- Edible Glitter/Dust: For a touch of sparkle (use sparingly and with supervision).
- Coconut Flakes: Can resemble snow!
3. Edible Markers: Precision & Personalization
For older kids, edible food markers are a game-changer. They allow for intricate details, drawing faces on gingerbread men, or adding messages to cookies. Ensure cookies are fully cooled and the base icing is dry before using.
4. Creative Cookie Cutters & Presses
Beyond the traditional shapes, consider:
- Cookie Presses: These mechanical tools allow you to create beautiful, intricate designs (like snowflakes or wreaths) with minimal effort once the dough is loaded. A great way to introduce simple mechanics!
- Themed Cutters: Even beloved characters can make learning fun, like when kids make Peppa Pig Muddy Puddle Cookie Pies. These provide a familiar starting point for creative storytelling through food.
Integrating Art and Imagination
As kids decorate, encourage them to:
- Tell a Story: "What kind of face does your gingerbread person have? Are they happy or surprised?"
- Experiment with Color: "What happens if you mix red and green sprinkles?" "What colors make the cookie look like snow?"
- Create Patterns: "Can you make a pattern with the red and green candies?" This subtly introduces mathematical patterning.
- Focus on the Process: Remind them that there's no "right" or "wrong" way to decorate. The joy is in the creation!
At I'm the Chef Too!, we believe that fostering creativity is just as important as teaching STEM concepts. Our unique "edutainment" approach ensures that children are not just following a recipe, but actively engaging their imaginations and developing their artistic skills. This blend of food, STEM, and arts is what makes our kits so special, transforming ordinary ingredients into extraordinary adventures. For even more ways to spark imagination, explore our full library of adventure kits available for a single purchase in our shop!
Beyond the Basics: Fun Variations for the Adventurous Little Chef
Once your children have mastered the easy sugar cookie base and simple decorating, it’s time to venture into more exciting variations! These ideas offer new textures, flavors, and creative challenges that further enhance their kitchen skills and understanding of culinary science. Each one is designed to be engaging for kids and incorporates elements that blend learning with delicious outcomes, much like the adventures found in our I'm the Chef Too! kits.
1. Chocolate Crinkles: The Snowy Effect
These cookies are a holiday classic, famous for their "snowy" cracked appearance created by rolling them in powdered sugar before baking.
Kid-Friendly Steps:
- Dough Rolling: After preparing a chocolate cookie dough (a simple addition of cocoa powder to our basic sugar cookie recipe works wonders, or use a specific crinkle recipe), have kids help roll small portions into balls. This is great for developing fine motor skills and hand-eye coordination.
- Powdered Sugar Fun: The most exciting part! Place a generous amount of powdered sugar in a bowl. Kids can then roll each chocolate dough ball thoroughly in the powdered sugar, ensuring it's completely coated. This sensory experience is always a hit! They’ll observe how the sugar sticks and creates a protective coating.
- Baking Magic: When baked, the chocolate dough expands, causing the powdered sugar coating to crack, creating that signature "crinkle" effect. This is a visible chemical reaction that children can observe and discuss!
2. Raspberry and Almond Shortbread Thumbprints: Precision and Flavor
Thumbprint cookies are wonderful for introducing a bit more precision and the concept of combining flavors.
Kid-Friendly Steps:
- Dough Rolling & Indenting: Kids can roll the shortbread dough into small balls. Then, using their thumb (or the back of a small measuring spoon for a more uniform indent), they press a "thumbprint" into the center of each ball. This task requires gentle pressure and control, refining fine motor skills.
- Jam Filling: Spooning a small amount of raspberry jam (or any favorite jam) into the indent is another great fine motor challenge. For younger kids, you can put the jam in a small, snip-tipped Ziploc bag for easier "piping."
- Flavor Pairings: Discussing how the sweet jam pairs with the buttery shortbread and hint of almond extract introduces the idea of flavor profiles in cooking.
3. Candy Cane Swirls & Pinwheel Cookies: Geometric Art
These cookies are a visual treat and a fantastic way to introduce basic geometry and patterns.
Kid-Friendly Steps:
- Candy Cane Swirls: Divide your sugar cookie dough into two portions. Leave one white, and color the other red with gel food coloring. Kids can roll small pieces of each color into "snakes" of equal length. Then, gently twist a red and white snake together and bend it into a candy cane shape. This teaches about primary colors, mixing, and creating spirals.
- Pinwheel Cookies: Roll out one portion of white dough into a rectangle. Roll out a red portion of dough into a rectangle of the same size. Carefully lay the red dough on top of the white dough. Have kids gently roll the stacked dough into a tight spiral log. This is an excellent exercise in spatial reasoning and understanding how two-dimensional shapes can be transformed into three-dimensional forms. Chill the log, then slice to reveal beautiful pinwheel patterns.
- I'm the Chef Too! Connection: This is similar to how we explore astronomy by creating your own edible solar system with our Galaxy Donut Kit, where layering and shaping lead to incredible visual results.
4. Melting Snowmen Cookies: A Mini Engineering Project
These whimsical cookies combine multiple elements and are a fantastic multi-step project for older kids.
Kid-Friendly Steps:
- Cookie Base: Bake round sugar cookies (our easy recipe is perfect!).
- Snowman Hat Assembly: This involves a bit of assembly. Melt some chocolate candy melts. Kids can pipe a small circle of chocolate onto parchment paper, then place a Rolo candy on top and chill to set. This teaches about adhesion and structural integrity.
- Snowman Head & Details: Use marshmallows for the snowman heads. Older kids can carefully use edible markers or toothpicks dipped in melted chocolate to draw eyes and mouths. Orange sprinkles or tiny pieces of orange fondant can be used for carrot noses. "Glue" the hat onto the marshmallow head with a dab of melted chocolate.
- Melting Snow Layer: Once the round cookie base is cool, spread a layer of white melted chocolate or thick glaze on top, letting it "drip" slightly over the edges to create a melted snow effect.
- Assemble: Place the prepared snowman head onto the "melted snow" on the cookie. Add mini M&Ms or sprinkles for buttons. I'm the Chef Too! Connection: This multi-component assembly is a fantastic mini-engineering project, requiring planning and careful execution, much like the engaging, step-by-step challenges in our kits.
These variations are not just about making different kinds of cookies; they're about expanding your child's culinary repertoire, introducing them to new techniques, and continuously challenging their problem-solving and creative thinking. At I'm the Chef Too!, we craft our kits to provide these continuous learning opportunities, fostering a love for discovery with every delicious creation. Give the gift of learning that lasts all year with a 12-month subscription to our STEM cooking adventures!
Turning Cookies into Gifts: The Joy of Giving
While eating freshly baked cookies is undoubtedly a highlight, transforming them into heartfelt gifts adds another layer of meaning and education to the holiday baking experience. This practice nurtures generosity, thoughtfulness, and the joy of sharing, reinforcing core values that are deeply important to us at I'm the Chef Too!
Thoughtful Packaging Ideas
Once your delicious creations are cooled and decorated, the fun of presentation begins! Involving kids in packaging turns this into another creative project:
- Decorative Tins: A classic for a reason! Let kids pick out festive tins and carefully arrange the cookies inside, perhaps with layers of parchment paper to prevent sticking.
- Cellophane Bags with Ribbons: Clear cellophane bags tied with colorful ribbons or twine allow the beautiful cookies to be seen. Kids can help choose ribbon colors and tie simple bows.
- Homemade Labels & Tags: This is a wonderful opportunity for art and writing. Kids can draw pictures, write "Merry Christmas" or "Made with Love by [Child's Name]," and attach the tags to the packages. This adds a deeply personal touch.
- Cookie Boxes: Simple white or craft paper boxes can be decorated with stamps, markers, or stickers before the cookies are placed inside.
- Tissue Paper & Shredded Fillers: Teach children how to gently nestle cookies in layers of colorful tissue paper or shredded paper filler for protection and aesthetics.
Nurturing Generosity and Thoughtfulness
The act of making and giving gifts teaches children valuable lessons that extend far beyond the kitchen:
- Empathy and Kindness: Discuss who will receive the cookies and how much joy a homemade gift can bring. "Grandma loves shortbread, let's make sure to give her some."
- The Value of Effort: Children learn that true generosity often involves time and effort, not just monetary value. A homemade cookie often means more than a store-bought item.
- Community Connection: Delivering cookies to neighbors, teachers, or local community helpers (firefighters, postal workers) helps children understand their role in the wider community and fosters a sense of gratitude.
- Gratitude: Baking for others can be an act of saying "thank you" or showing appreciation.
Case Study: A Cookie Gifting Mission
Consider a hypothetical scenario: The Miller family, with 6-year-old Leo and 9-year-old Maya, decides that this year, their Christmas cookie baking will be focused on giving. They dedicate an afternoon to making several batches of the easy sugar cookie recipe and some no-bake reindeer cookies.
- Planning Phase: Maya helps create a list of recipients – neighbors, their grandmother, Leo's kindergarten teacher, and the local fire station. They discuss what kind of cookie each person might like.
- Baking & Decorating: Leo focuses on the no-bake cookies, eagerly pressing on the pretzel antlers. Maya takes charge of decorating the sugar cookies, experimenting with different icing colors and sprinkles.
- Packaging Production: They turn their dining table into an assembly line for packaging. Leo carefully places cookies into small bags, while Maya designs unique tags for each recipient.
- The Delivery: As they deliver the cookies, the children experience firsthand the joy their homemade gifts bring. The smiles, the heartfelt thank yous – these moments are invaluable in teaching the true spirit of giving. This screen-free activity provides meaningful engagement and lasting memories, embodying I'm the Chef Too!'s philosophy.
This intentional approach to cookie gifting transforms a fun activity into a powerful lesson in character development. It's about instilling the values of sharing, caring, and community, all wrapped up in a delicious package. For groups looking to undertake similar projects, perhaps for a school fundraiser or a community outreach program, our adaptable programs can provide all the ingredients and guidance needed. Bring our hands-on STEM adventures to your classroom, camp, or homeschool co-op. Learn more about our versatile programs for schools and groups, available with or without food components.
Making it Educational: Simple STEM Questions to Ask
The beauty of "edutainment" lies in seamlessly integrating learning into fun activities. With Christmas cookie baking, every step is an opportunity to spark curiosity and engage your child's STEM mind. As mothers and educators, we at I'm the Chef Too! know that teaching complex subjects through tangible experiences is the most effective and enjoyable way. Here are some simple, open-ended questions you can ask your little chefs to turn baking into an interactive lesson:
-
Science (Chemistry & Physics):
- "What happens when we add the baking powder/soda to the dough? Why do you think we put it in?" (Leavening agents creating gas, causing cookies to rise.)
- "Why is the butter soft now, but it was hard before? What caused that change?" (States of matter, temperature effects.)
- "What happens to the chocolate when we melt it? Can we turn it back into a solid?" (Melting point, reversible changes.)
- "Why do some cookies spread out more than others? What might make them do that?" (The ratio of ingredients, butter temperature, oven temperature, dough consistency.)
- "If we mix red and yellow food coloring, what color do you think we'll get?" (Color theory, observation.)
-
Technology:
- "How does the oven know what temperature we want? What is the 'technology' in our kitchen helping us bake?" (Thermostats, electrical circuits, basic appliance functions.)
- "Can you find the recipe on the tablet/phone? How does that technology help us follow instructions?" (Digital literacy, recipe apps.)
-
Engineering:
- "How can we make our cookies hold their shape better? What will happen if the dough is too thin or too thick?" (Structural integrity, material science, cause and effect.)
- "If we stack these cookies too high, what might happen? How can we package them so they don't break?" (Stability, packaging design, problem-solving.)
- "When you're decorating, how do you make sure the sprinkles stick? What's the best way to 'build' a snowman on this cookie?" (Adhesion, construction, design thinking.)
-
Math:
- "We need two cups of flour, and we've added one. How many more do we need?" (Subtraction, fractions, measurement.)
- "If this recipe makes 24 cookies, and we want to give 4 cookies to each neighbor, how many neighbors can we share with?" (Division, practical application of numbers.)
- "Which cookie is the biggest? Which is the smallest? Can you put them in order from biggest to smallest?" (Comparison, ordering, size concepts.)
- "What shape is this cookie cutter? How many sides does a star have?" (Geometry, shape recognition, counting.)
- "If we double the recipe, how much butter will we need?" (Multiplication, scaling.)
By asking these types of questions, you're not just baking; you're fostering critical thinking, observation skills, and an understanding of the world around them. These tangible, hands-on experiences are at the heart of I'm the Chef Too!'s philosophy – making learning an exciting and delicious adventure. Our unique approach is designed to teach complex subjects in an accessible way, sparking curiosity that lasts long after the cookies are gone. Ready for a new adventure every month? Join The Chef's Club and enjoy free shipping on every box for continuous learning and fun!
Tips for Success (and Sanity) in the Holiday Kitchen
Baking with kids during the holidays is a magical experience, but let's be realistic – it can also be a little messy and chaotic! At I'm the Chef Too!, we're all about setting realistic expectations and focusing on the joy of the process. We want to empower parents and educators to embrace these moments, knowing that the skills learned and memories made are far more valuable than a perfectly clean kitchen. Here are our top tips for ensuring a smooth, enjoyable, and relatively sane baking adventure:
-
Prep Ahead for Smooth Sailing:
- Mis en Place: Before inviting the kids into the kitchen, measure out all the dry ingredients into separate bowls. Soften your butter. This "mis en place" (everything in its place) approach reduces waiting time, prevents spills, and keeps the flow going, especially with eager little helpers.
- Clear the Decks: Designate a specific workspace and clear it of any non-baking items. A clutter-free zone helps kids focus and gives them room to move (and make a little mess!).
- Gather Tools: Have all your cookie cutters, rolling pins, mixing bowls, and decorating supplies ready and within reach.
-
Divide and Conquer with Age-Appropriate Tasks:
- As discussed earlier, assign specific tasks based on age and skill level. Toddlers can stir, preschoolers can cut shapes, and older kids can measure or decorate intricate details. This ensures everyone feels involved and successful.
- Don't be afraid to lead the tricky parts yourself, like handling hot trays or specific measurements, while children focus on the fun, sensory parts.
-
Embrace the Mess (and Prepare for It!):
- Smocks & Aprons: These are your best friends! Get everyone in aprons or old t-shirts.
- Floor Coverings: Laying down an old sheet, newspaper, or even a shower curtain under your workspace can save your floors from flour dust and sprinkle fallout.
- Wet Cloths & Sponges: Have them at the ready for quick wipe-ups.
- Realistic Expectation: The kitchen will get messy. That's part of the fun and learning! Focus on the laughter and the process, not a spotless environment.
-
Don't Aim for Perfection – Aim for Joy:
- The most beautiful cookies aren't always the most perfectly symmetrical or uniformly decorated ones. The ones made with love, featuring unique child-made designs, are often the most cherished.
- Remind yourself (and your kids) that this is about the experience, the bonding, and the learning, not about creating bakery-quality treats. Imperfections are character!
- I'm the Chef Too! Value: We emphasize fostering a love for learning and building confidence, understanding that the journey is as important as the outcome.
-
Involve Them in the Clean-Up Crew:
- Learning responsibility extends to tidying up. Even toddlers can help by putting cookie cutters in a bin, wiping down counters with a damp cloth, or putting spoons in the sink.
- Turn clean-up into a game – "Let's see who can put away the most sprinkles!" This reinforces the full cycle of a kitchen project, from start to finish.
-
Patience is Your Secret Ingredient:
- Things will take longer with kids involved. Embrace the slower pace.
- Be prepared for questions, interruptions, and maybe a little snacking on raw dough (if your recipe is egg-free!).
- Your calm and positive attitude will set the tone for the entire experience.
By following these practical tips, you can transform the potential stress of holiday baking into a delightful, enriching, and memorable family activity. At I'm the Chef Too!, we are committed to making these invaluable hands-on learning experiences accessible and enjoyable for every family. Our "edutainment" approach ensures that while you're creating delicious treats, you're also building confidence, developing key skills, and creating joyful family memories that will last a lifetime.
Conclusion
As the aroma of warm spices and sweet sugar fills your home, the true magic of the holiday season comes alive in your kitchen. Baking Christmas cookies with kids is so much more than just a culinary task; it's a vibrant, multi-sensory journey that intertwines learning, creativity, and precious family moments. From the simple act of measuring ingredients – a disguised math lesson – to the artistic flair of decorating each unique cookie, you’re nurturing essential STEM skills, fostering imagination, and building confidence in your little ones. We’ve explored truly easy, kid-friendly recipes and practical tips, ensuring that every whisk, roll, and sprinkle contributes to an unforgettable experience.
At I'm the Chef Too!, our mission is to blend the joy of food, the wonder of STEM, and the beauty of the arts into one-of-a-kind "edutainment" experiences. We believe in sparking curiosity, facilitating family bonding, and providing screen-free alternatives that genuinely enrich children’s lives. These holiday baking adventures perfectly embody our unique approach, transforming everyday ingredients into tangible, hands-on lessons and delicious memories.
Don't let the fun stop when the last Christmas cookie is eaten! Imagine a new educational adventure delivered right to your door every month, packed with pre-measured dry ingredients and specialty supplies, all designed by mothers and educators to spark curiosity and creativity.
Ready to bring this joyful, educational "edutainment" into your home year-round? Join our family of enthusiastic learners! Join The Chef's Club and enjoy free shipping on every box to continue building confidence, exploring fascinating subjects, and creating countless more delicious memories with I'm the Chef Too! Give the gift of learning that lasts all year with a 3, 6, or 12-month subscription to our STEM cooking adventures.
FAQ: Your Christmas Cookie Baking Questions Answered!
Here are some common questions parents and educators ask when embarking on Christmas cookie baking with kids:
Q1: How far in advance can I make the cookie dough?
A: Our easy sugar cookie dough can be made ahead of time! You can wrap it tightly in plastic wrap and refrigerate it for up to 2-3 days. If you want to prepare even further in advance, you can freeze the dough for up to 1 month. Thaw it in the refrigerator overnight before rolling and baking. Just be sure to let it soften slightly at room temperature for about 30 minutes before rolling if it’s very stiff from the fridge.
Q2: Can I freeze decorated Christmas cookies?
A: It depends on the type of decoration.
- Undecorated Baked Cookies: Yes! Once completely cooled, unfrosted cookies freeze beautifully in an airtight container or freezer bag for up to 3 months. Thaw at room temperature before decorating.
- Cookies with Glaze Icing: Our simple glaze icing generally holds up well to freezing. Ensure the icing is completely dry and set before stacking or packaging the cookies in an airtight container with layers of parchment paper. Thaw at room temperature.
- Cookies with Royal Icing or Buttercream: Royal icing can sometimes become brittle and crack when frozen and thawed. Buttercream can also change texture. If you plan to freeze, it’s often best to bake and freeze the cookies undecorated, then decorate them closer to serving time.
- Cookies with Fragile Candies: Candies like gumdrops or soft sprinkles might become sticky or harden excessively when frozen.
Q3: What if my cookie dough is too sticky or too crumbly?
A: This is a common occurrence and easily fixed!
- Too Sticky: If the dough is too sticky to roll, it likely needs more flour or more chilling time. Add a tablespoon of flour at a time and knead it in until the dough reaches a manageable consistency. Alternatively, wrap it in plastic and chill it in the refrigerator for another 30 minutes to an hour. Cold dough is less sticky.
- Too Crumbly: If the dough is too dry and crumbly, it needs more moisture. Add milk (or water, if dairy-free) a teaspoon at a time, kneading gently after each addition, until the dough comes together into a cohesive ball. Be careful not to add too much at once. The goal is just enough liquid to bind it without making it sticky.
Q4: How can I make these cookies gluten-free or dairy-free?
A: Our easy sugar cookie recipe is already egg-free, making it a good base for further modifications!
- Gluten-Free: Replace the all-purpose flour with a 1:1 gluten-free baking flour blend (ensure it contains xanthan gum). You might notice a slightly different texture, but the results are usually great.
- Dairy-Free: Use a plain, unsweetened non-dairy milk (like almond, oat, or soy milk) in place of dairy milk. For the butter, you can use a plant-based butter substitute (ensure it's a stick butter for baking, not spread) or even softened coconut oil (just softened, not fully liquid).
Q5: What are the best cookie cutters for kids?
A: The best cookie cutters for kids are typically:
- Sturdy and Easy to Grip: Metal cutters with a rolled top edge or plastic cutters are ideal as they are comfortable for small hands to press down on without hurting their palms.
- Simple Shapes: Classic holiday shapes like stars, trees, gingerbread people, and circles are easy for kids to recognize and cut out.
- Larger Sizes: Larger cutters are easier for kids to handle and result in cookies that are less prone to breaking.
- No Small Details: Avoid cutters with very intricate details, as these can be frustrating for kids to use and can cause the dough to stick or tear.
- Themed Cutters: Themed cutters, especially those related to popular characters, can make the activity even more engaging for kids, much like our Peppa Pig Muddy Puddle Cookie Pies kit sparks joy with a familiar friend!