Deliciously Spooky: Kids Halloween Drink Recipes

Table of Contents
- Introduction
- Why Spooky Sips? The Magic of Halloween Drinks for Kids
- The Sweet Science of Spooky Beverages: Our Philosophy
- Essential Ingredients for Your Mad Scientist's Lab
- Creative Tools & Terrifying Toppings
- Our Top Enchanting Elixirs: Kid-Friendly Halloween Drink Recipes
- Beyond the Glass: Turning Drink Making into a STEM Adventure
- Hosting a Haunted Hydration Station: Tips for Parties
- Safety First in the Spooky Kitchen
- Making Memories, Not Just Drinks
- Conclusion
- FAQ: Your Spooky Sips Questions Answered
The crisp autumn air, rustling leaves, and the thrilling promise of costumes and candy—Halloween is a magical time of year! While trick-or-treating might be the main event, the festive spirit of this holiday offers a fantastic opportunity to extend the fun right into our homes and kitchens. Imagine the delighted squeals as little ghouls and goblins sip on a bubbling "Witches' Brew" or a vibrant "Vampire's Vim & Vigor." Halloween isn't just about collecting sweets; it's a canvas for creativity, a stage for imaginative play, and a secret laboratory for delicious discovery.
We all cherish the memories made dressing up and scouring the neighborhood for treats, but what if we could add another layer of enchantment to the celebration? This year, let's transform simple ingredients into captivating, kid-friendly Halloween drink recipes that are as educational as they are delicious. Forget sugary store-bought concoctions; we're diving into the world of non-alcoholic elixirs that will spark joy, curiosity, and a little bit of spooky science in your little ones. Get ready to explore how these easy-to-make, deliciously spooky sips can not only delight taste buds but also secretly stir up a love for learning, foster essential skills, and create unforgettable family moments, all while offering a wonderful screen-free alternative to seasonal entertainment.
Introduction
Halloween. It's the one night a year when the ordinary transforms into the extraordinary, when ghosts and goblins roam free, and when imagination truly takes flight. As parents and educators, we at I'm the Chef Too! believe this spirit of transformation and wonder doesn't have to be confined to costumes and decorations. It can, and should, extend right into the heart of your home: the kitchen! For many, Halloween is synonymous with an abundance of candy, but we’re here to show you how to brew up even more excitement and engagement with a host of fun, easy, and non-alcoholic Halloween drink recipes perfect for kids of all ages.
Have you ever seen a child’s eyes light up as a "potion" fizzes and changes color right before them? Or watched them proudly present a drink they’ve concocted themselves, adorned with gummy worms and candy eyeballs? These aren't just beverages; they are hands-on, multi-sensory experiences that blend the magic of the holiday with real-world learning. In this comprehensive guide, we'll dive deep into the world of spooky sips, providing you with everything you need to create a haunted hydration station that will be the talk of the neighborhood. We'll explore essential ingredients, creative garnishes, step-by-step recipes, and most importantly, how to infuse every pour with a dash of STEM and a sprinkle of artistic flair. Our goal is to equip you with the tools and inspiration to transform your kitchen into a joyful learning lab, fostering curiosity, building confidence, and creating cherished family memories, one deliciously spooky drink at a time.
Why Spooky Sips? The Magic of Halloween Drinks for Kids
At I'm the Chef Too!, our mission goes beyond just providing ingredients; we're passionate about blending food, STEM, and the arts into one-of-a-kind "edutainment" experiences. Halloween drink recipes are a perfect embodiment of this philosophy. They offer a unique, tangible way for children to engage with concepts that might otherwise seem abstract, all while having a blast.
Think about it:
- Igniting Curiosity: Why does the drink fizz when we add ice cream? How do two colors create a third? These simple questions lead to exploration and discovery.
- Cultivating Creativity: From naming their concoctions to designing elaborate garnishes, children are encouraged to express themselves artistically. They're not just following a recipe; they're becoming culinary artists and mad scientists in their own right.
- Fostering Family Bonding: Preparing these drinks together is a fantastic way to spend quality time, laugh, and connect. It's an opportunity for shared experiences and collaborative fun, far removed from the distractions of screens. These moments become the stories told for years to come, strengthening family ties through joyful, shared creation.
- A Screen-Free Educational Alternative: In an increasingly digital world, hands-on activities are more vital than ever. Making Halloween drinks provides a refreshing break from screens, offering a tactile and sensory learning experience that engages multiple senses. It's learning disguised as play, developed by mothers and educators who understand the importance of engaging children where they are.
These spooky sips are more than just refreshments; they're vehicles for growth, learning, and pure, unadulterated fun. Much like the carefully curated activities in our monthly Chef's Club subscription, these Halloween drink adventures are designed to be complete experiences, sparking imagination and building skills in a delicious and memorable way.
The Sweet Science of Spooky Beverages: Our Philosophy
At I'm the Chef Too!, we firmly believe that the kitchen is one of the best classrooms. It's a place where complex scientific principles and artistic expression converge into tangible, delightful outcomes. When we embark on making Halloween drinks with children, we're not just mixing liquids; we're conducting delicious experiments.
Consider the simple act of creating a fizzy float. This seemingly magical transformation is actually a lesson in chemistry. The carbon dioxide gas trapped in the soda reacts with the fat in the ice cream, causing a rapid release of bubbles and that wonderful foam. It’s an immediate, observable chemical reaction, and it’s completely captivating for young minds. Similarly, layering different colored juices or Gatorade demonstrates concepts of density – how liquids of different weights will settle above or below each other. The vibrant hues of a "Witches' Brew" can lead to discussions about color theory and how primary colors combine to create new shades, connecting directly to the arts.
Our approach is to make these subjects accessible and exciting. We teach complex subjects through tangible, hands-on, and delicious cooking adventures. We don't promise that your child will become a top scientist overnight, but we do guarantee that these experiences will foster a love for learning, build confidence in their abilities, develop crucial motor skills (pouring, stirring, decorating), and create joyful family memories. Every spill is a learning opportunity, every new flavor combination a discovery, and every finished drink a testament to their growing capabilities.
It's about the process, the exploration, and the pride in creation. Just like how our Erupting Volcano Cakes Kit vividly demonstrates chemical reactions through a truly delicious baking experience, these Halloween drinks offer similar hands-on learning, making scientific concepts memorable and fun. These activities, always implicitly understood to be undertaken with adult supervision and safety at the forefront, are designed to empower children and spark a lifelong curiosity.
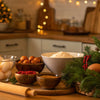
Essential Ingredients for Your Mad Scientist's Lab
Preparing for your spooky drink adventure begins with stocking your pantry with the right ingredients. The good news is, most of what you'll need is easily found at your local grocery store, and many items are likely already on hand! We aim for affordability and accessibility, ensuring that this fun doesn't become a daunting task.
Here’s a breakdown of the core components for your Halloween drink recipes:
-
Carbonated Beverages:
- Lemon-Lime Soda (Sprite, 7-Up): A versatile base for many drinks, offering a refreshing fizz that pairs well with most flavors. It’s excellent for floats and for lightening heavier juices.
- Orange Soda (Fanta, Sunkist): Perfect for creating a vibrant, pumpkin-like color for "Jack-O'-Lantern Floats" and offers a sweet, citrusy flavor.
- Grape Soda or Other Dark Sodas: Can contribute to "Witches' Brew" or "Vampire Blood" themes, providing deep, spooky colors.
- Ginger Ale: A milder option for fizz, great if you want less sweetness than typical sodas.
-
Juices & Drink Mixes:
- Gatorade (Various Colors): The ultimate secret weapon for vibrant, almost neon, Halloween colors without relying solely on food coloring. Blue, green, purple, and red Gatorade can instantly transform a drink into a "Monster Mash" or "Wiggly Worm" concoction.
- Lemonade: A tart base that can be colored or combined with other juices for a refreshing "Zombie Punch."
- Grape Juice, Cranberry Juice, Cherry Juice: These naturally dark or red juices are perfect for "Vampire Blood" themes or deep, mysterious "Witches' Brews."
- Pineapple Juice: Can add a tropical twist and a pale yellow base that’s easy to tint.
- Kool-Aid Powder (Sugared): An incredibly affordable option for creating large batches of brightly colored drinks. Blue raspberry, grape, or cherry flavors are fantastic for a spooky palette. Ensure you're using the pre-sugared containers for convenience, as the small packets require added sugar.
-
Dairy & Creamy Additions:
- Vanilla Ice Cream: Essential for classic floats! When mixed with carbonated soda, it creates that wonderful foam that screams "spooky potion."
- Lime Sherbet: Provides a fantastic green color and a creamy, tangy element, often used to create a "slimy" or "zombie" effect as it melts into punch. Rainbow sherbet can also be fun for multi-colored effects.
- Canned Whipped Cream: An easy and delicious topping that provides a "cloud" for candies to sit on top of, or a canvas for "blood" drizzles.
-
Syrups & Flavorings:
- Grenadine Syrup: A sugary, bright red syrup perfect for creating a "blood" effect, especially when drizzled into drinks or over whipped cream.
- Strawberry Syrup: Another excellent option for "blood" effects, often found in the ice cream topping or milk aisle.
- Jell-O Powder: A small amount (e.g., 1 tsp) can be added to carbonated drinks to enhance fizz and create foamy, bubbling effects, adding a magical touch to a "Witches' Brew."
- Food Coloring (Gel recommended): For intense, vibrant colors or to adjust the hue of your drinks. Gels provide richer color with less liquid, ensuring the flavor isn't diluted.
-
Other Essentials:
- Ice Cubes: Keep drinks chilled and can be used strategically for layering effects. You can even freeze small plastic spiders or gummy worms inside for an extra creepy touch!
- Water: For diluting juices or mixing Kool-Aid.
Remember, the goal is to have fun and be creative! Don’t be afraid to experiment with combinations. Think of your pantry as a mad scientist's laboratory, full of potential for new discoveries. These simple, everyday ingredients become extraordinary when blended with a little imagination and the spirit of Halloween. For more ready-to-go adventures with pre-measured ingredients and specialty supplies, explore our full library of one-time kits in our shop!
Creative Tools & Terrifying Toppings
Beyond the liquids, what truly transforms a simple drink into a Halloween masterpiece are the props and garnishes. These elements are where the "art" in our I'm the Chef Too! edutainment philosophy shines brightest, allowing for endless creative expression. They also add to the sensory experience, making each sip an adventure.
Spooky Servingware & Props:
- Halloween-Themed Cups: Look for plastic cups with pumpkin faces, skulls, Frankenstein designs, or even plain clear cups that you can decorate yourself. Dollar stores and party supply shops are treasure troves for these.
- DIY Cup Decorations: If you can't find themed cups, plain clear plastic cups are a blank canvas! Use permanent markers (Sharpies) to draw jack-o'-lantern faces, monster eyes, or spooky webs. Halloween stickers or decals are another easy way to personalize.
- Spooky Straws: Paper straws in Halloween colors (orange, black, purple, green) or with spooky patterns (skeletons, bats) elevate the look. Reusable straws are an eco-friendly option that can be decorated with small plastic spiders.
- Toy Syringes: Small, clean toy syringes (often found in Halloween decoration sections or party favors) make fantastic "poison" or "serum" dispensers for green or red drinks, adding a playful, mad scientist touch.
- Skull Cups or Cauldron Bowls: For serving a large batch of punch, a plastic skull-shaped bowl or a small cauldron can become a dramatic centerpiece.
- "Oozing" Eyeballs: If you can't find candy eyeballs that float, try clean ping-pong balls with drawn-on pupils. They float perfectly and add a wonderfully creepy touch!
Edible Garnishes & Creepy Candies:
-
Gummy Candies: These are the stars of Halloween drink garnishes!
- Gummy Worms: Perfect for "Wiggly Worms" drinks, crawling out of whipped cream, or lurking at the bottom of a punch bowl.
- Gummy Eyeballs: For a truly grotesque (and delicious) touch, have these floating in a punch or adorning the rim of a glass.
- Vampire Gummy Teeth: Hook these over the rim of a "Vampire Blood" drink for a chilling effect.
- Gummy Brains or Spiders: Add extra texture and theme-appropriate creepiness.
- Sprinkles: Green sprinkles on a "Jack-O'-Lantern Float," or orange and black sprinkles on any drink add instant festive color and a bit of crunch.
- Maraschino Cherries: These can double as "eyeballs" when dropped into a drink, or provide a juicy, bloody burst of flavor.
- Cotton Candy: Fluffy purple, orange, or green cotton candy can be gently placed on top of drinks to resemble ghostly wisps, spiderwebs, or a spooky cloud. It melts beautifully into the drink, adding sweetness and a visual surprise.
- Colored Sugar: To create a dramatic, sparkling rim for glasses. Mix granulated sugar with a few drops of food coloring, spread on a plate, then dip the rim of a cup (first moistened with a little water or lime juice) into the colored sugar. Black or green sugar works wonderfully for Halloween.
- Red Gel Food Coloring: For those "blood drip" effects on the outside of glasses, creating a truly macabre presentation.
When choosing toppings, involve your children! Let them pick out the "scariest" gummies or decide on the sprinkle combination. This empowers them in the creative process and encourages personal expression. You can find many of these candies and props at dollar stores, bulk food sections, or seasonal aisles of larger grocery stores, making it an affordable way to add maximum impact to your Halloween drink recipes.
Our Top Enchanting Elixirs: Kid-Friendly Halloween Drink Recipes
Now for the main event! Here are some of our favorite spooky sips, designed to be easy, delicious, and full of opportunities for learning. For each recipe, we'll provide ingredients, simple instructions, customization tips, and the secret educational ingredient that makes it an I'm the Chef Too!-style "edutainment" experience.
1. The Giggling Goblin Punch
This vibrant green punch is sure to elicit giggles, not screams, from your little goblins! It’s sweet, tangy, and visually striking.
Ingredients:
- 2 liters lemon-lime soda (like Sprite or 7-Up), chilled
- 64 ounces lemonade, chilled
- ½ cup blue raspberry Kool-Aid powder (the pre-sugared kind)
- 1.75 quart lime sherbet
- 1-2 bags gummy worms and/or gummy eyeballs
Instructions:
- Combine the Liquids: In a large punch bowl or pitcher, gently combine the chilled lemon-lime soda and lemonade. Stir them together until well mixed.
- Add the Blue Raspberry Magic: Sprinkle in the blue raspberry Kool-Aid powder. Stir very well until the powder is completely dissolved and the punch transforms into a fantastic light greenish-blue color. This step is where the magic of color mixing truly comes to life!
- Introduce the Sherbet: Carefully add scoops of lime sherbet across the surface of the punch. Don't stir it in completely; let the scoops float and slowly melt, creating a frothy, "slimy" effect.
- Garnish with Ghoulish Goodies: Right before serving, scatter gummy worms and gummy eyeballs over the sherbet and into the punch. You can even drape some gummy worms over the edge of individual serving cups.
- Serve & Enjoy! Ladle into individual cups, ensuring each serving gets some sherbet and a few gummy treats.
Educational Twist (STEM & Arts):
- Chemistry of Color: Observe how the blue Kool-Aid powder turns the yellow lemonade into a greenish hue. This is a perfect, simple demonstration of color mixing!
- States of Matter & Phase Change: Watch the solid sherbet slowly melt into a liquid, changing the texture and temperature of the punch. Discuss how temperature affects these changes.
- Dissolving & Solutions: The Kool-Aid powder dissolves into the liquid, creating a homogeneous solution. You can talk about what makes things dissolve faster (stirring, warmer liquids).
Customization Tips:
- For an even darker green, add a few drops of green food coloring (gel works best).
- Add frozen green grapes or slices of lime to keep it chilled without diluting the flavor.
- Serve in a cauldron for an authentic "Witches' Cauldron" look.
- CTA Integration: This punch, much like the vibrant projects in our Chef's Club subscription, brings a splash of color and a dash of learning to your kitchen every month, with new, exciting adventures delivered right to your door.
2. Vampire's Vim & Vigor (Cherry Limeade Twist)
A deliciously chilling drink that looks like it came straight from a vampire's lair. The "blood drips" and gummy fangs are a fantastic touch!
Ingredients:
- 2 cups chilled lemon-lime soda (Sprite or 7-Up)
- ¼ cup grenadine syrup
- 1 tablespoon fresh lime juice
- 6-8 maraschino cherries, plus extra for garnish
- Black sugar sprinkles (Wilton or any brand)
- Red gel food coloring
- Purple cotton candy
- Gummy vampire teeth
Instructions:
- Prepare the Spooky Rim: On two small plates, put a little lime juice on one and black sugar sprinkles on the other. Dip the rim of each serving glass into the lime juice, then immediately into the black sugar, ensuring an even coating.
- Add "Blood Drips": Carefully drizzle a few drops of red gel food coloring over the black sugar rim, allowing it to drip slowly down the outside of the glass. This creates a wonderfully macabre "blood" effect.
- Mix the Base: In a pitcher, combine the chilled lemon-lime soda, grenadine syrup, and fresh lime juice. Stir gently until the color is a uniform, deep red.
- Assemble the Drink: Add a few ice cubes to each decorated glass. Drop 1-2 maraschino cherries into each glass (these can look like floating eyeballs!).
- Pour and Garnish: Pour the vampire blood mixture into each glass, filling it almost to the brim. Top with a generous puff of purple cotton candy (it looks like a ghostly cloud!) and hook a gummy vampire tooth over the rim of the glass.
- Serve Immediately: Offer with a straw and watch the delight unfold!
Educational Twist (STEM & Arts):
- Solutions & Density: Observe how the grenadine mixes with the soda and lime juice. You can subtly discuss how different liquids might layer based on density if you were to pour them carefully (though here we're mixing for color).
- Color Saturation: The red gel food coloring demonstrates how a highly concentrated pigment can create a dramatic effect with just a few drops, adding to the visual art of the drink.
- Sensory Experience: The combination of fizz, sweet cherry, and tart lime engages multiple taste receptors, while the visual appeal of the "blood" and cotton candy adds to the overall experience.
Customization Tips:
- For an even more intense red, use cherry juice instead of some of the soda.
- Freeze small gummy eyeballs or plastic spiders into ice cubes for extra creepiness.
- Any bright-colored cotton candy (orange, green) will also look fantastic.
- CTA Integration: Just as we layer flavors and textures in our recipes, our monthly Chef's Club subscription layers learning with fun, delivering new adventures directly to your door, complete with pre-measured ingredients and specialty supplies.
3. Witches' Brew Whimsy
A mysterious, bubbly concoction with a secret fizzy ingredient that's sure to enchant!
Ingredients:
- ½ cup purple Gatorade (or grape juice), chilled
- ½ cup lemon-lime soda (Sprite or 7-Up), chilled
- 1 teaspoon purple or red Jell-O powder (uncooked)
- Canned whipped cream
- Small candy eyeballs
Instructions:
- Start with the Base: Pour the chilled purple Gatorade (or grape juice) into a plastic cup, filling it about halfway.
- Add the Fizzy Secret: Sprinkle in the 1 teaspoon of Jell-O powder. Stir well until it's mostly dissolved. You might notice some initial fizzing!
- Top with Sparkle: Slowly pour in the chilled lemon-lime soda until the cup is almost full. The combination of the Jell-O powder and the carbonation will create a delightful frothy, bubbly effect that looks truly magical.
- Add the Cloud & Eyes: Generously top the drink with a swirl of whipped cream. Carefully place a few candy eyeballs on top of the whipped cream, making them peer out from the "brew."
- Serve & Spellbind! Hand over this bewitching brew and watch the enchantment unfold.
Educational Twist (STEM & Arts):
- Chemical Reaction & Gas Production: The Jell-O powder, when mixed with the carbonated soda, acts as a nucleation point, causing the dissolved carbon dioxide to rapidly escape, creating that wonderful fizz and foam. This is a fantastic, simple chemical reaction to observe!
- Observation Skills: Encourage children to notice the changes in the drink: the fizzing, the color, the texture of the foam.
- Sensory Play: The sound of the fizz, the sweet taste, the creamy texture, and the visual appeal of the bubbling brew engage multiple senses.
Customization Tips:
- Try green Gatorade and green Jell-O powder for a different "Witches' Brew" color.
- Add a plastic spider ring to the side of the cup for extra flair.
- A drop of green or purple food coloring can enhance the color if using a paler juice base.
- CTA Integration: For more exciting experiments like these, where science and deliciousness collide, explore our range of one-time kits. They provide all the materials needed for a fantastic hands-on project any time!
4. Zombie Slime Smoothies
A two-toned, visually striking drink that uses density to create a creepy, crawly effect.
Ingredients:
- ½ cup blue Gatorade, chilled
- ½ cup green Gatorade, chilled
- 3-4 ice cubes
- Canned whipped cream
- Gummy worms
Instructions:
- Start with the Blue: Pour the chilled blue Gatorade into a clear plastic cup, filling it about halfway.
- Add the Ice: Carefully add 3-4 ice cubes to the cup. The ice will help slow down the mixing of the layers.
- Create the Slime Layer: Slowly and gently pour the chilled green Gatorade over the ice cubes. Pouring slowly helps create a distinct, layered effect, with the green "slime" appearing to float on top of the blue.
- Wiggly Worm Topping: Top the drink generously with a swirl of whipped cream. Stick several gummy worms into the whipped cream, letting some "wiggle" out over the edge of the cup and others "sink" into the drink. Add a few more gummy worms right on top for good measure.
- Serve the Slime: Present your two-toned "Zombie Slime Smoothie" for a wonderfully eerie treat.
Educational Twist (STEM & Arts):
- Density Demonstration: The most significant learning here is about density. While Gatorade flavors have similar densities, pouring slowly over ice can help minimize immediate mixing, illustrating how layers can form if liquids have slightly different densities or if introduced carefully. You can also talk about how the coldness of the ice affects the liquid.
- Color Blending & Aesthetics: Discuss the visual appeal of the two distinct colors and how they create a "slimy" or "swampy" aesthetic.
- Observation & Patience: Learning to pour slowly and observe the layering effect teaches patience and keen observation skills.
Customization Tips:
- Experiment with other Gatorade color combinations (e.g., purple and green) for different slime effects.
- Freeze small gummy worms into ice cubes for an extra surprise as they melt.
- Consider adding a scoop of lime sherbet instead of whipped cream for a thicker, more smoothie-like consistency.
- CTA Integration: We believe in hands-on exploration, whether it's layering a spooky drink or exploring the cosmos by making our own edible solar system with our Galaxy Donut Kit, sparking curiosity one delicious adventure at a time.
5. Jack-O'-Lantern Sparklers
A festive, bubbly float that looks just like a grinning pumpkin, complete with green "stem" sprinkles!
Ingredients:
- Chilled orange soda (like Fanta or Sunkist)
- Vanilla ice cream
- Jack-o'-lantern face stickers or a black permanent marker
- Green sprinkles
- Green paper straws
Instructions:
- Decorate Your Pumpkin: If using plain cups, apply jack-o'-lantern face stickers to the front of each clear plastic cup, or draw a fun pumpkin face using a black permanent marker.
- Start with Soda: Fill each decorated cup about halfway with chilled orange soda.
- Add the "Brain": Carefully add two generous scoops of vanilla ice cream to the soda. Watch as the ice cream starts to foam and bubble, creating that classic float effect.
- Top It Off: Slowly pour in more orange soda until it reaches the top of the cup, being careful not to overflow due to the foam.
- Add the "Stem" & Serve: Garnish the top of the foam with a sprinkle of green sprinkles (like a pumpkin stem!) and place a green straw in the drink.
- Enjoy Your Grinning Gourd!
Educational Twist (STEM & Arts):
- Gas Expansion & Physical Change: The interaction between the carbonated soda and the cold ice cream causes the dissolved carbon dioxide gas to escape rapidly, creating the foam. This is a fantastic, observable physical change!
- Temperature Effects: Discuss how the cold ice cream cools the soda and how the fizz might be affected by temperature.
- Creative Presentation: The act of decorating the cup and adding the "stem" sprinkles connects directly to artistic expression and visual storytelling.
Customization Tips:
- Add a dollop of whipped cream on top of the foam for extra sweetness.
- Experiment with other orange candies or edible glitter for extra sparkle.
- For an adult version (for parents!), a splash of orange liqueur could be added. (Always clearly label and supervise!)
6. Mad Scientist's Mystery Potion
An open-ended, customizable "experiment" where kids are in charge of the colors and flavors! This one is all about encouraging independent exploration.
Ingredients:
- Chilled clear lemon-lime soda (Sprite or 7-Up)
- Various small bowls of different colored fruit juices (e.g., grape, cranberry, pineapple, a tiny bit of blue Kool-Aid mixed with water)
- Small drops of gel food coloring in primary colors (red, blue, yellow)
- Assorted gummy candies (worms, eyeballs, rings)
- Toy syringes (clean and unused) for "injecting" colors
- Clear plastic cups
Instructions (Guided Exploration):
- Set Up the Lab: Arrange the clear soda, various juices, small drops of food coloring, and gummy candies like a "potion station." Give each child a clear plastic cup.
- The Base: Instruct children to pour the clear lemon-lime soda into their cup, filling it about halfway. This is their neutral base.
-
The Experiment Begins: Encourage them to choose a juice or a tiny drop of food coloring (start with one color!) and add it to their soda.
- "What color do you want your potion to be?"
- "What happens when you add just a little bit of blue?"
- "What if you use the syringe to 'inject' some red juice?"
-
Mix & Observe: Let them stir and observe the changes.
- "What happens when you add yellow to blue?" (Green!)
- "Does the color get darker or lighter if you add more?"
- Add the "Specimens": Once they're happy with their potion's color, let them add their chosen gummy "specimens"—worms, eyeballs, or rings.
- Name Your Creation: Encourage them to give their unique potion a spooky, mad scientist name.
- Sip Your Discovery!
Educational Twist (STEM & Arts):
- Color Mixing & Theory: This is the ultimate lesson in color mixing, allowing children to experiment directly with primary and secondary colors.
- Controlled Experimentation: By adding small amounts of color or juice, children learn about cause and effect and how to "control" their experiment to achieve a desired outcome.
- Hypothesis & Observation: Encourage them to predict what will happen ("I think it will turn purple if I add red and blue!") and then observe the results.
- Creative Problem Solving: "How can I make it darker?" or "How can I make it look more like a swamp?"
- Nomenclature (Language Arts): Giving their potion a unique, creative name ties into language and imaginative play.
Customization Tips:
- Add scoops of vanilla ice cream to create a fizzy, creamy "mystery goo."
- Provide different shaped ice cube trays (e.g., skulls, bats) to make themed ice cubes for their potions.
- Offer edible glitter for an extra magical shimmer.
- CTA Integration: If your child loves this kind of open-ended, hands-on exploration and discovery, they'll thrive with our monthly Chef's Club subscription, bringing new culinary STEM adventures to your home with free shipping!
Beyond the Glass: Turning Drink Making into a STEM Adventure
At I'm the Chef Too!, we don't just teach kids to cook; we inspire them to learn through cooking. Making these Halloween drink recipes is a fantastic way to subtly introduce and reinforce foundational STEM concepts, all wrapped up in fun and flavor.
-
Chemistry in Action:
- Carbonation & Fizz: The most obvious example! When you combine soda with ice cream, Jell-O powder, or even just observe the bubbles in soda, you're witnessing the release of carbon dioxide gas—a key chemical reaction. Ask, "What makes the bubbles?"
- Dissolving: When sugar, Kool-Aid, or syrups mix into liquids, they dissolve, creating solutions. Discuss what happens to the solid (it disappears, but the taste remains!).
- Acid-Base Reactions (Optional): If you use a natural indicator like red cabbage juice (which you can make by boiling red cabbage and straining the liquid) and add lemon juice (acid) or baking soda solution (base), you can visibly see color changes, making for a truly magical scientific demonstration.
-
Physics of Fluids:
- Density: Our "Zombie Slime Smoothies" and layered drinks beautifully illustrate how liquids of different densities (or even the same liquid at different temperatures) can create distinct layers. "Why did the green sit on top of the blue?"
- Buoyancy: When you add gummy eyeballs or plastic ping-pong eyes, some might float while others sink. This is a perfect opportunity to discuss buoyancy and density.
-
Mathematical Measurement:
- Fractions & Quantities: Following recipes involves measuring liquids and powders, introducing basic fractions ("half a cup," "1 teaspoon") and reinforcing measurement skills.
- Scaling: If you're making a big batch for a party, you might need to double or triple a recipe, which introduces the concept of scaling and multiplication.
-
Artistic Expression & Design:
- Color Theory: Mixing juices and food colorings directly demonstrates how primary colors combine to create secondary colors. Discuss warm and cool colors, and how colors evoke different "moods" (e.g., eerie green vs. vibrant orange).
- Presentation & Aesthetics: Decorating cups, arranging garnishes, and creating visually appealing layers all fall under the realm of design and artistic composition. Children learn about balance, contrast, and theme.
-
Engineering & Problem-Solving:
- When a child tries to make a gummy worm "wiggle" out of the cup and it falls, they're engaging in a mini engineering challenge. How can they make it stay? What tools might help?
- Thinking about how to set up a "potion station" efficiently is also a form of practical engineering.
-
Language Arts & Communication:
- Following Instructions: Recipes are fantastic tools for developing comprehension and following multi-step instructions.
- Creative Naming: Inventing spooky names for their drinks (e.g., "Ghoul Gulp," "Phantom Fizz") enhances vocabulary and imaginative writing skills.
-
Social-Emotional Learning:
- Teamwork & Sharing: Working together on a punch or taking turns adding ingredients promotes collaboration.
- Patience & Perseverance: Waiting for colors to mix, or for sherbet to slowly melt, teaches patience.
- Confidence & Pride: Successfully creating a delicious and visually appealing drink boosts self-esteem and a sense of accomplishment.
By simply engaging in these festive kitchen activities, you're not just making drinks; you're nurturing a well-rounded, curious, and capable child. This deep integration of learning across disciplines is at the core of what we do at I'm the Chef Too!, bringing meaningful educational experiences into your home.
Hosting a Haunted Hydration Station: Tips for Parties
When Halloween rolls around, these spooky sips are perfect for parties! Setting up a dedicated "Haunted Hydration Station" can turn drink-making into an interactive, engaging activity for all your little guests. Here are some expert tips to make your party drinks a scream:
-
Prep Ahead for Ease:
- Decorate Cups in Advance: Get those pumpkin faces or black sugar rims done before the party starts. This saves time and minimizes mess when guests arrive.
- Pre-Scoop Sherbet: Scoop lime or rainbow sherbet into muffin tins and freeze them. This makes adding sherbet to punch or individual drinks quick and easy, avoiding messy scooping during the party.
- Pre-Measure Ingredients (Dry): If using Kool-Aid powder or Jell-O powder, have the correct amounts pre-measured into small bowls for a "mix-your-own" station.
- Chill Everything: Ensure all sodas, juices, and Gatorades are thoroughly chilled. This keeps the drinks refreshing without over-relying on ice cubes, which can dilute flavors.
-
Design an Interactive "Potion Station":
- Ingredient Bar: Set up a table with separate pitchers of different colored sodas/juices, bowls of various gummy candies, sprinkles, and whipped cream.
- Recipe Cards: Provide simple, visual "recipe cards" for specific drinks (e.g., "Jack-O'-Lantern Float: Orange Soda + Vanilla Ice Cream + Green Sprinkles").
- "Mixologist" Badges: Give kids temporary "Mad Scientist" or "Potion Master" badges to wear, encouraging them to take ownership of their creations.
- Safety First: Designate an adult to supervise the station, especially with pouring and any use of specialized props.
-
Creative Presentation for a Spooky Vibe:
- Cauldron Serving: Serve large batches of punch in a clean plastic cauldron for a truly witchy effect.
- Garnish Galore: Offer a wide variety of garnishes. The more options, the more creative kids can get. Little bowls of candy eyeballs, gummy worms, and colorful sprinkles are a must.
- Themed Labels: Use fun, spooky labels for each drink or ingredient (e.g., "Vampire Blood," "Goblin Goo," "Monster Mash Soda").
-
The Dry Ice Effect (With Extreme Caution!):
- Visual Drama: If you want to add a dramatic smoky effect, dry ice is unparalleled. Place a few small pieces (never chunks!) in a separate, larger bowl under your punch bowl or in a special dry ice cage within the punch.
- CRITICAL SAFETY: Dry ice must NEVER be handled with bare hands (use gloves or tongs). It MUST NEVER be consumed or allowed into individual drinking glasses. It is extremely cold and can cause severe burns or internal injury. Ensure strict adult supervision, clearly label any dry ice presence, and instruct children to keep their hands and cups away from it. This is a visual effect only. We always prioritize safety and recommend using dry ice only if you are confident in implementing strict safety protocols.
-
Making it an Activity, Not Just a Drink:
- Encourage children to be the mixologists, letting them choose their ingredients and create their own "mystery potions" (with appropriate guidance). This is where the STEM and art truly comes alive.
- Award "Prizes" for the "Scariest Drink," "Most Colorful Potion," or "Best Name."
To make party planning even easier, consider our school and group programs. They offer flexible options, with or without food components, perfect for a classroom party, a large Halloween gathering, or even a homeschool co-op event. Learn more about our versatile programs for schools and groups. We're here to help you bring delicious discovery to any group setting!
Safety First in the Spooky Kitchen
While the kitchen is a fantastic place for fun and learning, safety is always our top priority at I'm the Chef Too!. When making any Halloween drink recipes with children, constant adult supervision is non-negotiable.
Here are essential safety guidelines to keep in mind:
- Adult Supervision is Key: Always have an adult present and actively involved. Little hands can be enthusiastic, but they need guidance.
- Handle Utensils Carefully: Even with simple drink recipes, you might use measuring cups, spoons, or even a small knife for fruit garnishes. Teach children how to handle these tools safely and appropriately for their age. For most drink preparations, no sharp knives are typically needed, but general kitchen awareness is important.
- Mind the Spills: Liquids can be messy. Teach children to clean up spills immediately to prevent slips and falls. Having paper towels or sponges handy is always a good idea.
- Choking Hazards: Be mindful of small candy eyeballs, gummy worms, or other small garnishes, especially for very young children. Cut larger gummies into smaller pieces if necessary, or simply use larger, less hazardous garnishes.
- Allergy Awareness: Before serving any drinks, especially at a party, inquire about food allergies among your guests. Clearly label ingredients if you have an open "potion station" so parents can make informed choices.
-
Dry Ice Safety (Reiterated and Expanded):
- NEVER Touch Directly: Dry ice is extremely cold (-109.3°F or -78.5°C) and can cause severe frostbite. Always use gloves or tongs to handle it.
- NEVER Consume: Dry ice is solid carbon dioxide and is not meant to be ingested. Ingesting it can cause serious internal injury. Ensure it is never placed directly into a drinking glass.
- Proper Ventilation: Use dry ice in a well-ventilated area, as it releases carbon dioxide gas, which can displace oxygen in enclosed spaces.
- Placement: For drinks, place dry ice in a separate, larger bowl underneath the punch bowl, or in a dedicated dry ice cage or chamber within the punch itself. The "smoke" effect will rise, but the dry ice will remain contained.
- Adults Only: If using dry ice, an adult must be responsible for its handling and supervision at all times. Clearly communicate to children that they cannot touch or put anything near the dry ice.
- Hot Liquids (If Applicable): While most Halloween drinks are cold, if you decide to make a warm cider or cocoa, ensure children are supervised around hot liquids and appliances.
- "Adults Only" Drinks: If you're also serving alcoholic versions for adults, ensure they are clearly labeled and kept completely separate and out of reach of children.
By prioritizing these safety measures, you can ensure that your Halloween drink-making adventures remain joyful, educational, and absolutely risk-free. These are the kinds of practical considerations that go into every I'm the Chef Too! kit we develop, ensuring a safe and enriching experience for every family.
Making Memories, Not Just Drinks
The beauty of these Halloween drink recipes, and indeed all our culinary STEM adventures at I'm the Chef Too!, lies far beyond the delicious outcome. It's in the laughter shared over a fizzing potion, the proud smile when a child presents their self-decorated cup, and the stories that will be recounted for years to come. These aren't just beverages; they are moments of wonder, discovery, and shared joy that contribute to the rich tapestry of family memories.
In an age where experiences often take a backseat to possessions, investing time in hands-on, creative activities like making spooky Halloween drinks fosters a deeper connection within families. Children learn that their contributions are valued, that trying new things can be exciting, and that the simplest ingredients can yield magical results. They gain confidence, curiosity, and a sense of accomplishment that builds their foundational skills in a way that truly sticks. We believe that facilitating family bonding through engaging activities is paramount, and these drinks are a perfect testament to that belief.
So, as you gather your ingredients and prepare for your Halloween festivities, remember that you're doing more than just mixing drinks. You're stirring up imagination, pouring in a love for learning, and crafting precious moments that will be cherished long after the last drop is gone. This is the heart of what we do at I'm the Chef Too!: empowering families to create, learn, and bond through delicious, screen-free experiences.
Conclusion
Halloween offers us a unique opportunity to embrace creativity, wonder, and a little bit of delicious learning. As we've explored, crafting kid-friendly Halloween drink recipes isn't just about mixing tasty concoctions; it's a vibrant journey into the worlds of STEM and the arts, all while building cherished family memories. From the bubbling chemistry of a "Witches' Brew" to the artistic expression of a "Vampire's Vim & Vigor," each sip is an invitation to explore, discover, and delight.
We've seen how simple ingredients can transform into enchanting elixirs, how everyday kitchen tools become a mad scientist's lab, and how the act of creation can spark curiosity and foster confidence in young minds. These screen-free, hands-on activities are at the core of I'm the Chef Too!'s mission: to blend food, STEM, and the arts into one-of-a-kind "edutainment" experiences, designed by mothers and educators to be both enriching and fun. We believe in providing tangible adventures that bring families together, encourage skill development, and ignite a lifelong love for learning.
So, this Halloween, go beyond the candy and costumes. Gather your little ghouls and goblins, step into the kitchen, and let the magic of homemade spooky sips fill your home with laughter, learning, and unforgettable moments.
Ready to infuse every month with this kind of delicious discovery? Don't let the fun stop after Halloween! Join The Chef's Club today and embark on a year-round journey of culinary STEM adventures, delivered right to your door with free US shipping on every box. Choose from our flexible 3, 6, or 12-month pre-paid plans, perfect for ongoing enrichment or as a truly unique gift that keeps on giving!
FAQ: Your Spooky Sips Questions Answered
Q1: Are all these Halloween drink recipes completely non-alcoholic and safe for kids? A1: Absolutely! Every single recipe featured in this blog post is specifically designed to be non-alcoholic and kid-friendly. We focus on using juices, sodas, and fun garnishes to create festive and delicious drinks that everyone in the family can enjoy safely.
Q2: Can I prepare these Halloween drinks ahead of time for a party? A2: For the best results, we recommend preparing most of these drinks right before serving, especially those that involve carbonated sodas or sherbet. The fizz from sodas can diminish over time, and sherbet will completely melt. However, you can definitely do some prep work in advance:
- Pre-decorate cups with stickers or drawn faces.
- Pre-mix non-carbonated juice bases (like the lemonade and Kool-Aid for The Giggling Goblin Punch).
- Pre-scoop sherbet into muffin tins and freeze them.
- Have all your garnishes (gummy worms, candy eyeballs, sprinkles) ready in bowls.
Q3: Is it safe to use dry ice for a smoky effect with these drinks? A3: Dry ice can create a fantastic, spooky smoky effect, but it must be handled with extreme caution and adult supervision.
- Never touch dry ice with bare hands; always use gloves or tongs to avoid severe frostbite.
- Never allow dry ice into individual drinking glasses, and never consume it. Ingesting dry ice can cause serious internal injury.
- For drinks, place small pieces of dry ice in a separate, larger bowl underneath your punch bowl, or in a dedicated dry ice cage/chamber within the punch itself. The "smoke" effect will rise, but the dry ice will remain safely contained.
- Ensure good ventilation, as dry ice releases carbon dioxide. We emphasize that dry ice is for visual effect only, and strict safety protocols are essential if you choose to use it.
Q4: My child has allergies. Can I make substitutions in these recipes? A4: Yes, many substitutions are possible!
- Juice/Soda: You can often swap out different flavors of juice or soda to suit preferences or avoid certain ingredients.
- Dairy: If using ice cream or whipped cream, look for dairy-free alternatives if needed (e.g., coconut milk ice cream, non-dairy whipped topping).
- Candies: Be very mindful of ingredients in gummy candies and sprinkles for common allergens like nuts, gluten, or certain dyes. Always read labels carefully, and opt for allergy-friendly brands where available. Always prioritize checking ingredient labels to ensure they meet your family's dietary needs.
Q5: What if I can't find specific Halloween-themed candies or props? A5: Don't let a missing item stop your fun! Creativity is key:
- Candies: Use any colorful gummy candies you have on hand. Gummy bears, fruit snacks, or even sliced fruit can make fun garnishes.
- Eyeballs: If you can't find candy eyeballs, draw eyes on clean ping-pong balls with a permanent marker – they float perfectly! Maraschino cherries can also look like "bloody eyeballs."
- Cup Decorations: A black permanent marker on a plain clear plastic cup can transform it into a pumpkin or monster face in seconds. The spirit of the holiday is about imagination, so get creative with what's available!
Q6: Can adults enjoy these drinks too, or are they strictly for kids? A6: Absolutely, adults can (and do!) enjoy these delicious and festive drinks too! They are refreshing, flavorful, and add a wonderful, whimsical touch to any Halloween gathering. For adult guests who prefer a "spiked" version, you can offer a splash of relevant spirits (e.g., vodka, rum, or a liqueur) on the side for them to add to their own glass, ensuring the main batch remains kid-friendly. Always clearly label and keep adult-only additions separate and out of reach of children.
Q7: How can I make these drinks even more educational or tie them into other learning? A7: These drinks are already packed with STEM opportunities! To enhance them further:
- Ask Open-Ended Questions: "What do you think will happen if...?" or "Why do you think this changed color?"
- Document: Encourage older children to write down their "recipes" or observations in a "Mad Scientist's Journal."
- Read Books: Pair the activity with spooky-themed books that talk about colors, science, or Halloween characters.
- Explore Different Themes: Use these drink-making skills to explore other themes, like making a "Galaxy Drink" after learning about space, similar to how our Galaxy Donut Kit combines baking with astronomy!