Blend & Learn: Easy Kids Milkshake Recipes

Table of Contents
- Introduction
- The Science of the Shake: A Delicious Dive into STEM
- Essential Ingredients for the Perfect Kids Milkshake
- Beyond Basic: Classic Kids Milkshake Recipes and Creative Twists
- The Art of the Mix: Blending for Perfection
- Topping It Off: Creative & Educational Garnishes
- STEM in Every Sip: Learning Through Milkshakes
- Milkshake Adventures for Every Occasion
- Tips for Parents: Keeping it Safe & Fun
- Beyond Milkshakes: More Culinary STEM Fun with I'm the Chef Too!
- Conclusion
Ever watched your child’s eyes light up at the sight of a vibrant, frothy milkshake, topped with a cloud of whipped cream and a sprinkle of magic? That moment of pure joy, that shared smile over a delicious treat – it’s a sweet memory in the making. But what if we told you that behind that delightful concoction lies a world of engaging, hands-on learning just waiting to be explored? At I'm the Chef Too!, we believe that the kitchen is one of the most exciting classrooms, a place where everyday activities transform into incredible "edutainment" experiences.
This isn't just about crafting the perfect, creamy kids milkshake recipe; it's about blending curiosity with creativity, mixing science with sweetness, and stirring up unforgettable family bonding. We're here to guide you through the process of making delicious milkshakes, not just as a treat, but as a gateway to understanding fascinating concepts, developing essential skills, and fostering a genuine love for discovery. Get ready to turn your kitchen into a laboratory of fun, where fractions make sense, states of matter come to life, and every sip is a lesson in deliciousness!
Introduction
Imagine a scorching summer afternoon, the kids are buzzing with energy, and the dreaded phrase, "I'm bored!" is just around the corner. What's a parent to do? Instead of reaching for the remote or the tablet, why not dive into a cool, creamy adventure right in your own kitchen? Milkshakes aren't just a refreshing delight; they're an incredibly versatile canvas for creative exploration and stealthy learning.
At I'm the Chef Too!, our mission is rooted in the belief that learning should be an adventure, not a chore. We combine the joy of cooking with the wonders of STEM (Science, Technology, Engineering, and Math) and the beauty of the arts, creating unique, tangible, and deliciously educational experiences. Our approach, developed by mothers and educators, ensures that complex subjects are demystified through hands-on activities, sparking curiosity and encouraging screen-free engagement. This blog post isn't just a collection of recipes; it's an invitation to transform a simple kitchen activity into a holistic learning journey. We'll explore the science behind the shake, share incredible kids milkshake recipe variations, provide practical tips for parents, and demonstrate how this humble treat can become a powerful tool for developing critical thinking, fine motor skills, and an enduring love for discovery. By the end, you'll see that making milkshakes is far more than just whipping up a dessert – it's an opportunity to create joyful family memories and build foundational knowledge, one delicious blend at a time.
The Science of the Shake: A Delicious Dive into STEM
Before we even get to the blending, let's talk about the magic, or rather, the science, happening in your blender. Making a milkshake is a fantastic, edible experiment that introduces children to fundamental STEM concepts without them even realizing it!
States of Matter in Action
Think about the main ingredients: ice cream (a solid, albeit a soft one) and milk (a liquid). When combined and blended, they transform into a semi-liquid, creamy, frothy substance. This is a perfect, tangible example of:
- Phase Change: The ice cream, originally a solid, partially melts and combines with the liquid milk. While it doesn't become a pure liquid, its structure changes significantly, demonstrating how solids can transition.
- Emulsions and Suspensions: A milkshake is a beautiful example of an emulsion (tiny droplets of one liquid dispersed in another, like fat in milk) and a suspension (solid particles, like ice crystals, suspended in a liquid). The blending process helps to evenly distribute these components, creating a smooth texture.
The Physics of Blending
The blender itself is a marvel of engineering! Its rapidly rotating blades do more than just mix; they apply force that:
- Breaks Down Solids: The blades break the ice cream into smaller pieces, allowing it to integrate seamlessly with the milk.
- Incorporates Air: The high-speed rotation whips air into the mixture, creating that delightful frothy texture. This aeration is key to a milkshake's creamy mouthfeel.
- Creates Friction and Heat: While minimal, the friction from the blades generates a tiny amount of heat, which further aids in the partial melting and softening of the ice cream, contributing to the smooth consistency.
Measurement and Ratios: Practical Math for Little Hands
Every kids milkshake recipe requires precise measurement. This is a fantastic, low-stakes way to introduce or reinforce mathematical concepts:
- Fractions: "Half a cup of milk," "a quarter scoop of sprinkles," "doubling the recipe" – these are all opportunities to work with fractions in a very practical way. Children can see how different quantities impact the final product.
- Ratios: The optimal ratio of ice cream to milk is crucial for a perfect milkshake. Too much milk, and it's watery; too little, and it's too thick to sip. Experimenting with different ratios helps kids understand proportional reasoning.
- Volume: Understanding that a cup is larger than a tablespoon, or that three scoops fills a certain volume, are foundational concepts in understanding volume.
By turning on the blender, you're not just making a treat; you're setting up a miniature science lab. It's exactly this kind of hands-on, multi-sensory learning that we champion at I'm the Chef Too!. We believe that when kids see, touch, smell, and taste the results of their culinary experiments, the lessons truly stick. Ready for a new adventure every month that blends delicious treats with captivating scientific principles? Join The Chef's Club and enjoy free shipping on every box. It's the perfect way to keep these "edutainment" experiences coming!
Essential Ingredients for the Perfect Kids Milkshake
The beauty of a milkshake lies in its simplicity. With just a few core ingredients, you can create endless variations. But choosing the right ones can make all the difference in achieving that ideal creamy, dreamy consistency.
The Star: Ice Cream
The type and quality of your ice cream are paramount. It forms the backbone of your milkshake's flavor and texture.
- Full-Fat vs. Low-Fat: For the creamiest, most satisfying milkshake, full-fat ice cream is generally recommended. The higher fat content contributes to a smoother, richer mouthfeel and helps prevent an icy texture. However, don't let lower-fat options deter you! They can still make delicious shakes, though they might be slightly less thick.
- Flavor Choice: This is where the fun truly begins! Vanilla, chocolate, and strawberry are classic starting points, but don't be afraid to experiment with cookie dough, mint chip, coffee, or even unique fruit-based ice creams. The flavor of your ice cream will largely dictate the flavor of your milkshake.
- Temperature: Make sure your ice cream isn't rock-hard straight from the freezer. Letting it soften slightly for 5-10 minutes at room temperature will make it much easier to blend into a smooth consistency, reducing the need for excess milk.
The Liquid Link: Milk
Milk is the second crucial component, binding everything together and dictating the thickness of your shake.
- Whole Milk is King: Just like with ice cream, whole milk provides the richest, creamiest result due to its fat content. It blends seamlessly with the ice cream to create a decadent texture.
- Alternative Milks: Don't hesitate to use dairy-free alternatives! Almond milk, oat milk, soy milk, or even coconut milk (for a tropical twist) all work wonderfully. Keep in mind that their fat content varies, which might slightly alter the final thickness and richness. You might need to adjust the amount of milk slightly.
- Temperature: Chilled milk is always best. It helps keep the milkshake cold and thick, preventing it from melting too quickly.
The Flavor Enhancers: Optional Add-ins
This is where you can truly unleash creativity and personalize your kids milkshake recipe.
- Syrups: Chocolate syrup, caramel sauce, strawberry sauce – these are instant flavor boosters. Drizzle them into the blender with the main ingredients, or swirl them into the glass before pouring for a beautiful effect.
- Malted Milk Powder: For that classic soda fountain taste, especially with vanilla or chocolate shakes, a tablespoon or two of malted milk powder adds a unique, nostalgic depth of flavor. This is a great way to introduce kids to different taste profiles and culinary history.
- Fruit: Fresh or frozen fruit can add natural sweetness, color, and nutrients. Berries, bananas, mangoes, and pineapple are excellent choices. Frozen fruit will also help maintain the milkshake's thickness.
- Cookies & Candy: Crushed cookies (like chocolate sandwich cookies or chocolate chip cookies), candy pieces, or even brownies can be blended in for a truly indulgent shake. This is where you can turn a simple milkshake into a themed treat – perhaps a "dinosaur fossil" milkshake with crushed cookie "dirt" for budding paleontologists!
- Nut Butters: Peanut butter, almond butter, or sunflower seed butter add protein and a creamy texture, making the milkshake more substantial.
- Spices: A pinch of cinnamon, nutmeg, or even a tiny dash of cayenne for a "spicy" chocolate shake (use with caution and only for adventurous palates!) can add surprising layers of flavor.
Remember, the key is to start with quality ingredients and then let your imagination (and your child's!) guide the additions. The beauty of these kitchen adventures, whether it's a simple milkshake or a more elaborate culinary quest from one of our kits, is the hands-on engagement. Our thoughtfully designed kits, like the one that explores geology through our Erupting Volcano Cakes Kit, provide pre-measured dry ingredients and specialty supplies, making it easy to jump straight into the fun and learning without the hassle of gathering every little thing.
Beyond Basic: Classic Kids Milkshake Recipes and Creative Twists
While the formula for a perfect milkshake is simple – typically 3 scoops of ice cream to 1 cup of milk – the possibilities for flavor combinations are truly endless. Let's explore some beloved classics and then spark some ideas for adventurous new creations. Each recipe below makes one generous serving.
The Vanilla Voyage Milkshake
Sometimes, the simplest things are the best. A well-made vanilla milkshake is a testament to pure, creamy deliciousness.
Ingredients:
- 3 large scoops vanilla ice cream (French vanilla for extra richness!)
- 1 cup whole milk (or preferred milk alternative)
- 1-2 tablespoons malted milk powder (optional, for that classic soda fountain flavor)
- Whipped cream and sprinkles for topping
Instructions:
- Add milk, vanilla ice cream, and malted milk powder (if using) to your blender.
- Blend on high speed until completely smooth and creamy. Ensure the malted milk powder is fully dissolved if using.
- Pour into a chilled glass.
- Top generously with whipped cream and a rainbow of sprinkles.
STEM Spotlight: Discuss how the malted milk powder (a solid) dissolves into the liquid mixture, demonstrating the concept of solubility.
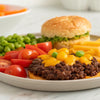
The Choco-Blast Milkshake
A perennial favorite, the chocolate milkshake is a guaranteed crowd-pleaser. We'll make it extra chocolatey!
Ingredients:
- 3 large scoops chocolate ice cream
- 1 cup whole milk (or chocolate milk for a double chocolate blast!)
- 1-2 tablespoons chocolate syrup or cocoa powder (optional, for intense chocolate flavor)
- Whipped cream, chocolate shavings, and a cherry for topping
Instructions:
- Pour the milk (or chocolate milk) into the blender first.
- Add chocolate ice cream and chocolate syrup/cocoa powder (if using).
- Blend until silky smooth.
- Pour into a glass, ideally one you've drizzled with chocolate syrup on the inside walls for an extra-fancy touch.
- Crown with whipped cream, a sprinkle of chocolate shavings, and a bright red cherry.
STEM Spotlight: Talk about how different forms of chocolate (solid ice cream, liquid syrup, powdered cocoa) contribute to the overall flavor and texture, touching on the idea of concentration and density.
The Berry Bliss Milkshake
Fresh, fruity, and vibrant, a strawberry (or mixed berry) milkshake is a refreshing alternative.
Ingredients:
- 3 large scoops strawberry ice cream (or vanilla ice cream if you prefer)
- 1 cup whole milk
- 1 cup fresh or frozen strawberries (or a mix of berries like raspberries, blueberries)
- Whipped cream, a sliced strawberry, and a fun straw for topping
Instructions:
- Place milk, ice cream, and berries into the blender.
- Blend on high until smooth. If using frozen berries, it might take a little longer to achieve perfect smoothness.
- Pour into a glass.
- Garnish with whipped cream and a fresh berry slice.
STEM Spotlight: Observe how the fresh or frozen fruit breaks down and integrates into the mixture. Discuss the role of fruit pectin in slightly thickening the shake. If using frozen fruit, note how it helps keep the shake colder and thicker.
The Tropical Twist Milkshake (No Ice Cream Option!)
Looking for a slightly healthier twist or don't have ice cream on hand? This banana-based milkshake is a creamy delight!
Ingredients:
- 1.5 medium frozen ripe bananas (this is KEY for thickness!)
- 1 cup milk (whole milk or coconut milk for an extra tropical feel)
- 1/2 cup frozen mango chunks (optional)
- 1 tablespoon hemp seeds (optional, for added nutrition)
- 1 teaspoon vanilla extract (optional, enhances flavor)
- Unsweetened coconut flakes or fresh fruit for topping
Instructions:
- Add milk, frozen banana, mango, hemp seeds, and vanilla extract (if using) to your blender.
- Blend on high until completely smooth and creamy. A high-powered blender works best for truly frozen fruit.
- Pour into a glass.
- Top with coconut flakes or fresh fruit.
STEM Spotlight: This recipe highlights how freezing changes the properties of food and how the structure of the frozen banana provides natural creaminess without the need for ice cream. Discuss the nutritional benefits of fruits and seeds.
Unleash Your Inner Culinary Scientist: Inventing New Flavors
The real fun comes from experimenting! Encourage your child to become a "flavor inventor" by trying these ideas:
- Cookie Crumble: Blend in crushed chocolate chip cookies, Oreo cookies, or graham crackers.
- Candy Craze: Add a handful of mini chocolate candies, peanut butter cups, or even a few pieces of leftover Halloween candy.
- Spiced Sweetness: A tiny pinch of cinnamon or pumpkin spice can transform a vanilla or banana shake.
- Fruity Fusion: Combine different fruits. How about a pineapple-coconut shake, or a blueberry-lemon concoction?
- Cereal Surprise: Believe it or not, some cereals (like fruity loops or cocoa puffs) can be blended in for a fun, flavored, and slightly textured milkshake.
Remember, every kitchen experiment is a learning opportunity. Just like our diverse range of educational kits helps children explore subjects from biology to engineering through delicious projects, making unique milkshakes teaches them about taste profiles, texture, and creative problem-solving. If you're looking for other exciting one-time adventures beyond milkshakes, perhaps a journey to explore astronomy by creating your own edible solar system with our Galaxy Donut Kit, or even digging for "fossils" with our Fudgy Fossil Dig kit, then browse our complete collection of one-time kits in our shop.
The Art of the Mix: Blending for Perfection
Achieving that perfect, velvety smooth milkshake consistency isn't just about the ingredients; it's also about the blending technique and the right equipment. This part of the process is where children can understand cause and effect, and the importance of method.
Choosing Your Tool: The Blender
While a high-powered blender (like a Vitamix) can certainly produce exceptionally smooth results, you absolutely don't need a professional-grade machine to make a great milkshake.
- Standard Blenders: Most kitchen blenders will work perfectly. The key is to be patient and perhaps use a little more milk if the mixture is too thick for your blender to handle.
- Immersion Blenders: These handheld blenders are surprisingly effective for single-serving milkshakes, especially if you blend directly in a tall glass. They offer convenience and less cleanup.
- Food Processors (with caution): While they can work in a pinch, food processors are not ideal. They tend to incorporate less air and may struggle to create the smooth, pourable consistency of a traditional milkshake.
The Perfect Ratio: Ice Cream to Milk
This is perhaps the most critical factor for consistency. The general rule of thumb is:
- 3 large scoops of ice cream to 1 cup of milk.
This ratio typically yields a thick, yet sip-able milkshake. However, personal preference plays a huge role.
- For a Thicker Shake: Start with slightly less milk (e.g., 3/4 cup) and add more in small increments (tablespoon by tablespoon) if needed. You can also add more ice cream scoops, or incorporate a small amount of a thickening agent like a frozen banana or a scoop of Greek yogurt.
- For a Thinner Shake: Simply add a splash more milk until you reach your desired consistency.
Blending Technique: The "How-To" for Creaminess
- Start with Liquid: Always add the milk (or liquid component) to the blender first. This allows the liquid to surround the blades, making it easier for them to start processing the solid ice cream and prevent the blades from getting stuck.
- Add Solids Second: Gently spoon in the ice cream scoops on top of the milk. Then add any other solid flavorings like fruit, cookies, or candy pieces.
- Pulse, Then Blend: Begin by pulsing the blender a few times. This helps to break down the larger chunks of ice cream and incorporates the initial ingredients without over-processing.
- Gradual Increase in Speed: Once the mixture starts to come together, increase the blender speed to medium-high or high. Blend continuously until the mixture is completely smooth. You want to see a consistent, even texture with no ice cream chunks remaining.
- Scrape Down Sides (if needed): If you notice ingredients clinging to the sides of the blender, stop the machine, use a spatula to push them down towards the blades, and continue blending.
- Don't Over-Blend: While you want it smooth, don't blend for too long. Over-blending can warm up the milkshake, making it thinner and less refreshing. Aim for just enough time to achieve desired smoothness.
By paying attention to these details, children learn about precision, patience, and how different actions impact an outcome – all valuable lessons that extend far beyond the kitchen! Just as we emphasize precise measurements and thoughtful execution in every one of our kits, whether it's baking delightful treats or constructing edible masterpieces, mastering the art of the milkshake is a rewarding experience.
Topping It Off: Creative & Educational Garnishes
The art of the milkshake isn't complete without the grand finale: the toppings! This is where imagination truly takes center stage, and where you can add layers of fun, texture, and even a little more learning.
Classic Toppings That Never Go Out of Style
- Whipped Cream: A fluffy cloud of whipped cream is almost mandatory. Kids love watching it expand from the can or helping to whip their own. This is a great chance to discuss how air is incorporated into cream to change its volume and texture.
- Sprinkles: Rainbow sprinkles, chocolate sprinkles, themed sprinkles – they add color, crunch, and instant festivity.
- Cherries: A maraschino cherry on top is the iconic milkshake crown.
- Chocolate or Caramel Drizzle: A final flourish of sauce adds another layer of flavor and visual appeal.
Edible "Experiments" and Themed Garnishes
This is where you can get really creative and tie toppings into other learning themes, much like how our kits integrate STEM concepts.
- Crushed Cookies/Candy: If you didn't blend them in, sprinkle them on top for texture. This can be "moon dust" for a space-themed shake, or "dinosaur eggs" for a prehistoric treat.
- Mini Chocolate Chips: A simple, yet effective topping that adds a pop of chocolate.
- Fresh Fruit Slices: A beautiful and healthy garnish. A fanned strawberry slice or a few fresh berries elevate the presentation.
- Cookie Rimmed Glass: Dip the rim of your glass in a little chocolate syrup, then immediately into crushed cookies or sprinkles. This adds a gourmet touch and a fun texture with every sip.
- Edible Glitter/Stars: For a truly magical shake, a sprinkle of edible glitter or star-shaped sprinkles can make it feel like a "galaxy" shake, echoing the wonder kids feel when they craft their own cosmic treats using our Galaxy Donut Kit.
- Mini Donuts/Cookies: For an "over-the-top" shake, skewer mini donuts or small cookies on top. This is great for special occasions and encourages impressive presentation skills.
- Gummy Worms/Candies: Create a "muddy puddle" milkshake (chocolate shake with crushed cookies) and let gummy worms peek out! This is especially fun if you've ever explored themes like our Peppa Pig Muddy Puddle Cookie Pies.
The Art of Presentation
Garnishing a milkshake is a fantastic opportunity to explore the "Arts" component of STEAM/STEM.
- Color Theory: Discuss how different colored sprinkles or fruits create a visually appealing contrast.
- Arrangement: Encourage children to think about how they arrange their toppings. Is it neat? Chaotic? What look are they going for?
- Texture: Point out the different textures – smooth shake, creamy whipped cream, crunchy sprinkles, chewy gummy worms. This enhances sensory development.
By involving children in the topping process, you empower them to express their creativity and take ownership of their culinary creation. It’s about more than just a tasty drink; it’s about fostering a sense of accomplishment and having fun in the process, much like the joyful discovery in every I'm the Chef Too! kit.
STEM in Every Sip: Learning Through Milkshakes
At I'm the Chef Too!, our core philosophy is that learning should be an adventure. Making milkshakes perfectly embodies this spirit, blending delicious fun with essential educational outcomes. It’s a wonderful example of how our unique "edutainment" experiences, developed by mothers and educators, transform complex subjects into tangible, hands-on, and utterly delicious cooking adventures.
Math in Action: Fractions, Measurement, and Estimation
We touched on this earlier, but it bears repeating: the kitchen is a living math lesson!
- Fractions and Proportions: "We need half a cup of milk," "Let's double the recipe to make enough for everyone," or "Divide the milkshake equally into two glasses." These phrases become practical math problems. Children learn that a "whole" can be divided into parts, and how to scale recipes up or down.
- Measurement Units: Working with cups, tablespoons, and even "scoops" introduces different units of measurement. Kids learn about volume and how to use measuring tools accurately.
- Estimation: Before measuring, ask, "How many scoops do you think will fit in this glass?" This encourages estimation skills and critical thinking.
Science Exploration: States of Matter, Solubility, and Emulsions
Every step of making a milkshake is a mini-science experiment:
- Solid to Liquid (and Back!): Observing ice cream (solid) melt and combine with milk (liquid) to form a new, semi-liquid consistency. Discuss why you can't refreeze a milkshake back into perfect ice cream (the water molecules separate and form ice crystals).
- Solubility: Watch how chocolate syrup or malted milk powder dissolves into the liquid. What happens if you add cocoa powder instead of syrup? It might not dissolve as easily, requiring more blending, teaching about different forms of ingredients.
- Air and Volume: The magic of the blender whipping air into the mixture, increasing its volume and creating froth. This is why a milkshake often seems bigger than the sum of its parts!
- Temperature and Viscosity: Discuss how temperature affects how thick or thin the milkshake is. A colder milkshake will be thicker.
Engineering and Design: Building the Perfect Beverage
- Tool Usage: Learning to safely operate a blender, understanding how its blades work, and selecting the right equipment for the job.
- Process Optimization: Experimenting with the order of ingredients (liquid first!), blending speed, and duration to achieve the desired consistency. This is a practical application of engineering principles.
- Recipe Design: Encouraging kids to "engineer" their own flavor combinations and toppings, thinking about how different ingredients will interact and contribute to the final taste and texture.
Art and Creativity: Visual Appeal and Flavor Profiles
The "Arts" component of STEAM shines brightly in milkshake making:
- Color and Presentation: Choosing vibrant fruits or colorful sprinkles to make the milkshake visually appealing. Drizzling chocolate syrup on the inside of the glass adds a professional, artistic touch.
- Flavor Pairing: Experimenting with different flavor combinations – what tastes good together? This develops culinary creativity and sensory awareness.
- Sensory Exploration: Focusing on the five senses: the sound of the blender, the smell of the ingredients, the vibrant colors, the smooth texture, and of course, the taste!
Life Skills and Confidence Building
Beyond academic concepts, making milkshakes fosters crucial life skills:
- Following Instructions: Learning to read and follow a recipe builds foundational literacy and comprehension.
- Fine Motor Skills: Scooping, pouring, measuring, and decorating all enhance hand-eye coordination and fine motor development.
- Problem-Solving: What if the milkshake is too thin? Too thick? How can we fix it? These little challenges encourage creative problem-solving.
- Patience and Delayed Gratification: Waiting for the milkshake to blend, or for a glass to chill, teaches patience.
- Teamwork and Communication: When done as a family activity, it promotes collaboration and communication.
- Confidence and Accomplishment: The pride a child feels in creating something delicious from start to finish is invaluable. It builds self-esteem and a love for taking on new challenges.
This holistic learning approach is at the heart of what we do at I'm the Chef Too!. We don't just send you ingredients; we send an experience designed to spark that very curiosity and facilitate family bonding, providing a unique screen-free alternative. Whether it's exploring the vastness of the cosmos through baking with our Galaxy Donut Kit or delving into the mysteries of geology by creating edible geological wonders, every kit is a step towards a deeper understanding of the world, all wrapped up in a delicious package. Don't let the learning stop here! Give the gift of learning that lasts all year with a 12-month subscription to our STEM cooking adventures. Join The Chef's Club today!
Milkshake Adventures for Every Occasion
A simple kids milkshake recipe isn't just for a hot summer day; it can be transformed into a special activity for almost any occasion, turning everyday moments into extraordinary memories and learning opportunities.
Rainy Day Rescues
When the weather outside is gloomy, a milkshake party inside can instantly lift spirits. Make it a "Mad Scientist Milkshake Lab" where kids experiment with different flavor combinations and discuss their hypotheses before blending. This encourages open-ended experimentation and observation skills.
Birthday Bashes and Sleepover Fun
Milkshakes are a fantastic, interactive treat for parties. Set up a "Milkshake Bar" with various ice cream flavors, milks, syrups, fruits, and an array of toppings. Provide different colored straws and encourage kids to design their own unique creations. This promotes creativity, choice, and social interaction. Children can practice their "customer service" skills by taking "orders" from their friends or family members!
Weekend Wonders and Family Bonding
Dedicate a portion of your weekend to a "Culinary Creation Station." Milkshakes can be just one part of a larger kitchen adventure. Perhaps make a batch of cookies first, and then use some of those cookies to make a "Cookie Monster" milkshake. These shared experiences foster communication, teamwork, and create lasting family memories away from screens. This aligns perfectly with our mission at I'm the Chef Too! – to facilitate family bonding through engaging culinary experiences.
Educational Themes and Learning Reinforcement
Tie your milkshake making to specific educational themes.
- Color Mixing Milkshakes: Start with a vanilla base and add small amounts of different colored syrups or pureed fruits (e.g., a tiny bit of blueberry for blue, strawberry for red) and discuss how colors combine.
- "Outer Space" Milkshakes: Use blue or purple ice cream, blend with milk, and top with edible glitter and star sprinkles, just like exploring the cosmos with our Galaxy Donut Kit.
- "Volcano" Milkshakes: Use red or orange ice cream, a dash of ginger ale or sparkling water for fizz (carefully!), and top with "lava" (red syrup) and "ash" (crushed dark cookies). This can be a fun, albeit messy, way to talk about geological forces, similar to the exciting chemical reactions kids explore when making our Erupting Volcano Cakes Kit.
- "Ocean Depth" Milkshakes: Blue ice cream, blended with milk, topped with gummy fish or edible "seaweed" (green fruit leathers cut into strips).
By framing milkshake making around a theme or occasion, you elevate it from a simple snack to a memorable activity, reinforcing learning in a playful, low-pressure environment. It's about providing children with tangible ways to explore the world around them, making learning a joyful discovery.
Tips for Parents: Keeping it Safe & Fun
Creating milkshakes with your kids is incredibly rewarding, but a few practical tips can ensure the experience is both safe and enjoyable for everyone involved. Remember, our goal at I'm the Chef Too! is to provide valuable, practical advice that sets realistic expectations and prioritizes safety.
Emphasize Safety First
- Blender Supervision is Key: Never leave children unsupervised with a blender. Blades are sharp! Teach them to always keep fingers clear and to ensure the lid is securely on before blending. Always plug and unplug the blender yourself, or supervise closely.
- Knife Safety (Optional): If your recipe involves slicing fruit, use age-appropriate tools. For younger children, a butter knife on soft fruit or a crinkle cutter can be safer. For older children, teach proper knife safety techniques and always supervise. Better yet, pre-cut fruits or use frozen varieties to avoid knives altogether.
- Spills Happen: Place a towel or baking mat under the blender to catch any drips. Embrace the mess as part of the learning process!
Age-Appropriate Tasks
Tailor the level of involvement to your child's age and skill level.
- Toddlers & Preschoolers: Focus on pouring pre-measured ingredients (milk into the blender), adding scoops of ice cream (with a sturdy spoon), pressing the blender buttons (with supervision!), and, of course, choosing and adding toppings.
- Early Elementary (6-8 years): They can start measuring ingredients, following simple recipe steps, and assisting with ingredient prep (like unwrapping candy or washing berries). They'll love selecting flavor combinations and decorating.
- Upper Elementary & Pre-Teens (9+ years): They can often follow the entire recipe independently (with a quick check-in from you), experiment with new flavors, and take on more cleanup responsibilities.
Managing Expectations (Yours and Theirs!)
- Focus on the Process, Not Perfection: The goal isn't a perfectly restaurant-quality milkshake every time. It's about the shared experience, the learning, and the joy of creating something together. There might be too many sprinkles, or the shake might be a bit thin – and that's perfectly okay! We emphasize fostering a love for learning, building confidence, and creating joyful family memories, not guaranteeing culinary masterpieces every time.
- Embrace the Mess: Cooking with kids is inherently messy. See it as an opportunity for sensory play and a lesson in cleanup! Having a damp cloth ready and encouraging them to wipe up spills immediately can help.
- Flexibility is Key: If you don't have exactly three scoops of ice cream, or exactly one cup of milk, don't sweat it. Adjust as needed. The best recipes are adaptable.
- Taste Test Often: Encourage them to taste the ingredients separately and then the final product. Ask, "What do you taste?" "What's your favorite part?" This builds sensory awareness and encourages descriptive language.
Making it a Routine
Consider making milkshake making a weekly or bi-weekly tradition. Predictable fun activities give children something to look forward to and reinforce the learning. This aligns with the idea of ongoing enrichment that our Chef's Club subscription offers, bringing new, exciting projects right to your door every month.
By keeping these tips in mind, you're setting the stage for not just delicious milkshakes, but truly positive and enriching family experiences. The moments spent in the kitchen, blending, laughing, and learning, are the ones that children will cherish and remember long after the last sip is gone. Ready for endless educational fun and family bonding without the planning hassle? Join The Chef's Club and get a new adventure delivered to your door every month with free shipping in the US!
Beyond Milkshakes: More Culinary STEM Fun with I'm the Chef Too!
While mastering the kids milkshake recipe is a fantastic stepping stone, it's just one delicious example of how food can unlock a universe of learning. At I'm the Chef Too!, we are dedicated to blending food, STEM, and the arts into one-of-a-kind "edutainment" experiences that go far beyond a single recipe. Our unique approach sparks curiosity, encourages creativity, and provides invaluable screen-free educational alternatives for children.
We understand the challenges parents and educators face in finding engaging, educational activities that truly capture a child's attention. That's why our kits are developed by mothers and educators, ensuring that every project is not only fun but also thoughtfully designed to teach complex subjects through tangible, hands-on, and utterly delicious cooking adventures.
Imagine your child not just making a dessert, but:
- Exploring the human body by baking and decorating edible brain or heart models.
- Understanding geology as they create and excavate "fudgy fossils."
- Delving into chemistry through bubbling, colorful concoctions that taste as amazing as they look, just like the amazing chemical reactions kids explore when making our Erupting Volcano Cakes Kit.
- Journeying through astronomy by crafting and decorating edible planets and stars, such as with our Galaxy Donut Kit.
Each I'm the Chef Too! kit is a complete experience, thoughtfully curated with pre-measured dry ingredients, specialty supplies, and a detailed, child-friendly lesson plan. This means less planning and shopping for you, and more quality time and impactful learning for your child.
Our mission isn't to guarantee your child will become a top scientist or a master chef overnight. Instead, we focus on the incredible benefits of the process: fostering a genuine love for learning, building confidence in their abilities, developing crucial problem-solving and fine motor skills, and, most importantly, creating joyful family memories that will last a lifetime. We believe in the power of shared experiences in the kitchen to ignite a lifelong passion for discovery.
If you're looking for more ways to bring exciting, hands-on STEM and art adventures into your home beyond just a milkshake, we have a solution that delivers fresh inspiration every month. Our flexible subscription plans are perfect for ongoing enrichment or as a unique gift that keeps on giving. Ready to transform your kitchen into a hub of "edutainment" and make learning an irresistible treat? Join The Chef's Club today and enjoy the convenience of a new, unique adventure delivered right to your door with free shipping in the US! Or, if you prefer to pick and choose your next culinary adventure, browse our complete collection of one-time kits for a specific theme or interest. The possibilities for delicious learning are endless!
Conclusion
Making a milkshake with your kids is so much more than just blending a sweet treat. It's an opportunity to transform your kitchen into a dynamic learning laboratory, where the simple act of creating a delicious beverage unfolds into lessons in science, math, engineering, and art. From understanding the states of matter as ice cream melts into milk, to mastering fractions with measuring cups, and unleashing creativity with colorful toppings, every step of the kids milkshake recipe journey is brimming with educational value.
At I'm the Chef Too!, we are passionate about sparking curiosity and nurturing a love for learning through tangible, hands-on experiences. The joy of a child's discovery, the pride in their culinary creation, and the precious moments of family bonding away from screens are the heart of our mission. So, gather your ingredients, fire up the blender, and dive into the wonderful world of milkshake making. Embrace the spills, celebrate the experiments, and savor the shared laughter.
And when you're ready to explore even more captivating "edutainment" adventures that blend delicious fun with profound learning, remember that a new world of discovery awaits. Don't let the learning stop at just one delicious project. Join The Chef's Club and receive a fresh, exciting STEM cooking kit delivered to your door every month with free shipping. Give the gift of ongoing curiosity, creativity, and unforgettable family memories – because the best lessons are always the most delicious ones!
FAQ
Q1: What is the best ratio of ice cream to milk for a thick milkshake?
A1: For a classic thick yet sip-able milkshake, a good starting ratio is 3 large scoops of ice cream to 1 cup of milk. You can adjust this slightly based on your preference; use a little less milk for an extra thick shake, or a touch more for a thinner consistency.
Q2: Can I make a milkshake without ice cream?
A2: Absolutely! You can create delicious and often healthier milkshakes using frozen fruit, especially frozen ripe bananas. Blended with milk (dairy or non-dairy), they create a surprisingly creamy and thick base. You can then add other fruits, nut butters, or a little cocoa powder for flavor.
Q3: How can I make my milkshake thicker without adding more ice cream?
A3: There are a few tricks:
- Use less milk initially: Start with a smaller amount of milk than the recipe calls for, and add more slowly until you reach your desired thickness.
- Add frozen fruit: A handful of frozen berries, mango, or especially frozen banana chunks will add volume and thickness without diluting the flavor too much.
- Chill your glass: Place your serving glass in the freezer for 10-15 minutes before pouring. This helps the milkshake stay colder and thicker longer.
- Use full-fat ingredients: Whole milk and full-fat ice cream naturally contribute to a thicker, creamier texture.
Q4: Can I store leftover milkshake?
A4: Milkshakes are definitely best enjoyed immediately. Once blended and exposed to air, the ice cream starts to melt, and the texture changes. If you must store it, you can place it in an airtight container in the freezer for a short period (an hour or two). However, when re-thawed, the texture will likely be icier and more watery due to the separation of milk solids and water, making it more like a slushie than a creamy shake. It's usually best to make small batches or encourage everyone to finish their delicious creations!
Q5: What kind of blender is best for making milkshakes?
A5: A standard kitchen blender works perfectly well for most milkshakes. High-powered blenders can achieve an incredibly smooth consistency quickly, but they're not essential. An immersion blender can also be a convenient option for single servings, blending directly in the glass. The key is to ensure the blender can handle frozen ingredients without burning out the motor, and to add liquids first to help the blades move easily.
Q6: How can I make milkshakes healthier for my kids?
A6: You can make several healthy swaps:
- Use frozen fruit: As mentioned, frozen bananas and other fruits can replace or reduce the need for ice cream.
- Add veggies: A handful of spinach blends seamlessly into fruit milkshakes, adding nutrients without altering the taste significantly (it will change the color though!).
- Boost with nutrition: Add a tablespoon of chia seeds, flax seeds, or hemp seeds for extra fiber, healthy fats, and protein. A scoop of Greek yogurt can also add protein and creaminess.
- Control sweetness: Use ripe fruit for natural sweetness, and consider reducing or omitting added sugars like syrups.
Q7: My kids want really unique milkshake flavors. Any ideas?
A7: The sky's the limit!
- Cookie Monster Shake: Blend vanilla ice cream with blue food coloring and crushed chocolate chip cookies, top with more cookies.
- Root Beer Float Shake: Blend vanilla ice cream with a splash of root beer for a frothy, classic flavor.
- Birthday Cake Shake: Vanilla ice cream, a dash of vanilla extract, a pinch of sprinkles blended in, and more sprinkles on top.
- S'mores Shake: Chocolate ice cream, a few toasted marshmallows (cooled!), and crushed graham crackers. Top with whipped cream, more graham crackers, and a mini toasted marshmallow. Encourage your kids to brainstorm their own combinations – that's where the real culinary creativity begins!