Table of Contents
- Introduction
- The Power of the "Deconstructed" Lunch
- Bento Box Magic and Color Theory
- The Physics of the Thermos: Bringing Hot Meals to School
- Sandwich Art and Geometric Fractions
- The Science of the "Brown Apple" and Food Chemistry
- Theme Days: Connecting Lunch to STEM Adventures
- Scaffolding Skills: Age-Appropriate Lunch Prep
- Strategies for the Busy Educator and Parent
- Lunch as a Social-Emotional Tool
- Creating a Positive Relationship with Food
- The Role of Educators in the Lunchroom
- Final Steps for a Successful Week
- FAQ
Introduction
There is a specific kind of sinking feeling that happens when a child comes home, drops their backpack, and you open a lunchbox to find it exactly as it was seven hours ago. We have all been there. Whether it is the same sandwich every day causing "lunch fatigue" or the lure of the playground being stronger than the appetite, getting kids to eat a nutritious meal at school can feel like a daily puzzle.
At I’m the Chef Too!, we believe that when children are involved in the process of creating their food, they are far more likely to enjoy eating it. This post will explore how to turn the mid-day meal into a fun, educational, and delicious experience. We will cover creative recipes, the science behind food preservation, and practical ways to integrate STEM learning into every bite. By the end of this guide, you will have a toolkit of ideas that spark curiosity and keep those lunchboxes coming home empty. For more inspiration, explore these delicious and easy kids' lunches.
The Power of the "Deconstructed" Lunch
Many children find large, complex sandwiches or heavy meals overwhelming. A deconstructed lunch—often called a "DIY Lunchable"—breaks food down into its individual components. This approach serves two purposes: it gives children agency over how they eat, and it introduces them to the concept of food engineering.
When we provide crackers, cheese slices, and turkey rounds separately, we are inviting our children to build. They become the architects of their own meal. This tactile experience is a foundational element of our edutainment philosophy. It turns a standard meal into a hands-on project.
Engineering the Perfect Bite
Building structural integrity in a snack is a simple way to talk about physics. If the cheese is too heavy for the cracker, what happens? If we stack the turkey in a certain way, can we make a tower? These small observations help children understand balance and weight.
Nutrient Mapping
We can use the deconstructed lunch to teach "nutrient mapping." Instead of just saying "eat your protein," we can explain that the turkey provides the building blocks for muscles, while the whole-grain crackers provide the energy to run at recess. Using this language makes the components of the lunch feel like tools for a successful day rather than chores to be eaten.
Bento Box Magic and Color Theory
The visual appeal of a meal is often what determines if a child will take that first bite. Using a bento-style box allows for a variety of colors and textures, which is a perfect time to introduce the concept of color theory and plant biology. These ideas also pair well with creative and healthy school lunch options.
Color theory in the kitchen is about more than just making things look pretty. In nature, different colors often represent different nutrients. For example, orange carrots are high in beta-carotene, while deep green spinach is loaded with iron.
Creating a Rainbow Palette
When packing a bento box, aim for at least four different colors. This not only ensures a variety of vitamins but also makes the meal look like a work of art.
- Red: Strawberries, cherry tomatoes, or red bell pepper strips.
- Yellow/Orange: Mango chunks, yellow carrots, or cheddar cheese cubes.
- Green: Snap peas, cucumber rounds, or grapes.
- Purple/Blue: Blueberries, purple cabbage slaw, or blackberries.
Key Takeaway: Visual variety in a lunchbox reduces "food neophobia" (the fear of new foods) by making the meal look approachable and exciting through color and shape.
The Physics of the Thermos: Bringing Hot Meals to School
As the weather cools down, many children crave something warm. However, a lukewarm pasta dish can be a major turn-off. Understanding the physics of heat retention can help parents ensure that "hot lunch" actually stays hot.
Understanding Thermodynamics
Conduction and convection are the two main ways heat escapes a lunch container. To fight this, we must "prime" the thermos.
Step 1: Boil water and pour it into the empty thermos. Step 2: Let it sit for at least five minutes with the lid on. This warms the inner walls of the container so they do not "steal" heat from the food. Step 3: Empty the water and immediately add piping-hot food (like mac and cheese or chicken noodle soup). Step 4: Seal the lid tightly to prevent heat from escaping via steam.
Liquid vs. Solid Heat Retention
Soups and stews generally stay warm longer than solid foods like nuggets because liquids have a higher heat capacity. If you are sending solid food in a thermos, try adding a little bit of warm sauce or even a damp, warm paper towel at the bottom to create a steam pocket that maintains the temperature.
Sandwich Art and Geometric Fractions
The humble sandwich is a school lunch staple, but it does not have to be boring. We can use sandwiches to teach geometry and fractions while making the meal more engaging for little hands.
Cutting sandwiches into different shapes is a great way to introduce mathematical concepts. Instead of the standard vertical cut, try these variations:
- The Triangle Transformation: Cut a square sandwich diagonally twice to create four small triangles. Discuss how four quarters make a whole.
- The Strip Method: Cut the sandwich into four long rectangles. This is excellent for dipping into hummus or yogurt.
- Cookie Cutter Creations: Use a star or dinosaur-shaped cutter. This reduces waste if you talk about the "negative space" left behind and use the scraps for a "deconstructed" snack later.
Pinwheel Engineering
Pinwheels—tortillas spread with cream cheese and fillings, rolled tightly and sliced—are essentially cylinders. When we slice them, we are creating cross-sections. This is a wonderful way to show kids what the "inside" of a structure looks like. It also makes the food easier to eat for younger children who are still developing their fine motor skills.
The Science of the "Brown Apple" and Food Chemistry
Few things are as disappointing to a child as opening a lunchbox to find brown, mushy apple slices. This is a perfect opportunity to teach a lesson in chemistry right at the kitchen counter. You can find another hands-on version of this idea in these nutritious and fun lunch ideas for kids.
Quick Answer: Apples turn brown because of a chemical reaction called oxidation. When the inside of the apple is exposed to oxygen, enzymes react to create a brown pigment.
The Citric Acid Experiment
Before packing the lunch, you can conduct a small experiment with your child. Place one apple slice in a bowl of plain water and another in a bowl of water mixed with lemon juice (citric acid).
Citric acid acts as an antioxidant. It lowers the pH on the surface of the apple, which slows down the enzyme's ability to react with oxygen. By showing your child how the lemon-water slice stays white, you are teaching them about chemical inhibitors. They will be much more likely to eat the "science project" apples you pack the next day.
Theme Days: Connecting Lunch to STEM Adventures
One way to keep the momentum going throughout the school year is to implement "Theme Fridays." This allows you to connect what your child is eating to larger STEM concepts. For example, if your child is currently obsessed with outer space, you might create a "Galaxy Lunch" featuring dark purple grapes, star-shaped cheese, and "moon rock" popcorn.
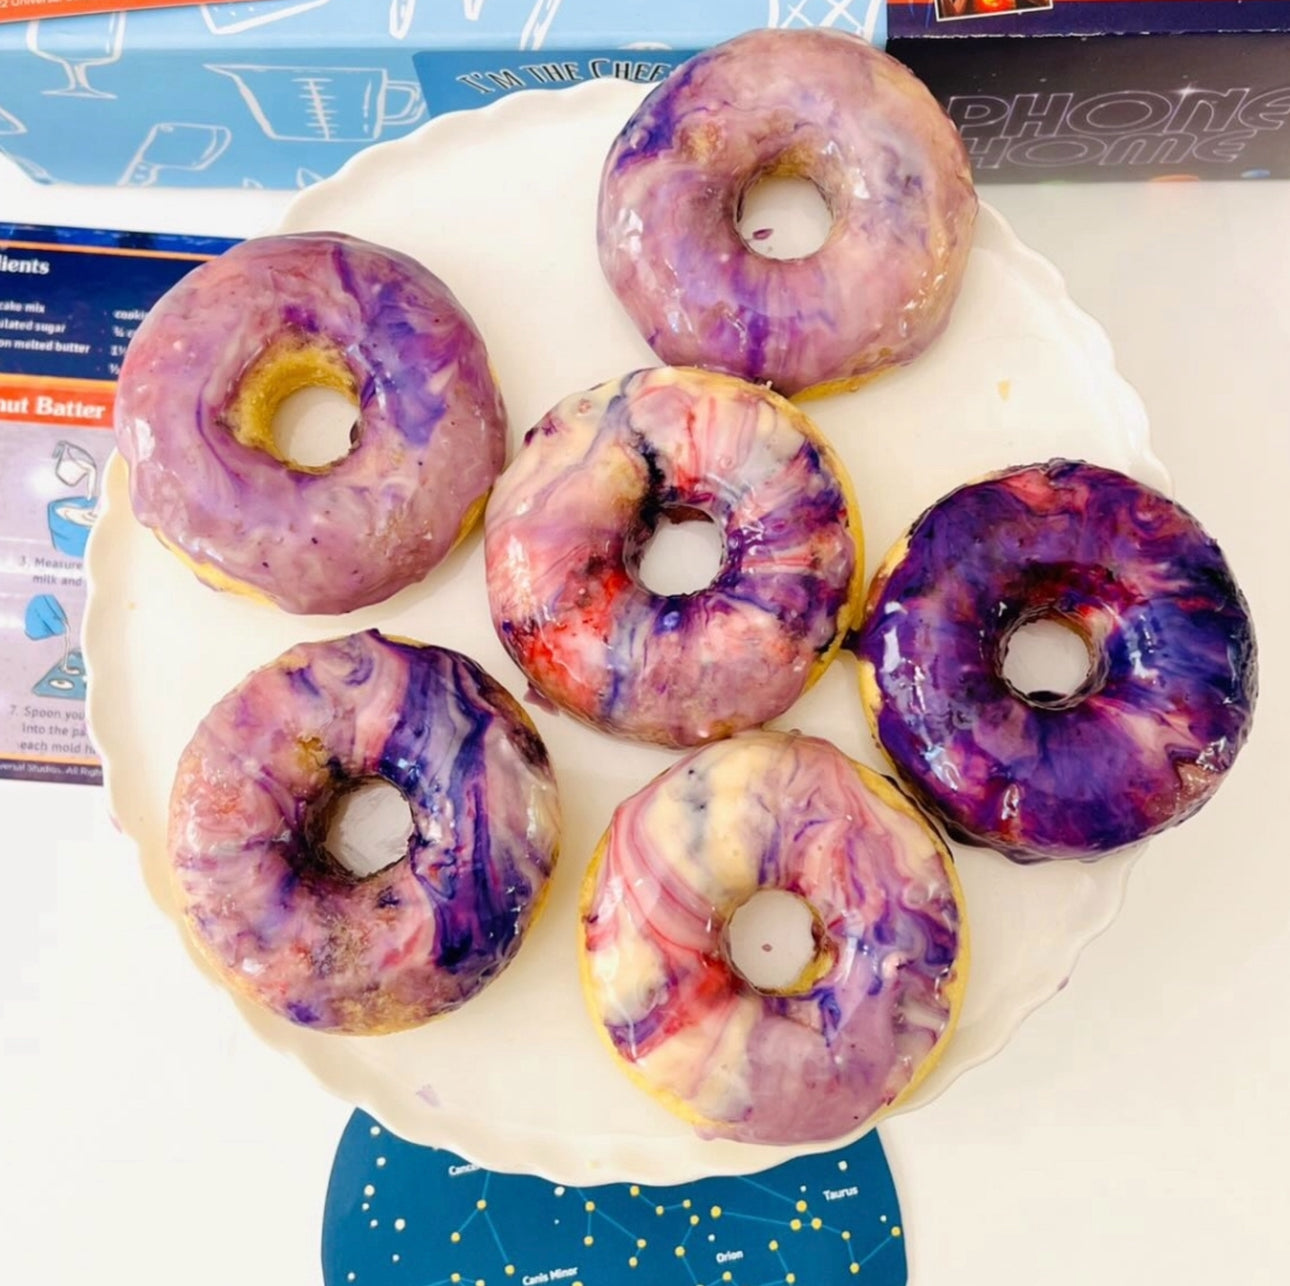
Our kits at I’m the Chef Too! are designed to bridge this gap between fun and education. For instance, if you spent the weekend making treats from our Galaxy Donut Kit, you could pack a leftover donut as a special "cosmic" treat in the Friday lunchbox. This reinforces the learning they did at home—about planets, stars, and the vastness of the universe—while they are at school.
Integrating Earth Science
If you are teaching your child about geology using our Erupting Volcano Cakes kit, you can carry that theme into the lunchbox. Pack "lava" (red pepper hummus), "volcanic rocks" (dark chocolate clusters), and "tectonic plates" (flatbread crackers). When a child can associate their lunch with a fun experiment they did with you, the food becomes part of a larger story.
Biology and Wildlife
For a lesson in zoology, look at our Wild Turtle Whoopie Pies. You can pack a "habitat" lunch with green vegetables representing the forest floor and round snacks representing shells. Discussing how animals eat and stay healthy in the wild can encourage children to think about their own bodies as biological systems that need high-quality fuel.
Scaffolding Skills: Age-Appropriate Lunch Prep
We often think of lunch packing as a parental chore, but it is actually a vital life skill. In education, we use a concept called "scaffolding"—providing support that is gradually removed as the learner gains competence.
For Preschoolers (Ages 3–5)
At this age, the goal is exposure and fine motor development.
- The Task: Let them choose between two healthy options (e.g., "Do you want blueberries or strawberries?").
- The Learning: Decision-making and identifying colors/shapes.
- The Art: Let them use a plastic (child-safe) cutter to make one shape in their cheese.
For Elementary Students (Ages 6–10)
This is the "Golden Age" of kitchen STEM.
- The Task: Have them help with the "Apple Experiment" mentioned above or have them measure out a half-cup of crackers.
- The Learning: Measurement, fractions, and simple chemical reactions.
- The Responsibility: They can be responsible for placing the items into the bento box sections, focusing on "visual balance."
For Middle Schoolers (Ages 11+)
By this stage, they can take the lead on the "Engineering" phase.
- The Task: They should plan a week of lunches based on a budget or a caloric/nutrient goal.
- The Learning: Economics, advanced nutrition, and time management.
- The Responsibility: Packing the entire lunch the night before to understand the value of preparation.
Strategies for the Busy Educator and Parent
We know that despite the best intentions, mornings are often a race against the clock. The key to maintaining "fun" and "educational" lunches is to build a system that manages the mess and the stress. For more ideas, read this guide to making lunch with kids fun and educational every day.
The Sunday "Prep Lab"
Spend 30 minutes on Sunday afternoon prepping the "foundations" of the week. Wash and dry all fruit, slice the vegetables, and portion out dry snacks like pretzels or popcorn into reusable containers.
Why this works: When the components are already prepared, the "assembly" phase (where the creativity happens) is much faster. You are not stuck chopping carrots at 7:00 AM; instead, you are spending two minutes talking to your child about why the carrots are orange.
The "Must-Have" Tool Kit
You do not need a kitchen full of gadgets, but a few specific supplies can make a world of difference:
- Leak-proof containers: Essential for dips like hummus or yogurt.
- Silicone muffin liners: These are excellent for creating extra "zones" in a large bento box.
- Insulated water bottles: Keeping water cold is just as important as keeping soup hot.
Lunch as a Social-Emotional Tool
In the classroom, lunch is more than just a break; it is a social-emotional learning (SEL) period. Educators often observe that children who have engaging, varied lunches are more likely to interact with their peers about what they are eating.
Encouraging food curiosity in a group setting helps build empathy and cultural awareness. If one child brings kimbap (Korean seaweed rolls) and another brings a turkey wrap, they are seeing different versions of "the cylinder" in food engineering. This can spark a conversation about how different cultures use similar ingredients in different ways.
As a parent, you can encourage this by including a "conversation starter" in the lunchbox. This could be a small card with a science fact or a joke.
- Example Fact: "Did you know that honey is the only food that never spoils? Archaeologists found 3,000-year-old honey in an Egyptian tomb, and it was still edible!"
- Example Fact: "Strawberries are the only fruit that grow their seeds on the outside!"
These small additions make the lunchbox a bridge between home and school, giving the child something fun to share with their friends.
Creating a Positive Relationship with Food
The ultimate goal of all these "fun" ideas is to foster a lifelong positive relationship with food and learning. We want children to see food not just as something that stops hunger, but as something that is fascinating, artistic, and scientifically complex.
Avoiding the "good food vs. bad food" trap is crucial. Instead, focus on "anytime foods" (nutrient-dense) and "sometimes foods" (treats). When we frame a special snack—like a treat from our Chef's Club subscription—as a reward for a week of hard work and curiosity, we are teaching balance.
Bottom line: Engaging a child’s mind through STEM and art during the lunch-making process increases their "buy-in," leading to better nutrition and less food waste.
The Role of Educators in the Lunchroom
If you are a teacher or a homeschool co-op leader, you can use lunch to reinforce your morning lessons. If you just taught a lesson on the solar system, mention the "spheres" and "orbits" found in the fruit salad.
Our school and group programmes often highlight how food can be a universal language for teaching complex subjects. When children see their teachers or leaders showing genuine interest in the science of food, it validates their own curiosity. Educators can facilitate "tasting circles" where kids describe the texture (physics) and flavor (chemistry) of their snacks using descriptive vocabulary.
Final Steps for a Successful Week
To wrap up, remember that you do not have to be an artist or a scientist to make school lunches fun. It is about the small moments of engagement.
- Start small: Pick one "theme" or "experiment" for the week.
- Involve them: Give them the "scaffolded" tasks that match their age.
- Focus on the why: Use the language of STEM to explain why we prime the thermos or why we use lemon on apples.
- Celebrate the win: If the lunchbox comes home empty, ask them what their favorite "discovery" was.
Our mission at I’m the Chef Too! is to blend food, STEM, and the arts into experiences that create joyful memories. By applying these principles to the daily school lunch, you are turning a routine task into a consistent source of "edutainment" that fuels both the body and the mind. When you're ready to extend that discovery beyond lunch, join The Chef's Club for a new adventure every month.
"When we treat the kitchen as a laboratory and the lunchbox as a gallery, we teach our children that learning doesn't stop when the school bell rings."
FAQ
How can I keep my child's lunch cold until recess without a refrigerator?
The best way to maintain a safe temperature is to use a high-quality insulated lunch bag with at least two ice packs. Placing one ice pack on the bottom and one on top of the food creates a "cold zone" that mimics a refrigerator's environment. You can also freeze a juice box or a yogurt tube to act as a third, edible ice pack that will thaw just in time for lunch.
What are some nut-free alternatives for "Lunchbox Dippers"?
Since many schools are nut-free zones, sunflower seed butter or soy nut butter are excellent protein-rich alternatives for dipping apples or celery. Hummus, Greek yogurt mixed with honey, or even a mild bean dip are also great options that provide the "dip factor" without the allergy risk. Always check your specific school’s policy regarding "look-alike" nut butters, as some prefer they are clearly labeled.
My child is a very picky eater; will these fun ideas actually work?
While no method is a magic fix, involving picky eaters in the "engineering" phase significantly reduces their resistance. Start with very small changes, like using a cookie cutter on a food they already like. By focusing on the STEM aspects—like the "negative space" of a cut sandwich or the "oxidation" of an apple—you shift the focus from the act of eating to the act of observing, which often lowers anxiety around food.
How do I stop bread from getting soggy in a packed sandwich?
Soggy bread is usually caused by moisture from the fillings (like tomatoes or pickles) or the condiments migrating into the bread. To prevent this, create a "moisture barrier" by spreading a thin layer of butter, cream cheese, or mayo to the very edges of both slices of bread. Place "wet" ingredients like lettuce or sliced tomatoes in the center of the sandwich, sandwiched between layers of meat or cheese.