Vampire Craft for Kids: Spooky Fun & Learning Adventures

Table of Contents
- Introduction
- Why Vampire Crafts? More Than Just Spooky Fun
- Getting Started: Your Vampire Crafting Headquarters
- A Gallery of Frightfully Fun Vampire Craft Ideas
- Beyond the Craft Table: Extending the Learning
- The I'm the Chef Too! Approach to Hands-On Learning
- Tips for Parents and Educators
- Frequently Asked Questions (FAQ)
- Conclusion
Have you ever watched your child's eyes light up with a spark of mischievous delight, eagerly planning their next imaginative adventure? Whether it's the thrill of Halloween approaching or simply a love for playful monsters, the world of vampires holds a unique charm for kids – especially when those vampires are more silly than scary! Creating a vampire craft for kids isn't just about making a spooky decoration; it's a fantastic, hands-on journey into creativity, skill development, and unforgettable family fun.
In this comprehensive guide, we're diving deep into the art of vampire crafting. We’ll explore a vast array of creative ideas, from classic paper plate characters to clever upcycled creations and interactive puppets. More than just providing instructions, we’ll uncover the incredible educational benefits hidden within each snip, glue, and dab of paint, showing how these activities foster crucial developmental skills. We’ll also share practical tips for parents and educators to make every crafting session a success, and reveal how our mission at I'm the Chef Too! aligns perfectly with these engaging, hands-on learning experiences. Get ready to transform everyday materials into charming, not-so-frightful vampire masterpieces that spark curiosity and creativity in your little ones.
Introduction
There’s a unique magic that unfolds when children get to create something with their own hands. It’s a blend of concentration, imagination, and the sheer joy of seeing an idea come to life. Halloween, in particular, unleashes a torrent of creative energy, with its whimsical monsters and opportunities for imaginative play. Among these beloved characters, the vampire, often portrayed in children's media as more goofy than ghoulish, captures a special place in young hearts. This isn't about blood-curdling frights; it's about friendly fangs, swishy capes, and the thrill of making a not-so-scary creature come to life.
This blog post is your ultimate guide to embracing the playful side of the vampire legend through engaging, educational crafts. We aim to equip parents, guardians, and educators with a treasure trove of ideas for vampire crafts for kids that are not only fun but also incredibly beneficial for a child's development. From simple paper plate designs that even the littlest hands can manage, to more intricate projects that challenge older children, we've got something for every age and skill level. We'll show you how these activities naturally blend art, fine motor skill development, problem-solving, and even early STEM concepts, transforming craft time into a powerful "edutainment" experience. So, gather your supplies, prepare your imagination, and let’s embark on a crafting adventure that promises laughter, learning, and plenty of memorable moments.
Why Vampire Crafts? More Than Just Spooky Fun
At first glance, a vampire craft might seem like just a seasonal activity, but dig a little deeper, and you’ll discover a rich vein of developmental benefits. For us at I'm the Chef Too!, our mission is to blend food, STEM, and the arts into one-of-a-kind "edutainment" experiences, and the principles behind a great craft project align perfectly with our philosophy. These hands-on activities are a powerful screen-free alternative that sparks curiosity and creativity, encouraging children to explore, experiment, and express themselves in tangible ways.
Let’s explore the profound impact vampire crafts, and crafting in general, can have on a child’s growth:
Cultivating Creativity and Imagination
When a child sets out to make a vampire, they aren't just following instructions; they're envisioning a character. Will their vampire be friendly or silly? What color will its cape be? This process fuels their imagination, allowing them to transform simple materials into a unique creation. They learn to think outside the box, make choices, and bring their internal world to life.
Sharpening Fine Motor Skills and Hand-Eye Coordination
Crafting is a workout for little hands! Cutting with scissors, gluing small pieces, peeling stickers, painting details – all these actions require precision and control. These activities strengthen the small muscles in the fingers and hands, crucial for tasks like writing, tying shoelaces, and eventually, even playing musical instruments or performing delicate scientific experiments. The coordination between what their eyes see and what their hands do is constantly being refined.
Boosting Problem-Solving Abilities
"How do I make the fangs pointy?" "Where should the eyes go so my vampire looks surprised?" Crafting often presents mini-challenges that encourage children to think critically and find solutions. They learn to adapt, iterate, and understand that sometimes, the first attempt isn't the final one. This resilience and analytical thinking are invaluable life skills.
Learning to Follow Instructions (and When to Deviate!)
Many crafts involve a sequence of steps. Following these instructions helps children develop listening skills, attention to detail, and the ability to complete a task from beginning to end. However, the beauty of art also lies in its flexibility. Kids learn when it's okay to personalize, to add their own flair, or to try a different approach, fostering a healthy balance between structure and innovation.
Encouraging Self-Expression and Building Confidence
Every vampire craft made by a child is a reflection of their unique personality. There's no "right" or "wrong" way to be creative. The pride a child feels when they hold up their completed project, something they made themselves, is immense. This sense of accomplishment builds self-esteem and confidence, empowering them to tackle new challenges.
Facilitating Family Bonding and Screen-Free Engagement
In our fast-paced, digital world, screen-free activities that bring families together are more important than ever. Crafting a vampire side-by-side with your child offers a wonderful opportunity for quality time, conversation, and shared laughter. These moments create lasting memories and strengthen family connections, which is a core value we champion at I'm the Chef Too!.
Just as our culinary STEM kits teach complex subjects through tangible, hands-on, and delicious cooking adventures, vampire crafts utilize simple materials to teach fundamental skills. It’s all about making learning engaging and accessible, transforming abstract concepts into something children can touch, feel, and be proud of.
Getting Started: Your Vampire Crafting Headquarters
Before the crafting fun begins, a little preparation goes a long way in ensuring a smooth, enjoyable, and less messy experience for everyone. Think of it like setting up a science lab or a bakery station – the right environment makes all the difference!
Setting Up for Success: The Crafting Zone
Choose an area that is easy to clean. This might be the kitchen table, a designated craft table, or even a spot on the floor covered with a plastic tablecloth, old newspaper, or a craft mat. This simple step can dramatically reduce stress about spills and glue marks, allowing you and your child to relax and enjoy the creative process. Good lighting is also helpful for seeing details and colors accurately.
Gathering Your Materials: Everyday Items for Extraordinary Creations
One of the most appealing aspects of vampire crafts is that they often use common household items or inexpensive supplies readily available at any craft or dollar store. This makes them budget-friendly and accessible. Here’s a basic list of what you might need:
- Paper Plates: The ultimate versatile base for many crafts.
- Construction Paper: Black, red, white, purple, and flesh tones are perfect for vampire features.
- Recycled Materials: Empty toilet paper rolls, paper towel rolls, brown paper bags (lunch bags).
- Paint: Acrylic or tempera paints in various colors.
- Googly Eyes: A must-have for adding personality to any creature.
- Scissors: Child-safe scissors are essential.
- Glue: Glue sticks for paper, liquid school glue for stronger bonds.
- Markers, Crayons, Colored Pencils: For drawing details, coloring, and personalizing.
- Optional Enhancements: Cotton balls, pipe cleaners, glitter, felt scraps, popsicle sticks, yarn.
Having all your supplies ready and organized before you start minimizes interruptions and keeps the creative flow going.
Adult Supervision: The Implicit Understanding
While we encourage children's independence in their creative process, it's always understood that adult supervision is key for kitchen activities, crafting, or any hands-on project. This ensures safety with tools like scissors, helps with tricky gluing, and provides guidance without stifling creativity. Your presence also reinforces the idea of family bonding and shared experiences. We know that every kit we send out at I'm the Chef Too! implies adult involvement to ensure both safety and the most engaging experience.
Encouraging Independence Within Boundaries
Once the setup is complete, let your child lead! Offer choices, ask open-ended questions ("What kind of fangs do you think your vampire needs?"), and allow them to make their own decisions about colors, shapes, and placement. Resist the urge to "fix" their work or make it look perfect. The beauty lies in their effort and unique vision, not in a flawless outcome. This approach builds confidence and reinforces the idea that their ideas are valued.
With your crafting headquarters ready, it’s time to dive into the exciting world of vampire crafts!
A Gallery of Frightfully Fun Vampire Craft Ideas
The world of vampire crafts is incredibly diverse, offering something for every age, skill level, and attention span. We’ve curated a collection of ideas that not only promise fun but also subtly weave in educational elements, much like how we at I'm the Chef Too! develop our kits to teach STEM concepts through delicious culinary adventures. Each craft below is designed to spark curiosity and creativity, using accessible materials to create memorable "edutainment" moments.
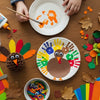
1. Paper Plate Vampires: Classic & Versatile
Paper plates are the unsung heroes of the crafting world. They’re inexpensive, readily available, and incredibly versatile, making them a perfect starting point for a vampire craft for kids. Their circular shape naturally lends itself to creating faces and bodies, providing an easy-to-manage canvas for young crafters.
The Appeal of Paper Plates:
- Affordable: You can often buy large packs for a low cost, perfect for group activities or multiple projects.
- Accessible: Found in any grocery or party supply store.
- Easy to Cut & Paint: The material is soft enough for child-safe scissors and takes paint well.
How to Create a Classic Paper Plate Vampire:
- The Head: Start by painting one paper plate with a flesh-colored paint (or light gray/green for a spookier look!). Let it dry completely. This step introduces children to color mixing if they need to create their own flesh tone, and practices careful painting within a boundary.
- Hair Power: Cut out a wavy or spiky "widow's peak" haircut from black construction paper. Glue this onto the top of the painted plate. This is a great exercise for scissor skills and understanding shapes.
- Expressive Eyes: Glue two large googly eyes onto the face. For younger children, pre-drawn eyes or paper cut-outs work just as well. This helps with spatial reasoning – where do the eyes go on a face?
- A Friendly Frown (or Grin!): Cut a large mouth shape from red paper. Then, cut two small, pointy triangles from white paper for the fangs. Glue the mouth onto the face, and then tuck the fangs slightly under the top edge of the mouth, making them peek out. This introduces geometric shapes (triangles) and precise gluing.
- The Caped Crusader: Cut another paper plate in half. Paint these two halves red or black – these will be the cape pieces. Cut a collar shape from a small strip of black paper. Once dry, glue the cape pieces to the back of your vampire's head, fanning them out like a dramatic cape. Add the collar to the front, at the base of the head.
- Finishing Touches: Add eyebrows from black paper strips for more expression. A red construction paper bow tie glued to the collar adds a touch of classic Dracula charm.
Educational Tie-Ins: This craft is rich in developmental opportunities:
- Color Recognition: Identifying and using specific colors (red, black, flesh tone).
- Shape Identification: Working with circles (plates), triangles (fangs), and various other shapes.
- Scissor Skills: Practicing cutting along lines, curves, and angles.
- Gluing & Adhesion: Learning about different types of glue and how to apply them effectively.
- Sequencing: Following a series of steps in a specific order.
Variations:
- Ears: Cut pointy ears from leftover paper plate scraps and paint them flesh color, then glue them to the sides of the head.
- Texture: Glue on cotton balls for fluffy hair or a felt cape.
- Vampire Bat: Cut out bat wings from black paper and glue them behind the head instead of a cape.
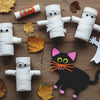
2. Upcycled Wonders: Toilet Paper Roll & Paper Bag Vampires
Embracing sustainability in crafting is a wonderful lesson for kids, showing them that "trash" can be transformed into treasure. Empty toilet paper rolls and humble paper bags become fantastic foundations for a vampire craft for kids, fostering creativity while being kind to the planet.
Eco-Friendly Crafting: Using recycled materials teaches children about resourcefulness and the importance of upcycling, turning household discards into imaginative playthings.
Toilet Paper Roll Vampire: These little cylindrical friends are perfect for creating stand-up figures.
- Body Base: Paint an empty toilet paper roll black or purple, or wrap it in colored construction paper. This forms the vampire's body.
- Facial Features: From colored paper (white or light gray for the face area), cut out a face shape that will fit on the roll. Add small googly eyes, a drawn-on mouth, and tiny white paper fangs. Glue these onto the paper roll.
- Hair & Cape: Cut wavy black hair from construction paper and glue it to the top. For the cape, cut a semi-circle from black or red paper. You can glue this directly to the back of the roll, or for a more dramatic effect, make two small slits on either side of the roll, slide the cape ends through, and glue them inside.
- Details: Add a small red bow tie from paper or fabric, or draw on a waistcoat.
Benefits:
- Imaginative Play: Once complete, these little vampires are ready for puppet shows or role-playing.
- Fine Motor Skills: Wrapping, cutting small details, and gluing.
Paper Bag Puppet Vampire: A brown paper lunch bag offers a ready-made puppet structure, making this a favorite for storytelling.
- The Mouth/Head: The folded bottom flap of the paper bag naturally becomes the vampire's mouth when you put your hand inside. Glue a white or flesh-colored paper rectangle onto the main body of the bag for the face, extending slightly onto the flap.
- Features: Glue on googly eyes, draw eyebrows, and add those essential paper fangs to the bottom flap. Cut out spiky black hair and glue it to the top of the head.
- Cape & Clothes: Cut a large semi-circle or rectangle from black or red paper for the cape and glue it to the back. Add a small bow tie and perhaps some paper "clothes" (a waistcoat, cuffs) to the front of the bag.
Benefits:
- Storytelling & Dramatic Play: Children can put their hand inside and bring their vampire to life, creating dialogues and narratives.
- Letter Recognition: This can be a fantastic "Letter V" activity for preschoolers, associating the sound with the vampire puppet.
- Creativity: Encourages kids to think about character design and personality.
Educational Tie-Ins: These upcycled crafts emphasize:
- Recycling & Environmental Awareness: Understanding that materials can have a second life.
- Fine Motor Precision: Handling smaller paper pieces and intricate gluing.
- Language & Literacy: Enhancing vocabulary through storytelling and character development.
- Problem-Solving: Figuring out how to attach features to a curved surface or a floppy bag.
3. Popsicle Stick & Shape Vampires: Building & Geometry
These crafts move beyond flat surfaces, engaging children in three-dimensional construction and fundamental geometric principles. They are excellent avenues for developing spatial reasoning and attention to detail.
Popsicle Stick Vampires: Popsicle sticks are sturdy, inexpensive, and fantastic for building.
- The Base: Line up 5-7 standard popsicle sticks side-by-side. Glue a few other sticks horizontally across the back to hold them all together, forming a solid "body." This step introduces basic structural engineering.
- Vampire Features: Once the glue is dry, flip it over. Paint the front with a flesh tone. From construction paper or foam, cut out black hair, pointy ears, a red bow tie, googly eyes, and of course, white fangs. Glue these elements onto the stick base.
- Variations: Attach a magnet to the back to turn it into a fridge decoration. Add a craft stick handle to the bottom to make a stick puppet.
Benefits:
- Construction Skills: Understanding how to join pieces to create a stable structure.
- Creativity with Constraints: Learning to work within the shape and texture of the sticks.
Shape Vampires: This project ingeniously blends art with early math concepts, making learning shapes fun and tangible.
-
The Concept: The idea is to build a vampire character entirely out of pre-cut or self-cut 2D shapes. Think:
- Head: A large circle.
- Eyes: Two smaller circles.
- Fangs & Ears: Triangles.
- Body: A rectangle or trapezoid.
- Cape: A large semi-circle or two triangles joined.
- Shoes: Rectangles.
- How-to: Provide children with a variety of pre-cut shapes in different colors, or encourage them to cut their own. Challenge them to assemble their vampire using only these shapes. This is a fantastic opportunity to name and identify each shape as they use it.
-
Educational Tie-ins: This craft is a powerhouse for learning:
- Geometry: Hands-on identification of circles, squares, rectangles, triangles, semi-circles, trapezoids.
- Spatial Reasoning: How do different shapes fit together? What happens when you overlap them?
- Counting: Counting how many triangles for fangs, how many circles for eyes.
- Problem-Solving: Figuring out which shapes best represent different body parts.
Thinking about building and shapes makes us realize how every activity, even cooking, is full of hidden lessons. Just like our Galaxy Donut Kit lets kids explore astronomy by creating their own edible solar system, these crafts turn simple materials into a structured learning experience. They both bridge the gap between abstract concepts and tangible, engaging activities.
4. Interactive & Personal Vampires: Puppets, Bobble-Heads & Photo Keepsakes
These vampire crafts add an extra layer of engagement by allowing children to interact with their creations or personalize them in a deeply meaningful way. These projects encourage storytelling, dramatic play, and a sense of self.
Vampire Puppets (Beyond Paper Bags & TP Rolls): While we touched on paper bag and toilet roll puppets, the world of puppet making is vast.
- Stick Puppets: Attach any paper vampire creation (from a coloring page, a drawing, or a simple cut-out) to a craft stick. These are easy for little hands to manipulate.
- Finger Puppets: Smaller versions of vampire heads or full bodies can be made to slip onto fingers, perfect for spontaneous storytelling.
- Benefits: Puppets are incredible tools for fostering language development, encouraging dialogue, role-playing different scenarios, and expressing emotions in a safe, creative way. They're also fantastic for group play and impromptu theatrical productions!
Bobble-Head Vampires: Adding a bit of movement makes a craft irresistibly fun.
- The Mechanism: The secret to a bobble-head is an accordion-folded paper spring. Cut two long, thin strips of paper (about 1 inch wide, 8-10 inches long). Glue the ends perpendicular to each other, then fold them over each other repeatedly, creating a spring.
- Assembly: Create a vampire body (paper, cardstock, or even a toilet roll base). Make a separate vampire head. Attach one end of your paper spring to the body and the other end to the back of the head.
- Interaction: When touched, the head will delightfully wobble and bounce!
- Benefits: This activity introduces children to a simple mechanical principle (the spring), cause-and-effect, and adds an element of surprise and delight to their creation. It's a bit more advanced in terms of fine motor control for assembly.
Photo Vampires: A Spooky Self-Portrait: This is a particularly charming and memorable craft, especially for families.
- The Idea: Print a picture of your child's face, preferably a close-up with a funny or neutral expression.
- The Body: Provide a pre-drawn or printed template of a vampire body (complete with cape, fangs, and perhaps some slightly spooky clothes) but with a blank space for the head.
- Personalization: Children glue their own face onto the vampire body.
-
Benefits:
- Personal Connection: Kids adore seeing their own faces integrated into a craft.
- Humor: The juxtaposition of their sweet face with a goofy vampire body often leads to giggles.
- Keepsake: These make wonderful, personalized Halloween decorations and cherished mementos.
- Self-Recognition: Helps younger children recognize themselves and their features.
Educational Tie-Ins: These interactive and personal crafts promote:
- Dramatic Arts & Storytelling: Enhancing narrative skills and emotional intelligence.
- Basic Physics: Understanding how simple structures like springs create movement.
- Self-Esteem & Identity: Fostering a positive self-image and celebrating individuality.
- Memory & Connection: Creating tangible reminders of family fun.
For those looking for structured, educational activities that consistently deliver engaging experiences, our monthly subscription is ideal. A new adventure is delivered to your door every month, perfect for continuous learning and fun! Join The Chef's Club and enjoy free shipping on every box.
5. Printable & Coloring Vampires: Low-Prep Fun
Sometimes, you need a quick, low-prep activity that still delivers maximum fun and learning. Printable vampire crafts and coloring pages are perfect for those moments, offering structured creativity with minimal setup.
The Ease of Printables: Printable templates simplify the crafting process by providing pre-designed elements. They are excellent for:
- Scissor Skill Practice: Outlines provide clear guides for cutting.
- Following Instructions: Assembling a cut-and-paste craft involves a sequence of steps.
- Instant Engagement: No need to draw, just print and go!
Cut-and-Paste Vampires:
- Preparation: Download and print a "build a vampire" craft template. These typically feature separate pieces for the head, hair, cape, body, fangs, and eyes.
- Coloring (Optional): Children can color all the separate parts of their vampire before cutting them out. This adds a layer of artistic expression and makes the final product unique.
- Cutting: Using child-safe scissors, kids carefully cut out each component. This is prime real estate for developing fine motor control and precise cutting skills.
- Assembly: Following simple visual or written instructions, children glue the pieces together onto a background paper or directly onto each other. For example, glue the head onto the body, then add the hair, eyes, fangs, and cape.
- Tips for Durability: If your child is likely to play with their finished vampire, print the template on cardstock instead of regular printer paper. This makes the craft more durable and prevents marker ink from bleeding through.
Educational Tie-Ins:
- Fine Motor Control: The intricate cutting required for many templates is excellent for dexterity.
- Pre-Reading Skills: Following visual instructions and sequencing events.
- Color Theory: Choosing appropriate colors for their vampire.
- Concentration: Staying focused on the task until completion.
Line Art Coloring Pages: For a quieter, more meditative activity, vampire-themed line art coloring pages are fantastic.
- Concept: These are more than just simple coloring pages. Line art involves adding patterns, textures, and lines within the pre-drawn outlines of a vampire. Think Zentangle-style designs for older kids or simple patterns for younger ones.
- How-to: Provide a printed vampire outline. Encourage children to use different colors, markers, or even gel pens to fill in sections with varied patterns – zigzags, dots, swirls, stripes, checkerboards.
-
Benefits:
- Focus & Mindfulness: The repetitive nature of creating patterns can be very calming and help improve concentration.
- Artistic Expression: Allows for creative exploration within a defined boundary.
- Hand Strength: Gripping and controlling coloring tools.
- Quiet Activity: Perfect for winding down or for a focused individual task.
Educational Tie-Ins:
- Pattern Recognition & Creation: Developing an understanding of repeating elements.
- Color Blending & Harmony: Experimenting with how different colors look together.
- Attention to Detail: Focusing on small areas within the design.
Just as these vampire crafts offer a complete hands-on experience, so do our specially designed kits. Explore our full library of adventure kits available for a single purchase in our shop. Browse our complete collection of one-time kits.
Beyond the Craft Table: Extending the Learning
Completing a vampire craft is a fantastic achievement, but the learning and fun don't have to stop there! At I'm the Chef Too!, we believe in extending "edutainment" beyond a single activity, encouraging children to connect their experiences and explore new avenues. Here are some ideas to make your vampire crafts part of a bigger adventure:
Storytelling and Dramatic Play
Once your child has created their vampire puppets (whether from paper bags, toilet rolls, or popsicle sticks), encourage them to put on a show!
- Develop a Plot: Ask questions like, "What is your vampire's name? Where does it live? What is its favorite (not-so-scary) snack?"
- Character Voices: Experiment with different voices for each vampire character.
- Audience Engagement: Invite family members to be the audience, or even have the puppets interact with other toys. This fosters language development, narrative skills, and boosts confidence in public speaking (even if it's just for stuffed animals!).
Decorative Displays
Your child's vampire crafts are more than just fun projects; they're unique works of art!
- Halloween Decor: Use them to decorate your home for Halloween. Hang paper plate vampires on walls, place toilet roll vampires on shelves, or create a "vampire's lair" in a corner of the room.
- Gift-Giving: A handmade vampire craft makes a thoughtful and personal gift for grandparents or friends during the spooky season. This teaches children about pride in their work, aesthetics, and the joy of sharing.
Themed Snacks: From Craft to Culinary Adventure
This is where the magic of I'm the Chef Too! truly shines, connecting the world of crafting to the delicious adventures of the kitchen. After making a playful vampire, why not extend the theme to a culinary creation?
- "Bloody" Smoothies: Blend red fruits like strawberries, raspberries, and cherries for a delicious, vampire-approved drink.
- "Swamp Slime" Pudding Cups: Green-tinted pudding with cookie crumb "dirt" and gummy worms can be a fun, spooky treat.
- Vampire Fang Cookies: Bake simple sugar cookies and use white icing to draw fangs. Add a drop of red food coloring for a "blood" effect. This connection between craft and food reinforces learning in a multi-sensory way. After crafting, imagine making a spooky treat that ties into the fun! We believe in hands-on learning that extends to the kitchen. Our Erupting Volcano Cakes Kit is a fantastic example of blending science with baking, creating a delicious and bubbly experience that’s just as engaging as a craft.
Ready for more engaging "edutainment" that sparks curiosity and creativity? Join The Chef's Club and receive a new culinary STEM adventure delivered right to your door every month with free shipping! Each box is a complete experience, containing pre-measured dry ingredients and specialty supplies, making it incredibly convenient for busy families. Join The Chef's Club today!
The I'm the Chef Too! Approach to Hands-On Learning
At I'm the Chef Too!, we wholeheartedly believe in the power of hands-on learning, and our philosophy resonates deeply with the benefits seen in engaging craft activities like making a vampire craft for kids. Our mission is to seamlessly blend food, STEM (Science, Technology, Engineering, and Math), and the arts into one-of-a-kind "edutainment" experiences that ignite curiosity and creativity in children. Just as a simple paper plate can become a gateway to understanding shapes and developing fine motor skills, our culinary adventures transform everyday ingredients into exciting lessons in chemistry, engineering, and cultural exploration.
We are committed to:
- Sparking Curiosity and Creativity: Every I'm the Chef Too! kit is designed to inspire children to ask "why?" and "how?", fostering a lifelong love for learning through imaginative cooking and crafting.
- Facilitating Family Bonding: Our activities are perfect for families to do together, creating precious screen-free moments where parents and children can connect, learn, and laugh in the kitchen. We understand that these shared experiences build strong family foundations.
- Providing a Screen-Free Educational Alternative: In an increasingly digital world, we offer a refreshing and tangible way for children to learn and develop essential skills away from screens, promoting active engagement and real-world exploration.
- Our Unique Approach: Our kits teach complex subjects – like the physics of states of matter or the biology of yeast – through delicious, tangible cooking adventures. Developed by mothers and educators, each box is thoughtfully crafted to be educational, fun, and easy for families to use. We provide pre-measured dry ingredients and specialty supplies, taking the guesswork and prep work out of your hands, so you can focus entirely on the joy of creating and learning with your child.
Just as these vampire crafts offer a complete hands-on experience, so do our specially designed kits. We pour the same passion for discovery and skill-building into every box. Our culinary adventures take children on journeys to build edible volcanoes, create galaxy donuts, or even explore ancient civilizations through baking. The emphasis is always on the process, the exploration, and the delightful outcome. Explore our full library of adventure kits available for a single purchase in our shop. You'll find a wide variety of themes that complement the creative spirit of crafting. Browse our complete collection of one-time kits.
Tips for Parents and Educators
Guiding children through creative projects like making a vampire craft for kids is a rewarding experience. Here are some tips to ensure that every session is not only fun but also genuinely beneficial for your child's growth and development:
-
Embrace the Mess! Art and crafting, by nature, can be messy. Instead of trying to prevent every spill or smudge, prepare for it. Cover surfaces, have wipes or paper towels ready, and dress children in play clothes. A relaxed approach to mess encourages more freedom in creation. Remember, a little mess often means a lot of learning and exploration is happening!
-
Focus on the Process, Not Just the Perfect Outcome. It's easy to get caught up in how the finished craft should look. However, the real value for children lies in the journey: the cutting, gluing, painting, and decision-making. Celebrate their effort, their choices, and their unique artistic vision, even if their vampire doesn't look exactly like the example. Avoid "fixing" their work unless they ask for help.
-
Adapt to Age and Skill Level. Not all crafts are suitable for all ages.
- Younger Children (Toddlers/Preschoolers): Focus on large pieces, simple gluing (glue sticks are great!), tearing paper, and pre-cut shapes. Emphasize sensory exploration and basic color recognition. Short attention spans mean shorter, simpler projects.
- Older Children (School-Age): Introduce more intricate cutting, detailed drawing, multi-step instructions, and opportunities for independent design. Challenge them with problem-solving ("How can we make the cape stand out more?").
-
Encourage Experimentation. Provide a variety of materials and let children experiment. What happens if they use yarn for hair instead of paper? Can they mix paints to create a new color for their vampire's skin? This fosters scientific thinking and encourages them to test hypotheses in a creative context.
-
Celebrate Every Effort. Praise specific actions and efforts rather than just the final product. "I love how you chose those bright colors for the cape!" or "You worked so patiently to cut out those tiny fangs!" This builds intrinsic motivation and helps children understand what they did well. Display their finished crafts proudly to show you value their work.
-
Safety First (Always). Always supervise children when using scissors, glue guns (for older kids), or paints. Teach proper handling of tools and ensure good ventilation if using strong-smelling glues or paints. For I'm the Chef Too! activities, we always frame kitchen activities with an implicit understanding of adult supervision and safety, just as you would with any craft.
For those looking for structured, educational activities that consistently deliver engaging experiences, our monthly subscription is ideal. A new adventure is delivered to your door every month, perfect for continuous learning and fun! Our prepaid plans (3, 6, and 12-month options) are perfect for gifting or long-term enrichment, ensuring a steady stream of "edutainment" that complements the hands-on fun of crafting. Join The Chef's Club and enjoy free shipping on every box.
Frequently Asked Questions (FAQ)
1. What age are vampire crafts suitable for?
Vampire crafts can be adapted for a wide range of ages, from toddlers to pre-teens. For toddlers and preschoolers (2-5 years), focus on simple activities like coloring pre-drawn vampire outlines, gluing large pre-cut shapes, or finger painting. Older children (6-12 years) can handle more intricate cutting, multi-step assembly, drawing details, and designing their own unique vampire characters with minimal guidance. The key is to select projects that match their developmental stage and fine motor skills.
2. What are the best materials for vampire crafts?
The beauty of vampire crafts is that they often utilize inexpensive and readily available materials. Some of the best include:
- Paper-based: Construction paper (black, red, white, flesh tones), paper plates, toilet paper rolls, paper bags, cardstock.
- Adhesives: Glue sticks (for paper), liquid school glue (for stronger bonds).
- Decorations: Googly eyes, markers, crayons, colored pencils, paint (tempera or acrylic), cotton balls, pipe cleaners, craft foam, glitter (sparingly!).
- Tools: Child-safe scissors. Having a variety on hand encourages creativity and problem-solving.
3. How can I make vampire crafts less scary for young children?
The trick is to focus on the "silly" rather than "spooky" aspects.
- Friendly Faces: Encourage big, happy smiles with visible (but not menacing) fangs. Use oversized googly eyes to give a cartoonish, rather than frightening, look.
- Bright Colors: Instead of just black and red, introduce purples, greens, and even polka dots or stripes to capes and outfits.
- Context: Talk about your vampire as being "friendly," "goofy," or "hungry for cookies, not blood!"
- Stories: Read children's books that feature gentle or funny vampire characters to set a playful tone.
4. Can these crafts be adapted for a group setting?
Absolutely! Vampire crafts are fantastic for group activities, whether for a Halloween party, a classroom project, or a homeschool co-op.
- Pre-prep: For larger groups, pre-cut some of the more challenging shapes (like intricate hair or small fangs) to save time and reduce frustration.
- Station Setup: Set up different stations for painting, cutting, and gluing to manage supplies and flow.
- Templates: Provide printable templates to ensure everyone has a starting point.
- Role-Playing: Encourage children to create a "vampire's ball" or a puppet show with their finished crafts. Many of our I'm the Chef Too! activities are also perfect for groups, providing a structured, engaging, and educational experience. Learn more about our versatile programs for schools and groups, available with or without food components, designed to bring hands-on "edutainment" to any learning environment. Explore our School & Group Programs.
5. How can crafting help my child's development?
Crafting is a powerhouse for child development! It significantly boosts:
- Fine Motor Skills: Cutting, gluing, painting, and drawing strengthen hand and finger muscles.
- Creativity & Imagination: Encouraging original ideas and storytelling.
- Problem-Solving: Figuring out how to assemble pieces, or adapt designs.
- Following Instructions: Learning to complete tasks step-by-step.
- Self-Expression: Providing an outlet for emotions and personality.
- Concentration: Fostering focus and attention to detail.
- Cognitive Skills: Shape recognition, color identification, and spatial awareness.
6. How do I clean up after a messy craft session?
A little planning makes cleanup much easier:
- Protect Surfaces: Lay down newspaper, old sheets, or plastic tablecloths before starting.
- Disposable Containers: Use paper plates or old yogurt containers for paint.
- Wipes/Damp Cloths: Keep a supply handy for immediate spills.
- Soak Tools: Place paintbrushes and glue spreaders in warm soapy water immediately after use.
- Contain the Glitter: If using glitter, do it over a large tray or box to minimize spread. Vacuuming works wonders! Embrace the mess as part of the creative process, and involve children in age-appropriate cleanup tasks to teach responsibility.
Conclusion
The journey into creating a vampire craft for kids is truly more than just a seasonal pastime; it’s a vibrant, hands-on adventure into creativity, skill-building, and cherished family moments. From the satisfying snip of scissors shaping a paper cape to the proud display of a goofy, googly-eyed vampire, each step is an opportunity for learning, self-expression, and connection. These not-so-scary monsters open doors to exploring shapes, honing fine motor skills, fostering imagination, and developing problem-solving abilities, all while providing a delightful screen-free alternative.
At I'm the Chef Too!, we wholeheartedly believe in the power of such "edutainment" experiences, blending the arts, STEM, and delicious food into one-of-a-kind adventures. We are dedicated to sparking curiosity and creativity in children, facilitating family bonding, and creating joyful memories that last a lifetime. Just like the best vampire crafts, our kits are developed by mothers and educators to deliver tangible, engaging learning through hands-on activities.
Ready to infuse more "edutainment" into your family's routine? Dive into a world where learning is delicious and exciting with I'm the Chef Too!. Give the gift of learning that lasts all year with a 12-month subscription to our STEM cooking adventures, and watch your child's curiosity and skills flourish with a new, exciting experience delivered right to your door every month. Each box comes with pre-measured dry ingredients and specialty supplies, making it easy to focus on the fun and learning. Subscribe to The Chef's Club now!