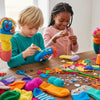
Sweet & Simple Valentine Card Crafts for Kids

Table of Contents
- Introduction to the Joy of Handmade Valentines
- Classic & Creative Heart-Themed Crafts
- Dazzling Art Technique-Focused Cards
- Imaginative 3D & Pop-Up Card Adventures
- Whimsical & Personalized Valentine Cards
- Cards for Little Hands: Toddlers & Preschoolers
- Integrating STEM & Art in Valentine Card Crafts
- Tips for a Successful Crafting Session
- Conclusion: Crafting Connections, Cultivating Creativity
- FAQ: Your Valentine Card Crafting Questions Answered
Remember the excitement of carefully selecting the perfect glitter, glue, and construction paper, painstakingly cutting out hearts, and then proudly presenting your handmade Valentine to a loved one? That cherished feeling of creating something unique and personal is a foundational part of childhood, a memory many of us carry into adulthood. Valentine's Day, often seen as a celebration of love, offers a magnificent, screen-free opportunity to rekindle that creative spark in our children, transforming simple materials into heartfelt expressions.
At I'm the Chef Too!, we believe that learning should be as engaging as it is enriching, blending the magic of food, the principles of STEM, and the beauty of the arts into unforgettable "edutainment" experiences. Crafting homemade Valentine cards for kids perfectly embodies this philosophy. It's not just about making a pretty card; it's about fostering fine motor skills, encouraging creative problem-solving, exploring artistic techniques, and most importantly, connecting with others in a meaningful way. From the simplest painted heart to intricate pop-up designs, each craft offers a chance for discovery and self-expression. In this comprehensive guide, we'll delve into a delightful array of Valentine card crafts, offering practical ideas, tips for success, and insights into the wonderful developmental benefits. Get ready to transform everyday materials into extraordinary tokens of affection, creating not just cards, but lasting memories and a deeper love for hands-on learning.
Introduction to the Joy of Handmade Valentines
There's something uniquely special about a handmade Valentine. In an increasingly digital world, receiving a tangible card, crafted with care by a child's own hands, holds immeasurable value. It’s a physical manifestation of thought and affection, far more impactful than a store-bought greeting. For children, the process of making these cards is an adventure in itself. It's a chance to experiment with colors, textures, and shapes, to practice cutting and gluing, and to pour their budding personalities into a creation. This hands-on engagement is precisely what we champion at I'm the Chef Too! – the idea that learning isn't just about absorbing facts, but about doing, discovering, and creating.
When children are involved in Valentine card crafts for kids, they’re not just making a card; they’re building confidence, honing their fine motor skills, engaging in creative expression, and understanding the joy of giving. We've seen firsthand how blending creativity with tangible activities sparks incredible curiosity. Just as our kits blend culinary adventures with scientific principles, these crafting endeavors intertwine artistic exploration with developmental milestones. We’re passionate about providing screen-free alternatives that encourage family bonding, and what better way to do that than gathered around a table, covered in craft supplies, all working on heartfelt messages?
Whether your child is a budding artist, a meticulous engineer-in-training, or simply loves to get their hands messy, there's a Valentine's Day craft waiting to spark their imagination. We'll explore a variety of techniques, from classic painting and stamping to more intricate 3D designs, ensuring there's something for every age and skill level. Our goal is to empower you, the parent or educator, with accessible, fun, and educational ideas that celebrate creativity and connection.
Ready for a new adventure every month? Don't let the fun stop here! Join The Chef's Club and enjoy free shipping on every box, bringing curated STEM cooking experiences directly to your door.
Classic & Creative Heart-Themed Crafts
The heart is the quintessential symbol of Valentine's Day, and there are countless ways to incorporate it into beautiful, handmade cards. These classic approaches often require minimal supplies and are perfect for children of all ages, allowing for broad creative freedom.
Painted Cardboard Heart Valentines
Transforming simple cardboard into a canvas for affection is an incredibly satisfying process. This craft not only repurposes materials but also allows children to explore color mixing and design.
How to Make Them: Gather an assortment of cardboard – perhaps from an old cereal box or a shipping container. Help your child cut out various heart shapes and sizes. These don't need to be perfect; irregular shapes add to their charm. Provide acrylic paints in a range of Valentine's colors (red, pink, purple, white, gold). Let children paint the cardboard hearts freely, experimenting with different brushes, sponges, or even their fingers. Once the base coat is dry, offer embellishments like glitter glue, sequins, small beads, or even yarn scraps to add texture and sparkle. Attach these decorated hearts to folded cardstock to create unique, dimensional cards.
Materials Needed:
- Cardboard scraps
- Scissors (child-safe or adult-supervised)
- Acrylic paints
- Paintbrushes, sponges, or fingers
- Glitter, sequins, small beads, yarn scraps (optional)
- Craft glue
- Blank cardstock or folded paper
Educational Benefits: This activity is fantastic for developing fine motor skills through cutting, painting, and detailed embellishment. It encourages color recognition and mixing, pattern creation, and fosters creative expression. Repurposing cardboard also subtly introduces concepts of sustainability and resourcefulness. It’s a wonderful exercise in turning ordinary objects into extraordinary art, much like how our Galaxy Donut Kit transforms simple ingredients into an edible work of astronomical art, combining creativity with a touch of science.
Watercolor Heart Resist Magic
The magic of resist art is always a crowd-pleaser, revealing hidden designs as colors wash over them. This technique makes for stunning, vibrant Valentine cards.
How to Make Them: Start by drawing heart shapes onto cardstock using a white crayon or an oil pastel. The key is to press firmly so the wax creates a strong barrier. Provide children with watercolors and let them paint directly over the crayon hearts and the surrounding paper. The wax will "resist" the watercolor, leaving the heart shapes brilliantly unpainted, creating a striking contrast. Experiment with different shades of watercolor or layered washes for a more complex look.
Materials Needed:
- Cardstock or heavy watercolor paper
- White crayon or oil pastel
- Watercolor paints
- Paintbrushes
- Water
Educational Benefits: This activity introduces children to the scientific concept of "resist" – how wax repels water-based paint. It's a visual lesson in material properties, color blending, and composition. The anticipation of the reveal adds an exciting element of discovery, nurturing curiosity and patience. It also refines hand-eye coordination and brush control, crucial skills developed through hands-on artistic endeavors.
Playful Potato Heart Prints
Stamping is a timeless art activity that allows even the youngest crafters to create repetitive patterns and bold designs with ease.
How to Make Them: Cut a potato in half. Using a mini heart-shaped cookie cutter, press it firmly into the cut surface of the potato. Carefully cut away the excess potato around the cookie cutter, leaving a raised heart shape to serve as your stamp. Pour various colors of washable paint onto shallow plates. Children can then dip the potato stamp into the paint and press it onto cardstock to create a charming pattern of hearts. They can vary the pressure or direction for different effects.
Materials Needed:
- Large potato
- Mini heart-shaped cookie cutter
- Knife (adult use only)
- Washable paints
- Shallow plates or trays
- Cardstock or construction paper
Educational Benefits: Potato printing strengthens hand muscles and improves coordination, making it an excellent fine motor exercise. Children learn about cause and effect (press down, get a print) and explore pattern recognition and repetition. This simple technique fosters a sense of accomplishment and encourages imaginative play with colors and shapes, laying a foundation for more complex artistic skills.
Dazzling Art Technique-Focused Cards
Beyond basic painting, incorporating specific art techniques can elevate homemade Valentine cards for kids, making them truly unique and showcasing a wider range of artistic expression. These methods often involve a little more preparation but yield spectacular results that feel truly special.
Stained Glass Valentines with Black Glue
This striking technique mimics the beauty of stained glass, allowing vibrant colors to shine through bold outlines.
How to Make Them: On heavy paper or cardstock, use black glue (made by mixing liquid glue with black acrylic paint) to "draw" heart outlines or intricate patterns. Encourage various sizes and overlapping shapes. Let the black glue dry completely, which might take several hours or overnight. Once dry, children can fill in the sections with liquid watercolors or thinned acrylic paints. The black glue lines will act as a barrier, keeping the colors contained, creating a stained-glass effect. Hold them up to a window when finished for a magical glow.
Materials Needed:
- Heavy cardstock or watercolor paper
- Liquid glue
- Black acrylic paint
- Toothpick or thin stick for mixing
- Liquid watercolors or thinned acrylic paints
- Paintbrushes
- Scissors (optional, to cut into heart shapes)
Educational Benefits: This craft is a wonderful exercise in patience, as waiting for the glue to dry is crucial. It develops precision in drawing lines and careful painting within boundaries. Children also learn about color theory through blending and contrasting shades. The "stained glass" effect introduces an element of light and transparency, connecting art to optical principles. This kind of detailed work, requiring careful application and anticipation, is similar to the measured steps we follow in our I'm the Chef Too! kits, where each ingredient and action leads to a delicious and educational outcome. Not ready to subscribe? Explore our full library of adventure kits available for a single purchase in our shop for more hands-on fun!
Pointillism Hearts with Q-tips
Inspired by the art movement of Pointillism, this technique uses dots of color to create an image, offering a meditative and visually interesting approach to card making.
How to Make Them: On cardstock, children can lightly draw large heart outlines with a pencil. Then, using Q-tips dipped in various colors of paint, they can fill in the hearts and background with tiny dots. Encourage them to experiment with different color combinations and densities of dots to create texture and depth. They can layer dots or keep them separate to explore how colors blend visually from a distance.
Materials Needed:
- Cardstock
- Pencil
- Q-tips
- Washable paints (various colors)
- Shallow plates or trays
Educational Benefits: Pointillism introduces children to a unique artistic style and the concept of color mixing through optical blending. It's excellent for developing fine motor control and concentration, as placing individual dots requires precision. This activity also encourages observation and experimentation, helping children understand how small components contribute to a larger image, a concept applicable in many scientific and engineering fields.
Mesmerizing Spin Art Hearts
Spin art is a dynamic and exciting process that yields abstract, colorful designs, perfect for unique Valentine cards.
How to Make Them: For spin art, you'll need either a salad spinner or a dedicated kids' spin art machine. Place a piece of paper (cut into a heart shape or a square that can be later cut into a heart) inside the spinner. Drip various colors of liquid paint onto the paper. Close the lid (if using a salad spinner) and spin vigorously. The centrifugal force will spread the paint in mesmerizing patterns. Repeat with different colors and papers for a collection of unique designs.
Materials Needed:
- Salad spinner or kids' spin art machine
- Cardstock or heavy paper, cut into heart shapes or squares
- Liquid paints (thinned slightly if too thick)
- Scissors (to cut into heart shapes after spinning)
Educational Benefits: This craft is a fantastic introduction to physics principles, specifically centrifugal force, in a fun and tangible way. Children observe how force and motion influence the movement of liquids and the creation of patterns. It's a highly sensory activity that encourages experimentation with color and paint flow, fostering creativity without the pressure of precision. The sheer joy of seeing the colors blend and swirl is a powerful motivator for continued exploration. The excitement of seeing a design come to life, much like the chemical reaction that makes our Erupting Volcano Cakes bubble over with deliciousness, is pure joy.
Imaginative 3D & Pop-Up Card Adventures
For children who love a challenge and the element of surprise, 3D and pop-up Valentine cards offer an exciting opportunity to explore basic engineering principles alongside artistic design. These cards go beyond flat surfaces, adding depth and interactive elements.
Easy Pop-Up Heart Cards
Creating a pop-up element can seem complex, but simple techniques make it accessible for kids, leading to delightful surprises when the card is opened.
How to Make Them: Fold a piece of cardstock in half for the main card. Take another smaller piece of cardstock and fold it in half. On the folded edge of the smaller piece, make two parallel cuts, about an inch long and an inch apart. Fold this cut section inward to create a small "ledge" or "spring." Glue a decorated heart shape onto this ledge. Now, glue the smaller piece inside the larger card, ensuring that when the main card opens, the heart "pops up." Children can decorate the pop-up heart and the rest of the card with drawings, stickers, or even a heartfelt message.
Materials Needed:
- Cardstock (two contrasting colors)
- Scissors
- Craft glue or glue stick
- Decorative elements (markers, stickers, glitter, etc.)
Educational Benefits: This activity introduces basic engineering concepts like levers and springs in a hands-on way. Children develop spatial reasoning as they visualize how the pop-up mechanism will work. It enhances precision in cutting and gluing, and fosters problem-solving skills as they adjust and align components. The element of surprise within a pop-up card adds an extra layer of engagement and delight.
Heart Bouquet Cards
These cards are a beautiful way to present a collection of smaller hearts, opening up into a delightful display.
How to Make Them: Take a piece of cardstock and fold it in half. Cut several smaller heart shapes from various colors of paper. Fold each small heart in half down the middle. Glue one side of a folded heart to the card, then glue the side of another folded heart to the exposed side of the first, creating a layered, dimensional effect. Continue adding hearts in this way to form a "bouquet" that expands when the card is opened. Children can personalize each heart with individual messages or drawings.
Materials Needed:
- Cardstock for the main card
- Construction paper in various colors for hearts
- Scissors
- Glue stick or craft glue
- Markers or pens
Educational Benefits: This craft encourages children to think about spatial arrangement and symmetry as they create the layered heart effect. It refines cutting and gluing skills and offers opportunities for creative design and personalization. The act of folding and assembling multiple components into a cohesive whole provides a tangible lesson in construction and design, mirroring the careful layering of ingredients found in many delicious culinary creations.
Whimsical & Personalized Valentine Cards
Adding a personal touch, whether through clever puns, unique materials, or incorporating a child's own personality, makes these Valentine cards truly unforgettable.
Punny Animal Valentines
Combine the cuteness of animals with clever wordplay for a dose of humor and affection. These are particularly popular for school exchanges.
How to Make Them: Help your child choose their favorite animal. Draw or print out simple animal shapes (e.g., a bee, a whale, a cat, an owl, a frog) on cardstock. Cut them out. Then, brainstorm puns related to the animal. For example, a bee could say "Bee Mine!" or "You're the Bee's Knees!", a whale "I Whaley Love You!", a cat "You are Purrrrfect!", or a frog "Toad-ally Awesome!" Children can decorate the animals and write their chosen pun. You can add googly eyes, pipe cleaner antennae, or glitter for extra flair.
Materials Needed:
- Cardstock or construction paper
- Scissors
- Markers or colored pencils
- Googly eyes, pipe cleaners, glitter (optional)
- Craft glue (if adding embellishments)
Educational Benefits: This activity is fantastic for language development, encouraging creative wordplay and vocabulary expansion through puns. It also promotes artistic design in representing animals and strengthens fine motor skills through cutting and decorating. The humorous element adds a fun, social aspect to card-making, teaching children about expressing affection with a smile. It's a testament to how simple ideas can spark both creativity and laughter. Give the gift of learning that lasts all year with a 12-month subscription to our STEM cooking adventures – a monthly dose of fun and discovery! Join The Chef's Club today!
Recycled Cactus Cards – "I'm Stuck on You!"
Embrace sustainability and clever wordplay with these adorable, textured cards made from recycled materials.
How to Make Them: Cut a cactus shape from green cardstock. For the "spines," you can use green yarn snippets, small pieces of pipe cleaner, or even tiny paper quills. Glue these onto the cactus. For the "pot," use a strip of brown paper, perhaps from a paper bag, and glue it to the bottom of the cactus. Attach the completed cactus to a folded card. Write the pun "I'm Stuck on You!" inside or on the front. This is a wonderfully tactile project that encourages resourcefulness.
Materials Needed:
- Green cardstock
- Brown paper (e.g., paper bag)
- Green yarn, pipe cleaners, or paper strips
- Scissors
- Craft glue
- Markers or pens
Educational Benefits: This craft introduces the concept of recycling and upcycling materials, fostering environmental awareness. It develops fine motor skills through intricate gluing and arranging of small pieces. Children practice shape recognition (cactus, pot) and engage in creative problem-solving by finding materials for textures. The pun adds a layer of literacy and humor.
Glitter Rock Valentines
Offering a unique alternative to traditional paper cards, glitter rocks are tangible tokens of affection that last.
How to Make Them: Collect smooth, flat rocks of various sizes. Clean them thoroughly and ensure they are dry. Provide children with craft glue and various colors of glitter. They can paint the rocks with glue in patterns or entirely, then sprinkle glitter over the wet glue. Let them dry completely. Once dry, they can use permanent markers to write a small message like "You Rock!" or draw a tiny heart. These make wonderful keepsakes.
Materials Needed:
- Smooth, flat rocks
- Craft glue
- Various colors of glitter
- Small paintbrushes (optional, for glue application)
- Permanent markers (adult supervision recommended)
Educational Benefits: This activity connects nature with art, encouraging outdoor exploration to find suitable rocks. It develops fine motor skills through glue application and glitter sprinkling. Children learn about different textures and the properties of materials. The creation of a lasting keepsake also imparts a sense of permanence and thoughtfulness in gift-giving.
Cards for Little Hands: Toddlers & Preschoolers
Crafting with very young children requires simpler activities that focus on sensory exploration, large motor movements, and safety. These ideas are perfect for tiny hands and big hearts.
Fingerprint Hearts for Toddlers
It doesn't get much simpler or more personal than using fingerprints to create art.
How to Make Them: Provide washable paint in red, pink, or purple. Show your child how to dip their finger into the paint and then press two fingerprints next to each other, angled inward, to form the top curves of a heart. Repeat to create many hearts on cardstock. Once the paint is dry, you can draw a stem or a message around them. It's a sweet, easy way for even the youngest children to participate.
Materials Needed:
- Washable paints (red, pink, purple)
- Shallow plates or trays
- Cardstock or construction paper
Educational Benefits: Fingerprint art is an excellent sensory experience, allowing toddlers to explore paint texture directly. It develops fine motor control, encourages hand-eye coordination, and fosters creative expression through simple mark-making. It's also a wonderful way to introduce color recognition and counting.
Cupcake Liner Cards
Transforming ordinary cupcake liners into charming cards adds an element of texture and fun.
How to Make Them: Flatten various colorful cupcake liners. Children can then glue these liners onto cardstock to create different shapes. They can fold them in half to make layered hearts, crinkle them for texture, or stack them to create dimensional flowers. Add pipe cleaner stems or drawn details with markers. These cards are lightweight and full of character.
Materials Needed:
- Colorful cupcake liners
- Cardstock
- Glue stick or craft glue
- Markers, crayons, pipe cleaners (optional)
Educational Benefits: This craft develops fine motor skills through the manipulation of delicate liners and precise gluing. It encourages shape recognition, color sorting, and creative problem-solving as children decide how to arrange the liners. The tactile nature of the liners also provides a gentle sensory experience.
Simple Collage Hearts
Collage is a fantastic activity for young children, encouraging them to explore textures, colors, and shapes while developing their fine motor skills.
How to Make Them: Cut a large heart shape from a piece of cardstock. Provide a variety of materials for collage: torn pieces of colored paper, fabric scraps, yarn snippets, glitter, old magazine cutouts, or even dried pasta shapes. Give children a glue stick or liquid glue and let them freely arrange and stick the materials onto the heart shape. This process is all about exploration and creative freedom.
Materials Needed:
- Cardstock heart cutouts
- Various collage materials (paper scraps, fabric, yarn, glitter, etc.)
- Glue stick or craft glue
- Tray or mat for messy play
Educational Benefits: Collage is a powerhouse for developing fine motor skills (tearing, picking up small pieces, gluing). It stimulates sensory exploration through different textures and visual discrimination through color and shape recognition. Children learn about composition and arrangement, fostering creativity and independent decision-making.
Integrating STEM & Art in Valentine Card Crafts
At I'm the Chef Too!, our core mission is to blend food, STEM, and the arts into one-of-a-kind "edutainment" experiences. Crafting, at its heart, is a fantastic gateway to understanding STEM principles in a fun, accessible way. Many Valentine card crafts for kids naturally incorporate elements of science, technology, engineering, and mathematics, often without children even realizing they’re learning!
The Science of Color Mixing and Pigments
Many painting-based crafts, like watercolor resist or simple painted hearts, are excellent opportunities to explore basic chemistry.
- Observation: Ask children to observe what happens when blue and yellow paint mix – "What new color do you see?"
- Experimentation: Encourage them to experiment with different ratios of colors to create varying shades. "What if we add more red to the pink?"
- Pigment Properties: Discuss how different paints (watercolor vs. acrylic) behave differently on paper, introducing concepts of solubility and opacity.
This playful exploration of color is a foundational step in understanding chemical reactions and material properties. Just like mixing colors for a vibrant valentine, exploring astronomy by creating your own edible solar system with our Galaxy Donut Kit sparks wonder and learning through tangible experiences.
Engineering Pop-Up Mechanisms
Creating 3D and pop-up cards is a fantastic introduction to engineering concepts.
- Design & Structure: Children learn about structural integrity and how cuts and folds can create movement and dimension. "How can we make this heart stand up?"
- Problem-Solving: If a pop-up doesn't work, they engage in trial and error, adjusting cuts or folds to achieve the desired effect. This iterative process is fundamental to engineering.
- Spatial Reasoning: They develop an understanding of how two-dimensional paper can be manipulated to create three-dimensional forms.
These "mini-engineering projects" teach children about design, function, and stability in a very engaging way, preparing them for more complex challenges.
Mathematics in Shapes and Patterns
From cutting symmetrical hearts to arranging patterns with stamps or collage elements, mathematics is inherently woven into crafting.
- Geometry: Identifying and creating shapes like hearts, circles, and squares. Discussing symmetry when folding paper or cutting identical shapes.
- Measurement: Estimating lengths for cuts, spacing elements evenly, or understanding proportions.
- Sequencing & Patterns: Arranging collage pieces in a repeating pattern or stamping hearts in a specific order helps develop an understanding of sequences and mathematical patterns.
These mathematical explorations are subtle but powerful, building a foundational understanding of concepts that extend far beyond the craft table.
Art as a Form of Communication
Beyond the STEM aspects, all these crafts reinforce the power of art as a means of communication and self-expression.
- Emotional Expression: Children learn to convey feelings of love, friendship, and appreciation through their chosen colors, designs, and messages.
- Storytelling: Each card tells a small story, whether it's the joy of a glitter-covered rock or the humor of a punny animal.
- Cultural Connection: Understanding that art is a universal language used to celebrate special occasions and relationships across cultures.
At I'm the Chef Too!, we believe that fostering this holistic development—where the hands-on creation of something beautiful and delicious also teaches scientific principles and artistic skills—is paramount. Our unique approach, developed by mothers and educators, aims to make complex subjects accessible and exciting, turning every kitchen adventure into a learning opportunity.
Tips for a Successful Crafting Session
To ensure your Valentine card crafts for kids are fun, engaging, and minimize stress for everyone, here are some practical tips:
- Prepare Your Space: Before starting, lay down newspaper, a washable tablecloth, or a craft mat. Have all materials easily accessible and organized. This reduces interruptions and helps manage mess.
- Gather Supplies: Check that you have all necessary items before you begin. Simple supplies like construction paper, scissors, glue, markers, and paint can go a long way. Consider adding fun extras like glitter, googly eyes, or stickers.
- Set Realistic Expectations: Remember, it's about the process, not perfection. Children's crafts are meant to be unique and reflect their age and skill level. Avoid stepping in too much to "fix" their work. Encourage effort and creativity over flawless execution.
- Offer Choices, Not Overwhelm: Present a few options for crafts, allowing your child to choose, which fosters independence. However, don't overwhelm them with too many choices at once.
- Embrace the Mess: Crafting can be messy, and that's part of the fun! Dress children in old clothes or provide aprons. Having wipes or a damp cloth nearby is always a good idea. We understand that sometimes things get a little messy in the pursuit of learning and deliciousness, but the joy and discovery are always worth it!
- Focus on the Learning & Bonding: Use crafting time as an opportunity for conversation and connection. Ask open-ended questions: "What colors do you like together?" "Who are you making this for and why?" "What's your favorite part about making this?" This encourages reflection and strengthens family bonds.
-
Adapt for Age and Skill:
- Toddlers & Preschoolers: Focus on large motor skills, sensory exploration, and simple tasks like tearing paper, large stamping, or gluing big pieces. Always supervise closely, especially with small parts.
- Elementary Schoolers: Introduce more complex cutting, detailed painting, and multi-step projects like pop-up cards or mixed-media collages. They can often follow multi-step instructions more independently.
- Older Kids: Encourage self-directed design, complex techniques, and personalization. They might enjoy intricate quilling, detailed drawing, or combining several techniques.
- The Power of a "Valentine Making Station": Set out a variety of leftover artwork, stickers, markers, colored paper, and even repurposed items. Let kids decorate these all month long, turning leftover scraps into colorful homemade valentines. This promotes sustained engagement and creativity.
- Celebrate Their Creations: Display their finished cards proudly, even if it's just on the refrigerator. This validates their effort and boosts their self-esteem.
By keeping these tips in mind, you can transform a simple crafting session into a memorable, educational, and joyful experience for everyone involved. For more inspiring ideas that blend learning and fun, remember that we at I'm the Chef Too! are always cooking up new adventures. Ready for a new adventure every month? Join The Chef's Club and enjoy free shipping on every box, bringing curated STEM cooking experiences directly to your door!
Conclusion: Crafting Connections, Cultivating Creativity
As we’ve explored the wonderful world of valentine card crafts for kids, it becomes abundantly clear that these simple activities offer far more than just a pretty card. They are gateways to imagination, catalysts for skill development, and powerful tools for connection. From the careful strokes of a paintbrush on a watercolor resist heart to the inventive engineering of a pop-up design, each craft provides a unique opportunity for children to learn, grow, and express themselves. We've seen how they subtly introduce STEM concepts, hone fine motor skills, and cultivate an appreciation for the arts, all while fostering invaluable family bonding.
At I'm the Chef Too!, our mission is rooted in the belief that "edutainment" is the most effective way to spark a lifelong love for learning. These homemade Valentine cards perfectly echo our philosophy, providing screen-free, hands-on experiences that encourage curiosity and creativity. They’re about the joy of the process, the pride in a handmade gift, and the lasting memories created when families gather to craft together. We don't promise your child will become a top scientist overnight, but we do guarantee a foundation built on confidence, exploration, and the sheer delight of discovery.
So, this Valentine's Day, embrace the glitter, the glue, and the glorious mess. Sit down with your little ones and dive into the heartwarming world of handmade cards. You're not just making paper and paint into a token of affection; you're nurturing their development, fostering their love for learning, and creating precious moments that will be cherished for years to come.
Want to keep the hands-on learning and family fun going all year long? Discover the magic of blending food, STEM, and the arts with our unique culinary adventures. Join The Chef's Club today and receive a new, exciting kit delivered right to your door every month, complete with pre-measured dry ingredients and specialty supplies. It’s the perfect way to spark ongoing curiosity, creativity, and delicious educational experiences! Not ready to subscribe? Browse our complete collection of one-time kits to find the perfect theme for your little learner!
FAQ: Your Valentine Card Crafting Questions Answered
Q1: What age group are these Valentine card crafts suitable for?
A1: The crafts listed span a wide range of ages! Simple activities like fingerprint hearts, potato prints, and basic collages are perfect for toddlers and preschoolers (ages 2-5) with adult supervision. Elementary-aged children (ages 6-10) can enjoy watercolor resist, black glue stained glass, punny animal cards, and simple pop-up designs, often with more independence. Older children and pre-teens (10+) might gravitate towards more intricate 3D cards, detailed art techniques like pointillism, or personalized recycled crafts. The key is to adapt the complexity and level of adult assistance to your child's developmental stage.
Q2: What are the most essential materials to have on hand for Valentine card crafts?
A2: You don't need to break the bank! The essentials are usually:
- Paper: Cardstock (for sturdy cards), construction paper (various colors), white paper.
- Cutting Tools: Child-safe scissors (for kids), adult scissors.
- Adhesives: Glue sticks, liquid craft glue.
- Drawing/Coloring: Markers, crayons, colored pencils.
- Paints: Washable paints (tempera or acrylic), watercolors.
- Bonus: Glitter, stickers, googly eyes, yarn scraps, old magazines for collage.
Many materials can also be found around the house, encouraging creative recycling!
Q3: How can I make crafting less messy?
A3: While mess is often part of the fun, you can certainly minimize it:
- Prep your space: Lay down old newspapers, a plastic tablecloth, or a designated craft mat.
- Wear aprons: Old shirts or smocks are perfect for protecting clothing.
- Use washable materials: Opt for washable paints and markers.
- Small portions: Dispense small amounts of paint or glue into trays or small cups to prevent spills and overuse.
- Have cleaning supplies ready: Keep a damp cloth, paper towels, and a trash can nearby for quick clean-ups.
- Contain glitter: Work over a tray or box lid to catch excess glitter, which can then be poured back into the container.
Q4: What are the educational benefits of making Valentine cards?
A4: The benefits are numerous and cover various developmental areas:
- Fine Motor Skills: Cutting, gluing, drawing, painting, manipulating small embellishments.
- Creative Expression: Choosing colors, designs, and messages to convey feelings.
- Cognitive Development: Problem-solving (e.g., how to make a pop-up work), spatial reasoning, following instructions, understanding cause and effect.
- Language & Literacy: Writing messages, puns, discussing ideas.
- Social-Emotional Learning: Expressing love and gratitude, understanding the joy of giving, empathy.
- STEM Concepts: Introducing basic geometry (shapes, symmetry), engineering (3D structures), and science (color mixing, resist art physics).
These hands-on activities provide a holistic learning experience that sparks curiosity and builds confidence.
Q5: My child gets frustrated if their craft isn't "perfect." How can I help them?
A5: It's common for children to strive for perfection, but it's important to shift the focus to the process and effort:
- Emphasize uniqueness: Remind them that handmade means unique! "Your card is special because you made it, and no one else will have one exactly like it."
- Model imperfection: Share your own "mistakes" or moments of happy accidents in crafting.
- Praise effort, not outcome: Instead of "That's a perfect heart," say "I love how carefully you cut that heart," or "You worked really hard on all those colors!"
- Offer assistance, not takeover: Ask, "Would you like some help with that part?" rather than just doing it for them.
- Focus on the message: Remind them that the person receiving the card will appreciate the thought and love behind it, not how "perfect" it looks.
- Encourage experimentation: Let them try different approaches and learn from what works and what doesn't. This builds resilience.
Remember, the goal is to foster a love for creativity and learning, not to produce gallery-worthy art.