Spooky & Sweet: 35+ Free Pumpkin Crafts for Kids This Fall

Table of Contents
- The Power of the Pumpkin: Why Crafting Matters for Kids
- Gathering Your Treasure Chest: Essential "Free" Craft Supplies
- Our Top "Free Pumpkin Crafts for Kids" Categories
- Tips for a Spooktacular Crafting Session
- Beyond the Craft: Extending the Learning
- Igniting Curiosity, One Pumpkin at a Time
- FAQ Section
As the crisp autumn air arrives and leaves begin to transform into a riot of reds, oranges, and golds, there's a certain magic that fills the air. It’s a season of cozy sweaters, warm drinks, and the undeniable allure of the pumpkin! From towering porch decorations to delicious pies, pumpkins are the undisputed symbol of fall. For parents and educators, this seasonal shift often sparks a hunt for engaging, screen-free activities that captivate young minds and hands. We all want to tap into that autumn wonder and channel it into creative play that also nurtures growth and learning.
But finding genuinely "free" or low-cost activities that are both fun and enriching can sometimes feel like searching for a needle in a haystack. That's where we come in! At I'm the Chef Too!, our mission is to blend food, STEM, and the arts into one-of-a-kind "edutainment" experiences, and we believe that the same magic can be found in simple, everyday crafting. This extensive guide is your ultimate resource for discovering over 35 fantastic, budget-friendly pumpkin crafts for kids that you can create using materials you likely already have around the house or can easily gather. We'll explore a cornucopia of creative ideas, from classic paper projects to nature-inspired masterpieces and clever upcycled treasures, all designed to spark curiosity, build skills, and most importantly, create joyful family memories without breaking the bank. Get ready to transform ordinary items into extraordinary pumpkin-themed art, fostering a love for learning and hands-on discovery, one delightful craft at a time!
The Power of the Pumpkin: Why Crafting Matters for Kids
Pumpkins are more than just a seasonal decoration or a tasty ingredient; they are a gateway to a world of learning and development for children. Engaging in pumpkin crafts offers a rich, multi-faceted experience that supports various areas of growth, aligning perfectly with our philosophy at I'm the Chef Too! of teaching complex subjects through tangible, hands-on adventures. When children engage in crafting, they're not just making something pretty; they're actively building essential skills that will serve them far beyond the crafting table.
First and foremost, fine motor skills receive a fantastic workout. Think about it: cutting paper shapes, squeezing glue, drawing intricate faces, tearing tissue paper, wrapping yarn around an object, or even carefully placing seeds for a mosaic. Each of these actions requires precision and coordination between small muscles in the hands and fingers, crucial for tasks like writing, buttoning clothes, and using utensils. The more opportunities children have to refine these skills, the more confident and capable they become in their everyday lives.
Beyond the physical, crafting ignites creativity and imagination. There’s no single "right" way to decorate a pumpkin, whether it's real or made of paper. Children are encouraged to experiment with colors, textures, and designs, allowing their unique personalities to shine through. This open-ended exploration fosters imaginative thinking, encouraging them to envision possibilities and bring their ideas to life. It’s about the journey of creation, not just the destination.
Problem-solving is another key skill honed during craft time. How do I make this paper pumpkin stand up? Which glue works best for these leaves? What happens if I mix these two colors? These aren't just art questions; they're opportunities for children to hypothesize, test, and adapt. They learn resilience as they encounter challenges and the satisfaction of finding solutions independently or with a little guidance.
Crafting also offers rich sensory exploration. The feel of cool paint, the rustle of dry leaves, the stickiness of glue, the scent of a real pumpkin, the varied textures of yarn or bubble wrap – these experiences engage multiple senses, enriching a child's understanding of the world around them. This sensory input is vital for cognitive development and can be incredibly calming and grounding for many children.
Perhaps less obvious but equally important are the STEM connections embedded in many simple crafts. When children cut out geometric shapes for a pumpkin's eyes, they're exploring basic geometry. When they mix colors, they’re engaging in rudimentary color theory, a branch of science. When they try to balance elements on a 3D pumpkin, they're grappling with engineering principles. Even observing natural elements gathered for a craft can spark conversations about botany or the life cycle of a pumpkin. These subtle introductions to scientific and mathematical concepts lay foundational understanding in a fun, non-intimidating way. We believe in this approach wholeheartedly at I'm the Chef Too!, where our kits blend these subjects seamlessly, such as exploring chemical reactions that make our Erupting Volcano Cakes bubble over with deliciousness.
Finally, and perhaps most cherished by parents, crafting fosters family bonding and provides a wonderful screen-free alternative. In a world increasingly dominated by digital screens, dedicated craft time offers a precious opportunity for connection. Parents and children can collaborate, chat, laugh, and simply enjoy being present with one another. These shared experiences become treasured memories, strengthening familial ties and creating a positive association with learning and creative expression. We are committed to facilitating these moments through our carefully designed activities, offering delightful avenues for families to connect and learn together. Ready for a new adventure every month? Join The Chef's Club and enjoy free shipping on every box.
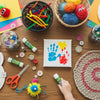
Gathering Your Treasure Chest: Essential "Free" Craft Supplies
Before we dive into the exciting world of pumpkin crafts, let’s talk supplies! The beauty of "free" crafts is that they leverage items you probably already have lying around your home. This approach not only saves money but also encourages resourcefulness and teaches children about upcycling and sustainability.
Here’s a list of common household items that can be transformed into fantastic craft materials. Remember, the goal is not to buy new things but to see everyday objects with a fresh, creative eye!
-
Paper Power:
- Newspaper & Magazines: Perfect for tearing, collaging, papier-mâché, or simply protecting your workspace.
- Scrap Paper: Leftover construction paper, printer paper, old drawings (use the blank side!), junk mail, brown paper bags.
- Cardboard: Cereal boxes, tissue boxes, paper towel/toilet paper rolls, shipping boxes – incredibly versatile for 3D structures and sturdy bases.
- Paper Plates: Excellent for circular bases, masks, or simple painting projects.
-
The Glue & Cut Crew:
- Scissors: Kid-friendly safety scissors are a must.
- Glue: White school glue, glue sticks.
- Tape: Masking tape, clear tape.
-
Color & Sparkle:
- Crayons, Markers, Colored Pencils: The staples of any craft bin.
- Paints: Washable tempera or acrylic paints (even old, dried up paint can sometimes be reactivated with a little water!). Food coloring can also dye glue, water, or other materials.
- Sponges: Old kitchen sponges cut into shapes for stamping.
- Cotton Balls/Pads: For dabbing, creating soft textures, or adding clouds.
-
Nature’s Bounty (Free & Seasonal!):
- Leaves: Of all shapes, sizes, and autumn colors.
- Twigs & Small Sticks: Perfect for pumpkin stems or adding texture.
- Acorns, Pinecones, Seeds: For mosaics, embellishments, or mini-crafts.
- Small Rocks/Pebbles: For painting.
-
Textural Treasures:
- Yarn/String/Twine: Leftover bits from knitting projects, old gift wrap string.
- Fabric Scraps: Old clothing, worn towels cut into pieces.
- Buttons, Beads, Pom-Poms: From old garments or craft kits.
- Bubble Wrap: For printing unique textures.
- Aluminum Foil: For sculpting, adding shine.
-
Miscellaneous Magic:
- Googly Eyes: If you have them, they instantly add personality!
- Pipe Cleaners: Flexible and colorful for stems, arms, or curly accents.
- Old CDs/DVDs: For shiny, reflective bases.
- Egg Cartons: Easily cut into segments for small 3D creations.
- Playdough/Salt Dough ingredients: Flour, salt, water for homemade sculpting.
- Shaving Cream: For sensory play or puffy paint.
By stocking up on these humble heroes, you'll be well-equipped to tackle a vast array of engaging pumpkin crafts without spending a dime. Remember, the most important ingredient is always a willingness to play, experiment, and embrace the unexpected!
Our Top "Free Pumpkin Crafts for Kids" Categories
Let's dive into the creative fun! We've categorized these free pumpkin crafts to make it easy to find the perfect project based on your available materials and your child's interests. Each section offers multiple ideas, ensuring there's something for every little artist.
I. Paper & Printables: The Foundation of Fun
Paper is arguably the most versatile and readily available crafting material. These crafts utilize various forms of paper to create delightful pumpkin masterpieces.
1. Cut & Paste Jack-O'-Lanterns
This is a classic for a reason! It’s fantastic for developing scissor skills and allowing creative expression.
- Materials: White paper, orange paper (or white paper to color orange), crayons/markers, kid-safe scissors, glue stick.
-
Instructions:
- Draw or print a simple pumpkin outline on orange paper (or color white paper orange).
- Draw various eyes, noses, and mouths on white or black paper (triangles, zigzags, circles, wavy lines). You can also find many free printable templates online for different facial features.
- Children cut out the pumpkin outline and the facial features.
- Then, they arrange and glue the features onto the pumpkin to create their unique jack-o'-lantern face.
- Variations: Use crumpled tissue paper for texture, add glitter (if you have it), or draw extra details like spooky spiders or friendly bats. This is a great practice run for carving a real pumpkin later!
2. Paper Plate Pumpkins
Simple, circular, and ready for transformation!
- Materials: Paper plates, orange paint (or crayons/markers), green paper/pipe cleaners, glue, optional: yarn, additional paper scraps.
-
Instructions:
- Have children paint the paper plate orange. Let it dry completely.
- Once dry, they can draw or cut out facial features (from paper scraps) and glue them on.
- Add a green paper stem (cut from scrap paper) or a curled green pipe cleaner to the top.
-
Variations:
- Yarn Lacing Pumpkin: Punch holes around the edge of the plate and let children thread orange yarn through for a fine motor challenge.
- Tissue Paper Pumpkin: Instead of paint, tear orange tissue paper into small pieces and glue them all over the plate for a textured, mosaic effect.
- Collage Pumpkin: Provide various scraps of orange, yellow, and brown paper, magazines, or fabric for children to glue onto the plate, creating a mixed-media pumpkin.
3. Paper Strip 3D Pumpkins
This craft introduces basic engineering and geometry concepts.
- Materials: Orange construction paper (or colored paper strips from magazines/cardboard), green paper/pipe cleaners, stapler or glue.
-
Instructions:
- Cut several strips of orange paper, all the same length and width (e.g., 1 inch wide, 8-10 inches long).
- Stack the strips and staple them together at one end.
- Fan out the strips into a circle.
- Bring the other ends of the strips together at the top, stapling them to form a 3D sphere-like pumpkin shape.
- Add a green paper leaf or pipe cleaner stem.
- Learning: Discuss how flat strips can create a round shape, explore symmetry, and practice fine motor skills with stapling (adult supervision needed) or gluing.
4. Newspaper/Magazine Collage Pumpkins
A wonderful way to recycle and explore textures and patterns.
- Materials: Cardboard (from a cereal box) cut into a pumpkin shape, old newspapers/magazines, glue, orange paint (optional).
-
Instructions:
- Tear (or cut) newspaper or magazine pages into small strips or shapes. Encourage children to look for shades of orange, yellow, red, and brown for an autumnal feel.
- Glue the paper pieces onto the cardboard pumpkin shape, overlapping them to create a textured collage.
- Once dry, you can paint over the collage with a thin wash of orange paint to unify the look while still allowing the textures and hints of print to show through.
5. Paper Bag Pumpkins
Simple, charming, and can even be functional!
- Materials: Brown paper bags (lunch or grocery size), orange paint/markers/crayons, green paper or pipe cleaners, string/twine.
-
Instructions:
- Paint or color the paper bag orange. Let dry.
- Crumple up some newspaper or scrap paper and stuff it into the bottom of the bag to give it shape. Don't overstuff; you want a roundish bottom.
- Gather the top of the bag together and tie it securely with string or twine to form the pumpkin's "stem" area.
- Add a green leaf cut from paper or a coiled pipe cleaner around the "stem."
- Draw a jack-o'-lantern face.
- Variations: Use smaller bags to create a "pumpkin patch" display. They can also be used as decorative trick-or-treat bags!
6. Tissue Paper Stained Glass Pumpkins
A beautiful craft that plays with light and color.
- Materials: Black construction paper, various colors of tissue paper (orange, yellow, red), clear contact paper (or laminating pouches/wax paper with glue), scissors.
-
Instructions:
- Cut a large pumpkin shape out of black construction paper. Cut out the inside of the pumpkin, leaving a thick border (like a frame).
- Cut or tear tissue paper into small squares or irregular shapes.
- Place a piece of clear contact paper (sticky side up) on your workspace. Let children arrange the tissue paper pieces onto the sticky surface, filling the pumpkin frame.
- Once filled, place the black pumpkin frame on top of the tissue paper design.
- Cover with another piece of contact paper (or glue wax paper to the back). Trim excess.
- Display: Hang in a window to let the light shine through, creating a "stained glass" effect.
7. Accordion Fold Paper Pumpkins
This craft is a fun way to explore folding and 3D shapes.
- Materials: Orange paper (construction paper or printer paper), scissors, glue, string/yarn, green paper or pipe cleaner.
-
Instructions:
- Take two pieces of orange paper and fold them accordion-style lengthwise (folding back and forth, like a fan). Make the folds about 1/2 inch to 1 inch wide.
- Fold each accordion strip in half.
- Glue the inner edges of the folded strips together to form two half-circles.
- Glue these two half-circles together along their flat edges to create a full, round, accordion-folded pumpkin.
- Punch a hole at the top and thread a string through to hang. Add a green stem and leaf.
II. Nature's Palette: Bringing the Outdoors In
Harness the beauty of autumn by incorporating natural elements into your crafts. These ideas encourage children to explore their surroundings and appreciate nature.
8. No-Carve Real Pumpkin Decorating
A fantastic, safer alternative to carving, allowing for more creative freedom.
- Materials: Small real pumpkins or gourds, tempera or acrylic paints, permanent markers, glue, collected leaves, twigs, seeds, googly eyes (optional).
-
Instructions:
- Clean and dry your pumpkin.
- Let children paint designs, patterns, or full colors onto their pumpkins. They can create spooky faces, abstract art, or even animal characters.
- Once paint is dry, use permanent markers for finer details.
- Glue on leaves for hair, small twigs for arms, seeds for patterns, or googly eyes for personality.
- Benefits: This teaches observation of natural objects, enhances artistic expression without sharp tools, and results in a beautiful, natural decoration.
9. Leaf Rubbing Pumpkins
A classic art technique with an autumn twist.
- Materials: Various autumn leaves (flat ones work best), white paper, crayons (peeled of paper).
-
Instructions:
- Place a leaf vein-side up on a hard, flat surface.
- Place a piece of white paper over the leaf.
- Using the side of a peeled crayon (an orange or yellow crayon is great!), gently rub over the paper where the leaf is underneath. The texture and veins of the leaf will magically appear!
- Once the rubbing is complete, cut the paper into a pumpkin shape and add a stem.
- Learning: Children observe the intricate details of leaves and learn about texture transfer, a simple form of printmaking.
10. Pinecone & Acorn Mini Pumpkins
Transform tiny nature finds into adorable decorations.
- Materials: Pinecones, acorns, orange paint, small green pipe cleaners or felt scraps, glue.
-
Instructions:
- Paint the pinecones and/or acorn caps orange. Let them dry thoroughly.
- For pinecones: cut a small piece of green pipe cleaner and coil it to create a stem, then glue it to the top.
- For acorns: glue a small green felt leaf or a tiny piece of green paper to the acorn cap, or paint a tiny green stem.
- Display: Arrange these cute mini pumpkins in a bowl or on a windowsill.
11. Painted Rock Pumpkins
A simple, charming craft for outdoor or indoor display.
- Materials: Smooth, flat rocks, orange paint, black/green/white paint or markers, clear sealant (optional, for outdoor display).
-
Instructions:
- Clean and dry the rocks.
- Paint the entire rock orange as a base. Let dry.
- Use black paint or a marker to draw a jack-o'-lantern face. Add a green stem.
- If desired, apply a clear sealant to protect the paint, especially if they'll be placed outdoors.
- Tip: These make great little garden decorations or hidden treasures for a neighborhood rock hunt!
12. Seed Mosaic Pumpkins
This craft teaches patience and attention to detail.
- Materials: Cardboard cut into a pumpkin shape, various seeds (pumpkin, sunflower, dried beans, lentils), glue.
-
Instructions:
- Spread a layer of glue over sections of the cardboard pumpkin.
- Children carefully press seeds into the glue to create patterns, outlines, or fill entire areas. They can sort seeds by color and shape.
- Continue until the pumpkin is covered. Let dry completely.
- Learning: Excellent for fine motor skills, pattern recognition, and sensory exploration of different seed textures.
III. Recycled Riches: Transforming Trash into Treasure
Upcycling household "trash" into craft materials is a fantastic way to teach children about sustainability and creative reuse.
13. Toilet Paper Roll Yarn Pumpkins
Expanding on a popular idea, this craft uses readily available materials.
- Materials: Empty toilet paper rolls (or paper towel rolls cut down), orange yarn (or strips of orange fabric/paper), small sticks, glue, googly eyes (optional).
-
Instructions:
- Cut the toilet paper roll to the desired height of your pumpkin.
- Cut lengths of orange yarn (about 1.5 to 2 times the height of your roll). You'll need enough to cover the circumference.
- Fold each yarn strand in half. Loop the folded end around the toilet paper roll, then pull the loose ends through the loop to secure it (lark's head knot). Repeat with more yarn strands until the entire roll is covered.
- Once the roll is covered, gather all the loose yarn ends at the top and tie them tightly with another piece of yarn to create the top of the pumpkin. Trim evenly.
- Insert a small stick into the center for a stem.
- Glue on googly eyes for a silly pumpkin friend.
- Variations: Use strips of old orange t-shirts for fabric pumpkins, or cut strips of orange paper for a paper version.
14. Egg Carton Mini Pumpkins
Cute, 3D, and surprisingly easy to make.
- Materials: Cardboard egg carton, orange paint, green pipe cleaners, glue.
-
Instructions:
- Cut out individual egg cups from the carton. Trim the edges to make them rounder.
- Paint each cup orange. Let dry.
- Punch a small hole in the center top of each "pumpkin" (adult help may be needed for younger children).
- Cut small pieces of green pipe cleaner, curl them around a pencil to make a spiral, and insert one into each hole for a stem. Secure with a dot of glue if needed.
- Learning: Practicing cutting, painting, and creating 3D objects from flat materials.
15. Cardboard Box Pumpkins
Go big with larger cardboard pieces for a statement piece.
- Materials: Large pieces of cardboard (from a shipping box), orange paint, black/green paint or markers, glue, construction paper scraps.
-
Instructions:
- Draw and cut out large pumpkin shapes from the cardboard. You can make several different sizes.
- Paint the pumpkins orange. Let dry.
- Children can then decorate them with painted or paper-cut jack-o'-lantern faces.
- Attach a green stem and leaves.
- Display: Lean them against a wall, hang them, or use them as part of a homemade fall scene.
16. Plastic Bottle Bottom Pumpkin Art
An imaginative way to reuse plastic waste.
- Materials: Empty plastic bottles (soda, water), orange paint, green pipe cleaners or paper, glue.
-
Instructions:
- Carefully cut off the bottom (the ridged part) of a clean plastic bottle. Adult assistance is definitely needed here.
- Paint the inside and/or outside of the plastic bottle bottom orange. The ridges will naturally give it a pumpkin-like shape. Let dry.
- Glue a small green pipe cleaner curl or paper stem to the center.
- These create abstract, almost jewel-like pumpkins when light shines through them.
17. Old CD/DVD Pumpkins
Give old tech a vibrant new life!
- Materials: Old CDs or DVDs, orange paint, black marker, green paper scraps, glue.
-
Instructions:
- Paint one side of the CD/DVD orange. You might need a few coats for good coverage. Let dry.
- Once dry, use a black marker to draw a jack-o'-lantern face.
- Glue a small green paper stem and leaf to the top edge.
- Display: Hang them up as shimmering, reflective pumpkin decorations.
IV. Sensory & Process Art: Exploring Textures and Techniques
These crafts focus on the experience of creating, often with interesting textures or unique artistic processes, which is a fantastic way to engage sensory learners.
18. Puffy Paint Pumpkins
A satisfyingly tactile experience.
- Materials: White school glue, shaving cream, orange food coloring, paper (cardstock is best), paintbrush or craft stick.
-
Instructions:
- In a bowl, mix equal parts white school glue and shaving cream.
- Add a few drops of orange food coloring and stir until combined.
- Have children draw a pumpkin outline on paper.
- They can then use a paintbrush or craft stick to "paint" the puffy mixture inside the pumpkin outline.
- As it dries, the paint will remain dimensional and "puffy"!
- Learning: Exploring chemical reactions (how ingredients combine to create texture) and sensory qualities of the paint. It’s a bit like our Erupting Volcano Cakes where different ingredients combine to create a delightful, bubbling reaction!
19. Salt Dough Pumpkins
Sculpting, baking (or air-drying), and painting – a multi-step project.
- Materials: 1 cup flour, 1/2 cup salt, 1/2 cup water, orange paint, paintbrush, cookie cutters (optional).
-
Instructions:
- Mix flour, salt, and water in a bowl until a dough forms. Knead for a few minutes until smooth.
- Roll out the dough. Children can use pumpkin-shaped cookie cutters, or simply cut out pumpkin shapes with a knife (adult help). Don't forget to poke a hole at the top if you want to hang them.
- Bake at 250°F (120°C) for 1-2 hours, or until hardened, flipping halfway through. Alternatively, air-dry for 2-3 days.
- Once completely dry, paint the pumpkins orange and add faces.
- Learning: Following a recipe, measuring, sculpting, and understanding how heat changes materials.
20. Bubble Wrap Print Pumpkins
A unique way to add texture.
- Materials: Cardboard cut into a pumpkin shape, bubble wrap, orange paint, paintbrush.
-
Instructions:
- Paint a piece of bubble wrap (bubble side up) with orange paint.
- Carefully press the painted bubble wrap onto the cardboard pumpkin shape.
- Peel it off to reveal a fantastic textured, bumpy pumpkin print!
- Add a green stem once dry.
- Learning: Exploring printmaking, texture, and creative uses for unconventional materials.
21. Sponge Painted Pumpkins
Great for younger children to practice gross motor skills and create an interesting texture.
- Materials: White paper or cardboard pumpkin cutouts, orange paint, small sponge (or cut a kitchen sponge into shapes).
-
Instructions:
- Pour a small amount of orange paint onto a plate.
- Children dip the sponge into the paint and then dab it repeatedly onto their paper pumpkin cutout until it's fully covered with a textured orange.
- Add a green stem and facial features.
22. Shaving Cream Marbled Pumpkins
A mesmerizing process art project with beautiful results.
- Materials: Shaving cream, orange food coloring, cookie sheet or shallow tray, craft stick or skewer, white cardstock cut into pumpkin shapes, paper towels, squeegee or ruler.
-
Instructions:
- Spray a thin layer of shaving cream onto the tray.
- Drip various shades of orange (and maybe a touch of yellow or red) food coloring randomly onto the shaving cream.
- Use a craft stick or skewer to swirl the colors gently – don't overmix!
- Place a pumpkin cutout onto the colored shaving cream, pressing gently.
- Lift the paper, place it print-side up on paper towels, and use a squeegee or ruler to scrape off the excess shaving cream.
- The marbled design will remain! Let dry. Add a stem.
- Learning: Understanding color mixing, observing the science of immiscible liquids, and creating unique patterns.
23. Yarn Wrapped Cardboard Pumpkins
A calming and focused activity for developing fine motor skills.
- Materials: Cardboard cut into a pumpkin shape, orange yarn/string/twine, green paper for a stem/leaf, glue.
-
Instructions:
- Start by gluing one end of the orange yarn to the back of the cardboard pumpkin.
- Begin tightly wrapping the yarn around the cardboard pumpkin, covering it completely. Overlap and crisscross to ensure no cardboard shows through.
- Once covered, secure the end of the yarn with glue on the back.
- Glue on a green paper stem and leaf.
- Variations: Use multiple shades of orange yarn for a striped effect, or incorporate other textures like thin fabric strips.
24. Button or Pom-Pom Pumpkins
Small motor skill heaven!
- Materials: Cardboard cut into a pumpkin shape, orange buttons or pom-poms (if you have them), green paper, glue.
-
Instructions:
- Children glue buttons or pom-poms onto the cardboard pumpkin, filling it in completely or creating patterns.
- Add a green paper stem.
- Learning: Excellent for pincer grasp development, sorting by color/size, and pattern creation.
25. DIY Window Cling Pumpkins
A fun, temporary decoration.
- Materials: White school glue, orange food coloring, plastic sheet protector or zip-top bag, black permanent marker (optional).
-
Instructions:
- Draw a pumpkin outline (and a face if desired) on a plastic sheet protector with a black permanent marker, or simply freehand draw with glue.
- Mix glue with orange food coloring in a small cup to create colored glue.
- Carefully fill in the pumpkin shape with the colored glue.
- Let it dry completely (this can take 24-48 hours). It will become translucent and peel off the plastic.
- Once dry, peel off your pumpkin cling and stick it to a window!
- Learning: Experimenting with materials, understanding adhesion, and observing how liquids dry and change.
26. Playdough Pumpkins
A sensory favorite for open-ended creative play.
- Materials: Orange playdough (store-bought or homemade using flour, salt, water, orange food coloring), small twigs, leaves, plastic knives/tools.
-
Instructions:
- Provide orange playdough. Children can roll, flatten, and sculpt their own pumpkins.
- They can use twigs for stems, small leaves for decoration, or plastic tools to carve faces.
- Benefits: Highly sensory, fantastic for strengthening hand muscles, and encouraging imaginative role-play.
27. Crayon Resist Pumpkins
An artistic technique that reveals hidden colors.
- Materials: White paper, white crayon (or light-colored crayon), orange watercolor paint (or watered-down tempera), paintbrush.
-
Instructions:
- Children draw a pumpkin outline and a jack-o'-lantern face on white paper using a white crayon. Encourage them to press firmly. The drawing will be nearly invisible.
- Once the drawing is done, use orange watercolor paint to paint over the entire paper. The crayon marks will "resist" the paint, revealing the hidden pumpkin design!
- Learning: Exploring properties of wax and water, color theory, and the magic of hidden images.
28. Cornstarch Dough Pumpkins
Similar to salt dough but with a smoother texture.
- Materials: 1 cup cornstarch, 2 cups baking soda, 1 1/4 cups cold water, orange food coloring, paint.
-
Instructions:
- In a saucepan, combine cornstarch, baking soda, and cold water. Stir in orange food coloring.
- Cook over medium heat, stirring constantly, until the mixture thickens to a mashed potato consistency.
- Remove from heat, let cool slightly, then knead until smooth.
- Children can then sculpt pumpkins, dry them (air dry for 24-48 hours or bake at a very low temperature), and paint details.
- Benefits: A different tactile experience, perfect for sculpting detailed small pumpkins.
29. Sticker Scene Pumpkins
A simple, low-mess activity for younger crafters.
- Materials: Paper cut into a pumpkin shape, various stickers (any kind you have – even address labels!), markers.
-
Instructions:
- Children cover the pumpkin shape with stickers, creating patterns, textures, or even using round stickers for eyes.
- They can then draw around the stickers or add a stem/leaf.
- Learning: Fine motor skills (peeling and placing stickers), pattern recognition, and imaginative play.
30. Dot Marker Pumpkins
Great for preschoolers to practice pre-writing skills and color recognition.
- Materials: Paper with pumpkin outlines (or draw them yourself), orange/green/black dot markers (or bingo daubers).
-
Instructions:
- Children use dot markers to fill in the pumpkin shapes.
- They can use different colors for the stem, face, and body of the pumpkin.
- Benefits: Improves hand-eye coordination, strengthens grip, and encourages focus within boundaries.
31. Foil Art Pumpkins
Exploring texture and shine with a common kitchen item.
- Materials: Cardboard cut into a pumpkin shape, aluminum foil, glue, permanent markers (orange, black, green).
-
Instructions:
- Cover the cardboard pumpkin shape with glue.
- Carefully wrap aluminum foil tightly around the cardboard, pressing it down to adhere and create a smooth surface.
- Use permanent markers to color the foil orange, and then draw a face and stem.
- Learning: Exploring different textures, observing how light reflects off foil, and creative drawing.
32. Cookie Cutter Stamped Pumpkins
A quick and easy art activity for all ages.
- Materials: Orange paint, paper, pumpkin-shaped cookie cutters (or other autumn shapes), green paper for stems.
-
Instructions:
- Pour orange paint onto a shallow plate.
- Children dip the cookie cutter into the paint and then press it onto paper to create pumpkin prints.
- They can then add stems and faces with markers or small paper cutouts.
- Benefits: Simple art technique, shape recognition, and repetition for pattern creation.
33. Fingerprint/Handprint Pumpkins
A cherished keepsake craft.
- Materials: Paper, orange paint, brown or green marker.
-
Instructions:
- For Handprint Pumpkins: Paint a child's hand orange and press it onto paper. Once dry, add a green stem and leaf, and a face to the palm or fingers.
- For Fingerprint Pumpkins: Dip a finger in orange paint and press multiple fingerprints onto paper to form a pumpkin shape. Add a stem and leaf with a marker.
- Benefits: Personal, sentimental, and great for very young children.
34. Yarn & Glue Pumpkins (3D)
A more advanced 3D craft for older children, exploring structure.
- Materials: Orange yarn, white school glue, small balloon, wax paper, green pipe cleaner or paper for stem.
-
Instructions:
- Inflate a small balloon.
- In a bowl, mix white school glue with a little water to thin it slightly.
- Dip lengths of orange yarn into the glue mixture, saturating them.
- Wrap the glue-soaked yarn around the balloon in various directions, leaving some gaps. Place on wax paper to dry.
- Once completely dry and hardened (24-48 hours), pop the balloon and carefully remove it. You'll be left with a beautiful 3D yarn pumpkin shape!
- Add a green stem/leaf to the top.
- Learning: Experimenting with materials to create 3D forms, understanding structural integrity, and patience.
35. Q-Tip Dot Pumpkins
Another fine motor booster for precision and pattern.
- Materials: Paper with pumpkin outlines, orange, black, green paint, Q-tips.
-
Instructions:
- Pour small amounts of paint onto a plate.
- Children use Q-tips to make dots of paint, filling in the pumpkin shape. They can create patterns, fill solid, or make pointillist designs for faces.
- Benefits: Excellent for refining pincer grasp, hand-eye coordination, and encouraging detailed work.
I'm the Chef Too! Connect: Seamlessly Blending Learning & Fun
At I'm the Chef Too!, we believe that learning should always be an adventure, filled with discovery and delight. Just as these free pumpkin crafts transform simple materials into engaging educational experiences, our cooking STEM kits take complex subjects and make them digestible, delicious, and utterly captivating. We understand the joy of hands-on learning, the pride in creating something tangible, and the powerful bond forged through shared, screen-free moments.
Whether your child is experimenting with colors in a marbled pumpkin craft or learning about density by observing how different objects float or sink, they are building foundational STEM and artistic skills. Our kits extend this philosophy, diving deeper into concepts like chemical reactions, geology, astronomy, and biology, all while baking up incredible edible creations. Imagine exploring a chemical reaction that makes our Erupting Volcano Cakes bubble over with deliciousness, or mastering geometry while decorating a beautiful edible structure. That's the magic we bring to your kitchen table every month.
These pumpkin crafts are a fantastic start to a season of creativity and learning. If you and your little one have enjoyed these hands-on projects and are eager for more structured "edutainment" that blends science, cooking, and art, then we invite you to explore what we offer. Explore our full library of adventure kits available for a single purchase in our shop.
Tips for a Spooktacular Crafting Session
To make your pumpkin crafting experience as smooth and enjoyable as possible, here are some practical tips from our team of mothers and educators:
- Preparation is Key: Before you begin, gather all your materials. Lay down newspaper or a washable mat to protect your workspace. Have wet wipes or a damp cloth handy for quick cleanups. A prepared space minimizes stress and maximizes fun!
- Embrace the Mess: Crafting with kids often means a bit of a mess, and that's okay! See it as a sign of active engagement and exploration. Dress children in old clothes or provide aprons. Focus on the joy of creation rather than pristine perfection.
- Focus on the Process, Not Just the Product: The true value of crafting lies in the journey. Encourage experimentation, allow for "mistakes" (which are often just happy accidents!), and praise effort rather than just the final outcome. The learning happens in the doing.
- Encourage Independence: Offer suggestions but let your child take the lead. This builds confidence and fosters their unique creative voice. Step back and watch them discover!
- Celebrate Imperfections: A child-made craft is wonderfully unique precisely because it's not perfect. These quirks are part of its charm and tell a story of their creative process. Display their creations proudly!
- Safety First: Always supervise children, especially when using scissors, glue guns (if applicable), or any small items that could be choking hazards for younger kids. Teach them how to use tools safely.
Beyond the Craft: Extending the Learning
The learning doesn't have to stop when the glue dries! Pumpkin crafts can be a springboard for further exploration and discovery:
- Read Pumpkin-Themed Books: Visit your local library or pull out your favorite autumn storybooks. Reading aloud connects the hands-on activity with literacy skills and expands vocabulary.
- Talk About Pumpkin Life Cycles: Discuss how pumpkins grow from seeds to vines to fruit. If you’re using a real pumpkin, cut it open (carefully!) and explore the insides – count the seeds, feel the pulp, talk about germination.
- Bake Pumpkin Treats: Connect the craft to a culinary adventure! Make pumpkin muffins, pies, or roasted pumpkin seeds. This reinforces measurement skills, understanding of ingredients, and the science of baking. If you love the idea of baking as learning, remember that joining The Chef's Club brings new, delicious STEM adventures to your door every month.
- Visit a Pumpkin Patch: See where real pumpkins grow! This outing can tie all the crafting and learning together, making the experience even more tangible and memorable.
Igniting Curiosity, One Pumpkin at a Time
The autumn season offers a golden opportunity to engage children in delightful, educational activities. These free pumpkin crafts are more than just ways to pass the time; they are powerful tools for fostering creativity, honing fine motor skills, building problem-solving abilities, and strengthening family bonds. By transforming everyday items into engaging projects, we empower children to see the potential in their surroundings and ignite a lifelong love for learning and discovery.
At I'm the Chef Too!, we are dedicated to providing these kinds of enriching, screen-free experiences year-round. Our unique approach of blending food, STEM, and the arts ensures that every kit is a complete "edutainment" adventure, meticulously developed by mothers and educators to spark curiosity and creativity. We believe that learning should be a joyful, delicious journey.
So, gather your supplies, embrace the autumn spirit, and get ready for a season filled with imaginative pumpkin creations and invaluable family time. And when you're ready to take the next step in hands-on, educational fun, remember that we have even more adventures waiting for you. Give the gift of learning that lasts all year with a 12-month subscription to our STEM cooking adventures! You can also Browse our complete collection of one-time kits to find the perfect theme for your little learner. Ready for a new adventure every month? Join The Chef's Club and enjoy free shipping on every box.
Spark curiosity and creativity year-round – Join The Chef's Club today!
FAQ Section
Q1: What age are these free pumpkin crafts suitable for?
A: Most of these crafts can be adapted for a wide range of ages, from toddlers to early elementary children. For toddlers and preschoolers (2-5 years), focus on simpler activities like finger painting, tearing paper, sponge painting, or large sticker placement, with plenty of adult supervision. Elementary-aged children (6-10 years) can handle more complex cutting, detailed gluing, fine motor tasks like yarn wrapping, and multi-step projects like salt dough or 3D paper crafts, often with minimal assistance. Always prioritize safety, especially with scissors or small pieces.
Q2: How can I make crafting less messy?
A: While embracing a little mess is part of the fun, you can definitely minimize it:
- Designated Space: Choose a crafting spot that's easy to clean, like a kitchen table or an area with a washable mat.
- Surface Protection: Always cover your table with old newspaper, a plastic tablecloth, or a cut-open garbage bag.
- Aprons/Old Clothes: Have children wear old clothes or a craft apron.
- Portion Control: Dispense small amounts of paint or glue at a time. You can always add more.
- Wet Wipes/Damp Cloth: Keep them easily accessible for quick hand and surface cleanups.
- Containment: Use shallow trays or cookie sheets to contain messy elements like shaving cream or small beads.
Q3: Where can I find free pumpkin printables?
A: Many websites offer free printable pumpkin outlines, jack-o'-lantern faces, or pumpkin-themed coloring pages. A quick search on Google or Pinterest for "free pumpkin craft templates" or "printable jack-o-lantern faces" will yield countless options. Look for reputable craft blogs or educational resource sites. Remember to check their terms of use for personal vs. classroom use.
Q4: What are the educational benefits of pumpkin crafts?
A: Pumpkin crafts offer a wealth of developmental benefits, including:
- Fine Motor Skills: Cutting, gluing, painting, tearing, manipulating small objects.
- Creativity & Imagination: Designing unique pumpkins, expressing ideas.
- Problem-Solving: Figuring out how to assemble parts, make materials stick, or create desired effects.
- Sensory Exploration: Engaging with different textures, colors, and (with real pumpkins) smells.
- STEM Concepts: Exploring shapes (geometry), color mixing (science/art), balance (engineering), and observation of natural elements.
- Language & Communication: Talking about colors, shapes, the process, and sharing ideas.
- Emotional Development: Building confidence, experiencing pride in accomplishment, and patience.
- Family Bonding: Creating shared memories and fostering positive interactions.
Q5: How does I'm the Chef Too! combine learning with fun?
A: At I'm the Chef Too!, we believe that the most effective learning happens when children are actively engaged and having fun. Our unique "edutainment" approach blends the exciting world of cooking with core STEM (Science, Technology, Engineering, Math) and art concepts. Each month, our carefully curated kits deliver everything you need to create delicious treats while exploring fascinating topics – from the chemical reactions in baking to the geological layers of the earth. We empower children to learn by doing, tasting, and creating, fostering curiosity, critical thinking, and a love for discovery in a screen-free, family-friendly environment. Our kits are developed by mothers and educators, ensuring both educational value and irresistible fun.
Q6: What if my child isn't "artistic"?
A: There's no such thing as "not artistic" when it comes to childhood crafting! The goal isn't to create gallery-worthy masterpieces, but to enjoy the process of creation and self-expression.
- Focus on Process: Emphasize the fun of experimenting with materials, mixing colors, and trying new things, rather than the final look.
- Open-Ended Activities: Choose crafts that don't have a rigid "right" way to be done, allowing for abstract expression.
- Praise Effort: Always praise your child's effort and engagement, not just the outcome. "I love how you experimented with those colors!" or "You worked so hard on that!"
- Collaborate: Join in with them! Show them that adults also enjoy creative play without pressure. Remember, it's about building confidence and fostering a love for trying new things.