Sparkling Painting Christmas Craft for Kids

Table of Contents
- Why Painting Christmas Crafts? More Than Just Pretty Pictures
- Getting Started: Essential Supplies & Safety Tips for Your Painting Adventure
- Classic & Beloved Painting Christmas Crafts
- Innovative Painting Techniques for Holiday Fun
- Beyond Paper: Unique Surfaces for Painting
- Integrating STEM with Painting Christmas Crafts
- Making it a Family Affair: Tips for Shared Creativity
- Cleaning Up After the Fun: Easy Tips for a Stress-Free Finish
- Beyond Christmas Day: Using Your Creations
- Conclusion: Ignite the Holiday Spirit with Artful Learning
- Frequently Asked Questions (FAQ) about Painting Christmas Crafts for Kids
The air fills with a crisp chill, store windows twinkle with festive lights, and suddenly, every child's imagination seems to ignite with the magic of the holiday season. If your home is anything like ours, this time of year brings a flurry of excitement, often coupled with the challenge of finding engaging, screen-free activities that truly capture that boundless energy. It's easy to get caught up in the hustle and bustle, but there's a simple, joyful solution that offers a wonderful way to slow down, connect, and create lasting memories: painting Christmas crafts for kids.
At I'm the Chef Too!, we believe in the power of hands-on discovery, blending food, STEM, and the arts into unforgettable "edutainment" experiences. We know that the kitchen and the craft table are incredible classrooms, and the holiday season offers a perfect opportunity to explore both. This comprehensive guide is dedicated to providing you with a treasure trove of painting Christmas craft ideas, from classic favorites to innovative techniques, all designed to spark curiosity, build confidence, and encourage creativity in your children. We’ll delve into why these activities are so beneficial, what supplies you’ll need, and how to make every painting session a delightful adventure for the whole family, fostering a love for learning that goes far beyond the holiday season. Get ready to transform everyday materials into festive masterpieces, one colorful stroke at a time!
Why Painting Christmas Crafts? More Than Just Pretty Pictures
Painting Christmas crafts for kids isn't just about creating decorations to adorn your home or gifts for loved ones; it's a rich, multi-faceted experience that offers a wealth of developmental benefits. While the end product is often charming, it's the process itself where the real magic and learning happen.
First and foremost, these activities are incredible for fostering creativity and imagination. Children are naturally innovative, and providing them with a blank canvas (or ornament!) and a palette of colors empowers them to express themselves freely. There's no right or wrong way to paint a snowflake or a Santa Claus, and this freedom encourages imaginative thinking and problem-solving. They learn to experiment with color combinations, textures, and designs, developing their unique artistic voice.
Beyond the artistic expression, painting crafts are fantastic for developing fine motor skills and hand-eye coordination. Holding a paintbrush, squeezing paint, making precise strokes, or even just finger painting all require careful control of small muscles in the hands and fingers. These skills are crucial for tasks like writing, buttoning clothes, and using utensils. The act of dipping a brush, wiping excess paint, and guiding it across a surface refines dexterity and improves the coordination between what the eyes see and what the hands do.
These crafts also offer wonderful opportunities for early STEM learning, even when it seems purely artistic. Consider the science of color mixing: watching primary colors blend to form secondary hues is a captivating chemistry lesson in action. Understanding how different amounts of water affect watercolor paints introduces concepts of concentration and dilution. When children experiment with various tools like sponges or q-tips, they're exploring different textures and their effects, touching on basic physics. Even something as simple as arranging painted shapes on a card involves spatial reasoning and early geometry. At I'm the Chef Too!, we believe in these subtle yet powerful learning moments, making every activity an "edutainment" opportunity.
Moreover, engaging in painting Christmas crafts provides a fantastic screen-free alternative that encourages mindful engagement and presence. In a world brimming with digital distractions, these hands-on activities invite children to disconnect from screens and connect with their creative instincts and with family members. It’s a chance to slow down, focus on a tangible task, and enjoy the simple pleasure of making something with their own hands. This focused time can also be incredibly calming and therapeutic, offering a quiet moment amidst the holiday rush.
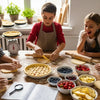
Finally, and perhaps most importantly, painting Christmas crafts are about creating joyful family memories. Gathering around a table, sharing materials, laughing at accidental smudges, and admiring each other's creations builds strong bonds. It's an opportunity for parents and children to collaborate, chat, and simply enjoy each other's company. The painted ornaments and cards become cherished keepsakes, not just because they’re beautiful, but because they carry the warmth of shared experiences and the love poured into their creation. These are the moments that truly make the holidays special, fostering a love for learning and creating that lasts a lifetime.
Getting Started: Essential Supplies & Safety Tips for Your Painting Adventure
Embarking on a painting Christmas craft adventure doesn't require a professional art studio, but having a few essential supplies on hand will make the experience much smoother and more enjoyable for everyone. We also can't stress enough the importance of creating a safe and supervised environment, especially when little hands are involved with paint and craft tools.
Your Painting Toolkit: What You'll Need
Paints: This is where the magic happens!
- Washable Tempera Paints: Our absolute favorite for kids' crafts. They're vibrant, easy to clean up from skin, clothes, and surfaces, and perfect for toddlers and preschoolers. They dry quickly and are non-toxic.
- Acrylic Paints: Great for older kids or if you want a more permanent, vibrant finish on surfaces like wood, ceramic, or canvas. They are not easily washable once dry, so be extra mindful of clothing and surfaces.
- Watercolors: Ideal for delicate washes, blending, and creating beautiful, translucent effects on paper. They're less messy than tempera or acrylics and fantastic for practicing control.
- Finger Paints: Specifically designed for the youngest artists, offering a wonderful sensory experience.
Brushes & Applicators: Don't limit yourself to traditional brushes!
- Assorted Paintbrushes: A variety of sizes and shapes (flat, round, foam) will allow for different strokes and details.
- Sponges: Cut up kitchen sponges or craft sponges create interesting textures and are easy for small hands to grip. Perfect for creating snowy scenes or fluffy trees.
- Q-Tips (Cotton Swabs): Excellent for dot painting (pointillism), fine details, or creating patterns like falling snow or tiny lights. They also help develop fine motor control.
- Cotton Balls: Great for dabbing soft, cloud-like textures or gentle snow drifts.
- Forks: An unexpected tool that can create fantastic textures, like the bristly needles of a pine tree or the fur of a reindeer.
- Cookie Cutters: Dip the edges in paint and stamp festive shapes onto paper or cards.
- Nature's Tools: Pinecones, leaves, twigs can all be used as unique stamps or brushes, adding an organic touch to your creations.
Surfaces: The canvas for your festive visions!
- Paper & Cardstock: White and colored paper, construction paper, and sturdy cardstock for cards, gift tags, and drawings.
- Wooden Blanks: Unfinished wooden ornaments, shapes (stars, trees, snowflakes), or small blocks are perfect for creating durable, paintable keepsakes.
- Ceramic Ornaments: Bisque ceramic ornaments can be painted with acrylics and then sealed for a glossy finish.
- Clear Plastic Baubles: Fill them with paint swirls or decorate the outside for unique ornaments.
- Salt Dough: Homemade salt dough can be shaped, baked, and then painted for charming, personalized ornaments.
- Rocks: Smooth, clean rocks transform into delightful painted characters or festive messages.
Protective Gear & Cleanup Crew: Essential for a stress-free experience.
- Art Smocks or Old Clothes: Protect clothing from inevitable spills.
- Newspaper or Drop Cloths: Cover your workspace (table, floor) to catch drips and splatters. An old shower curtain or plastic tablecloth also works wonders.
- Paper Towels & Wet Wipes: For quick cleanups of hands and surfaces.
- Water Cups: Several cups of water for rinsing brushes (one for dark colors, one for light, one for a final rinse).
- Soap & Water: Keep a basin or sink nearby for immediate brush cleaning and hand washing.
Safety First: Our Golden Rules
At I'm the Chef Too!, we always prioritize a safe environment for all our activities, whether it's cooking or crafting. Here are our top safety tips for your painting Christmas craft sessions:
- Adult Supervision is Key: Never leave young children unattended with paints or craft supplies. An adult should always be present to guide, assist, and ensure safety.
- Non-Toxic Paints Only: Always choose paints labeled "non-toxic," especially for activities with younger children who might put things in their mouths. Most children's tempera and finger paints fit this bill.
- Ventilation: If using acrylic paints or sealants (which are less common for basic kid crafts, but good to remember for older projects), ensure the area is well-ventilated. Open a window or work in a spacious room.
- Mindful of Small Parts: Be aware of any small decorative elements (glitter, beads, googly eyes) that could be choking hazards for toddlers. Opt for larger, safer alternatives or skip them altogether for very young children.
- Educate on Tool Use: Teach children how to use brushes and other tools safely. For example, brushes are for painting, not poking.
- Allergy Awareness: If incorporating any food-based elements (like using cookie cutters for painting or making salt dough), be mindful of potential food allergies for anyone in your household or who might receive the finished crafts.
By gathering your supplies and keeping these safety tips in mind, you're all set to create a joyful and mess-managed painting experience that everyone can enjoy. We encourage you to explore our full library of adventure kits available for a single purchase in our shop for even more hands-on fun, or consider subscribing to our monthly Chef's Club for new adventures delivered right to your door with free shipping!
Classic & Beloved Painting Christmas Crafts
Some Christmas craft ideas are timeless for a reason. They're simple, impactful, and offer endless possibilities for personalization. These classic painting Christmas crafts are fantastic starting points for any age group, promising cherished keepsakes and heartwarming gifts.
Ornament Painting: Personalized Treasures
Painting ornaments is a quintessential holiday activity, transforming plain surfaces into sparkling keepsakes. The beauty lies in their versatility and the fact that they can be hung on the tree year after year, serving as colorful reminders of childhood Christmases.
Types of Ornaments to Paint:
- Wooden Blanks: Easily found at craft stores, these come in various shapes like stars, trees, snowflakes, or simple circles. They take acrylic and tempera paints beautifully.
- Ceramic Bisque Ornaments: These unglazed ceramic pieces are ready to be painted and can then be sealed for durability.
- Clear Plastic Baubles: These are a fantastic, shatter-proof option, especially for younger children. You can paint designs on the outside, or even pour small amounts of different colored paints inside, swirling them around to create a marbled effect before letting them dry upside down.
Painting Ideas for Ornaments:
-
Handprint/Fingerprint Characters:
- Reindeer: Paint your child's palm brown, press it onto an ornament, and once dry, add googly eyes and a red nose (a fingerprint or tiny pom-pom).
- Snowmen: Use a white fingerprint for a snowman's body, then add a tiny orange nose, black dots for eyes and buttons, and a painted scarf.
- Christmas Lights: Dip fingertips in various bright colors to create a string of colorful "lights" around the ornament.
- Why it's great: These capture a snapshot of your child's size each year, making them incredibly sentimental.
-
Marbled Ornaments:
- Using the clear plastic baubles mentioned above, squeeze a few drops of different colored acrylic paints inside. Swirl gently until the colors create a beautiful marbled pattern. Let excess paint drip out and dry.
- Alternatively, for a shaving cream marble effect (as described in the "Innovative Techniques" section), you can roll a plain wooden ornament through painted shaving cream.
- Why it's great: Every ornament is unique, and the process is fascinating to watch.
-
Glitter & Glam Ornaments:
- Paint ornaments with a base color, then, while the paint is still wet, sprinkle generously with glitter. You can also use glitter glue for accents or designs.
- Why it's great: Who doesn't love a bit of sparkle during the holidays?
-
Abstract Designs:
- Sometimes, the most beautiful creations come from pure, unguided expression. Encourage children to use various colors and strokes to create their own abstract patterns, dots, or swirls.
- Why it's great: Focuses on the process, allowing complete creative freedom.
Salt Dough Ornaments: From Kitchen to Keepsake
Salt dough is a wonderful, inexpensive medium that combines cooking and crafting. It's safe for children to handle, easy to make, and results in durable, paintable ornaments.
Making Salt Dough:
- Ingredients: 1 cup salt, 2 cups flour, 1 cup water.
- Method: Mix salt and flour thoroughly. Gradually add water, mixing until a dough forms. Knead for 5-10 minutes until smooth and pliable.
- Shaping: Roll out the dough (about 1/4 inch thick) and use Christmas cookie cutters (stars, trees, gingerbread men, angels) to cut out shapes. Don't forget to poke a hole at the top of each ornament with a straw for hanging!
- Baking: Bake at 250°F (120°C) for 1-3 hours, or until completely dry and hard. Thicker ornaments will take longer. Let cool completely.
Painting Salt Dough Ornaments: Once baked and cooled, salt dough ornaments are like mini canvases. Tempera or acrylic paints work wonderfully.
- Solid Colors: Paint a base color, then add details with contrasting colors.
- Sparkle & Shine: Add glitter glue, sequins, or small beads (for older children) to decorate.
- Personalized Touch: Write names, dates, or special messages on the back.
- Why it's great: It's a multi-step project that involves measuring, mixing, shaping, and painting, offering a holistic learning experience. Plus, they make fantastic, heartfelt gifts. This is exactly the kind of blending of culinary and creative arts that we champion at I'm the Chef Too!, where every project is an opportunity for discovery.
Christmas Card Creations: Hand-Painted Greetings
In our digital age, a handmade Christmas card carries immense personal value. Painting cards allows children to create unique greetings that truly come from the heart.
Painting Ideas for Cards:
-
Sponge Print Trees/Wreaths:
- Cut a kitchen sponge into a triangle (for trees) or a donut shape (for wreaths). Dip in green paint and stamp onto folded cardstock. Once dry, add painted "ornaments" or "berries" with fingertips.
-
Tape Resist Designs:
- Place strips of painter's tape on cardstock to form a Christmas tree, a star, or even initials. Children paint over the entire card. Once dry, peel off the tape to reveal the unpainted, crisp design underneath.
-
Fingerprint Characters/Scenes:
- Create a winter wonderland with white fingerprint snowmen, red fingerprint Rudolph noses, or green fingerprint holly berries.
-
Watercolor Washes:
- Wet the cardstock slightly, then apply watercolors in broad strokes. The colors will bleed beautifully, creating a soft, ethereal background for a silhouette (e.g., a painted black reindeer) or a simple festive message.
- Why it's great: Sending these cards is a lesson in thoughtfulness and generosity, and receiving them is a pure delight. They teach children about communication, art, and the joy of giving.
These classic painting Christmas crafts offer a foundation for holiday creativity. They are engaging, educational, and lead to tangible results that families can cherish. If your family enjoys these kinds of engaging projects, you’ll love what we offer at I'm the Chef Too! Ready for a new adventure every month? Join The Chef's Club and enjoy free shipping on every box. Our kits deliver pre-measured dry ingredients and specialty supplies right to your door, making hands-on learning convenient and fun!
Innovative Painting Techniques for Holiday Fun
While classic methods are wonderful, exploring new painting techniques can ignite even more excitement and introduce children to different textures, effects, and artistic possibilities. These innovative approaches turn painting into a true exploration of materials and processes.
Tape Resist Art: The Magic of Unveiling
Tape resist art is a fantastic technique that reveals a crisp, unpainted design when the tape is removed. It's always a delightful surprise for kids!
- How To: Place strips of painter's tape on paper or cardstock to create a Christmas-themed design – a tree, a star, a candy cane, or even just geometric patterns. Encourage children to paint over the entire surface with various colors, using brushes, sponges, or even their fingers. Once the paint is completely dry, slowly peel off the tape to reveal the clean, unpainted areas underneath.
- Holiday Ideas: Create negative space Christmas trees, stars, snowflakes, or even messages like "JOY" or "NOEL."
- Educational Connection: This technique subtly introduces concepts of positive and negative space in art, as well as the importance of patience while waiting for paint to dry.
Marble Painting (Shaving Cream or Oil-Based): Beautiful Swirls
Marbling creates mesmerizing, unique patterns that are truly works of art. There are a couple of fun ways to achieve this effect.
- Shaving Cream Method: Spread a layer of shaving cream onto a tray or shallow dish. Drip various colors of washable paint onto the shaving cream. Use a craft stick or skewer to gently swirl the colors, creating patterns (don't overmix!). Place a piece of paper or a flat ornament gently onto the swirled cream, press lightly, then lift. Scrape off the excess shaving cream with a ruler or cardboard edge to reveal the marbled design.
- Oil-Based Method (for older kids, with supervision): Fill a shallow container with water. Drip small amounts of oil-based paints (or even nail polish) onto the surface of the water. The oil will float and spread. Gently lay paper or a wooden ornament onto the surface, lift, and let dry.
- Holiday Ideas: Use red, green, silver, and gold paints for festive swirled paper that can be turned into cards, gift tags, or even wrapping paper. You can also marble plain wooden ornaments.
- Educational Connection: This is a fantastic, hands-on chemistry lesson, observing how different liquids (paint, shaving cream, water, oil) interact and repel each other.
Sponge Painting: Textured & Tactile
Using sponges instead of brushes can create wonderfully textured effects, perfect for certain holiday scenes.
- How To: Cut kitchen sponges into various shapes (triangles for trees, circles for snowmen, irregular shapes for snowdrifts). Dip the sponge into paint and dab or press it onto your surface.
- Holiday Ideas: Create fuzzy Christmas trees, fluffy snow scenes, polka-dot ornaments, or even textured "garland" on a painted wreath.
- Educational Connection: This method explores different textures and how tools can alter the visual outcome, developing an understanding of tactile art. It's also great for strengthening hand muscles with the dabbing motion.
Fork Painting: Unexpected Textures
A simple kitchen fork can be an amazing painting tool, especially for creating spiky or bristly textures.
- How To: Dip the tines of a plastic or old metal fork into paint. Drag, dab, or press the fork onto your paper.
- Holiday Ideas: Create the textured needles of a pine tree, the fur of a reindeer or polar bear, or even a whimsical fireworks effect for a New Year's themed craft.
- Educational Connection: This encourages out-of-the-box thinking about tools and their potential, expanding creativity beyond traditional art supplies.
Q-Tip or Finger Painting: Precision & Sensory Fun
These methods offer both fine detail capabilities and a wonderful sensory experience.
-
Q-Tip Painting: Dip the cotton tip into paint and use it to create dots, lines, or small shapes.
- Holiday Ideas: Pointillism Christmas trees (made of many tiny dots), strings of colorful Christmas lights, falling snow, or adding intricate patterns to ornaments.
-
Finger Painting: The ultimate sensory experience for young children.
- Holiday Ideas: Use fingers to create swirls for snow, smudges for clouds, or even simple handprint/fingerprint characters like snowmen or reindeer.
- Educational Connection: Q-tip painting is excellent for developing fine motor skills and precision, while finger painting provides rich sensory input, important for early development.
Bubble Painting: A Breath of Fresh Art
This is a really fun, slightly messy, and very visual way to create unique patterns.
- How To: Mix tempera paint with a bit of dish soap and water in a shallow bowl. Using a straw, blow into the mixture until bubbles form and rise above the rim of the bowl. Carefully place a piece of paper (or a small paper ornament) onto the bubbles, letting the colored bubbles burst and leave their mark.
- Holiday Ideas: Use red and green bubbles for festive patterns, or blue and white for snowy scenes. The resulting paper can be cut into shapes or used for cards.
- Educational Connection: This activity is a fantastic introduction to the physics of bubbles and how air pressure affects their formation. It's also a great way to observe how colors can layer and blend.
Spin Art: Physics in Motion
Spin art is always a hit, combining art with a bit of science and motion.
- How To: You can buy a spin art machine, or DIY one with an old salad spinner (dedicate it to crafts!). Place a piece of paper (cut to fit) inside. Drip different colored paints onto the paper. Close the lid and spin rapidly. Open to reveal a burst of abstract, swirled patterns.
- Holiday Ideas: Use holiday colors for abstract Christmas art, or cut the dried spin art paper into ornament shapes, stars, or gift tags.
- Educational Connection: This is a clear demonstration of centrifugal force! Children observe how the spinning motion distributes paint outwards, creating radial patterns.
These innovative painting techniques are wonderful for keeping creativity fresh and showing children that art can be made in countless exciting ways. They encourage experimentation, problem-solving, and a deeper appreciation for the interplay of art and science. If your kids love these kinds of creative explorations, they will be thrilled by our unique "edutainment" approach. You can browse our complete collection of one-time kits to find the perfect blend of learning and fun!
Beyond Paper: Unique Surfaces for Painting
While paper is a fantastic and accessible medium for painting Christmas crafts, expanding to other surfaces can open up a whole new world of creative possibilities, leading to even more durable and unique keepsakes or gifts.
Rock Painting: Festive Garden Treasures
Painting rocks is a popular and engaging activity that can turn ordinary stones into extraordinary works of art, perfect for holiday decor or thoughtful gifts.
- Preparation: Collect smooth, relatively flat rocks. Wash them thoroughly and let them dry completely.
-
Painting Ideas:
- Christmas Characters: Transform rocks into tiny Santas, snowmen, reindeer, or elves.
- Festive Messages: Paint words like "JOY," "PEACE," "LOVE," or "HO HO HO!"
- Mandalas/Patterns: For older children, intricate dot patterns or abstract designs using holiday colors can be very meditative and beautiful.
- Finishing: Once the paint is dry, seal the rocks with a clear sealant (mod podge, spray sealer) to protect the design, especially if they will be placed outdoors.
- Why it's great: Connects art with nature, encourages outdoor exploration, and creates long-lasting decorations or "kindness rocks" to hide for others to find.
Wood Slices: Rustic & Charming
Wood slices offer a lovely rustic backdrop for painted Christmas designs, making beautiful ornaments, coasters, or small decorative signs.
- Preparation: Purchase pre-cut, sanded wood slices from craft stores, or forage for suitable branches and slice them yourself (with adult supervision and proper tools). Ensure they are dry.
-
Painting Ideas:
- Miniature Scenes: Paint small winter landscapes, cozy cabins, or snowy trees.
- Personalized Ornaments: Add names, dates, or small handprints/fingerprints.
- Animal Friends: Turn wood slices into woodland creatures like owls or foxes wearing Santa hats.
- Abstract Designs: Use acrylics to create bold, colorful patterns that contrast with the natural wood grain.
- Finishing: A clear sealant will protect the paint and bring out the natural beauty of the wood.
- Why it's great: Provides a durable, natural canvas that feels special and can become a cherished heirloom.
Fabric Painting: Wearable & Usable Art
Painting on fabric allows children to create gifts or decorations that are not only beautiful but also practical and usable.
- Materials: Plain cotton items like tote bags, aprons, tea towels, t-shirts, or small canvas pouches. You'll need fabric paints (or acrylics mixed with a fabric medium).
-
Painting Ideas:
- Holiday Themed Tote Bags: Perfect for carrying gifts or groceries. Kids can paint Christmas trees, presents, or a cheerful Santa.
- Personalized Aprons: A wonderful gift for a budding chef! They can paint their favorite holiday treat or a chef's hat.
- Festive Tea Towels: Simple stencils or handprints can create charming designs.
- Process: Place cardboard inside the fabric item to prevent bleed-through. Paint your design. Once dry, follow the fabric paint instructions for heat-setting (usually with an iron) to make the design permanent and washable.
- Why it's great: Creates functional art, teaches a new medium, and results in personalized gifts that recipients will truly appreciate and use. It aligns perfectly with our mission at I'm the Chef Too!, where we blend creativity with practical skills, often through delicious cooking adventures.
Window Clings / Faux Stained Glass: Colorful Light Play
Create stunning, light-catching decorations that can adhere to windows or mirrors, mimicking the look of stained glass.
- Materials: Clear contact paper, transparency sheets, or even laminating pouches. Washable markers, permanent markers (for outlines), liquid glue (PVA), and food coloring.
-
Painting Ideas:
- Simple Contact Paper Clings: Draw holiday shapes (stars, snowflakes, trees) on the non-sticky side of clear contact paper. Children color them in with washable markers. Cut out the shapes, peel the backing, and stick to a window.
- "Stained Glass" with Glue & Food Coloring: Mix liquid glue with a few drops of food coloring to create vibrant "paints." Draw outlines of Christmas designs on a transparency sheet with a permanent marker. Fill in the sections with your colored glue mixtures. Let dry completely (this can take 1-2 days), and the result is a beautiful, translucent effect.
- Why it's great: Plays with light and color, offers a unique textural experience, and creates temporary decorations that can be easily removed.
Exploring these unique surfaces expands the artistic horizons for children, allowing them to experiment with how different materials interact with paint. These durable and often functional crafts make fantastic gifts and decorations, extending the joy of creation beyond the immediate activity. If you're inspired by these hands-on activities, remember that at I'm the Chef Too!, we craft incredible kits that inspire similar engagement and learning. Not ready to subscribe? You can always explore our full library of adventure kits available for a single purchase in our shop.
Integrating STEM with Painting Christmas Crafts
At I'm the Chef Too!, our core mission is to blend food, STEM, and the arts into one-of-a-kind "edutainment" experiences. It might not be immediately obvious, but painting Christmas crafts are brimming with opportunities to introduce and reinforce fundamental STEM concepts. By highlighting these connections, we can transform a fun art project into a powerful learning adventure that sparks curiosity and builds foundational knowledge.
The Science of Color and Light
Every time a child mixes paints or observes colors, they're engaging with chemistry and physics.
- Color Theory: Introduce primary colors (red, yellow, blue) and secondary colors (green, orange, purple) by having children mix them. "What happens when we mix blue and yellow? We get green – just like the pine needles on our Christmas tree!" Experiment with adding white to create lighter tints or black for darker shades. This teaches them about pigment composition and the visible light spectrum.
- Light and Reflection: When painting glitter ornaments or creating faux stained glass, discuss how light interacts with different materials. Why does glitter sparkle? How does light pass through the colored glue on a window? This touches on basic optics and the properties of light.
Math in Every Stroke
Math concepts are naturally woven into many painting activities, enhancing mathematical reasoning.
- Geometry and Shapes: When painting a Christmas tree, children are working with triangles. Snowflakes often involve symmetry and radial balance. Discuss different shapes they can paint for ornaments – circles, squares, stars. "How many points does our star have?" "Can you make your snowman with three circles of different sizes?"
- Symmetry: Many Christmas designs, like snowflakes or symmetrical trees, offer a perfect chance to explore symmetry. Fold paper in half, paint on one side, then press to transfer the design to the other for a mirrored effect. This is a foundational concept in geometry.
- Patterns and Sequences: Creating repetitive patterns on a border of a card or an ornament (e.g., dot-stripe-dot-stripe) introduces early algebraic thinking and sequencing.
Engineering & Design Principles
Even simple crafts involve elements of engineering and design thinking.
- Planning and Problem-Solving: Before painting, children decide what they want to create and how to achieve it. "Which colors will I use? How will I make the snow look fluffy?" This involves planning and mental visualization.
- Structure and Stability: If they're making salt dough ornaments, they learn that if the ornament is too thin, it might break, or if the hole for the string is too close to the edge, it might tear. This subtly introduces concepts of structural integrity and design constraints.
- Tool Selection: Deciding whether to use a wide brush for a background or a Q-tip for fine details is an engineering choice about selecting the right tool for the job.
Sensory Exploration and Beyond
Beyond the traditional STEM fields, painting offers rich sensory exploration and develops crucial executive function skills.
- Texture and Properties: Exploring how different paints feel (thick tempera vs. runny watercolor), how they adhere to various surfaces (paper, wood, rock), and how different tools create unique textures (sponge dabs, fork scrapes) enhances tactile and visual sensory processing.
- Focus and Patience: Many painting projects require sustained attention and the patience to wait for layers to dry. These are vital executive function skills.
- Cause and Effect: "If I press hard with the sponge, the paint is thick. If I press lightly, it's softer." This teaches direct cause and effect.
Hypothetical Case Study Example: Imagine a parent looking for a screen-free weekend activity for their 7-year-old who is fascinated by the natural world. Instead of just painting a generic tree, they could gather pinecones and twigs from the backyard to use as stamping tools on a piece of paper, creating a "winter forest" scene. As they paint, they could discuss the biology of pine trees, how pinecones protect seeds, or even the engineering challenge of how a bird builds its nest.
Or, for a child captivated by geology, perhaps they could paint "geode slice" ornaments on flattened clay with vibrant colors and glitter, discussing the crystals and layers found inside real geodes. This kind of hands-on creativity is at the heart of what we do at I'm the Chef Too!, where even seemingly simple activities like painting can lead to deeper learning and connect to fascinating subjects like the chemical reactions that make our Erupting Volcano Cakes bubble over with deliciousness, or exploring astronomy by creating your own edible solar system with our Galaxy Donut Kit. These experiences, developed by mothers and educators, are designed to seamlessly weave complex subjects into tangible, delightful adventures.
By approaching painting Christmas crafts with a STEM lens, you're not just creating art; you're nurturing a curious mind, developing critical thinking skills, and laying the groundwork for a lifelong love of discovery. These activities are powerful tools for "edutainment," demonstrating that learning can be joyful, messy, and wonderfully creative.
Making it a Family Affair: Tips for Shared Creativity
The holiday season is all about togetherness, and painting Christmas crafts offer a perfect opportunity for family bonding. It’s a chance to step away from the everyday, put down the devices, and connect through shared creative expression. At I'm the Chef Too!, fostering family bonding is central to our mission, and we encourage activities that bring everyone to the table, both literally and figuratively.
Tips for Involving All Ages
Creating a painting Christmas craft session that includes toddlers, preschoolers, school-aged kids, and even adults might seem daunting, but with a few strategies, it can be wonderfully successful.
- Set Up a Central "Creation Station": Designate a large table or floor space that's easily accessible and well-protected. Lay out newspapers, plastic tablecloths, or old sheets. Have all paints, brushes, water cups, and surfaces ready. This clear setup signals "creative time" and helps manage mess.
-
Offer Age-Appropriate Choices:
- For Toddlers (1-3 years): Focus on sensory exploration. Large sheets of paper, finger paints, sponges, and simple cookie cutters for stamping are ideal. Don't worry about the outcome; celebrate the process! Provide large, chunky items that are easy to grip.
- For Preschoolers (3-5 years): Introduce basic brushes, tape resist, sponge painting, and pre-cut shapes. They can start making simple characters or patterns. Focus on color recognition and simple instructions.
- For School-Aged Kids (6+ years): They can tackle more complex designs, intricate details with Q-tips, salt painting, or experiment with mixing colors and different techniques. Encourage them to plan their designs.
- For Teens & Adults: Participate alongside! Offer more advanced techniques like watercolor washes, detailed rock painting, or designing complex fabric patterns. Adults can also assist younger children, fostering mentorship.
- Collaborative Projects: Encourage everyone to contribute to a single, larger project. For instance, each family member could paint a section of a long paper "Christmas banner," or everyone contributes a hand-painted ornament to a special "Family Tree" collection.
- No Pressure, Just Fun: Emphasize that the goal is not perfection, but the joy of creating together. Avoid comparing children's work or criticizing their efforts. Celebrate every unique stroke and color choice. Remind everyone that process over product is key!
- Storytelling and Conversation: Use the craft time as an opportunity to talk about favorite holiday memories, traditions, or stories. "What's your favorite part about Christmas?" "What colors make you feel happy?" These conversations deepen connections.
- Music to Set the Mood: Put on some festive holiday music to enhance the cheerful atmosphere. It's amazing how much a little background music can elevate the experience.
The Value of Process Over Product
One of the most important aspects of engaging in creative activities with children, particularly painting, is to value the process more than the final product. At I'm the Chef Too!, we wholeheartedly embrace this philosophy.
- Learning is in the Doing: The act of choosing colors, experimenting with tools, making decisions, and seeing how materials interact is where the true learning happens. It’s about the sensory experience, the problem-solving, and the development of skills, not just the perfectly symmetrical star.
- Building Confidence: When children feel free to explore without the pressure of producing something "perfect," they are more likely to take risks, try new things, and build self-confidence in their abilities. Their unique creations are celebrated, reinforcing their sense of self-worth.
- Fostering a Love for Learning: When activities are enjoyable and stress-free, children associate learning with positive emotions. This fosters an intrinsic motivation to explore, create, and discover, which is a core value we uphold in every I'm the Chef Too! kit.
- Joyful Memories: The shared laughter, the colorful mess, the quiet moments of concentration – these are the real "products" of family craft time. These joyful memories strengthen family bonds far more than any perfectly executed craft ever could.
So, gather your family, lay out the paints, and embrace the beautiful, messy, and memorable adventure of painting Christmas crafts together. It's a precious way to slow down, connect, and celebrate the magic of the season, creating not just decorations, but traditions and memories that will last a lifetime. If you're looking to extend this spirit of playful learning throughout the year, our unique monthly subscriptions are perfect. Give the gift of learning that lasts all year with a 12-month subscription to our STEM cooking adventures, complete with pre-measured ingredients and specialty supplies!
Cleaning Up After the Fun: Easy Tips for a Stress-Free Finish
Let's be honest: while the creative process of painting Christmas crafts is incredibly joyful, the thought of cleanup can sometimes deter even the most enthusiastic parent. But fear not! With a few simple strategies, managing the post-painting mess can be quick and painless, ensuring that the fun factor of the activity isn't overshadowed by cleanup anxiety. At I'm the Chef Too!, we understand the importance of making hands-on activities manageable for busy families, which is why our kits aim for convenience, and these cleanup tips will further simplify your crafting adventures.
Before You Even Start: The Pre-Game Plan
The easiest cleanup begins before the first drop of paint hits the paper.
- Protect Your Surfaces: As mentioned earlier, lay down newspaper, old towels, or a dedicated plastic tablecloth. This barrier will catch most spills and splatters, protecting your furniture.
- Dress for Mess: Encourage children (and adults!) to wear old clothes or art smocks. This simple step prevents paint-stained favorites and reduces laundry stress.
- Designate a Rinse Station: Have at least two cups of water ready for brushes – one for initial rinsing of darker colors, and a second for a cleaner rinse. This prevents murky paint water from spreading.
During the Activity: Small Actions, Big Impact
A few mindful habits during the crafting session can significantly ease cleanup.
- "Less is More" with Paint: Instead of pouring large puddles of paint, start with small amounts on a palette (old plates, plastic lids, or even aluminum foil work well). Children can always ask for more if needed. This reduces waste and potential for large spills.
- Wipe As You Go: Keep a roll of paper towels or a stack of wet wipes handy. Encourage children to wipe brushes between colors or clean up small spills immediately. This instills a sense of responsibility and prevents dried-on messes.
- Brush Etiquette: Teach children to place used brushes in the rinse water immediately after they're done with a color, rather than letting paint dry on them.
After the Masterpieces Are Complete: The Cleanup Crew
Once the last stroke is painted and the art is set aside to dry, it's cleanup time!
- Scrape and Dispose: If using paper palettes, scrape any excess paint back into containers (if clean) or into the trash. Fold up newspaper or tablecloths with wet paint facing inwards and discard.
-
Wash Brushes Promptly: This is crucial! Dried paint can ruin brushes.
- Rinse brushes thoroughly under warm running water until the water runs clear.
- Gently work a little soap (dish soap works great) into the bristles, swirling them in your palm.
- Rinse again until all soap and paint are gone.
- Reshape the bristles and stand brushes upright to dry, or lay them flat.
- Clean Palettes and Containers: Wash plastic palettes, cups, and any other reusable containers with warm soapy water.
- Wipe Down Surfaces: Use a damp cloth or sponge with a little all-purpose cleaner to wipe down your table, chairs, and any surrounding areas that might have caught stray splatters. For washable paints, a simple damp cloth is usually enough.
- Hands & Faces: A quick trip to the sink with soap and water will take care of painted hands and faces. For stubborn spots, a little olive oil can help remove paint from skin before washing with soap.
By following these simple cleanup tips, you can minimize the post-crafting hassle and keep the joy of creating alive. Remember, a little preparation goes a long way in making painting Christmas crafts a delightful, stress-free family tradition. We believe that learning should always be fun and manageable, just like the exciting journeys you'll find in our kits. If you're looking for more ways to spark curiosity and creativity without the fuss, we invite you to explore our full library of adventure kits available for a single purchase in our shop.
Beyond Christmas Day: Using Your Creations
The magic of painting Christmas crafts doesn't end when the paint dries. In fact, that's just the beginning! The creations your children make hold immense value, not just as festive decorations, but as tangible representations of their learning, creativity, and the precious memories forged during the holiday season. At I'm the Chef Too!, we emphasize the lasting impact of hands-on experiences, and these crafts are perfect examples of how "edutainment" extends beyond the immediate activity.
Decking the Halls: Festive Decorations
The most obvious, and perhaps most cherished, use for your painted Christmas crafts is to incorporate them into your holiday decor.
- Tree Ornaments: Hand-painted wooden, ceramic, or salt dough ornaments add a deeply personal and sentimental touch to your Christmas tree. Each year, as you unpack them, they'll bring back a flood of memories and stories about when they were made.
- Garlands & Banners: String together painted paper cut-outs, strung wooden beads, or even small painted rocks to create unique garlands for mantels, doorways, or windows.
- Window Displays: Faux stained glass creations or painted window clings catch the light beautifully, adding a colorful glow to any room.
- Table Centerpieces: A collection of painted rocks, small wood slice ornaments, or even a child's painted miniature forest scene can make a charming centerpiece for your holiday dining table.
- Personalized Place Settings: Painted wood slices or small cards can serve as unique place cards for your holiday dinner, making each guest feel extra special.
Heartfelt Gifts from the Heart
Handmade gifts carry an incomparable warmth and sincerity. Painted crafts make truly thoughtful presents for family and friends.
- For Grandparents: Nothing melts a grandparent's heart faster than a hand-painted ornament, a custom-designed card, or a personalized tea towel or tote bag made by their grandchild. These are treasures they'll cherish for years.
- For Teachers & Neighbors: A painted rock with a festive message, a small wooden ornament, or a set of handmade cards can be a lovely gesture of appreciation.
- For Siblings & Cousins: Kids often love exchanging handmade gifts, and a painted bookmark, a decorated mug (using paint pens designed for ceramics), or a custom-painted picture frame can be very special.
- Why They're Special: These gifts aren't just objects; they are expressions of love, time, and effort. They teach children the joy of giving and the value of personal connection, aligning perfectly with our values of fostering kindness and creativity.
Treasured Keepsakes & Memory Builders
Beyond immediate decoration or gifting, your painted Christmas crafts serve as powerful memory builders.
- Memory Boxes: Designate a special "Christmas Crafts" box where you can store a selection of your child's creations each year. It’s incredibly rewarding to look back through these boxes in future years, seeing how their artistic skills and interests evolved.
- Yearly Traditions: Making a specific type of painted craft each Christmas (e.g., a new handprint ornament, a painted ceramic plate for Santa's cookies) can become a cherished family tradition, marking the passage of time and creating continuity.
- Documenting Growth: These crafts inadvertently document your child's developmental stages – from the wild, abstract smears of a toddler to the detailed designs of an older child. They are snapshots of their growth and personality.
- Story Starters: A painted ornament might spark a conversation about the year it was made, a funny anecdote during its creation, or even a dream the child had while painting. These stories enrich family lore.
By embracing the diverse uses of your children's painted Christmas crafts, you extend the joy and learning beyond the initial activity. You transform simple art projects into meaningful decorations, cherished gifts, and lasting memories that underscore the true spirit of the holidays. This continuous cycle of creation, sharing, and remembrance is at the heart of the holistic "edutainment" experience we champion at I'm the Chef Too! Our mission is to spark this kind of curiosity and creativity, encouraging family bonding through tangible, hands-on, and delicious adventures.
Conclusion: Ignite the Holiday Spirit with Artful Learning
As the festive season approaches, the opportunity to engage our children in meaningful, screen-free activities becomes more precious than ever. Painting Christmas crafts for kids offers a magical blend of creativity, learning, and family togetherness, transforming simple materials into cherished keepsakes and lasting memories. From the delicate strokes of a watercolor snowflake to the vibrant splashes of a hand-painted ornament, each project is a testament to your child's imagination and a joyful moment shared with family.
We've explored a wide array of possibilities, from classic ornament painting and heartfelt handmade cards to innovative techniques like tape resist and marble art, and even unique surfaces like rocks and wood slices. Beyond the beautiful outcomes, we've seen how these activities naturally weave in vital STEM concepts – from the chemistry of color mixing to the physics of spin art, and the math of symmetry. They hone fine motor skills, build confidence, and provide an invaluable outlet for self-expression, all while fostering a love for learning.
At I'm the Chef Too!, our mission is rooted in these very principles: to spark curiosity and creativity in children by blending food, STEM, and the arts into unforgettable "edutainment" experiences. We believe that the most profound learning happens through tangible, hands-on discovery, guided by the warmth of family connection. These painting Christmas crafts perfectly embody that philosophy, reminding us that the greatest gifts are often the time and love we share in creating something together.
So, gather your paints, prepare your workspace, and invite your children to dive into the wonderful world of holiday art. Embrace the mess, celebrate the process, and cherish every unique masterpiece. These are the moments that truly make the holidays special, building confidence, developing key skills, and creating joyful family memories that will last a lifetime.
Ready to continue the adventure and bring even more "edutainment" experiences into your home? Discover the joy and convenience of our monthly STEM cooking kits, meticulously developed by mothers and educators. Join The Chef's Club today and enjoy a new adventure delivered to your door every month with free shipping in the US! Whether you choose a 3, 6, or 12-month pre-paid plan, you’re giving the gift of learning that lasts all year.
Frequently Asked Questions (FAQ) about Painting Christmas Crafts for Kids
Q1: What's the best type of paint for young children (toddlers and preschoolers)? A1: For very young children, washable tempera paints or dedicated finger paints are highly recommended. They are non-toxic, vibrant, and incredibly easy to clean from skin, clothing, and surfaces, making the experience stress-free for both kids and adults.
Q2: How can I prevent a huge mess when doing painting crafts with kids? A2: Preparation is key! Lay down old newspapers, a plastic tablecloth, or an old shower curtain to protect your workspace. Have kids wear old clothes or art smocks. Keep wet wipes and paper towels handy for quick cleanups. Use small amounts of paint on a palette rather than large puddles, and teach children to rinse brushes immediately after use.
Q3: What if my child isn't interested in following a specific craft idea? A3: That's perfectly fine! Encourage free-form creativity. The goal is to spark curiosity and joy in the process, not to produce a perfect replica. Provide materials and let their imagination lead the way. You can suggest themes (e.g., "Let's make something snowy!") but allow them the freedom to interpret it in their own unique way.
Q4: Are these crafts suitable for all ages? A4: Many painting Christmas crafts can be adapted for various age groups. For toddlers, focus on sensory experiences like finger painting or sponge dabbing. Older children can handle more intricate details, specific techniques like tape resist, and painting on more diverse surfaces like wood or rocks. Adult supervision is always recommended, especially with younger children and certain materials.
Q5: What can we do with all the finished crafts after Christmas? A5: There are many wonderful ways to enjoy your creations! They can be used as cherished home decorations, hung on the tree, or displayed on shelves. Many crafts make heartfelt gifts for grandparents, teachers, or friends. You can also designate a "Christmas Craft Memory Box" to store a few special pieces each year, creating a delightful collection that documents your child's artistic growth and holiday memories over time.
Q6: How can these painting crafts be educational or STEM-focused? A6: Painting naturally incorporates STEM elements! Color mixing teaches basic chemistry and color theory. Spin art demonstrates physics principles like centrifugal force. Designing symmetrical snowflakes or counting points on a star involves math and geometry. Problem-solving, planning, and tool selection are all aspects of engineering and design thinking. Encouraging observation and experimentation turns art into a valuable learning opportunity.
Q7: My child gets frustrated easily if their art isn't "perfect." How can I help? A7: Focus on the process, not the product. Emphasize that there's no "right" or "wrong" way to create art. Celebrate their effort, creativity, and unique choices rather than the final outcome. Use encouraging language like, "I love how you chose those colors!" or "What an interesting texture you made!" Remind them that art is about expressing themselves and having fun. It's about the joy of making, which is a core value we champion at I'm the Chef Too!