Spark Joy: Easy Kid Snow Globe Craft & STEM Fun

Table of Contents
- Introduction
- Why Snow Globes? More Than Just a Pretty Shake
- The Science Behind the Shake: A Dash of STEM Learning
- Choosing Your Snow Globe Adventure: Types & Themes
- Crafting Your Masterpiece: Step-by-Step Guide
- Beyond the Basic: Creative Themes & Educational Twists
- Troubleshooting Your Terrific Snow Globe
- Making Learning a Family Adventure with I'm the Chef Too!
- Conclusion
- FAQ
Imagine a tiny, magical world, encapsulated in a sphere, waiting for a gentle shake to bring a flurry of sparkling snow. Few things capture the whimsical wonder of childhood quite like a snow globe. The simple act of tipping it upside down and watching the glitter cascade down evokes a sense of calm and fascination, transporting us to a miniature winter wonderland, no matter the season outside. For children, it’s not just a pretty toy; it's an interactive spectacle, a tangible piece of magic they can hold in their hands.
Here at I'm the Chef Too!, we believe that the most profound learning happens when curiosity is sparked through hands-on experiences. That's why our mission is to blend food, STEM, and the arts into one-of-a-kind "edutainment" adventures. Making a snow globe isn't just a craft; it's a journey into physics, engineering, and artistic design, wrapped in a delightful, screen-free activity that encourages family bonding. Whether your little one dreams of a frosty forest scene, a deep-sea exploration, or even a miniature galaxy, a homemade snow globe offers endless possibilities for creative expression and scientific discovery. In this comprehensive guide, we'll dive into the enchanting world of kid snow globe crafts, exploring different types, materials, and step-by-step instructions, all while uncovering the hidden educational gems within each glittering shake. Get ready to transform ordinary jars into extraordinary miniature worlds, fostering a love for learning and creating cherished memories along the way.
Introduction
Picture this: A child’s eyes light up, wide with wonder, as a swirling storm of glitter dances around a tiny figurine. That moment of pure enchantment? It's the magic of a snow globe. For generations, these miniature worlds have captivated hearts, offering a mesmerizing escape into a frosty fantasy. But what if we told you that beyond the shimmering beauty, there’s a whole universe of learning waiting to be discovered within a simple kid snow globe craft?
We often think of crafts as purely artistic endeavors, great for fine motor skills and creativity. While they certainly are, at I'm the Chef Too!, we see them as powerful vehicles for blending STEM (Science, Technology, Engineering, and Math) with artistic expression. Crafting a snow globe isn't just about gluing a figure into a jar; it's an opportunity to explore concepts like density, buoyancy, viscosity, and even basic engineering principles, all while igniting a child's natural curiosity. This post is your ultimate guide to creating enchanting snow globes with your kids, whether you prefer the traditional water-filled variety, a mess-free waterless version, or a personalized photo globe. We’ll walk you through the materials, the magic, and the myriad ways this delightful project can become a fun, educational family adventure. We're committed to providing screen-free educational alternatives that truly engage young minds, and this craft perfectly embodies that spirit. Get ready to embark on a glittering journey that promises to spark creativity, foster scientific thinking, and create lasting memories, one shake at a time!
Why Snow Globes? More Than Just a Pretty Shake
At first glance, a snow globe might seem like a simple decorative item, perhaps a souvenir from a vacation or a festive holiday trinket. However, when we look closer, especially through the eyes of a child, a snow globe transforms into something much more profound. It becomes a miniature stage where imagination plays out, a personal universe that responds to every touch. This inherent appeal is precisely why we, at I'm the Chef Too!, advocate for activities like kid snow globe crafts. They're not just about the end product; they're about the engaging process and the valuable lessons embedded within.
Our unique approach to "edutainment" is built on the belief that learning should be fun, tangible, and integrated into everyday experiences. Making a snow globe fits this philosophy perfectly. It’s a hands-on activity that draws children into a creative flow, away from screens and into a world where their own ideas take shape. This type of screen-free engagement is crucial for developing focus, problem-solving skills, and a deeper connection to the physical world around them. When a child carefully selects a figurine, mixes the glitter, and seals their creation, they're not just following instructions; they're actively participating in a mini-engineering project and artistic endeavor.
Moreover, the collaborative nature of crafting a snow globe makes it an ideal activity for family bonding. Parents and children work together, sharing ideas, overcoming challenges, and celebrating successes. These shared moments in the kitchen or at the craft table are invaluable, strengthening relationships and creating lasting memories. It’s during these times that casual conversations about science, art, and personal expression naturally arise, transforming a simple craft session into a rich learning experience. This aligns perfectly with our mission to facilitate family bonding through engaging activities.
Ultimately, a kid snow globe craft is more than just a fleeting amusement. It’s a tool for developing fine motor skills as children handle small objects and apply glue with precision. It’s a canvas for artistic expression, allowing them to choose colors, themes, and arrangements that reflect their personality. And, as we'll delve into next, it's a fantastic, delicious disguise for a robust STEM lesson, teaching complex subjects through tangible, hands-on, and delightful adventures.
The Science Behind the Shake: A Dash of STEM Learning
What makes the glitter in a snow globe fall so gracefully, rather than simply plummeting to the bottom? This seemingly simple question opens the door to a fascinating world of scientific principles, making a kid snow globe craft a stealthy STEM lesson in disguise. At I'm the Chef Too!, we specialize in teaching complex subjects through tangible, hands-on experiences, and the physics of a snow globe is a perfect example of how everyday objects can unlock scientific understanding.
Let's break down the STEM magic at play:
- Physics of Density and Buoyancy: When you add a figurine to your snow globe, will it float or sink? This depends on its density compared to the liquid. Objects denser than water (like most plastic or ceramic figures) will sink, while less dense objects (like some lighter plastics or hollow figures) might float. This simple observation introduces the concept of density and buoyancy in a very visual way. You can even experiment with different objects to see which ones sink faster or float.
- Viscosity and Fluid Dynamics: The secret ingredient in many traditional snow globes is glycerin (or sometimes clear corn syrup). Why do we add it? Because it increases the viscosity of the water. Viscosity is a fluid's resistance to flow. Think about honey versus water – honey is much more viscous. When the water in your snow globe is thicker with glycerin, the glitter and "snow" particles fall more slowly, creating that beautiful, mesmerizing cascade. Without it, the glitter would just plop down quickly. This demonstrates how different liquids behave and how their properties affect objects moving through them.
- Suspension vs. Dissolving: The glitter in a snow globe suspends in the liquid, meaning it floats around for a while before settling. It doesn't dissolve like sugar in hot tea. This is a great opportunity to talk about mixtures and solutions, and how some materials disperse in a liquid while others maintain their individual particles.
- Engineering and Design: The act of building the snow globe itself involves basic engineering. Children decide on the structure (what goes where), select materials, and figure out how to best secure their elements to ensure they stay put. Sealing the jar correctly to prevent leaks is a practical application of structural integrity. They learn about design constraints (like the size of the jar) and problem-solving if something doesn't work as expected (e.g., a figure comes unstuck).
- Observation and Prediction: Kids learn to observe the effects of adding more glitter, less glycerin, or a different type of liquid. They can make predictions: "What do you think will happen if we add more glue to the lid?" or "Will the glitter fall faster or slower if we use warmer water?" These questions encourage scientific thinking and hypothesis testing.
By engaging in a kid snow globe craft, children aren't just making something pretty; they're conducting mini-experiments, observing physical phenomena, and applying engineering principles in a fun, tangible way. This hands-on exploration makes abstract concepts real and relatable, sparking a deeper appreciation for the world around them. It's exactly the kind of "edutainment" experience we champion at I'm the Chef Too!, encouraging kids to think like scientists and artists simultaneously.
Choosing Your Snow Globe Adventure: Types & Themes
One of the most exciting aspects of a kid snow globe craft is the sheer variety of ways you can bring your miniature world to life. There's no single "right" way to make one, which fosters incredible creativity and allows for personalized learning experiences. At I'm the Chef Too!, we celebrate this diversity, recognizing that different approaches can spark different interests and skill sets. Let's explore the main types of snow globes you can create, along with a plethora of theme ideas to get those creative juices flowing!
Classic Water-Based Snow Globes: Materials & Magic
This is the traditional snow globe, filled with liquid and shimmering glitter. It's the one that most readily conjures images of delicate snowfalls and magical scenes.
Key Materials:
- Jars: Repurposed glass jars with tight-fitting lids are perfect – think old jam, pickle, or baby food jars. Smaller jars tend to work best to prevent "lots of watery space" above your figurine. Ensure they are thoroughly cleaned and dried.
- Figurines: Small, waterproof figurines are ideal. Plastic toys from Kinder Surprises or party bags, small LEGO characters (if your child can part with them!), FIMO (polymer clay) creations that have been baked and sealed, or even small ceramic pieces are great. Avoid anything that might rust, decompose, or bleed color in water.
- Distilled Water: Using distilled water can help prevent cloudiness over time, though tap water usually works fine.
- Glycerin (the "secret ingredient"): A few drops of glycerin are essential. This is where the STEM magic of viscosity comes in! Glycerin is thicker than water, making the glitter fall more slowly and elegantly, creating that beautiful, lingering snowfall effect. You can find it at most pharmacies or craft stores. Clear corn syrup is a common substitute if you don't have glycerin on hand, but use it sparingly as it can make the water too cloudy.
- Glitter: Fine, iridescent, or white glitter works best for a "snow" effect. PVC glitter is often recommended as it's less likely to clump or dissolve. "Less is more" is truly the mantra here – a teaspoon or two is usually plenty. You can also add tiny faux snow flakes for extra texture.
- Waterproof Glue: A hot glue gun is excellent for quick, strong bonds (adult supervision required!). Super glue or marine-grade epoxy are other strong, waterproof options. Make sure the glue is completely dry and cured before adding water.
- Optional: Small pebbles, aquarium gravel, or plastic plants to create a base for your scene.
Theme Ideas for Water-Based Globes:
- Winter Wonderland: Mini evergreen trees, tiny deer, snowmen.
- Oceanic Adventure: Small plastic fish, seashells (ensure they are thoroughly cleaned and sealed if real), mermaids, divers.
- Dinosaur Discovery: Miniature dinosaurs amidst plastic plants. This is a fantastic way to extend the learning fun, much like our Fudgy Fossil Dig kit combines geology with delicious baking!
- Enchanted Forest: Gnomes, fairies, mushrooms, small plastic animals.
- Space Odyssey: Small plastic rockets, astronauts, or even FIMO planets (though as the top result noted, these can be quite fiddly!). If space is your child's passion, our Galaxy Donut Kit offers another out-of-this-world cooking adventure!
Waterless Wonders: Easy & Mess-Free Alternatives
For those who prefer to skip the liquid and potential leaks, or for very young children, waterless snow globes are a fantastic, mess-free alternative. They offer all the charm without the worry!
Key Materials:
- Jars: Again, glass jars with tight lids or even clear plastic domes/plates for a flat-back version.
- Artificial Snow: Fluffy faux snow, tiny beads, or iridescent confetti create a delightful "snow" effect.
- Figurines: Anything goes here! Since there's no water, you don't have to worry about waterproofing. Small plastic figures, wooden animals, mini Christmas trees, felt characters, even small pinecones or acorns can work.
- Strong Glue: Hot glue gun (with adult supervision) is perfect for securing items to the lid or base.
- Optional: Small cotton balls for "snowdrifts," mini pom-poms, craft moss, glitter spray adhesive for extra sparkle.
Theme Ideas for Waterless Globes:
- Cozy Cabin Scene: A small wooden cabin, tiny pine trees, maybe a little fox.
- Holiday Cheer: Santa, reindeer, presents, candy canes.
- Fairy Garden: Faux flowers, tiny benches, whimsical creatures.
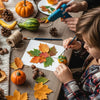
- Seasonal Delights: Mini pumpkins and fall leaves for autumn, bunnies and eggs for spring.
Personalized Photo Snow Globes: Capturing Memories
A special twist on the snow globe is to incorporate a beloved photo. These make incredibly thoughtful gifts and are wonderful keepsakes. They can be water-based or waterless.
Key Materials:
- Jars/Clear Domes: Clear plastic plates or shallow jars work well for flat-back photo globes. For 3D water globes, a regular jar is best.
- Photos: Print photos on waterproof paper if making a water-based globe, or laminate regular photos. For waterless or flat-back versions, regular photo paper is fine. Crop them to fit your scene.
- Accessories: Small snowmen, snowflakes, mini trees, plastic animals – anything that complements the photo.
- Glue: Waterproof glue for water-based, hot glue for waterless/flat-back.
- "Snow": Glitter, faux snow, or small white beads.
Theme Ideas for Photo Globes:
- "Me in the Snow": A photo of your child dressed in winter gear, surrounded by faux snow and mini trees.
- Family Memory: A cherished family photo, perhaps from a holiday or a special outing.
- Pet Portraits: A picture of a beloved pet in a miniature scene.
No matter which type of snow globe you choose, the key is to have fun with the process. At I'm the Chef Too!, we believe in fostering a love for learning and building confidence through engaging activities. Each choice, from the type of glue to the color of glitter, is a step in a child's creative and scientific journey. Ready for more adventures? Join The Chef's Club today! for a new blend of food, STEM, and art delivered right to your door every month! Or, browse our complete collection of one-time kits to find your next educational adventure.
Crafting Your Masterpiece: Step-by-Step Guide
Now that you've chosen your snow globe adventure, it’s time to roll up your sleeves and bring your miniature world to life! This step-by-step guide will walk you through the process, whether you're making a classic water-based globe or a charming waterless wonder. Remember, adult supervision is key, especially when dealing with hot glue or glass jars. We want these adventures to be safe, fun, and educational for everyone!
Gather Your Supplies
Before you begin, lay out all your chosen materials. This makes the process smoother and helps prevent interruptions.
For Water-Based Snow Globes:
- Clean glass jar with a tight-fitting lid
- Waterproof figurines or FIMO creations
- Distilled water
- Glycerin (or clear corn syrup)
- Waterproof glitter (fine, iridescent, or PVC glitter recommended)
- Strong waterproof glue (hot glue gun, super glue, or marine epoxy)
- Optional: Small pebbles, plastic plants, small waterproof accessories
For Waterless Snow Globes:
- Clean glass jar with a tight-fitting lid (or clear plastic dome/plate)
- Figurines or small decorative items (no need for waterproofing)
- Artificial snow, mini pom-poms, or iridescent confetti
- Strong glue (hot glue gun or strong craft glue)
- Optional: Cotton balls, mini trees, craft moss, glitter spray adhesive
- For photo globes: Laminated or waterproof photo (for water-based), regular photo (for waterless/flat-back).
Designing Your Scene
This is where creativity truly shines! Encourage your child to think about the story their snow globe will tell.
- Select Your Star: Choose the main figurine or photo that will be the focal point.
- Arrange and Plan: Before gluing, place your items on the inside of the jar lid (if you're attaching them there, which is often easier) or directly onto the bottom of the jar. Experiment with different arrangements. Do you want a tall tree or a small bush? Where should the animal stand? This planning stage is fantastic for developing spatial reasoning and design skills.
-
Attach Your Elements (Water-Based):
- To the Lid (Recommended): Apply a generous amount of your strong waterproof glue to the inside of the jar lid. Carefully press your figurine(s) and any base elements (like pebbles or plastic plants) onto the glue. Hold firmly until set.
- To the Jar Bottom: If your design requires elements to be at the very bottom of the jar, apply glue directly to the clean, dry bottom and attach your items. This can be trickier, especially in taller jars.
- Allow to Dry COMPLETELY: This is critical! If your glue isn't fully cured, it will weaken or potentially cloud your water. Follow the glue manufacturer's instructions for drying time (hot glue dries quickly, but others might need hours).
-
Attach Your Elements (Waterless):
- To the Lid: Apply hot glue to the inside of the jar lid and attach your chosen figurines, mini trees, cotton snow, or other elements.
- To the Jar Bottom: For scenes directly on the jar's bottom, use hot glue to secure items.
- Allow to Dry: Hot glue sets quickly, but give it a moment to ensure a strong bond.
The Liquid Magic (For Water-Based Globes Only)
This step is pure science in action!
- Fill the Jar: Carefully fill your clean jar with distilled water. Leave a little space at the top, perhaps about an inch, to account for the volume of the lid and figurine when inverted.
- Add Glycerin: This is where the magic happens! Add a few drops of glycerin. Start with 1/2 to 1 teaspoon for a small jar. You can always add more if the glitter falls too fast. Stir gently to mix. This is a great moment to discuss viscosity and why it's important for the "snowfall" effect.
- Introduce the Glitter: Now for the fun part! Add your glitter. Remember the "less is more" rule – start with 1-2 teaspoons for a standard-sized jar. Too much glitter can obscure your scene and make the water cloudy. You can always add more if you want a heavier snowfall.
- Optional Color: A tiny drop of food coloring can tint the water if you're going for a specific aesthetic, but too much can make the water opaque.
Sealing the Deal
This is the final, crucial step to ensure your snow globe lasts and doesn't leak.
- Prepare the Lid: Ensure the glue holding your figures to the lid is completely dry.
- Apply Glue to Rim: Apply a bead of strong waterproof glue (hot glue works well here, too, or a silicone sealant) around the inner rim of the jar's lid. This creates a watertight seal.
- Screw On the Lid: Carefully and firmly screw the lid onto the jar. Ensure it's tight but don't overtighten, especially if using a glass jar.
- Invert and Test: Once the seal is secure and the glue has set (again, follow glue instructions), gently turn the jar upside down. Check for any leaks around the lid. If you see any, you may need to apply more glue or sealant and let it dry again.
Waterless Globe Assembly
For waterless globes, the final steps are slightly different.
- Add the Snow: Once your figures are glued securely to the lid or base, carefully add the artificial snow or glitter into the jar. Again, don't overfill – just enough to cover the bottom and create a snowdrift effect.
- Secure the Lid: Simply screw the lid onto the jar. You can use a strong glue around the rim of the jar before screwing on the lid if you want a permanent seal (especially if it's for very young children or as a gift) to prevent it from being opened.
- Shake! Turn it over and watch the faux snow dance!
And there you have it – your very own, handcrafted snow globe! The pride your child will feel in creating this magical world is immense. This process, developed by mothers and educators, embodies our commitment at I'm the Chef Too! to sparking curiosity and creativity in children. Want more engaging, hands-on activities delivered to your doorstep? Sign up for The Chef's Club and discover a world of culinary STEM adventures!
Beyond the Basic: Creative Themes & Educational Twists
Once you've mastered the basic kid snow globe craft, the real fun begins: unleashing your imagination! Snow globes aren't just for winter scenes; they're tiny canvases waiting to be filled with any world your child can dream up. This is where the "arts" truly blend with "STEM," as we encourage innovative thinking and cross-curricular exploration. At I'm the Chef Too!, we believe in pushing boundaries and showing children how diverse learning can be.
Nature's Mini Worlds
Instead of traditional figurines, look to nature for inspiration (with a few important caveats for water-based globes).
- Forest Floor: Collect small, dried acorns, tiny pinecones (ensure they're clean and fully dried), or smooth river stones. In a waterless globe, these make charming scenes. For water-based, use plastic replicas to avoid decomposition or clouding the water.
- Seaside Treasures: Smooth, tiny pebbles, fragments of sea glass, or miniature plastic sea creatures can create a peaceful underwater scene. Again, for water-based globes, ensure any natural elements are thoroughly cleaned, dried, and ideally sealed with a clear, waterproof sealant to prevent organic matter from contaminating the water.
- Garden Delights: Small plastic flowers, ladybugs, or butterflies can bring a vibrant garden to life. This is a wonderful way to talk about ecosystems and biodiversity.
Dinosaur Digs & Ancient Worlds
Kids are naturally fascinated by dinosaurs. Why not create a prehistoric snow globe?
- Prehistoric Ponds: Small plastic dinosaurs, miniature plastic ferns or trees, and some brown gravel for a muddy pond. Add green glitter for a swampy feel. This theme can naturally lead to discussions about paleontology, different dinosaur species, and ancient habitats, much like the exciting discoveries children make with our Fudgy Fossil Dig kit, where they excavate delicious cookies!
- Volcano Eruptions: While you can't have a real eruption in a snow globe, a red-orange glitter storm around a tiny volcano figurine can simulate one. This is a great segue into talking about geology and chemical reactions, just like the exciting fizz in our Erupting Volcano Cakes Kit!
Galaxy Gazers & Stellar Scenes
Take your snow globe craft out of this world!
- Cosmic Canisters: Small plastic planets, rockets, or astronauts, with dark blue or black water, silver glitter, and star confetti. This can inspire conversations about astronomy, constellations, and space exploration. It’s a perfect pairing for kids who love to learn about the cosmos, perhaps after creating their own edible solar system with our amazing Galaxy Donut Kit.
- Alien Encounters: Colorful small alien figures and glow-in-the-dark glitter for a truly out-of-this-world experience.
Storybook & Character Scenes
Bring beloved tales and characters to life inside a jar.
- Fairy Tale Forests: Use small figures from classic stories – a tiny Red Riding Hood, a wolf, or a trio of pigs.
- Beloved Animals: Create a farm scene with small farm animals or a zoo scene. Even beloved characters can make learning fun, like when kids make Peppa Pig Muddy Puddle Cookie Pies with our kits, combining popular culture with practical skills.
Seasonal Celebrations
Snow globes aren't just for winter! Adapt them for any holiday or season.
- Halloween Haunts: Spooky glitter (orange, black, purple), tiny plastic spiders, ghosts, or pumpkins.
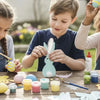
- Easter Eggs-travaganza: Pastel glitter, small plastic bunnies, and decorated mini eggs.
- Spring Blooms: Green glitter, tiny flowers, and buzzing bees.
These creative themes turn a simple kid snow globe craft into an expansive journey of discovery. Each choice children make, from the scene to the glitter, is an exercise in creativity and decision-making, while discussions around the themes themselves introduce new concepts and vocabulary. This embodies our philosophy at I'm the Chef Too! – making learning an engaging, multi-faceted adventure. To keep the screen-free learning and family fun going, consider our monthly Chef's Club subscriptions, where new adventures arrive right at your door! Or, if you're looking for a specific theme, explore all our one-time kits to find the perfect blend of food, STEM, and art for your little learner.
Troubleshooting Your Terrific Snow Globe
Even with the best intentions and careful crafting, sometimes a kid snow globe craft might not turn out exactly as planned. Don't worry, this is part of the learning process! Troubleshooting is a crucial STEM skill, encouraging problem-solving and perseverance. At I'm the Chef Too!, we embrace these moments as opportunities for growth. Here are some common issues you might encounter and how to fix them:
Issue 1: Glitter Falls Too Fast
- Problem: The glitter settles almost immediately after shaking, without that beautiful, slow cascade.
-
Solution: This usually means your liquid isn't viscous enough.
- Add more glycerin: Carefully open your snow globe (if sealed, you might need to pry the lid or add more glue after). Add another 1/2 to 1 teaspoon of glycerin. Stir gently and re-test before resealing. Remember to leave a little airspace to avoid overflow.
- Less is more with glitter: Sometimes too much heavy glitter can also contribute. Consider removing some glitter if you added a lot.
Issue 2: Water is Cloudy or Murky
- Problem: The water in your snow globe isn't crystal clear; it looks hazy, milky, or has bits floating in it.
-
Solution:
- Use distilled water: Tap water can contain minerals that react with glue or glitter, causing cloudiness. Distilled water is purer.
- Cleanliness is key: Ensure your jar and all figurines are perfectly clean and dry before assembling. Any dust, soap residue, or unsealed organic matter (like uncleaned seashells or pinecones) can cause cloudiness or even mold over time.
- Check your glue: Some glues, if not fully cured or if not truly waterproof, can leach chemicals into the water and cause cloudiness. Always use a strong, waterproof glue and allow it to dry completely.
- Glitter type: Certain types of glitter, especially craft glitter that isn't specifically designed for snow globes, can sometimes "bleed" color or have a powdery residue that makes the water cloudy. Opt for fine, PVC, or iridescent glitter.
- Solution: If the water is cloudy, the best fix is often to disassemble, clean everything again, and refill with distilled water and fresh, appropriate glitter.
Issue 3: Leaks!
- Problem: Your snow globe is dripping around the lid.
-
Solution: This is a common issue and highlights the importance of good sealing.
- Re-seal: Carefully unscrew the lid, wipe the rim and jar threads completely dry. Apply a new, generous bead of strong waterproof glue (like hot glue, marine epoxy, or silicone sealant) around the inner rim of the lid. Screw it back on tightly and let it cure for at least 24 hours before testing again.
- Check for cracks: Very rarely, a glass jar might have an invisible hairline crack. If repeated sealing attempts fail, consider using a different jar.
Issue 4: Figures Come Unstuck
- Problem: Your carefully placed figurine detaches from the lid or base.
-
Solution:
- Use stronger glue: The glue might not have been waterproof enough or applied thickly enough. For reattachment, use a marine-grade epoxy or super glue designed for plastics/ceramics, ensuring a good amount is used and that surfaces are dry.
- Cure time: Did you wait long enough for the glue to fully dry and cure before adding water? This is crucial for a strong bond.
- Surface preparation: Ensure the surfaces you're gluing are clean, dry, and free of any oils or residues. Sometimes lightly sanding a smooth plastic surface can help the glue adhere better.
Issue 5: Air Bubble at the Top
- Problem: After sealing, you notice a large air bubble at the top of the globe when it's upright.
-
Solution: This is simply an indication that you didn't quite fill the jar enough.
- Top it off (carefully): If your seal isn't permanent, you can carefully unscrew the lid (over a sink!), add a tiny bit more distilled water and maybe a few more glitter flakes to minimize the air bubble, then re-seal.
- Embrace it: A small air bubble isn't harmful and adds to the charm, acting like a tiny viewfinder!
Troubleshooting these issues is a valuable part of the STEM process, teaching children that not everything works perfectly the first time and that persistence and critical thinking lead to solutions. These moments of problem-solving are where true learning takes root. We foster this resilience and investigative spirit in all our "edutainment" kits, designed by mothers and educators. Ready to tackle more exciting challenges? Become a part of The Chef's Club and get a new adventure delivered monthly, complete with pre-measured ingredients and specialty supplies for hassle-free fun!
Making Learning a Family Adventure with I'm the Chef Too!
Crafting a kid snow globe isn't just a delightful way to spend an afternoon; it's a testament to the power of hands-on learning, creativity, and family connection. As we've explored, these shimmering little worlds offer a unique blend of artistic expression and scientific discovery, introducing children to concepts like density, viscosity, and engineering in a tangible, exciting way. From selecting the perfect figurine to watching the glitter slowly descend, every step is an opportunity for learning and wonder.
At I'm the Chef Too!, our core mission revolves around this very idea: making education an adventure. We firmly believe that the best way for children to learn is by doing, touching, tasting, and creating. Our "edutainment" experiences are meticulously designed by mothers and educators to spark curiosity, build confidence, and foster a lifelong love for learning, all while creating precious, screen-free family memories. Just like the simple snow globe, our cooking STEM kits take complex subjects and transform them into accessible, engaging, and delicious projects that children can truly interact with.
We understand the challenges parents and educators face in finding activities that are both fun and genuinely educational. That's why we pour our hearts into developing unique kits that combine the joy of cooking with the excitement of scientific exploration and artistic flair. When you make a snow globe, you're embracing the same philosophy that guides us: that learning can be magical, messy, and memorable. It’s about the process, the shared laughter, the small discoveries, and the pride in a handmade creation. While we can't promise your child will become a top scientist overnight, we can promise that engaging in activities like these will foster their natural curiosity, build crucial skills, and create joyful moments that strengthen family bonds.
We invite you to continue this journey of discovery with us. Let's make every moment an opportunity for growth and connection, transforming everyday activities into extraordinary learning experiences.
Conclusion
From the initial spark of an idea to the final, shimmering shake, a kid snow globe craft is so much more than a simple DIY project. It’s a captivating journey into creativity, a fun foray into fundamental scientific principles, and a precious opportunity for family bonding. We've seen how a few everyday items can become a powerful tool for teaching about density, viscosity, and basic engineering, all wrapped up in an activity that delights and inspires. The beauty of these projects lies not just in the enchanting miniature worlds they create, but in the hands-on learning, problem-solving, and shared moments they foster.
At I'm the Chef Too!, our passion is to bring these kinds of "edutainment" experiences directly to your home. We believe in sparking curiosity, encouraging creativity, and providing screen-free alternatives that truly engage children's minds. Every kit we create, developed by mothers and educators, blends the excitement of food, the wonders of STEM, and the joy of the arts into a single, cohesive adventure. We focus on the benefits of the process: fostering a love for learning, building confidence through tangible achievements, developing key skills, and creating joyful family memories that will last a lifetime.
Ready to unlock a world of ongoing educational fun and delicious discovery? Don't let the learning stop here! Join The Chef's Club today! Imagine a new, exciting adventure delivered to your door every month, complete with pre-measured dry ingredients, specialty supplies, and free shipping in the US. It's the perfect way to keep that spark of curiosity alive, year-round. We offer flexible 3, 6, and 12-month pre-paid plans, perfect for gifting or long-term enrichment. Let us help you make every moment a celebration of learning and family togetherness!
FAQ
Q1: What kind of jars are best for making snow globes with kids? A1: Clean, empty glass jars with tight-fitting lids work best. Mason jars, old jam jars, baby food jars, or pickle jars are all excellent choices. Smaller jars are often easier for kids to handle and can create a more concentrated scene. Always ensure the jars are thoroughly cleaned and completely dry before you start.
Q2: Is glycerin absolutely necessary for a water-based snow globe? What does it do? A2: While not strictly mandatory, glycerin is highly recommended! It's the "secret ingredient" that increases the water's viscosity (thickness), causing the glitter and "snow" to fall slowly and beautifully, creating that mesmerizing cascading effect. Without it, the glitter tends to fall too quickly. Clear corn syrup can be used as a substitute, but use sparingly as it can make the water cloudy.
Q3: What kind of glue should I use to make sure my snow globe doesn't leak? A3: For water-based snow globes, a strong, waterproof glue is essential for attaching figurines and sealing the lid. A hot glue gun (with adult supervision) is popular for its quick drying time and strong bond. Super glue, marine-grade epoxy, or silicone sealant are other reliable waterproof options. Ensure the glue is fully cured before adding water or inverting the globe.
Q4: Can I use real leaves or natural items in a water-based snow globe? A4: It's generally not recommended for water-based globes. Natural items like real leaves, wood, or unsealed seashells can decompose, mold, or leach colors into the water, causing it to become cloudy or murky over time. It's safer to use plastic replicas or thoroughly clean and seal natural items with a waterproof sealant if you really want to include them. For waterless snow globes, natural items are perfectly fine!
Q5: My snow globe water looks cloudy! What went wrong? A5: Cloudy water can happen for a few reasons:
- Tap water: Minerals in tap water can sometimes react with other materials. Distilled water is purer.
- Dirty jar/figurines: Ensure everything is perfectly clean and dry.
- Uncured glue: Some glues can leach chemicals if not fully dry.
- Glitter type: Some craft glitter can have a residue or bleed color. Use fine, PVC, or iridescent glitter.
- Organic matter: If unsealed natural items were used, they might be decomposing. To fix it, you'll likely need to disassemble, clean all components, and reassemble with distilled water and fresh, appropriate glitter.
Q6: How much glitter should I put in my snow globe? A6: "Less is more" is the golden rule! Start with 1 to 2 teaspoons for a standard-sized jar. Too much glitter can obscure your scene and make the water appear overly cloudy or dense. You can always add a little more if you want a heavier snowfall, but it's hard to remove once added.
Q7: Can I make snow globes without water for younger children? A7: Absolutely! Waterless snow globes are fantastic for younger children as they eliminate the risk of leaks and are less messy. You use artificial snow, glitter, and figurines secured to the lid or base, and simply close the jar. They offer all the charm with none of the watery worries!
Q8: What educational benefits does making a snow globe offer? A8: A kid snow globe craft offers a wealth of educational benefits! It introduces basic STEM concepts like:
- Physics: Density, viscosity, buoyancy.
- Engineering: Planning, construction, sealing, structural integrity.
- Art: Design, composition, color theory, creativity. It also develops fine motor skills, encourages problem-solving (especially when troubleshooting), and sparks curiosity, making learning a fun and hands-on experience. This aligns perfectly with I'm the Chef Too!'s "edutainment" philosophy!