Spark Curiosity: Fun Easy Summer Crafts for Kids

Table of Contents
- Introduction
- Why Summer Crafts Are More Than Just Fun
- The I'm the Chef Too! Philosophy: Blending STEM, Food, and Art
- Essential Supplies for Your Summer Crafting Kit
- Super Simple Crafts for Little Hands (Toddlers & Preschoolers)
- Engaging Crafts for Elementary Explorers (Ages 5+)
- Beyond the Craft: Extending the Learning and Fun
- Making Craft Time a Breeze: Tips for Parents
- Conclusion
- FAQ Section
Summer has arrived, bringing with it bright sunshine, long days, and the delightful dilemma many parents face: how to keep those energetic little minds and bodies engaged, learning, and entertained without relying solely on screens. It's a common challenge, isn't it? The school year's structured activities fade, and suddenly, the vast expanse of summer stretches out, full of potential for both joy and, let's be honest, a little bit of boredom. But what if we told you that some of the most memorable and impactful summer moments can be found in the simplest of activities, right in your own home?
At I'm the Chef Too!, we believe in the magic of hands-on learning, especially when it involves a sprinkle of STEM, a dash of art, and a whole lot of delicious fun. Our mission is to blend food, STEM, and the arts into one-of-a-kind "edutainment" experiences that spark curiosity and creativity in children. We know that summer crafts aren't just about making something pretty; they're powerful tools for development, family bonding, and creating a screen-free educational alternative that children genuinely love. This post is your comprehensive guide to unlocking a summer filled with fun, easy crafts that delight, educate, and inspire, all while fostering a love for learning that lasts long after the last ice cream cone has melted.
Introduction
As the school doors close and the warm breezes of summer beckon, a unique opportunity presents itself: unstructured time for exploration, creativity, and discovery. But this freedom can sometimes lead to the dreaded "I'm bored!" chorus. The quest for engaging, meaningful activities that don't involve a tablet or television can feel endless. This is where the simple yet profound joy of summer crafting shines. Imagine a world where everyday materials transform into masterpieces, where a dab of paint becomes a lesson in color theory, and where the act of creating builds confidence and critical thinking.
We understand the desire to provide children with enriching experiences that extend beyond academic walls. That's why we've dedicated ourselves to developing programs that teach complex subjects through tangible, hands-on, and delicious cooking adventures. But the principles we champion – curiosity, creativity, and family connection – extend beautifully to the realm of general summer crafts. From squishy stress balls that teach about material science to vibrant suncatchers that explore light, these activities offer more than just a momentary distraction; they offer a chance for growth.
In this extensive guide, we'll dive deep into a treasure trove of fun easy summer crafts for kids of all ages. We'll explore the incredible benefits these activities offer, outline essential supplies, and provide step-by-step ideas that are both simple to execute and rich in learning potential. We'll also share how these crafting philosophies perfectly align with our own unique approach at I'm the Chef Too!, where every kit is designed by mothers and educators to be an unforgettable journey of taste, touch, and triumph. Get ready to transform your summer into a season of imaginative play, joyful discovery, and cherished family memories.
Why Summer Crafts Are More Than Just Fun
Crafting might seem like a simple pastime, but its benefits for children are extensive and profound. Far beyond keeping little hands busy, engaging in creative projects fosters a wide array of developmental skills that are crucial for growth.
- Boosting Creativity and Imagination: When children craft, they're not just following instructions; they're imagining possibilities, experimenting with materials, and bringing their unique visions to life. This process is a powerful exercise for the imagination, encouraging divergent thinking and problem-solving. It teaches them that there isn't just one "right" way to do things and that creativity is about exploring new ideas.
- Developing Fine Motor Skills: Many crafts involve intricate movements like cutting, gluing, painting, threading beads, or kneading dough. These actions are invaluable for strengthening small muscles in the hands and fingers, improving hand-eye coordination, and developing dexterity – skills essential for writing, drawing, and even using utensils.
- Enhancing Cognitive Skills: Crafting often requires children to follow a sequence of steps, understand cause and effect (e.g., "if I add more water, the paint will be thinner"), and make decisions. This sequential thinking, planning, and problem-solving are fundamental cognitive exercises. They might learn about shapes, colors, textures, and even basic physics or chemistry without even realizing it.
- Fostering Patience and Persistence: Not every craft turns out perfectly on the first try, and sometimes, a project takes time to complete. Crafting teaches children the value of patience, the satisfaction of perseverance, and the importance of seeing a project through. It's a wonderful way to build resilience.
- Building Self-Esteem and Confidence: The act of creating something with their own hands, from start to finish, instills a tremendous sense of accomplishment in children. Displaying their artwork or giving it as a gift boosts their self-esteem and confidence in their abilities. It’s a tangible representation of their effort and skill.
- Promoting Relaxation and Mindfulness: In our increasingly busy world, crafting offers a calming, focused activity. The meditative nature of repetitive actions like painting or weaving can help children de-stress, focus their attention, and practice mindfulness, providing a much-needed break from overstimulation.
- Encouraging Family Bonding: Craft projects are fantastic opportunities for shared experiences. Parents and children can work together, chat, laugh, and create memories side-by-side. It’s quality time that doesn’t involve screens and builds stronger connections.
This holistic approach to development is at the heart of what we do at I'm the Chef Too!. We believe that learning should be an adventure, engaging all the senses and sparking genuine excitement. Whether it’s through a simple paper craft or a complex edible science experiment, the benefits of hands-on creativity are undeniable. Ready for a new adventure every month? Join The Chef's Club and enjoy free shipping on every box! Our kits deliver all these benefits, pre-measured and ready for discovery.
The I'm the Chef Too! Philosophy: Blending STEM, Food, and Art
At I'm the Chef Too!, we've taken the magic of hands-on creation and elevated it, blending the exciting worlds of food, STEM, and the arts into truly unique "edutainment" experiences. Our philosophy is simple yet powerful: children learn best when they are actively engaged, when their senses are ignited, and when the learning is tangible and, dare we say, delicious! We are committed to sparking curiosity and creativity in children, facilitating family bonding, and providing a screen-free educational alternative that truly resonates.
We believe that every child is a natural scientist, an budding artist, and a curious chef. Our unique approach teaches complex subjects – from chemical reactions to planetary orbits, historical narratives to geographical landscapes – through the accessible and engaging medium of cooking. Imagine your child discovering the science behind leavening agents by baking bread, or understanding geological strata by layering colorful dough. This is the essence of our kits, developed by mothers and educators who understand how children learn and what truly captures their attention.
When you think about the fun easy summer crafts for kids that we're discussing today, notice how many of them naturally incorporate elements of STEM and art. Building a wind chime involves understanding sound vibrations (physics) and aesthetic design (art). Creating sand art bottles is an exercise in layering and color theory (art) with a touch of fluid dynamics (science). Our edible adventures take this integration a step further, making the learning process even more immersive and rewarding.
For example, our Erupting Volcano Cakes Kit doesn't just result in a tasty treat; it’s a vibrant, hands-on chemistry lesson where kids witness a real acid-base reaction. The visual spectacle and the delicious outcome make the science unforgettable. Similarly, our Galaxy Donut Kit transforms baking into an astronomical journey, allowing children to create edible representations of planets and stars while learning about the solar system. Even beloved characters can make learning fun, like when kids make Peppa Pig Muddy Puddle Cookie Pies, where storytelling and creativity intertwine with simple baking skills.
These are not just recipes; they are fully immersive experiences designed to foster a love for learning, build confidence, and develop key skills, all while creating joyful family memories. We focus on the process – the discovery, the experimentation, the teamwork – knowing that these are the true ingredients for success. While we can't guarantee your child will become a top scientist, we can promise an environment where their natural curiosity is celebrated and nurtured.
Essential Supplies for Your Summer Crafting Kit
Before diving into specific projects, it’s helpful to gather a foundational collection of craft supplies. Having these on hand makes spontaneous crafting sessions a breeze and encourages children to explore their ideas freely. Think of this as your creative toolkit, ready for any whim!
The Basics:
- Paper, Paper, and More Paper: Construction paper in various colors, plain white printer paper, cardstock, paper plates, tissue paper.
- Drawing & Coloring Tools: Crayons, washable markers, colored pencils, permanent markers (for older children, with supervision).
- Cutting & Adhering: Child-safe scissors, glue sticks, liquid school glue, craft adhesive (like Mod Podge), duct tape.
- Paints: Washable tempera paint (for younger kids), acrylic paints (for older kids, better coverage), paintbrushes of various sizes, sponges for stamping.
- Sensory & Sculpting: Play dough (store-bought or homemade), air-dry clay, sand (colored or natural).
- Embellishments: Googly eyes, pipe cleaners, pom-poms, glitter, beads, stickers, sequins, buttons, yarn, string.
Recycled & Repurposed Treasures:
Don't forget the power of "found" objects! These add an eco-friendly element and encourage resourcefulness.
- Cardboard tubes (from toilet paper/paper towels)
- Egg cartons
- Plastic bottles and caps
- Clean tin cans (with smooth edges)
- Fabric scraps
- Natural elements: pinecones, leaves, twigs, small stones, shells (collected on a nature walk!).
Having a well-stocked craft drawer or bin means you're always just moments away from a creative adventure. And for those times you want a completely hassle-free, all-inclusive experience, remember our unique kits! We deliver pre-measured dry ingredients and specialty supplies right to your door, transforming kitchen time into a seamless blend of education and fun. Not ready to subscribe? Explore our full library of adventure kits available for a single purchase in our shop!
Super Simple Crafts for Little Hands (Toddlers & Preschoolers)
For our youngest artists, the focus is on sensory exploration, developing fine motor skills, and fostering a love for creative play. These crafts are designed to be quick, use minimal supplies, and be incredibly forgiving – because at this age, the process is always more important than the perfect outcome. Adult supervision is always key, especially with small parts or messy materials.
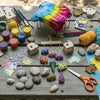
1. Rock Magnets: Pet Rocks with a Purpose
- Concept: Turn ordinary rocks into imaginative creatures or personalized decorations.
- Why it's great: Encourages imaginative play, fine motor skills (painting, gluing), and observation of natural objects.
- Materials: Smooth river rocks, acrylic paint, paintbrushes, googly eyes, strong craft glue, small magnets.
-
Quick Steps:
- Go on a nature walk to find smooth, palm-sized rocks. Wash and dry them thoroughly.
- Have your child paint the rock their favorite colors. Encourage patterns or stripes.
- Once the paint is dry, glue on googly eyes to bring their "pet rock" to life.
- Finally, with adult assistance, glue a magnet to the back once all is dry.
- I'm the Chef Too! Connection: Just like painting rocks lets kids explore color and texture, our kits engage multiple senses. When they knead dough or mix ingredients, they're using touch and sight to create something new, much like transforming a simple rock.
2. Colorful Suncatchers: Capturing Summer Light
- Concept: Create beautiful, translucent art that plays with sunlight.
- Why it's great: Introduces color mixing, light exploration, and develops fine motor skills.
- Materials: Pre-made clear plastic suncatchers (often found at craft stores), craft paint designed for suncatchers or stained glass, paintbrushes, paper towels.
-
Quick Steps:
- Choose a pre-made suncatcher shape (butterflies, flowers, sea creatures are popular).
- Let your child fill in the designs with various colors of craft paint. Encourage them to experiment with mixing colors on the suncatcher itself.
- Allow to dry completely (this can take several hours).
- Hang in a sunny window and watch the colors glow!
- Bonus Challenge (Older Kids): Tissue Paper Suncatchers: Cut shapes from wax paper, arrange torn tissue paper pieces inside, cover with another wax paper shape, and gently iron (adult supervision!) between parchment paper to melt and fuse. Cut out and hang.
3. Sponge Sailboats: Bathtime or Puddle Fun
- Concept: Design and build simple boats that actually float!
- Why it's great: Introduces basic engineering principles (buoyancy), fine motor skills (cutting, poking), and encourages imaginative water play.
- Materials: Kitchen sponges, construction paper, wooden skewers (blunt tips or cut for safety), child-safe scissors, something to poke a hole (e.g., the back of a paintbrush).
-
Quick Steps:
- Help your child cut a triangle shape from construction paper for the sail.
- Carefully poke two holes in the sail (one at the top, one at the bottom, centered).
- Insert the skewer through the holes to create the mast and sail.
- Poke a hole in the center of the sponge.
- Insert the blunt end of the skewer (with the sail) into the sponge.
- Set sail in a bathtub, sink, or kiddie pool!
- I'm the Chef Too! Connection: Just as kids learn about buoyancy with sponge boats, our kits teach real scientific concepts. For instance, creating our Erupting Volcano Cakes Kit is a delicious lesson in chemical reactions, much like a tiny science experiment they can eat!
4. Pasta Necklaces: A Timeless Classic
- Concept: Stringing colorful pasta to create wearable art.
- Why it's great: Excellent for developing fine motor skills, hand-eye coordination, pattern recognition, and color identification.
- Materials: Various types of dry pasta (penne, ditalini, wagon wheels, macaroni), food coloring, rubbing alcohol (optional, for vibrant colors), Ziploc bags, string or yarn.
-
Quick Steps:
- Coloring the pasta (adult-led): Place pasta in Ziploc bags. Add a few drops of food coloring and a splash of rubbing alcohol (alcohol helps colors set faster and more vibrantly; skip for a softer pastel look if preferred). Shake well until pasta is coated. Spread on parchment paper to dry completely (several hours or overnight).
- Once dry, provide yarn or string with a piece of tape on one end to make a "needle."
- Let your child string the pasta onto the yarn, creating patterns or simply enjoying the process.
- I'm the Chef Too! Connection: The precision and dexterity needed to string pasta are similar to the fine motor skills honed when measuring and mixing ingredients in our kits. These tactile experiences are crucial for early development, and our kits like the Peppa Pig Muddy Puddle Cookie Pies offer a similarly engaging and delicious way to practice.
5. Wooden Object Design: Personalized Keepsakes
- Concept: Decorate simple wooden objects to create unique gifts or room decor.
- Why it's great: Encourages personal expression, creativity, and the joy of making something truly unique. Builds pride in their work.
- Materials: Plain wooden objects (small boxes, picture frames, cutouts, door hangers – readily available at craft stores), acrylic paint, paintbrushes, glitter, collage stickers, small jewels, craft glue.
-
Quick Steps:
- Provide a selection of wooden objects and decorating supplies.
- Let your child choose an object and decorate it freely with paint, stickers, glitter, and other embellishments.
- Ensure the object dries completely before handling or using.
- I'm the Chef Too! Connection: Much like personalizing a wooden object, our kits allow for creative customization within a structured learning experience. For instance, decorating our Galaxy Donut Kit donuts provides a fun, edible canvas for artistic expression alongside learning about space.
6. Egg Carton Creations: Recycled Art
- Concept: Transform ordinary egg cartons into imaginative creatures or scenes.
- Why it's great: Teaches about repurposing materials, enhances creativity, and builds fine motor skills through cutting, painting, and gluing.
- Materials: Cardboard egg cartons, child-safe scissors, paint, paintbrushes, googly eyes, pipe cleaners, glue.
-
Quick Steps:
- Egg Carton Baby Turtles: Cut out individual egg cups (the "shell"). Have kids paint them green or brown. Once dry, glue green construction paper legs and a head peeking out, then add googly eyes.
- Egg Carton Toadstools: Cut out individual egg cups. Paint the inside white and the outside a bright red (or any color) with white dots. Attach to a paper stem or simply display as is.
- I'm the Chef Too! Connection: The resourcefulness of using recycled materials mirrors our approach to making learning accessible and engaging. We aim to turn everyday moments into opportunities for discovery, much like turning an egg carton into a whimsical creature.
7. DIY Play Dough: Sensory Exploration
- Concept: Make your own soft, pliable play dough from common kitchen ingredients.
- Why it's great: Fantastic for sensory development, strengthens hand muscles, encourages imaginative play and storytelling. Introduces basic chemistry concepts (ingredients reacting).
- Materials: ½ cup corn starch, 1 cup baking soda, ¾ cup water, saucepan, optional: food coloring or essential oils.
-
Quick Steps (Adult Supervision for heating):
- Mix corn starch, baking soda, and water in a saucepan. Do not add food coloring yet.
- Heat on medium heat for 4-5 minutes, stirring constantly.
- Remove from heat once the mixture starts to form a solid ball.
- Let cool completely.
- Once cool, knead the dough. Now you can add a drop or two of food coloring or essential oils (like lavender for calming dough!) and knead until combined. Store in an airtight container.
- I'm the Chef Too! Connection: This activity is a perfect example of blending kitchen skills with STEM learning, just like our entire mission! Making dough from scratch is a hands-on chemistry lesson, where understanding ratios and heat transforms simple ingredients into something new. This is exactly how we approach our kits, turning baking into a delicious science experiment. Don't forget that our monthly deliveries from The Chef's Club offer similar easy-to-follow, screen-free educational fun.
Engaging Crafts for Elementary Explorers (Ages 5+)
As children grow, their fine motor skills become more refined, their attention spans lengthen, and their capacity for complex instructions and abstract concepts expands. These crafts offer more detailed instructions, introduce new materials, and provide opportunities for deeper learning and creative expression. Always ensure appropriate supervision, especially when using permanent markers or more intricate tools.
1. Stress Balls: Squishy Science
- Concept: Create soft, squeezable balls that can help with sensory regulation and focus.
- Why it's great: Teaches about material properties, provides a calming sensory tool, and allows for personalized decoration.
- Materials: Balloons (sturdy ones work best), sand, rice, or flour (choose one), a funnel, scissors, permanent markers.
-
Quick Steps:
- Have your child stretch out a balloon by blowing it up a few times, then releasing the air.
- Place a funnel into the neck of the balloon.
- Carefully pour the chosen filling (sand, rice, or flour) into the funnel until the balloon is full but still squishy.
- Remove the funnel, gently press out any excess air, and tightly knot the top of the balloon. Younger children may need help securing the knot.
- Trim any excess rubber.
- Decorate the stress ball with silly faces or designs using permanent markers. Let ink dry completely.
- I'm the Chef Too! Connection: Understanding how different fillings create various textures and weights in a stress ball is a basic lesson in material science. This mirrors how our kits teach about the properties of ingredients and how they transform through cooking, like observing the chemical reaction that makes our Erupting Volcano Cakes bubble over with deliciousness.
2. Design-Your-Own Sunglasses: Wearable Art
- Concept: Customize plain sunglasses to express personal style.
- Why it's great: Encourages personal expression, creativity, and attention to detail. Practical outcome kids can wear.
- Materials: Plain, inexpensive sunglasses, permanent markers, stickers, glitter, small jewels, craft adhesive.
-
Quick Steps:
- Gather all decorating materials.
- Let kids unleash their creativity, decorating the frames and even the lenses (if using non-permanent markers for the lenses, just make sure they can see through them!).
- Allow any glued-on embellishments to dry completely.
- Show off their unique shades!
3. Layered Sand Art Bottles: Calm & Colorful
- Concept: Create mesmerizing patterns by layering different colors of sand in a clear bottle.
- Why it's great: A calming, meditative activity that teaches about layering, color combinations, and gentle pouring.
- Materials: Colored sand (or make your own by mixing fine salt with chalk or food coloring), clear glass or plastic bottles/jars, a funnel, measuring cups or scoops.
-
Quick Steps:
- Pour different colors of sand into separate bowls or cups for easy access.
- Place a funnel into the top of the bottle.
- Have your child scoop and pour layers of different colored sand through the funnel. Encourage tilting the bottle to create slanted layers.
- Once full, gently remove the funnel and cap the bottle tightly to prevent spilling.
- I'm the Chef Too! Connection: The careful layering and aesthetic design of sand art are similar to the precision and artistry involved in decorating our edible creations. Our Galaxy Donut Kit, for instance, invites children to create visually stunning designs while learning about astronomy.
4. Homemade Wind Chimes: Music to Your Ears
- Concept: Construct a musical decorative piece using repurposed materials.
- Why it's great: Explores sound, physics (how different objects produce different sounds), and design. Teaches about repurposing and creativity.
- Materials: An interesting base (a stick, an old CD, a small wooden hoop), various "chime" materials (metal washers, old keys, painted pasta shapes, bottle caps, small bells, beads), string or fishing line, paint (optional), glue (optional).
-
Quick Steps:
- If using raw materials, paint and decorate them as desired. Let dry.
- Help your child cut varying lengths of string or fishing line.
- Tie or glue individual chime elements to the strings. Add beads for extra flair.
- Attach the strings to the chosen base, making sure they hang at different lengths to maximize sound.
- Hang outdoors and enjoy the gentle music!
5. DIY Putty/Slime: Chemical Creations
- Concept: Make your own stretchy, squishy putty or slime, exploring basic chemistry.
- Why it's great: Engaging sensory play, a hands-on introduction to polymers and chemical reactions, and encourages experimentation.
- Materials: Slime activator solution (often borax solution or liquid starch, available at craft stores), clear school glue, plastic cups, paint or food coloring, plastic egg or other storage container.
-
Quick Steps:
- Shake the slime activator solution well.
- Pour about 1 to 1.5 inches of clear school glue into each child's cup.
- Let each child choose a paint color and add about two tablespoons into the glue. Stir well.
- Slowly add the slime activator, a tablespoon at a time, mixing continuously with hands. It will start to firm up.
- Once it reaches a firm, stretchy gel consistency, remove from the cup and continue to knead and play with it. It will get stretchier the longer it's played with.
- Store in an airtight container.
- I'm the Chef Too! Connection: This is a classic example of kitchen science that aligns perfectly with our mission! The transformation of liquid glue into a solid putty is a fascinating chemical reaction. Our kits provide similar "magic" moments, turning simple ingredients into delicious creations while teaching scientific principles. Want more easy-to-follow, screen-free educational fun delivered right to your door? Join The Chef's Club today!
6. Washer Necklaces: Hardware Store Chic
- Concept: Decorate simple metal washers to create unique pendants for necklaces.
- Why it's great: Easy, inexpensive, allows for lots of personalization, and a cool way to make wearable art.
- Materials: Metal washers (various sizes), acrylic paint, paintbrushes, glitter, small beads, string or yarn.
-
Quick Steps:
- Lay out washers and decorating supplies.
- Have children paint and decorate the washers with patterns, colors, or designs. Add glitter while the paint is wet.
- Let dry completely.
- Once dry, thread string or yarn through the washer and secure with a bead near the washer.
- Tie the string to form a necklace.
7. Nature Dioramas: Miniature Worlds
- Concept: Create a small 3D scene using collected natural elements and craft supplies.
- Why it's great: Encourages observation of nature, storytelling, spatial reasoning, and creative construction.
- Materials: Small shoebox or sturdy cardboard box (as the base), natural items (pinecones, leaves, twigs, moss, small stones, acorns, dried flowers), craft glue, paint, markers, small toy figures (optional).
-
Quick Steps:
- Go on a nature walk to collect interesting items.
- Use paint or markers to decorate the inside of the shoebox to create a background (sky, grass, water).
- Arrange and glue the collected natural items inside the box to create a miniature landscape or scene. Encourage children to tell a story about their diorama.
- I'm the Chef Too! Connection: Creating a diorama is a multi-disciplinary activity that combines art, science (observing ecosystems), and storytelling. This interdisciplinary learning is exactly what we strive for at I'm the Chef Too!, where our kits blend STEM, food, and the arts into cohesive, educational adventures.
8. Pressed Flower Art: Capturing Botanical Beauty
- Concept: Preserve the beauty of summer blooms by pressing them and incorporating them into art.
- Why it's great: Teaches patience, observation of nature, and creates delicate, beautiful artwork.
- Materials: Fresh flowers and leaves (choose relatively flat ones), heavy books, parchment paper, cardstock or watercolor paper, craft glue, tweezers (optional).
-
Quick Steps:
- Collect flowers and leaves.
- Carefully arrange them between sheets of parchment paper, then place inside a heavy book. Add more heavy books on top.
- Wait 1-2 weeks for the flowers to completely dry and flatten.
- Once pressed, gently remove the flowers. Arrange them on cardstock or watercolor paper to create a design.
- Carefully glue them down using a small dot of craft glue, or use them to decorate journals or greeting cards.
9. Friendship Bracelets: Weaving Connections
- Concept: Learn basic weaving or knotting techniques to create bracelets to share.
- Why it's great: Develops fine motor skills, patience, pattern recognition, and encourages social connection.
- Materials: Embroidery floss or thin yarn in various colors, safety pin or clipboard to hold the threads.
-
Quick Steps:
- Cut several lengths of embroidery floss (about 2-3 feet each, depending on desired bracelet length and thickness).
- Tie all strands together in a knot, leaving a loop at the top.
- Secure the loop to a safety pin on a pant leg or a clipboard.
- Follow a simple knotting tutorial (e.g., square knot, candy stripe pattern) to create the bracelet. There are many easy-to-follow video tutorials online.
- Tie off the ends once the desired length is achieved.
10. Batik Tote Bags: Art & Utility
- Concept: Use a resist dyeing technique (traditionally wax, but glue for kids!) to create unique fabric designs.
- Why it's great: Introduces a traditional art form, teaches about resist techniques, and results in a functional item.
- Materials: Plain canvas tote bag (or cotton fabric), washable school glue (PVA glue), fabric paints or diluted acrylics, paintbrushes.
-
Quick Steps:
- Place a piece of cardboard inside the tote bag to prevent paint from bleeding through.
- Have your child draw designs on the tote bag using washable school glue. Encourage bold lines and shapes. Let the glue dry completely (this can take several hours or overnight). The dried glue will act as your "resist."
- Once the glue is dry, paint over the entire bag (including the glue designs) with fabric paints or diluted acrylics. Let the paint dry completely.
- Wash the tote bag in warm water to remove the glue. The areas covered by glue will remain the original fabric color, creating the batik effect!
11. Paper Bag Kites: Flying High
- Concept: Construct a simple kite from a paper bag that can actually fly.
- Why it's great: Introduces basic aerodynamic principles, fine motor skills, and provides an incentive for outdoor play.
- Materials: Small paper lunch bag, construction paper for tail and streamers, string, hole punch, glue, markers/crayons, scissors.
-
Quick Steps:
- Decorate the paper bag with markers, crayons, or stickers.
- Punch a hole near the closed end of the bag (the top when held upright).
- Thread a long piece of string (kite string works best) through the hole and tie it securely. This is your kite string.
- Cut strips of construction paper or fabric to create a tail. Glue or tape these streamers to the open end of the bag.
- Find an open, breezy area and let your kite fly! Observe how it moves with the wind.
Edible Crafts: The I'm the Chef Too! Advantage
While traditional crafts are wonderful, we believe in taking creativity to the next level by making it edible! Our kits seamlessly blend the joy of cooking with fascinating STEM lessons, making learning tangible, delicious, and deeply engaging. These aren't just crafts; they're comprehensive "edutainment" experiences.
- Journey to the Stars with the Galaxy Donut Kit: Imagine baking and decorating vibrant, celestial-themed donuts. Kids learn about planetary colors, galaxy formations, and the science of baking, all while creating treats that are truly out of this world. It’s an astronomy lesson you can eat!
- Unearth Science with Erupting Volcano Cakes: This kit is a fantastic way to introduce basic chemistry. Children mix ingredients to create "lava" that actually bubbles and erupts, demonstrating acid-base reactions in a safe, exciting, and delicious way. It's a geology lesson that ends with cake!
- Storytelling and Baking with Peppa Pig Muddy Puddle Cookie Pies: For fans of Peppa Pig, this kit combines beloved characters with simple baking. Kids get to create "muddy puddle" cookie pies, fostering imaginative play, following instructions, and enjoying a sweet story come to life in the kitchen.
Our approach goes beyond just a recipe; each kit is a complete experience, containing pre-measured dry ingredients and specialty supplies, along with a beautifully illustrated lesson plan. It’s convenience, education, and fun, all rolled into one delightful package. Give the gift of learning that lasts all year with a 12-month subscription to our STEM cooking adventures! Join The Chef's Club for ongoing educational fun.
Beyond the Craft: Extending the Learning and Fun
The moment a craft is finished doesn't mean the learning stops. In fact, it often opens up new avenues for exploration and development.
- Storytelling with Crafts: Encourage your child to tell a story about their creation. Who is the rock magnet? Where does the sponge sailboat travel? This develops language skills, narrative thinking, and imagination.
- Displaying Creations: Find a special place to display their artwork. This validates their efforts and boosts their confidence. Rotate displays to keep things fresh.
- Gifting Crafts: Making a craft as a gift for a friend, family member, or teacher teaches generosity, thoughtfulness, and the joy of giving.
- Scientific Inquiry: Ask open-ended questions. "What if we used a different material for the sail?" "Why did the colors mix that way?" "What would happen if we added more water to the paint?" This fosters critical thinking and a scientific mindset.
- Documentation: Take photos of their creations! Create a digital scrapbook or a physical album. This chronicles their artistic journey and provides wonderful memories.
At I'm the Chef Too!, we also provide extension activities within our kit guides, encouraging children to think beyond the immediate project and delve deeper into the underlying STEM concepts or artistic themes. It's all part of our commitment to sparking a lifelong love for learning.
Making Craft Time a Breeze: Tips for Parents
We know that the idea of crafting can sometimes feel overwhelming, especially with the thought of mess and complicated instructions. But with a few simple strategies, you can make craft time an enjoyable, low-stress experience for everyone.
- Set Up a "Craft Station": Designate a specific area for crafting – maybe a corner of the kitchen table, a spot on the floor with a washable mat, or an outdoor table. Cover surfaces with newspaper, an old tablecloth, or a plastic mat to simplify cleanup.
- Embrace the Mess (Within Reason): Mess is often a sign of active engagement and exploration. Provide aprons or old t-shirts to protect clothing. Have wet cloths and paper towels readily available for quick cleanups. Frame messes as part of the creative process.
- Focus on Process, Not Perfection: Especially with younger children, the goal is the experience of creating, experimenting, and exploring materials. The final product doesn't need to be magazine-worthy. Praise effort and imagination over flawless execution.
- Simplify Instructions: Break down complex projects into small, manageable steps. Demonstrate actions if needed. For younger children, pre-cut some materials or have supplies organized into individual portions.
- Safety First: Always supervise children, especially when using scissors, permanent markers, or hot glue guns (for older kids). Ensure materials are non-toxic. For our cooking kits, adult supervision is always implied and encouraged.
- Involve Kids in Cleanup: Teach children to help with tidying up. This instills responsibility and shows them that the entire creative process, including putting things away, is a shared activity. Make it a game!
- Be Present and Participate: While independent play is important, joining in on the craft occasionally shows your child that you value their creative endeavors and strengthens your bond. It's a wonderful opportunity for shared joy.
- Plan Ahead (or Don't!): Sometimes a spontaneous craft is the best kind. Other times, having a few ideas and supplies ready can prevent boredom. Our kits are perfect for this, as everything is planned and ready for you to enjoy. For an easy way to keep the creative juices flowing, consider joining The Chef's Club! Imagine a new, exciting STEM cooking adventure delivered right to your door every month.
Remember, the goal is to create positive experiences and lasting memories. By providing a supportive and engaging environment, you’ll foster a love for creativity and learning that will benefit your child far beyond the summer months.
Conclusion
As our journey through the world of fun easy summer crafts for kids comes to a close, we hope you feel inspired and equipped to make this summer a season of unforgettable discoveries. From the simplest rock magnets to the most intricate edible creations, each craft is an opportunity for children to explore, learn, and grow. We've seen how these activities naturally spark curiosity, build confidence, develop essential skills, and create cherished family memories – all without the need for screens.
At I'm the Chef Too!, this spirit of hands-on, multi-sensory learning is at the heart of everything we do. Our unique blend of food, STEM, and the arts transforms complex subjects into tangible, delicious adventures. We believe that every child deserves the chance to experience the magic of creation, whether it's through a vibrant paper project or a scientific baking experiment.
So, this summer, challenge the "I'm bored" blues with a canvas of creativity. Gather your supplies, embrace the process, and watch your children's imaginations soar. And for those moments when you want a completely curated, educational, and delicious adventure delivered right to your doorstep, we've got you covered.
Ready to infuse more hands-on learning into your summer? Browse our full library of adventure kits available for a single purchase in our shop! Explore our collection of one-time kits to find the perfect theme for your little learner. But for truly ongoing educational fun, convenience, and endless inspiration, there's nothing quite like a monthly surprise.
Make this summer truly special by igniting a passion for discovery in your child. Join The Chef's Club today and ensure a new, exciting STEM cooking adventure is delivered to your door every month, complete with free shipping in the US. Let's make this a summer of learning, laughter, and delicious memories, together!
FAQ Section
Q1: What age group are these crafts best suited for? A1: We've categorized the crafts into "Super Simple Crafts for Little Hands" (toddlers and preschoolers, generally ages 2-4) and "Engaging Crafts for Elementary Explorers" (ages 5+). However, many crafts can be adapted for different ages with varying levels of adult assistance. Always consider your child's individual dexterity and attention span.
Q2: How can I minimize the mess during craft time? A2: Designate a specific "craft zone" and cover your workspace with newspaper, a plastic tablecloth, or an old sheet. Have wet wipes, paper towels, and a trash can nearby. Dress children in old clothes or aprons. Involving children in the cleanup process also teaches responsibility.
Q3: My child isn't very "artistic." How can I encourage them? A3: Focus on the process, not the product. Praise their effort, their choices, and their enthusiasm, rather than the "perfection" of their creation. Emphasize that there's no right or wrong way to be creative. Encourage experimentation and simply enjoy the time spent together. Our I'm the Chef Too! kits are designed to make learning fun and accessible for all skill levels, building confidence through delicious achievement.
Q4: What are the main benefits of doing summer crafts with kids? A4: Summer crafts offer numerous benefits, including boosting creativity and imagination, developing fine motor skills, enhancing cognitive abilities (problem-solving, sequential thinking), fostering patience and persistence, building self-esteem, promoting relaxation, and strengthening family bonds.
Q5: How do I choose the right craft for my child? A5: Consider your child's interests! Do they love animals, space, or colorful things? Look at the materials required – do you have them readily available, or are they easy to acquire? Also, factor in the time commitment and the level of supervision needed. For a hassle-free experience tailored to their interests, check out our I'm the Chef Too! kits, like the Galaxy Donut Kit for aspiring astronomers or the Peppa Pig Muddy Puddle Cookie Pies for character fans.
Q6: Where can I find convenient, all-inclusive craft kits? A6: For engaging and educational cooking-based STEM and art kits, I'm the Chef Too! is your go-to! We offer a wide variety of themed kits available for single purchase in our shop. Browse our full library of adventure kits to find the perfect one. For ongoing fun and learning, our monthly Chef's Club subscription delivers a new adventure to your door with free shipping!
Q7: Can these crafts be done indoors and outdoors? A7: Absolutely! Many of these crafts, especially those involving water or natural materials, can be moved outdoors for less mess and more fresh air. Indoor crafts are perfect for rainy days or when you need a break from the sun.