Spark Creativity: Kids Butterfly Craft Fun

Table of Contents
- Introduction
- Why Butterfly Crafts? The Educational Wings of Creativity
- Preparing for Your Butterfly Crafting Adventure
- A Flutter of Craft Ideas: Diverse Kids Butterfly Crafts
- Integrating STEM and Culinary Arts with I'm the Chef Too!
- Tips for a Successful Crafting Session
- Conclusion
- FAQ Section
Imagine a tiny, unassuming caterpillar munching on a leaf, slowly, steadily transforming. Then, one magical day, it emerges from its chrysalis, a breathtaking butterfly, wings unfurled in vibrant splendor, ready to dance in the sunlight. This incredible journey, known as metamorphosis, is one of nature's most captivating wonders, a true testament to transformation and beauty. Just as a caterpillar transforms, so too can a simple craft session transform an ordinary afternoon into an extraordinary adventure filled with learning, laughter, and lasting memories.
Here at I'm the Chef Too!, we believe in the power of hands-on exploration to spark curiosity and ignite a passion for learning in children. We know that the kitchen is a fantastic laboratory for discovery, blending the delicious world of food with the fascinating principles of STEM and the boundless possibilities of art. But the learning doesn't stop there! Butterfly crafts offer a similar magic, providing a canvas for children to express their creativity while subtly absorbing valuable lessons about nature, symmetry, colors, and so much more. This comprehensive guide will flutter through a kaleidoscope of easy, engaging kids butterfly craft ideas, perfect for artists of all ages and skill levels. We'll explore how these simple projects can foster essential developmental skills, deepen an understanding of the natural world, and create precious screen-free moments for your family, proving that every craft is an opportunity for "edutainment."
Introduction
Have you ever watched a child’s eyes light up as a butterfly flutters by? There’s a universal enchantment in these delicate creatures, a fleeting magic that captures imagination and wonder. From their vibrant, often symmetrical wings to their incredible life cycle, butterflies offer a rich tapestry of inspiration for young minds. But beyond their beauty, butterflies also serve as wonderful teachers, guiding us through lessons in biology, art, and even mathematics.
This blog post is dedicated to exploring the delightful world of kids butterfly craft projects. We'll dive into a treasure trove of ideas, from classic favorites to innovative creations, all designed to be simple, accessible, and incredibly fun. Our journey will cover why these crafts are more than just art projects—they're powerful tools for learning and development. We'll share practical tips for setting up a successful crafting space, discuss a variety of materials you can use (many of which are likely already in your home!), and walk you through specific craft ideas with step-by-step guidance and educational insights. At I'm the Chef Too!, our mission is to blend food, STEM, and the arts into one-of-a-kind "edutainment" experiences, and these butterfly crafts perfectly embody that philosophy, proving that learning can be deliciously fun, even without a mixing bowl! Get ready to spread your wings and embark on a creative adventure that promises to spark curiosity, build confidence, and create joyful family memories.
Why Butterfly Crafts? The Educational Wings of Creativity
At first glance, a kids butterfly craft might seem like just a fun way to pass the time. But peel back the layers, and you'll discover a world of educational benefits, seamlessly integrated into an enjoyable activity. These crafts are a fantastic example of how hands-on experiences can teach complex subjects without ever feeling like schoolwork. They align perfectly with our philosophy at I'm the Chef Too!, where we believe that the best learning happens when children are actively engaged, curious, and having a blast.
Beyond Just Fun: STEM and Art in Action
Butterfly crafts are a vibrant gateway to STEM (Science, Technology, Engineering, and Math) and the Arts. They provide tangible ways for children to interact with abstract concepts, making learning memorable and exciting.
- Science: The most obvious scientific connection is the butterfly's life cycle. Crafting butterflies can naturally lead to discussions about metamorphosis—the fascinating transformation from egg to larva (caterpillar), to pupa (chrysalis), and finally, to a beautiful adult butterfly. Children can explore different butterfly species, observing their unique patterns and colors, leading to lessons in biology and ecology. Why do butterflies have certain patterns? How do they help them survive? This encourages observation and critical thinking.
- Technology: While not overtly "techy," these crafts involve using various tools. Scissors require understanding how a simple machine works. Pipettes, used for watercolor effects, introduce concepts of liquid transfer and controlled application. Even the act of folding paper in a specific way to create a concertina effect involves a form of technological process—applying a method to achieve a desired outcome.
- Engineering: Designing a butterfly craft involves basic engineering principles. How do we attach the wings to the body so they stay? How can we make a mask comfortable and durable? Children might experiment with different adhesives, structural supports (like pipe cleaners or lollipop sticks for antennae), and materials to achieve their desired design. They learn about stability, balance, and the properties of various materials.
- Math: Symmetry is at the heart of most butterfly wings. Crafting symmetrical butterflies—by painting on one side and folding, or by carefully cutting matching wing shapes—is a direct lesson in geometry. Children can explore patterns, count beads for a beaded butterfly, measure paper for accurate folds, and sort colors, all of which strengthen early mathematical reasoning.
- Art: The artistic possibilities are endless! Children experiment with color theory (mixing paints, choosing complementary colors), texture (collage materials, scrunched paper), design (creating wing patterns), and various art techniques (painting, drawing, gluing). It’s a powerful platform for self-expression, allowing each child to create a unique masterpiece.
Developing Essential Skills
Every snip, dab, and twist in a butterfly craft contributes to a child's holistic development. These activities are designed by mothers and educators to foster a wide range of crucial skills.
- Fine Motor Skills: The precision required for cutting shapes, threading small beads onto pipe cleaners, applying glue, or manipulating markers and paintbrushes significantly strengthens the small muscles in the hands and fingers. These skills are foundational for writing, dressing, and many daily tasks.
- Gross Motor Skills: Some crafts, like creating "bubbly butterfly art" by blowing through a straw into paint, engage oral motor skills and breath control. Others, like decorating and playing with a butterfly mask, encourage imaginative play that involves movement and coordination.
- Cognitive Skills: Following multi-step instructions, planning the sequence of a craft, problem-solving when a material doesn't quite work as expected, and making choices about colors and designs all build critical thinking and cognitive flexibility.
- Creativity & Imagination: With open-ended craft prompts, children are free to invent their own butterfly species, imagine their butterfly flying through a magical garden, or even create a story around their finished piece. This nurtures their imaginative capacity and encourages innovative thinking.
- Patience & Persistence: Some crafts, like waiting for paint or glue to dry, or meticulously placing mosaic pieces, require patience. The satisfaction of a completed project teaches children the value of persistence and seeing a task through to the end.
- Nature Connection: Observing real butterflies (perhaps during a pre-crafting walk!) and then replicating them through art deepens a child's connection to nature and appreciation for the environment.
Family Bonding & Screen-Free Engagement
In today's fast-paced, screen-dominated world, finding meaningful ways to connect as a family can be a challenge. Butterfly crafts offer a wonderful, screen-free alternative that brings everyone together.
These shared creative experiences spark conversations, encourage cooperation, and build a sense of shared accomplishment. Imagine the giggles as you paint tiny feet for a footprint butterfly or the collaborative effort of deciding where to place each piece of a mosaic. These moments become cherished memories, fostering stronger family bonds. At I'm the Chef Too!, we are committed to facilitating family bonding through engaging activities that create lasting joy. Our unique approach allows families to connect over delicious cooking adventures that are also rich in educational content.
Ready for a new adventure every month, delivered right to your door with free shipping in the US? Our kits include pre-measured dry ingredients and specialty supplies, making family crafting and cooking a breeze. Dive into continuous discovery! Join The Chef's Club and enjoy free shipping on every box!
Preparing for Your Butterfly Crafting Adventure
Before you dive into the colorful world of butterfly crafts, a little preparation can go a long way in ensuring a smooth, enjoyable, and mess-manageable experience for everyone. Think of it like preparing your kitchen for a fun baking project – having everything ready makes the process much more pleasant.
Gathering Your Materials: Repurpose, Recycle, Reimagine
One of the greatest joys of kids butterfly crafts is how many can be made using everyday items you might already have around the house. This not only makes crafting accessible but also teaches children about sustainability and resourcefulness.
-
Paper & Cardboard: This is your foundation!
- Scrap Paper: Old magazines, junk mail, newspapers, or even drawings that weren't quite perfect can be torn, cut, or crumpled for collages and mosaics. Look for pages with interesting colors and textures.
- Card Stock: Thicker card stock provides a sturdy base for masks, painted butterflies, or mounting collages. Cereal boxes or other packaging can be cut up.
- Toilet Paper Rolls & Paper Towel Rolls: Perfect for creating 3D butterfly bodies.
- Egg Cartons: Individual cups can become segments of a butterfly body or even entire small butterflies.
- Coffee Filters: Their absorbent nature makes them ideal for beautiful watercolor-effect butterflies.
- Paper Plates & Foam Cups: Excellent for creating round wing bases or sturdy bodies.
-
Decorating & Adorning:
- Paints: Poster paints, watercolors, acrylics (for older kids, with supervision) – a rainbow of options! Consider washable paints for younger children.
- Markers & Crayons: For coloring, drawing patterns, or creating vibrant designs on coffee filters. Scented markers can add an extra sensory element!
- Glue: White craft glue (PVA), glue sticks, or even a glue gun (for adult use or very close supervision with older kids) depending on the materials being joined.
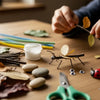
- Pipe Cleaners (Chenille Stems): Essential for antennae, creating wing shapes, or forming the body of bead butterflies.
- Beads: Leftover beads from old necklaces, bracelets, or craft kits are perfect for threading, adding texture, or decorating. Buttons also work well.
- Googly Eyes: A simple way to bring your butterfly to life with personality!
- Glitter & Sequins: For that extra sparkle and fluttery magic.
- Yarn & String: For hanging creations, adding texture, or creating a mask tie.
- Natural Items: For unique collages, gather pressed leaves, small seeds, tiny twigs, or dried flowers from your garden or a nature walk.
-
Tools:
- Scissors: Child-safe scissors for younger crafters, regular scissors for adults.
- Spoons/Eye Droppers: For controlled water application in coffee filter crafts.
- Paper Straws: For bubbly paint art (make sure to remind kids not to suck!).
- Old Jam Jars/Small Bowls: For mixing paints or bubble solution.
- Paint Brushes & Sponges: Various sizes for different effects.
Setting Up for Success: A Mess-Friendly Zone
Crafting can get wonderfully messy, and that's part of the fun! But a little preparation can prevent cleanup headaches.
- Protect Surfaces: Lay down old newspapers, cardboard, a plastic tablecloth, or an old sheet to protect your table and floor.
- Wear Old Clothes: Designate "craft clothes" or use aprons/smocks to protect clothing from paint and glue.
- Easy Access to Water & Wipes: Keep a bowl of water and a rag or paper towels nearby for quick cleanups of hands and brushes.
- Organize Materials: Have all your chosen supplies laid out and accessible. This helps children focus on the craft rather than searching for materials.
- Clear the Area: Remove anything valuable or easily damaged from the immediate crafting zone.
Safety First: Adult Supervision is Key
While these crafts are designed to be fun and engaging, safety should always be a priority, especially with young children.
- Scissors: Always supervise children when using scissors, teaching them safe handling techniques.
- Small Parts: Beads, buttons, and other small embellishments can be choking hazards for babies and toddlers. Keep these out of reach if younger children are present, or choose age-appropriate crafts.
- Paints & Glues: Ensure all materials are non-toxic and washable. Read labels carefully.
- Straws: When doing bubble art, explicitly instruct children not to suck up the liquid.
- Clean Hands: Encourage hand washing before and after crafting, especially if working with food-related items (even if not edible, it's a good habit!).
At I'm the Chef Too!, we always frame our kitchen activities with an implicit understanding of adult supervision and safety. Our kits are developed by mothers and educators, ensuring that while the fun is paramount, safety guidelines are always considered. These preparations allow for a relaxed and creative environment, where the focus can be on the joy of making and learning, just like when you embark on one of our culinary STEM adventures. Not ready to subscribe? Explore our full library of adventure kits available for a single purchase in our shop. Browse our complete collection of one-time kits!
A Flutter of Craft Ideas: Diverse Kids Butterfly Crafts
Now, let's get to the heart of the matter—the crafts themselves! We've curated a diverse collection of kids butterfly craft ideas, ranging from timeless favorites perfect for toddlers to more involved projects that will engage older children. Each idea offers unique educational benefits and opportunities for creativity.
Classic & Simple for All Ages
These tried-and-true crafts are fantastic starting points, requiring minimal materials and delivering maximum delight.
Symmetry Butterfly Paintings (Splatter/Fold Art)
This classic technique never fails to enchant! It's a fantastic introduction to the concept of symmetry and allows for beautiful, unpredictable results.
-
How to Make It:
- Fold a piece of paper or card stock neatly in half.
- Open it up and on one half, invite your child to splodge, drip, or paint colorful designs. Encourage them to use a few different colors.
- While the paint is still wet, fold the other half of the paper over the painted side and press down firmly. You can gently rub the paper to spread the paint.
- Carefully open the paper to reveal a perfectly symmetrical butterfly wing pattern!
- Once dry, you can cut out the butterfly shape and add a body and antennae with markers or pipe cleaners.
- Educational Connection: This craft vividly demonstrates symmetry. Children learn that one side mirrors the other. It also encourages experimentation with color mixing and understanding how paint spreads.
- Enhancement: Experiment with adding glitter to the wet paint before folding for extra sparkle. Use thicker card for a more substantial piece, or try different folding techniques (e.g., folding horizontally after vertical) for varied patterns.
Footprint Butterfly
A precious keepsake and an adorable craft, perfect for babies and toddlers with adult assistance.
-
How to Make It:
- On a piece of card, draw a simple butterfly body (an elongated oval) and antennae.
- Gently apply non-toxic, washable paint to one of your child's feet.
- Carefully press their painted foot onto the card, next to one side of the butterfly body, with the heel pointing inwards.
- Repeat with the other foot on the opposite side, creating two symmetrical 'wings.'
- Once dry, you can add more decorations with markers or paint, perhaps tiny dots or veins on the wings.
- Educational Connection: This is a lovely way to introduce body awareness for younger children and explore basic shapes. It's also a tactile sensory experience with the paint.
- Enhancement: Use different colors for each foot. Add a date and your child's name to make it a cherished memory. Frame it as a gift for grandparents!
Tissue Paper Butterflies (Concertina Fold)
These delicate, airy butterflies are simple to make and look beautiful hanging in a window.
-
How to Make It:
- Cut two rectangles of tissue paper (about the same size, or one slightly larger). Choose complementary or contrasting colors.
- Stack the two rectangles on top of each other.
- Starting from one short end, fold the stacked tissue paper in an accordion (concertina) style, making folds about an inch wide.
- Once fully folded, pinch the center of the folded stack.
- Wrap a pipe cleaner around the pinched center, twisting it tightly to secure. Bend the ends of the pipe cleaner upwards to form antennae, curling the tips.
- Gently fan out and separate the layers of tissue paper to create the butterfly's wings.
- Educational Connection: This craft practices fine motor skills, precision folding, and understanding how different materials can be manipulated. It also offers a chance to discuss light and translucency when hung.
- Enhancement: Use patterned tissue paper. Create a mobile by hanging several butterflies at different lengths from a hanger or stick.
Looking for more diverse themes to spark imagination? While you're enjoying the simple charm of these butterfly crafts, remember our wider collection of creative adventures. Find the perfect theme for your little learner by Browse our complete collection of one-time kits.
Repurposed & Recycled Creations
Transforming everyday household items into beautiful butterflies teaches children the value of recycling and seeing creative potential in what others might discard.
Toilet Paper Roll Butterflies
A classic craft that gives new life to cardboard tubes.
-
How to Make It:
- Take an empty toilet paper roll. Paint it or cover it with colored paper to form the butterfly's body.
- On colored card stock, draw and cut out two sets of butterfly wings (one larger pair for the top, one smaller for the bottom). Decorate these wings with markers, paint, glitter, or stickers.
- Glue the decorated wings to the back of the toilet paper roll body.
- Attach pipe cleaners for antennae to the top of the roll (you can poke small holes or glue them inside). Add googly eyes for extra character.
- Educational Connection: This promotes recycling and encourages 3D construction. It's also a great exercise in visualizing and planning how different shapes (tube, wings) fit together.
- Enhancement: Make a whole collection of insect friends (bees, ladybugs) using different colored rolls and wing shapes. Add texture with fabric scraps or yarn.
Egg Carton Butterflies
Another fantastic way to repurpose materials, turning humble egg cartons into colorful creatures.
-
How to Make It:
- Cut individual cups or strips of 2-3 cups from a cardboard egg carton. These will form the butterfly's body.
- Paint the egg carton pieces any color you like.
- Once dry, poke small holes in the front cup for pipe cleaner antennae.
- Cut wings from card stock, paper plates, or even thin fabric. Decorate them creatively.
- Glue the wings to the back of the egg carton body.
- Educational Connection: This encourages spatial reasoning (how to cut and assemble) and imaginative play. It's a tangible way to discuss repurposing materials.
- Enhancement: Use a longer strip of egg carton cups to create a caterpillar first, then add wings to transform it into a butterfly!
Coffee Filter Butterflies (Watercolor Effect)
This craft is a beautiful blend of art and science, creating stunning, vibrant wings.
-
How to Make It:
- Place one or two coffee filters flat on a protected surface (like a cookie sheet).
- Have your child draw and color patterns on the coffee filter using washable markers. Encourage them to leave some white space between colors.
- Using an eye dropper or a small spoon, carefully drip water onto the colored areas. Watch as the colors bleed and blend, creating a watercolor effect. Remember: don't oversaturate, just enough water to make the colors run.
- Let the coffee filters dry completely (this can take several hours, or speed it up in sunlight).
- Once dry, fold the coffee filters accordion-style, pinch the center, and secure with a pipe cleaner to form antennae. Fan out the wings.
- Educational Connection: This demonstrates capillary action (how water travels through porous materials) and color diffusion. Children observe how colors spread and mix, a simple chemistry lesson!
- Enhancement: Experiment with different brands of washable markers to see how they blend differently. Create butterflies with specific color palettes to match real species. Speaking of amazing science in action, have you seen the chemical reaction that makes our Erupting Volcano Cakes Kit bubble over with deliciousness? It’s a fantastic way to bring science to life in your kitchen, much like the color magic in these coffee filter crafts!
Paper Plate Butterflies
Simple, versatile, and a great way to use up those extra paper plates.
-
How to Make It:
- Take a paper plate and fold it in half. Draw a butterfly wing shape on the folded plate, starting from the fold, and cut it out. When unfolded, you'll have a symmetrical butterfly shape.
- Decorate the butterfly with paint, markers, glitter, yarn, or collage materials.
- Once decorated, you can add a toilet paper roll body, a craft stick, or pipe cleaners for a body and antennae.
- Educational Connection: Reinforces symmetry and allows for large-scale artistic expression. Can discuss texture if using collage elements.
- Enhancement: Try "marble painting" by adding drops of paint to a tray of shaving cream, swirling gently, then pressing the paper plate onto the surface for a unique pattern.
Stained Glass Butterflies (Tissue Paper Squares)
A beautiful craft that creates a vibrant display when hung in a window.
-
How to Make It:
- Draw a butterfly outline onto a piece of contact paper (sticky side up) or clear sticky-back plastic. Alternatively, cut out a butterfly shape from black construction paper, leaving a "frame" outline.
- Tear or cut small squares and shapes from various colors of tissue paper.
- Have your child stick the tissue paper pieces onto the sticky surface inside the butterfly outline, overlapping them slightly to create a mosaic effect.
- Once complete, cover with another piece of contact paper (sticky side down) or laminate. Trim the edges.
- Educational Connection: Teaches about light, color transparency, and basic design principles. Develops fine motor skills for placing small pieces.
- Enhancement: Discuss how light shines through and mixes colors. Hang them in different windows to see how the light changes throughout the day.
Sensory & Imaginative Play Crafts
These crafts go beyond visual appeal, engaging touch, fostering imaginative play, and encouraging storytelling.
Bead Butterflies
A wonderful craft for developing fine motor skills, hand-eye coordination, and pattern recognition.
-
How to Make It:
- Take two pipe cleaners. Bend one into a U-shape for the antennae.
- Take the second pipe cleaner and thread beads onto it to create the butterfly's body. Twist the ends to secure the beads.
- For wings, you can thread beads onto separate pipe cleaners, shaping them into wing loops, then twisting them around the body. Or, create a simple pair of wings from card and attach to the beaded body.
- Attach the antennae pipe cleaner to the body.
- Educational Connection: This is fantastic for fine motor development, concentration, and pattern creation (e.g., "red-blue-red-blue" pattern). It also offers tactile sensory input.
- Enhancement: Use different sizes and textures of beads. Encourage children to sort beads by color or shape before threading.
Butterfly Mask
Transform your child into a magnificent butterfly, perfect for imaginative play and dress-up.
-
How to Make It:
- Draw a large butterfly wing shape onto a piece of colored card stock or poster board. You can mimic real butterfly wings (like a Monarch or Peacock butterfly) or create a fantastical design.
- Cut out the butterfly shape. Carefully cut out two eye holes so your child can see.
- Decorate the mask with paints, markers, glitter, feathers, or stick-on gems.
- For holding, glue a lollipop stick or sturdy craft stick to the back center of the mask. Alternatively, punch holes on either side and tie elastic string or ribbon to fit around your child's head.
- Educational Connection: Promotes imaginative play, storytelling, and self-expression. Can be a springboard for learning about different butterfly species and their unique wing markings.
- Enhancement: Research real butterfly wing patterns (e.g., the "eyes" on a peacock butterfly) for inspiration. Add small pipe cleaner antennae to the mask.
Bubbly Butterfly Art (Paint & Straws)
This activity is guaranteed to bring giggles and produce unique, textured artwork.
-
How to Make It:
- Draw a simple butterfly outline on a piece of card.
- In several old jam jars or small bowls, mix poster paint with a little washing-up liquid and some water. Stir well. Create 3-4 different colors.
- Using a paper straw, have your child blow gently into one of the paint mixtures to create lots of bubbles. Crucially, remind them NOT to suck!
- Once a good head of bubbles has formed, quickly lay your card (with the butterfly outline) on top of the bubbles to "catch" them.
- Carefully lift the card to see the bubbly impression. Repeat with different colors to build up a vibrant, textured butterfly.
- When dry, cut out the butterfly and add a body and antennae with other materials like craft sticks or beads.
- Educational Connection: This is a fun introduction to air pressure, surface tension, and how colors can layer and combine. It's also a sensory delight with the bubbles!
- Enhancement: Try different sized straws for varied bubble sizes. Experiment with adding more or less washing-up liquid to see how it affects bubble formation.
Collage Butterfly
An open-ended craft that encourages texture exploration and creative composition.
-
How to Make It:
- Draw a large butterfly outline on a piece of card stock.
- Gather a variety of collage materials: torn paper from magazines, scrunched-up tissue paper, fabric scraps, yarn, dried leaves, small seeds, feathers, buttons, sequins, etc.
- Have your child glue these materials onto the butterfly outline, creating layers and textures. They can fill the entire butterfly or create intricate patterns on the wings.
- Once dry, cut out the butterfly and add antennae if desired.
- Educational Connection: Enhances sensory awareness (different textures), develops fine motor skills (gluing small items), and encourages creative decision-making about composition and color.
- Enhancement: Take a nature walk specifically to collect collage materials. Discuss the origin of each material (e.g., "this leaf came from our oak tree").
Still searching for the perfect activity? Our complete collection of individual kits offers even more themes and adventures beyond butterflies. Find your next favorite Browse our complete collection of one-time kits.
Advanced & Themed Crafts
These crafts offer opportunities for deeper learning or more refined artistic expression, suitable for slightly older children or those with a passion for a specific theme.
Monarch Butterfly Craft (Learning about Migration)
Focusing on a specific species allows for rich scientific learning.
-
How to Make It:
- Draw a large butterfly outline, paying attention to the distinctive shape of Monarch wings.
- Use black paint (or a black glue mixture, as described in some craft ideas) to create the bold outlines of the Monarch's wing veins and edges.
- Once the black lines are dry, fill in the sections with various shades of orange and yellow watercolor or acrylic paint, mimicking the Monarch's iconic coloring. Don't forget the small white dots near the wing tips!
- While painting, discuss Monarch butterfly migration. Show pictures or maps of their incredible journey from Canada and the northern US down to Mexico for the winter.
- Educational Connection: This is an immersive lesson in biology, geography, and ecology. Children learn about animal migration, specific species identification, and environmental factors.
- Enhancement: Track the Monarch migration path on a map. Discuss why butterflies (and some birds) migrate south for the winter. What do they eat? What plants attract them?
Washi Tape Butterflies
A clean, precise, and colorful crafting option that allows for intricate patterns.
-
How to Make It:
- Draw a butterfly outline on card stock.
- Have your child tear or cut small pieces of various patterned washi tape.
- They can then stick the tape pieces onto the butterfly outline, creating stripes, plaids, or geometric patterns. Overlap pieces for a layered effect.
- Once the butterfly is covered, trim any tape that extends beyond the outline.
- Add a body and antennae with markers or pipe cleaners.
- Educational Connection: Develops fine motor skills, precision, and pattern recognition. It's also a great way to explore different design aesthetics.
- Enhancement: Use different widths of washi tape. Create symmetrical patterns on the wings with the tape.
Watercolor Butterfly
For those who enjoy painting and blending colors, this allows for beautiful artistic expression.
-
How to Make It:
- Draw a detailed butterfly outline on watercolor paper.
- Using watercolors, have your child fill in the wings, experimenting with blending colors and creating soft, diffused effects. They can mimic real butterfly wing patterns or invent their own.
- Let it dry, then you can outline with a fine-tip black marker for definition, and add details to the body and antennae.
- Educational Connection: Teaches watercolor techniques, color blending, and allows for exploration of light and shade.
- Enhancement: Try the "wet-on-wet" technique (painting on wet paper for more blended colors) or sprinkle salt onto wet watercolor for textured effects. Just as these watercolor projects allow for blending and intricate patterns, our Galaxy Donut Kit takes children on an artistic and scientific journey, allowing them to explore astronomy by creating their own edible solar system with vibrant, swirling glazes!
Integrating STEM and Culinary Arts with I'm the Chef Too!
At I'm the Chef Too!, our core belief is that learning should be an adventure—a delicious, hands-on, and utterly captivating one. Our mission is to seamlessly blend food, STEM, and the arts into one-of-a-kind "edutainment" experiences that ignite curiosity and creativity in children. The joy and learning derived from a simple kids butterfly craft directly mirror the values we champion.
Think about it:
-
The Chemistry of Colors: Just as children observe colors blending in coffee filter butterflies, they explore chemical reactions when yeast makes bread rise or baking soda reacts with acid to create bubbles in our
Erupting Volcano Cakes Kit. - The Biology of Life Cycles: Understanding a butterfly's metamorphosis through craft can be extended to understanding the growth cycle of plants in cooking, or the transformation of ingredients during baking. Our Peppa Pig Muddy Puddle Cookie Pies kit, for example, cleverly ties in discussions about ecosystems and the importance of healthy environments, making learning about living things delightful.
- The Geometry of Shapes: Whether it's the symmetry of a butterfly wing or the precise measurements in a recipe, math is an invisible ingredient in both crafting and cooking.
- The Art of Presentation: Decorating a butterfly is akin to garnishing a dish. Both teach aesthetic appreciation, attention to detail, and the joy of creating something beautiful.
Our unique approach provides screen-free educational alternatives that are developed by mothers and educators who understand the importance of tangible, hands-on learning. We know that these simple butterfly crafts are fantastic individual projects, but sometimes, you crave that structured, convenient adventure that arrives right at your door.
That's where our "Chef's Club" subscription truly shines. Imagine a new, exciting themed kit every month, complete with pre-measured dry ingredients and specialty supplies, ready to transform your kitchen into a learning lab. It's the ultimate hassle-free way to continue fostering that love for learning, building confidence, and creating those invaluable family bonding moments without the stress of planning or shopping.
Give the gift of learning that lasts all year with a 12-month subscription to our STEM cooking adventures! With free shipping in the US and flexible 3, 6, and 12-month pre-paid plans, our monthly "Chef's Club" kits are perfect for ongoing educational fun and easy gifting. Join The Chef's Club today!
Tips for a Successful Crafting Session
To ensure your kids butterfly craft adventure is as enjoyable and enriching as possible, keep these friendly tips in mind. They’re designed to make the process smoother and the outcomes more rewarding for both you and your little crafters.
- Embrace the Mess! Creativity often comes with a bit of chaos. Laying down newspaper or a plastic tablecloth, and dressing in old clothes, will free everyone from worrying about spills and stains. A little mess is a sign of great fun and exploration!
- Focus on the Process, Not Just the Product: While a beautiful finished butterfly is wonderful, the true value lies in the journey. Encourage experimentation, allow for "mistakes" (which are often just unique artistic choices!), and praise effort and creativity rather than perfection. The goal is to learn and have fun, not to produce a museum-worthy piece.
- Encourage Individuality: Each child will interpret a craft idea in their own unique way, and that's fantastic! Resist the urge to "fix" their artwork or make it look like the example. Celebrate their individual choices in color, pattern, and design. Their butterfly should reflect their imagination.
-
Ask Open-Ended Questions: Instead of "What is it?" try questions like:
- "Tell me about your butterfly. What kind of adventures do you think it will have?"
- "What colors did you choose and why?"
- "What was your favorite part of making this?"
- "If your butterfly could talk, what would it say?" These questions spark imagination, encourage language development, and show your child you're genuinely interested in their creative process.
- Display Their Art Proudly: Find a special spot to showcase your child's finished butterfly crafts. This validates their effort, boosts their confidence, and makes them feel proud of their accomplishments. A rotating "art gallery" on the fridge or a dedicated shelf can be very encouraging.
- Connect to Nature: Before or after crafting, take a moment to look at real butterflies (in a book, online, or even better, in your garden!). Discuss their patterns, colors, and how they fly. This reinforces the real-world connection and deepens their appreciation for nature.
- Prepare for Cleanup: Just as you set up for the mess, have a plan for cleaning up. Involve children in putting away supplies, wiping surfaces, and washing hands. This teaches responsibility and reinforces that the activity has a beginning, middle, and end.
- Keep It Short and Sweet: Gauge your child's attention span. It's better to have a shorter, focused, and enjoyable crafting session than to push them until frustration sets in. You can always come back to it later or save materials for another day.
Sometimes, even with the best intentions, gathering all the materials for a complex craft can feel overwhelming. That’s why our "Chef's Club" is such a lifesaver for busy families! We deliver new, exciting STEM adventures monthly, complete with pre-measured dry ingredients and specialty supplies, taking the planning off your plate so you can focus on the fun and learning. Ready for hassle-free educational fun? Join The Chef's Club!
Conclusion
The magic of a kids butterfly craft extends far beyond a simple piece of paper or a dab of paint. It’s an enchanting journey into the natural world, a hands-on exploration of STEM concepts, and a vibrant canvas for artistic expression. From developing fine motor skills and encouraging critical thinking to fostering a deep connection with nature and creating invaluable family memories, these crafts are truly a testament to the power of imaginative play and tangible learning.
At I'm the Chef Too!, we wholeheartedly believe in the power of "edutainment"—where every activity is an opportunity for discovery, growth, and joy. Whether it’s through the simple elegance of a symmetrical butterfly painting or the scientific wonder of a coffee filter dissolving colors, these butterfly crafts echo our commitment to sparking curiosity and creativity in children. They offer a delightful screen-free alternative, encouraging children and families to bond over shared experiences that build confidence and leave a lasting impression.
We are dedicated to providing experiences that are not only fun but also deeply enriching, developed by mothers and educators who understand the delicate balance between play and purposeful learning. So, gather your materials, embrace the potential for a little mess, and embark on your next butterfly crafting adventure. Your child's creativity is waiting to take flight!
Ready to effortlessly continue your family's journey of discovery and delicious learning? With our "Chef's Club" subscription, a new, exciting themed adventure is delivered to your door every month, complete with pre-measured dry ingredients and specialty supplies. It’s the perfect, flexible way to ensure continuous screen-free educational fun. Join The Chef's Club today and let the "edutainment" continue!
FAQ Section
Q: What age are these butterfly crafts suitable for? A: Many butterfly crafts are incredibly versatile! Simple activities like symmetry painting and footprint butterflies are perfect for toddlers and preschoolers with adult supervision. Crafts involving cutting, threading beads, or detailed decoration (like mosaics or specific species designs) are better suited for older children (ages 5 and up). Always adapt the complexity to your child's skill level and attention span.
Q: How can I make these crafts more educational? A: Integrate learning naturally!
- Science: Discuss butterfly metamorphosis, different species, habitats, and what butterflies eat.
- Math: Talk about symmetry, count colors or beads, measure paper.
- Art: Explore color mixing, textures, and different art techniques.
- Literacy: Read a book about butterflies before or after crafting. Ask open-ended questions about their choices and observations.
Q: What if my child gets frustrated during a craft? A: It's completely normal for children to get frustrated.
- Offer help: Provide assistance without taking over the project.
- Simplify: Break down the steps into smaller, more manageable tasks.
- Take a break: Sometimes stepping away for a few minutes can help reset.
- Refocus on fun: Remind them that the goal is to enjoy the process, not to create a perfect outcome. Celebrate their effort and creativity regardless of the final product.
Q: Can I really use items from nature for butterfly crafts? A: Absolutely! Nature provides a wonderful array of free and beautiful craft materials. Collect fallen leaves, small seeds, petals, or twigs on a nature walk. These can be glued onto paper for collage butterflies, adding unique textures and a direct connection to the natural world. Just be sure to clean and dry natural items before use.
Q: How do I store or display the finished butterfly crafts? A: Displaying artwork boosts a child's confidence!
- Fridge Gallery: A classic and easy option.
- String & Clothespins: Hang a string across a wall or window and use small clothespins to display multiple crafts.
- Framing: For particularly cherished pieces (like footprint art), a simple frame elevates it to a special keepsake.
- Mobile: Attach several lightweight paper or tissue paper butterflies to a hanger or stick with thread to create a fluttering mobile.
- Storage: For flat crafts, a designated art portfolio or large envelope can keep them safe. For 3D crafts, a display shelf or clear storage bin works well.