Shake Up Some Fun: Crafting Magical Snow Globes for Kids

Table of Contents
- Introduction
- Why Snow Globes? Beyond Just a Craft
- The STEM & Arts Magic Behind Every Shake
- Gathering Your Wonderland Workshop Supplies
- Crafting Your Classic Jar Snow Globe: Step-by-Step Adventure
- Creative Twists: Beyond the Basic Snow Globe
- Tips for Success & Safety First
- Bringing I'm the Chef Too! Magic to Your Kitchen and Craft Table
- Conclusion
- FAQ Section
Imagine a miniature world captured in a jar, shimmering with glitter as "snow" gently falls, revealing a tiny scene of wonder. There's something undeniably enchanting about a snow globe, a timeless craft that captivates both children and adults. In a world increasingly dominated by screens, finding engaging, hands-on activities that spark creativity and learning can feel like a quest. But what if we told you that creating your own snow globes for kids craft is not only a fantastic way to unplug and unwind, but also a stealthy masterclass in STEM and the arts?
At I'm the Chef Too!, our mission is to blend the exciting worlds of food, STEM, and the arts into one-of-a-kind "edutainment" experiences. We believe that learning should be an adventure, filled with discovery and delicious outcomes. Crafting a snow globe perfectly embodies this philosophy, transforming simple materials into a magical keepsake while subtly introducing principles of science, engineering, and artistic design. This post isn't just about glue and glitter; it's about exploring the educational potential of a classic craft, offering practical tips, creative ideas, and showing you how this delightful activity fits right into our vision of hands-on, screen-free family fun. Get ready to dive into the wonderful world of DIY snow globes and discover how to shake up some serious fun and learning!
Introduction
Have you ever wondered what makes the "snow" inside a snow globe float and fall so gracefully? Or how those tiny scenes stay perfectly preserved underwater, year after year? It might seem like pure magic, but beneath the sparkling surface, there's a fascinating blend of science, engineering, and artistic expression at play. Making snow globes isn't just a nostalgic craft; it's an incredible opportunity for kids to engage their minds, flex their creative muscles, and produce a tangible, beautiful keepsake.
We’re here to guide you through the exciting process of creating enchanting snow globes with your children, transforming everyday items into extraordinary miniature worlds. We’ll explore the simple science behind the glittery snowfall, delve into the imaginative art of scene design, and provide step-by-step instructions to ensure a successful and enjoyable crafting experience. From selecting the perfect jar to sealing your watery wonderland, we'll cover everything you need to know. More than just a craft, we'll uncover how this activity encourages problem-solving, fine motor skill development, and fosters a love for hands-on discovery – values that are at the heart of everything we do at I'm the Chef Too!. This journey into DIY snow globes promises not only a cherished creation but also precious moments of family bonding, proving that the best adventures often happen right at your kitchen table.
Why Snow Globes? Beyond Just a Craft
The allure of a snow globe is universal. That moment you give it a gentle shake and watch a cascade of glitter or tiny flakes drift down, slowly settling over a miniature landscape, is truly mesmerizing. For children, it’s not just a toy or a decoration; it’s a tiny universe they can control, a moment of calm, and a powerful tool for imaginative play. But the benefits of making snow globes extend far beyond their visual appeal.
Think about the process itself. It's a journey of creation, starting with an idea and culminating in a finished product. This journey nurtures a child's imagination as they envision the scene, select the characters, and decide on the details that will bring their mini-world to life. Is it a winter wonderland with tiny trees and reindeer? A magical undersea adventure with mermaids and colorful shells? Or perhaps a dinosaur's prehistoric playground? The possibilities are as limitless as a child's creativity. This open-ended approach to crafting aligns perfectly with our belief at I'm the Chef Too! that fostering curiosity and creativity is key to a child's development. We don't just provide ingredients; we provide a springboard for imagination.
Beyond imagination, snow globe crafting is a fantastic avenue for developing crucial practical skills. Fine motor skills are honed as children carefully place figurines, sprinkle glitter, and manage glue. Problem-solving comes into play when deciding how to best position elements or how much glitter is "just right." It teaches patience as they wait for glue to dry or watch the glitter settle. Moreover, the sense of accomplishment a child feels when they hold their own handmade snow globe, knowing they created this magical object, is immense. This builds confidence and encourages them to take on new challenges, much like the confidence children gain when they successfully bake a delicious treat from one of our kits.
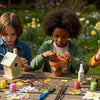
In an age where digital distractions are abundant, snow globe crafting offers a much-needed screen-free alternative. It's an activity that brings families together, encouraging conversation, collaboration, and shared laughter. Parents and children can bond over the simple joy of making something beautiful with their own hands, creating not just a craft, but lasting memories. This family bonding is a core value at I'm the Chef Too!, where our kits are designed to be shared experiences that nourish relationships as much as they nourish hungry minds.
Ready to bring more screen-free educational fun into your home every month? Join The Chef's Club and enjoy a new adventure delivered right to your door with free shipping in the US. Our 3, 6, and 12-month pre-paid plans are perfect for gifting or long-term enrichment, ensuring a steady stream of hands-on, delicious learning!
The STEM & Arts Magic Behind Every Shake
While making snow globes might seem like pure artistic fun, it's actually a wonderful blend of Science, Technology, Engineering, and Math (STEM), intertwined with artistic expression. At I'm the Chef Too!, we love demonstrating how complex subjects can be made tangible and exciting, and snow globes are a prime example of this "edutainment" approach.
Science in a Jar: Density, Viscosity, and Gravity
When you shake a snow globe, you're observing several scientific principles in action:
- Density: The glitter (our "snow") needs to be denser than the water to fall, but not so dense that it sinks immediately. Different types of glitter or faux snow will have varying densities, affecting how quickly they settle.
- Viscosity: This is where our "secret ingredient," glycerine, comes in! Glycerine is a thick, syrupy liquid. When added to water, it increases the water's viscosity, or its resistance to flow. Think of honey versus water – honey is more viscous. By increasing the water's viscosity, the glitter falls more slowly and gracefully, creating that magical, lingering snowfall effect. Without glycerine, the glitter would just plummet to the bottom. It’s a simple addition that dramatically alters the physics of the globe!
- Gravity: Of course, gravity is the force pulling the glitter downwards. The interplay between gravity and the liquid's viscosity determines the speed of the descent.
- Light Refraction: The water in the globe acts like a lens, slightly distorting and magnifying the scene inside, adding to its whimsical quality.
Engineering & Design: Building a Miniature World
Crafting a snow globe is an exercise in miniature engineering and design. Children learn to:
- Plan and Design: What will their scene look like? How will the elements fit together? What's the best focal point? This requires spatial reasoning and forward-thinking.
- Structural Stability: How do they ensure their figurines stay upright and securely attached? Choosing the right adhesive and attachment points is critical. Will it be glued to the lid or the base? The orientation matters!
- Waterproofing: Selecting materials that won't degrade or dissolve in water is essential. This teaches about material properties and the importance of chemical inertness.
- Sealing: Creating a watertight seal is a practical engineering challenge. It requires careful application of glue to prevent leaks and maintain the integrity of the mini-ecosystem.
Artistic Expression: Colors, Composition, and Storytelling
The "arts" component is perhaps the most obvious, yet deeply profound. Making a snow globe is an act of storytelling and visual art:
- Composition: Children learn about arranging elements within a small space to create an appealing scene. This involves understanding foreground, background, and balance.
- Color Theory: Choosing glitter colors that complement the figurines and theme. Will it be classic white and silver, or a vibrant rainbow?
- Miniature Sculpting: If using modeling clay or FIMO, kids engage in sculpting, shaping tiny figures, and adding intricate details. This hones dexterity and artistic vision.
- Theme Development: Deciding on a theme (winter, space, dinosaurs, characters) allows children to express their interests and bring their internal worlds to life. Even beloved characters can make learning fun, like when kids make Peppa Pig Muddy Puddle Cookie Pies with us!
Through this hands-on process, children aren't just making a craft; they're experimenting with scientific principles, solving design challenges, and expressing their unique artistic vision. It's a holistic learning experience that sparks curiosity and builds confidence, just like the exciting experiments and delicious creations in our own STEM cooking kits.
Gathering Your Wonderland Workshop Supplies
Before you embark on your snow globe adventure, it’s essential to gather all your materials. Part of the fun (and the learning!) is in the selection process, thinking about how each component will contribute to your final miniature masterpiece. We believe in making learning accessible and fun, and often, the best supplies are items you already have around the house or can easily acquire.
The Vessel: Jars of All Shapes and Sizes
- Glass Jars with Tight-Fitting Lids: Mason jars are classics, but any clean, empty glass jar with a screw-on lid will work perfectly. Think pickle jars, jam jars, baby food jars, or even spice jars. The size matters – smaller jars tend to be easier for kids to handle and require fewer internal elements to look complete. As some seasoned crafters recommend, smaller is often better to avoid "lots of watery space" above your chosen scene.
- Clear Plastic Domes or Plates (for flat, photo-style globes): If you're going for a flat, display-style snow globe (often used in classrooms), clear plastic plates or domes can serve as the "glass" covering. These are great for younger kids or for creating personalized photo gifts.
The "Snow": Glitter and Faux Flakes
- Glitter: This is your classic snow! Fine glitter provides a delicate, shimmering snowfall, while chunkier glitter offers a more dramatic effect. Opt for plastic or PVC glitter, as it's more likely to be colorfast in water. A mix of white, silver, and iridescent glitter creates a magical sparkle. Remember the golden rule: less is often more! You can always add more, but it’s tricky to take it out.
- Faux Snow Flakes: Small, plastic faux snow flakes can be added for texture and a more realistic snow effect. Just ensure they are designed to be submerged in water and won't disintegrate or swell.
- Biodegradable Options: For an eco-conscious approach, consider biodegradable glitter or finely shredded natural materials if you're experimenting with a truly temporary, eco-friendly globe (though these might not last as long in water).
The Liquid Layer: Water and the "Secret Ingredient"
- Distilled Water: Using distilled water helps prevent cloudiness and minimizes algae growth over time, keeping your snow globe crystal clear. Tap water can work, but mineral content might lead to issues later.
- Glycerine (the "Secret Sauce"): As we discussed, glycerine is key to that slow, enchanting snowfall. You can find it in the baking aisle of many grocery stores or craft stores. A few drops are usually all you need, making the glitter float and swirl before settling gently. Without it, your glitter will sink quickly, losing some of its magic.
The Scene Setters: What Goes Inside?
This is where the real fun and creativity come in!
- Waterproof Figurines: Think plastic animals, tiny toy cars, LEGO characters (if your children can part with them!), or miniature plastic dolls. Small toys from party bags or Kinder Surprises are perfect for this. Ensure they are made of plastic or other non-porous materials that won't degrade or leach color into the water.
- Modeling Clay (FIMO or Polymer Clay): If your child loves to sculpt, oven-bake polymer clay (like FIMO) is an excellent choice. They can create their own custom characters, trees, houses, or even fantastical creatures. Just make sure to bake them according to package instructions to harden them fully before submerging them in water. We’ve seen incredible solar system themed snow globes crafted with FIMO planets, though as some experienced crafters note, these can be a bit fiddly!
- Laminated Photos: For a personal touch, especially popular in classroom settings, print out small photos of your child, family, or pets. Laminate them thoroughly to make them waterproof, then cut them out. These make wonderful gifts!
- Small Plastic Plants or Aquarium Decorations: These can add a natural element to your scene without fear of decay.
- Pebbles, Small Shells, or Smooth Glass Beads: These can create a natural landscape at the bottom of your globe, but ensure they are thoroughly cleaned.
- WARNING: Avoid anything made of paper, cardboard, fabric, wood (unless sealed completely with a waterproof varnish), or anything that might rust or dissolve in water.
Adhesives & Tools: Keeping It All Together
- Waterproof Super Glue or Epoxy: This is crucial for securely attaching your figurines to the inside of the jar lid or base. Hot glue can work but sometimes doesn't provide a strong enough waterproof seal long-term, especially with heavier objects. For a truly durable globe, a strong waterproof adhesive is best.
- Silicone Sealant (Optional but Recommended): For extra security, especially if kids will be handling the globes frequently, a bead of aquarium-safe silicone sealant around the inside of the lid (after the main glue has dried) can create an impenetrable waterproof barrier.
- Funnels: A small funnel makes it much easier to pour in water and glitter without making a mess.
- Gloves: Useful when working with strong adhesives.
- Cotton Swabs or Paper Towels: For wiping away excess glue or cleaning the jar.
Remember, the goal is to make a fun, engaging, and educational experience. Having all your supplies ready streamlines the process and keeps little hands busy and excited! Just like our I'm the Chef Too! kits come with pre-measured dry ingredients and specialty supplies, having your snow globe station prepped makes for a smoother creative journey.
Not ready to subscribe for monthly deliveries just yet? No problem! Explore our full library of adventure kits available for a single purchase in our shop to find the perfect hands-on STEM and art experience for your little learner today.
Crafting Your Classic Jar Snow Globe: Step-by-Step Adventure
Now that you have all your magical supplies, let’s get crafting! This step-by-step guide will help you create a beautiful and long-lasting snow globe. Remember to always work with adult supervision, especially when using strong adhesives.
Step 1: Design Your Scene and Prepare Your Figures
This is the moment for imagination to take center stage!
- Brainstorming: Talk with your child about what kind of miniature world they want to create. A snowy forest? An outer space adventure? A character’s favorite hangout?
- Selecting Elements: Choose waterproof figurines, clay creations, or laminated photos. Arrange them outside the jar first to get a sense of the composition and ensure they fit through the jar's opening and don't touch the sides. Consider making a small "base" for your figures using modeling clay or a small plastic disc if they need to be elevated.
- Prepare Your Figures: If using FIMO or polymer clay, bake and cool them completely. If using laminated photos, cut them precisely.
Step 2: Secure Your Miniature World
This is a critical step for the longevity of your snow globe. You generally have two options for attaching your scene: to the inside of the jar lid or to the bottom of the jar. Attaching to the lid is often recommended as it makes assembly easier and less messy inside the jar itself.
-
Lid Attachment (Recommended):
- Flip your jar lid upside down.
- Apply a generous amount of waterproof super glue or epoxy to the base of your chosen figurine(s) or scene elements.
- Carefully press the elements onto the inside of the lid, holding them firmly in place until the glue starts to set.
- If creating a multi-element scene (like a small tree next to a character), glue them one by one, ensuring proper spacing and stability.
- Allow the glue to cure completely, ideally for 24 hours, according to the adhesive manufacturer's instructions. This is crucial to prevent leakage or figures detaching later.
- Optional but recommended: Once the main glue is dry, you can apply a bead of silicone sealant around the base of your figures where they meet the lid, creating an extra waterproof barrier. Let this cure as well.
-
Jar Bottom Attachment (More Challenging):
- If you choose to glue to the bottom of the jar (perhaps for a very shallow scene), apply glue directly to the interior base of the jar.
- Carefully place your figure(s) inside, using tongs or a long stick if the jar is deep, to position them.
- This method can be more fiddly as you have to work within the jar's confined space and ensure the glue has enough time to set without tilting the jar.
Step 3: The Liquid Layer: Water, Glycerine, & Glitter
This is where the magic really starts to happen!
- Fill with Water: Carefully fill your clean jar with distilled water, leaving about half an inch to an inch of space at the very top. This space is important to prevent overflow when you insert the lid, and it allows for air circulation that helps the glitter move.
- Add Glycerine: Add a few drops of glycerine to the water. Start with 1/2 teaspoon for a small jar (e.g., baby food jar) and up to 1-2 teaspoons for a larger mason jar. You can always adjust later. The goal is to make the glitter fall slowly, not too fast and not too slow.
- Introduce the Glitter: Using a funnel, carefully add your chosen glitter. Start with 1-2 teaspoons. Remember, less is often more! You can always add more glitter if you want a heavier snowfall, but it's very difficult to remove once added. For a truly shimmering effect, mix fine white/silver glitter with a touch of iridescent glitter. For a celestial globe, golden and star-shaped glitter would be perfect, much like creating your own edible solar system with our Galaxy Donut Kit.
- Test the "Snowfall": Place a small piece of plastic wrap over the jar opening and gently shake the jar. Observe how the glitter falls. If it falls too fast, add a few more drops of glycerine. If it falls too slowly, add a tiny bit more plain water (which will slightly dilute the glycerine). Adjust until you achieve your desired "snowfall" effect.
Step 4: The Grand Finale: Sealing It Up
This step transforms your collection of materials into a finished snow globe!
- Clean the Rim: Wipe the rim of the jar thoroughly to ensure it’s dry and free of glitter or water. This is crucial for a good seal.
- Apply Adhesive to Lid: Apply a generous, continuous bead of waterproof super glue, epoxy, or silicone sealant around the inside edge of the jar lid (the part that screws onto the jar).
- Screw on the Lid: Carefully and quickly invert your lid (with the attached scene) and slowly lower it into the jar. Screw the lid on as tightly as possible. As you do this, some water may overflow – have a towel ready!
- Final Seal (Optional but Recommended): Once the lid is tightly screwed on and the glue has dried for a few hours, you can apply another thin bead of silicone sealant around the outside seam where the lid meets the jar. This adds an extra layer of protection against leaks. Allow this to cure for at least 24-48 hours before handling extensively.
- Initial Leak Test: After the glue has fully cured, gently invert the snow globe over a sink or towel and check for any drips. If you find a leak, you may need to apply more sealant.
Tada! You’ve created your very own magical snow globe! This project emphasizes the meticulous steps involved in bringing a creative vision to life, much like the careful measuring and mixing required for our delicious STEM baking kits.
Ready for a new adventure every month, complete with pre-measured ingredients and specialty supplies? Join The Chef's Club today and enjoy free shipping on every box. Give the gift of learning that lasts all year with a 3, 6, or 12-month subscription to our STEM cooking adventures!
Creative Twists: Beyond the Basic Snow Globe
Once you've mastered the classic jar snow globe, the possibilities for creative variations are endless! At I'm the Chef Too!, we believe in fostering innovation and encouraging children to think outside the box, and these snow globe twists are perfect for that.
Photo Snow Globes: A Personalized Keepsake
Imagine a snow globe where your child's own smiling face is part of the winter wonderland! Photo snow globes are incredibly popular, especially as gifts for grandparents or teachers.
-
The Flat Globe Method: As seen in many classroom settings, this method often uses clear plastic plates or domes.
- Print a photo of your child or family. Crop and cut it out.
- Glue the photo to a piece of cardstock or light blue construction paper (this forms your "background").
- Decorate around the photo with small, flat embellishments like felt snowmen, snowflakes, or hand-drawn details. Ensure these are securely glued down.
- Add a sprinkle of faux snow or glitter to the paper background, covering the "ground" of your scene.
- Place a clear plastic plate or dome over your decorated paper. Carefully glue the edges of the plate to the paper, leaving a small opening.
- Pour in extra faux snow or glitter through the opening, then seal it completely. This method provides a fun, less messy alternative to water-filled globes, especially for very young crafters, while still giving that "snow globe" effect.
-
Laminated Photo in a Jar: For a water-filled photo globe, print your photo on high-quality paper and then thoroughly laminate it. Cut out the laminated photo, leaving a small border. You can then glue this laminated photo to the inside of your jar lid, just like you would a figurine. This creates a more traditional snow globe effect with your personalized image.
Themed Globes: Unleashing Imagination
Encourage your child to create a globe around a specific theme that sparks their interest.
-
Seasonal Scenes:
- Winter Wonderland: Classic snowmen, tiny pine trees, plastic reindeer.
- Autumn Harvest: Mini pumpkins, fall leaves (artificial and waterproof!), tiny scarecrows (again, waterproof!).
- Spring Blooms: Small plastic flowers, bees, butterflies.
- Summer Beach: Tiny shells, plastic crabs, miniature beach umbrellas.
-
Fantasy Worlds:
- Under the Sea: Plastic fish, mermaids, coral (aquarium safe!).
- Dinosaur Era: Miniature dinosaurs, plastic ferns, volcano shapes (if not using water, you could even add some "lava" elements).
- Outer Space: Tiny planets (perhaps crafted from FIMO, like some experienced crafters have done for a "solar system" snow globe!), astronauts, rockets. Exploring astronomy through edible crafts is also fantastic, like with our Galaxy Donut Kit!
- Character Globes: Use small action figures or toy characters from your child's favorite books, movies, or cartoons. This makes the craft extra special and personal.
Edible Inspirations (A Nod to Our Passion!)
While we don't recommend putting actual edible ingredients into a water-filled snow globe (for obvious reasons related to spoilage!), the concept of a snow globe can inspire amazing edible creations. Think about how food can mimic the elements of a snow globe:
- "Snow" Toppings: Powdered sugar, shredded coconut, or white sprinkles can create a snowy effect on cakes, cookies, or cupcakes.
- Miniature Scenes: Use edible figurines made from fondant or gum paste to create tiny scenes atop desserts, mirroring the intricate worlds inside a snow globe.
- Clear Glazes: A clear, shimmering glaze on a pastry can give a "glass-like" appearance, beneath which edible "snow" or decorations reside.
This approach demonstrates how the principles of design and creativity found in crafts can seamlessly transfer to the kitchen, reinforcing our mission at I'm the Chef Too! to blend food, STEM, and the arts.
These creative twists show that making snow globes is not a one-and-done activity, but a versatile craft that can evolve with your child's interests and abilities, providing endless opportunities for imaginative play and learning.
Want more engaging, hands-on, and delicious activities like these? Browse our complete collection of one-time kits and find the perfect theme for your little learner!
Tips for Success & Safety First
Creating snow globes with kids is a joyful process, but a few key tips can ensure success and, most importantly, safety. At I'm the Chef Too!, we always emphasize a safe and supportive environment for learning and creativity.
Prioritize Safety
- Adult Supervision is Key: Always supervise children when using hot glue guns, super glue, epoxy, or any sharp tools (like scissors for cutting laminated photos). These adhesives can bond skin quickly or cause burns.
- Ventilation: When using strong adhesives or sealants, ensure you are in a well-ventilated area to avoid inhaling fumes.
- Glass Jars: Handle glass jars with care. For younger children, pre-cleaning and preparing the jars can minimize the risk of breakage. Consider plastic alternatives if safety is a major concern.
- Non-Toxic Materials: While the contents are sealed, it's good practice to use non-toxic materials for figurines and decorations, especially if the globe might be handled frequently by young children.
Crafting Tips for a Beautiful Outcome
- Start Small: For first-timers, smaller jars are generally easier to manage and less intimidating. They also require fewer internal elements, making scene design simpler.
- Test Your Figurines: Before permanently gluing anything, place your chosen figurines into an empty jar. Make sure they fit comfortably, don't touch the sides, and allow enough space for the lid to screw on. Test with water if unsure about buoyancy.
- Less Glitter, More Grace: It's tempting to dump in a whole bottle of glitter, but often, a small amount (1-2 teaspoons for a standard mason jar) provides a more elegant and realistic snowfall. Too much glitter can obscure the scene and make the water cloudy.
- The Glycerine Experiment: The amount of glycerine is not an exact science, as it depends on the size of your jar, the amount of water, and the type of glitter. Start with a small amount and test it. You can always add more drops until you achieve that perfect slow drift. This is a wonderful mini-science experiment in itself!
- Cleanliness is Next to Globeliness: Ensure your jar and figures are sparkling clean before assembly. Any dust, fingerprints, or debris can show up clearly once the globe is filled with water.
- Cure Time is Crucial: Do NOT rush the glue or sealant drying times. This is the most common reason for leaks or figures detaching. Patience in this step will save you headaches later.
- Water Quality Matters: Distilled water is recommended to prevent cloudiness and minimize the growth of unsightly things over time.
- Consider the Lid: Gluing the scene to the lid often makes assembly easier than trying to glue elements to the bottom of the jar. This allows you to work upside down and position everything before the final inversion.
- External Decorations: Once your snow globe is complete and thoroughly sealed, you can get creative with decorating the outside of the jar and lid. Paint the lid, tie a ribbon around the neck, or even add labels.
Embracing the Process, Not Just the Product
At I'm the Chef Too!, we believe that the journey of learning and creating is as important, if not more important, than the final result. Sometimes, a snow globe might not turn out exactly as planned, or a leak might occur. These are valuable learning opportunities!
- Problem-Solving: What went wrong? How can we fix it next time? This encourages critical thinking.
- Resilience: It teaches children that not everything is perfect on the first try, and that's okay. Persistence leads to success.
- Love for Learning: The objective isn't to create a museum-quality piece, but to foster curiosity, build confidence, develop key skills, and most importantly, create joyful family memories. The joy is in the making, the shaking, and the shared experience.
By keeping these tips in mind, your snow globe crafting session will be safe, successful, and filled with delightful learning moments.
Bringing I'm the Chef Too! Magic to Your Kitchen and Craft Table
As you’ve journeyed with us through the whimsical world of snow globe crafting, you might have noticed how perfectly this activity aligns with the heart of I'm the Chef Too! Our mission is rooted in the belief that blending food, STEM, and the arts creates one-of-a-kind "edutainment" experiences that genuinely spark curiosity and creativity in children. Just like designing a miniature world in a jar, our cooking kits invite children to explore new concepts, experiment with ingredients, and create delicious outcomes that are as educational as they are fun.
Making a snow globe is a testament to the power of tangible, hands-on learning. It’s a screen-free activity that encourages focused engagement, problem-solving, and artistic expression – all core tenets of our educational philosophy. From understanding the science of density with glycerine to the engineering of a watertight seal, and the artistic design of a captivating scene, snow globes offer a microcosm of the holistic learning experience we strive to deliver.
We understand the demands on busy parents and educators, which is why our cooking STEM kits are developed by mothers and educators who know the importance of convenience without compromising on educational value. Imagine the ease of receiving a complete experience at your doorstep, with pre-measured dry ingredients and specialty supplies, ready for an adventure. This convenience allows you to spend less time planning and more time creating unforgettable moments with your children.
Whether you're crafting a galaxy-themed snow globe that hints at the wonders of astronomy, much like our Galaxy Donut Kit, or building a tiny volcano scene, reminiscent of the fizzing reactions in our Erupting Volcano Cakes Kit, the spirit of discovery is the same. We are committed to helping you nurture your child's love for learning, build their confidence through successful creation, and develop key skills that extend far beyond the kitchen or craft table.
Think of how the joyous memories made while shaking a homemade snow globe are echoed in the laughter and excitement shared over a freshly baked, science-inspired treat from I'm the Chef Too! We're not just selling kits; we're facilitating family bonding, inspiring future innovators, and providing a gateway to a world where learning is an adventure waiting to be explored.
Conclusion
The humble snow globe, far from being just a decorative item, is a powerful tool for engaging children in a world of discovery. Through the simple act of crafting these miniature wonders, kids delve into scientific principles like density and viscosity, tackle engineering challenges of design and sealing, and unleash their artistic flair through composition and storytelling. It's a wonderful example of how hands-on, screen-free activities can foster curiosity, build confidence, and create lasting family memories – values that are at the very heart of I'm the Chef Too!'s mission.
We've explored everything from selecting the perfect waterproof elements and the secret to a graceful snowfall (hello, glycerine!) to creative twists like personalized photo globes and themed adventures. Remember, the journey of making is as enriching as the final product. It's about the conversations, the problem-solving, the little "aha!" moments, and the sheer joy of creating something magical with your own hands.
Just as snow globe crafting blends fun with fundamental learning, so do our unique cooking STEM kits. We are dedicated to providing these "edutainment" experiences that make complex subjects tangible and delicious. So, why let the learning stop here? Continue the adventure of hands-on discovery and creative fun with your family.
Ready to embark on a new culinary and scientific journey every month? Join The Chef's Club today! With our convenient monthly deliveries, complete with pre-measured dry ingredients and specialty supplies, you'll open the door to ongoing educational fun, spark endless curiosity, and create even more delicious memories together. Enjoy free shipping in the US and choose from our flexible 3, 6, or 12-month pre-paid plans – the perfect way to keep the magic of learning alive all year long!
FAQ Section
Q1: What is the "secret ingredient" for snow globes and why is it important?
The "secret ingredient" is glycerine. It's important because it increases the viscosity (thickness) of the water inside the snow globe. This causes the glitter or faux snow to fall more slowly and gracefully, creating that beautiful, lingering snowfall effect that makes snow globes so magical. Without glycerine, the glitter would simply drop quickly to the bottom of the jar.
Q2: What kind of jars are best for making snow globes with kids?
Any clean, empty glass jar with a tight-fitting screw-on lid will work well. Mason jars are a popular choice, but you can also use old pickle jars, jam jars, baby food jars, or even spice jars. Smaller jars are often recommended for kids as they are easier to handle and manage, and require fewer elements to create a complete scene. Ensure the lid forms a good seal.
Q3: What materials should I avoid putting inside a water-filled snow globe?
You should avoid any materials that are not waterproof, as they can degrade, dissolve, or leach colors into the water, making it cloudy or discolored. This includes paper, cardboard, fabric, wood (unless thoroughly sealed with a waterproof varnish), anything that might rust (like certain metals), or items that might swell or grow mold. Always stick to plastic, fully baked polymer clay (like FIMO), laminated photos, or aquarium-safe decorations.
Q4: My glitter falls too fast/too slow. How can I fix it?
If your glitter falls too fast, you need to increase the water's viscosity. Add a few more drops of glycerine, shake, and observe. Repeat until you achieve the desired slow fall. If your glitter falls too slowly, it means the water is too viscous. You can dilute the mixture by carefully removing a small amount of the water/glycerine mixture and replacing it with plain distilled water.
Q5: How can I prevent my snow globe from leaking?
Preventing leaks is crucial for a long-lasting snow globe. Here are the key steps:
- Use a strong, waterproof adhesive: Super glue, epoxy, or silicone sealant are better choices than hot glue for attaching figures to the lid and sealing the lid itself.
- Allow sufficient cure time: Read the adhesive manufacturer's instructions and allow the glue to cure completely, often 24-48 hours, before filling with water or handling extensively. Rushing this step is the most common cause of leaks.
- Clean and dry surfaces: Ensure the rim of the jar and the inside of the lid are perfectly clean and dry before applying sealant and screwing on the lid.
- Consider a secondary seal: After the initial glue on the lid has cured, you can apply an additional bead of silicone sealant around the outside seam where the lid meets the jar for extra protection.
Q6: Can I make snow globes with photos?
Yes, absolutely! Photo snow globes are a wonderful way to personalize your craft. You can print out small photos, laminate them thoroughly to make them waterproof, and then cut them out. These laminated photos can then be glued to the inside of the jar lid, just like any other figurine. For a flat, display-style snow globe, you can use clear plastic plates or domes over a decorated paper background with a photo.
Q7: What are the educational benefits of making snow globes?
Making snow globes offers a fantastic blend of STEM and arts education:
- Science: Children learn about density, viscosity, gravity, and material properties.
- Engineering: They engage in design, problem-solving (e.g., how to secure figures, prevent leaks), and structural stability.
- Art: They develop creativity, composition skills, color theory, and fine motor skills.
- Cognitive Skills: It encourages patience, focus, planning, and a sense of accomplishment. It's a wonderful screen-free activity that promotes hands-on learning and family bonding.
Q8: How long do homemade snow globes last?
With proper sealing and waterproof materials, a homemade snow globe can last for many years. Using distilled water helps prevent cloudiness, and choosing materials that won't degrade or rust is essential for longevity. If a leak occurs, the water level might drop or the contents could be affected, but a well-made snow globe can become a cherished keepsake.