Table of Contents
- Introduction
- Why Historical Crafts Matter: The I'm the Chef Too! Philosophy
- Exploring George Washington: A Journey Through Time
- Getting Started: Essential Supplies for Presidential Crafting
- Classic George Washington Crafts: Hair, Hats, and Portraits
- Beyond the Bust: Thematic George Washington Crafts
- Integrating Learning: How Crafts Become STEM & Art Adventures
- Cooking Up History: Edible George Washington Crafts with I'm the Chef Too!
- Tips for Parents and Educators: Maximizing the Learning Fun
- Making Learning a Monthly Tradition with I'm the Chef Too!
- Conclusion
- FAQ Section
Ever wondered how to make history leap off the page and into your child’s imagination? For many of us, the stories of our nation's founders, like George Washington, can feel distant, tucked away in textbooks. But what if learning about the first president could be as fun and tangible as crafting a three-cornered hat or baking a delicious cherry pie? It’s not just possible; it’s an incredibly effective way to spark curiosity and bring history to life for young learners.
At I'm the Chef Too!, we believe that the most memorable learning experiences are those that engage all the senses, combining the joy of creation with the thrill of discovery. Our mission is to blend food, STEM, and the arts into one-of-a-kind "edutainment" experiences, and exploring historical figures through hands-on crafts is a perfect example of this philosophy. We're committed to sparking curiosity and creativity in children, facilitating family bonding, and providing a screen-free educational alternative that truly makes complex subjects accessible.
In this comprehensive guide, we'll journey back to colonial times to explore a wealth of George Washington crafts for kids. We'll dive into classic paper projects, creative mixed-media ideas, and even some delicious, edible historical adventures that exemplify our unique approach. From crafting iconic wigs and hats to recreating pivotal moments in American history, we’ll show you how to transform lessons about George Washington into engaging, memorable activities. Get ready to gather your materials, ignite your child's imagination, and make history deliciously fun!
Introduction
Imagine a world where children eagerly dive into history lessons, not through rote memorization, but through the exciting process of making and creating. That’s the world we envision when we talk about George Washington crafts for kids. These aren't just simple cut-and-paste activities; they're gateways to understanding, empathy, and hands-on learning that transcends the typical classroom experience.
Think about the iconic image of George Washington: his powdered wig, his distinctive uniform, the story of the cherry tree. These visual and narrative elements offer a rich tapestry for engaging children. Beyond just memorizing dates and names, crafting allows kids to connect with the person behind the legend. They can literally put themselves in his shoes by designing a uniform, or understand the concept of honesty by exploring the cherry tree tale through art.
This blog post is designed to be your ultimate resource for bringing George Washington's world to your kitchen table or classroom. We’ll guide you through a variety of craft ideas, from simple paper creations perfect for preschoolers to more intricate projects suitable for older elementary students. Crucially, we’ll also explore how to infuse these activities with STEM principles and the arts, turning a craft session into a rich, multidisciplinary learning opportunity. We’ll cover essential supplies, step-by-step instructions, and most importantly, how these activities foster creativity, critical thinking, and a genuine love for history. By the end, you’ll be equipped with countless ideas to make learning about George Washington an unforgettable adventure for the young historians in your life.
Why Historical Crafts Matter: The I'm the Chef Too! Philosophy
At I'm the Chef Too!, we believe that true learning happens when children are actively engaged, not passively observing. This belief is at the core of why historical crafts, especially those infused with STEM and culinary elements, are so incredibly valuable. We don't just teach kids facts; we equip them with the tools to explore, question, and discover on their own terms.
When a child creates a George Washington craft, they're doing more than just cutting paper or applying glue. They are:
- Developing Fine Motor Skills: Precision cutting, gluing, drawing, and shaping are fundamental for dexterity and hand-eye coordination. These are essential pre-writing and practical life skills that often get overlooked in purely academic settings.
- Boosting Creativity and Imagination: There's no single "right" way to make a craft. Children are encouraged to personalize their creations, making George Washington's wig a bit fluffier or his hat a unique shade of blue. This artistic freedom sparks imaginative thinking and helps them understand that history can be interpreted and visualized in many ways.
- Fostering a Love for Learning: When learning is fun, it ceases to be a chore. A child who laughs while making a paper plate George Washington is far more likely to retain information about him than one who just reads a paragraph in a book. Our "edutainment" approach is all about making learning irresistible.
- Building Confidence: Successfully completing a craft, especially one that requires following multiple steps, gives children a tangible sense of accomplishment. They can proudly display their "George Washington," knowing they created it themselves. This boosts self-esteem and encourages them to tackle new challenges.
- Facilitating Family Bonding: Crafting together provides a wonderful opportunity for quality family time. Parents and children can discuss history, share stories, and collaborate on a project. These shared experiences create lasting memories and strengthen family connections, fulfilling a core part of our mission to provide screen-free educational alternatives that bring families closer.
- Connecting to STEM and Arts: Our unique approach, developed by mothers and educators, is all about showing how seemingly complex subjects are interwoven into everyday life. When a child measures paper for a hat (math), understands the properties of different glues (science), designs a uniform (art), and learns about colonial life (history/social studies), they're engaging in a holistic, interdisciplinary educational experience. These are the kinds of tangible, hands-on, and often delicious adventures that define I'm the Chef Too!
We believe that learning should be an adventure, a journey of discovery that's both enriching and joyful. Our kits, and the ideas we share, are crafted to do just that – to spark curiosity, nurture creativity, and help families create unforgettable moments together. If you're looking for ongoing inspiration and perfectly portioned fun delivered right to your door, consider joining The Chef's Club and enjoy free shipping on every box. It's a fantastic way to keep the learning adventures coming month after month!
Exploring George Washington: A Journey Through Time
Before we grab our glue sticks and construction paper, let’s briefly revisit the life and times of George Washington. Understanding who he was and his significance can deepen the impact of the crafts and provide rich context for conversations with your children.
Born on February 22, 1732, George Washington grew up in colonial Virginia. He wasn't born into royalty, but rather into a family of modest wealth, allowing him an education and the opportunity to become a surveyor. His early career as a military officer, particularly during the French and Indian War, prepared him for the monumental role he would later play.
Washington’s most defining moment came when he was chosen to lead the Continental Army during the American Revolutionary War. Under his leadership, a fledgling army of patriots fought against the mighty British Empire. His perseverance, strategic thinking, and ability to rally his troops, even through harsh winters like the one at Valley Forge, were instrumental in securing America's independence.
After the war, Washington could have seized power, but he famously relinquished command and returned to his farm at Mount Vernon, a truly remarkable act of civic virtue. However, he was called upon once more to lead the Constitutional Convention and later became the first President of the United States. He served two terms, setting many precedents for the office, including the peaceful transfer of power. He lived from February 22, 1732, to December 14, 1799.
Fun Facts & Myth-Busting for Kids:
- The Cherry Tree: One of the most famous stories about young George Washington involves him chopping down a cherry tree and, when confronted by his father, bravely admitting, "I cannot tell a lie." While a beautiful lesson in honesty, historians generally agree this story is a myth, likely invented by his biographer, Mason Locke Weems. It's a great opportunity to discuss the difference between historical fact and legend with your kids!
- Presidential Smile: While he's often depicted with a stern expression, Washington suffered from dental problems throughout his life. He didn't have wooden teeth, as is commonly believed, but rather dentures made from various materials, including ivory, human teeth, and lead. You can talk about how different life was back then!
- Birthday Change: Interestingly, when George Washington was born, Britain (and its colonies) used the Julian calendar. In 1752, they switched to the Gregorian calendar, which shifted dates forward. So, his original birth date of February 11, 1731, became February 22, 1732! A fun concept for older kids to ponder.
Understanding these aspects makes George Washington more than just a figure in a book; he becomes a relatable human being who faced challenges, made tough decisions, and ultimately shaped a nation. This background provides a fantastic jumping-off point for our hands-on adventures.
Getting Started: Essential Supplies for Presidential Crafting
Before embarking on your historical craft journey, it's helpful to gather a basic arsenal of supplies. Many of these items are probably already in your craft bin or kitchen pantry, making these activities accessible and easy to start. At I'm the Chef Too!, we love using everyday materials to create extraordinary learning experiences, and George Washington crafts are no exception!
Here’s a general list of items you'll want to have on hand:
Basic Craft Supplies:
-
Paper:
- Construction paper (white, black, blue, brown, red, green, skin tones)
- Cardstock (for hats or sturdy templates)
- Printer paper (for templates)
- Paper plates (for face crafts)
- Brown paper bags (for puppets)
-
Drawing & Coloring Tools:
- Crayons
- Colored pencils
- Markers
- Paints (watercolor or tempera) and paintbrushes
-
Cutting & Adhering Tools:
- Child-safe scissors (and adult scissors for trickier cuts)
- Glue sticks
- Liquid school glue (like Elmer's)
- Tape (masking tape, clear tape)
-
Embellishments & Textures:
- Cotton balls (for wigs and clouds)
- Yarn or string (for hair, ropes, or hanging elements)
- Googly eyes
- Felt scraps
- Fabric scraps (especially red, white, and blue)
- Glitter (optional, but always fun!)
Kitchen & Edible Craft Supplies (when we cook up history!):
-
Pantry Staples:
- Flour
- Sugar
- Butter/Oil
- Eggs
- Salt
- Baking powder/soda
- Gelatin mix (blue for the Delaware River!)
- Graham crackers
- Pretzels
-
Fresh Ingredients:
- Cherries (fresh or canned for pies)
- Red, white, and blue fruits (strawberries, blueberries, bananas, raspberries)
-
Baking Tools:
- Mixing bowls
- Spoons/spatulas
- Measuring cups and spoons
- Baking sheets
- Muffin tins (for mini pies)
- Rolling pin
- Cookie cutters (star shapes, circles)
- Safety First: When engaging in edible crafts, remember that adult supervision is paramount, especially when using ovens or sharp tools.
Having these materials ready will make your crafting sessions smooth and enjoyable. Don't feel pressured to buy everything at once; many crafts can be adapted with whatever you have on hand. The beauty of I'm the Chef Too!'s approach is in encouraging creativity with accessible resources.
Not ready to subscribe yet? That's perfectly fine! You can always explore our full library of adventure kits available for a single purchase in our shop to find specific themes that spark your child's interest right now. We have so many delightful options to choose from!
Classic George Washington Crafts: Hair, Hats, and Portraits
Let's dive into some timeless George Washington crafts that capture his iconic look and provide excellent opportunities for learning about colonial fashion and portraiture. These are perfect for Presidents' Day, American history units, or just a fun, educational afternoon.
1. The Famous Cotton Ball Wig Craft
George Washington's powdered wig is arguably his most recognizable feature. This craft is simple, tactile, and visually striking, making it a hit with kids of all ages.
What You'll Need:
- White construction paper or cardstock (for the head template)
- About 10-15 cotton balls
- Glue (liquid school glue works best for cotton balls)
- Crayons or markers (for the face)
- Scissors
- Optional: Googly eyes, a small piece of black construction paper for a hat.
Step-by-Step Instructions:
- Prepare the Head: Start by drawing or printing a simple oval head shape onto white paper. You can make it as simple or detailed as you like. Older children can draw their own, while younger ones can use a template.
- Draw the Face: Have your child draw George Washington's face. Encourage them to observe pictures of him and note his features – perhaps a kind smile, a determined expression, and of course, a distinctive nose. Add googly eyes for extra fun!
- Glue the Wig Base: Apply a generous amount of liquid glue along the sides and top of the head shape, leaving the center face area clear.
- Attach Cotton Balls: Gently pull apart the cotton balls slightly to make them fluffier. Then, carefully press them onto the glued areas, covering the sides and top to create the voluminous, powdered wig effect. You can layer them for more depth.
- Add a Queue (Optional): For a more historically accurate wig, twist a few cotton balls together to form a "queue" (the ponytail at the back of the wig) and glue it to the back of the head, or just behind one ear, suggesting it's tied back.
- Let it Dry: Allow plenty of time for the glue to dry completely.
Educational Extension: Discuss why people wore wigs in colonial times (fashion, hygiene, status). Talk about how wigs were powdered with flour or starch to achieve the white look.
2. The Iconic Tricorn Hat Craft
The three-cornered hat, or tricorn, was a staple of military and civilian fashion in the 18th century. Making one helps kids understand colonial attire and geometry!
What You'll Need:
- Large sheet of black or brown construction paper or cardstock (12x18 inches or larger for a wearable hat)
- Scissors
- Glue or stapler
- Ruler
- Optional: White paper for a feather or rosette, gold glitter glue for trim.
Step-by-Step Instructions (for a simple, wearable hat):
- Create the Base: Cut a large circle or square from the paper. A good starting point for a child's head is a 12x12 inch square or a 10-12 inch diameter circle.
- Form the Crown (Optional): If making a wearable hat, you'll need a "crown" piece to sit on the head. Measure your child's head circumference and cut a strip of paper that length, plus an inch for overlap. Staple or glue the ends to form a band. Attach this band to the center of your larger base piece.
- Fold the Corners: To create the tricorn shape, fold up three equidistant points of the brim towards the center of the hat, creasing them sharply. Overlap the folds slightly if needed.
- Secure the Folds: Use glue or a stapler to secure the folded points in place, creating the three upward-pointing corners.
- Decorate: Historically, these hats were often adorned with a "cockade" (a decorative knot of ribbons or a rosette) or a feather. Your child can cut a white paper feather and glue it on, or add some gold glitter glue along the edges for a fancy trim.
Educational Extension: Discuss the practical reasons for the tricorn (kept rain off, allowed soldiers to carry muskets easily). Compare it to hats worn today.
3. Paper Plate George Washington Portrait
This classic craft is perfect for younger children, combining coloring, cutting, and gluing to create a friendly George Washington face.
What You'll Need:
- Paper plate
- Crayons, markers, or paints (skin tone, blue for the jacket, black for the hat)
- Cotton balls
- Glue
- Scissors
- Googly eyes (optional)
Step-by-Step Instructions:
- Color the Base: Have your child color the center of the paper plate in a skin tone. For the upper portion (which will become the hat), color it black or blue. The lower portion can be colored blue for his jacket collar.
- Cut the Shape: This step might require adult assistance. Cut out a curved "jawline" at the bottom of the plate to define the face. You can also make a slight cut-out at the top edge of the plate where the hat will be, or simply fold the rim.
- Draw the Face: Draw George Washington’s facial features: eyes (or glue on googly eyes), nose, and mouth. Encourage a friendly expression!
- Add the Wig: Glue cotton balls generously along the sides of the face, extending upwards and slightly backward to create his iconic white wig.
- Form the Hat: If you colored the top rim of the plate black/blue, you can now gently fold it upwards to create a hat brim. You might also cut two small vertical lines from the bottom of this blue section, fold these pieces up, and glue them down to create a more defined tricorn effect on the plate.
- Add Collar: If you colored the bottom part of the plate blue, simply define it as a collar under his chin.
Educational Extension: Talk about portraits and how artists capture a person's likeness. Discuss the colors and styles of clothing from the colonial era.
4. Handprint or Footprint George Washington
For a truly personal and adorable keepsake, integrate your child's handprints or footprints into a George Washington portrait.
What You'll Need:
- White or blue construction paper
- Washable white paint
- Washable skin-tone paint
- Red, white, and blue markers or crayons
- Fine-tipped black marker
- Glue (if adding cotton balls)
- Cotton balls (optional)
Step-by-Step Instructions:
- Body/Jacket: Paint your child's palm and fingers with white paint. Press their hand firmly onto the construction paper to create the "wig." Let it dry. Or, if using blue paper, you can just paint the hand white for the wig.
- Face: Once the white handprint is dry, apply skin-tone paint to your child's other palm or heel (for a footprint). Press it slightly below the white handprint, centered. This will be the face. Let it dry completely.
- Details: Once dry, use markers to draw the facial features onto the skin-tone print. Add a small tricorn hat above the head (you can draw it or cut a small one from black paper). Use red and blue markers to draw a colonial uniform collar and lapels around the "face," extending down from the white "wig."
- Optional Wig Fluff: You can still add small cotton balls on top of the white paint for a more textured wig effect.
Educational Extension: Discuss how unique each person's handprint/footprint is, just as each person in history is unique. This is a great craft for younger children, offering a sensory experience with paint.
These classic crafts are fantastic starting points for engaging your children with George Washington's story. Remember to always supervise children, especially with scissors and glue, and encourage their unique artistic expression!
Beyond the Bust: Thematic George Washington Crafts
Moving beyond simple portraits, we can explore George Washington's life and the events of his time through more thematic crafts. These projects offer deeper insights into history and can incorporate a wider range of STEM and artistic elements, truly bringing our "edutainment" philosophy to life.
1. The Cherry Tree Craft: A Lesson in Honesty
The story of the cherry tree, whether myth or legend, is a powerful vehicle for discussing honesty and integrity. This craft allows children to visualize the story.
What You'll Need:
- Brown construction paper (for the tree trunk)
- Green construction paper (for leaves)
- Red construction paper or red tissue paper (for cherries)
- Scissors
- Glue
- Optional: Cotton swabs and red paint for fingerprint cherries, real twigs for a 3D effect.
Step-by-Step Instructions:
- Tree Trunk: Draw and cut out a simple tree trunk shape from brown paper. Glue it onto a larger piece of white or light blue paper (this will be your background).
- Leafy Canopy: Cut out various leaf shapes from green paper and glue them around the top of the trunk to form the tree's canopy. Alternatively, tear small pieces of green tissue paper and crumple them for a textured, leafy look.
-
Add Cherries: This is the fun part!
- Option 1 (Paper Cherries): Cut small red circles from red paper and glue them onto the green leaves.
- Option 2 (Fingerprint Cherries): Dip your child's fingertip or a cotton swab into red paint and dot "cherries" onto the tree.
- Option 3 (3D Cherries): Crumple small pieces of red tissue paper into tiny balls and glue them on for a textural effect.
- The Ax (Optional): Discuss the story! You can draw a small ax cut from brown paper and glue it near the base of the tree, or even have a picture of young George Washington next to it.
- Write the Moral: Encourage older children to write the famous quote, "I cannot tell a lie," or their own thoughts on honesty, on the paper below the tree.
Educational Extension: This is a prime opportunity to talk about moral character, honesty, and why these traits are important. Discuss the difference between fact and fiction in historical storytelling. For a delicious connection, this naturally leads into our next idea: baking with cherries!
2. Crossing the Delaware River Diorama / Paper Boat Craft
One of George Washington’s most daring and strategically brilliant maneuvers was the crossing of the Delaware River on Christmas night, 1776, leading to a surprise attack on Hessian forces at Trenton. This craft helps visualize the challenging journey.
What You'll Need:
- Shoe box or small cardboard box (for diorama)
- Blue construction paper, blue paint, or blue fabric/felt (for the river)
- Brown construction paper or small twigs (for the riverbanks/trees)
- Small craft sticks, construction paper, or aluminum foil (for boats)
- Small figures (cut out paper soldiers, Lego figures, or printed images)
- Cotton balls (for snow/clouds)
- Glue, tape, scissors
Step-by-Step Instructions (Diorama):
- Set the Scene: Line the bottom of the shoebox with blue paper or paint it blue to represent the icy Delaware River. You can crinkle the paper slightly to give it a water texture.
- Riverbanks/Background: Glue brown paper along the sides of the box to create riverbanks. You can draw or glue on bare trees (representing winter) in the background.
- Create Boats: Help your child make small boats. These can be simple paper boats (origami style) or small rectangles of aluminum foil folded into boat shapes.
- Add Soldiers: Cut out small paper soldier figures (or use printed images of colonial soldiers) and glue them into the boats or onto the riverbanks. Make sure to include a George Washington figure leading the way!
- Wintery Touch: Glue cotton balls around the riverbanks and on the trees to represent snow, and a few above for clouds.
Educational Extension: Discuss the significance of this event in the Revolutionary War. Talk about the challenges faced by the soldiers (cold, ice, danger). This craft can also touch upon simple physics (why boats float) and geography (rivers as natural barriers).
3. Colonial Uniform Craft: Dressing for History
Understanding what people wore in the 18th century offers insights into daily life and social structure. This craft focuses on George Washington’s military uniform.
What You'll Need:
- White construction paper (for the body template)
- Blue construction paper (for the jacket)
- White construction paper (for pants, vest, and cuffs)
- Red construction paper (for trim or sashes)
- Yellow or gold paper/glitter glue (for buttons and accents)
- Scissors
- Glue
- Crayons/markers
- Optional: Yarn for hair, cotton balls for wig.
Step-by-Step Instructions:
- Body Base: Draw or print a simple stick figure or a basic outline of a person on white paper.
- Jacket: Cut a blue "jacket" shape from blue paper, typically longer in the back with broad lapels. Glue it onto the paper body.
- Vest & Shirt: Cut a small white "vest" to go under the jacket, and white cuffs for the sleeves.
- Pants & Boots: Draw or cut out white pants that meet black "boots."
- Details: Add gold glitter glue or small yellow paper circles for buttons. Use red paper for any sashes or decorative trim.
- Head & Wig: Attach a previously made paper plate George Washington head, or draw a face and add cotton ball hair.
Educational Extension: Research different parts of a colonial uniform (tricorn, waistcoat, breeches, gaiters). Discuss the colors and why they were chosen (blue for Continental Army). This is a great way to learn about the division of labor in historical societies.
4. Mount Vernon Estate Model or Drawing
George Washington's beloved home, Mount Vernon, provides a glimpse into his personal life and the operations of a large colonial plantation.
What You'll Need:
- Cardboard box or large sheet of paper
- Green, brown, red, white paper
- Crayons, markers, paints
- Glue, scissors
- Optional: Small twigs, craft sticks for fences/trees, toy animals.
Step-by-Step Instructions (Simplified Model):
- Base: Use a large piece of cardboard as the base for the estate.
- Mansion: Draw or construct a simple white mansion building. You can use a smaller box or just fold and glue white paper. Mount Vernon is known for its distinctive red roof and prominent pillars.
- Landscaping: Glue green paper for grass, and brown paper for pathways. Add small green paper trees or real twigs.
- Details: Draw or cut out small figures of people working on the farm, animals, or even the Potomac River flowing nearby.
Educational Extension: Discuss what life was like on a plantation. Talk about different buildings (barns, stables, slave quarters – an opportunity for age-appropriate discussion about complex historical truths). Research Washington's role as a farmer and innovator. If you're looking for more general creative inspiration, or perhaps a kit that could inspire the creation of a landscape or architectural model, you can always browse our complete collection of one-time kits to see the variety of themes we offer.
These thematic crafts invite deeper engagement with George Washington's story, allowing children to visualize history and connect with it in a truly memorable way.
Integrating Learning: How Crafts Become STEM & Art Adventures
At I'm the Chef Too!, we don't just see crafts as artistic endeavors; we view them as powerful vehicles for integrated learning. Every snip, fold, and brushstroke can be a lesson in STEM (Science, Technology, Engineering, Math) and the Arts. When children engage with George Washington crafts, they're not just creating; they're experimenting, problem-solving, and developing crucial cognitive skills.
Here's how these presidential crafts become rich, multidisciplinary adventures:
History & Social Studies
This is the most obvious connection, but we can make it deeper than just memorizing facts:
- Timelines: As children complete different crafts (e.g., a young George Washington with an ax, a general in uniform, an older president), create a simple timeline to show his life stages and key events.
- Biography Research: Each craft can be a starting point for learning about a specific aspect of his life. Making a tricorn hat leads to researching colonial fashion. Creating a Delaware River diorama leads to understanding the Revolutionary War.
- Compare and Contrast: Once they've learned about George Washington, perhaps make an Abraham Lincoln craft and discuss similarities and differences in their presidencies, challenges, and legacies.
- Historical Empathy: Discuss the lives of people in colonial times – what they ate, how they dressed, what challenges they faced. This helps children develop a sense of historical empathy.
Art & Creativity
Beyond just aesthetics, the artistic component of crafts fosters critical thinking and self-expression:
- Design and Composition: Children make choices about colors, shapes, and arrangements. How should the cherry tree look? What expression should George Washington's face have? These are design decisions.
- Material Exploration: Experimenting with different textures (cotton balls, tissue paper, felt) teaches children about properties of materials and how they can be used to create specific effects.
- Drawing and Painting Skills: Practicing drawing faces, uniforms, or landscapes improves artistic technique and observation skills.
- Symbolism: Discuss the symbolism behind colors (red, white, and blue) or objects (the cherry tree representing honesty, the uniform representing leadership).
Fine Motor Skills
Crafting is a powerhouse for developing essential physical dexterity:
- Cutting: Using scissors accurately requires hand-eye coordination and strengthens hand muscles.
- Gluing: Applying glue precisely, especially with small pieces, develops fine motor control.
- Folding and Shaping: Manipulating paper to create hats or boats enhances dexterity and spatial reasoning.
- Detail Work: Drawing small facial features or adding tiny embellishments refines precision grip.
Science
Even simple crafts can have scientific undertones:
- Material Properties: Why does glue stick? How do cotton balls hold their shape? Why does paint dry? These are questions that touch upon chemistry and physics.
- Botany (Cherry Tree): A cherry tree craft can lead to discussions about plant life cycles, fruit, and how trees grow.
- Physics (Boats): Making paper boats for the Delaware River provides an opportunity to discuss buoyancy and why some shapes float better than others.
- Chemical Reactions (Especially with Edible Crafts): When we move into the kitchen, the scientific connections explode! Baking involves precise measurements, heat transfer, and fascinating chemical reactions that transform raw ingredients into delicious treats.
Math
Math is woven into every aspect of crafting:
- Measurement: "How long should the hat brim be?" "How many cotton balls do we need?" These questions involve estimation and measurement.
- Geometry: Identifying and creating shapes (circles, squares, triangles for the tricorn hat) builds geometric understanding.
- Symmetry: Many crafts, like faces and uniforms, involve symmetry, teaching children about balance and proportion.
- Counting and Sorting: Counting materials, sorting colors, or grouping items are all foundational math skills.
- Fractions (Especially with Edible Crafts): Following recipes means working with fractions (1/2 cup, 1/4 teaspoon), which is a fantastic real-world application of math.
By approaching George Washington crafts with this holistic mindset, we transform simple activities into profound learning experiences. It's exactly this kind of hands-on, inquiry-based learning that we champion at I'm the Chef Too! Our kits are meticulously designed by mothers and educators to seamlessly integrate these subjects, making learning tangible, exciting, and delicious. For educators and group leaders looking to bring this multidisciplinary magic into their settings, we invite you to learn more about our versatile programs for schools and groups, available with or without food components.
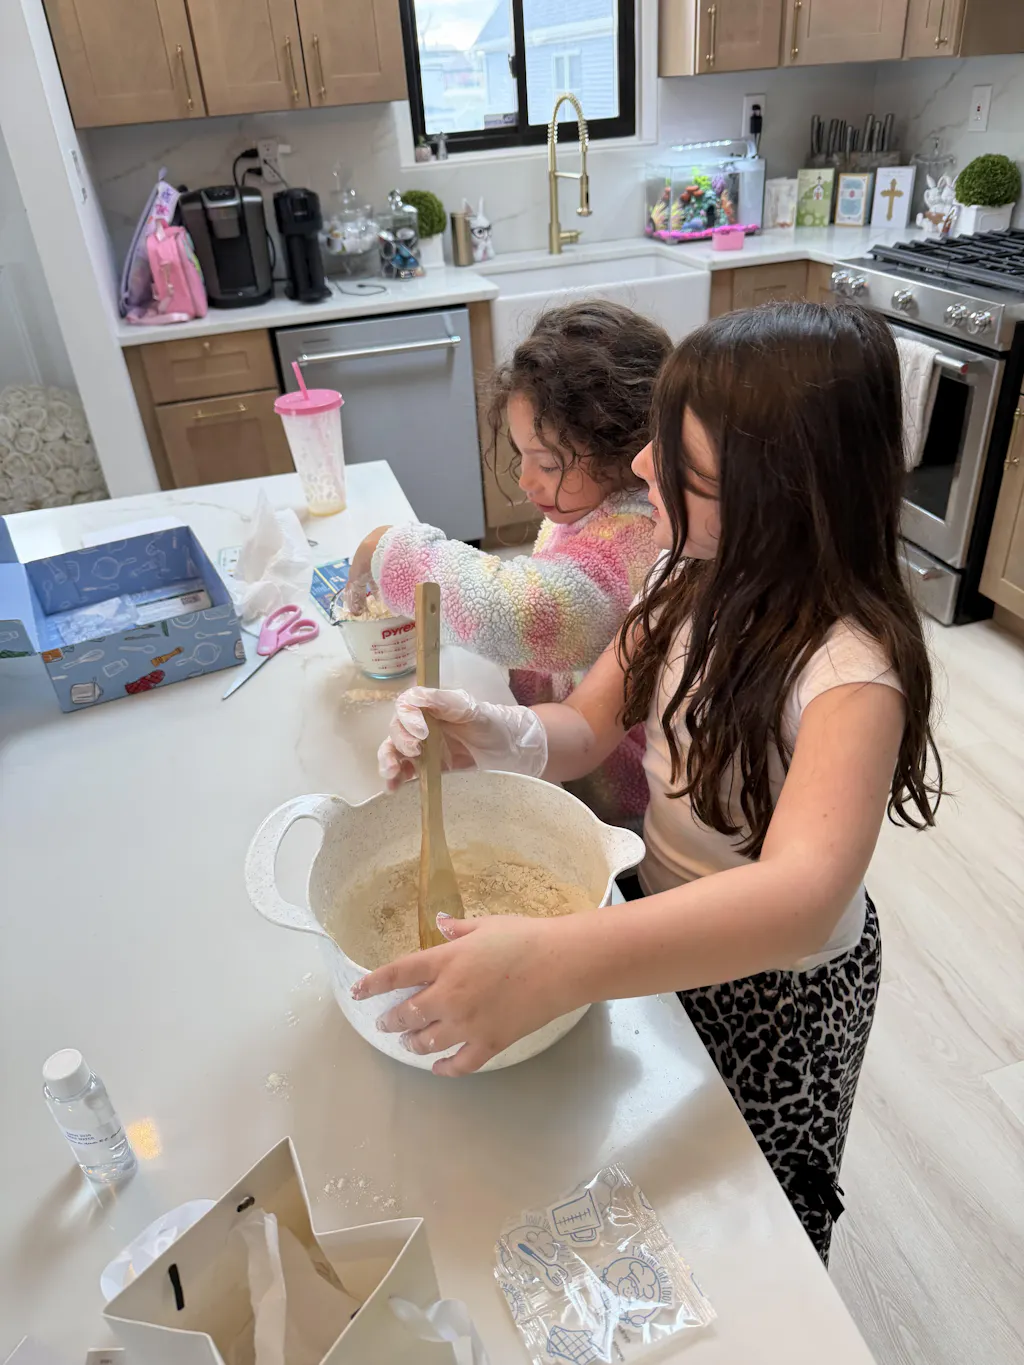
Cooking Up History: Edible George Washington Crafts with I'm the Chef Too!
At I'm the Chef Too!, we believe that the kitchen is one of the most exciting classrooms. What better way to connect with history than by exploring it through taste, texture, and the delicious science of baking? Our unique approach to "edutainment" truly shines when we turn historical themes into edible adventures. Here are some George Washington-inspired edible crafts that bring his era to life in a mouth-watering way, perfectly aligning with our mission to spark curiosity through tangible, delicious experiences.
1. "I Cannot Tell a Pie": Mini Cherry Pies or Tarts
The iconic (though mythical) cherry tree story is a perfect springboard for a delightful baking project. Making mini cherry pies or tarts connects to the tale while teaching basic baking skills.
The Historical Connection: The cherry tree myth, honesty, colonial-era fruits. The STEM Connection:
- Science: Understanding how heat transforms ingredients, the role of leavening agents (if using a leavened crust), how fruit fillings thicken (starch science).
- Math: Precise measuring of ingredients for the crust and filling, dividing dough, understanding fractions.
- Engineering: Designing the pie crust (lattices, crimping), understanding how structure holds the filling.
Simple Recipe Idea (Adult supervision required for oven use!):
Ingredients:
- 1 roll pre-made pie crust dough (or your favorite homemade recipe)
- 1 can (15 oz) cherry pie filling, or 2 cups fresh pitted cherries mixed with 1/4 cup sugar and 1 tbsp cornstarch
- 1 egg, beaten (for egg wash, optional)
- Sugar for sprinkling (optional)
- Muffin tin or mini tart pans
Instructions:
- Prepare Crust: Unroll the pie crust. Using a round cookie cutter (or a glass rim), cut out circles large enough to fit into your muffin tin cups. You'll need two circles per mini pie (one for the base, one for the top or lattice strips).
- Fill Muffin Tin: Gently press one crust circle into each muffin cup.
- Add Filling: Spoon about 1-2 tablespoons of cherry filling into each crust-lined cup.
-
Top the Pies: For the top, you can either:
- Place a second crust circle on top, crimping the edges to seal. Cut a few small slits in the top for steam to escape.
- Cut thin strips from extra dough and create a simple lattice top by weaving them over the filling.
- Use a small star cookie cutter to create decorative cut-outs to place on top.
- Bake: Brush the tops with beaten egg wash and sprinkle with sugar if desired. Bake at 375°F (190°C) for 15-20 minutes, or until the crust is golden brown and the filling is bubbly.
- Cool & Enjoy: Let cool slightly before removing from the muffin tin.
This is a fantastic example of the kind of hands-on, delicious learning we champion. Imagine the delight of your child receiving a new, exciting kit designed to spark their imagination and satisfy their sweet tooth – all while learning. That's the magic of The Chef's Club.
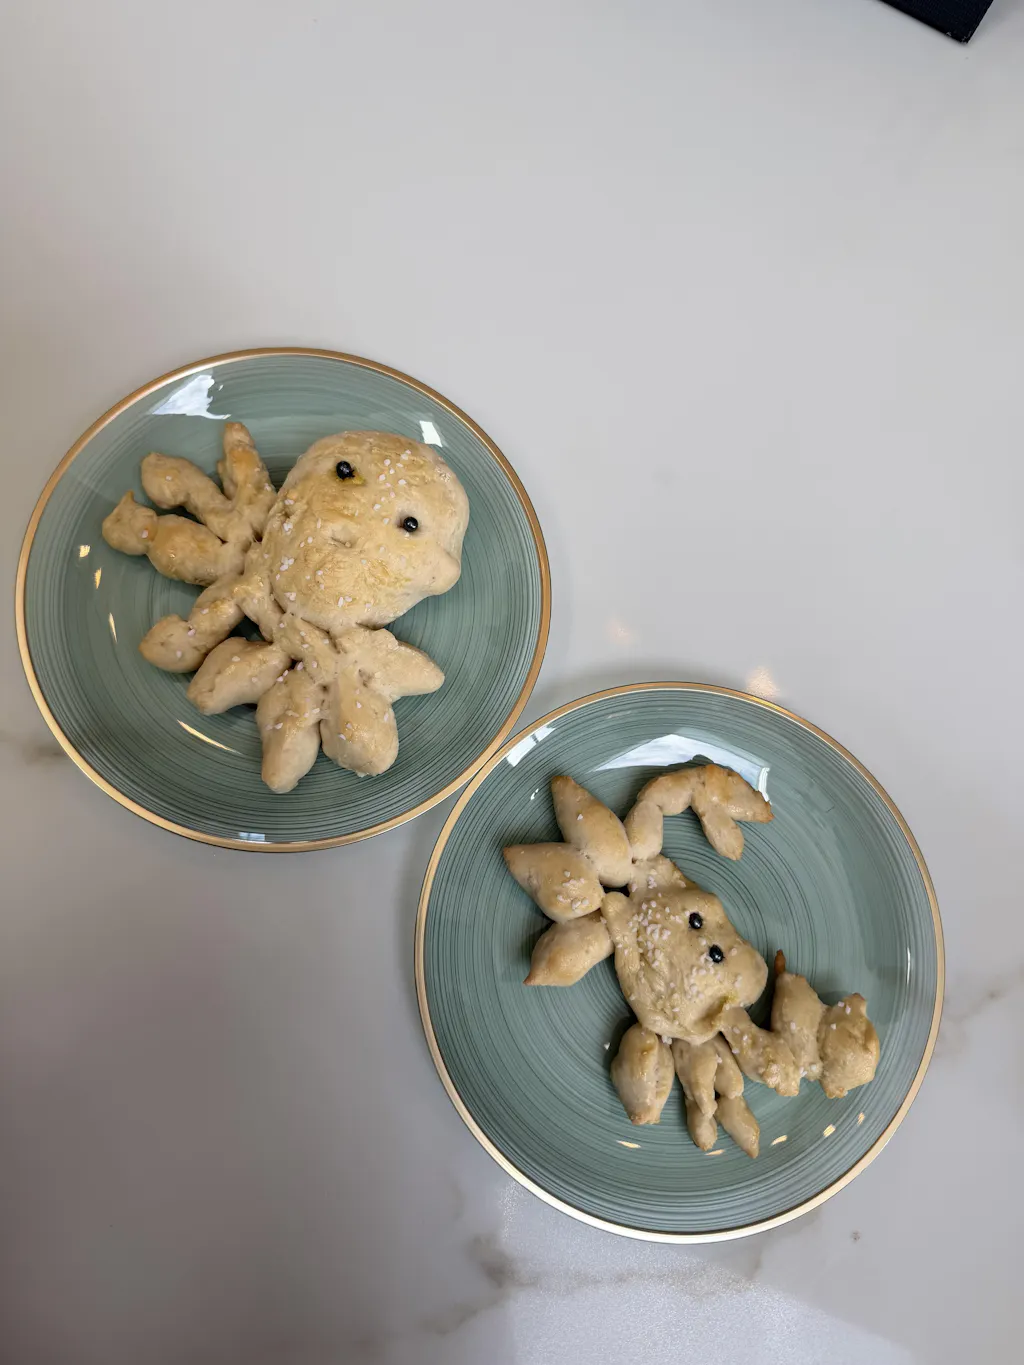
2. Colonial "Hardtack" or Simple Biscuits
While hardtack was a notoriously tough staple for soldiers, we can make a more palatable, historically-inspired biscuit or simple bread that connects to colonial baking.
The Historical Connection: What soldiers ate, basic pantry ingredients of the era, food preservation. The STEM Connection:
- Science: The science of yeast (if making bread), gluten development, acid-base reactions in baking powder/soda.
- Math: Measuring, ratios, understanding volume and weight.
- Engineering: Shaping dough, understanding how heat affects structure.
Simple Biscuit Recipe Idea:
Ingredients:
- 2 cups all-purpose flour
- 1 tbsp baking powder
- 1/2 tsp salt
- 1/2 cup cold butter, cut into small pieces
- 3/4 cup milk (plus more for brushing)
Instructions:
- Mix Dry Ingredients: In a large bowl, whisk together flour, baking powder, and salt.
- Cut in Butter: Add the cold butter pieces to the flour mixture. Use your fingertips or a pastry blender to cut the butter into the flour until it resembles coarse crumbs. This is a great sensory activity for kids!
- Add Milk: Pour in the milk and stir with a spoon until just combined. Don't overmix; a shaggy dough is fine.
- Knead & Shape: Turn the dough out onto a lightly floured surface. Gently knead a few times (about 5-10 times) until it comes together. Pat or roll the dough to about 1/2-inch thickness.
- Cut Biscuits: Use a round cookie cutter or a knife to cut out biscuits. Place them on a baking sheet.
- Bake: Brush the tops with a little milk. Bake at 425°F (220°C) for 12-15 minutes, or until golden brown.
3. "Crossing the Delaware" Blue Jell-O Diorama
This edible diorama is a fun, vibrant way to recreate the historic river crossing.
The Historical Connection: The Delaware River, the winter crossing, a pivotal moment in the Revolutionary War. The STEM Connection:
- Science: The process of gelatinization (how liquid turns solid), understanding polymers.
- Math: Measuring water, understanding chilling times.
- Art: Creating a visual scene with food, color contrasts.
Ingredients:
- 1 large box blue gelatin mix
- 2 cups boiling water
- 2 cups cold water
- Graham crackers (for riverbanks)
- Pretzel sticks or small crackers (for boats)
- Small gummy bear "soldiers" or paper cut-outs
Instructions:
- Prepare Gelatin: In a large bowl, whisk the gelatin mix with boiling water until completely dissolved. Stir in cold water.
- Chill: Pour the liquid gelatin into a clear baking dish (like a 9x13 inch Pyrex). Chill in the refrigerator for 2-3 hours, or until partially set but still wobbly. This is important for the next step!
- Add Land & Boats: Once partially set, gently arrange crushed graham crackers along the "shores" of the gelatin to represent the riverbanks. Stand pretzel sticks upright to resemble trees or place small cracker "boats" on the wobbly surface. You can even add small gummy bear "soldiers" or paper cut-outs (laminated if you want them to be food-safe) into the boats.
- Final Chill: Return the dish to the refrigerator and chill for at least 4 more hours, or until completely firm.
- Serve & Discuss: Once firm, serve slices and discuss the historical event as you eat your edible diorama!
4. Patriotic Red, White, and Blue Fruit Skewers or Parfaits
While not directly linked to a specific George Washington event, the colors red, white, and blue are synonymous with American patriotism and the ideals he helped establish.
The Historical Connection: American flag, patriotism, celebrating independence. The STEM Connection:
- Science: Discussing different fruits, vitamins, healthy eating.
- Math: Counting fruit pieces, creating patterns, understanding layers.
- Art: Color arrangement, visual appeal.
Ingredients:
- Strawberries or raspberries (red)
- Blueberries (blue)
- Banana slices or marshmallows (white)
- Wooden skewers (for kebabs) or clear glasses (for parfaits)
- Yogurt or whipped cream (for parfaits)
Instructions (Skewers):
- Wash & Prep: Wash and dry all fruits. Slice bananas into rounds.
- Assemble: Carefully thread the fruit onto the skewers, alternating red, white, and blue for a patriotic pattern.
- Serve: Enjoy as a healthy and colorful snack!
Instructions (Parfaits):
- Layer: In clear glasses, layer yogurt or whipped cream with the red, white, and blue fruits. Repeat layers until the glass is full.
- Serve: A delicious and visually appealing dessert!
These edible crafts offer a unique and engaging way to teach children about George Washington and his era, reinforcing history, science, math, and art in a truly memorable, delicious manner. These are the types of hands-on, multi-sensory experiences that are at the heart of what we do at I'm the Chef Too!. We love creating these joyful moments of discovery. For even more curated fun delivered right to your door, consider a subscription! You can give the gift of learning that lasts all year with a 12-month subscription to our STEM cooking adventures.
Tips for Parents and Educators: Maximizing the Learning Fun
Engaging children in George Washington crafts is more than just providing materials; it's about creating an environment where curiosity thrives and learning feels like play. As mothers and educators ourselves, we've learned a few tricks at I'm the Chef Too! to make these experiences truly impactful and enjoyable for everyone involved.
Here are our top tips for maximizing the learning and fun:
1. Safety First, Always
This is paramount, especially when working with scissors, glue, or any kitchen tools.
- Supervision: Always provide appropriate adult supervision, particularly for younger children or when using sharp objects, hot ovens, or stovetops for edible crafts.
- Child-Safe Tools: Use child-safe scissors and non-toxic glues and paints.
- Cleanliness: If making edible crafts, ensure hands are washed, and surfaces are clean.
2. Encourage Creativity, Not Perfection
Remember, the goal is the process, not a flawless product.
- No "Right" Way: Emphasize that there’s no single "correct" way to make a craft. Encourage children to personalize their George Washington or cherry tree.
- Embrace Imperfection: A wig made of slightly uneven cotton balls or a hat that leans a little is part of the charm and the child's unique creation. Focus on their effort and imagination.
- Open-Ended Exploration: Sometimes, just providing materials and a theme can lead to unexpected and wonderful creations.
3. Ask Open-Ended Questions to Spark Curiosity
Turn crafting into a conversation.
- "What do you think George Washington felt like crossing the icy river?"
- "Why do you think people wore wigs in colonial times?"
- "If you were designing a uniform, what colors would you choose and why?"
- "What does 'honesty' mean to you, and how does the cherry tree story relate to it?" These questions encourage critical thinking and deeper engagement with the historical context.
4. Connect to Books, Stories, and Other Resources
Reinforce learning by linking crafts to other educational materials.
- Read Alouds: Read age-appropriate picture books about George Washington or colonial life before, during, or after the craft.
- Documentaries/Videos: Watch a short, child-friendly documentary or animated historical video.
- Field Trips (Virtual or Real): If possible, visit a historical site (like Mount Vernon virtually or in person) or a museum with colonial artifacts.
- Songs/Rhymes: Incorporate songs or rhymes about American history or presidents.
5. Display Their Artwork Proudly
Showcasing their creations builds confidence and pride.
- Designated Space: Create a special spot in your home or classroom to display their George Washington crafts.
- Share with Others: Encourage children to share their creations and explain what they learned to family members or friends. This reinforces their knowledge and communication skills.
6. Set Realistic Expectations (for yourself and your child)
Learning is a journey, not a destination.
- Focus on the Process: At I'm the Chef Too!, we always emphasize the benefits of the process: fostering a love for learning, building confidence, developing key skills, and creating joyful family memories. Do not suggest guaranteed educational outcomes like "your child will become a top historian" instantly.
- Patience and Flexibility: Some crafts might take longer than expected, or a child might lose interest halfway through. Be flexible, take breaks, and remember that even short bursts of engaged learning are valuable.
- Manage Mess: Crafting can be messy, especially with edible components. Lay down newspaper or a washable mat, and have cleaning supplies ready. Embrace the mess as part of the creative process!
By following these tips, you'll not only create amazing George Washington crafts but also foster a rich, engaging, and supportive learning environment that aligns perfectly with the I'm the Chef Too! philosophy. Whether you're a parent seeking a fun weekend activity or an educator looking to enrich your curriculum, these hands-on historical adventures are a wonderful way to spark curiosity and cultivate a lifelong love of learning. If you're an educator or run a group, we encourage you to discover how our school and group programs can enrich your curriculum with flexible options for every setting.
Making Learning a Monthly Tradition with I'm the Chef Too!
We hope this deep dive into George Washington crafts for kids has sparked your imagination and inspired you to bring history to life in your home or classroom. The joy of creating, the thrill of discovery, and the delicious satisfaction of an edible project are all powerful ingredients for memorable learning.
At I'm the Chef Too!, we believe that every child deserves the opportunity to explore, experiment, and learn in a way that truly resonates with them. Our unique "edutainment" approach, blending food, STEM, and the arts, is meticulously designed by mothers and educators to do just that – to spark curiosity, foster creativity, and facilitate invaluable family bonding moments, all while providing a refreshing screen-free educational alternative.
Imagine the excitement when a beautifully themed box arrives at your door each month, filled with everything you need for a new adventure. No more scrambling for supplies, no more endless recipe searches – just pure, ready-to-go educational fun. Our kits come with pre-measured dry ingredients and specialty supplies, making it easy for you to jump right into the creative process.
Ready to make learning a consistent, engaging, and delicious part of your child's life? We invite you to explore the ultimate convenience and value with The Chef's Club subscription. A new adventure is delivered to your door every month with free shipping in the US. It's the perfect way to ensure a steady stream of hands-on STEM and cooking experiences that your children will adore. We offer flexible 3, 6, and 12-month pre-paid plans, perfect for gifting or long-term enrichment.
Join our community of curious minds and creative hands. Let us help you cultivate a love for learning that lasts a lifetime, one delicious, educational adventure at a time.
Conclusion
We've journeyed through time, from crafting iconic powdered wigs and tricorn hats to baking cherry pies inspired by historical tales. We've seen how George Washington crafts for kids can be so much more than simple activities; they are vibrant gateways to understanding history, developing critical STEM and artistic skills, and fostering invaluable family connections. By integrating hands-on creation with engaging stories and delicious edibles, we transform passive learning into active, unforgettable experiences.
The legacy of figures like George Washington offers a boundless wellspring of inspiration for educational fun. Through crafts, children not only learn about historical facts but also develop fine motor skills, unleash their creativity, and build confidence in their abilities. More importantly, they learn that history is alive, relatable, and can be explored in the most exciting, multi-sensory ways.
At I'm the Chef Too!, we are passionate about nurturing this love for learning. We believe that by blending food, STEM, and the arts, we can create "edutainment" experiences that truly spark curiosity and bring families closer. Our commitment to providing screen-free, educational alternatives ensures that learning is always an adventure, never a chore.
Don't let the learning stop here! Keep the spirit of discovery alive and well in your home with ongoing, exciting adventures. Make every month an opportunity for your child to explore new themes, master new skills, and create delicious memories. Join The Chef's Club today and enjoy free shipping on every box, bringing the magic of hands-on STEM cooking directly to your doorstep. It’s the perfect way to ensure a continuous stream of creative, educational fun for your aspiring chefs and historians!
FAQ Section
Q1: What age group are these George Washington crafts best suited for?
A1: The crafts listed here are adaptable for various age groups! Simple paper plate and cotton ball crafts are excellent for preschoolers (ages 3-5) with adult assistance. The tricorn hat and cherry tree crafts are great for early elementary (ages 5-8), while the edible crafts and more detailed dioramas can engage older elementary children (ages 8-12) with more complex STEM discussions. Always tailor the complexity and level of assistance to your child's individual skills and attention span.
Q2: How can I make these crafts educational without making them feel like schoolwork?
A2: The key is to integrate learning naturally and playfully. Instead of quizzing, ask open-ended questions during the activity (e.g., "What do you think George Washington would have worn if he lived today?"). Play historical music, read a short story about George Washington while crafting, or use the craft as a springboard for a fun discussion about colonial life. At I'm the Chef Too!, we call this "edutainment" – making learning so engaging it feels like pure fun.
Q3: What if my child isn't interested in history? Will they still enjoy these crafts?
A3: Absolutely! Many children are drawn to hands-on activities regardless of the theme. The tactile experience of gluing cotton balls, the creative freedom of designing a hat, or the delicious reward of baking can be highly motivating. Frame the activity as a fun "making" project first, and introduce the historical elements casually. Our edible crafts, in particular, are designed to appeal to every child's love for delicious treats, making the historical connection a pleasant bonus.
Q4: Are there any specific I'm the Chef Too! kits that relate directly to George Washington or American history?
A4: While we don't have a kit specifically named "George Washington's Adventures" at all times, our themes often touch upon broader scientific, artistic, and culinary concepts that can be easily linked to historical topics. For example, kits that involve baking, understanding chemical reactions, or exploring different cultures through food can provide a wonderful foundation for discussing colonial cooking or the science behind historical innovations. You can browse our complete collection of one-time kits to find themes like "Galaxy Donut Kit" for astronomy or "Erupting Volcano Cakes" for geology, demonstrating our unique blend of STEM and delicious fun that can inspire similar creative historical explorations.
Q5: How can I make the edible crafts safe for children with allergies?
A5: When adapting recipes for allergies, always exercise caution and thoroughly check all ingredient labels. For severe allergies, it's often safest to use dedicated allergen-free ingredients or choose non-edible crafts instead. Many recipes can be modified (e.g., gluten-free flour, dairy-free milk), but always consult with a healthcare professional or allergist for specific dietary needs. I'm the Chef Too! kits are pre-portioned and our ingredient lists are always available, but for our blog recipes, individual responsibility for allergen checks is key.
Q6: What's the best way to store or display the finished crafts?
A6: Paper crafts like hats and portraits can be displayed on shelves, refrigerators, or bulletin boards. Dioramas look great on a table or shelf where they can be viewed from different angles. For edible crafts, enjoy them fresh! For memories, take photos of your child with their delicious creations. Displaying their work validates their efforts and encourages their continued creativity and interest in learning.
Q7: Can these crafts be adapted for a classroom or homeschool group setting?
A7: Absolutely! Many of these crafts are ideal for group settings. For classrooms, providing pre-cut templates can save time. The edible crafts can be done in small groups or as a "station" activity. We at I'm the Chef Too! are passionate about supporting educators. Our programs for schools and groups are designed with flexibility in mind, offering options with or without food components, and can easily be tailored to fit your curriculum and class size. To learn more about how we can support your educational needs, please learn more about our versatile programs for schools and groups.