Nature's Little Treasures: Fun Pine Cone Craft Ideas for Kids

Table of Contents
- Introduction
- The Magic of Pine Cones: More Than Just Forest Floor Decor
- Before You Begin: Gathering and Preparing Your Pine Cones
- Essential Supplies for Pine Cone Crafting Success
- Pine Cone Crafts for Every Season and Skill Level
- The Educational Power of Pine Cone Crafts: Beyond Just Fun
- Tips for Parents and Educators for Successful Crafting Sessions
- Bringing STEM to Life with I'm the Chef Too!
- Conclusion
- FAQ Section
Have you ever paused on a crisp autumn walk, stooping to pick up a fallen pine cone, its intricate scales a testament to nature's artistry? For many of us, these humble forest treasures might seem like mere ground cover, but for children, and for us here at I'm the Chef Too!, they represent a world of untapped potential. Imagine a simple pine cone transforming into a whimsical creature, a festive decoration, or even a mini science experiment, all while sparking joy and learning. This isn't just wishful thinking; it's the beautiful reality of incorporating natural elements into hands-on activities that delight and educate.
Introduction
In a world increasingly dominated by screens, finding engaging, enriching, and screen-free activities for children can feel like a quest. But what if the answer lay right beneath our feet, waiting to be discovered? Pine cones, often overlooked, offer an incredible gateway to creativity, scientific exploration, and meaningful family time. They are a free, abundant, and wonderfully versatile resource that can transform an ordinary afternoon into an extraordinary adventure. At I'm the Chef Too!, our mission is to blend food, STEM, and the arts into one-of-a-kind "edutainment" experiences, and while pine cones aren't edible (trust us, we've thought about it!), they perfectly embody our commitment to sparking curiosity and creativity through tangible, hands-on learning. This comprehensive guide will delve into the magical world of pine cone crafts for kids, offering practical tips, inspiring project ideas, and highlighting the invaluable developmental benefits that come from playing and learning with nature's bounty. Our aim is to equip you with everything you need to turn simple pine cones into cherished memories and powerful learning opportunities, fostering a love for discovery that extends far beyond the craft table.
The Magic of Pine Cones: More Than Just Forest Floor Decor
Pine cones are truly nature's little marvels. They come in an astonishing variety of shapes and sizes, from the tiny, delicate cones of hemlocks to the impressive, robust specimens of sugar pines. Each one is a small, natural sculpture, begging to be picked up, examined, and transformed. For children, the act of collecting pine cones itself is an adventure. It encourages them to step outside, observe their surroundings, and connect with the natural world – a fundamental aspect of holistic development that we deeply value at I'm the Chef Too!. This simple act of gathering kickstarts a chain reaction of benefits, from physical activity to sensory engagement as they feel the textured scales and inhale the earthy scent.
Beyond their aesthetic appeal and the joy of discovery, pine cones offer a unique "blank canvas" for creativity. They can be painted, adorned, glued, and combined with other materials to become almost anything a child can imagine. This adaptability makes them an ideal crafting material for all ages and skill levels, providing endless opportunities for imaginative play and artistic expression. Think of them as natural building blocks, ready to be integrated into imaginative worlds and artistic creations.
At I'm the Chef Too!, we believe that learning should be an adventure – a delicious one, often! – but the core philosophy extends to all hands-on exploration. Just as our cooking kits demystify complex STEM concepts through baking, pine cone crafts provide a tangible, screen-free way to engage children's minds and hands. They offer a break from digital distractions, encouraging focus, patience, and problem-solving in a calming, natural context. This blend of sensory input, creative output, and cognitive engagement makes pine cone crafting a truly rich educational experience, perfectly aligned with our goal of fostering curiosity and facilitating family bonding.
Ready to embark on more hands-on learning adventures that come right to your door? Join The Chef's Club today and enjoy free shipping on every box!
Before You Begin: Gathering and Preparing Your Pine Cones
Before the crafting fun can truly begin, a little preparation goes a long way. This initial step isn't just about cleanliness; it's an integral part of the learning process, teaching children about safety, hygiene, and the importance of preparing materials.
Collecting Your Treasures
The first step, and often the most exciting for kids, is the hunt! Take a family walk in a local park, forest, or even your own backyard.
- Where to Look: Underneath pine trees, of course! Different species of pine trees produce different types of cones. You might find long, slender cones, short, squat ones, or even those with particularly spiky scales.
- What to Look For: Choose cones that are fully open, as these are drier and often cleaner. Avoid cones that are noticeably moldy, squishy, or still green (these are often immature and won't dry well). Encourage children to observe the variations and discuss why some might be bigger or smaller. This is a subtle introduction to botany and observation skills!
Cleaning and Sanitizing: A Crucial Step
Bringing nature indoors can sometimes mean bringing in a few uninvited guests – tiny bugs, sap, and dirt. A quick prep ensures your crafting experience is clean and safe. This step also offers a great opportunity to discuss hygiene and the importance of clean materials with your kids.
1. The Oven Method (Our Preferred Choice for Thoroughness)
This method not only cleans but also helps the cones fully open and dry out, making them easier to paint and decorate.
- What you'll need: Baking sheet, aluminum foil or parchment paper.
-
Steps:
- Preheat: Set your oven to a low temperature, around 200°F (93°C). High heat can cause them to burn, so keep it low and slow.
- Line: Line a baking sheet with aluminum foil or parchment paper to catch any melting sap and prevent sticking.
- Arrange: Spread the pine cones in a single layer on the prepared baking sheet. Don't overcrowd them.
- Bake: Place them in the oven for about 30-60 minutes. Keep a close eye on them, as baking times can vary depending on the cone's moisture content. You'll notice them opening up further and becoming more rigid. The heat effectively kills any lingering insects and melts away sticky sap.
- Cool: Once done, remove them from the oven and let them cool completely on the baking sheet. They will be hot and delicate right after baking.
2. The Washing Method (An Alternative for Removing Sap)
If you prefer to avoid the oven or want to physically remove sap rather than melting it, washing is an option.
- What you'll need: Large bucket or tub, warm water, white vinegar, newspaper or paper towels.
-
Steps:
- Prepare Solution: Fill your bucket with warm water and add ½ to 1 cup of white vinegar. The vinegar acts as a natural disinfectant.
- Soak: Submerge the pine cones in the water-vinegar solution for about 20-30 minutes. You might see some dirt and debris float off.
- Rinse: After soaking, rinse the pine cones thoroughly under clean running water to remove any remaining dirt or vinegar smell.
- Dry: This is the most crucial part of this method. Place the rinsed pine cones on several layers of newspaper or paper towels in a well-ventilated area. It can take anywhere from a few days to a week for them to completely dry. Ensure they are fully dry before crafting to prevent mold and ensure paint adheres properly.
Why Drying is Crucial
Whether you bake or wash, ensuring your pine cones are completely dry is essential. Wet or damp pine cones can develop mold, and paint or glue won't adhere properly. Thoroughly dried cones are also lighter and more pleasant to work with. This step teaches children about patience and the properties of natural materials.
By involving children in the collection and preparation process, you're already laying the groundwork for a rich learning experience, long before the glitter even comes out!
Essential Supplies for Pine Cone Crafting Success
While pine cones are the star of the show, a few complementary supplies can unlock a world of creative possibilities. Many of these items are likely already in your craft bin, making pine cone projects incredibly budget-friendly. However, this is also where we can introduce how diverse materials, much like the ingredients in our I'm the Chef Too! kits, come together to create something wonderful.
Here's a list of staple supplies that will elevate your pine cone crafts:
-
Paints:
- Acrylic Paints: Versatile and vibrant, perfect for detailed work or full coverage. A range of colors will allow for endless creative expression.
- Spray Paint: Excellent for quick, even coverage, especially for base layers. Always use spray paint in a well-ventilated area and with adult supervision. It's a great way to transform a brown pine cone into a shimmering gold ornament or a bright red apple base.
- Glitter Paint or Glitter Glue: Adds sparkle and magic to any project.
-
Adhesives:
- Craft Glue (White School Glue): Perfect for younger children and attaching lightweight items like cotton balls, googly eyes, or smaller felt pieces. It takes longer to dry but is safer.
- Hot Glue Gun (Adult Supervision Required): For older children (with direct adult help) and more robust constructions, like attaching heavier embellishments, making wreaths, or creating three-dimensional figures. Emphasize safety and never let children operate a hot glue gun unsupervised.
-
Embellishments & Decorative Bits:
- Googly Eyes: Instantly brings any pine cone creature to life!
- Felt Sheets: Easy to cut into shapes for ears, wings, hats, or clothing for your pine cone characters.
- Pom-Poms: Soft, colorful, and come in various sizes – great for noses, hats, or decorative "berries."
- Pipe Cleaners (Chenille Stems): Flexible and bendable, perfect for antennae, arms, legs, or decorative swirls.
- Yarn & String: For hanging ornaments, wrapping, or creating textures.
- Ribbon: Adds a decorative touch, especially for holiday crafts.
- Natural Elements: Small twigs, leaves, acorns, small stones – incorporate them for an even more organic feel. This teaches children about complementary textures and forms found in nature.
- Buttons, Beads, Sequins: For adding sparkle, patterns, or intricate details.
-
Tools:
- Paint Brushes: A variety of sizes for different painting techniques.
- Scissors: Kid-friendly scissors for cutting felt, paper, or yarn.
- Newspaper or Drop Cloth: Essential for protecting your work surface from paint and glue.
- Old Clothes/Aprons: To protect clothing from inevitable messes!
- Small Bowls/Plates: For holding paint or small embellishments.
Having these supplies on hand transforms a simple pine cone into an opportunity for children to practice fine motor skills, experiment with color and texture, and bring their imaginative visions to life. Just like how we carefully curate the ingredients and specialty supplies in our I'm the Chef Too! kits, providing a good range of crafting materials empowers children to explore and innovate.
Not ready to subscribe for monthly deliveries? You can still dive into creativity! Explore our full library of adventure kits available for a single purchase in our shop. Find the perfect theme for your little learner and grab all the fun you need for a day of discovery!
Pine Cone Crafts for Every Season and Skill Level
The beauty of pine cones lies in their versatility. They can be transformed to suit any season, any holiday, and any level of crafting expertise. Let's explore some inspiring pine cone craft ideas that also subtly weave in opportunities for STEM and artistic learning, demonstrating how hands-on activities, whether culinary or crafty, ignite young minds.
Fall & Harvest Themes: Celebrating Nature's Bounty
Fall is prime pine cone season, and these crafts perfectly capture the cozy, colorful essence of autumn.
-
Pine Cone Owls:
- Craft: Paint pine cones brown, white, or gray. Glue on large googly eyes, felt cut-outs for wings, beaks, and feet. You can even use small leaves for feathers.
- Learning: Discuss different types of owls, their habitats, and nocturnal animals (Science – Biology). Practicing cutting felt improves fine motor skills.
-
Pine Cone Turkeys:
- Craft: The broad base of a pine cone is perfect for a turkey body. Add felt or construction paper cut-outs for a head, wattle, and tail feathers. Kids can decorate the "feathers" with patterns, beads, or different colors.
- Learning: Counting feathers, pattern recognition (Math). Discussing Thanksgiving traditions and gratitude (Social Studies).
-
Pine Cone Apples & Pumpkins:
- Craft: Paint pine cones vibrant red for apples or bright orange for pumpkins. Add a small twig for a stem and a tiny green felt leaf. These are charming for tabletop decor.
- Learning: Color recognition, seasonal fruit/vegetable discussion. Simple transformation demonstrates how abstract thinking can lead to creative representation.
-
Pine Cone Wreaths:
- Craft: (Older children/adult help needed for hot gluing) Collect many pine cones. Paint some in fall colors (gold, bronze, red, orange) or leave them natural. Hot glue them onto a cardboard or wire wreath form. Add faux berries, small twigs, or autumn leaves for embellishment.
- Learning: Design principles, spatial reasoning (fitting cones together), geometry (circle of the wreath), collaborative project skills.
Winter & Holiday Wonders: Bringing Cheer to Cold Days
Pine cones are a natural fit for winter and holiday decorations, adding a rustic, festive touch.
-
Pine Cone Christmas Trees:
- Craft: Paint upright pine cones green, white, or silver. Once dry, let kids "decorate" them with small pom-poms, beads, glitter glue, or tiny sequins as "ornaments." A star can be added to the top with a pipe cleaner or cardboard.
- Learning: Fine motor skills, pattern creation, color theory, holiday traditions. This is a perfect activity for making handmade gifts or decorations, fostering a sense of accomplishment.
-
Snowy Pine Cones:
- Craft: Paint the tips of pine cone scales white, or use white craft glue and sprinkle with Epsom salts or white glitter for a "snow-dusted" effect.
- Learning: Sensory exploration (texture of salt/glitter), discussions about winter weather and nature in cold climates.
-
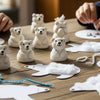
Pine Cone Reindeer/Snowmen:
- Reindeer: Paint a pine cone brown, add googly eyes, pipe cleaner antlers, and a red pom-pom nose.
- Snowmen: Paint white, add a felt hat and scarf, tiny pom-poms for buttons, and a small orange felt triangle for a carrot nose.
- Learning: Character design, storytelling, imaginative play around holiday themes.
-
Pine Cone Ornaments:
- Craft: Attach a loop of string or ribbon to the top of any decorated pine cone using hot glue (adult help). These make wonderful, personalized gifts.
- Learning: Gifting, personal expression, understanding different types of fasteners.
-
Pine Cone Fire Starters (Adult supervision paramount):
- Craft: Dip pine cones in melted wax (soy or beeswax is great) mixed with essential oils for a pleasant scent. Allow them to dry. Add a small wick if desired. This is an adult-led craft that can involve children in the dipping and decorating (with dried orange slices, cinnamon sticks) but the handling of hot wax and eventual use requires careful adult supervision.
- Learning: States of matter (melting/solidifying wax), properties of materials (flammability), practical outdoor skills. Emphasize safety and proper use, making it clear this is not a child's toy.
Looking for more ways to make learning feel like a delightful surprise every month? Give the gift of learning that lasts all year with a 12-month subscription to our STEM cooking adventures!
Spring & Summer Blooms: Vibrant Creations for Warmer Days
Pine cones aren't just for autumn and winter! With a splash of color, they can celebrate warmer seasons too.
-
Pine Cone Fairies/Gnomes:
- Craft: Paint small pine cones vibrant colors. Add a wooden bead for a head, yarn for hair, and felt or fabric scraps for tiny hats, cloaks, or wings.
- Learning: Imaginative storytelling, role-playing, understanding scale and proportion. These can become characters in a miniature fairy garden.
-
Pine Cone Flowers (Zinnias):
- Craft: Paint the entire pine cone in bright flower colors (pinks, purples, yellows). The scales naturally resemble petals. Hot glue a pipe cleaner stem to the base. You can even arrange several "blooms" into a pine cone bouquet.
- Learning: Color mixing, appreciation for symmetry and natural patterns, basic art composition.
-
Pine Cone Animals (Farm or Zoo):
- Craft: Transform pine cones into pigs, cows, sheep, or even lions and elephants using felt, pom-poms, and googly eyes. For example, a sheep could have cotton balls glued to the scales, a pig could have pink felt ears and snout.
- Learning: Animal identification, characteristics of different animals, imaginative farm or zoo play.
-
Pine Cone Sensory Bins:
- Craft: Combine cleaned pine cones with other natural materials like acorns, leaves, twigs, smooth stones, and perhaps some dried beans or rice in a bin. Add scoops and small containers.
- Learning: Tactile exploration, scooping and pouring (fine motor), imaginative play, understanding different textures and weights.
Year-Round Learning Fun: Beyond Seasonal Themes
These ideas highlight the ongoing educational value of pine cones, regardless of the season.
-
Nature Mandalas:
- Craft: Arrange pine cones (and other natural items like pebbles, leaves, small twigs) in circular, symmetrical patterns on a piece of paper or directly on the ground.
- Learning: Pattern recognition, symmetry, mindfulness, mathematical concepts (radial balance).
-
Pine Cone Science Experiments:
- Craft/Experiment: Place a dry, open pine cone in a bowl of water. Observe what happens over a few hours – it will close up! Then let it dry out, and it will open again.
- Learning: This demonstrates hygroscopy – how pine cones react to humidity to protect their seeds. It's an accessible introduction to plant biology and environmental science. This can lead into discussions about other scientific reactions, much like the exciting chemical reaction that makes our Erupting Volcano Cakes bubble over with deliciousness!
-
Pine Cone Painting Techniques:
-
Craft: Experiment with different painting methods:
- Ombre: Gradually blending shades of a color.
- Dry Brushing: Lightly coating the brush and brushing across the scales for a weathered look.
- Tipping: Painting just the very tips of the scales for a subtle highlight.
- Learning: Color theory, understanding paint application, developing artistic techniques.
-
Craft: Experiment with different painting methods:
Each of these pine cone crafts offers a springboard for imagination and discovery. By engaging in these activities, children aren't just making pretty objects; they're building skills, exploring concepts, and creating tangible connections to the world around them.
The Educational Power of Pine Cone Crafts: Beyond Just Fun
At I'm the Chef Too!, we firmly believe that learning should be an adventure, a joyous exploration that blends subjects seamlessly. Pine cone crafts, much like our culinary STEM kits, are a prime example of "edutainment" in action. They are far more than just a way to pass the time; they are powerful tools for holistic child development, fostering a wide array of skills across multiple domains.
STEM Connections in Nature's Classroom
Even without a beaker or a circuit board, pine cones offer rich opportunities for STEM learning.
-
Science:
- Botany: Children learn about trees, seeds, and the life cycle of plants. Discussing different types of pine cones introduces biodiversity.
- Biology: Investigating pine cones can lead to discussions about small insects that might live within them (and why we clean them!).
- Physics: The classic "pine cone in water" experiment beautifully demonstrates hygroscopy – how pine cones open and close in response to humidity. This introduces concepts of absorption, moisture, and natural mechanics.
- Chemistry: While painting, kids learn about color mixing and how different paints adhere to surfaces. Making fire starters (with adult supervision!) touches upon combustion and material properties. This is similar to how we explore states of matter and chemical reactions in kits like our Erupting Volcano Cakes.
- Technology (Indirectly): While not explicitly tech-focused, planning and executing a craft project involves using tools (scissors, glue guns – safely!), which are fundamental aspects of technology and engineering problem-solving.
- Engineering: Designing and constructing pine cone animals, wreaths, or decorative scenes involves basic engineering principles. How do you make the pieces stick? How do you ensure the structure is stable? Children naturally engage in trial and error, problem-solving, and spatial reasoning.
-
Mathematics:
- Counting: How many pine cones for the wreath? How many pom-poms for the snowman's buttons?
- Patterns & Symmetry: Arranging decorations, observing the natural spiral patterns (Fibonacci sequence!) in pine cones, or creating symmetrical designs for fairies.
- Measurement: Estimating how much paint or felt is needed, comparing sizes of pine cones.
Art & Creativity: Unleashing Inner Expression
Pine cones are a fantastic medium for artistic development.
- Color Theory: Experimenting with different paint colors, mixing primary colors to create secondary ones, or choosing palettes for a seasonal theme.
- Design & Composition: Deciding where to place embellishments, how to arrange a collection of pine cones, or creating a balanced aesthetic.
- Imagination & Self-Expression: Transforming a simple cone into a fantastical creature or a cherished ornament encourages children to tap into their imaginative worlds and express their unique ideas without judgment. There's no "wrong" way to decorate a pine cone!
Essential Life Skills: Building Blocks for Success
Beyond academic subjects, pine cone crafts nurture crucial life skills.
- Fine Motor Skills: The intricate nature of pine cones, combined with the manipulation of small craft items (googly eyes, beads, felt), significantly enhances dexterity, hand-eye coordination, and finger strength – vital for writing, dressing, and other daily tasks.
- Problem-Solving: "How do I make the wings stay on?" "What kind of glue should I use?" Children naturally encounter small challenges and learn to devise solutions, fostering critical thinking.
- Patience & Persistence: Waiting for paint or glue to dry, or meticulously attaching many small pieces, teaches valuable lessons in patience and seeing a project through to completion.
- Following Instructions: For guided crafts, children learn to follow step-by-step directions, which is a foundational skill for all learning.
- Decision-Making: Choosing colors, materials, and designs empowers children to make choices and take ownership of their creations.
- Environmental Awareness: Collecting pine cones naturally connects children with nature, fostering respect for the environment and an understanding of natural resources.
Family Bonding & Screen-Free Time: Cherished Memories
Perhaps one of the most significant benefits, deeply aligned with our values at I'm the Chef Too!, is the opportunity for meaningful family bonding. Crafting together provides:
- Shared Experience: Working side-by-side on a creative project builds connection and shared memories.
- Communication: Conversations flow naturally during crafting, allowing for open dialogue, laughter, and mutual encouragement.
- Screen-Free Engagement: Pine cone crafts offer a wonderful alternative to passive screen time, promoting active engagement and imaginative play.
Just as our I'm the Chef Too! kits are designed to bring families together around a delicious, educational activity, pine cone crafts provide another avenue for invaluable shared moments. Every painted pine cone, every whimsical creature, becomes a tangible reminder of time well spent and lessons learned together. Ready for a new adventure every month that focuses on screen-free educational fun and family bonding? Join The Chef's Club and enjoy free shipping on every box!
Tips for Parents and Educators for Successful Crafting Sessions
To ensure your pine cone crafting sessions are enjoyable, educational, and relatively stress-free, here are some practical tips from our team of mothers and educators at I'm the Chef Too!:
- Embrace the Mess: Creativity often comes with a little (or a lot!) of mess. Lay down newspaper or a washable drop cloth, have wipes or paper towels ready, and dress kids (and yourself!) in old clothes. Framing it as part of the creative process helps manage expectations and reduces stress.
-
Prioritize Safety:
- Adult Supervision: Always be present, especially when using scissors, hot glue guns (adults should handle the gun, kids can point to where glue goes), or spray paint.
- Age Appropriateness: Choose crafts and materials suitable for your child's developmental stage. Very young children might enjoy simple painting and gluing large items, while older kids can tackle more intricate designs.
- Allergies: Be mindful of any potential allergies to natural materials or craft supplies.
- Encourage Individuality, Not Perfection: The goal is the process, not a Pinterest-perfect outcome. Let children lead their creative journey, even if their owl has three eyes or their Christmas tree is purple. Celebrate their unique vision and effort. This fosters confidence and self-esteem.
- Prep Together: Involve kids in the preparation steps – collecting, cleaning, and gathering supplies. This builds excitement, teaches responsibility, and gives them ownership of the project from the start.
- Provide Inspiration, But Allow Freedom: Show them examples of pine cone crafts, but then let them experiment. Offer open-ended questions like, "What do you think this pine cone could be?" or "What colors would you like to use?"
-
Extend the Learning:
- Read Books: Find books about pine trees, forest animals, or the seasons that relate to your craft.
- Nature Walks: Follow up crafting with another nature walk, encouraging children to observe where pine cones come from and how they look in their natural habitat.
- Journaling/Storytelling: Encourage older kids to write or tell stories about their pine cone creations.
- Keep It Fun and Flexible: If a child loses interest, it's okay to put the craft away and revisit it later, or move on to something else. The aim is to create positive associations with learning and creativity, not to force participation.
- Clean Up Together: Make tidying up part of the activity. This teaches responsibility and organization.
For larger groups, classrooms, or homeschool co-ops, these principles still apply, but with added considerations for managing multiple children and resources. At I'm the Chef Too!, we also offer specialized programs to support educators and group leaders. Bring our hands-on STEM adventures to your classroom, camp, or homeschool co-op. Learn more about our versatile programs for schools and groups, available with or without food components. We're committed to making STEM and the arts accessible and engaging for all children, in any setting.
Bringing STEM to Life with I'm the Chef Too!
At I'm the Chef Too!, our core philosophy revolves around the idea that learning should be an adventure – a multi-sensory journey that ignites curiosity and creativity. While pine cone crafts offer a fantastic way to engage with nature and develop essential skills, our unique approach takes "edutainment" to the kitchen, blending food, STEM, and the arts into delicious, hands-on experiences.
We believe that children learn best when they are actively involved, when they can touch, taste, smell, and see the concepts in action. This is why our kits, developed by mothers and educators, transform complex subjects into tangible, edible projects. Imagine your child exploring astronomy by creating their own edible solar system with our Galaxy Donut Kit, or discovering geological forces as they build and erupt our Erupting Volcano Cakes. Even beloved characters can make learning fun, like when kids make Peppa Pig Muddy Puddle Cookie Pies, a delightful way to explore textures and shapes.
Our commitment goes beyond just providing ingredients; each I'm the Chef Too! box is a complete experience, containing pre-measured dry ingredients, specialty supplies, and a beautifully illustrated activity guide that walks children through the steps while explaining the underlying STEM principles. We aim to spark a love for learning, build confidence through accomplishment, develop key skills like following instructions and problem-solving, and most importantly, create joyful family memories around the kitchen table.
We offer convenience with a new adventure delivered to your door every month with free shipping in the US, providing a consistent source of screen-free educational fun. Our flexible 3, 6, and 12-month pre-paid plans are perfect for gifting or long-term enrichment, ensuring there's always something new and exciting to discover. Whether you're making pine cone creatures or baking up a scientific masterpiece, the goal is the same: to foster a lifelong love of learning through tangible, engaging experiences.
Ready for ongoing educational fun and delicious discoveries delivered right to your door? Join The Chef's Club today and ignite your child's curiosity with new adventures every month!
Conclusion
Pine cone crafts for kids offer a beautiful intersection of nature, creativity, and education. From the simple act of collecting these natural treasures to transforming them into whimsical creations, children gain invaluable skills in fine motor control, problem-solving, artistic expression, and an appreciation for the natural world. These activities provide a much-needed screen-free escape, fostering mindfulness, patience, and joyful family bonding. Just as we believe at I'm the Chef Too! that learning is an adventure best explored hands-on, pine cones remind us that some of the richest educational experiences are often the simplest and most accessible.
By incorporating pine cone crafts into your family's routine, you're not just creating decorations; you're cultivating curiosity, building confidence, and forging cherished memories. You're showing children that wonder can be found everywhere, even in a fallen pine cone, and that with a little imagination, anything is possible. Embrace the glue, the glitter, and the giggles, and watch as your children's imaginations take flight.
To continue fostering a love for learning that blends creativity, STEM, and delicious fun, we invite you to explore the unique world of I'm the Chef Too!. Our monthly Chef's Club subscription delivers engaging, screen-free culinary adventures right to your door, complete with pre-measured ingredients and educational guides. Spark curiosity, encourage creativity, and make learning a delicious family tradition – join The Chef's Club today!
FAQ Section
Q1: How do I prepare pine cones for crafting? A1: It's best to clean and dry them first. You can bake them on a foil-lined sheet at 200°F (93°C) for 30-60 minutes to kill bugs and melt sap, or soak them in warm water with a little white vinegar for 20-30 minutes, then air dry completely for several days. Baking is generally quicker and more thorough for sanitization.
Q2: What kind of paint is best for pine cones? A2: Acrylic paints are excellent for detailed work and vibrant colors. Spray paint works well for quick, even base coats (always with adult supervision and in a well-ventilated area). Glitter glue or glitter paints add extra sparkle!
Q3: Are pine cone crafts safe for young children? A3: Yes, with appropriate supervision and age-specific adaptations. For very young children, focus on larger pine cones, easy-to-handle craft glue, and big embellishments like pom-poms or cotton balls. Always supervise when using scissors or any small parts that could be choking hazards. Hot glue guns should only be operated by adults or older children with direct adult guidance.
Q4: Where can I find pine cones if I don't have pine trees nearby? A4: You can often find pine cones in local parks, nature preserves, or even purchased from craft stores or online retailers. Many gardening centers also sell decorative pine cones, especially around the holidays.
Q5: How can I make pine cone crafts more educational? A5: Incorporate STEM elements by discussing the pine cone's structure, why it opens and closes (hygroscopy), or where it comes from (botany). Practice counting, pattern recognition, and color mixing. Encourage storytelling and imaginative play to boost language and cognitive skills. Our I'm the Chef Too! kits also beautifully blend STEM and art for ongoing educational fun.
Q6: What are some good ideas for fall pine cone crafts? A6: Pine cone owls, turkeys with colorful felt feathers, painted pine cone apples or pumpkins, and pine cone wreaths adorned with fall leaves are all wonderful fall-themed ideas that celebrate the season's bounty.
Q7: Can pine cone crafts be used for gifts? A7: Absolutely! Hand-decorated pine cone ornaments, painted pine cone flowers, or whimsical pine cone creatures make heartfelt and unique gifts for family and friends. Attach a small ribbon loop to the top of any decorated pine cone to turn it into an instant ornament.
Q8: My child gets frustrated easily with crafts. Any tips? A8: Keep it simple! Start with projects that have a quick payoff and allow for lots of creative freedom. Focus on the process and effort rather than a perfect end product. Praise their imagination and perseverance. Sometimes, taking a break and coming back to it later can also help. Remember, the goal is fun and exploration, not perfection.
Q9: How do I store crafted pine cones? A9: If they are fully dry, store them in airtight containers or boxes in a cool, dry place. This helps prevent moisture accumulation, which could lead to mold or damage, especially for items with glue or paint.