Joyful Thanksgiving DIY Crafts for Kids: A Harvest of Creativity

Table of Contents
- Introduction
- Why Thanksgiving DIY Crafts for Kids are More Than Just Fun
- Preparing for a Crafty Thanksgiving: Tips for Success
- A Cornucopia of Thanksgiving DIY Crafts for Kids
- Maximizing the Educational Value of Thanksgiving DIY Crafts for Kids
- Conclusion
- FAQ: Thanksgiving DIY Crafts for Kids
The scent of roasted turkey, the comforting warmth of spiced pumpkin pie, and the joyful chatter of loved ones gathering around the table – Thanksgiving is a symphony for the senses, a time when gratitude fills our homes and hearts. But amidst the delicious chaos of holiday preparations, have you ever wondered how to keep your little ones happily engaged in meaningful ways? How do we turn that pre-dinner energy into creative output, moving beyond screens and into hands-on experiences that truly capture the spirit of the season?
At I'm the Chef Too!, we believe the answer lies in blending food, STEM, and the arts into one-of-a-kind "edutainment" experiences. We know that the holiday season, with its emphasis on family and connection, presents a perfect opportunity to spark curiosity and creativity in children. Just like our unique approach of teaching complex subjects through tangible, hands-on, and delicious cooking adventures developed by mothers and educators, Thanksgiving DIY crafts for kids offer a wonderful way to foster learning, build confidence, and create joyful family memories. It’s about more than just making something pretty; it’s about the process, the shared laughter, and the skills developed along the way.
This guide will dive into a bountiful harvest of Thanksgiving DIY crafts for kids, offering practical advice, step-by-step ideas, and insights into the valuable skills your children will develop. We’ll explore how these simple, fun projects can transform your holiday season, making it richer, more engaging, and filled with cherished moments. Get ready to gather your materials, embrace a little delightful mess, and embark on a creative journey that brings the true spirit of Thanksgiving to life in your home.
Introduction
As autumn leaves paint the landscape in hues of gold and crimson, and the aroma of cinnamon begins to waft through the air, our thoughts naturally turn to Thanksgiving. It's a holiday rich in tradition, focused on gratitude, family, and feasting. Yet, for many parents and caregivers, the lead-up to the big day can also be a balancing act. How do you manage the cooking, cleaning, and guest preparations while ensuring the children feel included, engaged, and truly connected to the holiday's meaning? The siren call of screens often seems like an easy solution, but we know deep down that the most memorable moments come from shared, tangible experiences.
This is where the magic of Thanksgiving DIY crafts for kids steps in. Imagine transforming everyday items into festive decorations, turning a nature walk into a treasure hunt for craft supplies, or simply sitting side-by-side with your child, creating something beautiful together. These aren't just activities to pass the time; they are powerful tools for development, connection, and fostering a spirit of thankfulness. They offer a delightful screen-free educational alternative, allowing children to learn, explore, and express themselves in a way that resonates with the hands-on philosophy we champion at I'm the Chef Too!.
Our mission is centered on sparking curiosity and creativity in children, and we know that crafting for Thanksgiving provides an ideal platform for this. From developing fine motor skills and encouraging problem-solving to cultivating a deeper understanding of gratitude, these activities offer a wealth of benefits. In the following sections, we'll uncover how to prepare for a successful crafting session, delve into a cornucopia of delightful craft ideas, explore the educational value woven into each project, and ensure your Thanksgiving is not just delicious, but also wonderfully creative and memorable.
Why Thanksgiving DIY Crafts for Kids are More Than Just Fun
Engaging children in Thanksgiving DIY crafts goes far beyond simply keeping them occupied. These activities are rich with developmental, emotional, and social benefits that contribute significantly to a child's holistic growth. When little hands are busy cutting, gluing, painting, and assembling, a world of learning unfolds.
Developmental Benefits:
- Fine Motor Skills: The precise movements required for cutting shapes, peeling stickers, pinching clay, or tying knots are crucial for strengthening the small muscles in the hands and fingers. This improved dexterity is foundational for writing, drawing, and many self-care tasks.
- Creativity and Imagination: Crafts provide an open canvas for children to express their unique ideas. There's no single "right" way to decorate a pinecone turkey or design a thankful leaf, fostering imaginative thinking and encouraging them to explore different possibilities.
- Problem-Solving: What if the glue doesn't stick immediately? How can we make the turkey stand up? Crafting inevitably presents small challenges that children learn to navigate, developing their critical thinking and adaptability.
- Following Instructions: Many crafts involve a sequence of steps. Children learn to listen carefully, follow directions, and complete tasks in order, which are vital skills for academic success and everyday life.
- Patience and Persistence: Some projects require time and effort. Children learn the value of seeing a task through to completion, even if it means waiting for paint to dry or carefully assembling multiple pieces. This builds resilience and a sense of accomplishment.
Emotional Benefits:
- Self-Expression: Art and crafts offer a powerful outlet for children to express their feelings and ideas without words. This can be especially beneficial for younger children who are still developing their verbal communication skills.
- Building Confidence: Successfully completing a craft project, no matter how simple, gives children a tremendous boost in confidence. They can proudly display their creations, knowing they made it themselves. This sense of achievement reinforces a positive self-image.
- Sense of Accomplishment: Holding a finished craft in their hands provides a tangible representation of their hard work and creativity. This feeling of pride is incredibly motivating.
- Gratitude and Reflection: Many Thanksgiving crafts are specifically designed to encourage thankfulness, prompting children to think about and articulate what they are grateful for. This cultivates an important emotional intelligence.
Family Bonding:
- Shared Experiences: Crafting together creates special memories that families will cherish for years to come. It's a dedicated time for interaction, conversation, and mutual enjoyment.
- Conversation Starters: While working on a craft, children often open up about their thoughts, their day, or their ideas. It’s a natural, relaxed setting for meaningful communication.
- Screen-Free Engagement: In an increasingly digital world, hands-on activities like Thanksgiving crafts provide a much-needed break from screens. They encourage interaction with the physical world, sensory exploration, and direct engagement with family members. This aligns perfectly with I'm the Chef Too!'s commitment to providing screen-free educational alternatives that bring families together.
- Legacy and Tradition: Many Thanksgiving crafts become annual traditions, serving as nostalgic touchstones that families look forward to creating together each year.
At I'm the Chef Too!, our educational philosophy centers on these very principles. We know that the best learning happens when children are actively engaged, when their hands are busy, and when their imaginations are sparked. Whether they're baking an edible creation or crafting a thankful tree, the underlying process of discovery, problem-solving, and creative expression is what truly enriches their development.
If your family thrives on these kinds of engaging, hands-on experiences, imagine extending that joy and learning beyond the holiday season. We bring new adventures right to your door every month with free shipping in the US, making ongoing creative fun incredibly convenient. Ready for a new adventure every month? Join The Chef's Club and enjoy free shipping on every box!
Preparing for a Crafty Thanksgiving: Tips for Success
A smooth and enjoyable crafting session begins long before the first dab of glue or stroke of paint. Thoughtful preparation can minimize stress, maximize fun, and ensure that your focus remains on the joy of creating with your children. Here’s how to set the stage for success with your Thanksgiving DIY crafts for kids.
Gathering Supplies: Your Creative Arsenal Before you begin, take stock of what you have and what you might need. Many Thanksgiving crafts can be made with items you already own or things found in nature.
- Natural Materials: Encourage an outdoor scavenger hunt! Fallen leaves (various shapes, sizes, and colors), pinecones, acorns, small twigs, smooth pebbles, and even dried flowers can become incredible craft components. This adds an extra layer of adventure and connection to nature.
- Household Items: Don't underestimate the power of everyday objects. Empty toilet paper rolls, paper towel rolls, cereal boxes, tin cans (cleaned with no sharp edges), cotton balls, old buttons, yarn scraps, and even bubble wrap can be transformed into artistic masterpieces.
-
Basic Craft Essentials: A well-stocked craft drawer is your best friend.
- Paper: Construction paper (fall colors like red, orange, yellow, brown), cardstock, white paper for drawing, tissue paper.
- Adhesives: Child-safe glue sticks, liquid craft glue, possibly a low-temp hot glue gun (for adult use only, or with very close supervision for older kids).
- Cutting Tools: Kid-safe scissors.
- Coloring Tools: Crayons, markers, washable paints (tempera or acrylic), paintbrushes.
- Embellishments: Googly eyes, glitter (if you dare!), pipe cleaners, pom-poms, ribbons, felt scraps.
Setting Up the Space: The Canvas for Creativity Designate a specific area for crafting, even if it's just for an hour.
- Protect Surfaces: Lay down newspaper, old towels, a plastic tablecloth, or even a large cardboard box opened flat. This protects your table from spills and allows for easier cleanup.
- Easy Access: Arrange supplies within easy reach for children, but in an organized manner. Small bins or containers for different items can keep things tidy.
- Consider the Floor: For very young children or particularly messy projects, the floor covered with a large sheet or tarp might be a better option, giving them more room to spread out.
- Good Lighting: Ensure the area is well-lit to reduce eye strain and allow for better visibility of colors and details.
Safety First: Crafting with Care Always prioritize safety, especially when crafting with young children.
- Supervision is Key: Never leave young children unsupervised with craft supplies, especially scissors, glue, or small items that could be choking hazards.
- Child-Safe Tools: Use scissors designed for children. If using a hot glue gun, it should only be handled by an adult, or with direct supervision for older, responsible children who understand the risks.
- Non-Toxic Materials: Ensure all paints, glues, and markers are labeled "non-toxic."
- Allergies: Be mindful of any food allergies if incorporating edible craft components.
Involving Kids in Preparation: Building Ownership Get your children excited and invested by letting them participate in the setup.
- Supply Gathering: "What colors do we need for our turkey feathers?" "Can you help me find some big leaves outside?"
- Activity Choice: Offer a few craft options and let them pick their favorite. This gives them a sense of control and increases their enthusiasm.
- Layout Helpers: Have them help lay down newspapers or organize the markers.
Managing Expectations: Embrace Imperfection The goal of Thanksgiving DIY crafts for kids isn't perfection; it's the process and the joy of creating.
- Process Over Product: Focus on the experience – the concentration, the laughter, the imaginative play – rather than the flawless end result.
- Embrace Imperfection: A wobbly turkey or an off-center leaf simply adds character and shows the unique touch of your child. Praise their effort and creativity, not just the "prettiness" of the craft.
- Be Flexible: Sometimes, a child's imagination will lead them away from your initial craft idea. Allow for spontaneous creativity and follow their lead when appropriate.
By taking these preparatory steps, you'll create an environment where creativity can flourish, and children can fully immerse themselves in the wonderful world of Thanksgiving crafting. And remember, the joy of hands-on learning isn't just for the holidays! We believe in nurturing that curiosity year-round. For families who love to explore and learn through delightful, screen-free experiences, The Chef's Club offers a convenient, enriching solution. Each month, a new adventure kit, complete with pre-measured dry ingredients and specialty supplies, is delivered right to your door.
A Cornucopia of Thanksgiving DIY Crafts for Kids
Now that we’re all prepped and ready, let’s dive into a treasure trove of Thanksgiving DIY crafts for kids! These ideas blend simplicity with creative potential, ensuring fun for various age groups and skill levels. We've categorized them to help you choose the perfect project for your family.
1. Nature's Bounty: Leaf and Pinecone Creations
The autumn landscape itself is a craft store waiting to be explored. A simple walk outside can provide a wealth of materials for beautiful and meaningful Thanksgiving crafts.
Handprint Leaf Turkeys This classic craft is a Thanksgiving staple for a reason: it’s simple, personal, and always adorable.
- What You’ll Need: Brown construction paper, various fallen leaves, child-safe glue, googly eyes, orange/red markers or felt scraps.
-
Steps:
- Help your child trace their hand on a piece of brown construction paper. This will be the turkey's body. Cut it out.
- Collect a variety of colorful fallen leaves. These will be the turkey's magnificent feathers!
- Glue the leaves onto the back of the handprint, fanning them out like a turkey's tail. Encourage your child to experiment with different color arrangements.
- Glue on googly eyes for personality.
- Cut a small orange triangle for the beak and a tiny red wattle (that little fleshy bit under a turkey's chin) from felt or paper, then glue them onto the "thumb" part of the handprint.
- Draw two small legs at the bottom.
-
Variations:
- Instead of tracing, use brown paint to create the handprint directly on a piece of paper, then add leaves once dry.
- Add glitter to the leaves for a bit of sparkle.
- Create a "flock" of turkeys by making several handprint leaf turkeys of different sizes, perhaps representing each family member.
- Learning Value: This craft enhances fine motor skills (cutting, gluing), encourages nature appreciation, and allows for creative expression through color and design. It also creates a wonderful keepsake, marking how much your child has grown each year.
Pinecone Turkeys and Friends These charming little creatures make perfect table decorations or place card holders.
- What You’ll Need: Pinecones (collected or store-bought), small pieces of colored felt or construction paper (red, orange, yellow, brown), googly eyes, glue (craft glue or low-temp hot glue for adults), small pom-poms (optional).
-
Steps:
- Select a pinecone for each turkey. The flatter side will be the base.
- Cut out feather shapes from your colored felt or paper. Aim for a mix of colors and sizes.
- Glue the "feathers" onto the back of the pinecone, tucking them into the scales so they fan out.
- For the turkey's head, you can either glue a pom-pom onto the front of the pinecone or cut out a small round head shape from paper.
- Glue on googly eyes.
- Cut a tiny orange beak and red wattle, and glue them onto the head.
-
Variations:
- Paint the pinecones first in fall colors before adding features.
- Create "acorn pilgrims" by gluing tiny felt hats and faces onto acorns.
- Make a whole forest of pinecone animals – squirrels, owls – to accompany your turkeys.
- Learning Value: This activity helps with dexterity, spatial reasoning (where to place features), and encourages imaginative play. It also fosters a connection to natural elements found outdoors.
Autumn Leaf Suncatchers Bring the beauty of autumn indoors with these vibrant, light-catching creations.
- What You’ll Need: Assorted fallen leaves (pressed flat, if possible), clear contact paper or wax paper, scissors, string/yarn.
-
Steps:
- Go on a leaf-collecting adventure! Look for leaves of different colors, shapes, and sizes.
- If using wax paper, you’ll need two sheets. If using contact paper, cut two pieces larger than your desired suncatcher size.
- For contact paper: Peel the backing off one piece of contact paper. Have your child arrange the leaves (and perhaps some small flower petals or glitter) on the sticky side. Leave a small border around the edges.
- Carefully place the second piece of contact paper over the first, sticky side down, pressing firmly to seal in the leaves and remove air bubbles.
- Trim the edges and cut the suncatcher into a desired shape (e.g., a circle, square, or even a large leaf shape).
- Punch a hole at the top and thread a piece of string through it for hanging.
- For wax paper: Place leaves on one sheet, cover with the second, then press with a warm (not hot!) iron over a towel or parchment paper to seal them together. Adult supervision is crucial here.
-
Variations:
- Create suncatchers in specific shapes like pumpkins or acorns.
- Add translucent paper snippets in fall colors for a stained-glass effect.
- Learning Value: This craft introduces concepts of light and transparency, color mixing, and allows children to observe and appreciate the intricate beauty of natural elements.
Looking for more ways to spark curiosity and creativity year-round? Our kits are designed by mothers and educators to make learning fun and accessible. Browse our complete collection of one-time kits and find the perfect theme for your little learner!
2. Gratitude-Focused Crafts: Cultivating Thankfulness
Thanksgiving is, at its heart, about giving thanks. These crafts provide a tangible way for children to express and reflect on what they are grateful for, making the holiday truly meaningful.
The Thankful Tree This beautiful centerpiece encourages daily reflection and adds a heartwarming touch to your home.
- What You’ll Need: A small branch (collected from outdoors, about 1-2 feet tall), a vase or sturdy pot, construction paper in fall colors, scissors, markers, hole punch, ribbon or string.
-
Steps:
- Place your branch securely in a vase or pot. You can use pebbles or sand in the vase to help it stand upright.
- Cut out various leaf shapes from the fall-colored construction paper.
- Have each family member write or draw something they are thankful for on a leaf. Encourage them to think broadly – friends, pets, a favorite toy, a sunny day, healthy food.
- Punch a hole in each leaf.
- Tie a piece of ribbon or string through the hole and hang the leaf onto a branch of your Thankful Tree.
-
Variations:
- Create a "Gratitude Garland" by stringing the thankful leaves together instead of hanging them on a tree.
- Use a "Thankful Jar" where family members write down their gratitudes on small slips of paper and place them in the jar throughout the month.
- Learning Value: This craft promotes emotional literacy, encourages reflection and positive thinking, and can be a wonderful conversation starter about gratitude. It also offers handwriting practice and develops fine motor skills through cutting and tying.
Gratefulness Rocks These simple, yet powerful, stones serve as daily reminders of blessings.
- What You’ll Need: Smooth, flat pebbles or small stones (collected from a garden or park, thoroughly washed), acrylic paints or permanent markers, clear sealant spray (optional, for adults).
-
Steps:
- Gather a collection of smooth, clean stones.
- Brainstorm with your child about things they are grateful for.
- Using paints or permanent markers, decorate each rock with a word (e.g., "Family," "Friends," "Nature," "Kindness") or a simple drawing representing something they appreciate.
- Once dry, an adult can spray the rocks with a clear sealant to protect the design, making them last longer.
-
Variations:
- Create "Kindness Stones" with uplifting messages to leave in public places for others to find.
- Arrange the rocks in a shallow bowl as a centerpiece, prompting guests to read them.
- Learning Value: This activity fosters mindfulness, encourages self-expression through art, and provides a tangible way to practice gratitude. It also refines fine motor skills and creativity.
"Give Thanks" Place Cards Add a personal touch to your Thanksgiving table with these handmade place cards.
- What You’ll Need: Cardstock (white or fall colors), markers, crayons, small leaves or decorative elements, glue.
-
Steps:
- Fold pieces of cardstock in half to create tent-style place cards.
- On one side, help your child write the name of a guest.
- On the other side, or around the name, have your child draw a picture, glue on a small pressed leaf, or add a heartfelt message of thanks.
-
Variations:
- Use small photos of each guest for a truly personalized touch.
- Cut the place cards into festive shapes like pumpkins or turkeys.
- Learning Value: This craft introduces concepts of hospitality and personalization, offers handwriting and drawing practice, and encourages children to think about others.
These gratitude-focused activities are perfect for sparking meaningful conversations and fostering a deeper appreciation for the holiday. Just like our carefully curated kits at I'm the Chef Too!, these crafts are designed to facilitate family bonding and provide engaging, screen-free educational fun. Give the gift of learning that lasts all year with a 12-month subscription to our STEM cooking adventures!
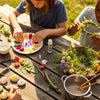
3. Edible & Culinary Crafts: Blending Art with Taste
At I'm the Chef Too!, we wholeheartedly believe that food is a fantastic medium for learning and creativity. Integrating edible elements into your Thanksgiving DIY crafts for kids offers a delicious dimension to your holiday fun, bringing science, math, and art right into the kitchen!
Edible Indian Corn This vibrant and sweet treat is a wonderful way to introduce basic cooking and measurement concepts.
- What You’ll Need: Popped popcorn (about 6-7 cups), mini marshmallows (10 oz bag), butter (3 tablespoons), food coloring (red, yellow, orange, brown, green), string or pipe cleaners, parchment paper.
-
Steps:
- In a large microwave-safe bowl, melt the butter. Add the marshmallows and microwave for 30-60 seconds, stirring until smooth and fully melted.
- Divide the melted marshmallow mixture into several smaller bowls. Add a few drops of different food coloring to each bowl (e.g., red, yellow, orange, brown, green) and stir to combine.
- Working quickly (the marshmallow hardens as it cools), add a portion of popcorn to each colored marshmallow bowl and stir until coated.
- Lightly butter your hands (or have an adult wear gloves). Take small handfuls of the colored popcorn and press them together firmly, shaping them into an ear of corn. You can layer different colors to create a variegated "Indian corn" effect.
- Once shaped, place the edible corn pieces on parchment paper to cool and harden.
- When firm, an adult can tie a piece of string around the top, or attach a green pipe cleaner "husk" for decoration.
-
Variations:
- Add small candies or sprinkles to the popcorn mixture for extra texture and sweetness.
- Experiment with different color combinations.
- Learning Value: This craft teaches basic kitchen safety, introduces concepts of measurement, mixing, and the physical change of ingredients (melting, hardening). It's a fantastic sensory experience and a delicious lesson in color theory and edible art. Just like these edible creations, we at I'm the Chef Too! believe in teaching complex subjects through tangible, hands-on, and delicious cooking adventures. If your child loves the magic of food science, they might enjoy discovering the bubbly chemical reaction that makes our Erupting Volcano Cakes Kit erupt with deliciousness!
Pumpkin Pie Coasters (Felt or Paper) While not edible, these coasters bring the delicious look of pie to your table without the oven!
- What You’ll Need: Tan, light orange, and white felt (or construction paper), scissors, craft glue.
-
Steps:
- Cut a large circle from the tan felt/paper for the "pie crust" base.
- Cut a slightly smaller circle from the light orange felt/paper for the "pumpkin filling."
- Glue the orange circle onto the tan circle.
- Cut a wavy strip from the tan felt/paper to create the "pie crust" edge, and glue it around the top edge of the orange circle.
- For the "whipped cream," cut a small swirl shape from the white felt/paper and glue it onto one edge of the pie.
-
Variations:
- Make "apple pie" coasters using red or green felt.
- Add tiny felt "sprinkles" or "cinnamon."
- Learning Value: This craft helps with shape recognition, cutting skills, layering, and understanding basic design principles. It also subtly introduces the idea of patterns and textures.
Turkey Leg Treats (Pretzel or Cookie) A whimsical and easy treat that’s sure to get a giggle!
- What You’ll Need: Large pretzel rods or shortbread cookies, white chocolate chips, milk chocolate chips, mini marshmallows, parchment paper.
-
Steps:
- Melt white chocolate chips in a microwave-safe bowl, stirring until smooth.
- Melt milk chocolate chips in another microwave-safe bowl.
- Dip one end of a pretzel rod or cookie into the melted milk chocolate, coating it about halfway.
- While the milk chocolate is still wet, attach a mini marshmallow to the very end of the dipped portion – this will be the "bone."
- Once the milk chocolate sets a bit, drizzle some melted white chocolate over the milk chocolate section to create a "skin" effect.
- Place on parchment paper to fully harden.
- Learning Value: This simple assembly activity enhances fine motor control, introduces basic food decorating techniques, and encourages creativity in presenting food.
These culinary crafts aren't just about making food; they're about making memories and exploring the fascinating world of ingredients and transformation. These activities perfectly embody our belief in blending discovery with deliciousness. For more innovative ideas and all the supplies you need for amazing edible adventures delivered right to your door, be sure to check out The Chef's Club!
4. Playful & Decorative Crafts: Adding Festive Flair
Beyond functional decorations or gratitude activities, some Thanksgiving DIY crafts for kids are simply about adding a festive, playful touch to your home and celebrating the fun side of the holiday.
Paper Roll Turkeys Upcycling everyday items into adorable decorations is a win-win!
- What You’ll Need: Empty toilet paper rolls or paper towel rolls cut in half, brown paint, various colored construction paper, googly eyes, orange/red felt or paper scraps, glue, scissors.
-
Steps:
- Paint the paper roll brown and let it dry completely.
- From construction paper, cut out several feather shapes in different fall colors.
- Glue the "feathers" to the back of the brown paper roll, fanning them out to create a tail.
- Glue two googly eyes onto the front of the roll.
- Cut a small orange triangle for the beak and a tiny red wattle, and glue them below the eyes.
- Draw or cut out two small brown feet and glue them to the bottom front of the roll.
-
Variations:
- Dress your turkeys! Add tiny hats, scarves made from yarn, or even superhero capes.
- Create a "turkey bowling" game by setting up several paper roll turkeys and knocking them down with a soft ball.
- Learning Value: This craft encourages recycling and upcycling, develops basic construction skills, fosters creativity in character design, and refines fine motor skills.
Thanksgiving Hats/Headbands These are perfect for adding a touch of whimsy to your holiday dinner table, and they make for fantastic photo opportunities!
- What You’ll Need: Brown paper bags (grocery store bags work well), cardboard strips, construction paper in fall colors, feathers, googly eyes, markers, glue, scissors.
-
Steps (for a Turkey Hat):
- Cut the brown paper bag into a wide strip that fits around your child’s head, plus extra for folding and gluing.
- Decorate the front of the strip with googly eyes, an orange beak, and a red wattle, creating a turkey face.
- Cut out several colorful feather shapes from construction paper or use real craft feathers. Glue these to the back of the headband, fanning them out.
- Form the strip into a circle and glue or tape the ends together to make a headband.
-
Variations:
- Pilgrim Hats: Use black construction paper for the hat, cut out a brim, and add a yellow buckle.
- Cornucopia Hats: Decorate a cone-shaped hat with pictures of fruits, vegetables, and fall leaves.
- Let each child design their own unique "Thanksgiving character" hat.
- Learning Value: This craft involves measurement (sizing the headband), cutting, decorating, and encourages imaginative play and role-playing. It also boosts confidence when children proudly wear their creations. Encouraging this kind of creative self-expression is at the heart of what we do. From crafting holiday hats to exploring the wonders of the cosmos with our Galaxy Donut Kit, we aim to spark curiosity and creativity in every child.
Leaf Lion A whimsical craft that combines nature with imagination.
- What You’ll Need: A printed or hand-drawn picture of a lion's face, various collected fall leaves, glue stick.
-
Steps:
- Have your child draw a lion's face on a piece of paper, or print out a simple outline.
- Collect a variety of colorful fallen leaves.
- Glue the leaves around the lion's face, using them to create a magnificent, textured mane.
- Learning Value: This activity sparks imagination, encourages nature observation, and develops fine motor skills through precise gluing and arrangement. It’s also a wonderful way to talk about animal characteristics and habitats.
These playful crafts ensure that the Thanksgiving season is not only about tradition and gratitude but also about unadulterated fun and creative exploration. They are perfect examples of how simple materials can lead to big smiles and lasting memories. Just as these activities foster joy and learning, our kits are designed to do the same, making everyday an adventure. For those moments when you're looking for an activity that's already planned out and packed with fun, explore our full library of adventure kits available for a single purchase in our shop. You might even find a kit featuring beloved characters, like when kids make Peppa Pig Muddy Puddle Cookie Pies, making learning even more relatable and engaging!
Maximizing the Educational Value of Thanksgiving DIY Crafts for Kids
While simply enjoying the process of creating is incredibly valuable, you can subtly amplify the educational impact of Thanksgiving DIY crafts for kids by engaging with your children in specific ways. Our philosophy at I'm the Chef Too! is rooted in "edutainment" – making learning so fun, children don't even realize they're doing it! Here’s how you can infuse more learning into your holiday crafting.
Ask Open-Ended Questions: Instead of just praising the finished product, engage your child in conversation about their process and choices.
- "Why did you choose those colors for the turkey's feathers?"
- "What do you like most about your gratefulness rock?"
- "How did you make that pinecone stand up so well?"
- "If you could add anything else to your craft, what would it be and why?" These questions encourage critical thinking, reflection, and help children articulate their creative decisions.
Connect to STEM Concepts: Crafting is a surprisingly fertile ground for exploring Science, Technology, Engineering, and Math.
-
Science:
- Observation: "Look at all the different shapes and textures of these leaves! What do you notice?"
- Properties of Materials: "Why does the glue stick to the paper? What happens when the paint dries?"
- Basic Reactions: If doing edible crafts, discuss how ingredients change when mixed or heated (e.g., marshmallows melting for edible Indian corn).
-
Technology:
- Tools: Discuss how scissors, rulers, or even a hole punch are tools that help us make things more easily or accurately.
-
Engineering:
- Design & Structure: "How can we make sure this pinecone turkey doesn't fall over?" "What's the best way to attach these feathers so they stay?" This involves planning, problem-solving, and understanding stability.
- Measurement: "We need a strip of paper that goes all the way around your head for the hat. How can we measure that?"
-
Math:
- Counting: "How many leaves are we using for our suncatcher?"
- Shapes: Identify circles, triangles, squares in craft materials. "Can you cut out a triangle for the turkey's beak?"
- Symmetry & Patterns: Discuss how things look balanced or how patterns repeat. "Can you make a pattern with the colors of your feathers?"
Integrate the Arts: Beyond just creating, talk about the artistic elements.
- Color Theory: "What happens when you mix a little red with yellow? What kind of feeling does this orange make you think of?"
- Composition: Discuss how elements are arranged on the page or project. "Where should we place the eyes to make our turkey look friendly?"
- Texture: Encourage touching and describing different materials: "How does the rough pinecone feel compared to the smooth felt?"
- Self-Expression: Reiterate that their unique creation is wonderful. "Your design is so original!"
Storytelling: Encourage your child to create narratives around their crafts.
- "What kind of adventure do you think your pinecone turkey will go on?"
- "What story does your Thankful Tree tell about our family?"
- This builds language skills, imagination, and a deeper connection to their creations.
Our commitment at I'm the Chef Too! is to foster this exact kind of holistic learning. We are mothers and educators who understand the power of hands-on, multi-sensory experiences. Our kits are meticulously designed to teach complex STEM subjects through engaging, delicious, and tangible cooking adventures. We believe that learning should be an exciting journey of discovery, not a chore.
By intentionally incorporating these educational approaches into your Thanksgiving DIY crafts for kids, you're not just creating decorations; you're nurturing curious minds, building essential skills, and strengthening family bonds. It’s the very essence of what we call "edutainment" – a perfect blend of learning and fun. And for families who desire these enriching experiences consistently, year-round, The Chef's Club subscription is the perfect solution, delivering a new adventure with free shipping right to your door every month.
Conclusion
As we've journeyed through this cornucopia of Thanksgiving DIY crafts for kids, it becomes clear that these activities offer far more than simple entertainment. They are a rich tapestry woven with threads of creativity, skill-building, emotional growth, and cherished family moments. From the rustic charm of nature-inspired decorations to the heartwarming practice of gratitude-focused projects and the delightful exploration of edible art, each craft provides a unique opportunity for discovery and connection.
We’ve seen how cutting paper can hone fine motor skills, how arranging leaves can teach about composition, and how articulating thanks can cultivate a profound sense of gratitude. These hands-on experiences serve as a vital screen-free alternative, encouraging children to engage with their physical world, interact with their loved ones, and express their burgeoning imaginations. This approach aligns perfectly with our core mission at I'm the Chef Too!: to spark curiosity and creativity in children, facilitate family bonding, and provide meaningful "edutainment" that blends food, STEM, and the arts. Our commitment, born from the hearts of mothers and educators, is to make complex subjects accessible and exciting through tangible, delicious adventures.
This Thanksgiving, let’s embrace the joyful mess, the unexpected turns, and the unique masterpieces that arise from crafting with our children. These aren't just crafts; they are catalysts for learning, confidence-building, and creating indelible memories that will warm your hearts for years to come.
Ready to make this Thanksgiving and every month a celebration of discovery and delicious fun? Join The Chef's Club today! We deliver new adventures right to your door with free shipping in the US, making it easy to keep the creative sparks flying all year long. Give the gift of ongoing learning and unforgettable family experiences – because every child is a chef, an artist, and a scientist in the making!
FAQ: Thanksgiving DIY Crafts for Kids
Q: What age group are these crafts best for? A: Many of these Thanksgiving DIY crafts for kids are adaptable for a wide range of ages. Younger children (toddlers and preschoolers) will enjoy activities like handprint turkeys, leaf stamping, and simple pinecone crafts with adult assistance. Older children (elementary school age) can tackle more intricate cutting, detailed decorating, and take a more independent role in projects like the Thankful Tree or edible crafts. Always supervise, especially with sharp tools or small parts.
Q: How can I make crafting less messy? A: Preparation is key! Lay down newspaper, old tablecloths, or a plastic sheet to protect surfaces. Use washable paints and markers. Have wet wipes and paper towels easily accessible. Consider giving each child a tray or a large piece of cardboard to work on. For very messy projects, taking the activity outdoors (if weather permits) can be a great solution.
Q: What if my child isn't "good" at crafts? A: Reframe the idea of "good"! The goal of Thanksgiving DIY crafts for kids isn't perfection, but the process of creativity and engagement. Encourage effort and unique expression rather than a flawless outcome. Praise their choices, their focus, and the joy they find in creating. Remind them that every artist has their own style, and their creation is special because they made it.
Q: How can I store our Thanksgiving crafts? A: Flat crafts like handprint turkeys or leaf suncatchers can be laminated or placed in clear sheet protectors in a binder. Three-dimensional crafts like pinecone turkeys or gratefulness rocks can be displayed on your Thanksgiving table, on a mantle, or in a special "memory box." Take photos of the crafts to preserve the memories, even if the physical craft doesn't last forever.
Q: Are there ways to involve toddlers in Thanksgiving crafts? A: Absolutely! Toddlers love sensory experiences. Focus on simple, hands-on activities like tearing paper for turkey feathers, smearing paint for handprints (with supervision), sticking large leaves onto contact paper, or simply exploring the textures of pinecones and acorns. Keep steps minimal and expectations focused on their enjoyment of the materials.
Q: What if I don't have all the supplies listed for a craft? A: Don't stress! Get creative with substitutions. No googly eyes? Draw them on! No felt? Use construction paper or fabric scraps. No specific colored paper? Mix paints to create new colors, or use what you have. The beauty of DIY crafts is their flexibility and resourcefulness. Often, working with what's available sparks even more creativity.
Q: How do these crafts promote learning, especially STEM? A: Thanksgiving DIY crafts for kids are fantastic for learning!
- Science: Observing nature (leaves, pinecones), understanding how glue sticks, properties of materials.
- Technology: Using tools like scissors or glue guns (with adult help).
- Engineering: Designing stable structures (pinecone turkeys), problem-solving how to attach different materials.
- Math: Counting, identifying shapes, understanding patterns and symmetry, basic measurement.
- Arts: Color theory, composition, self-expression, developing aesthetic appreciation.
Q: What if we want more structured, educational activities for kids throughout the year? A: For families seeking consistent, expertly designed educational experiences that blend learning with delicious fun, we invite you to explore our full library of adventure kits available for a single purchase in our shop. If you're looking for ongoing inspiration and convenience, our monthly Chef's Club subscription delivers new culinary STEM adventures right to your door with free shipping, ensuring the fun and learning never stop!