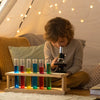
Hands-On Egg STEM Activity for Curious Kids

Table of Contents
- Introduction
- The Versatility of Eggs in STEM
- Egg-ceptional Physics Experiments
- Cracking Chemistry with Eggs
- Engaging Biology and Life Science with Eggs
- The Art of Egg-sperimentation: Blending Arts with STEM
- Beyond the Shell: Facilitating Learning & Family Bonding
- Conclusion
Ever peered into a carton of eggs and seen more than just breakfast? Beyond their humble appearance, eggs are truly remarkable, offering an incredible gateway to the captivating world of Science, Technology, Engineering, and Mathematics (STEM). For curious minds of all ages, the simple egg becomes a powerful tool for exploration, discovery, and delightful, hands-on learning experiences.
At I'm the Chef Too!, our mission is to blend the magic of food, the wonder of STEM, and the beauty of the arts into one-of-a-kind "edutainment" adventures. We believe that some of the most profound learning happens when children are actively engaged, getting their hands messy, and perhaps even tasting their experiments! That’s why we’re so excited to share how eggs can be at the heart of countless engaging, screen-free educational activities that spark curiosity, foster creativity, and create unforgettable family bonding moments. In this comprehensive guide, we'll crack open a variety of egg STEM activities, from gravity-defying engineering challenges to bubbling chemical reactions and even explorations into biology, demonstrating just how much a simple egg can teach. Get ready to transform your kitchen into a vibrant laboratory where learning is always delicious and fun!
Introduction
Imagine a world where learning isn't confined to textbooks or screens, but bursts forth from everyday objects, transforming ordinary moments into extraordinary discoveries. That's the world we champion at I'm the Chef Too!, and today, we're focusing on one such unassuming hero: the egg. Often seen only as a breakfast staple or a baking ingredient, the egg holds a universe of scientific principles waiting to be explored. From its incredible structural integrity to its fascinating chemical composition, a simple egg can introduce children to complex STEM concepts in a tangible, exciting way.
This blog post isn't just about giving you a list of activities; it's about empowering you, as parents and educators, to cultivate a love for learning through hands-on experiences. We'll delve into diverse egg STEM activities that encourage critical thinking, problem-solving, and creative exploration. Developed by mothers and educators, our approach at I'm the Chef Too! emphasizes that "edutainment" isn't just a buzzword – it's a philosophy where joy and education intertwine. Through these practical, engaging activities, children will develop key skills, build confidence, and, most importantly, have a truly joyful time discovering the science all around them. So, grab a carton of eggs, prepare for some delightful messes, and let's embark on an "egg-cellent" journey of scientific discovery together!
The Versatility of Eggs in STEM
Why are eggs such fantastic tools for STEM exploration? First, they're incredibly accessible and affordable, found in almost every kitchen. This makes them perfect for impromptu science sessions or for ongoing experiments without breaking the bank. Second, their unique composition and structure lend themselves to a wide array of scientific principles across all four pillars of STEM:
- Science: Eggs allow us to explore concepts in chemistry (acid-base reactions, crystallization), biology (osmosis, cell structure, life cycles), and physics (density, gravity, forces, structural strength).
- Technology: While not overtly tech-heavy, many egg activities involve designing and building, laying foundational understanding for technological innovation.
- Engineering: Designing structures to protect an egg, building catapults, or constructing towers all involve fundamental engineering design processes, from planning to testing and iterating.
- Mathematics: Measuring ingredients, calculating drop heights, comparing results, and analyzing data naturally integrate mathematical thinking into the activities.
Beyond these core subjects, eggs also seamlessly blend with the arts, allowing for creative expression through decorating, coloring, and even edible creations. This holistic approach aligns perfectly with our mission at I'm the Chef Too!, where we believe in fostering well-rounded learners who see the connections between different disciplines. Of course, when working with eggs, especially raw ones, adult supervision and a focus on safety and cleanliness are always paramount. But with a little planning, the learning potential is truly boundless.
Intrigued by hands-on learning? Imagine receiving a new adventure delivered to your door every month. Each box is a complete experience, containing pre-measured dry ingredients and specialty supplies, making it incredibly convenient for busy families. Ready for a new adventure every month? Join The Chef's Club and enjoy free shipping on every box. It's the perfect way to ensure your child's curiosity is continuously sparked with unique, delicious, and educational activities.
Egg-ceptional Physics Experiments
Physics is all about understanding how the world moves and interacts, and eggs offer a surprisingly robust platform for exploring fundamental physical principles like force, gravity, structure, and motion.
The Mighty Eggshell: Strength and Structure
One of the most surprising facts about eggs is their inherent strength, especially their unique structural integrity. The idiom "walking on eggshells" suggests extreme fragility, but in reality, an eggshell, when pressure is applied correctly, is incredibly strong. This is due to its arched, dome-like shape, which is one of the strongest structural forms found in nature.
The Activity: Walking on Eggshells
This experiment is a true eye-opener for kids and adults alike!
What you'll need:
- Two to three dozen eggs (make sure they are fresh and uncracked)
- Several egg cartons (to hold the eggs upright)
- A large plastic sheet or old blanket (for easy cleanup in case of breakage)
- An adult and a child (to safely conduct the experiment)
Instructions:
- Lay down your plastic sheet or blanket on a flat, sturdy surface.
- Carefully arrange the eggs in their cartons on the sheet, ensuring they are all pointed in the same direction (e.g., all pointy ends up or all round ends up). This helps distribute weight evenly.
- Have the child (or adult!) remove their shoes and carefully place one foot on top of several egg cartons, distributing their weight as evenly as possible across the eggs. It's crucial not to step on a single egg, but rather across a group.
- Once balanced on one foot, slowly bring the second foot onto another set of egg cartons, again, ensuring even weight distribution.
- With both feet balanced, you can gently "walk" or just stand there, marveling at the eggs supporting your weight!
The Physics Behind It: The magic lies in the egg's dome shape. When pressure is applied evenly across the curved surface, the force is distributed down the sides of the arch to the base, making it incredibly resistant to crushing. This is the same principle used in architectural arches and domes. However, if pressure is applied unevenly, such as tapping the side of an egg, it cracks easily because the force is concentrated on a single point rather than distributed. This experiment beautifully demonstrates how shape and structural design play a crucial role in strength.
The Great Egg Drop Challenge
The egg drop challenge is a classic STEM activity that brings together physics, engineering, and problem-solving in a thrilling, often messy, way. The goal? To design a protective structure that prevents a raw egg from breaking when dropped from a specific height.
What you'll need:
- Raw eggs (at least a few, as some will inevitably break!)
- Various recycled materials: cardboard, newspaper, cotton balls, bubble wrap, straws, plastic bags, tape, rubber bands, craft sticks, toilet paper tubes.
- A measurement tool (tape measure or ruler)
- A designated drop height (from a chair, table, or even a second-story window with proper safety measures).
Instructions:
- Design Phase (Engineering & Technology): Challenge your child to brainstorm and sketch designs for a device that will protect the egg. Encourage them to think about impact absorption, cushioning, and distributing the force of the fall. What materials will best absorb shock? How can they create a structure that cushions the egg?
- Build Phase (Engineering): Using the chosen materials, construct the protective device around the raw egg. Emphasize that the egg must be completely enclosed or secured within the design.
- Hypothesis (Science): Before the drop, ask your child to predict whether their egg will survive and why.
- Test Phase (Physics & Engineering): Carefully drop the egg and its protective structure from the designated height.
- Analyze & Iterate (Science & Engineering): Inspect the egg. Did it survive? If not, discuss why it broke. What could be improved in the design? Encourage redesigning and retesting. This iterative process is at the heart of engineering!
The Physics Behind It: This experiment demonstrates concepts of gravity, force, and impact. When the egg-protected device hits the ground, the kinetic energy from its fall is rapidly converted into other forms of energy, primarily sound and deformation. The goal of the protective structure is to extend the time over which this energy conversion happens, or to absorb the impact, thereby reducing the force exerted on the egg. Materials that deform easily (like bubble wrap or cotton) absorb energy, while structures that distribute force over a larger area (like a wide base or a parachute) can also prevent breakage.
Variations to Explore:
- Vary the height: Start low and gradually increase the drop height.
- Material constraints: Challenge kids to use only a limited set of materials (e.g., only newspaper and tape).
- Oobleck drop: For an even messier and more fascinating twist, create a container of oobleck (cornstarch and water, a non-Newtonian fluid) and drop the egg directly into it, with or without a protective structure. The oobleck's unique properties offer a different kind of impact absorption.
If your child loves hands-on building challenges and designing ingenious solutions, you might enjoy exploring our full range of creative projects. Our kits are designed to spark innovation and problem-solving skills, just like the egg drop. Browse our complete collection of one-time kits for more ideas and themed adventures that blend science with delicious fun!
Egg Catapults & Zip Wires
Beyond dropping, eggs can be propelled! Building devices to launch or transport eggs introduces concepts of levers, trajectory, friction, and motion.
Activity: Build an Egg Catapult
What you'll need:
- Craft sticks
- Rubber bands
- A plastic spoon or small cup
- Plastic eggs (or hard-boiled eggs for less mess!)
- A target (e.g., a bowl or a drawing)
Instructions:
- Stack several craft sticks together and secure them tightly at both ends with rubber bands. This will be your base.
- Take two more craft sticks and hold them together. Secure one end with a rubber band, creating a "V" shape.
- Slide the stack of craft sticks between the two "V" sticks, closer to the secured end.
- Attach the spoon or cup to the free end of the top craft stick using more rubber bands. This is your launching arm.
- Place a plastic egg in the spoon, press down on the launching arm, and release to send your egg flying!
The Physics Behind It: This simple catapult demonstrates the principle of a lever, a basic machine that helps us apply force more effectively. When you press down on the launching arm, you store potential energy in the bent craft sticks (or rubber bands). Releasing it converts that potential energy into kinetic energy, launching the egg. Experimenting with where the stack of sticks is placed (fulcrum) or how many rubber bands are used will change the force and trajectory, teaching about mechanical advantage and variables.
Activity: The Eggy Zip Wire
What you'll need:
- A long piece of string or thin rope (e.g., nylon or thick twine)
- Two fixed points at different heights (e.g., two chairs, a doorknob and a banister, or even two trees outdoors)
- A plastic egg or a small, lightweight toy "passenger"
- Materials to build a harness/carrier for the egg: cardboard, tape, pipe cleaners, small plastic cups, paper clips.
Instructions:
- Tie the string tightly between your two fixed points, ensuring one end is significantly higher than the other to create a slope. This is your zip wire.
- Challenge your child to design and build a small carrier or harness for the plastic egg. The carrier needs a way to slide along the string (e.g., using a paper clip or a small loop of tape).
- Once the carrier is built and the egg is secure, attach it to the higher end of the zip wire.
- Release the carrier and watch it slide down!
The Physics Behind It: This activity demonstrates gravity, friction, and inclined planes. Gravity pulls the egg and its carrier down the slope. Friction between the carrier and the string resists this motion. By changing the type of string (smoother vs. rougher), the incline (steeper vs. shallower), or the design of the carrier, children can explore how these variables affect the speed and smoothness of the "ride." It’s a wonderful way to observe forces in action and understand real-world engineering challenges, like designing efficient transportation systems.
Cracking Chemistry with Eggs
Eggs are packed with chemical wonders, making them perfect for hands-on chemistry experiments. From dissolving shells to growing sparkling crystals, these activities are sure to ignite a passion for reactions and molecular structures.
The Naked Egg Experiment: Dissolving Shells
This is perhaps one of the most iconic egg chemistry experiments, revealing a surprising transformation!
What you'll need:
- Raw eggs
- White vinegar
- Clear glass or jar
- Optional: Food coloring, a flashlight
Instructions:
- Carefully place a raw egg into a clear glass or jar.
- Pour enough white vinegar into the glass to completely submerge the egg.
- Observe! You'll immediately notice tiny bubbles forming on the eggshell.
- Leave the egg to soak for 24-48 hours. You may need to change the vinegar after 24 hours if the solution becomes cloudy.
- After soaking, carefully remove the egg. Gently rinse it under cool water while rubbing away any remaining shell residue.
The Chemistry Behind It: Eggshells are primarily made of calcium carbonate (CaCO3), the same compound found in chalk and limestone. White vinegar is an acid (acetic acid, CH3COOH). When calcium carbonate reacts with acetic acid, a chemical reaction occurs that dissolves the calcium carbonate, producing carbon dioxide gas (the bubbles you see), water, and calcium acetate.
CaCO3 (s) + 2CH3COOH (aq) → Ca(CH3COO)2 (aq) + H2O (l) + CO2 (g)
What's left is a "naked" egg, protected only by its semi-permeable membrane. It will feel rubbery and translucent. This experiment clearly demonstrates an acid-base reaction and the concept of chemical change. It also sets the stage for our next biology experiment!
Understanding chemical reactions is a fantastic part of STEM, much like the exciting bubbly reaction that makes our Erupting Volcano Cakes bubble over with deliciousness! Our kits provide all the pre-measured ingredients and instructions for a perfectly balanced chemical reaction that results in a tasty treat.
Crystal Eggshells: Growing Geodes
Turn a discarded eggshell into a sparkling, jewel-like geode with this mesmerizing chemistry experiment.
What you'll need:
- Clean, dry eggshell halves (carefully crack an egg and try to keep the halves as intact as possible; rinse and dry thoroughly)
- Borax (found in the laundry aisle)
- Hot water (boiled)
- A clear glass jar or bowl
- String or thread
- A pencil or craft stick
- Food coloring (optional)
Instructions:
- Prepare the eggshells: If you haven't already, gently clean and dry the eggshell halves. If there's any inner membrane left, try to peel it out for better crystal formation.
- Make a supersaturated solution: In the glass jar, pour hot (but not boiling) water. Slowly add borax, stirring constantly, until no more borax dissolves and you see some undissolved crystals at the bottom. This means your solution is "supersaturated." Use approximately 3 tablespoons of borax per cup of hot water as a starting point, adjusting as needed.
- Add color (optional): Stir in a few drops of food coloring if you want colored crystals.
- Suspend the eggshell: Tie a piece of string around an eggshell half (or thread it through a small hole in the top if you made one). Tie the other end of the string to a pencil or craft stick, creating a hanger.
- Submerge: Place the pencil across the top of the jar so the eggshell half hangs freely in the borax solution, not touching the bottom or sides.
- Wait and observe: Place the jar in a spot where it won't be disturbed. As the solution cools and the water slowly evaporates over 12-24 hours, borax crystals will begin to form on the eggshell.
- Reveal your geode: Once you're happy with the crystal growth, carefully remove the eggshell and let it dry completely.
The Chemistry Behind It: This experiment demonstrates the principle of crystallization from a supersaturated solution. When you dissolve a large amount of borax in hot water, you create a supersaturated solution – meaning it holds more dissolved solute than it normally would at room temperature. As the solution cools, the borax becomes less soluble and starts to precipitate out of the water. The rough surface of the eggshell provides nucleation sites where the borax molecules can begin to attach and form orderly crystal structures. The slower the cooling and evaporation, the larger and more defined the crystals tend to be.
Fizzy Fun: Erupting Eggs and Bath Bombs
Who doesn't love a good fizz? The classic baking soda and vinegar reaction can be repackaged into exciting egg-themed activities.
Activity: Erupting Eggshells
What you'll need:
- Clean, empty eggshell halves (carefully cracked, rinsed, and dried)
- Baking soda (sodium bicarbonate)
- White vinegar
- Liquid dish soap (optional, for more foam)
- Food coloring (optional)
- Small containers or a tray to catch the fizz.
Instructions:
- Place an empty eggshell half in a small container or on a tray.
- Put a teaspoon or two of baking soda into the eggshell.
- Add a drop of food coloring and a tiny squirt of dish soap (if using).
- Slowly pour vinegar into the eggshell and watch the "eruption"!
The Chemistry Behind It: This is an iconic acid-base reaction. Baking soda is a base, and vinegar is an acid. When they mix, they produce carbon dioxide gas (CO2), which creates the fizzing and bubbling eruption. The dish soap traps the gas, making the foam last longer. This simple reaction is a fantastic way to introduce chemical reactions and gas production in a visually exciting way.
Activity: DIY Egg-Shaped Bath Bombs
While not using actual eggs, making bath bombs in egg molds connects chemistry to fun and a familiar shape.
What you'll need:
- 1 cup baking soda
- 1/2 cup citric acid (found in baking or canning sections)
- 1/2 cup Epsom salts (optional, but adds to the bath experience)
- 1 teaspoon water
- 2 teaspoons essential oil (e.g., lavender, orange – optional, for scent)
- 2 teaspoons carrier oil (e.g., coconut oil, almond oil – for moisture)
- Food coloring (optional)
- Plastic egg molds (or silicone egg molds)
- Mixing bowls, whisk
Instructions:
- In a large bowl, whisk together the dry ingredients: baking soda, citric acid, and Epsom salts.
- In a separate small bowl, combine the wet ingredients: water, essential oil, carrier oil, and food coloring.
- Slowly, a few drops at a time, add the wet ingredients to the dry ingredients, whisking constantly. It's crucial to add slowly to prevent premature fizzing. You want the mixture to feel like damp sand – it should hold its shape when squeezed.
- Firmly press the mixture into each half of your plastic egg molds. Press the two halves together tightly.
- Allow the bath bombs to dry and harden in the molds for several hours or overnight.
- Gently remove them from the molds.
The Chemistry Behind It: The fizz in bath bombs comes from the reaction between baking soda (a base) and citric acid (an acid) when they dissolve in water. This reaction releases carbon dioxide gas, creating the bubbly effect. The oils and salts add to the sensory experience. Making bath bombs teaches about careful measurement, understanding dry vs. wet ingredients, and the timing of a chemical reaction.
These experiments offer a taste of the hands-on learning we champion at I'm the Chef Too!. Our cooking STEM kits are designed by mothers and educators to deliver complete, engaging experiences, ensuring kids learn complex subjects through tangible, delicious adventures. To keep the discoveries coming and enjoy the convenience of pre-measured ingredients and specialty supplies, consider joining The Chef's Club. With free shipping on every box, a new educational adventure is delivered to your door every month.
Natural Egg Dyeing
Beyond the usual food coloring, eggs can be dyed using natural pigments, introducing children to basic chemistry and botany.
What you'll need:
- Hard-boiled eggs
- Various natural dyeing materials:
- Purple cabbage (for blue/green)
- Onion skins (for orange/brown)
- Turmeric (for yellow)
- Beets (for pink/red)
- Coffee or black tea (for brown)
- Pots for boiling
- White vinegar
- Strainer
- Jars or bowls
Instructions:
- Prepare your dyes: For each natural material, place a generous amount (e.g., 2 cups chopped cabbage, skins from 4-5 onions) in a separate pot. Cover with water (about 2-3 cups) and add 1-2 tablespoons of white vinegar (the acid helps set the color).
- Bring the mixture to a boil, then reduce heat and simmer for 15-30 minutes, until the water takes on a strong color.
- Strain the liquid into separate jars or bowls, discarding the solids. Let the dye cool.
- Dye the eggs: Carefully place hard-boiled eggs into the cooled dye baths. Make sure they are fully submerged.
- Leave them to soak for a few hours, or even overnight in the refrigerator for deeper colors.
- Remove the eggs and let them dry on a wire rack.
The Chemistry Behind It: This activity explores the concept of natural pigments and how pH (acidity/alkalinity) can affect color. The vinegar, being an acid, helps extract the pigments from the plant material and also helps the dye adhere to the eggshell. For example, purple cabbage contains anthocyanins, which are natural indicators that change color based on pH – acidic solutions make them red, neutral solutions make them purple, and basic solutions make them blue/green. This is a simple, beautiful way to see chemical interactions at play in everyday life.
Engaging Biology and Life Science with Eggs
Eggs aren't just for physical and chemical reactions; they also offer incredible insights into fundamental biological processes.
The Osmosis Egg: Cell Membranes in Action
Building on the naked egg experiment, this activity introduces the concept of osmosis and semi-permeable membranes.
What you'll need:
- Naked eggs (prepared from the previous experiment)
- Clear glasses or jars
- Different liquids: plain water, salt water (very salty), corn syrup, colored water (using food coloring).
- A ruler for measurement.
Instructions:
- After preparing your naked eggs, gently measure their circumference or diameter.
- Place one naked egg into each of your glasses.
- Fill each glass with a different liquid: one with plain water, one with very salty water, one with corn syrup, and one with colored water. Ensure the eggs are fully submerged.
- Leave the eggs to soak for 24-48 hours.
- Observe the changes in the eggs. Measure their size again.
The Biology Behind It: The membrane surrounding the naked egg is semi-permeable, meaning it allows small molecules like water to pass through, but blocks larger molecules. Osmosis is the movement of water molecules across a semi-permeable membrane from an area of higher water concentration to an area of lower water concentration.
- Plain Water: The egg has a higher concentration of solutes (like proteins and salts) inside than pure water, so water will move into the egg, causing it to swell.
- Salty Water/Corn Syrup: These solutions have a much higher concentration of solutes than inside the egg. Therefore, water will move out of the egg into the solution, causing the egg to shrink.
- Colored Water: The water molecules, along with the small food coloring molecules, will move into the egg, causing the egg's interior to become colored. This is a visual demonstration of the membrane's permeability.
This experiment vividly illustrates how cells absorb and release water, a vital process for all living organisms. It's a fantastic visual for understanding cell function and transport.
From microscopic cell structures to the vastness of space, science is everywhere! For another awe-inspiring edible adventure that combines science, art, and delicious treats, explore astronomy by creating your own edible solar system with our Galaxy Donut Kit. It's a stellar way to make learning cosmic and fun!
Growing Seeds in Eggshells
Eggs can also be repurposed as miniature planters, offering a hands-on introduction to botany and the life cycle of plants.
What you'll need:
- Clean, empty eggshell halves (carefully crack off the top part and gently rinse)
- Potting soil
- Small seeds (e.g., cress, radish, bean, or herb seeds)
- A tray or egg carton to hold the eggshell planters
- Watering can or spray bottle
Instructions:
- Carefully create a small drainage hole at the bottom of each eggshell half using a pushpin or small nail (adult supervision required).
- Fill each eggshell with potting soil, leaving a little space at the top.
- Plant a few seeds in each eggshell, following the seed packet's instructions for depth.
- Lightly water the soil.
- Place the eggshell planters in an egg carton or tray near a sunny window.
- Keep the soil moist, and observe the seeds as they germinate and grow.
- Once the seedlings are large enough, you can gently crack the eggshell a bit and plant the whole thing directly into a larger pot or garden, as the shell will decompose and provide calcium to the soil.
The Biology Behind It: This activity allows children to observe the process of germination and plant growth firsthand. They'll learn about the essential needs for plant life (water, sunlight, soil/nutrients) and the concept of a life cycle. The eggshell provides a temporary, biodegradable home, demonstrating resourcefulness and environmental awareness. It's a beautiful way to connect with nature and understand the basics of horticulture.
The Art of Egg-sperimentation: Blending Arts with STEM
At I'm the Chef Too!, we firmly believe that STEM and the arts are not separate, but beautifully intertwined. Our unique "edutainment" philosophy emphasizes this connection, and eggs are a perfect canvas for exploring artistic concepts alongside scientific ones.
Marbled Eggs and Creative Decorating
Transforming plain hard-boiled eggs into works of art allows for exploration of design, color, and even properties of liquids.
Activity: Oil and Vinegar Marbled Eggs
What you'll need:
- Hard-boiled eggs
- Food coloring
- Small bowls or cups
- White vinegar
- Vegetable oil
- Paper towels
- Gloves (optional, to prevent stained fingers)
Instructions:
- Prepare colored vinegar: In small bowls, mix about a tablespoon of white vinegar with several drops of different food colorings to create vibrant shades.
- Add oil: Pour a thin layer of vegetable oil (about 1/4 inch) over the colored vinegar in each bowl. The oil will float on top.
- Create patterns: Gently swirl the oil and vinegar with a fork or toothpick to create interesting marbled patterns on the surface.
- Dip the eggs: Carefully roll or dip a hard-boiled egg into the mixture, allowing the oil and colored vinegar to coat the shell. The oil will create resistance, leaving uncolored areas and forming a beautiful marbled effect.
- Remove the egg and blot any excess liquid with a paper towel. Let the eggs dry completely.
The Science and Art Behind It: This activity demonstrates the principle of immiscibility – oil and vinegar don't mix because of their different polarities (oil is non-polar, vinegar/water is polar). The oil creates a resist effect, preventing the dye from adhering to certain areas of the eggshell, resulting in the marbled pattern. Children learn about liquid properties, color mixing, and create unique artistic designs. It’s a wonderful example of how understanding scientific properties can enhance creative expression.
Creative Decorating with Various Materials: Beyond marbling, eggs offer endless possibilities for artistic expression:
- Wax Resist: Draw designs on hard-boiled eggs with a white crayon before dyeing. The wax repels the dye, leaving the design in white.
- Nature Prints: Secure small leaves or flowers onto hard-boiled eggs with a piece of pantyhose before dyeing with natural dyes. The plant material acts as a stencil, leaving an undyed silhouette.
- Mixed Media: Use markers, glitter, stickers, yarn, or fabric scraps to adorn eggs. This encourages fine motor skills, pattern recognition, and imaginative play.
These creative explorations show how broad STEM can be, extending beyond typical laboratory settings into the realm of art and design! If you're looking for more unique cooking and craft adventures that foster both scientific curiosity and artistic flair, be sure to Browse our complete collection of one-time kits. Each kit is a curated experience designed to bring joy and learning to your home.
Edible Egg-Themed Creations
What better way to culminate an egg-themed STEM exploration than with a delicious, edible creation? This connects scientific principles directly to the culinary arts, emphasizing measurement, transformation, and the joy of sharing.
Activity: "Eggs in a Nest" No-Bake Treat
This activity is simple, requires no baking, and allows kids to practice basic measurement and assembly.
What you'll need:
- Shredded coconut (green food coloring optional, for "grass")
- Melted white chocolate or candy melts
- Small candies shaped like eggs (e.g., mini chocolate eggs, jelly beans)
- Cupcake liners or a baking sheet with parchment paper
Instructions:
- If desired, place shredded coconut in a bag with a few drops of green food coloring and shake to create "grass."
- In a bowl, combine the green coconut with a tablespoon or two of melted white chocolate. Mix until the coconut is just coated enough to hold together.
- Spoon small clumps of the mixture into cupcake liners or onto parchment paper, shaping them into small "nests" with an indentation in the center.
- Place 2-3 small egg-shaped candies into each "nest."
- Refrigerate for about 15-30 minutes until the chocolate sets and the nests harden.
The Culinary Art Behind It: This "no-bake" activity focuses on basic culinary concepts like mixing ingredients, understanding texture (how melted chocolate can bind), and assembly. It encourages creativity in decorating and presentation. While it doesn't involve complex chemical reactions like baking, it reinforces the idea that cooking is applied science and an accessible art form. Children practice fine motor skills, follow instructions, and enjoy the tangible, tasty outcome of their efforts.
Whether it’s understanding the physics of an egg drop or the chemistry of a naked egg, these activities bring STEM to life in an engaging, memorable way. Our commitment at I'm the Chef Too! is to provide these unique, hands-on learning experiences, making complex subjects fun and approachable. Ready to make hands-on STEM a regular part of your family's routine? We offer flexible plans, including 3, 6, and 12-month pre-paid subscriptions, perfect for gifting or long-term enrichment. Give the gift of learning that lasts all year with a 12-month subscription to our STEM cooking adventures by joining The Chef's Club today!
Beyond the Shell: Facilitating Learning & Family Bonding
The true value of these egg STEM activities extends far beyond the immediate scientific principles they teach. They are powerful catalysts for developing crucial 21st-century skills and fostering deeper family connections.
At I'm the Chef Too!, our "edutainment" experiences are specifically designed to go beyond mere instruction. Developed by mothers and educators, our approach is rooted in understanding how children truly learn and thrive. We emphasize:
- Screen-Free Engagement: In an increasingly digital world, these hands-on activities provide a much-needed alternative, encouraging direct interaction with materials and concepts.
- Sparking Curiosity: Instead of just providing answers, we aim to ignite a child's natural curiosity, prompting them to ask "why?" and "how?"
- Facilitating Family Bonding: STEM activities become shared adventures, where parents and children collaborate, problem-solve together, and celebrate discoveries side-by-side. These are the moments that build lasting memories and strengthen family ties.
- Teaching Complex Subjects Through Tangible Experiences: Abstract scientific concepts become concrete and understandable when children can see, touch, and even taste the results. This tactile learning deepens comprehension and retention.
Benefits of Hands-On Egg STEM Activities:
- Problem-Solving Skills: From figuring out how to protect an egg in a drop to troubleshooting a crystal growing experiment, children are constantly engaging their critical thinking.
- Observation and Analysis: Kids learn to pay close attention to details, record changes, and draw conclusions based on their observations – the core of the scientific method.
- Hypothesis Formation: Encouraging children to predict outcomes and explain their reasoning helps them develop logical thought processes.
- Fine Motor Skills: Measuring, stirring, cutting, and handling delicate eggs all contribute to the development of dexterity and hand-eye coordination.
- Communication: Discussing experiments, explaining results, and sharing ideas with parents or peers enhances verbal communication and collaborative skills.
- Resilience and Adaptability: When an experiment doesn't go as planned (and often it won't!), children learn to adapt, redesign, and try again, fostering a growth mindset.
- Confidence Building: Successfully completing a challenge or understanding a new concept, even a small one, significantly boosts a child's self-esteem and encourages further exploration.
Tips for Parents and Educators:
- Encourage Questions: Don't just provide answers. Ask open-ended questions like "What do you think will happen next?" or "Why do you think that happened?"
- Embrace the Mess: Science can be messy, and that's part of the fun! Lay down old towels or plastic sheets, have sponges ready, and frame cleanup as part of the process.
- Document Findings: Encourage drawing, writing, or even taking photos to record observations and results. This reinforces the scientific process.
- Celebrate the Process, Not Just the Outcome: It's okay if an egg breaks or crystals don't grow perfectly. The learning is in the trying, the questioning, and the redesigning. Mistakes are opportunities for deeper understanding.
- Connect to Real Life: Point out how the principles observed in these egg experiments apply to the world around us – from bridges (egg arch strength) to digestion (osmosis).
Remember, the goal isn't to guarantee your child becomes a top scientist, but to foster a love for learning, curiosity, and the confidence to explore. These egg STEM activities provide a joyful, accessible pathway to achieving just that, while creating cherished family memories along the way.
Conclusion
As we've explored, the humble egg is anything but ordinary. It's a fantastic, versatile, and accessible tool for igniting a passion for STEM in children. From the incredible strength of its shell to the fascinating chemical reactions it can undergo and the biological processes it reveals, eggs offer a unique, tangible way to understand the world around us. These hands-on activities encourage critical thinking, problem-solving, creativity, and the joy of discovery, all while creating precious moments of family bonding.
At I'm the Chef Too!, we are committed to providing "edutainment" experiences that blend food, STEM, and the arts, fostering curiosity and creativity in every child. Our unique cooking STEM kits, developed by mothers and educators, offer a screen-free alternative that brings learning to life through delicious, hands-on adventures. We believe that when education is fun and tangible, it becomes a lifelong journey of exploration and wonder.
Ready to whisk up some incredible learning adventures in your own kitchen? Make hands-on STEM a regular, exciting part of your family's routine without the hassle of planning and shopping for supplies. Give the gift of learning that lasts all year with a 12-month subscription to our STEM cooking adventures, complete with pre-measured ingredients and specialty supplies delivered right to your door with free shipping in the US. Join The Chef's Club today and embark on a continuous journey of delicious discovery!
FAQ
Q1: Are these egg STEM activities safe for all ages? A1: Most of these activities can be adapted for a wide range of ages. For younger children (preschool-early elementary), focus on the observation and sensory aspects, and ensure all steps involving heat, sharp objects, or chemicals (like vinegar or borax) are handled by an adult. For older children, encourage more independent planning, hypothesis testing, and deeper scientific explanations. Adult supervision is always recommended, especially when working with raw eggs or hot water.
Q2: What should I do if an experiment doesn't work as expected? A2: Don't worry, that's part of the scientific process! If an experiment doesn't yield the expected results, it's a fantastic opportunity for learning. Encourage your child to think like a scientist:
- What variables might have changed? (e.g., water temperature, amount of ingredient, time)
- What could be done differently next time?
- Can we re-test with adjustments? Emphasize that failures are simply steps on the path to discovery.
Q3: How can I minimize the mess from these egg activities? A3: While some mess is inevitable and often part of the fun, you can prepare by:
- Laying down old towels, newspaper, or a plastic tablecloth on your work surface.
- Having a designated "mess zone" if possible.
- Using trays or large bowls to contain spills.
- Having wet rags and paper towels on hand for immediate cleanup.
- Considering using hard-boiled or plastic eggs for certain activities (like the egg drop or catapult) if you're particularly concerned about raw egg mess.
Q4: Can these activities be adapted for groups or classrooms? A4: Absolutely! Many egg STEM activities, especially the Egg Drop Challenge, Egg Catapults, and Crystal Eggshells, are excellent for group settings. They encourage teamwork, collaborative problem-solving, and shared learning. We offer versatile programs for schools and groups, available with or without food components, designed to bring our hands-on STEM adventures to your classroom, camp, or homeschool co-op. Learn more about our school and group programs to see how we can support your educational environment.
Q5: What's the best way to get started with STEM activities at home if I'm new to this? A5: Start simple and don't feel overwhelmed! Begin with one or two activities that use materials you already have. Focus on the process of exploration and curiosity rather than perfect results. Our mission at I'm the Chef Too! is to make STEM learning fun and accessible. Our cooking STEM kits are designed by mothers and educators to provide complete, pre-measured experiences that take the guesswork out of planning. They're a fantastic way to jumpstart your family's STEM journey with confidence and a whole lot of delicious fun!