Handmade Valentine’s Card Craft for Kids
Table of Contents
- Introduction
- Why Homemade Valentine's Cards Matter: Beyond Just a Craft
- Setting Up Your Valentine's Craft Station: Fun Without the Fuss
- Easy Valentines Card Craft for Kids: Ideas for Every Age and Skill Level
- Bringing STEM & Art to Life in Your Valentine's Cards
- Making it Personal: Messages, Puns, and Thoughtful Touches
- The I'm the Chef Too! Difference: Where Learning is Always Delicious
- Tips for Parents and Educators: Nurturing Young Creators
- Conclusion
- Frequently Asked Questions (FAQ) about Valentine's Card Craft for Kids
Does the idea of a child’s handmade valentine bring a smile to your face, perhaps even a pang of nostalgia for your own childhood crafting adventures? There’s a unique magic in a card lovingly crafted by little hands, a tangible expression of affection that store-bought versions simply can’t replicate. In an age dominated by screens and instant gratification, taking the time to create something with care offers children invaluable lessons—and us, cherished keepsakes. It’s not just about the final product; it’s about the joy of the process, the sparkle of imagination, and the quiet satisfaction of giving.
Introduction
Imagine a quiet afternoon, scissors snipping, glue drying, and a kaleidoscope of paper, glitter, and heartfelt intentions spread across the kitchen table. This isn't just a scene of crafting; it's a vibrant learning laboratory, where young minds explore art, science, and the profound joy of connection. Our mission at I'm the Chef Too! is to transform ordinary moments into extraordinary learning experiences, blending food, STEM, and the arts into what we lovingly call "edutainment." We believe that the best lessons are often the ones you can touch, taste, and create, and making a special valentines card craft for kids is a perfect example of this philosophy in action.
This comprehensive guide will dive deep into the wonderful world of homemade Valentine’s cards. We’ll explore why these simple crafts are so important for children’s development, from fostering fine motor skills to sparking scientific curiosity. We'll equip you with practical tips for setting up a stress-free crafting station, share a treasure trove of easy-to-follow ideas for every age and skill level, and reveal how these creative endeavors seamlessly integrate with STEM and artistic principles. Our goal is to inspire you to embrace the glue, glitter, and giggles, turning Valentine’s Day into an opportunity for hands-on learning, heartfelt expression, and unforgettable family bonding. Get ready to discover how a simple card can become a powerful tool for education and connection, proving that the most meaningful gifts often come from the heart, made with love.
Why Homemade Valentine's Cards Matter: Beyond Just a Craft
At I'm the Chef Too!, we wholeheartedly believe in the power of hands-on learning, and a valentines card craft for kids offers a spectacular opportunity to put this belief into practice. These aren't just simple pieces of paper; they are canvases for development, gateways to emotional expression, and platforms for foundational skill-building. When children engage in making homemade Valentine's cards, they're not just passing the time; they're actively developing a wide array of cognitive, emotional, and physical skills that are crucial for their growth.
Emotional Connection & Thoughtfulness
One of the most profound benefits of creating a handmade card is the cultivation of empathy and thoughtfulness. In our increasingly digital world, children often communicate through quick texts or emojis. A physical card, however, requires them to consider the recipient, think about what makes that person special, and express their feelings in a tangible way. This process teaches them the value of personal effort and the joy of making someone else feel loved and appreciated. It’s a lesson in giving, in understanding that a gift from the heart carries immeasurable value, far beyond any monetary cost. This deepens their understanding of relationships and the importance of expressing affection, strengthening bonds with family and friends.
Sparking Creativity and Imagination
A blank sheet of paper, a pile of craft supplies – these are the ingredients for pure imagination. When children are given the freedom to create, their minds become a playground of possibilities. Homemade Valentine’s cards encourage kids to think outside the box, experiment with colors, textures, and designs, and bring their unique visions to life. There's no right or wrong way to make a Valentine, which empowers children to trust their instincts and express their individuality. This open-ended creativity is exactly what we champion at I'm the Chef Too!, where our kits blend the wonder of imagination with the excitement of discovery. Whether they’re crafting a whimsical creature or a geometric design, every choice they make is a step in developing their creative problem-solving skills, which are transferable to all areas of life, from academics to future careers.
Developing Essential Skills (Fine Motor, Problem-Solving, Patience)
The act of making a card is a workout for little hands and minds! Each step in the process, from cutting shapes and gluing pieces to drawing details and writing messages, contributes to the development of essential skills:
- Fine Motor Skills: Holding scissors, manipulating small embellishments, carefully applying glue, and precise drawing all refine hand-eye coordination and strengthen the small muscles in the hands and fingers. These skills are fundamental for tasks like writing, buttoning clothes, and using utensils.
- Problem-Solving: What if the glitter doesn't stick? How can I make this heart pop up? Children naturally encounter small challenges as they craft, forcing them to think critically and find solutions. They learn to adapt, experiment, and persist, building resilience along the way.
- Patience and Concentration: Crafting requires focus and sustained attention. Waiting for glue to dry, carefully cutting along a line, or meticulously decorating a small area teaches children the value of patience and the satisfaction of seeing a project through to completion. These are invaluable traits for academic success and everyday life.
Screen-Free Engagement and Family Bonding
In a world increasingly tethered to digital devices, providing screen-free educational alternatives is at the heart of what we do at I'm the Chef Too!. A valentines card craft for kids offers a wonderful opportunity for children to unplug and engage in a tangible activity. More than that, it creates a perfect setting for family bonding. Sitting together, sharing ideas, helping with tricky cuts, and laughing over glitter mishaps forge precious memories. These shared experiences are not only fun but also reinforce positive family dynamics, creating a supportive environment where children feel loved and valued. Our kits are designed with this very purpose in mind, facilitating connections and shared discoveries that go beyond the kitchen. Ready to explore more ways to spark curiosity and creativity while fostering family bonding? Join The Chef's Club and get a new adventure delivered to your door every month with free shipping! It's the perfect way to keep the hands-on learning going all year long.
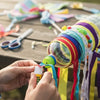
Setting Up Your Valentine's Craft Station: Fun Without the Fuss
Before the crafting magic can truly begin, a little preparation goes a long way. Creating an inviting and functional craft station can make all the difference, transforming potential chaos into a joyful, manageable experience for both children and adults. At I'm the Chef Too!, we understand that convenience and organization are key to fostering creativity, and the same principle applies to setting up your craft space for making a valentines card craft for kids.
Essential Supplies List: The Building Blocks of Creativity
You don't need a craft store's entire inventory to create amazing Valentine's cards. Often, the most imaginative creations spring from a limited, well-chosen set of basics. Here’s a list to get you started:
-
Paper:
- Cardstock: White, red, pink, and purple cardstock forms the sturdy base for cards. It holds up well to glue, paint, and embellishments.
- Construction Paper: A rainbow of colors for cutting shapes, layering, and adding accents.
- Scrapbook Paper: Fun patterns and textures can add visual interest.
- Recycled Paper: Old magazines, newspapers, even junk mail can be cut into interesting shapes for collages.
-
Cutting Tools:
- Kid-Safe Scissors: Essential for developing fine motor skills.
- Paper Punches: Heart shapes, circles, or stars can easily create decorative elements, especially helpful for younger children.
-
Adhesives:
- Glue Sticks: Less messy for younger kids and for attaching paper.
- Liquid School Glue: Stronger for heavier embellishments like glitter, buttons, or fabric.
- Tape: Double-sided tape can be useful for quick adhesion without waiting for drying.
-
Coloring & Decorating:
- Markers, Crayons, Colored Pencils: A diverse set allows for varied artistic expression.
- Stamps and Ink Pads: Simple heart or letter stamps can add personalized touches.
- Stickers: Valentine’s themed stickers, glitter stickers, or even plain shape stickers are always a hit.
-
Embellishments:
- Glitter: A classic for Valentine’s Day (though manage expectations for mess!). Glitter glue can be a less messy alternative.
- Sequins, Buttons, Pom-poms: Add texture and sparkle.
- Yarn, Ribbons, String: For threading, tying bows, or creating dimensional elements.
Creative Add-ons: Elevating Your Craft Game
Once you have the basics, consider adding a few unique items to inspire even more creativity. These can turn a simple valentines card craft for kids into a true masterpiece:
- Natural Elements: Small dried flowers, leaves (pressed), or even tiny pebbles can add an organic touch.
- Fabric Scraps: Felt, lace, or patterned cotton can introduce lovely textures.
- Washi Tape: Comes in endless patterns and is easy for kids to tear and stick, perfect for borders or decorative stripes.
- Salt: For salt painting effects (after applying liquid glue, sprinkle salt, then add watercolor).
- Q-tips: Excellent for pointillism or small detail painting.
- Potatoes: Cut in half with cookie cutters to create custom stamps.
Organizing for Success: Prep Work and Managing Mess
A well-organized craft station fosters independence and minimizes frustration. Think about setting up a "maker space" where everything is within reach and cleanup is simplified.
- Designate a Workspace: Cover a table with newspaper, a plastic tablecloth, or an old sheet. This protects surfaces and makes cleanup easier.
- Pre-Cut Shapes: For younger children, pre-cutting basic shapes (hearts, squares, strips) can remove a barrier to entry and let them focus on assembly and decoration.
- Containers for Supplies: Use small bins, muffin tins, or even old egg cartons to organize various embellishments, making them easy to see and access.
- Small Portions: Dispense glue, glitter, or paint into small, shallow dishes to control amounts and reduce waste.
- Wet Wipes or Damp Cloths: Keep these handy for sticky fingers and quick spills.
- Set Clear Expectations: Before starting, talk about how to use tools safely, how much glue is enough, and how to help clean up afterward.
Safety First in the Craft Kitchen
Just like in our I'm the Chef Too! kitchens, safety is paramount in your craft station.
- Adult Supervision: Always supervise young children, especially when using scissors or glue.
- Age-Appropriate Tools: Ensure scissors are blunt-tipped and easy for small hands to operate.
- Non-Toxic Materials: Confirm all glues, paints, and markers are labeled non-toxic.
- Choking Hazards: Be mindful of small embellishments like buttons or sequins, especially when crafting with toddlers or children who still put objects in their mouths. Store them safely out of reach when not in use.
By thoughtfully setting up your craft station, you're not just preparing for an activity; you're creating an environment where a valentines card craft for kids can flourish, sparking curiosity and creativity in a joyful and secure setting. If you're looking for more ways to easily bring educational and fun experiences into your home without all the planning, remember that I'm the Chef Too! offers a variety of One-Time Kits for a single purchase, perfect for browsing when you need a themed adventure!
Easy Valentines Card Craft for Kids: Ideas for Every Age and Skill Level
Now for the fun part – the ideas! We’ve gathered a fantastic collection of valentines card craft for kids that cater to different ages and interests, ensuring every child can find a project that sparks their creativity. Remember, the goal isn't perfection, but the joy of creation and expression.
Simple & Sweet: Toddler and Preschooler Friendly Crafts
For our youngest crafters, the focus is on sensory exploration, developing basic fine motor skills, and immediate gratification. These crafts are designed to be safe, easy, and engaging for little hands.
Fingerprint Hearts
- What you need: Cardstock, washable paint (red, pink, purple), markers.
- How to do it: Fold cardstock in half to create a card. Dip a child's thumb or fingertip into paint and make two overlapping prints to form a heart shape. Repeat across the card. Once dry, children can add details with markers or an adult can write a sweet message.
- Why it's great: Excellent for developing fine motor control and hand-eye coordination. It's a highly personalized and adorable keepsake.
Q-tip Pointillism Hearts
- What you need: Cardstock, washable paint, Q-tips.
- How to do it: Draw large heart outlines on cardstock. Provide different colored paints in shallow dishes. Children use Q-tips to make dots of color inside the heart outlines, filling them in with a pointillist technique.
- Why it's great: Introduces a simple art technique, improves fine motor precision, and teaches about color mixing.
Potato Print Hearts
- What you need: Potatoes, small heart-shaped cookie cutter (or knife for adult use), washable paint, cardstock.
- How to do it: An adult cuts a potato in half, then presses a cookie cutter into the cut surface (or carves a heart shape). Dab the potato stamp onto a shallow plate of paint, then press onto cardstock to make heart prints.
- Why it's great: A unique way to create stamps, teaches about patterns and repetition, and is surprisingly satisfying for little ones.
Squishy Heart Cards (Sensory Play)
- What you need: Ziploc bags, clear hair gel, red/pink glitter, small heart-shaped sequins, strong tape, cardstock.
- How to do it: Fill a Ziploc bag with hair gel, glitter, and sequins. Seal tightly, removing as much air as possible. Tape the seal shut securely. Attach the bag to the inside of a folded card with strong double-sided tape or hot glue (adult only). Children can squish the heart contents around.
- Why it's great: Wonderful for sensory exploration, calming, and visually stimulating.
Collage Hearts
- What you need: Cardstock, glue stick, various paper scraps (construction paper, magazine cutouts, fabric scraps, old artwork), child-safe scissors (optional).
- How to do it: Draw a large heart outline on cardstock. Children tear or cut paper scraps and glue them within the heart shape, overlapping and layering to create a textured collage.
- Why it's great: Boosts fine motor skills, encourages creativity with materials, and teaches about texture and composition.
Cupcake Liner Cards
- What you need: Cardstock, colorful cupcake liners, glue, markers.
- How to do it: Flatten cupcake liners. Fold them in half or quarters to create petal-like shapes. Glue them onto cardstock to form flowers, butterflies, or abstract designs.
- Why it's great: Easy to manipulate, introduces 3D elements, and allows for creative arrangements.
Handprint/Footprint Cards
- What you need: Cardstock, washable paint, markers.
- How to do it: Paint a child's hand or foot (pink or red works well!) and press it onto cardstock. Once dry, decorate around the print. A common design is a handprint holding a heart, or two foot prints forming a butterfly with a heart body.
- Why it's great: Creates a truly personal keepsake, captures a moment in time, and is a gentle sensory experience.
Creative & Colorful: Elementary Age Explorations
For school-aged children, we can introduce more complex techniques, encouraging them to combine different elements and explore artistic principles.
Watercolor Resist Cards (Wax Crayon or Glue Resist)
- What you need: Watercolor paper or thick cardstock, white crayon (for wax resist) OR black glue (glue mixed with black paint), watercolors, brushes.
- How to do it (Wax Resist): Children draw messages or designs on cardstock with a white crayon. When they paint over it with watercolors, the crayon resists the paint, revealing the hidden design.
- How to do it (Black Glue Resist): Draw outlines of hearts or designs with black glue (let dry completely, ideally overnight). Then, children paint inside the outlined sections with watercolors.
- Why it's great: Introduces the concept of resist art, explores color blending, and adds an element of surprise.
Spin Art Hearts (Salad Spinner Method)
- What you need: Salad spinner, cardstock cut into heart shapes, liquid paint (thinned slightly), tape (optional).
- How to do it: Tape a heart-shaped piece of cardstock to the bottom of a salad spinner. Drip small amounts of different colored paints onto the heart. Close the lid and spin rapidly. Open to reveal a unique, abstract artwork.
- Why it's great: Explores centrifugal force (a fun physics concept!), creates beautiful, unpredictable patterns, and is incredibly engaging.
Black Glue Stained Glass Hearts
- What you need: Cardstock, black glue (glue mixed with black paint), tissue paper in various colors, liquid glue.
- How to do it: Draw intricate heart designs on cardstock with black glue, creating sections like a stained-glass window. Let dry. Turn the card over, and glue small pieces of colored tissue paper over each section. Hold it up to the light for a stained-glass effect.
- Why it's great: Combines drawing, fine motor skills, and understanding of light and color.
Marbled Paper Hearts (Shaving Cream or Oil/Paint Methods)
- What you need: Shallow tray, shaving cream OR water and oil, liquid watercolors or acrylic paints, dropper/popsicle sticks, cardstock, scraper (old credit card).
- How to do it (Shaving Cream): Spread shaving cream in a tray. Drip paints onto the cream, swirl gently with a stick. Lay cardstock on top, press lightly, lift, and scrape off excess cream to reveal a marbled pattern.
- Why it's great: A fascinating process art technique, demonstrates how different liquids interact, and creates unique, beautiful papers for cutting into hearts.
Yarn Wrapped Heart Cards
- What you need: Cardstock, yarn in various colors, liquid glue, scissors, pencil.
- How to do it: Draw a heart outline on cardstock. Apply a generous layer of glue within the heart. Children then carefully lay strands of yarn within the glue, wrapping and swirling to fill the heart shape.
- Why it's great: Develops fine motor skills, introduces texture, and allows for vibrant color combinations.
Puffy Paint Hearts
- What you need: Cardstock, self-rising flour, salt, water, liquid watercolors or food coloring, microwave (optional).
- How to do it: Mix equal parts flour, salt, and water. Add drops of food coloring for desired colors. Put mixture into squeeze bottles or Ziploc bags with a corner snipped. Children draw heart designs on cardstock, squeezing the puffy paint. Microwave for 10-30 seconds (adult supervision required) to make it "puff" up, or let air dry for a more subtle effect.
- Why it's great: A fun chemistry experiment (the puffing!), explores texture, and creates a unique 3D effect.
Crayon Scratch Art Cards
- What you need: Thick cardstock, light-colored crayons, black crayon or black tempera paint, toothpick/skewer.
- How to do it: Have children color a piece of cardstock entirely with various bright, light-colored crayons. Press hard for solid coverage. Then, completely cover the colored surface with a thick layer of black crayon or black paint (if using paint, let dry thoroughly). Once dry, use a toothpick or skewer to scratch designs, messages, or hearts into the black surface, revealing the colors underneath.
- Why it's great: Teaches about layering, reveals a magical transformation, and encourages detailed design work.
Recycled Material Cards
- What you need: Cardstock, glue, collection of recycled materials (old buttons, fabric scraps, newspaper/magazine clippings, bottle caps, bits of ribbon, cereal box cutouts).
- How to do it: Encourage children to use their imagination to create a collage or a specific design using only recycled materials. They can cut heart shapes from cereal boxes or use bottle caps as bases for smaller designs.
- Why it's great: Promotes environmental awareness, encourages resourcefulness, and sparks creative problem-solving with unusual textures and shapes.
Ingenious & Interactive: Older Kids and STEM Integration
For older children, we can introduce more complex constructions, integrate STEM concepts directly, and encourage detailed design and planning.
Pop-Up Cards (Engineering Principles, 3D Design)
Pop-up cards are fantastic for introducing basic engineering concepts and 3D design. They require planning, precision, and an understanding of how folds and cuts create dimension.
-
Basic Pop-Up Heart:
- What you need: Two pieces of cardstock (one for the card base, one for the pop-up), scissors, glue stick.
- How to do it: Fold the card base in half. Cut two parallel slits into the fold (not too long!). Push the cut section inwards to create a "stand." Cut a separate heart shape and glue it onto this stand so it pops forward when the card opens.
- Why it's great: Teaches basic paper engineering, understanding folds and levers to create movement.
- Explosion Cards: These are a step up, with multiple pop-up elements. They often involve cutting multiple slits and attaching different shapes.
- Animal Pop-Ups: Adapt the basic pop-up technique to make animals pop out. For example, a bear holding a heart, a cat with a message, or even whimsical gnomes and axolotls (as seen in some inspirations). This adds a narrative element to the engineering.
- Why it's great: Enhances spatial reasoning, sequential thinking, and problem-solving.
Quilled Hearts (Geometry, Patience, Fine Motor)
Quilling, the art of rolling strips of paper, is a beautiful way to create intricate designs, perfect for a detailed valentines card craft for kids.
- What you need: Quilling paper strips (or thin strips of colored paper), quilling tool (or toothpick/knitting needle), liquid glue, cardstock.
- How to do it: Children use the quilling tool to roll paper strips into tight or loose coils. These coils can then be shaped into teardrops, eyes, or marquises, and glued onto a cardstock base to form heart patterns or words.
- Why it's great: Develops exceptional fine motor control and patience, introduces geometric shapes and patterns, and encourages intricate design.
Secret Message Cards (Simple Chemistry/Invisible Ink, Logic Puzzles)
Adding a secret message brings an element of mystery and a hint of chemistry!
- What you need: Cardstock, lemon juice OR white crayon, cotton swab or paintbrush, heat source (adult supervision, for lemon juice) OR markers.
- How to do it (Lemon Juice): Write a message on cardstock with a cotton swab dipped in lemon juice. Let it dry completely – the message will disappear. To reveal, hold the card carefully over a heat source (like a light bulb or toaster, with adult supervision) or iron it. The acid in the lemon juice will oxidize and turn brown.
- How to do it (White Crayon Resist): Write a secret message with a white crayon on white cardstock. To reveal, the recipient can color over the card with a light marker, and the crayon message will "resist" the color.
- Why it's great: Introduces basic chemical reactions (oxidation) or the concept of resist properties, and adds an exciting, interactive element to the card.
Punny Animal Cards (Language Arts, Humor)
Combining clever wordplay with adorable animal illustrations is a fantastic way to engage older kids in both art and language arts.
- "Bee Mine" Bee Card: Cut out a bee body from yellow and black striped paper. Add heart-shaped wings. The card reads, "Will you bee mine?"
- "I'm Not Lion" Lion Card: Craft a lion from heart shapes (large heart for head, smaller hearts for mane). The card states, "I love you and I'm not lion!"
- "You are Purrrrfect" Cat/Tiger Card: Make a cute cat or tiger face from paper and add 3D elements like whiskers. The message: "You are purrrrfect!"
- "I'm Stuck on You" Cactus Card: Craft a simple paper cactus and decorate with small heart "flowers." The pun: "I'm stuck on you, Valentine!"
- "I Whaley Whaley Love You" Whale Card: Create a cute whale with heart-shaped flukes. Message: "I whaley whaley love you!"
- Why it's great: Encourages creative writing, wordplay, and pairing text with visual design, adding a dose of humor.
Stenciled/Stamped Cards (Pattern, Design, Repetition)
- What you need: Cardstock, stencils (store-bought or DIY from cardboard), paint/ink pads, sponges, or stamps (DIY from foam/corks).
- How to do it: Use stencils to create repeating patterns or a central design. Children can make their own stamps by gluing craft foam shapes onto corks or lids.
- Why it's great: Explores concepts of pattern, repetition, and design, and can be used to create sophisticated-looking cards.
DIY Scratch-Off Cards (Design, Basic Chemistry)
- What you need: Cardstock, clear packing tape, dish soap, acrylic paint, brush.
- How to do it: Write a secret message or draw a picture on the card. Cover the message neatly with clear packing tape. In a small bowl, mix one part dish soap with two parts acrylic paint (e.g., black or silver). Paint over the taped message. Let dry completely and apply a second coat if needed. Recipients can scratch off the paint to reveal the message.
- Why it's great: A fun "reveal" activity, introduces basic properties of materials, and is exciting for older kids.
Glitter Rock Valentines (Geology Tie-in, Texture)
While not strictly a "card," these make for unique, tangible tokens of affection that can be presented with a small accompanying card.
- What you need: Small, smooth rocks, liquid glue, various colors of glitter, cardstock for accompanying message.
- How to do it: Children paint a layer of glue onto a rock, then sprinkle generously with glitter. Let dry. Attach a small tag or card with a message like "You rock!"
- Why it's great: Connects to nature and geology, explores texture, and makes for a unique, keepsake gift.
These ideas provide a fantastic range of options for making a valentines card craft for kids, encouraging them to develop skills while expressing their creativity and affection. Remember, at I'm the Chef Too!, we're all about fostering this kind of hands-on learning, making education delicious and fun!
Bringing STEM & Art to Life in Your Valentine's Cards
At I'm the Chef Too!, we thrive on the intersection of Science, Technology, Engineering, and Math (STEM) with the boundless world of art. It's truly our sweet spot, and surprisingly, a simple valentines card craft for kids offers countless opportunities to explore these fascinating connections. When children are engaged in crafting, they're not just being creative; they're acting as young scientists, engineers, and artists, often without even realizing it!
The Science of Colors (Mixing, Light)
Every time a child picks up a paintbrush or a set of markers for their Valentine's card, they're stepping into the realm of chemistry and physics.
- Color Mixing: Combining red and yellow paints to make orange, or blue and red for purple, is a hands-on experiment in subtractive color theory. They learn about primary and secondary colors through direct observation.
- Light and Reflection: Using glitter, metallic papers, or glossy finishes on cards demonstrates how light interacts with different surfaces, creating sparkle and shine. The stained-glass effect of tissue paper cards shows how light passes through translucent materials, revealing vibrant hues.
- Chemical Reactions: Remember the puffy paint cards using self-rising flour? The "puffing" in the microwave is a direct result of a chemical reaction, where baking powder releases gases when heated. Even the lemon juice invisible ink is a chemical reaction at play.
Engineering Pop-Up Structures
Pop-up cards are miniature marvels of engineering! They challenge children to think in three dimensions and understand basic mechanical principles.
- Structural Design: Kids learn about how cuts and folds create a stable platform. They experiment with different angles and depths of cuts to see how it affects the "pop" of their design.
- Levers and Springs: The mechanisms behind pop-ups are simplified versions of levers and springs, demonstrating how force can create movement and dimension.
- Spatial Reasoning: Planning where to make cuts and how to attach elements requires strong spatial reasoning – the ability to visualize objects in space and how they relate to each other. This is a foundational skill in engineering and architecture.
The Math of Symmetry and Shapes
Math isn't just about numbers; it's about patterns, shapes, and symmetry, all of which are abundant in a valentines card craft for kids.
- Geometry: Cutting perfect hearts, squares, or circles introduces children to basic geometric shapes. Folding a card in half and cutting shapes along the fold teaches about symmetry.
- Measurement: Deciding how long a strip of paper should be for quilling, or how wide a cut needs to be for a pop-up, involves informal measurement and estimation.
- Patterns and Repetition: Stamped cards, collages, and layered designs all explore mathematical patterns and sequences.
Artistic Expression: Texture, Mediums, Design
Art is where all these STEM concepts beautifully culminate into personal expression.
- Exploring Mediums: Working with paint, glue, yarn, paper, and natural elements introduces children to diverse artistic mediums and their unique properties.
- Texture and Sensory Input: From the smoothness of cardstock to the roughness of glitter, the soft squish of a sensory bag, or the raised feel of puffy paint, these crafts engage the sense of touch, enriching the artistic experience.
- Design Principles: Even young children instinctively use principles like balance, contrast, and focal points as they arrange elements on their cards. They learn what looks appealing and how to convey a message visually.
Beyond the Card: Pairing with Edible STEM Fun
We believe that learning should never stop at one activity. A fantastic way to extend the STEM and art exploration from your valentines card craft for kids is to dive into our unique, hands-on cooking adventures. Imagine crafting a beautiful, glittering space-themed card, then continuing the cosmic journey by creating an edible solar system in the kitchen!
At I'm the Chef Too!, our kits are designed by mothers and educators to blend science, technology, engineering, art, and math with delicious culinary creations. They offer a tangible, multisensory way to explore complex subjects. For instance, after making a "Bee Mine" card, you could bake something together where you learn about the science of yeast making dough rise (biology/chemistry) or the math of measuring ingredients.
Our approach reinforces the idea that learning is all around us, in every activity, from crafting a card to baking a treat. It’s about igniting curiosity, fostering a love for learning, and building confidence in a fun, screen-free environment. Ready to turn more moments into exciting educational adventures? Join The Chef's Club and enjoy a new themed kit delivered to your door every month, complete with pre-measured dry ingredients and specialty supplies, all with free shipping!
Making it Personal: Messages, Puns, and Thoughtful Touches
The true heart of any valentines card craft for kids lies not just in the glitter and glue, but in the personal touch. It’s the unique message, the specific design chosen for a particular person, and the genuine emotion poured into it that elevates a handmade card from a craft project to a treasured keepsake. This aspect of card-making is invaluable for developing emotional intelligence and communication skills.
Encouraging Originality and Self-Expression
While our ideas provide a great starting point, encourage your child to make each card uniquely their own. Ask open-ended questions like: "What does Grandma love?" or "What colors make you think of your best friend?" This prompts them to think critically about the recipient and tailor their creation.
- No two alike: Emphasize that every card will be special because they made it. There's no need for mass production or identical cards for every classmate. The beauty is in the individuality.
- Freedom of Choice: Let them pick the colors, the embellishments, and the design elements. Even if it seems unconventional to you, allowing them autonomy fosters confidence and ownership of their creation.
- Artist's Signature: Encourage them to sign their name proudly, perhaps with a self-portrait or a thumbprint.
Age-Appropriate Messaging
Helping children articulate their feelings through words is just as important as the visual design.
- For Toddlers & Preschoolers: Keep it simple. "I love you," "You are special," or even just their name and a big heart drawn by them is perfect. An adult can write a message from the child if they dictate it.
- For Elementary Age Kids: This is where the punny cards truly shine! "You're a-maze-ing," "You're the apple of my eye," or "I love you to pieces!" (with puzzle piece decorations) are fun and engaging. Encourage them to write about a specific memory or something they appreciate about the person.
- For Older Kids: They can delve into more personal messages, inside jokes, or reflective thoughts. Encourage them to think about gratitude, friendship, and the different kinds of love (family, friends, pets).
Adding Photos and Keepsakes
Integrating personal elements takes a card to the next level, making it truly one-of-a-kind.
- Photos: Print small photos of your child with the recipient (e.g., child with grandparent, child with pet, child with a sibling). These can be glued onto the card. A "wallet-sized" photo for a pop-up card is especially charming.
- Drawings: Have your child draw a picture of themselves with the recipient, or a picture representing a shared favorite activity.
- Small Keepsakes: If appropriate and safe, small, flat keepsakes can be attached. This could be a pressed flower from a favorite walk, a small piece of a special fabric, or even a tiny drawing that holds meaning. Always ensure it's securely attached and not a choking hazard.
By guiding children to infuse their valentines card craft for kids with personal touches, we help them understand the profound impact of genuine connection and heartfelt expression. It teaches them that the most cherished gifts often come wrapped in thought and sincerity, making the act of giving as rewarding as receiving. These personalized creations are more than just cards; they are tangible memories, brimming with love and individuality.
The I'm the Chef Too! Difference: Where Learning is Always Delicious
At I'm the Chef Too!, our heart beats with a passion for sparking curiosity and creativity in children. We believe that true learning flourishes when it's engaging, hands-on, and utterly joyful. Our unique approach seamlessly blends food, STEM, and the arts into what we affectionately call "edutainment" experiences. This philosophy is deeply rooted in the understanding that children learn best by doing, by exploring, and by making tangible connections with the world around them – much like the rich learning that unfolds during a valentines card craft for kids.
We are mothers and educators ourselves, and we know the challenges of finding meaningful, screen-free activities that genuinely educate and entertain. That's why we meticulously develop each of our kits, ensuring they teach complex subjects through delicious cooking adventures. Imagine learning about geology while excavating "fudgy fossils," or exploring astronomy as you create an edible galaxy. These aren't just recipes; they're comprehensive experiences designed to ignite a lifelong love for learning.
Our mission extends beyond the individual child; it's about fostering family bonding. We provide everything you need for a complete, enriching experience, turning kitchen time into quality time. With pre-measured dry ingredients and specialty supplies, our kits simplify the process, allowing you to focus on the fun and the learning, without the stress of grocery lists or complicated preparations. This convenience is a cornerstone of our offering, ensuring that a new adventure is always within reach.
Just as a handmade Valentine's card carries a piece of a child's heart and effort, our kits are crafted to deliver unforgettable moments of discovery and delight. They are a direct antidote to passive screen time, offering an active, creative, and delicious alternative that engages all the senses. We don't promise your child will become a top scientist overnight, but we do promise to foster a love for learning, build confidence, develop key skills, and create joyful family memories that will last a lifetime. Every box is an opportunity to experiment, to problem-solve, and to savor the sweet taste of success together.
Ready to bring more innovative learning and delicious discoveries into your home every month? Join The Chef's Club today and receive a new, exciting culinary STEM adventure delivered right to your door with free shipping in the US. It's the perfect way to ensure continuous screen-free educational fun and family bonding, offering flexible 3, 6, and 12-month pre-paid plans that make for truly special gifts or ongoing enrichment.
Tips for Parents and Educators: Nurturing Young Creators
Whether you're a parent guiding a single child or an educator overseeing a classroom of budding artists, nurturing creativity in children requires a thoughtful approach. At I'm the Chef Too!, we recognize the vital role adults play in fostering a love for learning and hands-on exploration. Here are some valuable tips to make any valentines card craft for kids, or any creative endeavor, a positive and enriching experience.
Focus on the Process, Not Perfection
This is perhaps the most crucial tip. When children create, their joy comes from the act of making, experimenting, and discovering. If the focus shifts to creating a "perfect" product, it can stifle creativity, lead to frustration, and diminish the intrinsic motivation to engage.
- Praise Effort: Instead of saying, "That's a beautiful card," try, "Wow, you worked so carefully on cutting out those tiny hearts!" or "I love how you experimented with so many different colors."
- Embrace Uniqueness: Acknowledge that every child's creation will be unique, reflecting their individual personality and skill level. There's no right or wrong way to make art.
- Resist "Fixing": It can be tempting to step in and "fix" a wonky cut or an uneven glue job. Resist! Allowing children to make mistakes and learn from them is part of the growth process. Their imperfect creations are perfect in their authenticity.
Embrace the Mess
Creative activities often involve a certain amount of mess – glue on fingers, glitter on the floor, paint splatters. Viewing this as part of the fun, rather than a nuisance, can transform the experience.
- Prepare for it: As discussed in our craft station setup, lay down newspapers or a plastic tablecloth. Have wet wipes and paper towels ready.
- Involve them in Cleanup: Teach children that cleanup is part of the process. Even toddlers can help put caps on markers or throw scraps in the bin. This instills responsibility and shows that messes can be managed.
Encourage Experimentation
The best learning comes from trying new things, observing the results, and adapting. Encourage children to explore without fear of failure.
- Ask Open-Ended Questions: "What do you think would happen if you mixed these two colors?" "How else could you attach that?" "What if you used a different texture here?"
- Provide Variety: Offer a range of materials and tools. Sometimes, just seeing a new type of paper or a different adhesive can spark a fresh idea.
- Let Them Lead: Follow their interests. If they want to make a dinosaur Valentine instead of a heart, go with it! The skills learned are transferable.
Celebrate Every Creation
Every piece of art a child creates is a reflection of their effort, imagination, and learning. Celebrate it!
- Display Their Work: Hang their Valentine's cards on the fridge, frame them, or create a special "gallery" wall. This shows them you value their work.
- Send Them Off: The ultimate celebration for a Valentine's card is sending it to its intended recipient. This reinforces the purpose of their creative effort.
- Document Their Journey: Take photos of them crafting and with their finished cards. These memories are priceless.
Adapting for Special Needs and Different Learning Styles
Every child is unique, and adapting activities ensures inclusivity and success for all.
- Sensory Considerations: For children sensitive to textures, offer gloves or use tools like glue sticks instead of liquid glue. For those who crave sensory input, incorporate elements like squishy cards, puffy paint, or textured collage materials.
- Fine Motor Challenges: Pre-cut shapes, use larger embellishments, or provide adaptive scissors. Focus on stamping or fingerprinting rather than intricate cutting.
- Cognitive Support: Break down complex tasks into smaller, manageable steps. Provide visual aids or demonstrate each step clearly.
- Engagement Levels: Some children thrive on structured activities, while others prefer open-ended exploration. Offer both types of choices. For children who struggle with prolonged focus, keep sessions short and sweet.
For educators, homeschool groups, or larger organizations seeking to bring these enriching, hands-on experiences to a broader audience, I'm the Chef Too! offers versatile School & Group Programs. Our programs are designed with flexibility in mind, available with or without food components, and can be tailored to suit different classroom needs, camp settings, or homeschool co-ops, extending the magic of STEM and art to every learner.
By implementing these tips, you're not just supervising a craft session; you're cultivating a joyful learning environment where creativity can flourish, essential skills are developed, and children feel empowered to express themselves through the delightful art of making a valentines card craft for kids.
Conclusion
As we've explored the vibrant world of valentines card craft for kids, it's clear that these seemingly simple projects are far more than just paper and glue. They are powerful conduits for learning, expression, and connection, embodying the very spirit of "edutainment" that defines I'm the Chef Too!. From the tiny fingerprints of a toddler's first heart card to the intricate engineering of an older child's pop-up masterpiece, each creation is a testament to the boundless creativity and innate curiosity that resides within every child.
We've seen how crafting a homemade Valentine fosters essential fine motor skills, sparks imagination, encourages problem-solving, and offers invaluable screen-free engagement. These activities seamlessly weave together the principles of STEM – from the chemistry of colors and the physics of pop-ups to the geometry of shapes – with the limitless possibilities of artistic expression. More importantly, they create cherished opportunities for family bonding, transforming ordinary moments into extraordinary memories.
In a world that often rushes us through experiences, taking the time to create something thoughtful and personal is a profound act of love, both for the recipient and for the child making the card. It teaches them the value of effort, the joy of giving, and the unique satisfaction of bringing an idea to life with their own hands. At I'm the Chef Too!, we are dedicated to providing these kinds of enriching, hands-on experiences, designed by mothers and educators to be both educational and deliciously fun.
So, this Valentine’s Day, embrace the glitter, tolerate the glue, and celebrate every unique stroke of genius from your young crafters. Let these moments of creativity not only brighten someone’s day but also ignite a lifelong spark for learning and discovery within your child.
Don't let the adventures stop here! Imagine extending the hands-on learning from crafting into the kitchen, exploring science and art through delicious culinary creations. Ready to spark even more curiosity and create unforgettable family memories with innovative, screen-free activities delivered right to your door?
Join The Chef's Club today! Choose from our flexible 3, 6, or 12-month pre-paid plans, perfect for gifting or ongoing enrichment, and enjoy free shipping on every box. A new, exciting "edutainment" experience awaits you and your little chefs each month!
Frequently Asked Questions (FAQ) about Valentine's Card Craft for Kids
Q1: What age group are these Valentine's card crafts suitable for?
A1: We've included a wide range of ideas suitable for all ages, from toddlers (with adult supervision, focusing on simple tasks like fingerprinting or collaging) to elementary and older children who can tackle more intricate projects like pop-up cards or quilling. Each section provides guidance for age-appropriateness, and most crafts can be adapted to suit different skill levels.
Q2: What are the must-have supplies for a basic Valentine's craft station?
A2: For a great start, you'll want cardstock (red, pink, white), construction paper, child-safe scissors, glue sticks and liquid school glue, markers/crayons, and some basic embellishments like glitter, stickers, or yarn. Many crafts can be made with items you already have around the house!
Q3: How can I make these crafts less messy?
A3: Mess is often part of the fun of crafting! However, you can minimize it by covering your workspace with newspaper or a plastic tablecloth, using glue sticks instead of liquid glue for younger children, dispensing small amounts of paint/glitter into separate dishes, and having wet wipes or a damp cloth readily available. Involving children in the cleanup process also helps manage expectations and responsibility.
Q4: My child gets frustrated if their card isn't "perfect." How can I encourage them?
A4: Focus on praising the effort and the process, rather than the final product. Emphasize the joy of creating and expressing themselves. Remind them that handmade cards are unique and special because they were made by them, not despite any imperfections. Avoid stepping in to "fix" their work; let them experience and learn from their own creations.
Q5: Can these crafts be adapted for a classroom or group setting?
A5: Absolutely! Many of these ideas are perfect for groups. You can set up different "stations" for various activities (e.g., a cutting station, a gluing station, a decorating station). Pre-cutting some shapes can help manage time and materials. For larger group needs, I'm the Chef Too! offers School & Group Programs which are flexible and available with or without food components, designed specifically for educational environments.
Q6: How do these Valentine's crafts incorporate STEM learning?
A6: Crafting offers numerous STEM connections! Children explore chemistry through color mixing and "puffy paint" reactions, engineering through pop-up card mechanisms, math through symmetry, patterns, and geometric shapes, and art through designing and using various mediums. It's a hands-on way to make abstract STEM concepts tangible and fun.
Q7: Are there any environmentally friendly options for Valentine's cards?
A7: Yes! Encourage the use of recycled materials like old magazines, newspaper, cardboard, buttons, or fabric scraps for collages. You can also opt for natural elements like pressed leaves or dried flowers. This teaches children about sustainability and resourcefulness.
Q8: Where can I find more engaging, screen-free activities like these?
A8: At I'm the Chef Too!, our mission is to provide unique, screen-free "edutainment" experiences that blend food, STEM, and the arts. Our kits are designed by mothers and educators to spark curiosity and creativity. You can explore our wide variety of One-Time Kits for individual purchases or, for ongoing adventures delivered right to your door, Join The Chef's Club for a monthly subscription!