Festive Pine Cone Crafts: Joyful Christmas Kids' DIY

Table of Contents
- The Magic of Pine Cones: More Than Just a Natural Wonder
- Prepping Your Pine Cones for Crafting Success
- Essential Craft Supplies for Your Pine Cone Adventures
- Pine Cone Christmas Ornaments: Hanging Memories on the Tree
- Beyond the Tree: Pine Cone Decorations for Your Home
- Edible Pine Cone Crafts: A Delicious Twist on Tradition
- The STEM & Arts of Pine Cone Crafting: Learning Through Play
- Adapting Pine Cone Crafts for Different Ages
- The I'm the Chef Too! Philosophy in Every Pine Cone
- Conclusion
- FAQ
As the crisp autumn air gives way to the gentle chill of winter, a familiar sense of magic begins to unfurl. For many families, this season brings not just the anticipation of holidays, but also the simple joy of connecting with nature and each other. Remember those childhood days spent wandering through a quiet forest, eyes scanning the ground for the perfect fallen pine cone? That small, unassuming treasure, often overlooked, holds a world of creative potential. It's a testament to the idea that some of the most wonderful adventures begin with the simplest things.
At I'm the Chef Too!, we believe in sparking curiosity and creativity through hands-on experiences, blending food, STEM, and the arts into what we call "edutainment." This holiday season, we want to guide you through a delightful journey that perfectly embodies our mission: transforming humble pine cones into enchanting Christmas crafts with your kids. This comprehensive guide will explore everything from gathering and preparing your pine cones to crafting a dazzling array of ornaments and home decorations. We'll delve into the educational benefits, offering a screen-free alternative that fosters family bonding and helps children develop crucial skills, all while making beautiful memories. Get ready to discover how these natural wonders can become the stars of your holiday crafting universe, proving that true magic often lies in the art of making and learning together.
The Magic of Pine Cones: More Than Just a Natural Wonder
Pine cones are truly fascinating botanical marvels, more than just decorative elements scattered beneath evergreen trees. They are the protective vessels for pine seeds, opening and closing in response to humidity to ensure their precious cargo is released only when conditions are just right for dispersal. This natural mechanism, a simple yet profound example of plant adaptation, offers an immediate entry point into scientific inquiry for young minds. Just think, holding a pine cone, you're holding a piece of nature's ingenious engineering!
Why are these humble gifts from the forest so perfect for crafting, especially with children? Firstly, their abundance and free availability make them an accessible and sustainable crafting material. A walk in a local park or forest can yield a plentiful supply, turning the collection process itself into an adventure. Secondly, their unique, scaly texture and distinct shape provide an excellent foundation for a myriad of creative transformations. They offer a tactile experience that engages the senses, inviting little hands to explore and create.
At I'm the Chef Too!, our mission is rooted in blending the natural world with the wonders of STEM and the arts. Pine cone crafts resonate deeply with this philosophy. They encourage children to observe, question, and engage with their environment. How do pine cones feel? What makes them different shapes? Why do some open wide and others stay tight? These aren't just crafts; they're invitations to explore botany, material science, and the sheer joy of discovery. Much like our culinary STEM kits that use everyday ingredients to teach complex subjects, pine cones allow children to learn about nature's processes through tangible, hands-on interaction. This connection to the environment fosters a sense of wonder and respect for nature, laying groundwork for scientific curiosity that can grow with every new craft.
Prepping Your Pine Cones for Crafting Success
Before the glitter flies and the glue flows, a crucial first step ensures your pine cone crafts are not only beautiful but also clean and long-lasting. Collecting and preparing your pine cones correctly is simple, but vital for avoiding unwanted guests or future crafting woes.
Collection: The Treasure Hunt Begins
The best time to collect pine cones is typically in the fall through early winter, after they've fallen naturally from the trees. Look for cones that are fully open, as these are usually dry and ready for crafting. While wandering through a park or forest, encourage your children to look for different shapes and sizes. Some might be long and slender, others short and plump. This simple act of observation is an early lesson in natural variation and scientific classification. Remember to collect more than you think you’ll need – it’s always good to have a few extra, and the hunt itself is half the fun!
Cleaning & Debugging: A Necessary Step
Bringing nature indoors sometimes means bringing a bit too much nature inside. Pine cones can harbor small insects, spiders, or even mold. Cleaning and debugging them is essential for hygiene and to prevent any critters from making a new home in your festive decor.
Here’s our recommended method, requiring adult supervision:
- Initial Shake and Brush: Outside, give each pine cone a good shake to dislodge loose dirt, needles, and any obvious insects. You can use a stiff brush (like an old toothbrush or pastry brush) to get into the crevices.
- Soak (Optional, for extra clean): For very dirty pine cones, you can soak them in a tub of warm water with a splash of white vinegar or a few drops of dish soap for about 30 minutes. This helps loosen stubborn dirt and grime. Be aware that soaking will cause them to close up, so they'll need thorough drying afterward.
-
Baking Method (Recommended for Debugging): This is the most effective way to eliminate any hidden pests and ensure your pine cones are completely dry and open.
- Preheat your oven to a low temperature, no more than 200°F (about 95°C). Higher temperatures risk burning the pine cones.
- Line a baking sheet with parchment paper or foil to catch any sap or debris.
- Spread the pine cones in a single layer on the prepared baking sheet, ensuring they don't touch.
- Bake for approximately 30-60 minutes. Keep a close eye on them. The baking time will vary depending on their moisture content and size. You'll notice them opening up further as they dry out.
- Once baked, turn off the oven and let the pine cones cool completely inside the oven or on a cooling rack. This allows them to slowly return to room temperature without cracking and ensures they stay fully open.
- Safety Note: Adult supervision is absolutely critical during this step. The oven will be hot, and pine cones can release sap, which might have a slight odor. Ensure good ventilation.
This preparation process, while a small step, reflects our commitment at I'm the Chef Too! to ensuring a safe and enjoyable experience for all. Just as we carefully select and pre-measure dry ingredients for our kits, preparing your natural materials sets the stage for a smooth and successful crafting adventure.
Essential Craft Supplies for Your Pine Cone Adventures
Embarking on a pine cone crafting journey doesn't require a trip to a specialized art store, but having a well-stocked "crafting pantry" can make all the difference. Think of it as preparing your kitchen before a delicious baking project – having everything at hand streamlines the process and lets creativity flow freely. Many of these items you might already have around the house, making pine cone crafts an incredibly budget-friendly way to engage in educational fun.
Here's a breakdown of essential supplies, along with tips for usage and safety:
Basic Toolkit: The Foundation of Every Craft
-
Glue:
- Craft Glue (White PVA glue): Perfect for younger children. It's non-toxic, easy to clean, and suitable for attaching lightweight items like pom-poms, glitter, or felt. It takes longer to dry, so patience is key!
-
Hot Glue Gun & Glue Sticks: This is a crafter's best friend for quick, strong bonds, especially when attaching heavier embellishments or assembling structures.
- Safety Note: Hot glue guns get very hot! They should always be operated by an adult or under very close adult supervision, especially with older children. Silicone finger protectors are a fantastic investment for both adults and kids to prevent accidental burns. We emphasize safety in all our activities, just as we would in a kitchen with kids.
- Scissors: Kid-friendly scissors for cutting felt, ribbon, or yarn. Ensure they are sharp enough for the materials but safe for small hands.
- Paintbrushes: A variety of sizes, from fine-tipped for detail work to foam brushes for broader coverage. Foam brushes are often easier for younger kids to handle.
- Newspaper or Drop Cloth: Essential for protecting your work surface from paint, glue, or glitter spills. Crafting can get a little messy, but that's part of the fun!
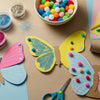
Decorative Elements: Bringing Your Creations to Life
This is where the real magic happens, adding personality and sparkle to your pine cones!
- Pom-Poms: A staple for kid crafts! Assorted sizes and colors can become ornaments, noses, eyes, or fluffy snow.
- Googly Eyes: Instantly transform a pine cone into a creature with personality – owls, reindeer, snowmen, and more!
- Felt Sheets: Easy to cut and glue, felt is ideal for making ears, wings, hats, scarves, or little gnome outfits. It comes in a rainbow of colors.
-
Glitter: A little sparkle goes a long way for Christmas crafts! Use glitter glue or sprinkle loose glitter over wet craft glue.
- Tip: Place a paper plate or tray under your pine cone when applying loose glitter to catch excess, which can then be poured back into the container.
- Ribbon, Twine, or Yarn: For hanging ornaments, creating loops, or adding decorative wraps. Look for festive colors and textures.
- Pipe Cleaners (Chenille Stems): Flexible and colorful, perfect for antlers, tiny arms, or adding structural details.
- Small Beads or Buttons: For added embellishment, extra "ornaments" on a pine cone tree, or as gnome noses.
-
Paints:
- Acrylic Paints: Versatile, vibrant, and quick-drying. Choose non-toxic brands. Green, red, white, gold, and silver are classic Christmas colors.
- Washable Tempera Paints: Great for younger kids as they clean up easily.
- Glitter Paint/Glitter Glue: Combines color and sparkle in one step.
Natural Additions: Enhancing the Woodland Charm
- Small Twigs: Gathered from your yard, these make fantastic antlers for reindeer or tiny branches for owl perches.
- Acorns, Small Seed Pods: Can be incorporated for added texture and natural appeal.
Remember, the beauty of crafting with pine cones lies in its flexibility. You don't need every item on this list for every project. Encourage your children to look at what they have and imagine what it could become. This exercise in creative problem-solving and resourcefulness is a valuable skill we champion at I'm the Chef Too!—turning simple materials into extraordinary "edutainment" experiences.
Pine Cone Christmas Ornaments: Hanging Memories on the Tree
Creating handmade ornaments is a cherished holiday tradition, and pine cones offer the perfect canvas for crafting personalized treasures. Each ornament becomes a tiny memory, a reminder of shared laughter and creative fun, much like the lasting memories forged while creating delicious dishes with our I'm the Chef Too! kits.
Classic Pine Cone Christmas Trees
These are perhaps the most straightforward and instantly recognizable pine cone crafts, ideal for even the youngest crafters.
How to Make:
- Paint: Start by painting your pine cones green. Acrylic craft paint works best. Kids can use foam brushes for easy application, covering the outer scales. Let them dry completely – patience is a virtue in crafting!
- Decorate: Once dry, it’s time for the "ornaments." Small, colorful pom-poms are perfect for this. Children can pick their favorite colors and glue them into the crevices of the pine cone scales.
- Star: A yellow pom-pom or a small felt star can be glued to the very top to represent the tree's star.
- Hanger: Secure a loop of festive ribbon or twine with hot glue to the top back of the pine cone for hanging.
Variations for Different Ages:
- Snowy Trees: Instead of full green paint, use white paint or glitter glue on just the tips of the scales for a "snowy" effect. Add silver or blue pom-poms for a winter wonderland theme.
- Glitter Trees: After painting green, lightly brush on craft glue and sprinkle with green or iridescent glitter for extra sparkle.
Skills Developed: Color recognition, fine motor control (holding brushes, placing small items), following multi-step instructions, and artistic expression. Just as we encourage hands-on learning with our Browse our complete collection of one-time kits, these crafts offer tangible results that children can proudly display, fostering a sense of accomplishment.
Whimsical Pine Cone Animals
Transforming pine cones into adorable creatures is where imagination truly takes flight. These make charming ornaments or delightful tabletop decorations.
Rudolph Reindeer Pine Cone Ornaments
How to Make:
- Ears & Antlers: Cut ear shapes from brown felt. Find small, thin twigs from your yard for antlers. Hot glue the felt ears (pinching the bottom to give them shape) and then the twigs to the top/back of the pine cone, ensuring the pointy end of the pine cone faces forward for Rudolph's "head."
- Face: Glue two medium-sized googly eyes onto the pine cone. For Rudolph's iconic nose, a large, sparkly red pom-pom is perfect, creating that bright, cheerful glow.
- Hanger: Attach a ribbon loop to the back with hot glue.
Skills Developed: This project encourages imaginative play, character design, and problem-solving (finding suitable twigs, positioning features). It's a wonderful way to blend nature's elements with craft supplies, much like our Galaxy Donut Kit transforms ingredients into a celestial masterpiece, teaching about astronomy in an engaging, edible format.
Owl Pine Cone Ornaments
How to Make:
- Wings: Cut wing shapes from brown felt (or another color) and hot glue them to the sides of the pine cone, slightly pinching the ends to give them a feathered look.
- Face: Glue on two large googly eyes. Cut a small orange felt triangle for the beak and glue it below the eyes.
- Festive Touch: For a Christmas owl, create tiny Santa hats from red and white felt and a small white pom-pom for the top. Hot glue the hat onto the owl's "head."
- Hanger: Add a ribbon loop to the back.
Skills Developed: Fine motor dexterity for cutting and gluing smaller felt pieces, spatial reasoning for positioning features, and imaginative storytelling.
Festive Gnome Ornaments
These little woodland dwellers bring a touch of Nordic charm to your tree.
How to Make:
- Body: Use a slightly longer, narrower pine cone for the gnome's body.
- Hat: Cut a half-circle from colorful felt (red, green, blue). Roll it into a cone shape and hot glue the seam. You can add a tiny pom-pom to the tip of the hat.
- Nose: A small wooden bead or a tiny pom-pom makes a perfect gnome nose. Glue it just under the front edge of the hat.
- Beard: Cut a small, fluffy beard shape from white or grey felt, or even a piece of cotton ball, and glue it under the nose.
- Hanger: Attach a ribbon loop to the top.
Skills Developed: This craft involves more intricate cutting and assembly, promoting patience and precision. It's an excellent way to practice working with different textures and creating character from simple shapes.
Elegant Painted Pine Cone Ornaments
Sometimes, simplicity is key to elegance. Painted pine cones can be stunning on their own or serve as a base for further embellishments.
How to Make:
-
Painting Techniques:
- Dipping: For a more uniform, saturated color, hold the pine cone by its base (or using floral wire as a handle) and dip it into a cup of liquid acrylic or latex paint. Gently tap off excess and hang to dry over newspaper.
- Brushing: For a more controlled application or a "snowy tipped" effect, use a paintbrush. Apply paint to the edges of the scales or cover the entire pine cone.
- Color Choices: Experiment! Traditional reds and greens are festive, but consider metallic gold or silver for a sophisticated look, or snowy whites for a wintery feel. Pastel blues and pinks can create a whimsical, sugar-plum fairy vibe.
- Glitter Application: While the paint is still wet, sprinkle fine glitter over the pine cone for extra sparkle. Alternatively, once dry, brush on a thin layer of craft glue and then sprinkle with glitter.
- Hanger: Once completely dry, hot glue a festive ribbon loop to the top of each pine cone.
Skills Developed: This process allows for experimentation with color mixing, understanding how different paints adhere, and developing an eye for aesthetic detail. It’s about exploring materials and techniques, a creative journey that mirrors the artistic exploration within our kits. Ready for a new adventure every month that sparks this kind of creativity? Join The Chef's Club and enjoy free shipping on every box! Each box is a complete experience, containing pre-measured dry ingredients and specialty supplies, making it easy to jump into hands-on learning without the prep work.
Beyond the Tree: Pine Cone Decorations for Your Home
Pine cones aren't just for hanging on the Christmas tree! Their natural beauty and versatility make them perfect for a wide array of festive home decorations that can adorn mantels, tables, and doorways. These larger-scale projects can be wonderful family endeavors, encouraging teamwork and shared creative vision.
Pine Cone Garlands and Wreaths: Grand Statements
Creating a garland or wreath from pine cones adds a rustic, elegant touch to your holiday decor. This is an activity that can involve various skill levels, with adults handling the more intricate or hot glue-intensive parts, and children assisting with assembly and decoration.
Pine Cone Garland:
- Preparation: Collect an abundance of pine cones of similar size for a cohesive look, or varied sizes for a more natural, eclectic feel.
-
Attachment:
- Method 1 (Drilling): For a more secure and discreet attachment, an adult can carefully drill a small hole through the base of each pine cone. Then, string them onto sturdy twine or fishing line.
- Method 2 (Wire/Screw Eyes): Wrap floral wire around the base of each pine cone, twisting to secure, and create a loop. Or, screw small eye hooks into the top of each pine cone (pre-drilling a tiny pilot hole helps). Then, string them.
- Method 3 (Hot Glue): For a quick, rustic garland, simply hot glue the pine cones to a thick piece of rope or twine, overlapping them slightly to create a fuller look.
- Embellishments: Once strung, kids can help add extra festive flair. Hot glue small berries (artificial, for safety), cinnamon sticks, dried orange slices, or bows made from festive ribbon between the pine cones.
Pine Cone Wreaths:
- Base: Purchase a basic wreath form (grapevine, foam, or wire) from a craft store.
- Attachment: Using a hot glue gun, adults should attach pine cones densely to the wreath form. Start with larger pine cones for the base and fill in gaps with smaller ones. Overlap them to create fullness.
- Decorate: Once the pine cones are securely in place, children can help adorn the wreath with bows, artificial cranberries, sprigs of evergreen, or even painted pine cone accents.
Skills Developed: These projects encourage dexterity, spatial arrangement, and understanding of design principles like balance and repetition. They are excellent opportunities for collaborative crafting, where everyone contributes to a grander piece.
"Crafting isn't just about the finished product; it's about the joy of the process, the shared laughter, and the memories created. These moments become the true treasures of the season."
Pine Cone Centerpieces and Table Decor: Festive Focal Points
Bring the woodland magic to your holiday table or mantelpiece with these charming ideas.
-
Pine Cone Jars:
- Gather clear glass jars of various sizes (mason jars, old jam jars).
- Fill the jars with a mix of small pine cones, faux snow, cranberries, and small sprigs of evergreen.
- Place battery-operated fairy lights or electric tealights inside for a warm, cozy glow. Avoid real candles unless closely supervised and in appropriate holders to prevent fire hazards. This creates a beautiful, safe "winter wonderland in a jar."
-
Mini Pine Cone Trees:
- Cork Base: Hot glue the base of a small, green-painted pine cone onto a wine cork or a small wooden disc for a charming miniature tree.
- Larger Trees: For larger trees, hot glue several pine cones around a foam cone form, starting from the bottom and working your way up. You can paint these, glitter them, or leave them natural.
- Decoration: Decorate with tiny beads, mini pom-poms, or small star cut-outs.
-
Pine Cone Fire Starters (Adult Supervision Only):
- These not only look beautiful but can be functional for those with fireplaces or outdoor fire pits.
- Process (Adults Only): Melt unscented wax (soy or paraffin) in a double boiler. Dip pine cones into the melted wax, allow to dry slightly, and repeat several times to build up a waxy coating. You can add a short, pre-waxed wick by dipping the pine cone into the wax and attaching the wick to the center, or by tying it around the pine cone before dipping. You can also add essential oils like cinnamon or pine for a festive scent.
- Extreme Safety Note: This activity involves melting hot wax and potential flammability. It must be done with extreme caution and only by adults. Never melt wax directly over an open flame.
Framed Pine Cone Art: A Touch of Rustic Elegance
For a truly unique piece of home decor, consider deconstructing pine cones for art.
- "Pine Cone Flowers": Carefully use strong scissors or small wire cutters (adults only) to snip off individual pine cone scales. These scales often resemble petals.
- Composition: Arrange and hot glue these "petals" onto a canvas or sturdy cardstock to create floral patterns. You can paint the scales first for vibrant "flowers."
- Framing: Once the artwork is complete, frame it for a beautiful, textured piece that celebrates nature. This can be displayed year-round, showcasing the versatility of pine cones beyond Christmas.
These decorating ideas foster creativity, design thinking, and the satisfaction of transforming natural elements into cherished household items. They embody our I'm the Chef Too! value of creating tangible, beautiful results through engaging hands-on work.
Edible Pine Cone Crafts: A Delicious Twist on Tradition
Who said pine cones aren't for eating? This unique and delightful craft offers a sweet, no-bake treat that cleverly mimics the look of a real pine cone. It’s an ideal activity for younger children, as it involves mixing and shaping, providing a fantastic sensory experience, and of course, a delicious reward! This kind of creative, food-based exploration is exactly what we champion at I'm the Chef Too!, demonstrating how food can be a gateway to imaginative play and learning.
The Unique Concept of Edible Pine Cones
Imagine the surprise and delight on a child's face when they discover their beautiful pine cone creation is actually a tasty snack! This craft plays on visual deception, transforming common kitchen ingredients into something truly special. It’s a wonderful way to introduce the idea of edible art and how different ingredients can be combined to create new forms and textures.
Ingredients: Simple & Sweet
The beauty of edible pine cones lies in their simplicity. You likely have most of these ingredients in your pantry:
- Cereal: A crisp, flaky cereal is best, such as corn flakes or shredded wheat (rectangular pieces work well for the "scales").
- Nut Butter: Creamy peanut butter is traditional, but for allergy-friendly alternatives, sunbutter (sunflower seed butter) or almond butter also work perfectly. This acts as the "glue."
- Sweetener: Honey, maple syrup, or corn syrup helps bind the mixture and adds sweetness.
- Powdered Sugar (Optional): For dusting, to give a "snowy" effect, or for added sweetness.
- Mini Chocolate Chips (Optional): Can be mixed into the base for extra flavor.
Process: Mix, Shape, & Delight
This is a fun, hands-on process that requires no baking and offers instant gratification.
- Melt & Mix: In a microwave-safe bowl, combine the nut butter and sweetener. Heat gently (in 30-second intervals) until softened and easily stirrable.
- Combine: Add the cereal to the nut butter mixture. Gently fold until the cereal is evenly coated. You can also add mini chocolate chips here if desired.
- Shape the Core: Lightly grease your hands with a little butter or cooking spray. Take a portion of the mixture and shape it into an elongated, slightly conical form – this will be the "body" of your pine cone. This step is excellent for developing fine motor skills and understanding 3D shapes.
- Add the Scales: Now for the signature pine cone look! Take individual cereal flakes (or small pieces of shredded wheat) and gently press them into the shaped core, starting from the wider base and working your way up. Overlap the "scales" slightly, just like a real pine cone. Children will love the repetitive, satisfying nature of this step.
- Chill: Place the finished edible pine cones on a plate or baking sheet lined with parchment paper. Refrigerate for at least 30 minutes to allow them to firm up.
- Garnish (Optional): Before serving, you can lightly dust them with powdered sugar to create a snowy, festive appearance.
Safety & Allergy Considerations:
- Nut Allergies: Always be mindful of nut allergies. If serving to a group, use a nut-free butter alternative.
- Choking Hazard: Ensure pieces are appropriately sized for younger children.
- Adult Supervision: While simple, adult supervision is still important for melting ingredients and ensuring proper hygiene.
This edible craft perfectly illustrates our mission at I'm the Chef Too!: blending food with fun, hands-on learning, and a dash of creativity. Just like our Erupting Volcano Cakes kit makes learning about chemical reactions deliciously unforgettable, these edible pine cones transform simple ingredients into a delightful and educational experience. It’s a wonderful way to engage all senses and show children that learning can be incredibly tasty!
The STEM & Arts of Pine Cone Crafting: Learning Through Play
At I'm the Chef Too!, we firmly believe that learning is an adventure, best explored through hands-on discovery that weaves together science, technology, engineering, art, and mathematics (STEM) with the creative spirit of the arts. Pine cone crafting, at first glance, might seem purely artistic, but delve a little deeper, and you'll uncover a rich tapestry of educational opportunities that perfectly align with our "edutainment" philosophy.
Science in Nature's Classroom
Pine cones offer a fantastic, accessible gateway to understanding basic scientific principles:
- Botany and Adaptation: As we touched on earlier, pine cones are seed-bearing structures. Discuss with your child why they have scales and how they protect the seeds. Introduce the concept of osmosis (in a simplified way) by observing how pine cones open when dry and close when wet – a natural mechanism to release seeds when conditions are favorable for growth. You can even conduct a simple experiment: place one pine cone in a bowl of water and another on a dry surface, and observe the changes over a few hours.
- Material Science: Explore the properties of the various materials you're using. Why does paint stick to the pine cone? How does glue work? What makes felt soft and a pine cone rough? This simple exploration of textures and properties is foundational to understanding the world around us.
- Sensory Exploration: Engaging multiple senses is crucial for early brain development. Pine cones offer a unique tactile experience – prickly, hard, woody. Paints add visual stimulation, while the scent of natural pine or cinnamon sticks can engage the olfactory sense.
Artistry & Creativity: Unleashing the Inner Artist
The "Arts" component of STEM is vibrantly present in pine cone crafting:
- Color Theory: Children learn about primary and secondary colors as they choose paints and pom-poms. They can experiment with color mixing or explore how different colors evoke different moods (e.g., bright reds for festive, cool blues for wintery).
- Texture Exploration: Combining the rough texture of a pine cone with soft felt, fluffy pom-poms, or smooth ribbons introduces children to different sensory experiences and how textures can be combined for visual interest.
- Design Principles: Even young children intuitively grasp concepts like balance (distributing decorations evenly), repetition (using similar elements), and proportion (making sure Rudolph's nose isn't bigger than his head!). Crafting encourages them to think about how elements fit together to create a cohesive whole.
- Imagination and Transformation: Taking a natural object and transforming it into a reindeer, an owl, or a miniature Christmas tree is a powerful exercise in imagination. It teaches children that they can re-envision and create, a cornerstone of innovative thinking.
Developing Key Life Skills: Beyond the Craft Table
The benefits extend far beyond the finished product, fostering skills that are invaluable in all aspects of life:
- Fine Motor Skills: The acts of holding a paintbrush, carefully placing a small pom-pom with tweezers, cutting felt, or tying a ribbon all refine hand-eye coordination and strengthen the small muscles in the hands and fingers. These skills are critical for writing, dressing, and many everyday tasks.
- Problem-Solving: "How do I make the hat stay on?" "What can I use for antlers?" "This ribbon isn't long enough, what should I do?" Crafting inherently presents small challenges that encourage children to think critically and find solutions, adapting their plans as they go.
- Following Instructions vs. Open-Ended Play: Some crafts involve following specific steps, teaching children patience and the ability to process instructions. Others, like decorating a pine cone "freestyle," encourage open-ended creativity where there's no "right" or "wrong" way, just individual expression. Balancing both is key to holistic development.
- Patience & Persistence: Waiting for paint or glue to dry, meticulously placing small details, or even searching for the perfect pine cone teaches patience and the rewards of sustained effort.
- Family Bonding: Perhaps one of the most significant benefits, especially around the holidays. Crafting together creates a shared experience, opportunities for conversation, laughter, and mutual encouragement. These screen-free moments build strong family connections and create cherished memories that last a lifetime. This emphasis on family bonding is a core value at I'm the Chef Too!.
Every month, we deliver engaging activities that blend food, STEM, and the arts, fostering these very skills in a delicious way. Join The Chef's Club and enjoy free shipping on every box! Our unique approach, developed by mothers and educators, ensures that complex subjects are taught through tangible, hands-on, and delicious cooking adventures. For those not ready to subscribe, you can still spark creativity and learning; Browse our complete collection of one-time kits for more opportunities to build these skills.
Adapting Pine Cone Crafts for Different Ages
One of the beautiful aspects of pine cone crafting is its inherent adaptability. Whether you have a curious toddler or an inventive pre-teen, there are ways to engage every child, ensuring they feel successful and enjoy the creative process. At I'm the Chef Too!, we understand the importance of age-appropriate activities, crafting our kits to be engaging and educational for a range of ages while still allowing for individual expression and skill development.
Toddlers & Preschoolers (Ages 2-5 years)
For this age group, the focus should be on sensory exploration, simple actions, and the joy of participation, rather than a perfect end product. Adult involvement is key for preparation and most of the gluing.
- Simple Painting: Provide large pine cones, chunky paintbrushes (or foam brushes), and washable, non-toxic paints. Let them freely paint the pine cones any color they wish. The texture of the pine cone itself is a wonderful sensory experience.
- Large Embellishments: Offer big pom-poms, pre-cut felt shapes (like circles, squares, or large triangles), and plenty of craft glue. Adults can help with hot gluing if a stronger bond is needed. Encourage them to stick things on wherever they like.
- Pre-made Elements: If making animals, have the eyes, ears, and noses ready. Toddlers can then "assemble" them with adult guidance.
- Focus on the Process: The joy for this age is in the squishing of glue, the feel of the paint, and the act of placing items. The final ornament is a bonus!
Early Elementary (Ages 6-9 years)
Children in this age range are developing better fine motor skills and can follow more detailed instructions. They enjoy creating recognizable objects and will appreciate a bit more independence.
- Multi-Step Projects: Introduce crafts like the Rudolph reindeer or pine cone owls. Kids can cut out felt shapes (with kid-safe scissors), choose colors, and carefully apply craft glue or, with close adult supervision, use a low-temp hot glue gun (with finger protectors).
- Patterning and Design: Encourage them to think about how they want their ornament to look. "Should Rudolph's nose be sparkly or matte?" "What color stripes for the gnome's hat?"
- Written Instructions: For older kids in this group, provide simple visual or written instructions for them to follow, fostering early literacy and comprehension skills.
- Exploration of Techniques: They can start experimenting with different painting techniques (snowy tips, glitter application) and yarn wrapping.
Older Kids (Ages 10+ years)
Older children are ready for more complex projects, independent work, and adding their unique personal flair. They can engage with the STEM aspects more deeply and take pride in refining their creations.
- Independent Crafting: They can safely use a regular hot glue gun (with proper instruction and safety precautions), cut more intricate felt designs, and take charge of the entire project from start to finish.
- Complex Designs: Challenge them with more detailed gnome designs, intricate yarn-wrapped pine cones, or even creating entire pine cone wreaths or garlands with minimal adult assistance.
- Personalization: Encourage them to go beyond the basic instructions. They might want to add tiny beads, use fabric paint for details, or combine different craft ideas. This fosters innovation and creative problem-solving.
- Scientific Inquiry: Engage them in discussions about the botany of the pine cone, the chemistry of paints and glues, or the physics of balance when making a centerpiece.
Regardless of age, the underlying principle remains the same: adult supervision is crucial. Especially when working with scissors, paint, and certainly hot glue. At I'm the Chef Too!, our "edutainment" approach is designed to be flexible enough to engage various age groups, providing opportunities for discovery and fun that align with developmental stages. By adapting these pine cone crafts, you ensure that every child can experience the joy of creating something beautiful and meaningful this Christmas season.
The I'm the Chef Too! Philosophy in Every Pine Cone
At I'm the Chef Too!, we are driven by a singular mission: to blend food, STEM, and the arts into one-of-a-kind "edutainment" experiences. We are committed to sparking curiosity and creativity in children, facilitating precious family bonding, and providing a screen-free educational alternative that truly engages young minds. When we look at the simple pine cone and the endless possibilities it offers, we see a perfect reflection of our core values and educational philosophy.
The act of pine cone crafting embodies the very essence of what we do. Just as our kits blend pre-measured ingredients with fascinating scientific concepts and artistic expression, a pine cone craft begins with a natural "ingredient" and transforms it into something new through a hands-on process. It’s a tangible journey from raw material to a cherished creation.
Consider how these crafts align with our principles:
- Blending STEM and Arts: Identifying different pine cone types, understanding their natural mechanisms (science), designing a Rudolph ornament (art), problem-solving how to attach components (engineering), and counting pom-poms (math) – it's all seamlessly integrated. Pine cones are nature's STEM kit!
- Sparking Curiosity and Creativity: A child observing a pine cone open and close is a budding scientist. A child imagining a pine cone as an owl or a gnome is a budding artist and storyteller. These crafts encourage children to ask "what if?" and to explore their own unique ideas.
- Facilitating Family Bonding: There's an undeniable warmth and connection that comes from crafting together. Sharing ideas, helping each other, and laughing over a glue mishap create lasting memories. It’s a dedicated block of time where screens are set aside, and genuine interaction flourishes – a direct parallel to the family memories created while baking and learning with our kits.
- Screen-Free Educational Alternative: In an increasingly digital world, providing opportunities for children to engage with the physical world, to feel textures, mix colors, and manipulate real objects, is more important than ever. Pine cone crafts, like our kits, offer a refreshing break from screens, stimulating different parts of the brain and fostering a sense of accomplishment through tangible effort.
- Developed by Mothers and Educators: The crafts we've outlined, like all our kit adventures, are designed with a deep understanding of child development and learning. They consider safety, age-appropriateness, and the balance between structured activity and creative freedom. They are practical, engaging, and genuinely educational, developed by those who understand the nuances of nurturing young minds.
These Christmas crafts with pine cones for kids are more than just holiday decor; they are miniature learning adventures. They are a celebration of nature, imagination, and the powerful magic that happens when families create together. We believe in the magic of hands-on discovery, and we invite you to continue that journey with us. Ready to effortlessly bring this kind of educational fun and family bonding into your home every month? Our "Chef's Club" subscriptions deliver new adventures directly to your door with free shipping in the US. With flexible 3, 6, and 12-month pre-paid plans, it's the perfect gift of learning that lasts all year. Join The Chef's Club and enjoy free shipping on every box today!
Conclusion
As we wrap up our journey through the enchanting world of Christmas crafts with pine cones for kids, it's clear that these humble gifts from nature offer far more than simple decoration. They are a gateway to creativity, a classroom for STEM exploration, and a catalyst for cherished family moments. From the rustic charm of a painted pine cone ornament to the imaginative delight of a Rudolph reindeer, each creation is a testament to the power of hands-on learning and the joy of making something beautiful together.
We've explored the essential steps from collecting and preparing your pine cones safely, to gathering the right supplies, and then diving into a multitude of craft ideas suitable for every age. More importantly, we've highlighted how these activities naturally foster critical skills such as fine motor development, problem-solving, and artistic expression, all while providing a much-needed screen-free alternative. This blend of learning and fun, of tangible creation and shared experience, resonates deeply with the mission and values we hold dear at I'm the Chef Too!
This holiday season, take a moment to step outside, gather some pine cones, and embark on a crafting adventure with your children. These simple acts of creation will not only adorn your home with unique, heartfelt decorations but will also weave a tapestry of unforgettable memories. The laughter, the shared ideas, and the pride in a handmade ornament will become treasures far more valuable than anything store-bought.
We believe in the magic of hands-on discovery, and we invite you to continue that journey with us. For ongoing educational fun delivered right to your door, perfectly blending food, STEM, and the arts, we encourage you to explore our "Chef's Club" subscription. Give the gift of learning that lasts all year with a 12-month subscription to our STEM cooking adventures, and let us help you cook up some learning! Join The Chef's Club today and let's create more delicious memories together!
FAQ
Q: Where can I find pine cones for crafting? A: The best places to find pine cones are in local parks, forests, or even your own backyard if you have evergreen trees. Look for them on the ground from fall through early winter. If you don't have access to natural ones, craft stores and online retailers also sell cleaned and prepared pine cones.
Q: How do I clean and prepare pine cones for crafts to avoid bugs? A: To clean and debug pine cones, first shake off any loose dirt or debris outdoors. Then, the most effective method is to bake them. Spread them on a baking sheet lined with parchment paper and bake at a low temperature (no more than 200°F or 95°C) for 30-60 minutes. Keep a close eye on them to prevent burning. This process kills any hidden pests and dries out the pine cones, ensuring they stay open. Adult supervision is crucial during baking.
Q: What kind of paint works best for pine cones? A: Acrylic craft paints are excellent for pine cones. They offer vibrant colors, good coverage, and dry relatively quickly. For younger children, washable tempera paints are a great, easy-to-clean option. Always choose non-toxic paints when crafting with kids.
Q: Are these pine cone crafts safe for toddlers? A: Many pine cone crafts can be adapted for toddlers with significant adult supervision. Focus on simple activities like free-form painting with washable paints and attaching large, easy-to-handle embellishments like big pom-poms using craft glue. Adults should handle all cutting and hot gluing. Always ensure any small parts are not choking hazards for very young children.
Q: How long do pine cone crafts last? A: With proper preparation (cleaning and baking) and using durable glues and paints, pine cone crafts can last for many years, becoming cherished family keepsakes. Storing them carefully in a dry, cool place after the holidays will help preserve them.
Q: Can I use pine cones for crafts year-round, or are they just for Christmas? A: While pine cones are a natural fit for Christmas and winter decor, they are incredibly versatile and can be used for crafts year-round! Think about creating pine cone "flowers" for spring, natural table centerpieces for fall, or even painted "pineapples" for summer-themed decor. Their natural beauty makes them adaptable to many seasons and themes.